
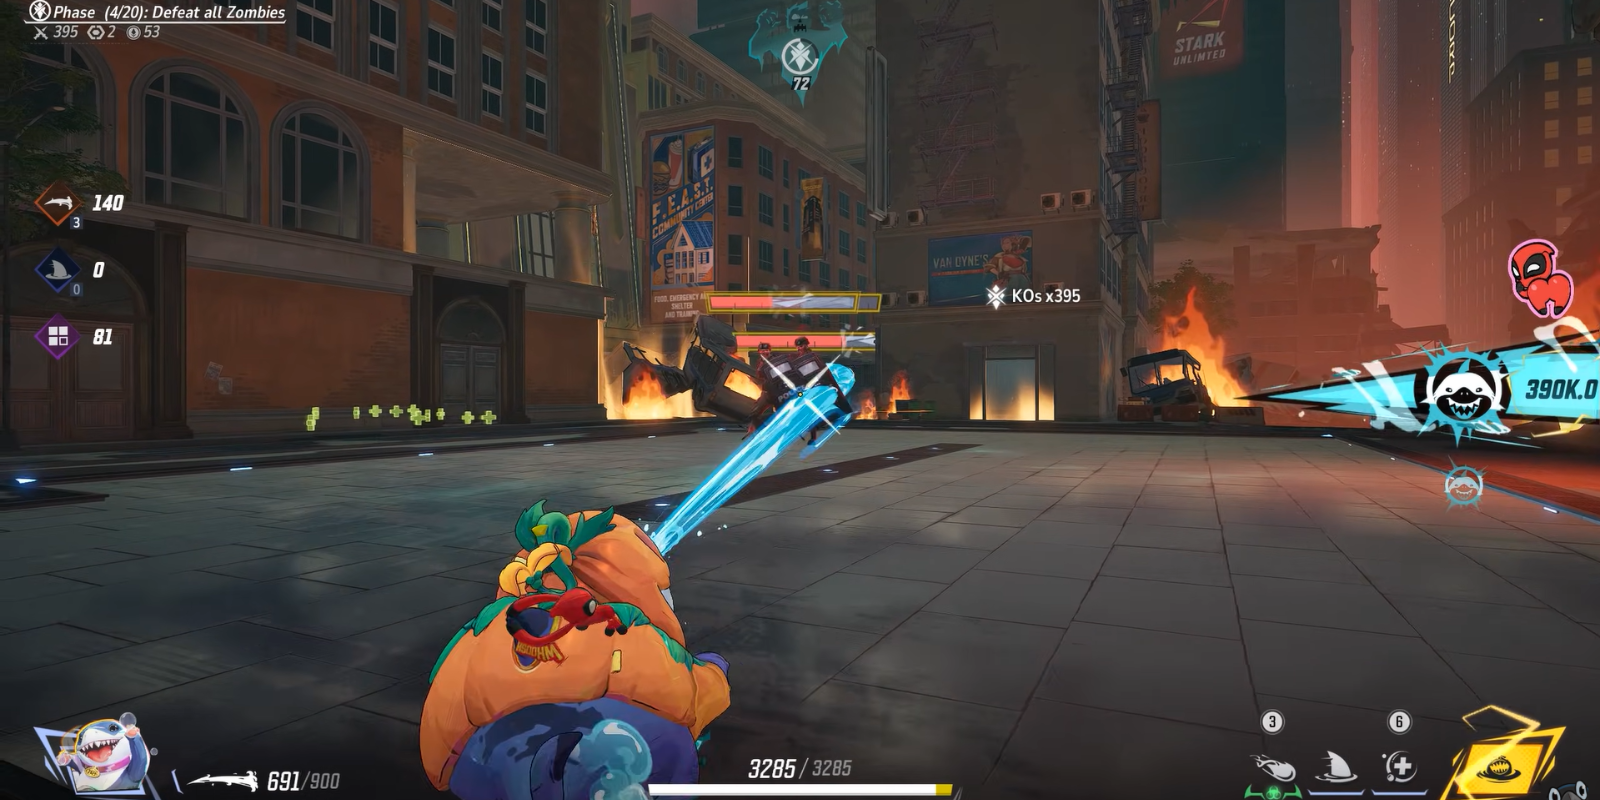
Introduction to Jeff in Zombie Mode
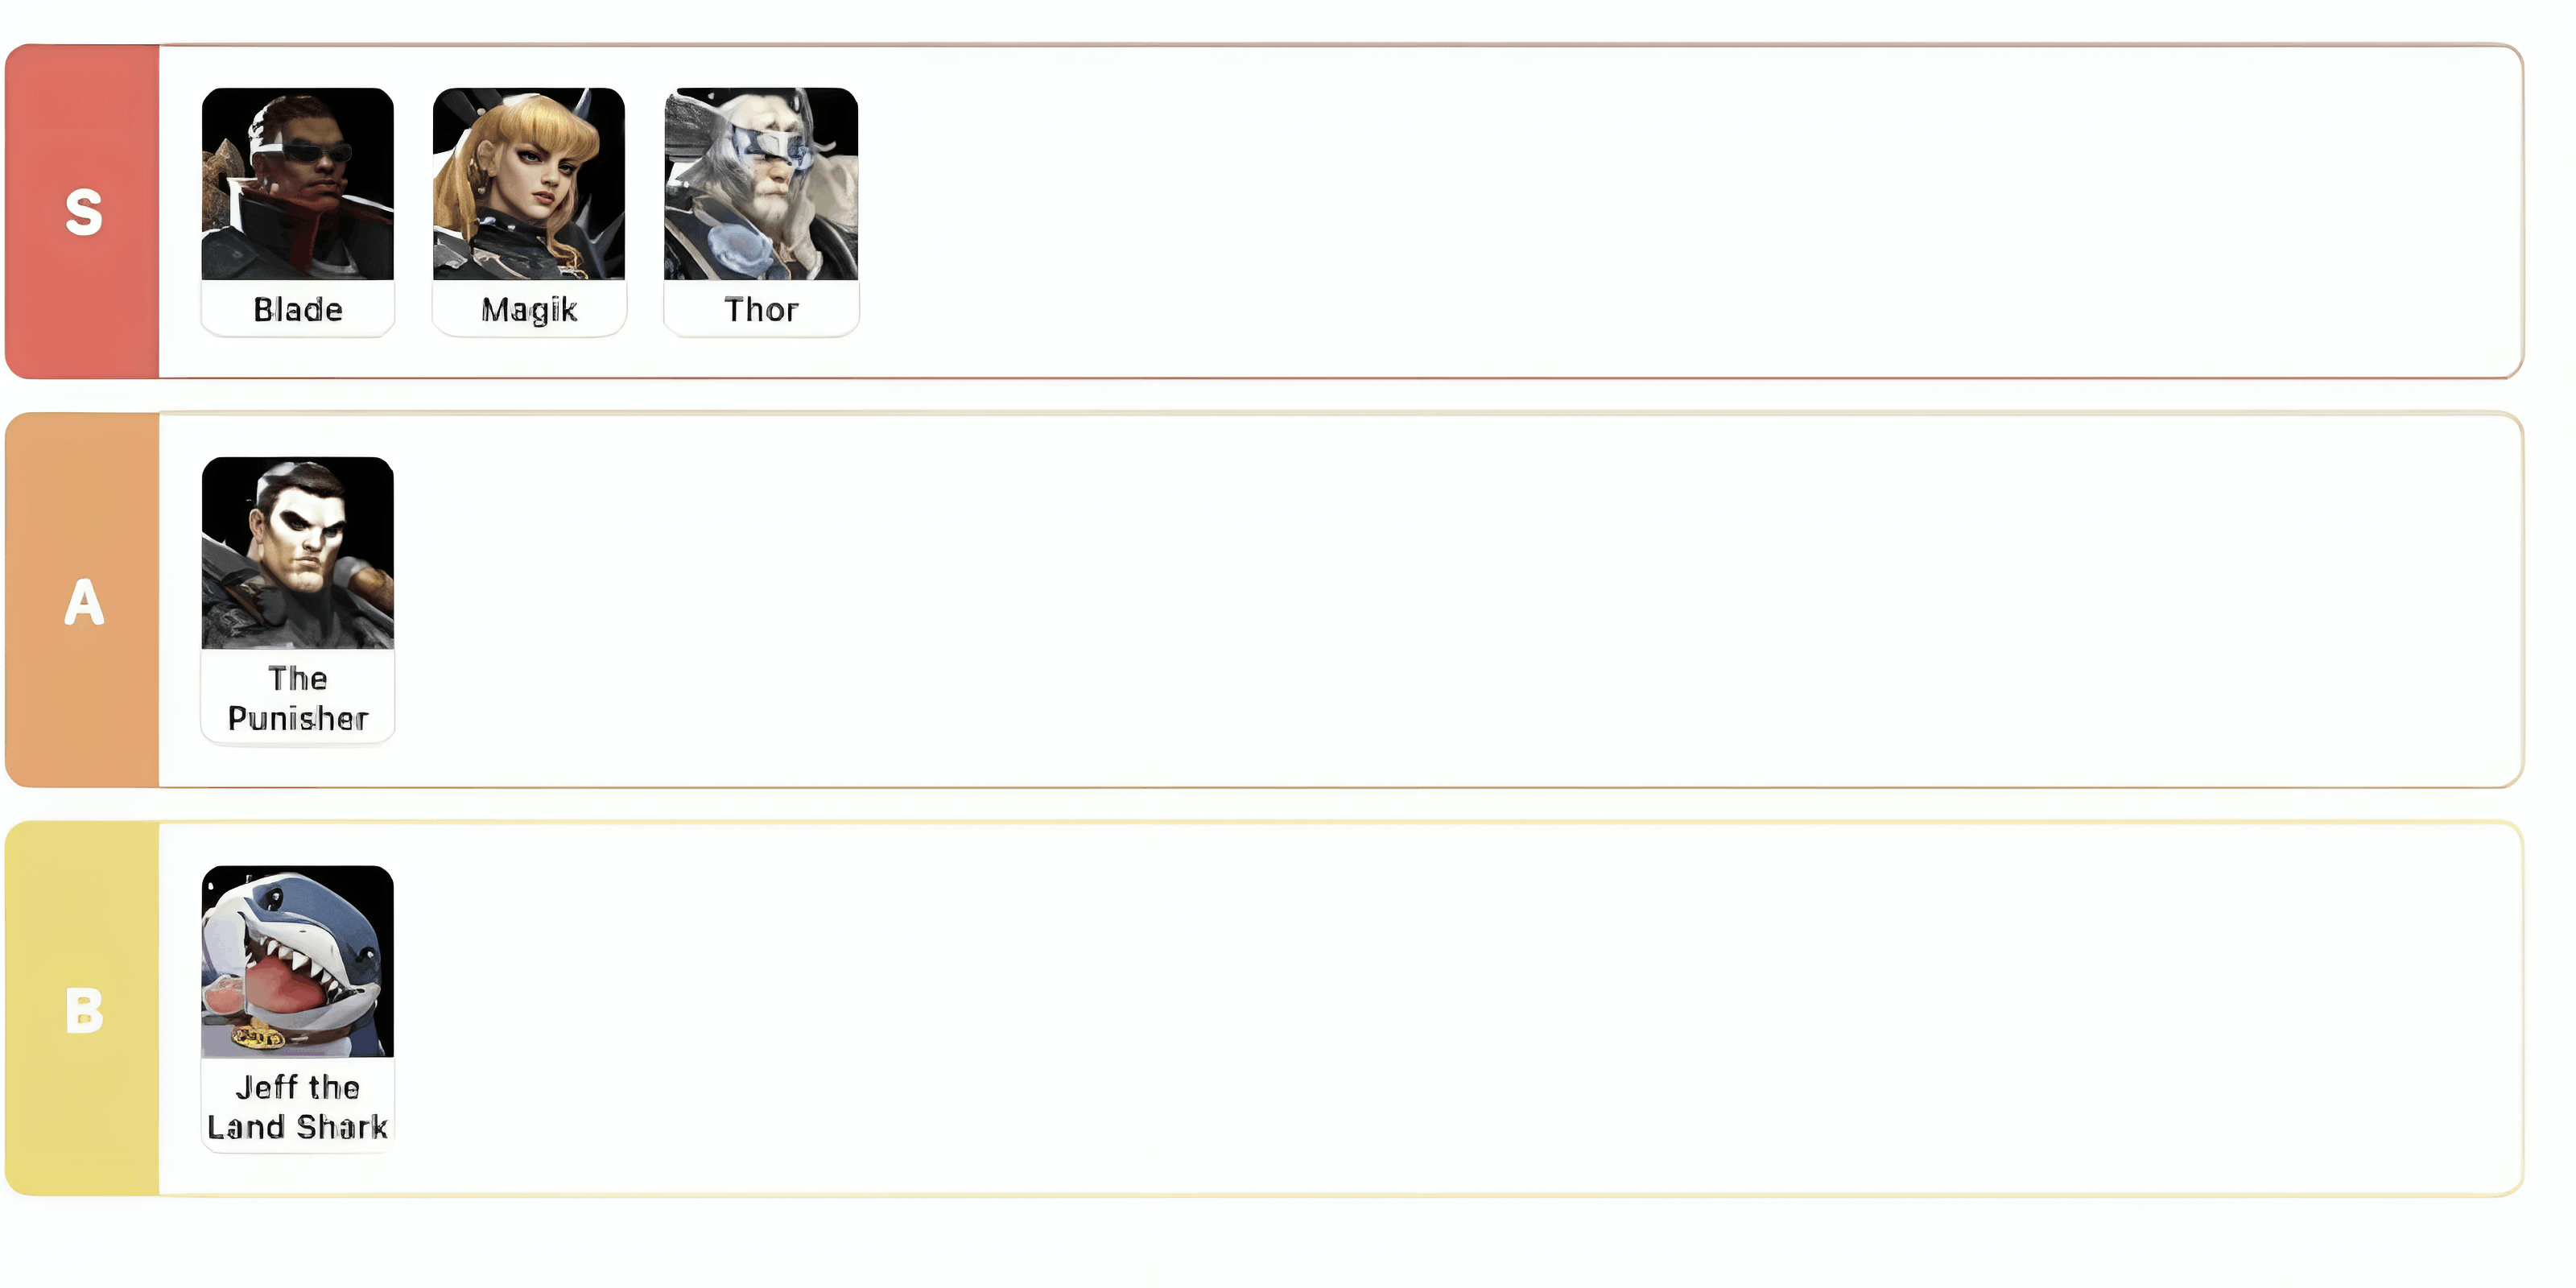
Jeff the Land Shark can clear every difficulty in Marvel Rivals' Zombie Mode, including Nightmare 4. But here's the catch: he takes way more work than top-tier picks like Blade or The Punisher. That's why he sits in B tier. Not because he can't get the job done, but because he needs specific blessing combos and doesn't carry as hard when you're flying solo.
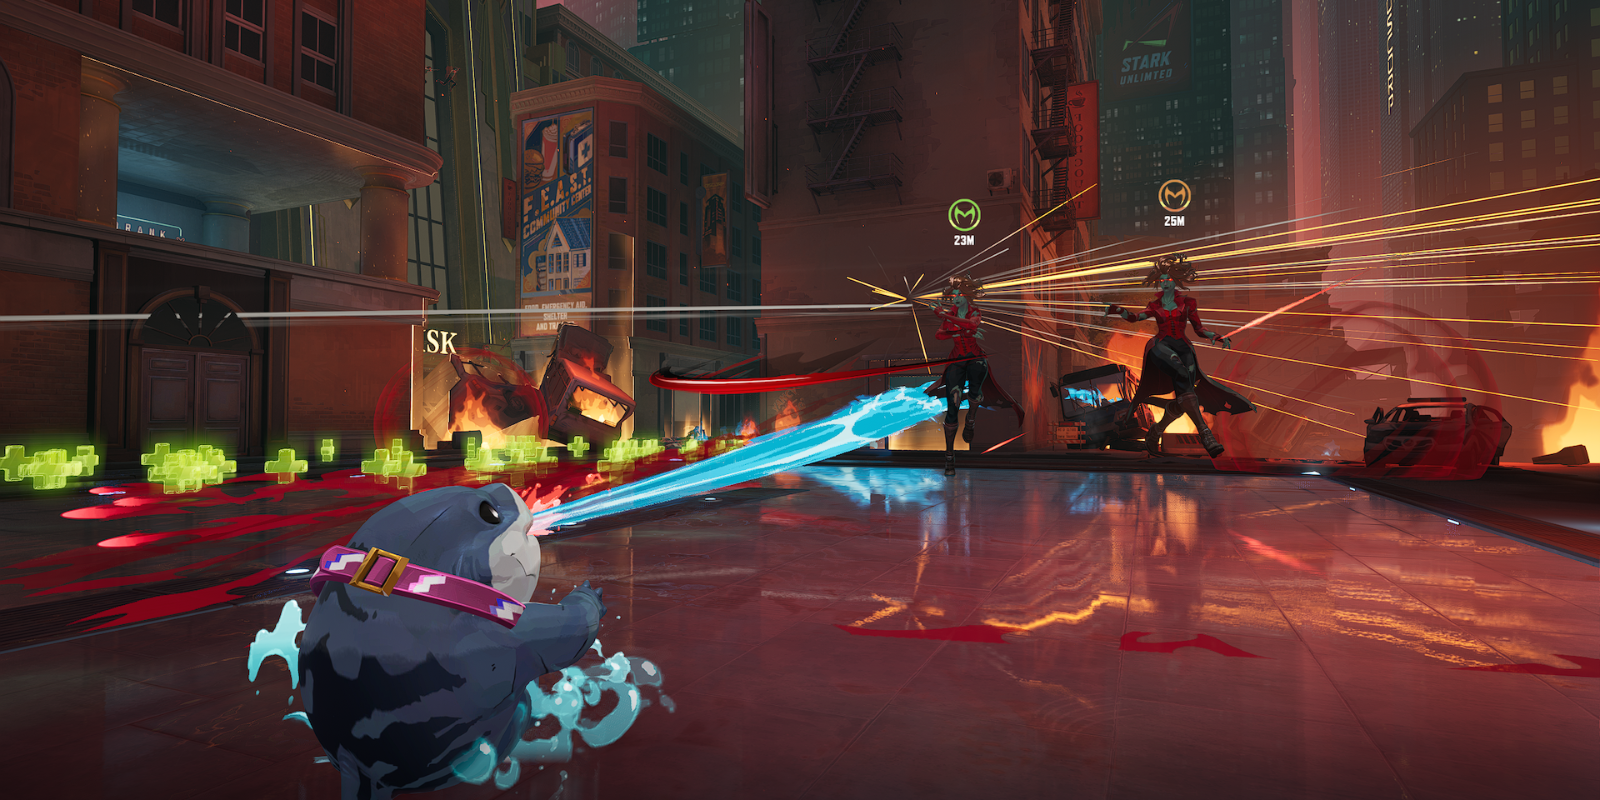
Jeff's biggest problem? Low base damage. You've got two ways to deal with this. Pour everything into his Joyful Splash for consistent ranged damage, or go all-in on his Hide and Seek ultimate to become a collision-based wrecking ball. Each path plays completely differently, and they work better or worse depending on the difficulty you're tackling.
Understanding Jeff's Two Build Paths
Red Path: Joyful Splash Damage Build
The red path turns Joyful Splash into your main weapon. When you build it right, you get steady damage output throughout entire waves. You'll need to grab specific blessings to make this work, especially on higher difficulties where enemy health pools balloon out of control.
This approach suits players who prefer normal ranged combat. You're constantly firing while dodging enemy attacks, which means you need decent positioning skills and resource management. The downside? You're hunting for very specific blessings to hit the damage thresholds that matter.
Blue Path: Hide and Seek Ultimate Build
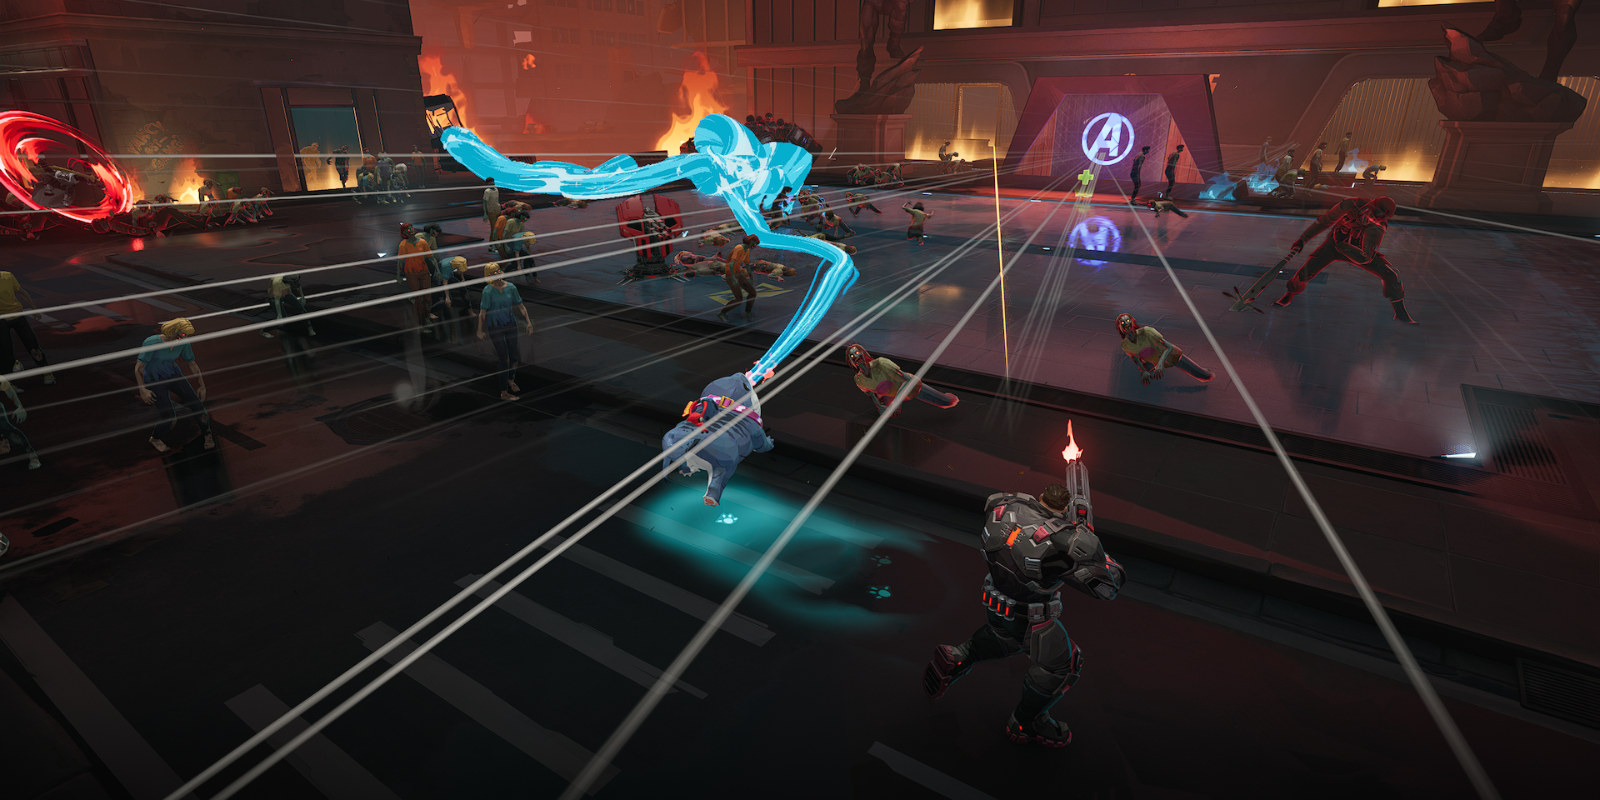
The blue path changes everything about how Jeff plays. You spend most of your time underwater, ramming into enemies to kill them with impact damage. You're basically invincible while submerged, though some attacks can still hurt you.
This build shines in boss fights and makes life easier if you struggle with aiming. Jeff stays protected during most combat, so you don't need surgeon-level precision to survive. Just swim around and bonk into things.
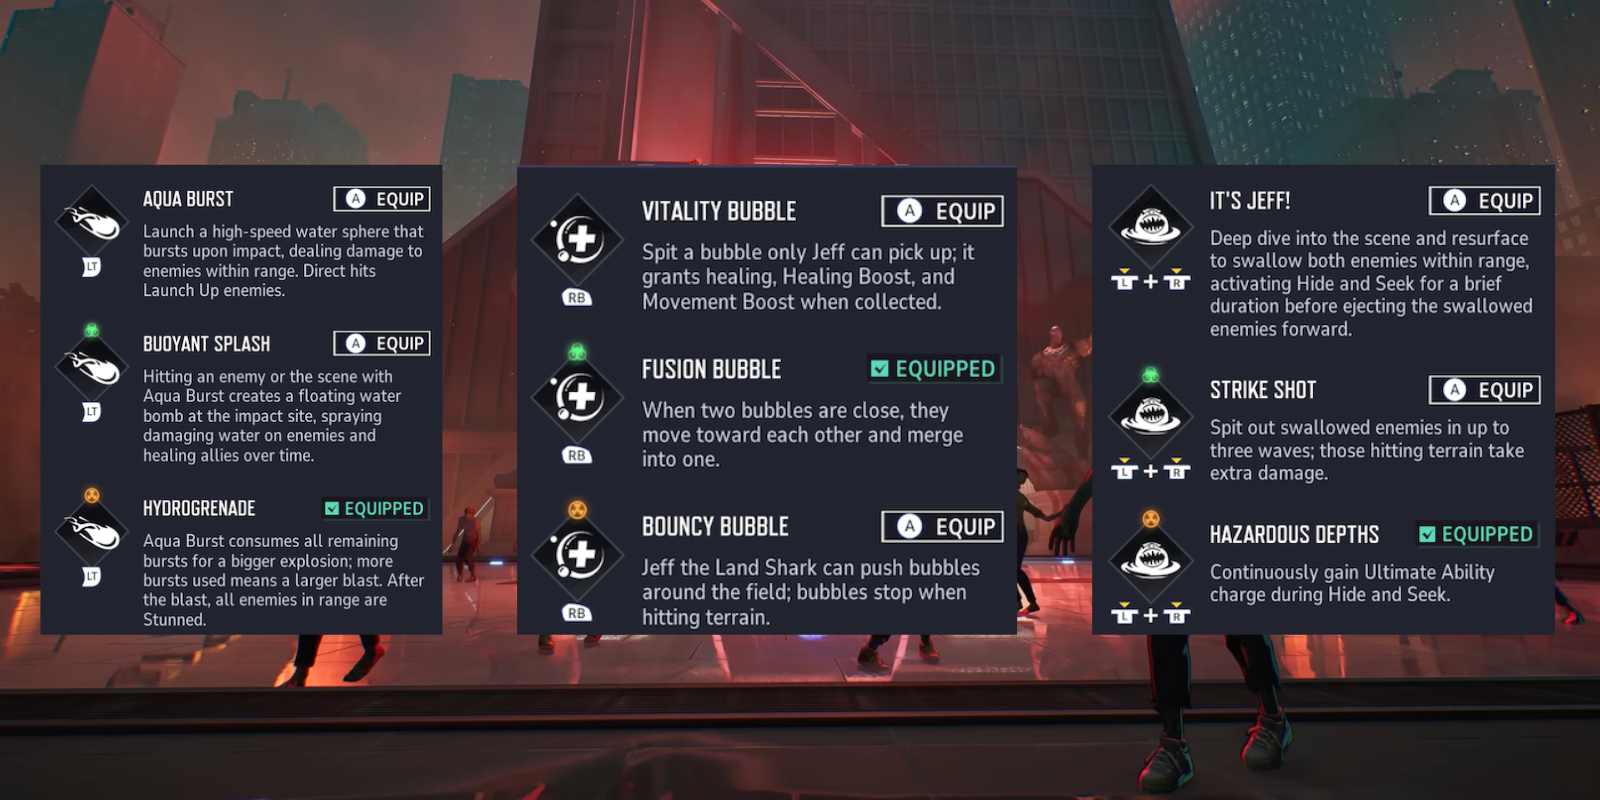
Jeff's Ability Modifications
You'll unlock different modifications as you level up. Some completely change how Jeff's abilities work.
Right Click Modifications
Aqua Burst (Default)
Your basic water sphere that explodes on impact and launches enemies upward. Nothing fancy, but it gets the job done from the start.
Buoyant Splash (Unlocks at Level 5)
Turns your water sphere into a floating bomb that damages enemies and heals teammates over time. Good for zone control when you need it.
Hydrogrenade (Unlocks at Level 5)
Burns all your remaining bursts for one big explosion that stuns everyone caught in it. You're trading rapid fire for crowd control here.
E Ability Modifications
Vitality Bubble (Default)
Spit out a bubble that only you can collect. Gives you healing, a Healing Boost, and Movement Boost. Your basic survival tool.
Fusion Bubble (Unlocks at Level 15)
Nearby bubbles automatically merge together. Lets you set up bigger heals with some planning.
Bouncy Bubble (Unlocks at Level 15)
You can push bubbles around by swimming into them. They stop when they hit walls. More control over bubble placement during fights.
Ultimate Ability Modifications
IT'S JEFF! (Default)
Dive underground, pop up, and swallow nearby enemies. You enter Hide and Seek mode for a bit, then spit everyone out. Does damage and moves enemies around.
Strike Shot (Unlocks at Level 25)
Spit enemies out in three waves instead of one. If they hit walls, they take bonus damage. More total damage from your ult.
Hazardous Depths (Unlocks at Level 25)
You keep charging your ultimate while Hide and Seek is active. Combined with the right traits, you can stay in ult mode basically forever.
Red Path Build: Complete Breakdown
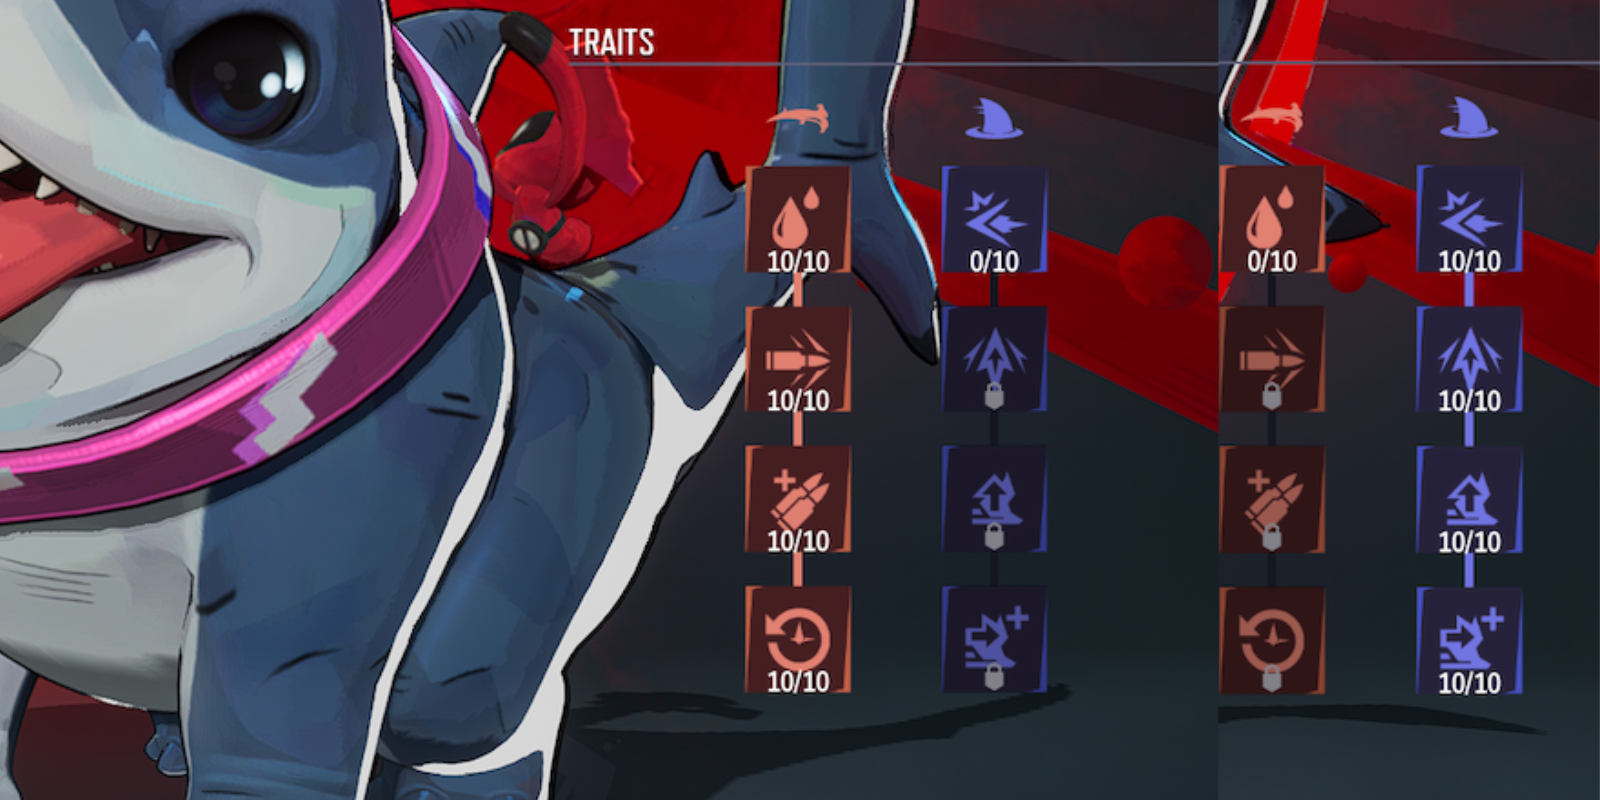
Trait Investment Strategy
Put every single trait point into red. These traits buff Joyful Splash, which is your only damage source for this build.
Damage Trait
Scales from 0.9 at level 1 up to 4.8 at level 10. Each level also gives you health (46 at level 1, 243 at level 10). Max this out if you want to meet damage checks on harder difficulties.
Reload Speed Trait
Cuts reload time by 30% at level 1, up to 160% at level 10. Health bonuses range from 68 to 365. Faster reloads mean more time shooting, less time vulnerable.
Magazine Capacity Trait
Expands your ammo from 150 at level 1 to 800 at level 10. Health goes from 103 to 550. Bigger mags let you maintain pressure without constant reloading.
Firing Interval Reduction Trait
Decreases time between shots by 8% at level 1, up to 40% at level 10. Health ranges from 183 to 977. This trait cranks up your DPS significantly.
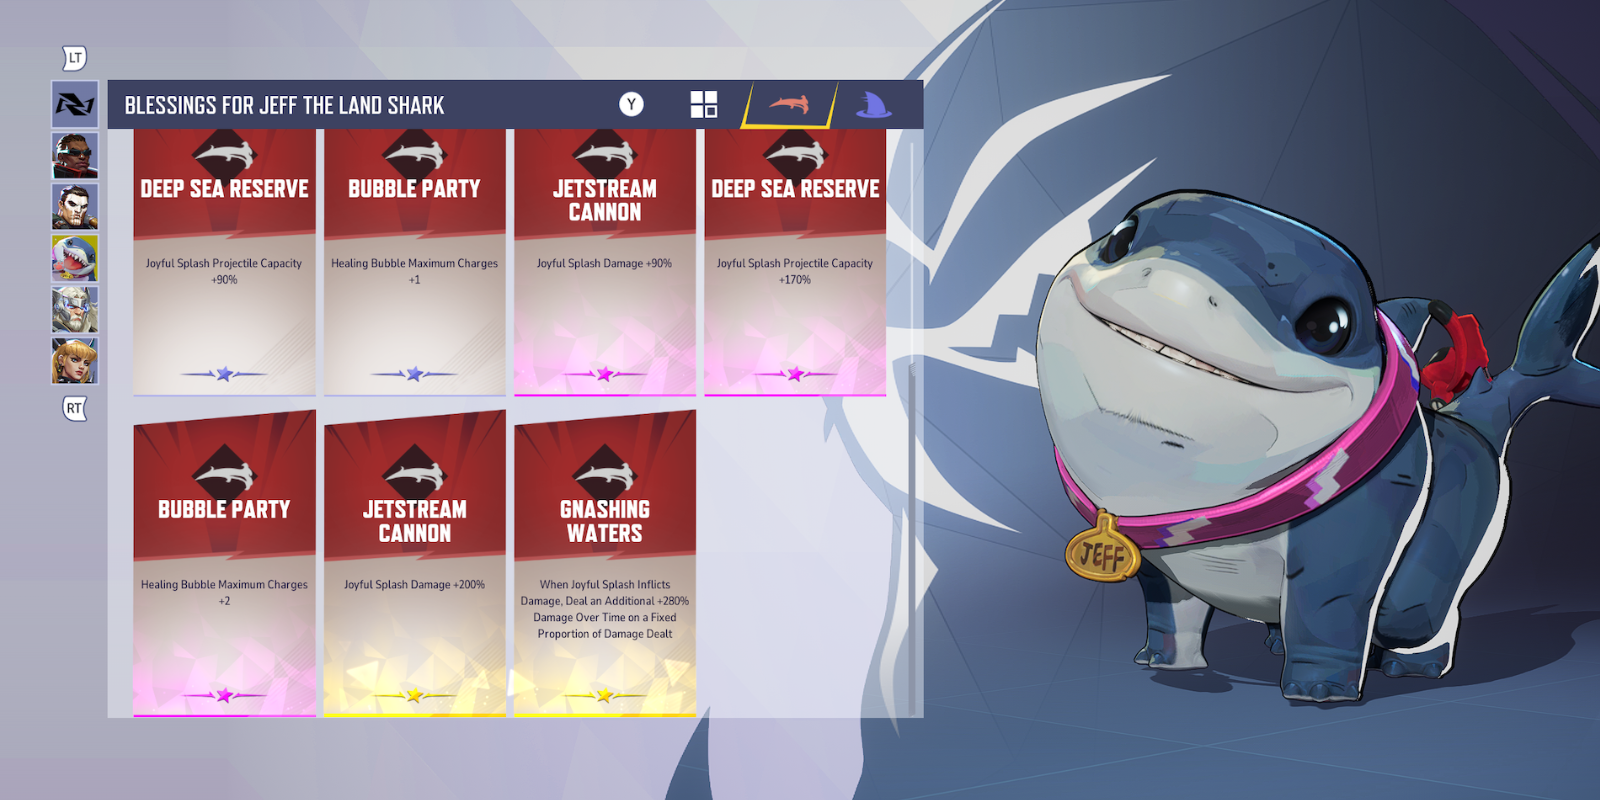
Hero-Specific Blessing Priorities
For red path, ignore all blue hero blessings. Only buy red ones.
Jetstream Cannon
Boosts Joyful Splash damage. Buy this every time you see it. Multiple purchases stack, so you keep getting stronger.
Rapid Surge
Increases your fire rate, which directly translates to higher DPS. Really valuable during boss damage windows when you need to pump out as much damage as possible.
Deep Sea Reserve
Expands your ammo pool. Grab several of these early on to build up your reserves. More ammo means less time reloading and more time applying pressure.
Gnashing Waters
This is the big one. Makes Joyful Splash deal an extra 200% damage over time based on your initial hit. You're basically tripling your damage output. This blessing is absolutely mandatory for higher difficulties. Grab it before anything else when it shows up.
General Blessing Priorities
Beyond hero blessings, you need general blessings to keep Jeff alive and amplify his damage.
Vampiric Vitality: Buy this multiple times throughout your run. It gives you life steal on damage dealt, which works great with Jeff's high-volume fire pattern. This blessing keeps you alive during long fights.
Vitality Boost: Adds maximum health. You need solid health pools to avoid getting deleted by single big hits. Buy multiple stacks.
Moonlight Protection: Reduces incoming damage from everything. Really important on higher difficulties. Even with lots of health, you need damage reduction to survive boss abilities. Buy multiple stacks.
Power Surge: Increases all your damage. Buy it whenever you see it. Jeff needs every damage boost he can get to compete with better characters. This also amplifies the DoT from Gnashing Waters.
Full Moon: Increases moon power (your blessing currency) from completing objectives. Get this early to buy more blessings throughout the run. It caps at three stacks, so don't go overboard.
Primordial Frost: Adds a chance to freeze enemies when you hit them. Frozen zombies can't chase you, which gives you safe windows to deal damage. Really helpful when you're surrounded by multiple enemy types.
Red Path Combat Strategy
You need to fire constantly while managing your position carefully. Joyful Splash spreads wide, so you can hit multiple enemies at once. Position yourself to catch as many targets as possible in each burst.
During regular waves, keep distance from enemy packs while firing non-stop. Use Vitality Bubbles to heal between fights and reposition when needed. Your goal is constant damage output without taking so much damage that your healing can't keep up.
Boss fights require even better positioning. Learn the attack patterns so you can dodge while maintaining steady fire. Gnashing Waters means every hit keeps dealing damage even when you're moving, so landing consistent hits matters more than standing still.
Blue Path Build: Complete Breakdown
Trait Investment Strategy
Dump all your trait points into blue. These traits turn Hide and Seek from a brief ability into your main combat mode.
Damage Trait
Scales from 30 at level 1 to 160 at level 10. Health bonuses range from 91 to 487. Higher impact damage lets you kill enemies just by swimming into them.
Duration Trait
Extends Hide and Seek from 36 at level 1 to 192 at level 10. Health goes from 137 to 730. Longer duration means you can stay underwater for extended periods while staying protected.
Maximum Movement Speed Trait
Increases swimming speed by 30% at level 1, up to 160% at level 10. Health ranges from 206 to 1100. Faster movement lets you chase down enemies and dodge attacks even while submerged.
Charge Speed Trait
Speeds up ultimate charging from 6 at level 1 to 32 at level 10. Health ranges from 367 to 1955. Faster charging means less downtime between Hide and Seek activations.
Hero-Specific Blessing Priorities
Blue path needs different hero blessings that make Hide and Seek stronger.
Forward Frenzy
Increases Hide and Seek impact damage. This is your core blessing for blue path. Buy it every time you can and stack multiple purchases. This directly controls how fast you kill enemies through contact.
Tidal Core
Raises your skill energy cap so you can store more ultimate charge. Stack this blessing and you can stay in Hide and Seek mode almost constantly. With enough Tidal Core, you can maintain your ult throughout entire waves and boss fights.
Bubbling Impact
Makes your healing bubbles explode when you hit them during Hide and Seek. Really important for boss fights since it lets you deal passive damage. Spit bubbles around the boss and swim through them repeatedly to stack damage while staying safe.
Shark Sovereignty
Increases your speed, damage, size, and enemy detection for every enemy you swallow during your ult. You get stronger as fights go on. The speed isn't that important in Zombie Mode, but the extra damage and bigger collision hitbox are very helpful.

General Blessing Priorities
You still need general blessings even with blue path.
Stack multiple Vitality Boost purchases for solid health reserves. You take less damage while submerged, but some attacks still hit you. Namor's creatures target you even while hiding, and the Dead Queen's chaos energy rays go right through your protection. You need enough health to survive these unavoidable hits.
Moonlight Protection helps reduce damage from attacks that penetrate Hide and Seek. Buy several stacks for meaningful damage reduction.
Get Full Moon early to speed up your overall blessing acquisition. More currency means faster build completion and more total blessings.
Blue Path Combat Strategy
Blue path completely changes how you play Jeff. You're now a mobile damage dealer who kills through collisions.
For regular waves, park yourself in one spot and wiggle back and forth while underwater. This simple pattern lets you constantly collide with enemies as they approach. Way easier than trying to aim.
Boss fights are where blue path really shines. Spit Vitality Bubbles around the boss location before or during Hide and Seek. With Bubbling Impact, swimming through these bubbles while hitting the boss stacks damage from both sources. This trick matters a lot on higher difficulties, especially if your teammates aren't pulling their weight.
During the Namor fight, focus on killing his summoned creatures while he's in the air. Let other players deal with him. Once Namor lands, activate Hide and Seek to burn through his health bars with repeated collisions.
For the Dead Queen fight, position bubbles around her before she starts her reality-erasing attacks. Swim back and forth through the bubbles while ramming into her to stack passive damage while staying relatively safe.
Nightmare 4 Solo Clear: Advanced Strategy
Someone beat Nightmare 4 completely solo with Jeff in 41 minutes and 11 seconds. This took extensive preparation and perfect execution of very specific strategies.
Starting Build Requirements
The solo clear used red path Joyful Splash with intense early game setup. The player spent over an hour rerolling to get the perfect starting build, which maxed out economy gains and reduced luck dependency for the rest of the run.
You need three specific cards in this exact order:
- Full Moon card to maximize economy (remember it caps at three stacks)
- Gnashing Waters for the huge 200% damage over time buff
- A multiplier card from the random draw
Getting all three cards gives you a 30% token multiplier and enough damage to carry through early and mid-game. Without this specific combo, the run becomes way harder or straight-up impossible.

Why so much rerolling? Jeff's base stats are too low to succeed without perfect blessings. You can build high damage but die instantly, or build tanky and fail damage checks. There's no middle ground.
Economic Management
The solo strategy prioritized economy to afford more blessings throughout the run. By grabbing Full Moon early and maxing token gains, the player could buy more blessings at each shop, which drastically cut down on luck dependency for later draws.
During the first four waves, the first major purchase went heavy on damage over survivability. This enabled faster wave clearing and maintained good pace. But it created risk for the later double Scarlet Witch fight where staying alive becomes critical.
Wave-Specific Strategies
Waves 1-4: Smooth sailing with good pace. Focus on aggressive damage while avoiding unnecessary hits.
Wave 5 (First Namor Fight): Always hit multiple squids and zombies at once with each Joyful Splash burst. This drops Namor's shield faster while clearing the horde. Once his shield breaks, keep moving to line up shots that pierce through both squids and Namor for the fastest kill. The first Namor fight finished at 6:41, which is excellent pace.
Waves 6-9: Quick and painless while maintaining strong pace.
Wave 10 (First Scarlet Witch Fight): This is your first real damage gate. If you can't break her crystals fast enough, you just lose. No second chances. The solo runner reached her at 11 minutes, way faster than the typical 15-minute arrival.
This fight is mostly a stat check. You need enough health to survive her damage and enough DPS to break her crystals. For speed, position yourself under Scarlet Witch when her crystals spawn. This lets your Joyful Splash hit both her and the crystals at once, maximizing damage efficiency.
The player cleared this with less health than previous attempts but way more healing. This created vulnerability to burst damage (two strong hits meant instant death) while sustained damage stayed manageable.
Waves 11-14: Quick progression with good pace. Health concerns started emerging since it became clear the 10k-12k health goal wouldn't happen before the final wave.
Wave 15 (Scarlet Witch + Namor): This fight cranks up the difficulty by throwing both bosses at you. Focus Namor first. His squids slow you and body block, making crystal management impossible. Once Namor's gone, the Scarlet Witch fight plays like wave 10, just with beefier stat requirements.
The low health pool became a real problem here. Any two strong hits meant instant death. Also, the high damage output pushed Scarlet Witch into her second phase while Namor was still alive. This flooded the arena with slows and stuns, creating a messy situation that burned precious seconds. The run continued anyway.
Waves 16-19: These led to the final shop where health purchases became desperate. The player went heavy on survivability but still grabbed some damage since higher damage equals more healing through Vampiric Vitality.
Wave 20 (Double Scarlet Witch): The final boss. This fight can take 10-15 minutes even when you win. The player arrived with great time but mixed stats: excellent damage, amazing healing, dangerously low health.
You need to burn down one witch first, but carefully manage their phase transitions. If the second witch doesn't enter her second phase before the first witch hits her final stage, the combined damage becomes overwhelming. You're juggling both bosses to keep their phases manageable.
The strategy was dealing damage to both witches initially to advance them through phases together. Once both approached their first transition, focus one exclusively to kill her while keeping the second in a manageable phase. Leave the first witch in her healing phase state, which makes her predictable and less threatening. This lets you safely focus the second witch.
Some scary moments happened when both witches attacked simultaneously, nearly causing death. Careful positioning and constant healing saved the run.
After killing the first witch, the final fight became much safer. With only one witch left, damage output became manageable and positioning plus crystal destruction could get full attention without juggling multiple threats.
Final time: 41 minutes and 11 seconds, beating the previous record of 43:50.
Difficulty-Specific Considerations
Jeff performs very differently across difficulty levels. Knowing these differences helps set realistic expectations.
Lower Difficulties (Normal, Hard)
Both build paths work fine without perfect blessings on lower difficulties. You can experiment with different ability mods and blessing combos to find what feels good. Health pools don't need to reach the extreme values required for Nightmare, so you can be more flexible with stats.
Red path gives consistent performance with moderate blessing investment. Blue path might feel overpowered since enemies lack the health to survive your collision damage.
Higher Difficulties (Nightmare 1-3)
Blessing choices matter more but perfect starts aren't strictly required. You should still prioritize core blessings (Gnashing Waters for red path, Forward Frenzy for blue path), but you can tolerate some bad draws.
Health becomes increasingly important as enemy damage scales up. Invest heavily in Vitality Boost and Moonlight Protection to survive burst damage from elite enemies and bosses. Your margin for error shrinks, requiring better positioning and resource management.
Nightmare 4
This is peak difficulty where Jeff's limitations show up hard. Perfect or near-perfect blessing acquisition becomes mandatory. The starting build setup from the solo clear section gives huge advantages by maxing economy and securing critical early blessings.
Even with perfect blessings, there's still a small chance of failure from bad RNG in shop offerings or enemy spawns. Jeff relies so heavily on specific blessing combos that unlucky shops can make runs impossible regardless of skill.
The stat requirements are brutal. You need high damage to meet boss DPS checks and massive survivability to survive boss attacks. Balancing these competing needs with Jeff's low base stats creates the main challenge.
Common Mistakes and How to Avoid Them
Skipping Early Economy
Players often skip Full Moon or don't prioritize early economic advantages. This cuts your total blessing purchases throughout the run, making builds harder to complete. Always grab Full Moon when it shows up early. Remember it caps at three stacks.
Over-Investing in Damage
Players frequently dump everything into damage while ignoring health and damage reduction. This creates situations where your high damage doesn't matter because you get deleted instantly by burst damage. Balance your investments, leaning harder into survivability on higher difficulties.
Poor Bubble Usage (Blue Path)
Players forget to use Vitality Bubbles effectively during boss fights. Position bubbles strategically before or during Hide and Seek to maximize Bubbling Impact damage. Put bubbles around bosses and swim through them repeatedly to stack passive damage.
Wrong Boss Priority
During the Scarlet Witch + Namor fight, some players focus Scarlet Witch first. This makes crystal management nearly impossible because Namor's squids body block and slow you. Always kill Namor first to simplify the Scarlet Witch portion.
Mismanaging Scarlet Witch Phases (Wave 20)
During the double Scarlet Witch fight, players often push both witches through phases at the same time without planning. This creates overwhelming situations where both witches enter dangerous phases together. Deliberately manage phase transitions by adjusting damage distribution to prevent synchronized danger phases.
Jeff's Position in the Zombie Mode Meta
Jeff sits solidly in B tier for Zombie Mode. This placement accurately reflects what he can and can't do across all difficulties.
He can clear everything including Nightmare 4, proving he's viable. But his dependence on specific blessing combos and lower solo carry potential compared to top picks prevents him from ranking higher. Characters like Blade can cruise through Zombie Mode with less planning and more forgiving execution.
B tier doesn't mean Jeff is weak or bad for Zombie Mode. It means success takes more effort, better blessing luck, and more precise execution than success with higher-tier characters. If you enjoy Jeff's playstyle or want the challenge of mastering a harder character, you'll find Zombie Mode rewarding and completable with him.
For the easiest path to Nightmare 4 completion, other characters offer smoother rides. But if you enjoy Jeff's mechanics or want to prove mastery of a tougher character, he's completely viable for all content.
Conclusion
Jeff the Land Shark offers two distinct but viable builds for Marvel Rivals Zombie Mode. Red path Joyful Splash gives you traditional ranged combat with consistent damage, while blue path Hide and Seek transforms you into a mobile collision damage dealer.
Both builds can complete all difficulties including Nightmare 4, though highest difficulty success requires specific blessing combos and careful execution. Jeff's lower base stats mean he demands more from you compared to top-tier characters, but dedicated players can achieve world-record performances like the 41:11 solo Nightmare 4 clear.
Pick the build that matches your playstyle, prioritize the right blessings, and practice the difficulty-specific strategies to maximize your success with Jeff in Zombie Mode. He requires more effort than top picks, but he provides completely viable paths to clearing all Zombie Mode content if you're willing to put in the work.