
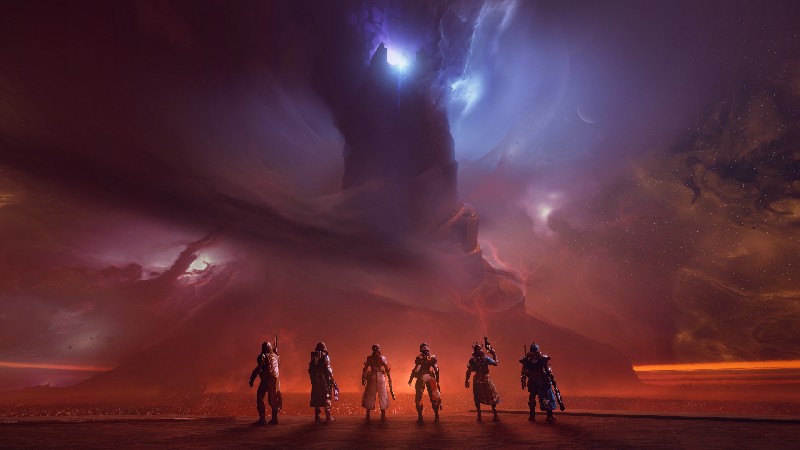
Raids represent a pinnacle Player versus Environment (PvE) challenge within the Destiny 2 universe. These are intricate, six-player cooperative missions demanding high levels of teamwork, precise execution of complex mechanics, and effective communication to overcome formidable adversaries and environmental puzzles. The primary allure of raids lies in their offering of exclusive, powerful rewards, including unique weapons and armor sets not obtainable elsewhere, alongside the significant development of player skill in advanced gameplay techniques and coordination strategies. Furthermore, raids provide unparalleled narrative experiences and foster a strong sense of camaraderie among fireteam members upon successful completion.
This compendium is designed to furnish novice Guardians with the foundational knowledge and strategic understanding requisite for embarking on their initial raid experiences. It aims to demystify the preparatory phases, elucidate common mechanics, and provide walkthroughs for raids deemed accessible to beginners.
Preparing for Your First Raid
Successful engagement in raid activities necessitates meticulous preparation, encompassing appropriate Power Levels, a functional arsenal of weapons and armor, understanding of armor modifications, and the correct mindset.
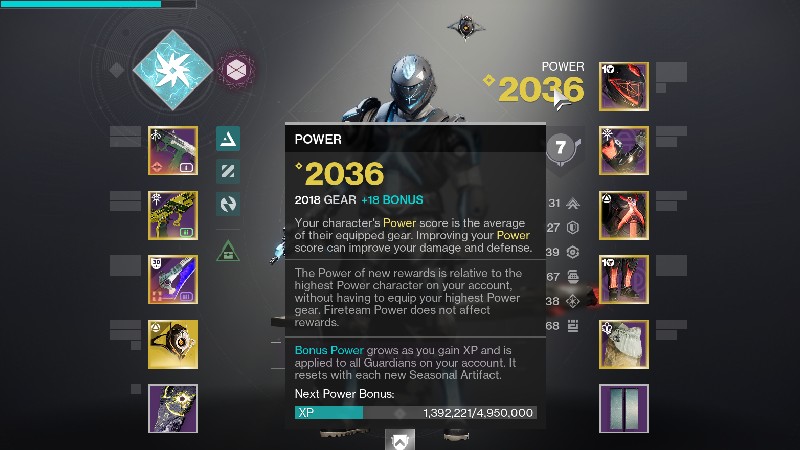
Minimum Power Level Requirements
While Destiny 2 has evolved to make older raids more accessible, a certain Power Level is still advisable to ensure a smoother learning experience. For Normal difficulty versions of older raids such as Vault of Glass and Deep Stone Crypt, a Power Level of 1600+ is generally recommended. Some sources indicate that for current-season accessibility, Vault of Glass Normal may benefit from a Power Level closer to 1950, though 1600 remains a functional baseline for learning the mechanics without significant power disadvantages. Deep Stone Crypt, while requiring the Beyond Light expansion, is also generally accessible at 1600 Power Level, with some noting no strict Power Level requirement for its legacy version. Newer raids, such as Root of Nightmares, have higher entry points; for Normal difficulty, a Power Level of 1945+ is suggested, with some community recommendations pushing towards 1790-1800 for a comfortable learning experience in its initial release window. It is imperative to verify the specific recommended Power Level for the current iteration of any raid being attempted.
Essential Gear Arsenal
A beginner's arsenal should focus on versatility and effectiveness in common raid scenarios: clearing minor combatants (adds), damaging elite enemies, and contributing to boss damage (DPS).
Weapon Archetypes & Perks
- Primary Weapons: Emphasis should be on user comfort and perks that enhance survivability or add-clearing capabilities. Perks such as Heal Clip for health regeneration, and area-of-effect (AoE) perks like Incandescent (Solar), Voltshot (Arc), and Destabilizing Rounds (Void) are highly beneficial for managing groups of enemies. Support Frame Auto Rifles, such as No Hesitation or Adamantite, offer intrinsic healing capabilities for the user and their fireteam, making them valuable additions.
- Special Weapons: These are crucial for dealing with tougher enemies and for burst damage.
- Breech-Loaded Grenade Launchers (BGLs): Effective for utility and add clear. Wave Frame and Area Denial Frame launchers are notable. Lost Signal (with Auto-Loading Holster and One for All/Vorpal Weapon) and Martyr's Retribution (with Heal Clip and Incandescent) are accessible options.
- Fusion Rifles: Provide a balance of damage and utility. Riptide, obtainable from Crucible engrams, with the Chill Clip perk is a strong, easily acquired option for crowd control and supplemental damage.
- Rocket Sidearms: A flexible option, particularly in "double special" weapon loadouts. Tinasha's Mastery (with Chill Clip) and Aberrant Action (with Heal Clip and Incandescent) are noteworthy.
- Shotguns: Reliable for close-quarters engagement against resilient targets. Perfect Paradox, with perks like One-Two Punch, is an accessible choice.
- Heavy Weapons: These are often central to boss DPS strategies.
- Heavy Grenade Launchers (HGLs): Despite some adjustments in their overall potency, they remain a user-friendly DPS option. Bitter//Sweet or Edge Transit with the Bait and Switch perk are obtainable examples.
- Machine Guns (LMGs): Essential for efficient add clear in non-DPS encounters. Hammerhead (with Destabilizing Rounds) and the craftable Pro Memoria (with Reconstruction and Dragonfly) are strong choices.
- Rocket Launchers: Currently a top-tier Legendary heavy DPS option. Cynosure (with Envious Arsenal and Elemental Honing) and Crux Termination IV (with Reconstruction and Explosive Light) are accessible and effective.
- Swords: Important for specific encounters requiring sustained close-range damage. Geodetic HSm or Double Edged Answer with Relentless Strikes and Whirlwind Blade are viable world drops.
Easily Obtainable Exotic Armor
Exotic armor pieces significantly define a Guardian's build and role. For beginners, focusing on Exotics that enhance survivability, support capabilities, or provide straightforward damage increases is advisable.
- Celestial Nighthawk (Helmet): Converts Golden Gun Super into a single, high-damage shot, excellent for boss DPS.
- Gyrfalcon's Hauberk (Chest): For Void Hunters, grants Volatile Rounds after emerging from invisibility, enhancing weapon damage and add clear, while also providing an easy loop back into invisibility.
- Cuirass of the Falling Star (Chest): Massively increases the damage of the Arc Thundercrash Super, making it a potent burst DPS option.
- Synthoceps (Gauntlets): Increases melee and Super damage when surrounded by enemies, effective for both add clear and some DPS scenarios.
- Lunafaction Boots (Legs): When standing in a Rift or Well of Radiance, grants increased weapon reload speeds to allies, invaluable during DPS phases.
- Phoenix Protocol (Chest): Kills and assists made while standing in Well of Radiance return Super energy, allowing for more frequent Well usage in add-heavy encounters.
- Speaker's Sight (Helmet, requires The Final Shape): Transforms Healing Grenades into automated healing turrets that also provide Restoration. Can be acquired by completing The Final Shape campaign on Legendary difficulty or through focused Exotic engram decryption at Rahool after resetting his rank.
General Buildcrafting Process for New Raiders
The initial approach to buildcrafting for raids should prioritize functionality and survivability over complex, min-maxed setups.
- Understand Encounter Archetypes: Raids typically feature two main types of encounters: those focused on clearing waves of enemies and performing mechanics (Non-DPS), and those focused on dealing maximum damage to a boss (DPS).
- Prepare Versatile Loadouts: Have distinct gear and ability configurations for both encounter types.
- Prioritize Survivability: Especially when learning, staying alive is paramount. High Resilience (aim for Tier 10 or 100 Resilience for maximum damage reduction from PvE combatants) is crucial. Perks like Heal Clip on weapons or Exotics that grant healing or damage resistance are beneficial.
- Synergize with Subclass: Ensure weapon choices and armor mods complement the chosen subclass. For instance, using Solar weapons with Solar-focused Fragments that trigger on Solar weapon kills.
- Exotic Armor as a Build Cornerstone: The selected Exotic armor piece often dictates the core function of a build. Choose one that supports the intended role (DPS, support, survivability).
- Fundamental Weapon Coverage: Aim to have at least one decent Legendary weapon of each essential archetype (e.g., a reliable add-clear primary, a special weapon for tougher targets, and a heavy weapon for DPS) in various elemental damage types to handle shielded enemies and match elemental "surges" (damage bonuses) if active.
Armor Mods Configuration
Armor mods provide passive benefits that can significantly improve performance. For beginners, a basic setup should focus on:
| Armor Slot | Recommended Mods | Purpose |
|---|---|---|
| Helmet | Siphon Mods, Ammo Finder Mods | Orb generation and ammo economy |
| Arms | Loader Mods, Focusing Strike/Firepower | Reload speed and ability energy |
| Chest | Damage Resistance Mods | Survivability against specific damage types |
| Legs | Surge Mods, Scavenger Mods, Recuperation | Damage boost and sustain |
| Class Item | Bomber/Outreach, Time Dilation | Ability uptime and buff duration |
- Oracle Disruptor Mods: Increase damage to Oracles with specific weapon types
- Vex Destroyer/Breaker/Striker: Chance to spawn Orbs of Power on Vex kills
- Superstructure Mods: Provide stun, healing, or weaken effects when hitting powerful Vex
- Anti-Praetorian/Anti-Oracle Mods: Grant Super energy for defeating specific enemies
Consumables and Preparation
- Raid Banners: Purchased from Suraya Hawthorne in the Tower or Petra Venj in the Dreaming City (when available). Before each raid encounter, one player can place a Raid Banner, allowing all fireteam members to fully replenish Super energy, abilities, and ammunition. These are highly recommended for every encounter attempt.
- Ammo Synthesis: Older forms of "Ammo Synthesis" consumables are largely deprecated in Destiny 2. Ammunition management now primarily relies on Ammo Finder/Scavenger mods and Raid Banners.
- Food/Hydration (Real-World): Raids can be lengthy, especially for learning groups. Ensuring personal comfort with hydration and snacks can maintain focus and energy over extended play sessions.
Mental Preparation
Raiding is a marathon, not a sprint, particularly for newcomers.
- Time Commitment: Be prepared for raid sessions to last several hours, especially during initial learning phases.
- Expect Wipes: Team wipes (where everyone dies and the encounter restarts) are a normal part of learning raid mechanics. View them as opportunities to understand what went wrong and how to improve.
- Positive Attitude: Maintain a patient, respectful, and constructive attitude. Frustration can hinder learning and team cohesion. A willingness to learn and adapt is paramount.
Finding Your Fireteam
Successfully participating in raids often requires finding teammates outside of pre-existing friend groups or clans. This is typically accomplished through "Looking For Group" (LFG) systems. The process of finding a suitable group and integrating effectively is a skill in itself, representing a social learning curve for many players new to high-stakes cooperative content.
What is LFG?
LFG refers to various platforms and in-game tools that allow players to find other Guardians to form fireteams for specific activities, including raids.
Popular LFG Platforms
Several resources exist for finding raid teams:
- Destiny 2 Companion App: Bungie's official mobile app includes a robust Fireteam Finder feature.
- Bungie.net Fireteam Finder: The official website offers a similar LFG service.
- Discord Servers: Numerous large, dedicated Destiny 2 LFG Discord servers are extremely popular. The "Destiny 2 LFG" (D2LFG) server is one of the largest, with hundreds of thousands of members. Other community Discords also host LFG channels.
- Reddit: The r/fireteams subreddit is a long-standing community for LFG posts.
- Third-Party Apps/Websites: Platforms like GameTree offer algorithm-based matchmaking and community features for finding teams.
Crafting Your LFG Post as a New Raider
When creating an LFG post as a beginner, clarity and honesty are crucial for attracting a suitable group.
Template Example: "LFS/LF5M VoG Normal - First time, have mic, willing to learn all roles. Watched guides. [Your Power Level][Your Class]. Chill/Teaching run please!"- Keywords: Use terms like "LFS" (Looking For Sherpa), "LF#M" (Looking For # More - e.g., LF5M means you are one player looking for five more), "Newbie," or "First Timer".
- Honesty: Clearly state your experience level. It is counterproductive to feign expertise, as this can lead to frustration for both the new player and the team.
- Show Initiative: Mentioning that one has watched video guides for the raid indicates a proactive approach to learning.
- Specify Run Type: Requesting a "chill run," "teaching run," or "Sherpa run" helps filter for patient players willing to explain mechanics.
The Role of a Sherpa
A "Sherpa" in the Destiny 2 community is an experienced player who voluntarily guides less experienced players (often called "Sherpees" or learners) through raids.
- Purpose: Sherpas focus on teaching raid mechanics, strategies, and encounter flow in a patient and supportive environment, rather than simply "carrying" new players through the content. The goal is to empower learners to understand and execute roles themselves.
- Finding Sherpas: Dedicated platforms exist for connecting with Sherpas:
- The r/DestinySherpa subreddit is a primary hub for finding and requesting Sherpa runs.
- The "Destiny Raid Sherpas" group on Bungie.net is another resource.
- Some LFG Discord servers may have specific channels or roles for Sherpas and learners.
- Recommendation: Engaging a Sherpa for one's first attempt at a raid is highly recommended for a structured and positive learning experience.
Raid Etiquette
Adhering to established raid etiquette is crucial for smooth and enjoyable experiences for everyone involved.
- Use a clear microphone and listen actively
- Be patient with yourself and teammates
- Come prepared with proper gear and time
- Ask questions when uncertain
- Own your mistakes and learn from them
- Respect the leader/Sherpa's guidance
- Stay committed to the team
- Talking over others during explanations
- Getting frustrated or blaming teammates
- Joining unprepared or with time constraints
- Pretending to know mechanics you don't
- Trying to take over or change strategies
- Leaving mid-raid without warning
- Creating negative atmosphere
Understanding Core Mechanics & Communication
Raids in Destiny 2 are built around a series of unique encounters, each featuring specific mechanics that the fireteam must collectively solve to progress. While every raid is distinct, many mechanics fall into recognizable categories.
Common Raid Mechanic Types Explained
Understanding these general types of mechanics can help new players quickly grasp the objectives in various encounters.
- Plates: These are designated areas on the ground, often circular or square, that players must stand on to trigger an effect. This could involve opening doors (e.g., the initial entrance to the Vault of Glass), capturing a point, activating a portal (e.g., Gatekeepers encounter in Vault of Glass), or progressing a sequence. Some plates require a single player, others multiple, and some may be timed.
- Orbs/Motes/Essences/Cores: These are interactive items that players typically pick up and carry to another location to "dunk" or deposit. Examples include the Taken Essence in the Last Wish raid, Nuclear Cores in Deep Stone Crypt which must be picked up and deposited into specific bins, or the orbs in the Dual Destiny mission. These items might grant the carrier a buff or debuff, or their deposit might trigger the next step of an encounter.
- Symbols & Callouts: Many raids incorporate unique visual symbols that players must identify, remember, and communicate accurately to their teammates. Examples include the sequence of Oracles in Vault of Glass, the various symbols in Riven's encounter in Last Wish, or the geometric shapes in the Salvation's Edge raid. Establishing clear, concise, and universally understood callouts for these symbols within the fireteam is critical for success.
- Buffs & Debuffs:
- Buffs are temporary positive status effects applied to players, often granting enhanced abilities, damage, or enabling interaction with specific mechanics. Examples include the "Field of Light" or "Flux of Darkness" buffs in the Root of Nightmares raid, which allow players to activate nodes, the cleanse provided by the Relic shield in Vault of Glass, or "Planetary Insight" in Root of Nightmares which allows players to discern planet alignments.
- Debuffs are temporary negative status effects that can hinder players or lead to a wipe if not addressed. Examples include "Marked for Negation" from Fanatic pools in Vault of Glass, which requires cleansing, the "Frostbite" debuff during the sparrow section of Deep Stone Crypt, or the "Atraks-1 Replication" debuff in Deep Stone Crypt that must be removed in an airlock. Managing buffs and debuffs is a core component of many raid encounters.
- Assigned Roles (Augments): More complex raids often assign specific roles to individual players, frequently indicated by a unique visual cue or a named buff (often called an "augment"). These roles dictate a player's primary responsibilities during an encounter.
- In Deep Stone Crypt, the Operator (typically associated with a red buff/glow) interacts with specific terminals, shoots keypads to open pathways or disable security systems.
- The Scanner (yellow buff/glow in DSC) is responsible for identifying correct targets, sequences, or vulnerable points that other players need to interact with or damage.
- The Suppressor (blue buff/glow in DSC's Taniks encounters) must shoot specific targets on the boss (e.g., Taniks' thrusters) at the correct times to enable other mechanics, like core deposits.
- In Vault of Glass, the Relic Holder wields the Aegis relic, which has multiple functions including cleansing debuffs, breaking the Templar's shield, and damaging specific enemies.
Communication is Key
Effective communication is arguably the single most important factor for success in Destiny 2 raids.
Essential Raid Callouts
Callouts are verbal cues used to relay critical information quickly and efficiently during an encounter.
- Conciseness: Callouts should be short and to the point (e.g., "Praetorian, right plate!" is preferable to a lengthy description).
- Clarity: Use terminology that is understood by the entire team. If unfamiliar with a group, quickly establish common names for locations or enemies (e.g., for Oracle positions in Vault of Glass, common systems include "L1, L2, L3, Mid, R1, R2, R3" or clock-face numbers).
- Timeliness: Deliver callouts as soon as the information is relevant.
- Minimize Chatter: Avoid unnecessary conversation during mechanically intensive phases or when critical callouts are being made. This ensures important information is not missed.
Key Information to Announce
- Your status if it impacts the team (e.g., "Reloading," "Grabbing Relic," "Popping Well of Radiance").
- Immediate threats or important enemy spawns (e.g., "Overload Champion spawning left," "Sniper top right").
- When you are in danger or downed (e.g., "Need help on right side," "Guardian down, middle").
- Confirmation of completing a task (e.g., "Left plate captured," "Oracle L1 destroyed").
Raid Terminology & Slang
Familiarity with common Destiny 2 raiding terms and slang is essential for understanding LFG posts and in-game communication.
| Term/Abbreviation | Meaning | Example Usage |
|---|---|---|
| Ads / Adds | Additional, smaller enemies in an encounter. | "Clear ads on left!" |
| DPS | Damage Per Second; also refers to the phase where you damage the boss. | "Get ready for DPS phase." |
| Wipe | Entire fireteam dies, restarting the encounter. | "Okay, let's wipe and reset." |
| Buff | A beneficial status effect. | "I have the Scanner buff." |
| Debuff | A detrimental status effect. | "Cleanse me, I have Marked for Negation debuff." |
| Mechanic | A specific puzzle or task required to progress an encounter. | "Who is doing the plate mechanic?" |
| Callout | Verbal communication of information during an encounter. | "Oracle is L1 (Left 1)." |
| Aggro | Who the enemy is currently targeting/attacking. | "Boss has aggro on me." |
| LFG | Looking For Group. | "Posting on LFG for two more." |
| KWTD | Know What To Do. (Often implies experience expected) | "LFG VoG KWTD." |
| Sherpa | An experienced player guiding newer players through a raid. | "Looking for a Sherpa for my first DSC." |
Understanding Basic Raid Roles
While some encounters may require all players to perform similar tasks, many raids benefit from or necessitate the assignment of basic roles within the fireteam.
- Ad Clear: This role focuses on eliminating the waves of smaller enemies (Adds) that spawn throughout an encounter. Effective ad clear is crucial for protecting teammates who are performing mechanics, reducing overall chaos, and preventing the team from being overwhelmed.
- DPS (Damage Per Second): Players in a DPS role are primarily focused on maximizing damage output against the main boss or other high-health targets during specific vulnerability phases. This often requires specialized weapons, armor mods, and subclass builds tailored for high burst or sustained damage.
- Support: Support players enhance the team's effectiveness or survivability. This can involve deploying abilities that provide damage buffs (e.g., a Warlock's Well of Radiance), healing (e.g., Well of Radiance, Titan Bastion Barricade with specific Exotics), or applying debuffs to enemies to increase incoming damage (e.g., Divinity Exotic Trace Rifle creating a large critical hit spot, Tractor Cannon applying a weaken effect).
- Mechanics-focused Roles: These players are directly responsible for executing the specific, often complex, mechanics of an encounter. This can include carrying and using special relics (like the Aegis in Vault of Glass), reading symbols and making callouts, operating unique raid augments (like the Operator or Scanner in Deep Stone Crypt), or completing specific platforming or object interaction sequences. In many encounters, multiple players will have mechanics-focused responsibilities simultaneously.
Recommended Beginner-Friendly Raids
For a Guardian's initial steps into raiding, selecting an appropriate starting point is crucial. The following raids are generally considered accessible for beginners due to their relatively straightforward mechanics and good learning curves. The strategies outlined will focus on common, beginner-friendly approaches, and loadout recommendations will prioritize easily obtainable Legendary weapons with generally useful perks, alongside accessible Exotic options.
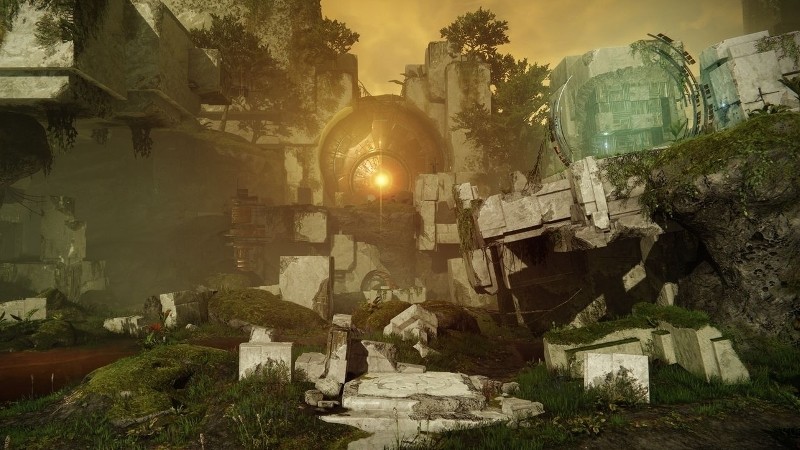
Vault of Glass - The Timeless Classic
The Vault of Glass, Destiny's original raid, remains an excellent entry point for new raiders in Destiny 2.
Why VoG is Great for Beginners
- It is widely regarded as one of the easiest raids, making it ideal for players unfamiliar with raid mechanics.
- The encounters introduce fundamental raiding concepts—such as plate control, synchronized actions, enemy prioritization, and role-based item usage (the Aegis Relic)—in a relatively clear and manageable way.
- Many segments of the raid emphasize efficient enemy clearing and basic team coordination over intricate puzzle-solving.
- Vault of Glass is Free to Play for all Destiny 2 players, ensuring maximum accessibility.
Encounter-by-Encounter Breakdown
Waking Ruins (Opening the Door)
Mechanics: Three Vex sync plates (left, middle, right relative to the entrance) must be simultaneously activated and held by Guardians to construct spires that open the main Vault door. Vex Praetorians (Void-shielded Minotaurs) will attempt to step on the plates to revert progress. Goblins and Hobgoblins provide supporting fire, and large Vex Cyclops turrets will periodically spawn overlooking each plate.
Beginner Strategy: Divide the six-player fireteam into three pairs, assigning each pair to a plate. The absolute priority is to eliminate Praetorians before they reach a plate; Void damage is effective against their shields. Within each pair, one player can focus on staying on the plate while the other has more freedom to engage enemies. Clear and immediate callouts for Praetorian spawns and their target plates are essential.
Key Callouts: "Praetorian Left/Middle/Right!", "Cyclops spawning Left/Middle/Right!", "Plate [X] clear/needs help!"
Confluxes
Mechanics: Guardians must defend a series of Vex Confluxes from waves of Vex attempting to sacrifice themselves. The encounter progresses in three phases: first, a single central Conflux; second, two Confluxes (left and right); third, all three Confluxes simultaneously. Key enemy types include Overload Minotaur Champions, Vex Wyverns, and Vex Fanatics. Fanatics explode upon death (or if they reach a conflux), leaving behind a pool of blue energy that applies the "Marked for Negation" debuff. The Templar (a large, stationary Hydra boss) periodically initiates a "Ritual of Negation," which instantly kills any player affected by this mark. A "Cleanse Well" (a pool of light, typically at the bottom of the central stairs) can remove the "Marked for Negation" debuff but has a cooldown.
Beginner Strategy: Split the team to cover the active Conflux(es). Prioritize eliminating Overload Champions (requiring Overload mods/abilities) and Wyverns. Avoid the blue pools left by Fanatics. If "Marked for Negation," the affected player must immediately call it out and move to the Cleanse Well, coordinating its use as it may be needed by multiple players. Area-of-effect weapons like Witherhoard can help control Fanatic groups.
Key Callouts: "Overload [Location, e.g., spawning left]!", "Wyvern [Location]!", "Fanatic wave incoming [Location]!", "Marked, heading to cleanse!", "Cleanse used/available."
Oracles
Mechanics: Seven distinct Oracles (glowing blue Vex cubes that emit a musical tone) spawn in a specific sequence across various locations in the arena. The fireteam must destroy all Oracles in the exact order they appeared. Destroying an Oracle out of sequence or failing to destroy them all within a time limit results in the team being "Marked by Oracles," leading to a wipe. The sequence length increases with each wave (e.g., three Oracles, then four, up to seven). Oracles do not repeat within a single sequence. Significant waves of Vex, including Fanatics, Champions, Wyverns, and Hobgoblin snipers on surrounding platforms, will continuously spawn.
Beginner Strategy: A common strategy is to assign each player (or a pair of players) responsibility for specific Oracle locations (e.g., using callouts like L1, L2, L3 for left side Oracles, R1, R2, R3 for right, and Mid). One or two players with a clear view of most Oracle spawns (or by quickly communicating amongst the team) identify the sequence number of each Oracle as it appears (e.g., "L1 is first, Mid is second, R2 is third"). Players then destroy their assigned Oracle only when its number in the sequence is called. Prioritize eliminating Hobgoblin snipers between Oracle waves. The Exotic Machine Gun Xenophage can one-shot Oracles, simplifying destruction if available.
Key Callouts: "Oracle Order: [Location of 1st Oracle], [Location of 2nd Oracle], [Location of 3rd Oracle]..." or using a numbered system like "L1 is 1, Mid is 2, R2 is 3...", "Shooting my Oracle!", "Missed an Oracle / Need cleanse!" (though cleanse is very difficult for Oracle wipes).
Templar (Boss)
Mechanics: The Templar boss is initially shielded and immune to damage. The Aegis Relic spawns in the center; picking it up starts the fight. The Relic holder is crucial. The Templar will periodically summon three Oracles that must be destroyed quickly. The Templar will also attempt to teleport to one of several pre-determined locations (marked by white rings on the ground). A player standing inside this ring as the Templar initiates its teleport can block it, extending the damage phase but also spawning powerful Minotaurs. Players hit by Fanatic pools or certain Templar attacks will be "Marked for Negation."
Relic Shield Uses:
- Cleanse: Holding the guard button (typically right mouse button or left trigger) creates a cleansing aura around the Relic holder, removing "Marked for Negation" from nearby allies.
- Break Templar Shield: The Relic's Super ability fires a projectile that shatters the Templar's shield, making it vulnerable to damage.
- Offense: The Relic has powerful melee attacks and an aerial slam attack.
Beginner Strategy: Designate a confident player as the Relic holder. The team should generally group up (often on a raised platform) for DPS once the Templar's shield is broken by the Relic Super. The Relic holder calls out when the shield is down. Other players focus fire on the Templar. It's common for beginners to attempt to block only the first teleport to maximize the initial damage window. The Relic holder must prioritize cleansing teammates marked for negation. All players should assist with Oracle destruction.
Key Callouts: "Relic up!", "Oracles spawning! [Locations]", "Templar shield down - DPS!", "Templar teleporting [Location, e.g., front right]!", "Blocking teleport!", "Need cleanse!"
Gorgon's Labyrinth
Mechanics: This is a stealth section. The labyrinth is patrolled by Gorgons (immune Harpies). If a Gorgon spots a player for too long (indicated by its red gaze and a rising screeching sound), the entire fireteam is wiped ("Gorgon's Gaze"). Gorgons are sensitive to sound, so sprinting and excessive jumping can attract their attention. The objective is to navigate the maze to an exit.
Beginner Strategy: Follow a well-known safe path (many visual guides exist; a common one involves hugging the left wall from the entrance, then using specific rock formations as cover and visual guides). Move slowly as a group, primarily crouch-walking when near Gorgons. Avoid double jumping unless necessary and certain of Gorgon positions. Hunters can use invisibility abilities to scout short distances.
Key Callouts: "Gorgon moving left/right," "Hold here," "Clear to move to next rock."
Jumping Puzzle (Platforms)
Mechanics: Players must traverse a large chasm by jumping across a series of Vex platforms that materialize and dematerialize in a set sequence.
Beginner Strategy: Observe the pattern of platform appearances carefully before committing to jumps. Take it slow; there is no rush. One player can often go slightly ahead and call out when platforms are solid or about to disappear.
Key Callouts: "Next platform up," "Wait for platform," "Platform fading."
Gatekeepers
Mechanics: The arena has two Vex sync plates that activate portals: Left Plate opens a portal to a "Future/Mars-like" area (often called Red or Desert), and Right Plate opens a portal to a "Past/Venus-like" area (often called Green or Jungle). Inside each portal dimension is a Gatekeeper Hydra, shielded Praetorians/Wyverns, and a conflux that must be defended from Vex sacrifices. The Aegis Relic is found inside one of the portals. Only the Relic can destroy the shields of the Praetorians/Wyverns inside the portals. When a player carries the Relic through a portal (either into a dimension or back to the main room), they receive a debuff preventing them from re-entering a portal with the Relic for a short time. The core loop involves sending a sub-team (usually 2-3 players) into one portal. One player picks up the Relic. The team inside kills the Gatekeeper, defends the conflux, and uses the Relic to kill shielded enemies. The Relic is then passed to the team in the other portal (or back to the main room for the Home team to take into the other portal). This relay continues until both Gatekeepers in the portals are defeated and their respective confluxes defended. Afterward, a central conflux activates in the main (present) room, which the entire team must defend against waves of Vex, including shielded Minotaurs that require the Relic to break their shields.
Beginner Strategy: Divide into a "Portal Team" (Relic holder + 1-2 others) and a "Home Team" (3 players). The Home Team is responsible for activating and defending the sync plates to keep the correct portal open and killing any Gatekeeper Hydras that spawn in the main room. The Portal Team enters, with one player designated to grab the Relic immediately. They prioritize killing shielded enemies and defending their conflux. Clear communication is vital to know which portal currently has the Relic and which side needs it next. During the final phase, Relic holders must quickly break the shields of Minotaurs attacking the central conflux.
Key Callouts: "Opening Left/Right portal," "Relic needed on Left/Right," "Shielded Praetorian in Left/Right portal," "Gatekeeper down in [Portal]," "Overload at Left/Right plate (if applicable)," "Middle conflux active, shielded Minotaurs spawning!"
Relic Shield: Essential for killing shielded Vex inside the portals and breaking Minotaur shields during the final conflux defense.
Atheon, Time's Conflux (Final Boss)
Mechanics: Atheon, the final boss, will periodically teleport three random players to either the Future/Mars (Red) or Past/Venus (Green) dimension. The three players who remain in the main room (Home Team) must identify which portal Atheon sent the others to and open it by standing on the corresponding sync plate. The Teleported Team will find an Aegis Relic in their dimension. One player must grab it immediately, as all teleported players are afflicted with a blinding debuff ("Marked by the Void") that only the Relic's cleanse (guard button) can remove. The Teleported Team must kill all Vex in their dimension (including a Gatekeeper, Minotaurs, and Hobgoblins) and then destroy three waves of Oracles. The Oracles appear in a specific sequence, one set at a time. Crucially, the Home Team sees a precursor sequence of three Oracles in the main room before they appear for the Teleported Team. The Home Team must call out this sequence (e.g., "Back Middle, then Front Left, then Far Right") to the Teleported Team, who will then see those same Oracles appear in that order in their dimension and must destroy them. This Oracle sequence repeats three times. After the third set of Oracles is destroyed by the Teleported Team, they can exit through the open portal back to the main room. Upon their return, all six players receive a buff called "Time's Vengeance," which significantly increases damage dealt to Atheon for a short duration (this is the DPS phase). During the DPS phase, Atheon will also periodically target one player with "Imminent Detainment." The targeted player gets a visual warning and must quickly move away from their teammates. A few seconds later, they and anyone nearby will be trapped in a transparent bubble. Teammates outside the bubble must shoot it to break it and free those inside. The Relic holder can also melee or shoot the bubble to break it. Atheon also summons explosive Harpies called Supplicants in the main room, which must be avoided or destroyed. The entire cycle repeats until Atheon is defeated.
Beginner Strategy: Clearly designate Oracle callers on the Home Team (often one player per general Oracle spawn area: left, middle, right relative to Atheon's platform). When teleported, one player should immediately grab the Relic and prioritize cleansing their two teammates. The other two teleported players should focus on clearing adds and then quickly destroying the Oracles in the sequence called out by the Home Team. The Home Team's priorities are: 1) Identify which portal to open, 2) Open it by standing on the plate, 3) Avoid Supplicants, 4) Clearly and accurately call out the Oracle sequence. During the DPS phase, it's highly beneficial for a Warlock to place a Well of Radiance in the common DPS spot (often a central floating island or the stairs). The player targeted by Imminent Detainment must immediately call it out and move away from the group.
Key Callouts: "Teleported to Mars/Venus!", "Home team, open Mars/Venus portal!", "Relic holder, cleanse us!", "Oracle Callouts from Home Team: [1st Oracle Location], then [2nd], then [3rd]...", "Teleported team, shoot [Oracle Location] now!", "DPS phase starting!", "Imminent Detain on [Player Name]!", "[Player Name] is detained, shoot them free!"

Recommended Beginner Loadouts for VoG
 Titan Recommendations
- Ward of Dawn (Void Bubble subclass, Sentinel) provides essential protection during DPS phases.
- Thundercrash (Arc subclass, Striker) with the Cuirass of the Falling Star Exotic chest piece offers high burst damage for Atheon or Templar.
- The Solar subclass (Sunbreaker) with Throwing Hammer can be very effective for add clear and survivability.
 Hunter Recommendations
- Golden Gun (Solar subclass, Gunslinger) paired with the Celestial Nighthawk Exotic helmet delivers significant single-shot damage to bosses.
- The Void subclass (Nightstalker) with Orpheus Rig Exotic legs can generate many Orbs of Power by tethering large groups of adds, fueling teammates' Supers.
- Stasis (Revenant subclass) offers excellent crowd control with abilities that slow and freeze enemies, which can be particularly useful in add-dense encounters like Confluxes.
 Warlock Recommendations
- Well of Radiance (Solar Super, Dawnblade subclass) is arguably the most valuable Super for VoG DPS phases, providing both healing and a damage buff to allies standing within it.
- Pairing this with Lunafaction Boots (Exotic legs, for faster reloads in Well/Rift) or Phoenix Protocol (Exotic chest, for Super energy return from kills/assists in Well) is highly effective.
- The Voidwalker subclass (Nova Bomb) can provide good burst DPS.
Deep Stone Crypt - A Journey to Europa
The Deep Stone Crypt, set on Jupiter's moon Europa, is often recommended as the next raid after Vault of Glass.
Why DSC is a Good Next Step
- It is generally considered one of the easier raids, often ranked just after VoG in terms of accessibility for beginners.
- DSC introduces more clearly defined and mechanically distinct roles (Operator, Scanner, Suppressor) compared to VoG, but the mechanics themselves remain fairly simple and learnable. This serves as a good introduction to the "augment-swapping" mechanics found in more complex raids.
- The raid features visually stunning environments and memorable set-piece encounters, such as the spacewalk section.
- The weapons obtainable from Deep Stone Crypt are highly sought after and many are craftable, providing strong incentives for repeated clears.
Encounter-by-Encounter Breakdown
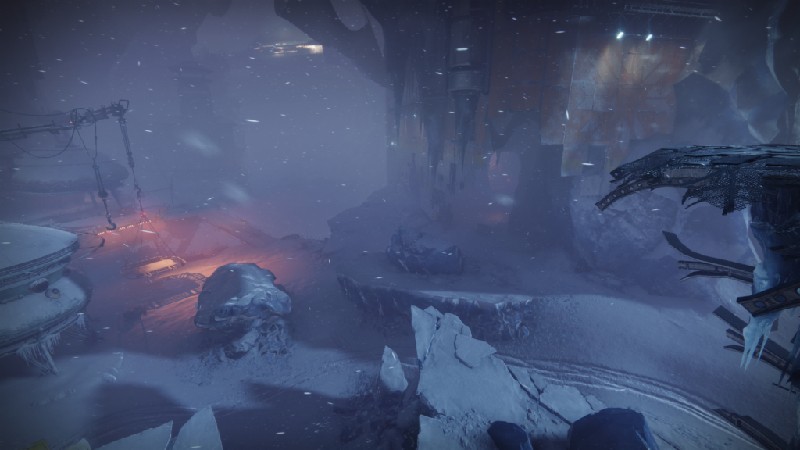
Sparrow Section (Descent/Blizzard)
Mechanics: Navigate a treacherous, snowy blizzard on Sparrows, moving from one heat bubble to the next to avoid accumulating 10 stacks of the "Frostbite" debuff, which results in death. The path is littered with explosive mines and Fallen enemies.
Beginner Strategy: Designate one player to scout slightly ahead to locate the next heat bubble. The team should try to stick together. Call out the locations of heat bubbles and significant enemy threats or mine clusters. Prioritize survival and reaching the next bubble over speed. If a player falls behind, others can wait in a bubble.
Key Callouts: "Bubble ahead on the right!", "Mines on the left path!", "Frostbite at [X] stacks!", "Enemies in this bubble!"
Crypt Security (Disable Fuses)
Mechanics: The arena is split into an upper level (divided into a "Light" side and a "Dark" side) and a basement level. Three players are assigned to the Light side upstairs, and three to the Dark side. The encounter involves two key roles/buffs: Operator (red augment) and Scanner (yellow augment).
- The Operator can shoot specific, glowing square panels in the basement to enable the Scanner to see vulnerable fuses. There are five panels on the Light side of the basement and five on the Dark side. The Operator also uses an augment terminal to send their buff to other players.
- The Scanner can see which of the ten panels (five per side) in the basement are glowing (these are the ones the Operator must shoot). After the panels are shot, the Scanner (now in the basement) can see which three of six large fuses (connected to the central pillar in the basement) are glowing and vulnerable.
The encounter loop:
- Operator (starting upstairs) shoots a panel to open the door to the basement and goes down.
- Scanner (starting upstairs on one side, e.g., Light) looks through a floor grate into the basement and calls out which of the five panels on their side are glowing.
- Operator in the basement shoots these five panels.
- The Scanner upstairs then sends their Scanner buff down to the basement via an augment terminal. The Operator in the basement picks up the Scanner buff.
- The now-Scanner in the basement identifies which three of the six central fuses are glowing and calls these out to the upstairs team.
- The upstairs team (Light and Dark sides) shoots these three glowing fuses on the corresponding large tubes that extend from the basement ceiling.
- This entire process (panels and fuses) needs to be repeated for the other side (e.g., Dark side panels if Light side was first). The Operator buff is passed upstairs via a terminal to allow another player to go down or to reset a lethal basement timer.
Beginner Strategy: Clearly assign initial Operator and Scanner roles. The Operator should only go downstairs once the Scanner has identified the first set of panels. Communication must be precise for panel locations (e.g., "Light side, top left panel," "Dark side, bottom middle panel"). Upstairs players not holding buffs focus on clearing Fallen enemies (including Overload Champions). When fuses are called, ensure the correct ones are shot.
Key Callouts: "[Light/Dark] side, Operator ready to go down." "Scanner sees." "Operator, shoot [called panels]." "Passing Scanner buff down to basement." "Fuses are." "Operator buff coming upstairs."
Atraks-1, Fallen Exo (Boss)
Mechanics: This boss fight occurs simultaneously in two locations: "Space" (the upper level, reached by space pods) and "Ground" (the initial lower level). The team splits, typically three players in Space and three on Ground. Key roles are Operator and Scanner. Atraks-1 creates multiple copies of himself. The Scanner identifies which Atraks-1 copy is the "real" one (it will glow yellow). After damaging a real Atraks-1 copy, it drops a purple debuff orb called "Atraks-1 Replication." A player must pick this up. This debuff has a timer; if it expires, the team wipes. The Operator can shoot a player holding the Replication debuff, causing the debuff to drop to the ground as an orb. The player can then pick it up again to refresh its timer, or another player can take it. To permanently remove the Replication debuff, the Operator must open one of four airlocks (two in Space, two on Ground), the debuffed player must enter the airlock, drop the Replication orb (by being shot by Operator or by Operator shooting the orb itself if it's on the ground in the airlock), and then exit the airlock before it purges. The purged Replication orb (a copy of Atraks' head) floats out into space. Eight Replications must be purged to reach the final stand. Servitors spawn on both levels; killing all Servitors on one level triggers a DPS phase against the real Atraks-1 on that level.
Encounter Flow:
- Operator usually stays in Space. Scanner starts in Space, identifies the real Atraks-1 copy.
- Space team damages their real Atraks-1. A player picks up the Replication debuff.
- Operator in Space shoots the Replication holder, they pick it up again (or it's left for a moment), and the Operator opens an airlock. Replication holder goes in, drops/is shot, orb is purged.
- Scanner buff is sent from Space to Ground via an augment terminal.
- Ground team kills their Servitors, Scanner identifies real Atraks-1, Ground team damages it. Player picks up Replication.
- This Replication holder takes a space pod up to Space. The Operator in Space opens an airlock for them to purge their Replication.
- This cycle repeats. Roles may need to be swapped via terminals if players die or if strategy dictates.
- After eight Replications are purged, a final stand occurs in Space where all Atraks-1 copies must be destroyed quickly.
Beginner Strategy: Clearly assign Space/Ground teams and initial Operator/Scanner. Communication is vital for Replication handoffs and airlock coordination. Swords, particularly The Lament Exotic sword, are highly effective for damaging Atraks-1 copies. Burst damage Supers are also good. Focus on smooth debuff management and clear callouts for the real Atraks.
Key Callouts: "Scanner has buff, Space." "Real Atraks is." "DPSing Atraks." "[Player Name] has Replication!" "Operator, shoot." "Sending Replication to [Airlock Number/Location]." "Scanner buff coming down/up." "Final stand, focus fire!"
Taniks, Reborn (Nuclear Cores / Descent)
Mechanics: This is not a boss fight but a mechanics-heavy encounter to prevent a space station from crashing. Three roles are active: Operator, Scanner, and Suppressor (blue augment). Four Nuclear Cores must be collected and deposited into two of four available bins.
- Operator: Shoots panels to release Nuclear Cores from containment units (two on each side of the room).
- Scanner: Identifies which two of the four deposit bins (at the front of the room) are active and glowing.
- Suppressor: Taniks (a large Shank) floats in the middle. Three small drones hover around him. The Suppressor must stand under whichever drone is currently glowing and shoot Taniks to stun him. This stun allows players carrying Nuclear Cores to deposit them. This must be done three times per cycle for all cores to be deposited.
- Core Carriers: Two players are typically assigned to carry two cores each. Picking up a core applies a stacking "Radiation" debuff. Reaching 10 stacks of Radiation is lethal. Players must juggle cores or have others take them if Radiation gets too high.
- After a Suppressor stuns Taniks three times, one of the three augment holders (Operator, Scanner, or Suppressor) will have their augment deactivated and must quickly pass it to another player via a terminal.
Beginner Strategy: Assign two players to each role (one primary, one backup/core runner). Typically, two Operators (one for each side's core spawns), two Scanners (one for each side to see bins, though one can cover both), and one primary Suppressor. The remaining players are primary core runners. Operators release cores. Core runners pick them up (max two per person initially to manage Radiation). Scanner calls out the two active bins. Suppressor stuns Taniks when drones glow. Core runners deposit into lit bins once Taniks is stunned. Augment holders must be ready to pass their buff if deactivated. After four cores are deposited, the floor opens, and the team must quickly run through a collapsing corridor to safety.
Key Callouts: "Operator, pop cores!" "Scanner, active bins are." "Suppressor, stun Taniks at [Drone location, e.g., under front drone]!" "Depositing cores." "Radiation high on [Player], need core swap!" "[Augment, e.g., Operator] deactivated, passing buff!" "Floor open, run!"
Taniks, The Abomination (Final Boss)
Mechanics: The final fight against Taniks. Roles (Operator, Scanner, Suppressor) and core mechanics are similar to the previous encounter, but with added complexities. Taniks has four thrusters on his sled that must be shot to release Nuclear Cores (one core per thruster, four total needed for DPS).
- Players carrying cores still get Radiation.
- Scanner still identifies two active deposit bins out of six total (three pairs around the arena).
- Suppressor still stuns Taniks by shooting him while under one of three glowing drones to allow core deposits.
- New Mechanic: Taniks will periodically trap two random players (not carrying cores) in purple energy fields ("Detainment"). The Operator is the only one who can shoot these fields to free the trapped players. If the Operator is detained, another player must quickly take the Operator buff from a terminal and free them. Therefore, the Operator should never carry a Nuclear Core.
- After four cores are successfully deposited, a DPS phase begins. Taniks will move to the center of the arena and create a damaging debris field around him. Players must find safe zones within this field to damage him.
Beginner Strategy: Maintain the same roles if possible. Players designated to shoot thrusters should do so quickly. Core runners must manage Radiation. The Operator's top priority is freeing detained players; they must always be aware of who is trapped. Suppressor ensures Taniks is stunned for deposits. During DPS, a Well of Radiance is highly beneficial. Rocket Launchers, Linear Fusion Rifles, or Slug Shotguns (like Heritage from DSC itself) are effective for damage. Players must be mindful of the debris field during DPS and reposition as needed.
Key Callouts: "Shooting thrusters!" "Cores are down!" "Scanner, which bins are active?" "Suppressor, stun Taniks!" "[Player 1] and [Player 2] detained! Operator, shoot them free!" "DPS phase! Move to Well!" "Watch out for debris field, move left/right!"
Recommended Beginner Loadouts for DSC
General: Overload stunning capability is needed for Champions in Crypt Security and the Descent (Taniks Reborn) encounter. Xenophage (Exotic LMG) can be useful for quickly shooting the panels for the Operator in Crypt Security. Swords, especially The Lament (Exotic), are top-tier for Atraks-1 DPS. Rocket Launchers are a strong choice for Taniks, The Abomination DPS. Slug Shotguns, such as Heritage (a DSC raid weapon), are also excellent for Taniks DPS.
Root of Nightmares - Newer, but Accessible
While a more recent addition, Root of Nightmares is often cited for its relative ease compared to other modern raids.
Why RoN Can Be Approached Early
- It is frequently described as one of the easiest recent raids, making it less intimidating for newcomers.
- The core mechanic, which involves connecting sequences of Light and Dark nodes, is relatively simple to understand and is repeated across most of the raid's encounters, reducing the overall learning load.
- The puzzles and combat encounters are generally straightforward, with less emphasis on punishing precision or complex multi-stage mechanics compared to some other raids.
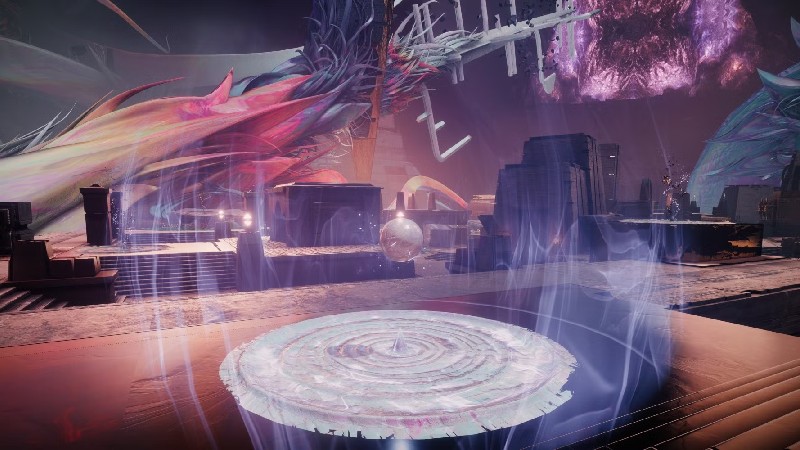
Core Node-Connecting Mechanic Overview
- Players typically shoot a starting node (either a Light "Traveler" sphere or a Dark "Pyramid" node) to gain a corresponding buff ("Field of Light" or "Flux of Darkness").
- Upon activating a node, a beam of energy (Light or Dark) will often point from that node towards the next node in a required sequence.
- A player carrying the correct buff must run to the indicated next node and shoot it. This "connects" that segment of the chain and usually consumes their buff.
- Often, other players may need to stand in an aura created by an activated node to also receive the buff, either to continue the chain themselves or to damage specific enemies that are immune without the corresponding Light or Dark buff.
- This "node running" or "seed connecting" is the primary mechanical loop for encounters 1 (Cataclysm), 2 (Scission), and parts of 4 (Nezarec), with variations in layout and additional enemy types or objectives. Encounter 3 (Macrocosm/Planets) utilizes a different set of mechanics involving aligning planets based on Light/Dark affinity.
General Loadout Tips for RoN
- Ad Clear: Strong add-clearing weapons like Submachine Guns and Auto Rifles are essential due to the high density of Cabal and Vex enemies.
- Majors/Tormentors: A weapon capable of dealing significant damage to tougher enemies like Tormentors (powerful Scorn mini-bosses) is needed. Machine Guns or Linear Fusion Rifles are good options.
- Champions: Barrier Champions are present in several encounters, so ensure the team has adequate anti-barrier capabilities (from seasonal artifact mods or specific Exotic weapons).
- Boss DPS (Nezarec): Rocket Launchers are a common and effective choice for damaging Nezarec, the final boss. If the team's overall damage output is low, Exotic primary weapons like Rat King (with multiple users) or Outbreak Perfected can provide consistent, albeit lower, damage.
Common Mistakes New Raiders Make (And How to Fix Them)
Navigating the complexities of Destiny 2 raids for the first time can be challenging, and certain errors are commonly observed among novice players. Understanding these pitfalls and their solutions can significantly improve the initial raiding experience. Many of these errors stem not just from a lack of raw skill, but from a deficiency in situational awareness—encompassing the environment, the flow of the encounter, the impact of one's role, and the needs of the team. Developing this broader "raid sense" is a key aspect of player growth.
- Prioritize staying alive above all else
- Focus on mechanics before DPS
- Make clear, concise callouts
- Prepare appropriate loadouts
- Learn encounter layouts
- Ask questions when unsure
- Save resources for key moments
- Maintain positive attitude
- Tunnel vision on damage dealing
- Ignoring mechanics for DPS
- Cluttering comms or staying silent
- Using wrong gear for encounters
- Standing in dangerous positions
- Pretending to understand
- Wasting supers/heavy ammo
- Blaming teammates for wipes
Specific Mistakes and Solutions
- Not Prioritizing Survival:
- Mistake: Becoming overly focused on dealing damage, neglecting personal safety by failing to use cover, or adopting an overly aggressive playstyle that results in frequent incapacitation. A common adage in raiding is "Dead DPS is no DPS".
- Solution: Prioritize staying alive above all else, especially while learning. Study enemy attack patterns, utilize available cover effectively, and avoid overextending into dangerous positions. Ensure your armor build includes high Resilience for damage reduction.
- Ignoring or Misunderstanding Mechanics for DPS:
- Mistake: Attempting to damage a boss during phases when it is immune or when critical mechanics are active and require player attention. Failing to perform assigned mechanical roles due to a premature focus on damage often leads to wipes.
- Solution: Understand that mechanics almost invariably precede DPS phases. Focus on learning and correctly executing your assigned role within the encounter's mechanics. Successful mechanical execution will create opportunities for damage.
- Poor Communication / Lack of Callouts:
- Mistake: Failing to communicate vital information such as active debuffs, critical enemy locations, or the status of a mechanic. Conversely, excessive, unclear, or ill-timed chatter can obscure important callouts from teammates.
- Solution: Practice making callouts that are clear, concise, and timely. Actively listen for information from teammates. If a callout is not understood, request clarification promptly.
- Inappropriate Loadout for the Encounter/Role:
- Mistake: Entering an encounter with a loadout ill-suited to its demands—for example, bringing short-range weapons to a long-range engagement, lacking necessary Champion-stunning capabilities when Champions are present, or not having effective boss damage weapons for a DPS phase.
- Solution: Consult guides or ask experienced teammates about recommended loadouts for each specific encounter and your assigned role within it. Prepare a few alternative weapon options to adapt to different situations.
- Unsafe Positioning / Lack of Environmental Awareness:
- Mistake: Standing in predictable enemy spawn locations (colloquially, getting "Caballed Out" if Cabal drop pods land on a player), being caught by environmental hazards such as malfunctioning lifts or moving walls, or inadvertently moving into a teammate's line of fire, especially when they are using explosive weapons like rocket launchers.
- Solution: Learn the layout of each encounter area, including common enemy spawn points and environmental hazards. Maintain awareness of your surroundings and the positioning of your teammates. Avoid standing stationary in locations known to be dangerous.
Growing as a Raider
Becoming a proficient raider is a journey of continuous learning and refinement. Beyond simply completing a raid, there are numerous ways to enhance one's skills, understanding, and contribution to a fireteam.
How to Effectively Learn and Master Mechanics
A systematic approach to learning raid mechanics is more effective than relying on trial and error alone.
- Pre-Raid Preparation: Before attempting a new raid, watch video guides or read detailed walkthroughs. This provides a general understanding of encounter flow, key mechanics, and common callouts, reducing the initial learning curve within the live environment.
- Active Participation: While it might seem safer to remain in an ad-clear role, actively volunteering for mechanical responsibilities is crucial for learning. Communicate your desire to learn a specific role to your team or Sherpa.
- Inquisitiveness: If any aspect of a mechanic, a callout, or the reason for a wipe is unclear, do not hesitate to ask teammates or the Sherpa for clarification. Understanding the "why" behind actions is as important as the "how".
- Focused Learning: For encounters with multiple complex roles, concentrate on mastering one specific role at a time. Once proficient in one, then expand to learning others.
- Repetition and Practice: There is no substitute for experience. The more times a raid or specific encounter is completed, the more familiar one becomes with its nuances, enemy behaviors, and optimal strategies.
Post-Raid Self-Assessment
Critical self-reflection after a raid session is a powerful tool for improvement.
- Identify aspects of your performance that were successful and areas where you struggled.
- Assess your understanding and execution of the mechanics for which you were responsible.
- Evaluate the clarity, accuracy, and timeliness of your callouts.
- Consider the effectiveness of your loadout for each encounter and role. Was it optimized? Did you encounter ammunition issues?
- Analyze your survivability. Were there instances where better positioning or ability usage could have prevented death?
- Gameplay Recording: If playing on a platform that supports gameplay recording (many PCs and modern consoles do), capturing your raid attempts allows for detailed post-mortem analysis. Reviewing footage can highlight mistakes, missed cues, or areas for improved positioning that might not be apparent in the moment.
- Team Debrief: If raiding with a consistent group, discuss the run afterward. What strategies worked well? What caused wipes? How can team coordination be improved for future attempts?
Progressing from "Ad Clear Duty" to Handling Mechanics
The common starting point of "ad clear" for new raiders is not a terminal role but a foundational one. It allows beginners to learn the general flow of an encounter, enemy spawn patterns, and team communication dynamics with lower individual mechanical pressure. The key is to then actively seek progression into more mechanically demanding roles as confidence and understanding grow.
- Build Foundational Awareness: Excel at ad clear by learning enemy types, spawn locations, and threat prioritization. This understanding of the encounter's rhythm provides a strong basis for learning specific mechanics within that rhythm.
- Communicate Intent: Inform your fireteam leader or Sherpa of your desire to learn a specific mechanical role in an upcoming run or attempt.
- Seek Mentorship: Ask an experienced player to explain the desired role in detail, or to "shadow" you as you attempt it, providing guidance and feedback.
- Start with Simpler Mechanics: Begin with roles that are less critical to immediate wipe prevention or those that involve more direct instruction before moving to roles that require independent decision-making or complex information relay.
Example Progression in Vault of Glass
- Plate defender/ad clear during opening and Confluxes.
- Assigned Oracle shooter (following calls).
- Relic holder for the Templar encounter (generally less pressure than Atheon Relic).
- Home team Oracle caller for Atheon.
- Atheon teleport team member (Relic holder or Oracle shooter inside).
Example Progression in Deep Stone Crypt
- Ad clear during Crypt Security or Taniks encounters.
- Operator for simpler tasks (e.g., shooting clearly called-out panels in Crypt Security from a safe position).
- Scanner role, initially focusing on relaying information provided by a more experienced Scanner, then taking on primary identification.
- Suppressor role for Taniks encounters.
- Primary Nuclear Core runner for Taniks encounters.
A Glimpse into Advanced Buildcrafting
Once a player is comfortable with raid mechanics and consistently performing roles effectively, exploring more advanced buildcrafting can further enhance their capabilities.
- Synergy is Key: Advanced buildcrafting moves beyond simply equipping high-stat armor and good weapons. It focuses on creating powerful synergies between subclass Aspects and Fragments, Exotic armor perks, weapon traits, and armor mods.
- Creating Ability Loops: Many advanced builds aim to create loops where ability usage refunds energy for other abilities, or where weapon kills enhance ability regeneration, leading to more frequent and potent ability uptime.
- Role Enhancement: Builds can be tailored to significantly boost performance in specific roles: maximizing survivability for high-pressure mechanics, amplifying team support (healing, buffs), or achieving peak damage output during DPS phases.
- Resources: Numerous community resources, including build-focused websites (e.g., Mobalytics), YouTube content creators specializing in Destiny 2 builds, and community forums, offer a wealth of inspiration and detailed guides for various advanced builds.
The Spoils of Victory and the Journey Ahead
Embarking on the path of a raider in Destiny 2 is to engage with some of the game's most challenging and ultimately rewarding content. This compendium has sought to equip novice Guardians with the essential knowledge to navigate their initial forays into these endgame activities. Key to this endeavor are diligent preparation, including achieving appropriate Power Levels and assembling a versatile loadout; a commitment to clear, concise, and respectful communication; and the patience to learn intricate mechanics, often through trial and error.
Starting with beginner-friendly raids such as Vault of Glass or Deep Stone Crypt allows new players to build a strong foundation in core raiding principles within environments that are relatively forgiving of mistakes. The importance of seeking out teaching runs or the guidance of a Sherpa cannot be overstated, as these resources provide structured learning and foster a positive introductory experience.
Raids offer more than just unique loot and powerful gear; they are a crucible for skill development, a test of teamwork, and a source of memorable shared experiences and camaraderie. The journey from a hesitant newcomer to a confident raider is one of continuous learning, adaptation, and improvement. As novice Guardians gain experience, they are encouraged to explore a wider variety of raids, to challenge themselves with new roles and responsibilities, and to delve deeper into the nuances of buildcrafting to further refine their capabilities. The challenges are significant, but the spoils of victory—both tangible and intangible—make the pursuit of raiding mastery a compelling and enriching aspect of the Destiny 2 experience.