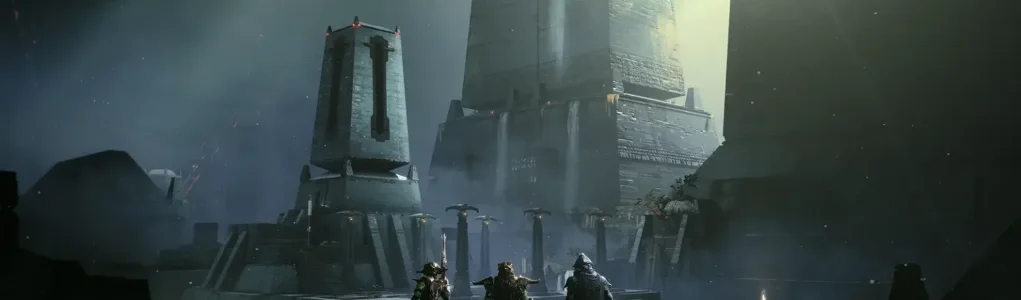
The Sundered Doctrine dungeon, introduced in Destiny 2's Episode: Heresy, plunges Guardians into the treacherous depths of Rhulk's Pyramid Ship, a familiar yet newly corrupted battleground within Savathûn's Throne World. This three-player endgame activity challenges fireteams with a gauntlet of intricate puzzles, relentless combat against the formidable Dread and Hive forces, and the promise of powerful, unique rewards. This guide will illuminate the path through every encounter, detail the treasures within, and equip players with the knowledge to conquer this formidable challenge on all difficulties. The return to Rhulk's Pyramid Ship is more than a change of scenery; it's a deliberate callback to the themes and mechanics encountered in the Vow of the Disciple raid. Rhulk, a Disciple of the Witness, presided over a domain steeped in symbol-based puzzles and a pervasive "truth versus deception" narrative. Sundered Doctrine echoes these elements, suggesting that players familiar with the Vow raid may find some conceptual footing amidst the new trials.
Introduction to the Sundered Doctrine
Overview and Thematic Setting
Guardians will find themselves navigating the sunken corridors of Rhulk's Pyramid, a vessel now teeming with the Witness's ruthless Dread faction and the ever-present Hive. The dungeon is characterized by its demanding mechanics, which require precise coordination and quick thinking, often under the duress of punishing enemy onslaughts. As stated in early intelligence, this activity "pits Guardians against the Dread—a ruthless faction serving The Witness—and introduces complex mechanics, punishing enemies, and high-stakes rewards," setting a clear expectation of the trials ahead.
Lore Connections
The narrative underpinning Sundered Doctrine involves Guardians venturing into the Pyramid to uncover secrets sought by the Dread within a hidden vault. A core mechanical and thematic element revolves around discerning truth from falsehood, presented through cryptic "stories" told by symbols during the first and third encounters. For instance, a sequence like "Traveler-Give-Light" would represent an undeniable truth within the game's lore, guiding players' actions. The "Main Wheel and side Wheels tell a story, and one must determine the true statement to progress... Main Wheel presents two statements, one true and one false, requiring players to 'shine light on the falsehood'". This focus on truth and lies is a recurring motif in Destiny, particularly linked with Savathûn, the Witch Queen, whose Throne World hosts this Pyramid, and by extension, the Darkness itself. Rhulk, too, dealt in twisted narratives. The dungeon's mechanics, therefore, are not merely arbitrary challenges but thematic tests reflecting the deceptive nature of the forces at play.
Accessing the Dungeon
This quest is not only an entry requirement but is also intrinsically linked to unlocking the full potential of the dungeon's exotic weapon. Once the quest is acquired, the Sundered Doctrine dungeon can be launched from its dedicated node within Savathûn's Throne World, situated near the Vow of the Disciple raid entrance. The very name "The Drowning Labyrinth" hints at the experience within: "Drowning" suggests being overwhelmed by complex information or deception, while "Labyrinth" points to the maze-like navigation and intricate puzzles described in early reports.
Preparing for the Depths
Recommended Power Levels & Initial Challenge
Upon its release, Sundered Doctrine established a base Power Level of 1995 for its Normal Mode. The initial 48 hours featured a Contest Mode, locking all players at 1995 Power, irrespective of their actual level, and introducing more aggressive enemies, limited revives per encounter, and punishing enrage mechanics on bosses. This heightened challenge served as a true test of skill and teamwork, with the significant incentive of a guaranteed Finality's Auger exotic weapon upon completion. For those seeking the ultimate PvE test, Master Mode elevates the challenge further, with enemies set at 20 Power Levels above the player, demanding a minimum Power Level of 2000+ for a fighting chance. The Contest Mode, by capping power and intensifying the difficulty, acts as an early benchmark, pushing fireteams to rely purely on mechanical mastery and coordination.
Key Enemy Factions and Types
Guardians will primarily contend with two factions: the newly prominent Dread and the familiar Hive. Understanding their capabilities is crucial for survival.
| Faction | Enemy Type | Description |
|---|---|---|
| Dread | Grim | Airborne units that can suppress Guardians with their screams. A notable variant, the Truthspeaker Major Grim, is integral to the mechanics of the first encounter, dropping vital clues. |
| Weavers & Attendants | These foes manipulate paracausal energies, using Strand to pull and Stasis to freeze unsuspecting players. | |
| Husks | Aggressive melee combatants that, upon defeat, release an exploding Geist. | |
| Tormentors | Elite Dread units with imposing figures and devastating attacks. They possess critical spots on their shoulders and chest and can execute a deadly grab-and-crush maneuver. Tormentors appear as a penalty for mechanical failures in the first encounter. | |
| Subjugators | Powerful Strand and Stasis-wielding adversaries that feature prominently in several encounters, often dropping key items like lenses upon defeat. | |
| Hive | Standard Combatants | Include Thrall (and their Cursed variants), Acolytes, and heavily armored Knights. |
| Wizards | Key in the second encounter, dropping Resonance Splinters (Knowledge buffs). | |
| Ogres | Can appear, often spawned as a result of specific mechanical interactions in the second encounter. | |
| Other | Red-bar Scions | Crucial in the final encounter. Defeating them grants the "Unwritten Empowerment" buff, necessary for breaking Strand tethers on vital puzzle elements. |
The diverse enemy roster, featuring suppressing Grims, ability-wielding Weavers, and formidable Tormentors, necessitates loadouts that balance crowd control, survivability, and high burst damage for priority targets. The varied elemental damage output, especially in the final encounter (which includes Arc, Void, Solar, Stasis, and Strand sources), also calls for versatile defensive mod setups.
Overview of Dungeon Difficulty Modes
Sundered Doctrine offers distinct experiences based on the chosen difficulty:
- Normal Mode: This is the standard version of the dungeon, providing the baseline experience for learning mechanics and enemy patterns. Rewards include the standard set of dungeon weapons and armor.
- Master Mode: A significantly more challenging endeavor, Master difficulty dramatically increases enemy health and damage output. As previously mentioned, enemies are 20 Power Levels higher. The most critical distinction is the introduction of Champion enemies (Unstoppable and Barrier types) throughout the encounters. This fundamentally alters engagement strategies, requiring dedicated anti-Champion weaponry and abilities. Successful completion of Master encounters rewards Guardians with Artifice Armor, which features an additional mod slot for enhanced build-crafting.
- Contest Mode (Launch Window Only): Active for the first 48 hours of the dungeon's release, this mode featured a fixed Power Level of 1995, heightened enemy aggression, limited revives, and enrage mechanics.
Encounter Walkthroughs
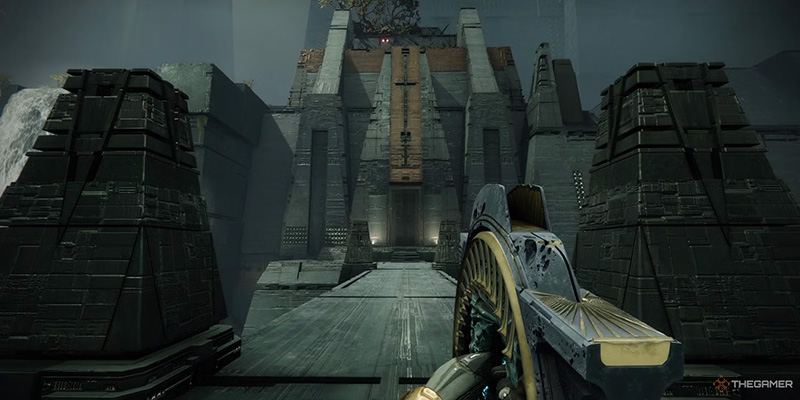
Traversal: Entering the Dungeon & Flooded Inspection
The initial foray into Sundered Doctrine begins in the Flooded Inspection area, a relatively linear path that soon gives way to more complex navigation. Guardians will face initial pockets of Dread and Hive resistance, including a pair of Subjugators that must be dispatched.
A keen eye will spot a hidden passage concealed behind a waterfall, marked by distinct red lights. This leads into a treacherous, maze-like section characterized by crumbling platforms and obscured pathways, demanding careful jumps to avoid fatal falls. Further progression brings players to a long hallway bisected by a sweeping, damaging darkness beam, requiring precise timing or the use of available cover to pass safely. The opening sequence is also punctuated by environmental hazards such as rolling spiked boulders, necessitating cautious advancement. These initial traversal segments serve to acclimate players to the dungeon's perilous nature, testing awareness and basic platforming skills before the first major mechanical challenge.
First Encounter: The Riddle (Lens Puzzle)
Objective: The core goal is to simultaneously activate a sequence of Wheels by creating pathways of light. This is done by directing beams from three Main Lenses in a central chamber to the correct Wheels located in four adjacent side rooms (two on the left, two on the right). The number of Wheels to activate increases with each round: one in the first, two in the second, and three in the final round.
Core Mechanics:
- Initiation & Main Room: The encounter begins when a player activates one of the three Main Lenses in the central "Main Room". This room also houses the Main Wheel, which displays a "story" or statement with missing symbols – these missing symbols are the key to the puzzle.
- Side Rooms & Symbols: Each of the four side rooms contains its own Wheel displaying a single symbol, along with some pre-placed lenses (which cannot be rotated) and empty sockets where players can place additional lenses.
- Identifying the Correct Wheel/Symbol:
- Truthspeaker Grim: The primary method involves locating and defeating a Truthspeaker Major Grim (also referred to as a "Truth Seeker" or "bat"). This enemy drops a symbol that corresponds to the correct Wheel to target, effectively revealing the missing piece of the "story" on the Main Wheel.
- Lore Deduction: Alternatively, fireteams can attempt to deduce the missing symbol and thus the correct Wheel by interpreting the partial "story" displayed on the Main Wheel in conjunction with the symbols visible on the side room Wheels. An example given is "Traveller → [Gift] → Light," where "Gift" is the deduced missing symbol.
- Lenses & Beam Construction:
- Subjugators, found in the side rooms, drop lenses when defeated. Players can carry one lens at a time.
- These lenses are placed into available sockets and can then be rotated to direct the light beam. It's crucial to note that lenses placed in sockets are fragile; if a beam successfully passes through them but is later interrupted (e.g., the Main Lens is deactivated or rotated away), the placed lenses in that path will disappear, requiring players to acquire new ones.
- Initial reports mentioned lenses shattering after three rotations, but more detailed accounts emphasize their disappearance upon beam interruption. Prioritize the latter as the more consistent mechanic.
- Activating Beams: To activate a Main Lens initially, shoot the darkness nodes hovering above it. For subsequent activations within a round or to switch which Main Lens powers a path, a designated "switcher" player in the Main Room must shoot the switch above the chosen Main Lens. A critical rule for multi-activation rounds is that the same Main Lens cannot be used to power two different target Wheels simultaneously within the same round; separate Main Lenses must be used.
- Progression & Penalty: Successfully activating a side Wheel by connecting a beam to it will fill an empty symbol slot on the Main Wheel from left to right. If an already active Wheel's beam is broken, its symbol is removed from the Main Wheel, and any subsequent symbols shift to the left. If the fireteam incorrectly completes the statement on the Main Wheel (i.e., connects a beam to a wrong Wheel), all Main Lenses will deactivate, and a powerful Tormentor will spawn in the Main Room as a penalty.
Enemies: The side rooms are patrolled by Strand and Stasis Subjugators, often accompanied by Attendants or Weavers. The Main Room will see Husks spawning. Notably, if a player is present in a side room, enemy spawns within that specific room are suppressed.
Time Limit (Contest Mode): The pressure is amplified in Contest Mode with strict time limits: 2 minutes for the first round, an additional 3 minutes for the second, and a final 5 minutes for the third round.
Strategy & Tips:
- The light beams themselves can damage both players and enemies; Husks in the Main Room can be lured into the beams for passive damage.
- When interacting with sockets, carefully read the prompt to ensure lens placement rather than accidental socket rotation.
- Consulting maps for optimal lens pathing can be highly beneficial, especially for later rounds.
This encounter is a demanding test of a fireteam's ability to juggle combat, puzzle-solving, and communication, particularly under the tight timers of Contest Mode. The process of acquiring lenses from formidable Subjugators, coupled with their fragility if beam paths are broken, introduces a resource management element that punishes careless mistakes and rewards meticulous planning of beam paths. The "switcher" role is vital to prevent accidental deactivation and loss of painstakingly placed lenses.
Traversal: Rolling Spike Traps
Following the intense Riddle encounter, Guardians face a hazardous traversal section featuring massive, rolling spiked boulders in a sloped corridor and an adjacent hallway. The key to survival here is patience and observation. Players should utilize the small alcoves along the sides of the corridor for temporary safety, carefully watching the boulders' patterns before making a dash to the next safe spot. This section, while less mechanically complex, serves as a brief respite from intense combat and puzzle-solving but still maintains a level of environmental threat, preventing complacency.
Second Encounter: Zoetic Lockset (Shrieker Boss)
Objective: The goal is to defeat four large Shriekers. This is achieved by manipulating symbols on four corresponding rotating Wheels to create a specific sequence that triggers a damage phase against the Shriekers.
Core Mechanics:
- Wheels, Cruxes, and Knowledge: The arena contains four large Wheels. Each Wheel displays an active symbol and has a specific rotation direction (clockwise or counter-clockwise), indicated by a spinning bar in its center. This direction can be reversed by shooting a Crux of Darkness positioned above the Wheel, typically requiring area-of-effect damage like an Incandescent proc or grenade. Defeating Wizards in the arena causes them to drop Resonance Splinters. Collecting these grants stacks of a "Knowledge" buff: Heightened Knowledge (1 Splinter), Brimming Knowledge (2 Splinters), or Overflowing Knowledge (3 Splinters). Interacting with (or "dunking" at) a Wheel consumes all currently held Knowledge stacks and rotates its active symbol forward a number of steps equal to the stacks consumed (e.g., Brimming Knowledge moves the symbol 2 steps in its current rotation direction).
- Lockset Progression Bar & Shrieker Actions: A "Lockset Progression Bar" at the top of the screen fills over approximately 60 seconds. At specific intervals on this bar, each Shrieker "reads" its corresponding Wheel (Wheel 1 from left, Shrieker 1, etc., though some community diagrams number differently based on lock-in order) and performs an action based on that Wheel's active symbol:
- 0%: Shrieker 1 reads Wheel 1.
- 25%: Shrieker 2 reads Wheel 2.
- 50%: Shrieker 3 reads Wheel 3.
- 75%: Shrieker 4 reads Wheel 4.
- Screens & Symbol Copying (Pre-Damage Phase): Four screens in the arena correspond to the four Wheels. Before a damage phase is initiated, certain screens will become highlighted by resonance energy, typically starting with Screen 4 (if numbering from left to right). When a Shrieker reads its Wheel while that Wheel's corresponding Screen is highlighted, the Wheel's active symbol is copied onto that Screen. The order in which Shriekers "lock" symbols onto these screens is fixed.
- Triggering Damage Phase vs. Lockset Engagement:
- Damage Phase: If Wheel 1's active symbol is "Kill" when it is read by Shrieker 1 after the highlighting sequence on the screens has occurred, the damage phase against the Shriekers begins.
- Lockset Engagement: If the condition for Damage Phase isn't met (e.g., Wheel 1 is not "Kill" or the timing is off relative to screen highlighting), "Lockset Engagement" begins. During this phase, the Shriekers are immune to damage, and the symbols on the Wheels are largely ignored for triggering further actions, though the Shriekers may still attack based on previously locked-in screen symbols.
- Symbol Actions & Effects:
- Empty: No effect. This is the default state at the start and after a damage phase.
- Stop: Pauses the Lockset Progression Bar for 10-11 seconds. This is crucial for extending the duration of a damage phase. It also appears to reduce or halt the spawning of certain enemies like Ogres or Wizards from other symbols, though basic adds may continue to spawn. It's important to note that "Stop" extends DPS, not "Commune" as some early theories suggested.
- Hive: Spawns up to two Hive Ogres (one left, one right). If Ogres from a previous "Hive" activation are still alive, new ones may not spawn.
- Knowledge (or Brain): Spawns numerous Acolytes, a Knight, and three Wizards. The spawn locations of the Knight and Wizards depend on which Shrieker reads the symbol. Similar to "Hive," if these specific enemies are still alive from a prior "Knowledge" activation, they may not respawn.
- Commune: Changes the attacking Shrieker's projectile to homing darkness bees. If "Commune" is active on a screen during a Damage Phase or Lockset Engagement, that Shrieker will launch these bees at every quarter-fill of the Progress Bar. This symbol does NOT extend the damage phase duration.
- Kill: Initiates the damage phase for the remainder of the Lockset Progression Bar's current cycle. For example, if Shrieker 2 reads "Kill" on Wheel 2 at the 25% mark, the damage phase will last for the remaining 75% of the bar. The ideal is to have "Kill" on Wheel 1, read at 0%, for a full 60-second damage window.
Enemies: Aside from the Shrieker bosses, Wizards (source of Knowledge buffs), Acolytes, Knights, and Ogres (spawned by Wheel symbols) are the primary threats. Regular Weavers and Grims will also spawn periodically throughout the encounter.
Strategy & Tips:
- A common strategy is to assign one player as the "wheeler" or "symbol manager," responsible for collecting Knowledge and manipulating the Wheels, while the other two players focus on add control, Wizard takedowns, and supporting the wheeler.
- The generally accepted optimal setup for a damage phase is to have "Kill" on Wheel 1 (far left, if numbering 1-4 left-to-right for reading order) and "Stop" on Wheels 2, 3, and 4. This maximizes the damage window and minimizes enemy interference.
- The Shriekers do not have precision damage spots; all damage is treated as body damage, even if critical hit numbers appear. This influences weapon choice for DPS.
- The "wheeler" must be extremely vigilant, tracking all four Wheels, their rotation directions, current symbols, Knowledge buff counts, the Progress Bar, and upcoming Shrieker reads, all while surviving. The auto-rotation mechanic means that inaction is also a choice with consequences.
- There has been community discussion and some confusion regarding the numbering of the Wheels (left-to-right vs. right-to-left based on the order symbols "lock" onto the large screens). For clarity in team communication, it's best to establish a consistent numbering system (e.g., 1-4 from left to right, corresponding to the reading order of Shriekers 1-4).
Traversal: Unlocking the Final Encounter
After vanquishing the Zoetic Lockset, a glowing eyeball-like object will be dropped. Players must shoot this object, pick it up, carry it to a designated slot in the center of the arena, and deposit it to unlock the passage to the final area.
This leads to another platforming challenge, this time featuring manipulated gravity effects, requiring careful navigation across floating platforms while dealing with scattered enemies. Near the top of this ascent, a final, smaller lens puzzle must be solved to open the doorway to the ultimate confrontation. This traversal acts as a final skill check, reintroducing earlier environmental and puzzle elements (platforming, lenses) in a condensed form to ensure teams remain focused before the final boss.
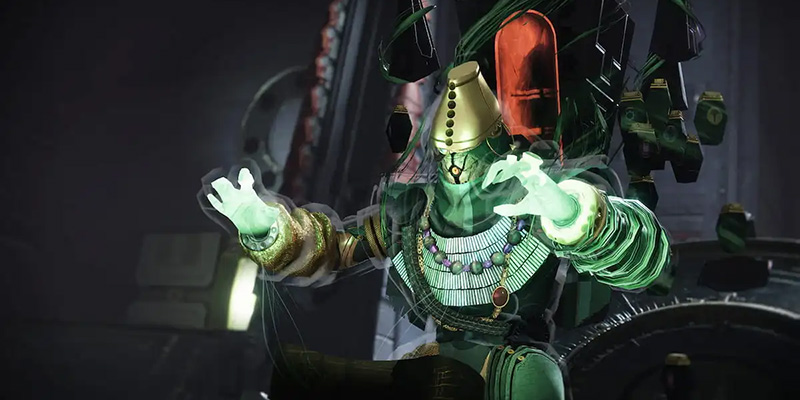
Final Encounter: Kerrev, The Erased (Final Boss)
Objective: The ultimate goal is to defeat Kerrev, The Erased. This is accomplished by repeatedly solving a "Truth and Lie" symbol puzzle to lower the boss's protective shield, allowing for damage phases.
Core Mechanics:
- Arena Layout: The encounter spans multiple interconnected areas: the Middle Room where Kerrev primarily resides and where the main symbol display is located; a Right Room, often accessed via a pressure plate; and a Left Room, which may require continuous shooting of a mechanism to keep its door open. Additional Wheels and lens sockets are found in these side rooms and in an area beneath the boss platform (Underground).
- The Truth/Lie Puzzle: A large Main Wheel (or symbol display) behind Kerrev in the Middle Room shows six symbols. These are divided into two three-symbol "statements" or "stories" – one on the left side of the wheel, one on the right. One of these statements is true according to Destiny lore, and the other is a lie.
- Identifying the Lie:
- Lore Knowledge: Players can determine the lie by interpreting the two statements. For example, if one side reads "Traveler - Give - Light" (true) and the other reads "Pyramid - Stop - Witness" (false, as the Pyramids serve the Witness), the latter is the lie.
- Truthspeaker Enemy: A Truthspeaker enemy (Grim/bat) will spawn in either the Left or Right room. Defeating it will cause it to drop a symbol. This dropped symbol is part of the true statement. Therefore, the three-symbol statement on the Main Wheel that does not contain this dropped symbol is the lie that must be illuminated.
- Activating the Lie (Illuminating Symbols): Using lenses similar to the first encounter, players must construct light beam paths to illuminate the three symbols that form the false statement on the Main Wheel. Simultaneously, they must ensure that none of the three symbols forming the true statement are lit by beams.
- Entangled Lenses & Switches: Progress can be impeded by "entangled" lenses or switches, which are bound by Strand tethers and cannot be rotated or interacted with. To free these, players must:
- Locate and defeat specific red-bar Scions or Attendants, often found near Darkness Spikes/Thorns in the Left and Right rooms.
- Killing these enemies grants a short (approximately 7-second) buff called "Unwritten Empowerment".
- While this buff is active, players can damage and destroy the Darkness Spikes/Thorns tethering the lenses or switches. Destroying a Spike often releases hostile enemy Threadlings.
- Initiating Damage Phase: Once all three symbols of the false statement are correctly illuminated (and the true statement symbols are unlit), players must activate a central console or the Main Wheel itself. If done correctly, Kerrev's shield will drop, and the damage phase will begin. Kerrev is described as highly mobile during this phase. Failure to solve the puzzle correctly can result in a wipe mechanic.
Enemies: The encounter features Knights in the boss room and the underground area, a Strand Subjugator in the Left room, and a Stasis Subjugator in the Right room. Attendants will spawn after these minibosses or Subjugators are defeated. Enemy Threadlings are released when Darkness Spikes are destroyed.
Strategy & Tips:
- The rest of the team can split to handle mechanics in the side rooms and underground, or stay together for safety, especially in Contest or Master mode.
- The reader should verify that only the symbols forming the false statement have resonance energy (are lit) before initiating the damage phase.
- To manage enemy spawns, teams can sometimes spare the miniboss Knight in the boss room if no lens adjustments are needed there, as this can prevent an Attendant from spawning.
- Maps detailing symbol locations in each room are invaluable for quick identification and coordination.
The final encounter serves as a true culmination of the dungeon's themes and mechanics. It re-employs the light beam and lens system from the first encounter but adds the complexity of entangled elements requiring the specific, time-sensitive "Unwritten Empowerment" buff. The truth/lie puzzle is the most direct engagement with the dungeon's deceptive narrative underpinnings, and the multi-room coordination required for both puzzle-solving and combat elevates the intensity beyond previous encounters.
Treasures of the Doctrine: Loot and Rewards
Sundered Doctrine offers a unique suite of Legendary weapons and armor, alongside a coveted Exotic weapon. Understanding the loot table is key to efficient farming.
| Weapon Name | Weapon Type | Element | Ammo | Armor Piece | Source Encounter(s) |
|---|---|---|---|---|---|
| Unloved | Hand Cannon | Strand | Primary | Flain Helmet | The Riddle, Zoetic Lockset, Kerrev, the Erased |
| Unsworn | Trace Rifle | Strand | Special | Flain Arms | The Riddle, Zoetic Lockset, Kerrev, the Erased |
| Unworthy | Scout Rifle | Arc | Primary | Flain Legs | The Riddle, Zoetic Lockset, Kerrev, the Erased |
| Unvoiced | Shotgun | Void | Special | Flain Chest | Zoetic Lockset, Kerrev, the Erased |
| Finality's Auger | Linear Fusion Rifle | Solar | Heavy | Flain Class Item | Kerrev, the Erased (Exotic) |
Legendary Weapon Drops
All Legendary weapons from the Sundered Doctrine dungeon come with the Subjugation Origin Trait, which adapts its behavior based on the target: it weakens stronger enemies (Majors, Ultras, Champions, Bosses) and causes weaker enemies (red bars) to explode upon defeat. This trait enhances their utility in add-dense environments typical of dungeons.
The available Legendary weapons are:
- Unsworn: A Strand Trace Rifle.
- Unworthy: An Arc Rapid-Fire Frame Scout Rifle.
- Unloved: A Strand Heavy Burst Hand Cannon, the first of its kind.
- Unvoiced: A Void Slug Shotgun.
These weapons feature perk pools that often synergize with Light 3.0 subclasses, Strand, and the newer Prismatic subclass capabilities, encouraging diverse build-crafting. Perks like Voltshot, Rolling Storm (Arc), Hatchling, Tear (Strand), Destabilizing Rounds (Void), Firefly (Solar), and Elemental Honing (Prismatic) are commonly found, allowing these weapons to integrate deeply with elemental subclass effects.
| Weapon | Type | PvE God Roll (Barrel, Mag, Trait 1, Trait 2, MW) | PvP God Roll (Barrel, Mag, Trait 1, Trait 2, MW) |
|---|---|---|---|
| Unloved | Hand Cannon | Smallbore, Flared Magwell, Dragonfly / Hatchling, Frenzy / Elemental Honing / Tear, Reload/Range | Smallbore, Accurized Rounds, Rapid Hit, Kill Clip, Range |
| Lucky Pants: Tactical Mag, Rapid Hit, Elemental Honing, Range | |||
| Unsworn | Trace Rifle | Smallbore, Tactical Mag, Shoot to Loot / Rewind Rounds, Detonator Beam / Tear, Stability/Range | Smallbore, Projection Fuse, Perpetual Motion, Killing Wind / Paracausal Affinity, Range |
| Unworthy | Scout Rifle | Smallbore, Accurized Rounds / Flared Magwell, Firefly / Shoot to Loot, Rolling Storm / Voltshot, Range/Reload | Smallbore, Accurized Rounds, Keep Away, Zen Moment / Precision Instrument, Stability |
| Unvoiced | Shotgun | Smallbore, Assault Mag, Envious Arsenal / Destabilizing Rounds, Bait and Switch / Demoralize, Handling/Range | Smallbore, Accurized Rounds, Lone Wolf / Slideshot, Closing Time / Opening Shot, Range |
Detailed Perk Recommendations:
PvE (General): Dragonfly or Hatchling provide excellent add clear, especially when paired with Frenzy for a consistent damage and reload buff in combat. Elemental Honing is strong for Prismatic builds, and Tear offers utility by applying Sever.
PvE (Lucky Pants Hunter): Rapid Hit for stability and reload speed, combined with Elemental Honing for maximum damage during the Lucky Pants window, is a top choice. A magazine perk that increases total rounds is beneficial.
PvP: Rapid Hit and Kill Clip is a classic combination, significantly reducing time-to-kill after a reload post-kill.
PvE: Shoot to Loot offers incredible utility for ammo and Orb collection from a safe distance. Detonator Beam (sustained damage causes target to detonate) provides good area damage. Rewind Rounds can also be excellent for sustained fire. Tear is another utility option.
PvE: Firefly for Solar explosions on precision kills adds good AoE clear. This pairs exceptionally well with Arc-specific perks like Rolling Storm (generates Bolt Charges) or Voltshot (Jolt on reload after kill) for potent elemental synergy.
PvP: For consistency, Keep Away and Zen Moment greatly enhance accuracy and stability at range. Precision Instrument can be an alternative for a faster TTK if Zen Moment isn't preferred.
PvE (Boss DPS): Envious Arsenal to overflow the magazine from reserves, paired with Bait and Switch for a substantial damage increase after damaging targets with other weapons, makes this a strong contender for close-range burst damage.
PvE (General/Debuff): Destabilizing Rounds to make nearby targets Volatile, combined with Demoralize (similar to a short-duration Weaken effect) can provide excellent utility and add clear, especially for Void builds.
PvP: Lone Wolf (improved stats when away from allies) or Slideshot (reload and range/stability boost on slide) paired with Closing Time (improved handling/movement near low-health targets) or Opening Shot (accuracy/range on first shot) can make it a reliable option.
Flain Armor Sets
Guardians can earn the full Flain armor set for their Titan, Hunter, or Warlock. This armor is thematically designed around the aesthetic of Rhulk, the former Disciple.
Acquisition:
- The Riddle (First Encounter): Drops Helmet, Arms, Legs.
- Zoetic Lockset (Second Encounter): Drops Helmet, Arms, Legs.
- Kerrev, the Erased (Final Encounter): Can drop any armor piece, including the Chest and Class Item. The Class Item might also have a specific acquisition path tied to "The Drowning Labyrinth" quest.
Flain Armor Piece Names:
- Titan (Flain Suit): Skull of the Flain (Helmet), Grips of the Flain (Arms), Carapace of the Flain (Chest), Claws of the Flain (Legs), Attendant's Mark (Class Item).
- Hunter (Flain Suit): Mask of the Flain (Helmet), Grasps of the Flain (Arms), Scales of the Flain (Chest), Hooks of the Flain (Legs), Husk's Cloak (Class Item).
- Warlock (Flain Suit): Visage of the Flain (Helmet), Reach of the Flain (Arms), Adornment of the Flain (Chest), Talons of the Flain (Legs), Weaver's Bond (Class Item).
Exotic Weapon: Finality's Auger
The grand prize of the Sundered Doctrine dungeon is the Finality's Auger, an Exotic Solar Linear Fusion Rifle that occupies the Heavy weapon slot.
Acquisition:
- Finality's Auger has a chance to drop from defeating Kerrev, the Erased, the final boss of the dungeon.
- During the initial 48-hour Contest Mode window, a clear of the dungeon guaranteed a drop of the Finality's Auger.
- Post-Contest, the drop is subject to RNG, with a weekly lockout per character (i.e., one chance per character per week for the exotic to drop).
- The drop rate can be increased by completing specific Triumphs associated with the dungeon, such as finding all collectibles, completing the dungeon solo, or clearing it on Master difficulty.
| Feature | Name | Description |
|---|---|---|
| Intrinsic Perk | Ruinscribe's Forge | [Alternate Weapon Action] to fire a special projectile (costs 3 ammo) that deploys a Ruinscribe Turret. Shoots nearby targets automatically. |
| Unique Trait | Ruinscribe's Beacon | While a Ruinscribe Turret is deployed, this weapon can "paint" targets with its laser projectiles. Turret prioritizes painted targets and fires more powerful munitions at them. |
| Catalyst Perk | Bait and Switch | Dealing damage with all equipped weapons within a short time grants this weapon a damage boost. |
The design of Finality's Auger encourages a unique, active support and DPS hybrid playstyle. The deployable turret offers passive damage and add control, while the target painting mechanic allows the user to actively direct and enhance that damage. This is a more involved system than typical "fire and forget" Linear Fusion Rifles.
Catalyst Acquisition – The Drowning Labyrinth & Laboratory Worms:
- Collecting nine "Laboratory Worms" (collectibles) scattered throughout the dungeon. Early reports suggested these might be found in diverse locations, potentially themed around areas like the Moon's Hellmouth and Sorrow's Harbor, hidden behind destructible walls or in dark recesses. The "Laboratory Inspector" Triumph is almost certainly tied to finding all these worms.
- After collecting all worms, players must interact with a Pyramid console, likely located near the final boss room, and input a correct sequence of symbols. These puzzles may resemble mechanics from the Vow of the Disciple raid, requiring deciphering Hive symbols found on walls or based on environmental cues.
- Solving the symbol puzzle might unlock an additional damage phase or a specific interaction with the final boss to finally secure the catalyst. Initial information on this quest was somewhat fragmented, with some sources indicating parts might have been time-gated or details were still emerging during the early days of the dungeon's release.
Secret Chest Locations
Sundered Doctrine contains two secret chests, offering players additional opportunities to earn loot they have already acquired from encounters. These chests reward thorough exploration.
- First Secret Chest:
- One location is described as being accessible after the first encounter ("The Riddle"). Players should look for a rocky structure with a small opening and follow the path within.
- Another description places it within the labyrinthine traversal section before the second encounter ("Zoetic Lockset"). To spawn this chest, players may need to find and shoot three Darkness objects scattered around this area; the chest would then appear in the center.
- Second Secret Chest:
- This chest is reportedly found during the rolling spike trap traversal (after the second encounter, leading towards the final area). One player may need to navigate the boulder gauntlet skillfully to reach a hidden ledge where the chest is located.
- While an older example from the Prophecy dungeon was cited, the principle holds: secret chests are often found in off-path platforming areas or require minor puzzle interactions.
Conquering Master Difficulty
Master difficulty in Sundered Doctrine transforms the dungeon into a significantly more formidable challenge, demanding optimized builds, flawless execution, and tight team coordination.
Key Differences from Normal Mode
- Power Level Disadvantage: Enemies are a stark +20 Power Levels above the player's current Power. It is highly recommended that Guardians be at a minimum of 2000 Power Level, ideally higher, before attempting Master.
- Increased Enemy Durability and Damage: Combatants have substantially more health and deal significantly increased damage.
- Champions: Master difficulty introduces Barrier and Unstoppable Champions into encounters, requiring specific anti-Champion weapons or abilities to defeat efficiently.
- Enemy Behavior: While not explicitly detailed for Sundered Doctrine in the provided materials beyond general difficulty, Master activities in Destiny 2 often feature more aggressive enemy AI, increased accuracy, more frequent ability usage, and better tactical positioning by enemies.
- Enhanced Rewards: The primary incentive for braving Master difficulty is the chance to earn Artifice Armor from encounter completions. Additionally, completing the dungeon on Master difficulty can award the "Future Proof" Exotic Sparrow.
The shift to Master difficulty moves the gameplay focus from simply learning and executing mechanics (as in Normal mode) to achieving near-perfect execution under immense pressure, coupled with robust and specialized build-crafting.
Master Mode Modifiers
While a comprehensive list of specific, unique modifiers for Sundered Doctrine Master (beyond Champions and Power deficit) isn't fully detailed in the provided information, Master dungeons typically incorporate several challenging modifiers. Based on general Destiny 2 Master-tier activities, players might encounter:
- Champions Present: Confirmed for Sundered Doctrine (Barrier, Unstoppable).
- Match Game: Enemy shields are highly resistant to damage from unmatched elemental types. (This is a common Master modifier).
- Elemental Threats: Increased incoming damage from a specific element (e.g., Solar Threat, Arc Threat).
- Elemental Surges: Increased outgoing player damage for a specific element.
- Equipment Lock: Potentially active, preventing loadout changes once the activity starts (less common in dungeons than Nightfalls but possible).
| Encounter | Champion Type(s) | Known Modifiers |
|---|---|---|
| The Riddle | Unstoppable Champions (likely Ogres) | Enemies +20 Power, Increased Health & Damage |
| Zoetic Lockset | Barrier Champions (likely Knights/Servitors, spawning with "Knowledge/Brain" symbol) | Enemies +20 Power, Increased Health & Damage |
| Kerrev, the Erased | Barrier Champions (multiple locations) & Unstoppable Champions (near activation tablet); respawn after DPS phase | Enemies +20 Power, Increased Health & Damage |
Champion Types and Locations per Encounter
Detailed reconnaissance from Master difficulty runs indicates the following Champion placements:
- First Encounter (The Riddle): Unstoppable Champions (often Ogres) are found in the hallways connecting the central Main Room to the side rooms, or sometimes directly within the side room required for the current lens connection. Their presence is designed to disrupt the flow of lens acquisition and pathing.
- Second Encounter (Zoetic Lockset): Barrier Champions (typically Knights or Servitors) spawn alongside the Wizards when the "Knowledge" (or "Brain") symbol is scanned by a Shrieker. Some reports also mentioned Unstoppable Ogres, though one account suggested these might be standard yellow-bar Ogres rather than true Champions. The Barrier Champions add significant pressure during the crucial symbol-setting phase.
- Third Encounter (Kerrev, The Erased): This encounter features a mix of both Champion types. Barrier Champions are located in the underground area, the Left room, and the Right room. An Unstoppable Champion is positioned near the main activation tablet in the boss room. Critically, these Champions respawn after each damage phase, ensuring they remain a consistent threat throughout the fight. This distribution means every aspect of the puzzle-solving and DPS setup process is contested by a high-priority Champion threat.
Advanced Strategies and Loadout Considerations for Master
Success in Master Sundered Doctrine hinges on survivability, dedicated Champion counters, and impeccable team coordination.
- Survivability is Paramount: Prioritize 100 Resilience on all characters. Utilize healing sources such as Well of Radiance, Healing Grenades, and abilities that grant Restoration or Devour. Damage resistance from mods like Concussive Dampener and specific elemental resist mods (Solar, Stasis, Arc, and Void are all relevant due to varied enemy damage types) is crucial.
- Champion Management: Loadouts must include reliable ways to stun both Barrier and Unstoppable Champions. This often dictates at least one weapon slot or a specific subclass/ability choice.
- Team Coordination: Focus firing Champions and other high-threat targets (like Subjugators or Psions with their potent area-of-effect attacks) is essential. Communication regarding safe spots, cover, and enemy locations becomes even more critical.
- Ammo Economy: For sustained damage phases, especially with Linear Fusion Rifles or Machine Guns, ensuring a steady supply of Heavy ammo is vital. A Warlock using Cenotaph Mask with a Trace Rifle (like Divinity) can generate Heavy ammo for the team.
Master difficulty encourages a more conservative playstyle. Reports from players suggest that "sticking together" and having "one person focus symbols while the other two keep ads down" or dedicating a player to a support role (e.g., an Omnioculus Hunter for invisibility) are common and effective strategies. This indicates a shift towards specialized roles even within a small fireteam, rather than three generalist DPS players.
The "Delver" Title: Triumphs Guide
Overview of the "Delver" Title
The "Delver" title is the ultimate mark of mastery for the Sundered Doctrine dungeon. It is awarded to Guardians who successfully complete all associated Triumphs on the dungeon's seal.
List of All Required Triumphs and Tips
The Triumphs for the "Delver" title are designed to test a player's skill, adaptability, and dedication across various challenging conditions.
| Triumph Name | Requirement | Tips & Notes |
|---|---|---|
| The Sundering | Complete the Sundered Doctrine dungeon. | Standard dungeon completion on Normal difficulty. |
| Lonely Travels | Complete all dungeon encounters solo and without leaving the activity. | Requires exceptional skill, optimized solo builds, deep encounter knowledge, and considerable patience. |
| Buried Together | Complete all dungeon encounters with a full fireteam of clanmates. | A social Triumph encouraging coordinated play with familiar teammates. |
| Lightning Round | Complete all dungeon encounters with a full fireteam of Arc subclasses. | Tests build-crafting synergy within a single element. Coordinate Arc abilities for maximum effect. |
| Shared Fire | Complete all dungeon encounters with a full fireteam of Solar subclasses. | Similar to Lightning Round, but with Solar. Focus on Solar keywords like Radiant, Scorch, and Ignition. |
| Space Cadets | Complete all dungeon encounters with a full fireteam of Void subclasses. | Focus on Void keywords like Volatile, Weaken, Suppress, and Invisibility. |
| Stable Triangle | Complete all dungeon encounters with a full fireteam of the same class (e.g., three Titans, three Hunters). | Challenges role adaptation when class diversity is removed. Requires creative build-crafting to cover all necessary functions (DPS, support, add clear). |
| Military Doctrine | Complete all dungeon encounters on Master difficulty. | A significant challenge requiring high Power Level, Champion management, and strong teamwork. |
| Laboratory Inspector | Find all collectibles (Laboratory Worms) within the dungeon. | Tied to the Finality's Auger Exotic catalyst quest. Requires thorough exploration to find all nine hidden worms. |
| Dungeon: Sundered Doctrine | Collect all trophies from the dungeon. | This is likely the meta-Triumph for completing all other Triumphs on the seal, effectively awarding the "Delver" title itself. |
The range of these Triumphs ensures that players earning the "Delver" title have truly mastered Sundered Doctrine in all its facets – from solo endurance runs and high-difficulty Master clears to specialized team compositions and meticulous collectible hunting. The "Laboratory Inspector" Triumph notably intertwines the pursuit of the title with the acquisition and upgrading of the dungeon's Exotic weapon, making the catalyst quest an integral part of achieving this ultimate recognition.
Optimal Guardian Builds and Loadouts
Success in Sundered Doctrine, especially on Master difficulty or in solo attempts, heavily relies on well-crafted builds that synergize subclass abilities, Exotic armor, and weapon choices.
General Stat Priorities for PvE
While specific builds may vary, some general stat priorities hold true for most PvE content in Destiny 2:
- Resilience: Universally the most critical stat. Aim for Tier 10 (100 Resilience) on all classes for maximum damage reduction (up to 30% in PvE).
- Discipline: Highly valued for grenade regeneration. Grenades are essential for add clear, applying elemental effects, and sometimes for specific mechanics or damage rotations.
- Recovery (Warlocks): Directly affects the cooldown of Warlock Rifts (Healing or Empowering). Also governs base health regeneration speed, though many builds incorporate proactive healing methods (Devour, Restoration, etc.).
- Mobility (Hunters): Governs the cooldown of Hunter Dodges, which are central to many Hunter builds for their utility effects (invisibility, melee recharge, reload).
- Strength & Intellect: Generally lower priority. Melee-focused builds will value Strength more, and while Super regeneration is important, Intellect has diminishing returns, and Orbs of Power generation is often sufficient for Super uptime.
Titan: Recommended Subclasses, Exotic Armor, and Builds
Titans can fulfill roles from frontline tanks and support to heavy burst DPS.
- Arc (Striker): Excellent for burst damage with Thundercrash. The Storm's Keep Aspect enhances Barricades, offering offensive and defensive utility, especially when paired with Exotics like Hazardous Propulsion. Pulse Grenades with Touch of Thunder are also very strong.
- Strand (Berserker): Banner of War is a top-tier option, providing substantial melee damage, team healing, and increased weapon damage. It has strong synergy with sword-based builds or melee-focused Exotics like Synthoceps.
- Solar (Sunbreaker): Can provide survivability with Sol Invictus (Sunspots) or high burst Super damage with Burning Maul (enhanced by Pyrogale Gauntlets). Hammer of Sol is also a solid option for add clear and sustained damage.
- Void (Sentinel): Offers strong defensive capabilities with Ward of Dawn (Bubble) and Overshields via Bastion Aspect. Offensive Aspects like Controlled Demolition can provide good add clear with Volatile.
- Prismatic: Allows for powerful combinations, often taking Thundercrash for DPS while incorporating survivability or utility Aspects from other subclasses.
Recommended Exotic Armor:
- Top Tier/General Use:
- Synthoceps: Increases melee lunge range and significantly boosts melee and Super damage when surrounded. Excellent for Strand (Banner of War) and Arc (Knockout) builds.
- Heart of Inmost Light: Empowers abilities (grenade, melee, barricade) and increases their regeneration rate when using other abilities. A strong neutral game Exotic (though it has seen adjustments, its core loop is effective).
- Hazardous Propulsion: Precision hits with weapons build up explosive charges released when activating class ability. Also buffs Rocket Sidearms and Rocket Launchers. Strong with Arc (Storm's Keep).
- Precious Scars: Kills with a weapon matching your subclass energy type create a burst of healing for you and nearby allies. Great for survivability.
- DPS Focused:
- Cuirass of the Falling Star: Massively increases Thundercrash impact damage and grants an Overshield. Essential for Arc DPS builds.
- Pyrogale Gauntlets: Transforms Burning Maul into a single, high-damage slam or enhances Hammer of Sol.
- Survivability/Utility:
- Stronghold: For dedicated sword builds, grants massive damage resistance while guarding and heals on perfect guards.
- Armamentarium: Grants an additional grenade charge. Simple but effective for grenade-focused builds.
Hunter: Recommended Subclasses, Exotic Armor, and Builds
Hunters excel at burst damage, debuffs, and survivability through invisibility.
- Arc (Arcstrider): Gathering Storm Super is a potent DPS option. The Amplified buff provides damage reduction and enhanced movement, beneficial for survivability. Lethal Current enhances melee capabilities.
- Void (Nightstalker): Invisibility (Stylish Executioner, Vanishing Step) is key for revives, repositioning, and safe mechanical interactions. Deadfall Tether provides excellent crowd control and debuffs. Orpheus Rig can grant significant Super energy return with multi-target Tethers.
- Solar (Gunslinger): Golden Gun (either Marksman for precision or Deadshot for add clear/PvP) with Celestial Nighthawk for massive single-target burst DPS is a classic. Blade Barrage with Knock 'Em Down offers high AoE and single-target damage.
- Strand (Threadrunner): Whirling Maelstrom Aspect combined with Cyrtarachne's Facade (Woven Mail on grapple) offers excellent add clear and damage resistance. Silkstrike is a strong roaming Super.
- Prismatic: Often incorporates Gifted Conviction for survivability alongside Golden Gun for DPS. Can also leverage Strand aspects for clones/Woven Mail or Void for invisibility.
Recommended Exotic Armor:
- Top Tier/General Use:
- Assassin's Cowl: Grants invisibility and health/shields on powered melee kills or finisher kills. Excellent for survivability across all subclasses.
- Omnioculus: Provides damage resistance while invisible and grants melee energy when making allies invisible. Essential for Void support builds in challenging content.
- Wormhusk Crown: Grants a small burst of health and shields when dodging. A reliable survivability option.
- Cyrtarachne's Facade: Grants Woven Mail (significant damage reduction) when grappling. Pairs well with Strand.
- Sixth Coyote: Grants a second Dodge charge. Versatile for builds that heavily rely on Dodge.
- DPS Focused:
- Celestial Nighthawk: Consolidates Golden Gun into a single, extremely high-damage shot.
- Star-Eater Scales: Picking up Orbs of Power overcharges your Super for increased damage and grants an Overshield.
- Lucky Pants: Greatly increases Hand Cannon ready speed and damage for a short duration after swapping to a matching Hand Cannon. Synergizes well with the Unloved Hand Cannon from this dungeon.
- Liar's Handshake: Enhances Arc melee damage significantly after using Arc melee or being hit by a melee attack.
- Utility/Add Clear:
- Caliban's Hand: Causes Proximity Knife to scorch targets; ignites on kill. Strong for Solar add clear.
- Mothkeeper's Wraps: Replaces Hunter grenade with a projectile that releases a cage of moths; moths can be Arc (blinding) or Void (weakening/Overshield).
Warlock: Recommended Subclasses, Exotic Armor, and Builds
Warlocks are masters of area control, support, and sustained ability damage.
- Solar (Dawnblade): Well of Radiance is almost indispensable for many fireteams in challenging content, providing massive healing and a damage buff. Song of Flame Super can offer good self-sustain and damage with certain builds.
- Arc (Stormcaller): Chaos Reach with Geomag Stabilizers is a potent ranged Super for DPS. Arc Souls provide additional damage.
- Void (Voidwalker): Devour Aspect (Feed the Void) grants excellent survivability through health regeneration on kills. Nova Bomb is a strong burst damage Super. Contraverse Hold enhances Void grenade spam. Briarbinds improves Child of the Old Gods uptime.
- Stasis (Shadebinder): Bleak Watcher turrets provide exceptional crowd control. Osmiomancy Gloves or Rimecoat Raiment can enhance Stasis turret builds.
- Prismatic: A popular Prismatic build combines Getaway Artist (Arc Soul on grenade consume) with the Bleak Watcher (Stasis turret) Aspect and the Devour (Void) Aspect for a potent mix of damage, control, and survivability. Speaker's Sight for healing turrets is also a strong Prismatic option.
Recommended Exotic Armor:
- Top Tier/Support:
- Cenotaph Mask: Gradually reloads Trace Rifles from reserves. Damaging bosses, minibosses, or Champions with a Trace Rifle marks them; allies defeating marked targets generate Special and Heavy ammo. Invaluable for team ammo economy, especially with Divinity.
- Speaker's Sight: Healing Grenades spawn a healing turret. Solar Kills extend its duration. Prismatic allows for versatile healing turret builds.
- Phoenix Protocol: Kills and assists inside Well of Radiance return Super energy. Great for maintaining Well uptime.
- DPS/Ability Focused:
- Sunbracers: Solar melee kills grant unlimited Solar grenade energy for a short time. Top-tier for Solar grenade spam and add clear.
- Geomag Stabilizers: Extends Chaos Reach duration when damaging targets at the end of the Super. Essential for maximizing Chaos Reach DPS.
- Contraverse Hold: Reduces grenade cooldown on hit and grants damage resistance while charging Void grenades. Excellent for Vortex or Handheld Supernova builds.
- Osmiomancy Gloves: Grants an additional Coldsnap grenade charge, and Coldsnaps recharge faster on direct impact. Key for Stasis turret builds.
- Getaway Artist: Consume your grenade to convert it into a supercharged Arc Soul. Strong for both Arc and Prismatic builds.
- Survivability/Utility:
- Karnstein Armlets: Melee kills instantly restore a large amount of health and grant continuous healing for a short duration. Good for aggressive playstyles.
- Necrotic Grip: Melee attacks corrupt enemies, dealing damage over time. Defeating a corrupted enemy spreads the corruption. Synergizes extremely well with Weapons of Sorrow like Osteo Striga or Thorn.
Meta Weapon Considerations (Post-May 2025 Balance Changes)
The landscape of optimal weapon choices is ever-evolving in Destiny 2, influenced by seasonal artifact mods and sandbox updates. Based on balance changes reported around May 2025, some shifts in the meta might affect loadout choices for Sundered Doctrine:
- Buffed Weapon Archetypes:
- High Impact Auto Rifles: Received a base damage increase, making them potentially more forgiving and effective for add clear.
- Adaptive Submachine Guns: Their ADS damage falloff was increased, giving them slightly more range and potentially better competitiveness in close-to-mid-range engagements.
- Heavy Burst Slug Shotguns: A direct damage increase of 8% could make options like Unvoiced (if it falls into this specific sub-archetype, or if general slug shotguns benefit from a re-evaluation) more appealing for burst DPS scenarios.
- Specific Weapon Adjustments:
- The Judgement Hand Cannon: A Trials of the Nine weapon slated to return with the "Rite of the Nine" event, received significant stat boosts to its magazine size, reload speed, and handling. While not a Sundered Doctrine weapon, its improved performance might make it a strong alternative to Unloved for players who acquire it.
- Exotic Armor Changes with Weapon Implications:
- Radiant Dance Machines (Hunter): The hip-fire bonuses granted to Primary weapons were reduced, making this Exotic less potent for sustained primary weapon spam builds.
- Lion Rampant (Titan): Gained RDM-like hip-fire accuracy and range bonuses for Primary weapons (always active, not just airborne), and its +50 Airborne Effectiveness bonus is now always active. This could open up more viable hip-fire primary builds for Titans.
- Lunafaction Boots (Warlock): Also gained RDM-like hip-fire bonuses for Primary weapons (always active). The Empowering Rift range bonus was nerfed in PvP, but its PvE implications for extreme range engagements remain unchanged.
- Ability Adjustments:
- Scatter Grenade: Damage against players was reduced by 15%. Its PvE impact is less clear but worth noting if it was an overperforming option.
- Hunter Throwing Knives: All variants received improved tracking consistency, with Lightweight Knife and Fan of Knives getting specific tracking buffs. This makes throwing knife-centric builds more reliable.
These balance changes suggest an effort by Bungie to diversify the meta by enhancing underused weapon archetypes and tuning certain Exotic armor pieces. When constructing loadouts for Sundered Doctrine, players should consider these adjustments, as they might highlight newly effective options or necessitate changes to previously dominant strategies.
Advanced Tactics
Beyond standard clears, many Guardians will seek to push their limits through solo play, aim for flawless runs, or optimize farming and speed.
Solo Play Guide: Encounter-Specific Strategies and Build Adjustments
Soloing Sundered Doctrine is a monumental feat, demanding exceptional survivability, patience, meticulous execution, and often highly specialized builds that exploit encounter mechanics or timings.
Encounter 1 (The Riddle): The primary challenge is managing Subjugators and collecting lenses while staying alive. Focus on defeating one Subjugator at a time. Losing lenses due to beam interruption is more punishing solo, so ensure Main Lens activations are deliberate and paths are clear.
Encounter 2 (Zoetic Lockset): This is often the make-or-break encounter for solo attempts.
A popular method involves using Chaos Reach with Geomag Stabilizers and the Delicate Tomb Fusion Rifle (for Ionic Trace generation and Super energy). The strategy is to bank the "Kill" symbol in the 4th lock (the rightmost Wheel, if numbering based on the sequence Shriekers lock symbols on screens). This results in a very short damage phase, perfectly timed for a full Chaos Reach. Repeat this cycle. An Ionic Sentry (Arc Soul) can help with add clear and super regeneration.
Alternative Strategy: Using Anarchy for passive damage on Shriekers while managing adds with an Unrelenting Grenade Launcher from a safe cover position has also been reported.
General Solo Tips for Zoetic: Focus on setting the far-right Wheel (first to be "read" for screen locking) to "Stop" as quickly as possible to minimize Ogre spawns, then work leftwards to set other "Stop" symbols before finally setting the leftmost Wheel to "Kill" for the longest potential DPS window. Avoid using Well of Radiance, as it encourages static play, which can be fatal against the Shriekers' attacks. A Prismatic Warlock with Getaway Artist (for the Arc Soul turret) and the Amplified buff (for speed and damage resistance) can be effective.
Encounter 3 (Kerrev, The Erased):
For mechanical phases, a Well of Radiance paired with Karnstein Armlets and a Glaive can provide excellent survivability while dealing with Subjugators and untangling lenses. For damage phases, swap to a dedicated DPS setup, such as a Prismatic Arc build with Sanguine Alchemy (to keep Rifts active while moving) and The Queenbreaker Linear Fusion Rifle. High mobility is crucial to avoid Kerrev's attacks.
Solo attempts often rely on these kinds of highly specialized builds and strategies that differ significantly from team play, focusing on exploiting specific timings or safe zones to overcome the lack of backup.
Common Mistakes and How to Avoid Them
Many pitfalls in Sundered Doctrine stem from misunderstandings of nuanced mechanics or breakdowns in communication.
Encounter 1 (The Riddle):
- Mistake: Connecting a light beam to the wrong symbol plate. Consequence: Spawns a Tormentor. Avoidance: Double-check the symbol dropped by the Truthspeaker Grim or carefully deduce the "true statement" from the lore clues.
- Mistake: Accidentally rotating a lens socket instead of placing a lens into it. Consequence: Wasted time, potential misalignment. Avoidance: Pay close attention to the on-screen interaction prompts.
- Mistake: A Main Lens deactivates due to its beam being interrupted (e.g., another player rotating it away, or an obstacle). Consequence: All player-placed lenses in that beam's path disappear. Avoidance: Clear communication from the "switcher" in the Main Room; ensure paths are stable before activating.
Encounter 2 (Zoetic Lockset):
- Mistake: Misunderstanding symbol effects, particularly believing "Commune" extends the damage phase. Consequence: Shorter DPS windows, unexpected enemy spawns. Avoidance: Learn the correct effects: "Stop" extends the damage phase by pausing the progress bar.
- Mistake: Failing to account for the automatic rotation of Wheel symbols if they are not manually interacted with before their "reading" phase ends. Consequence: Unintended symbols become active, potentially leading to Ogre spawns or missed DPS. Avoidance: The designated "wheeler" must proactively manage all Wheels, refreshing symbols as needed.
- Mistake: Incorrectly managing Knowledge buff stacks (using too many or too few when interacting with a Wheel). Consequence: Overshooting or undershooting the desired symbol. Avoidance: Always check current Knowledge buff count before interacting. Be mindful of armor mods like Powerful Attraction that might auto-collect nearby Splinters.
Encounter 3 (Kerrev, The Erased):
- Mistake: Illuminating the symbols of the "True" statement instead of the "Lie." Consequence: Failure to initiate damage phase, potential wipe. Avoidance: Carefully identify the false statement using lore deduction or the Truthspeaker Grim's dropped symbol (light up the opposite side).
- Mistake: Poor communication regarding which lenses need untangling or which symbols need to be lit/unlit. Consequence: Wasted time, incorrect puzzle setup. Avoidance: Clear, concise callouts from the "reader" and acknowledgment from other team members.
- Mistake: Ignoring in-game feedback messages that confirm correct/incorrect symbol activations. Consequence: Proceeding with a faulty setup. Avoidance: Monitor chat/UI for cues like "Pyramid reacts to command."
General Mistakes: Poor positioning during damage phases leading to avoidable deaths. Failing to prioritize high-threat enemies (Subjugators, Champions in Master). Wasting revives on risky plays.
Efficient Farming Routes and Speedrun Techniques
For Guardians looking to acquire specific loot rolls or achieve rapid completions, certain strategies can optimize farming and enable speedruns.
Checkpoint Farming: The second encounter, Zoetic Lockset, is often favored for farming due to its potential for relatively quick phases if the team is coordinated and has high DPS. The standard method involves one player (on an alternate character, e.g., a Hunter) holding the checkpoint just before the encounter. The other two players join, the checkpoint holder swaps to their main character, and the team completes the encounter. The character who held the checkpoint (and didn't get completion credit on that character) can then re-launch the dungeon from that checkpoint, allowing the team to repeat the encounter without re-clearing the entire dungeon.
Speedrun Techniques:
- Encounter 1 (The Riddle): Mastery of optimal lens placements is key. Some paths require only two player-placed lenses, while others might need three. Knowing the most efficient routes for common symbol combinations saves significant time.
- Encounter 2 (Zoetic Lockset): A reported Titan-centric strategy involves using Volatile Rounds (via Volatile Flow or an Aspect) and having a Titan immediately set the 4th Wheel (rightmost, if numbering by lock-in order) to "Kill." The fireteam then positions themselves in a specific safe spot (e.g., under the eventual chest spawn location), deploys a Well of Radiance and a Titan Barricade, and uses high-damage weapons like Le Monarque or Anarchy for a potential two-phase clear.
- Encounter 3 (Kerrev, The Erased): Utilizing specific, optimized DPS spots is crucial. Some commonly used corners (like the back left or near the entrance door) can be risky due to adds or the boss's pull/slingshot attacks. Identifying safer, effective DPS locations is important. Additionally, for the Left and Right rooms that have doors requiring shooting to open, using a Fusion Rifle can open them more quickly and reliably than many other weapon types.
Average Completion Times: Sundered Doctrine is generally considered a "long" dungeon by community standards, with average LFG (Looking For Group) clears taking between 45 to 90 minutes. Experienced teams can achieve much faster times, with some players reporting clears around 50 minutes and aiming for sub-40-minute runs. For context, top-tier speedrunners can clear even lengthy raids like Salvation's Edge in remarkably short times (e.g., 35 minutes), indicating that highly optimized dungeon runs can be significantly faster than average.
Efficient farming and speedrunning often rely on a deep understanding of encounter scripting, enemy behavior, and the exploitation of specific class abilities or mechanics to minimize time spent on puzzles and maximize damage uptime. These techniques are typically high-risk/high-reward for average players but are standard practice for dedicated runners.
Conclusion
The Sundered Doctrine dungeon stands as a testament to Destiny 2's capacity for delivering mechanically dense and thematically rich endgame experiences. From deciphering cryptic truths within Rhulk's sunken Pyramid to battling the relentless Dread and Hive, Guardians face a multifaceted challenge that tests their combat prowess, puzzle-solving acuity, and, above all, their ability to communicate and coordinate as a fireteam.
The journey through Sundered Doctrine is one of escalating complexity, culminating in encounters that demand precision and adaptability. Whether braving the punishing landscape of Master difficulty for Artifice Armor, meticulously hunting for Laboratory Worms to unlock the Finality's Auger catalyst, or striving for the prestigious "Delver" title, the dungeon offers layers of engagement for dedicated players. Its intricate systems, from the light-bending lenses of "The Riddle" to the temporal symbol manipulation of "Zoetic Lockset" and the ultimate truth-or-lie confrontation with "Kerrev, The Erased," are designed to be unraveled and mastered over repeated playthroughs.
With a unique arsenal of weapons featuring the synergistic Subjugation Origin Trait, striking Flain armor sets, and a novel Exotic Linear Fusion Rifle, the rewards are as compelling as the challenges. Sundered Doctrine is more than a loot source; it's a significant piece of endgame content that enriches the Destiny 2 universe, inviting Guardians to delve deep, uncover ancient secrets, and emerge triumphant from the shadowed depths.