Master Vesper's Host with our complete guide covering mechanics, optimal loadouts, and expert strategies. Dominate every encounter today!
Vesper's Host: Unveiling the Secrets of the Derelict Station
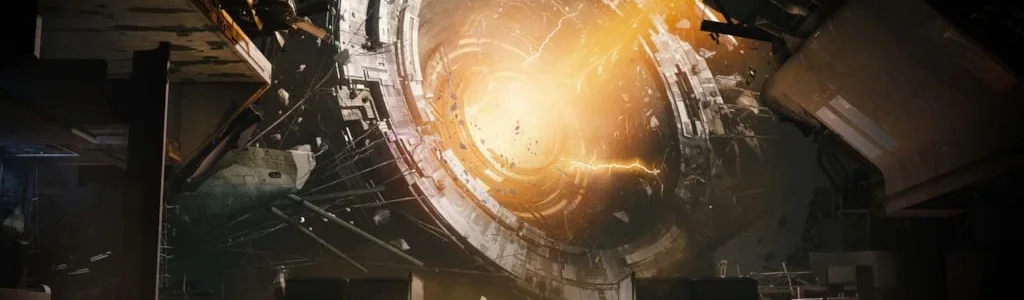
The Vesper's Host dungeon beckons Guardians to a derelict orbital station, a place steeped in mystery and echoing with the remnants of forbidden Braytech experiments. This guide will illuminate the path through its treacherous corridors, from answering the initial summons to mastering its most complex encounters and claiming its unique rewards.
The "Rogue Network": Answering Spider's Call
The journey into the Vesper's Host dungeon commences with a clandestine assignment from a familiar, if somewhat untrustworthy, associate: Spider. Guardians must first acquire the "Rogue Network" quest, obtainable from Spider in his usual haunt within the Last City's Seasonal Hub. Spider, ever the opportunist, explains that he has lost contact with one of his operatives who was investigating a "familiar orbital station" – a location players will soon discover is fraught with peril. Promising "riches" for their trouble, he tasks the Guardian with venturing into this station. This quest serves as the essential entry ticket; completing its initial steps is a prerequisite for accessing the dungeon itself.
Beyond the quest, prospective explorers must also possess The Final Shape Dungeon Key (or the relevant expansion/episode access that includes it) to launch the Vesper's Host activity. The dungeon node can be found on the Europa destination map, typically located in the upper right-hand corner of the Director screen.
Spider's role as the instigator immediately casts a certain light on the operation. His reputation for morally ambiguous dealings and the promise of "riches" suggest that this endeavor is likely to involve more than just a simple rescue or exploration. The "Rogue Network" quest is described as a ten-part storyline, indicating that the Vesper's Host dungeon is but one chapter in a more extensive narrative.
Story Significance and Background Lore
Vesper's Host plunges Guardians into the chilling depths of a derelict Braytech facility on Europa, a name synonymous with groundbreaking yet ethically questionable science. The station is a silent testament to unethical Exo creation experiments, where human minds were subjected to the dangerous influences of Vex technology and the Darkness itself. Guardians are drawn to this haunted place by strange signals, tasked with uncovering the extent of Clovis Bray's transgressions and the "dark history" that binds Braytech, the Exos, and the ever-enigmatic Vex. This dungeon was introduced as part of "Episode: Revenant," weaving its narrative into this specific chapter of Destiny 2's ongoing story.
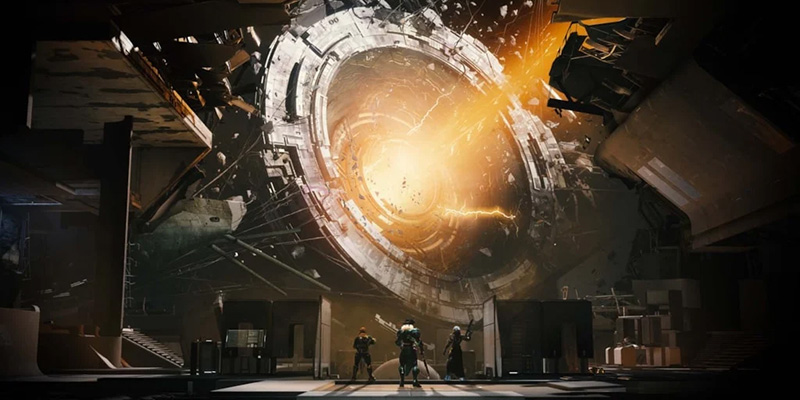
The orbital station itself is described as "reminiscent of the Deep Stone Crypt, but with mutated mechanics", immediately signaling to veteran players a connection to the birthplace of the Exos and hinting at familiar dangers twisted into new forms. The entire facility is being retooled for "nightmarish purposes", suggesting an active and malevolent presence.
A significant figure from the past makes a chilling return: Atraks-1, previously encountered in the Deep Stone Crypt raid, is the final boss of Vesper's Host, now bearing the ominous title "The Corrupted Puppeteer". Atraks-1 was the first Eliksni to be transformed into an Exo, a process involving the fusion of Fallen physiology with human consciousness and Vex technology. Her reappearance, especially as "corrupted" and "more complex", signifies an escalation of the threats tied to Bray's legacy and suggests she may be under a new, more sinister influence.
Contest Mode: The Ultimate Test
Vesper's Host marked a significant milestone in Destiny 2's endgame PvE landscape by being the first dungeon to launch with a "Contest Mode" and an associated World First Race. This challenging modifier was active for the initial 48 hours following the dungeon's release, transforming the experience into a brutal test of skill, strategy, and coordination.
During Contest Mode, several key conditions were enforced to level the playing field and intensify the challenge:
- Power Cap: Player Power was capped at a specific level (e.g., 1985 Power Level as cited in some sources for similar events). This meant that being significantly over-leveled provided no combat advantage, forcing teams to rely purely on their mastery of mechanics and buildcrafting rather than raw Power.
- Increased Enemy Difficulty: Combatants within the dungeon were substantially more resilient and dealt significantly more damage.
- Reduced Objective Timers: Certain encounters featured tighter time constraints. For instance, the "Activation" encounter reportedly had a strict six-minute countdown timer during Contest Mode.
Successfully completing Vesper's Host under these demanding Contest Mode conditions yielded exclusive rewards, including a guaranteed drop of the Ice Breaker Exotic Sniper Rifle and a unique emblem signifying the achievement. The World First Race itself was a community event, with Contest Mode typically being disabled after the first few teams officially cleared the dungeon.
Core Systems: Understanding Vesper's Host's Unique Mechanics
Mastery of Vesper's Host hinges on a thorough understanding of its intricate systems. While some mechanics may feel familiar to veterans of the Deep Stone Crypt, they return here with "mutated" or "corrupted" functionalities, demanding fresh learning and precise execution.
The Augment Trio: Scanner, Operator, and Suppressor Protocols
At the heart of Vesper's Host's challenges lies the interplay of three critical augments: Scanner (yellow), Operator (red), and Suppressor (blue). Each augment grants its wielder unique abilities essential for progressing through the station's puzzles and defeating its formidable bosses. A critical constraint is that each augment can only be held for a limited time—typically 59 or 60 seconds—before it becomes unstable and eliminates the carrier. To prevent this, augments must be periodically "refreshed" by depositing them into glowing yellow Vex-like receivers or terminals found throughout the encounters. These terminals also allow augments to be "banked," making them available for other fireteam members to pick up, facilitating role swaps or recovery if an augment carrier falls.
| Augment | Primary Function(s) in Vesper's Host | Key Interactions & Notes |
|---|---|---|
| Scanner (Yellow) |
- Identifies correct panels/nodes to be shot by Operator (often appear as persistent white icons on minimap, or specific visual cues on the panel itself). - Reveals which panels are lethal traps (e.g., those that disappear from minimap). - Pinpoints specific targets for interaction or damage (e.g., glowing Servitors during the Raneiks encounter, the correct Atraks-1 clone to attack). - In some secret puzzles, may require identifying the incorrect panels (opposite logic). |
- Constantly communicates findings to Operator. - Requires keen observation of minimap and environment. - Essential for avoiding lethal traps associated with panel mechanics. |
| Operator (Red) |
- Shoots panels, switches, or objects identified by the Scanner to progress mechanics or open pathways. - Activates specific environmental interactions (e.g., opening/closing the protective bunker during the Corrupted Puppeteer's wipe mechanic). |
- Relies entirely on accurate callouts from Scanner for panel shooting. - Critical: Shooting an incorrect panel often results in instant death for the Operator. - Precision aiming may be required for some distant or obscured panels. |
| Suppressor (Blue) |
- Interacts with specific enemies to make them vulnerable or alter their behavior. - Raneiks Unified: Using the grenade ability button while holding Suppressor spawns a decoy. Shooting this decoy near Raneiks causes him to split into multiple smaller, damageable Servitors. - Corrupted Puppeteer (Atraks-1): "Dunking" (activating the augment ability) within a radius of Atraks's clones can split or damage them. It's also used to make "Puppet" enemies vulnerable by detonating decoys created with the grenade ability. |
- Requires understanding specific boss/enemy tells for optimal use (e.g., "The Corrupted Puppeteer forms new puppets" tooltip). - Positioning is key for effective use against bosses. |
Nuclear Cores: Handling and Dunking Procedures
Nuclear cores are a recurring mechanical component throughout Vesper's Host, serving as key objectives in the "Activation," "Raneiks Unified" (maze section), and "Corrupted Puppeteer" encounters. These volatile objects are typically spawned after the successful completion of an augment-driven puzzle—such as the Operator shooting a sequence of correct panels—or are dropped by specific defeated enemies, like a designated Fallen foe during the Raneiks maze or the correct Atraks clone.
Successfully depositing a nuclear core is rarely a simple matter. Guardians must often overcome obstacles, such as a formidable Brig enemy casting a protective barrier over the dunking receptacles, or ensure they are depositing the core in the correctly numbered or specifically called-out location as dictated by the encounter's mechanics.
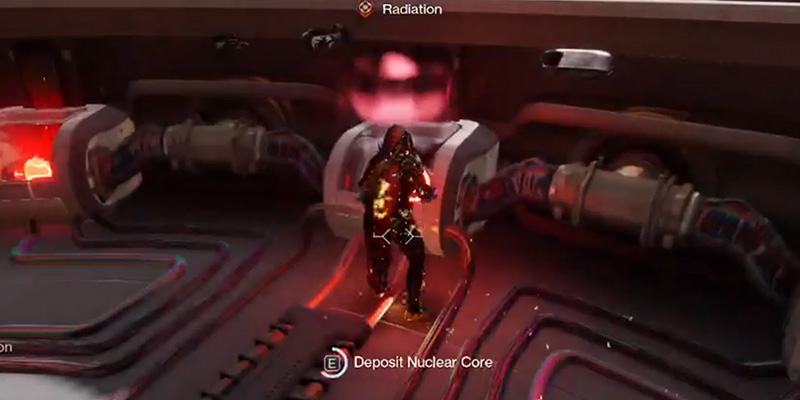
The timed nature of the cores, or the accumulating radiation, instills a sense of urgency and demands tight coordination. It's not enough for one player to carry the core; the entire team must work to clear paths, manage enemy threats, and facilitate safe hand-offs if juggling is required.
Symbolism and Panel Interactions: Decoding the Station's Language
The derelict Braytech station communicates its secrets and dangers through a complex language of symbols and interactive panels, forming the core puzzle elements of Vesper's Host. Similar to the intricate glyph mechanics found in raids like Vow of the Disciple, players must learn to interpret and manipulate these systems to progress.
The Scanner augment is paramount in this process. The Scanner typically identifies the correct panels to interact with, often by observing which panels on their minimap remain highlighted in white (indicating a correct, safe panel) versus those that disappear (indicating an incorrect and often lethal panel if shot). Other visual cues on the panels themselves or on associated targets might also guide the Scanner's callouts. Once identified, the Operator augment is used to shoot these designated panels, triggering the next step in a sequence or opening a new path.
Many encounters revolve around shooting numbered panels in a specific order, as seen in the Raneiks Unified and Corrupted Puppeteer boss fights. These numbers might be directly visible on the panels, derived from the names of specific enemies (e.g., a Servitor named "Raneiks-2" corresponds to panel number 2), or determined by a sequence of symbols or locations that the Scanner must decipher. The initial "Activation" encounter, for example, features three distinctly themed rooms—yellow "brain," red "heart," and blue "lungs"—which may house unique panel layouts or symbol associations that players need to learn.
Power Reserves: Managing Resources in the Raneiks Encounter
A unique resource management system known as "Power Reserves" comes into play during a specific segment of the Raneiks Unified encounter—specifically, the traversal or "maze" section where the fireteam is pursued by the invulnerable boss. This mechanic adds a strategic layer to navigation and survival.
The system is straightforward in its function:
- Closing a door behind the fireteam grants one unit of Power Reserve.
- Opening a door to progress or access a new area costs one unit of Power Reserve.
The primary use of these Power Reserves is to unlock "safe rooms" or secure areas within the maze, providing temporary refuge from Raneiks's relentless pursuit. Consequently, players are encouraged to be mindful of their actions, particularly closing doors they no longer need to conserve this vital resource.
Navigating the Vesper's Host: Step-by-Step Encounter Walkthroughs
This section provides a detailed breakdown of each encounter within Vesper's Host, from the initial entry to the final confrontation. Understanding the flow, mechanics, and critical roles for each stage is key to a successful run.
Embarkation: Breaching the Station
- Objective Summary: Gain entry to the main Vesper's Host station by solving an initial augment-based panel puzzle.
- Key Augments Used: Scanner, Operator.
Detailed Mechanics & Checkpoints:
- Guardians begin outside the station, navigating a short traversal section in space. Unlike the Deep Stone Crypt approach, sparrows are not usable here, and the freezing Deep Stone Lullaby mechanic is absent.
- After clearing an initial room of enemies, Viral Carrier enemies will spawn, one dropping the Scanner (yellow) augment and another the Operator (red) augment.
- The Scanner's role is to identify five correct red control panels scattered around the hangar bay. On the minimap, correct panels will typically appear as softly beeping white icons that remain visible. Panels that disappear from the minimap are traps and will kill the Operator if shot.
- The Scanner communicates the locations of the correct panels to the Operator.
- The Operator shoots the five identified correct panels. Remember the 60-second augment timer; refresh at a terminal if needed.
- Successfully shooting all correct panels will unlock the airlock, granting access to the station's interior.
Visual Cues and Critical Locations: Look for the distinct yellow glow of the Scanner augment and red glow of the Operator augment. Terminals for refreshing augments are usually glowing yellow Vex structures. Control panels are typically red.
1. Operator shooting an incorrect (disappearing) panel, resulting in death. Cause: Miscommunication from Scanner or Operator error. Solution: Clear, concise callouts; Scanner confirms panel stability before Operator shoots.
2. Augment holder dying due to expired timer. Cause: Not refreshing the augment in time. Solution: Constant awareness of the 59/60-second timer and proximity of refresh terminals.
Encounter 1: Activation
- Objective Summary: Collect three nuclear cores from side rooms and deposit them into Containment Units in the central chamber, all within a strict time limit (6 minutes in Contest Mode).
- Key Augments Used: Scanner, Operator.
Detailed Mechanics & Checkpoints:
- The encounter takes place in a large room with a rally banner spot and a large white AI orb in the center. Behind the orb are three open chest-like Containment Units.
- Initiate the encounter by interacting with the AI orb to "Reboot system". This spawns a yellow-bar Brig, Resilient Dregs, and Shanks.
- Defeat the Brig and other enemies until a "Viral Carrier approaches!" message appears. This enemy will drop the Scanner augment.
- Picking up the Scanner augment opens doors in each corner of the room, leading to three themed side areas: a yellow "brain" room, a red "heart" room, and a blue "lungs" room. The order of tackling these rooms does not matter.
- Inside a Side Room: - The Scanner enters one of the chosen side rooms. Each room has an initial area with enemies, including Vandal bosses or Machine Priest's Assistants, guarding an energy shield. - Defeat all enemies in this first area to drop the shield and access a second area. - In the second area, defeat more enemies (including Machine Priest's Assistants) until another Viral Carrier spawns, this one dropping the Operator augment. - The Scanner uses their ability to identify four correct panels out of six in this area. The Operator then shoots these four panels. - Successfully activating the panels spawns a nuclear core.
- Core Escort and Deposit: - One player picks up the nuclear core. The core inflicts stacking Radiation, and if stacks reach 10 (or if its own timer expires), it explodes, killing the carrier. Juggle the core between fireteam members if necessary to manage Radiation or the timer. - Bank the Scanner and Operator augments in terminals before leaving the side room; this makes them readily available in the other side rooms, saving time. - Return to the main central chamber with the core. - Another Brig will have spawned, casting a barrier over the Containment Units. Defeat this Brig to remove the barrier and unlock the deposit receptacles. - Deposit the nuclear core into one of the three Containment Units.
- Repeat steps 5 and 6 for the remaining two side rooms until all three nuclear cores are deposited.
1. Running out of time (especially in Contest Mode). Cause: Slow add clear, inefficient panel identification/shooting, slow core transport. Solution: Optimize loadouts for ad clear and single-target damage (Brigs), practice quick Scanner/Operator coordination, clear paths for core runner.
2. Core carrier dying to Radiation/timer. Cause: Holding core too long, not juggling effectively. Solution: Designate core jugglers, clear communication for hand-offs, carrier calls out stack count.
3. Wasting time re-acquiring augments. Cause: Not banking augments in side room terminals. Solution: Always deposit Scanner/Operator in a terminal before escorting the core from a side room.
4. Unable to dunk core. Cause: Brig barrier still active. Solution: Prioritize killing the central room Brig before attempting to dunk.
Traversal: Raneiks Unified – Puzzle Door Section (The Maze)
- Objective Summary: Navigate a maze-like area while being pursued by an invincible Raneiks Unified, collecting and depositing five nuclear cores in numerically ordered receptacles.
- Key Augments Used: None directly, but involves unique "Power Reserves" mechanic.
Detailed Mechanics & Checkpoints:
- This section begins after depositing the third nuclear core in the "Activation" encounter. Powering off the system opens a door revealing Raneiks Unified, a massive Servitor amalgamation.
- Raneiks's Pursuit & Integration: Raneiks is invincible during this phase and will constantly chase the fireteam. If Raneiks maintains line of sight on a player for too long (around 5 seconds), the "Integration" affliction will appear on their HUD, and if not broken, will result in instant death. Players must continuously move or use cover to break line of sight.
- Power Reserves Mechanic: - A new UI element, "Power Reserves," appears. - Closing a door behind the fireteam grants one Power Reserve. Opening a door costs one Power Reserve. - These reserves are used to unlock safe rooms or progress through certain doors in the maze. Strategic management is key; close unnecessary doors to build reserves.
- Nuclear Core Collection & Deposit: - The objective is to find and deposit five nuclear cores into five Containment Units, numbered 1 through 5, in sequential order. - Fallen Captains within the maze will drop these nuclear cores upon defeat. - Locate the currently active numbered deposit station (e.g., start with #1, then #2, etc.).
- Carry the core to the correct station and deposit it. Each successful deposit typically allows access further into the maze or opens the next numbered station.
- Repeat the process of avoiding Raneiks, managing Power Reserves, killing Captains for cores, and dunking them in numerical order until all five cores are deposited. This completes the traversal and leads to the actual boss fight arena with Raneiks Unified.
Visual Cues and Critical Locations: Deposit locations are scattered: one is in a locked room across from spawn; another near dunk station #3 involves turning left, killing a large Fallen Captain, and opening a door; others are found by following the main hall from spawn or after dropping a forcefield.
1. Dying to Raneiks's "Integration." Cause: Lingering in line of sight too long. Solution: Constant movement, utilizing cover, and quick reactions to the Integration warning.
2. Running out of Power Reserves. Cause: Opening too many doors unnecessarily, not closing doors behind the team. Solution: Strategic door management, prioritizing necessary openings, and consistently closing doors to build reserves.
3. Unable to find cores or deposit stations. Cause: Getting lost in the maze, not killing Captains efficiently. Solution: Learn the maze layout, clearly communicate Captain locations and active deposit station numbers.
Encounter 2: Raneiks Unified – First Boss
- Objective Summary: Defeat Raneiks Unified by using augments to identify and shoot numbered panels, then damage the boss during vulnerability phases.
- Key Augments Used: Operator, Suppressor, Scanner.
| Phase Name | Key Objective(s) | Augment(s) Used | Critical Player Actions | Wipe Mechanics to Avoid |
|---|---|---|---|---|
| 1. Add Clear & Initial Setup | Clear initial enemies. Obtain and bank Operator augment. Defeat Machine Priest. | Operator | Kill all enemies. A Dreg drops Operator; pick up and bank in a terminal. Kill the spawned Machine Priest miniboss. | Overwhelmed by adds. |
| 2. Number Phase (Repeats Twice) | Obtain Suppressor. Split Raneiks. Identify two numbered Servitors. | Suppressor, Scanner | After killing Machine Priest, team teleports to an upper area with Raneiks. Kill enemies, including a Sniper Shank that drops Suppressor. Player with Suppressor uses grenade ability near Raneiks to create a decoy; shoot the decoy. Raneiks splits into ~10 smaller Servitors. Scanner identifies two Servitors with glowing markings/dots near their crit spot and notes the number in their names (e.g., Raneiks-3, Raneiks-7) and potentially the dot position for sequence. Return to the starting room. Repeat this entire "Number Phase" once more to obtain a total of four numbers. | Augment timer expiry. Misidentifying Servitor numbers/sequence. |
| 3. Code Input & DPS | Operator shoots panels. Suppressor splits Raneiks. Damage boss. | Operator, Suppressor | Player with Operator retrieves it from terminal and shoots the four numbered panels (corresponding to the Servitor names/sequence obtained) at the front of the starting room. This makes Raneiks descend to the middle of the arena, vulnerable. An enemy with Suppressor spawns; kill it and take Suppressor. Player with Suppressor uses decoy ability near Raneiks again; shoot decoy to split him into Servitors. Damage the smaller Servitors. DPS window is short. | Operator shooting wrong panels. Augment timer expiry. Insufficient DPS. |
| 4. Repeat Cycle / Final Stand | Repeat phases 1-3. | All | Continue the cycle of add clear, number gathering, code input, and DPS. | Enrage timer if fight lasts too long (not explicitly stated but common for bosses). |
| Final Health Chip | Defeat all remaining Servitors. | N/A | Once Raneiks is at his final sliver of health, focus on destroying all spawned Servitors to fully defeat him. The arena fills with orbs upon completion. | Not killing all Servitors. |
For damage phases, splash damage weapons like grenade launchers (especially heavy wave frames like Dimensional Hypotrochoid) and the Exotic rocket launcher Parasite are effective. Titan Stasis Supers like Glacial Quake with Synthoceps or Star-Eater Scales can also deal significant damage.
1. Incorrect Servitor numbers/sequence called by Scanner. Cause: Misidentification, poor visibility. Solution: Scanner double-checks markings and names; clear, repeated callouts to Operator.
2. Operator shooting wrong panels. Cause: Miscommunication, incorrect sequence. Solution: Operator confirms numbers/sequence with Scanner before shooting each panel.
3. Insufficient DPS during the short window. Cause: Poor loadouts, not splitting Raneiks quickly with Suppressor during DPS. Solution: Optimize for burst damage, ensure Suppressor is ready and splits Raneiks immediately when DPS phase begins.
4. Team wipes during Number Phase in upper area. Cause: Overwhelmed by Shanks, Raneiks's attacks. Solution: Prioritize killing explosive Shanks, maintain mobility, assign players to focus Raneiks if his attacks are too disruptive.
Traversal: The Corrupted Puppeteer
- Objective Summary: Navigate a hazardous path involving jumping puzzles and enemy encounters to reach the final boss arena.
- Key Augments Used: None typically associated with core traversal, but Operator may be needed for secret chest access.
Detailed Mechanics & Checkpoints:
- After defeating Raneiks Unified, a new path opens. This traversal often involves intricate jumping sections, potentially with environmental hazards like lightning fields or tripmines.
- One section described involves dropping down a shaft with more tripmines, navigating past sniper Vandals, and following a wall to the right before dropping down another shaft. Careful descent is advised.
- Another segment might involve a Fallen Brig, followed by a jump into a "light / thunder area".
- There's mention of a "tripmine room" which also houses the second secret chest and focusing station. Accessing the focusing capabilities here requires the Operator buff, obtained by shooting four specific number panels hidden throughout the dungeon prior to this point in a single instance. - Panel 1 & 2: After the Servitor Maze (Raneiks puzzle section), drop down, enter an airlock, exit, turn around to see panel 1. Panel 2 is after a slide; go left instead of right. - Panel 3: After Raneiks boss fight, at the start of the jumping puzzle near a Fallen Brig. Go forward, turn around on a small ledge. - Panel 4: At the end of this jumping puzzle section, before a room with a small Servitor and more tripmines. Turn around to see it on the wall.
- The traversal culminates in reaching an airlock that leads to the final boss arena where The Corrupted Puppeteer (Atraks-1) awaits.
1. Dying to tripmines or environmental hazards. Cause: Rushing, poor jump timing. Solution: Move cautiously, shoot tripmines before advancing, learn jump sequences.
2. Getting lost or missing jumps. Cause: Unfamiliarity with the path. Solution: Follow visual cues, practice platforming.
Encounter 3: The Corrupted Puppeteer (Atraks-1) – Final Boss
- Objective Summary: Defeat The Corrupted Puppeteer (Atraks-1) by managing all three augments (Scanner, Operator, Suppressor) to identify and kill clones, manipulate panels, handle nuclear cores to lower her shield, survive wipe mechanics, and execute damage phases.
- Key Augments Used: Scanner, Operator, Suppressor.
| Phase Name | Key Objective(s) | Augment(s) Used | Critical Player Actions | Wipe Mechanics to Avoid |
|---|---|---|---|---|
| 1. Entrance & Panel Activation (Upper Arena) | Obtain augments. Kill Puppets. Operator shoots panels to open access to lower stacks. | Suppressor, Scanner, Operator | Boss appears, summons two large, immune Fallen with radiation fields (avoid). Viral Carriers spawn dropping Suppressor, then Scanner, then Operator. Suppressor uses decoy bomb to kill "Puppets" (smaller Atraks clones vulnerable only after decoy hit; inflict Radiation when close). Scanner identifies a number from one of four pillars. Operator shoots four panels in the chamber matching that number. This opens doors to lower stacks and teleports boss there. | High Radiation stacks from Puppets. Augment timer expiry. Operator shooting wrong panels. |
| 2. Shield Phase - Core Dunk (Lower Stacks - Repeats Twice) | Navigate to "real" Atraks. Operator shoots panels. Scanner IDs correct clone. Kill clone for core. Shelter from purge. Dunk core. | Scanner, Operator, Suppressor | Team drops down pipes (blue/orange wall pipes lead to different central rooms) into lower area with "real" Atraks and clones. Navigate to a room with three augment terminals and core dunk spot. Operator shoots four panels in the room with "real" Atraks. This starts "Sector Purge Countdown" / "impending shutdown". Scanner identifies the correct Atraks clone to damage/kill. Suppressor uses ability near clones ("Corrupted Puppeteer forms new puppets" tooltip) to split/damage them. Killing the correct clone drops a nuclear core. Entire fireteam must enter a bunker (opened/closed by Operator) before countdown hits zero to survive wipe. After purge, player with core dunks it in receptacle called by Scanner to lower Atraks's shield by half. Bank all augments before dunking. Repeat this entire "Shield Phase - Core Dunk" process once more to fully remove shield. | Sector Purge/Shutdown (failing to enter bunker). Killing wrong clone. Augment timer expiry. Core timer/Radiation. |
| 3. DPS Phase (Outer Anomaly Arena) | Damage Atraks. Kill glowing clone for core. Dunk core to prevent wipe/extend DPS. | (Augments may or may not be active/needed for DPS itself, but core mechanic is key) | After two cores are dunked in lower stacks, a portal in the initial rally banner chamber (upstairs path) takes team to a large outer arena with Atraks and the anomaly. Deal damage to Atraks and her clones. Avoid lightning strikes on the floor (screen turns orange). One of Atraks's copies will be glowing; kill this clone to drop a third nuclear core. When the message "The Puppeteer communes with the anomaly" appears (shockwave from anomaly), quickly grab this core and dunk it into a pod on the left side of the arena to prevent a team wipe and extend the DPS phase. | Failing to dunk core during "communion with anomaly" results in a wipe. Overwhelmed by clones/lightning. |
| 4. Repeat Cycle | Repeat phases 1-3. | All | If Atraks is not defeated, the encounter cycles back to managing augments, clones, and cores. | Enrage timer (implied if DPS is too slow over multiple cycles). |

For survivability and damage during the DPS phase, a Warlock's Well of Radiance, supplemented by healing grenades, is highly recommended. Weapons like grenade launchers or high-damage heavies such as Queenbreaker or Grand Overture are effective.
1. Dying to Radiation from Puppets/Fallen. Cause: Getting too close, Suppressor not managing Puppets effectively. Solution: Maintain distance, prioritize Suppressor's role in neutralizing Puppets.
2. Failing Sector Purge/Shutdown. Cause: Operator not opening bunker in time, team not entering bunker. Solution: Clear communication from Operator, team awareness of countdown.
3. Killing the wrong Atraks clone for the core. Cause: Miscommunication from Scanner. Solution: Scanner clearly identifies the target clone.
4. Wipe during DPS phase due to "communion with anomaly." Cause: Not killing glowing clone for core, not dunking core in time. Solution: Prioritize glowing clone, quick core transport and dunk upon seeing the warning message.
5. Augment juggling and timer management under pressure. Cause: High enemy density, complex mechanics. Solution: Practice, assign primary augment holders but have backups ready, clear communication for refresh needs.
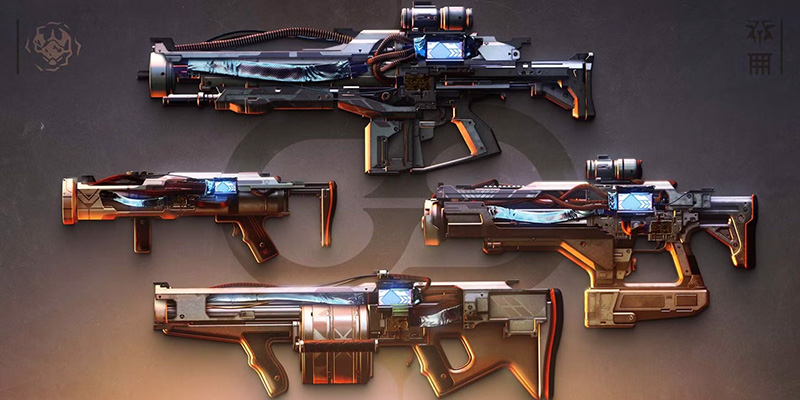
Armory of the Host: Exclusive Gear and Rewards
Vesper's Host offers a unique suite of rewards, including a coveted Exotic weapon, a new legendary weapon set, and distinctive armor. Understanding what treasures await and where to find them is a key motivator for Guardians braving this challenging dungeon.
The Spoils of Vesper: Complete Loot Table
The Vesper's Host dungeon features a curated loot pool, with specific weapons and armor pieces dropping from its various encounters and associated challenges. This allows for targeted farming once players are familiar with the activity. The primary rewards include four new Legendary weapons, the Exotic Sniper Rifle Ice Breaker, and the "Spacewalk" armor set for each class.
The following table details the known loot drops from each encounter and other sources within Vesper's Host:
| Encounter / Source | Weapon Drops | Armor Drops (Spacewalk Set) | Collectible Drops |
|---|---|---|---|
| Encounter 1: Activation (Vesper Station) | VS Chill Inhibitor (Heavy Stasis Grenade Launcher) VS Gravitic Arrest (Void Fusion Rifle) Some sources also list VS Velocity Baton here |
Arms, Chest, Legs Some sources list Helm & Gauntlets from E1 |
|
| Encounter 2: Raneiks Unified | VS Velocity Baton (Special Void Grenade Launcher) VS Pyroelectric Propellant (Arc Auto Rifle) Some sources list VS Chill Inhibitor & Gravitic Arrest here |
Helmet, Arms, Legs Some sources list Chest & Leg armor from E2 |
|
| Encounter 3: The Corrupted Puppeteer (Atraks-1) | Ice Breaker (Exotic Solar Sniper Rifle) VS Gravitic Arrest (Void Fusion Rifle) VS Pyroelectric Propellant (Arc Auto Rifle) VS Velocity Baton (Special Void Grenade Launcher) |
Chest, Legs, Class Item (Class Item only available after completing the "Rogue Network" quest) |
|
| Master Difficulty Completion | All Spacewalk Set pieces (Artifice) | VS Tech Sledge (Exotic Sparrow) | |
| Normal Difficulty Completion | Anomalous (Emblem) | ||
| Solo Flawless Completion | Station's Servitor (Emblem) | ||
| Contest Mode Completion (Historical) | Guaranteed Ice Breaker (during active period) | Vespertine (Emblem) | |
| "Rogue Network" Questline / Secret Chests | Ice Breaker Catalyst Focused Weapon/Armor Rolls (from second secret chest, requires Operator buff and Triumphs for full access) |
The distinct loot pools for each major encounter allow Guardians to focus their farming efforts. For example, if a player is seeking the VS Chill Inhibitor, repeatedly clearing the "Activation" encounter would be the most direct approach. Furthermore, the introduction of a focusing system via a secret chest, accessible after progressing the "Rogue Network" quest and potentially requiring specific Triumphs for full weapon focusing, adds a welcome layer of deterministic acquisition to the loot grind.
Exotic Spotlight: Ice Breaker – Stats, Perks, Catalyst, and Acquisition
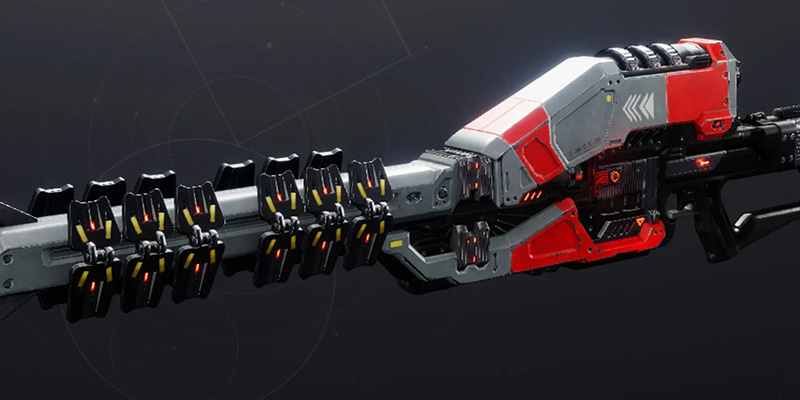
The Vesper's Host dungeon reintroduces a legendary name to the Guardian arsenal: the Ice Breaker, an Exotic Solar Sniper Rifle. This iteration, however, comes with a nuanced approach to its famed ammunition capabilities.
Base Stats & Characteristics:
- Element: Solar
- RPM: 49 (Heavy Hitting Frame)
- Magazine: 10 (though this is somewhat nominal given its ammo perks)
- Impact: 100
- Range: 72 - 87
- Stability: 38 - 48
- Handling: 40 - 50
- Reload Speed: 0 (effectively bypassed by perks)
- Aim Assistance: 58
- Zoom: 35
- Ammo Type: Special
Core Perks:
- Intrinsic Perk - "Ice Breaker": Defeating a target with this weapon causes them to explode. Precision final blows or shattering a Stasis-frozen target instead triggers a Solar ignition. This dual-condition ignition provides significant area-of-effect damage and elemental synergy.
- Ammo Perk - "No Backpack": This is where the Destiny 2 version diverges significantly from its predecessor. Instead of passive ammunition regeneration over time, "No Backpack" states: "Final blows or assists with any other weapon or ability have a chance to create ammo directly for Ice Breaker. Defeating powerful combatants (Majors, Ultras, Champions, Bosses) will create multiple rounds". This mechanic encourages an active, multi-faceted combat loop rather than passive sniping, rewarding overall engagement to fuel the Ice Breaker. While it offers the promise of "unlimited sniper shots", it's earned through continuous combat prowess.
Catalyst - "Icing-Breaker":
- The Ice Breaker catalyst is obtained by completing the "Rogue Network" questline or potentially through interactions with the dungeon's secret chests and associated puzzles.
- The catalyst adds the "Icing-Breaker" perk to the weapon. While the exact mechanical benefit of "Icing-Breaker" isn't explicitly detailed in all sources, its name and community feedback strongly suggest it enhances the weapon's synergy with Stasis, potentially by making it easier to freeze targets or boosting the effectiveness of ignitions triggered by shattering frozen enemies. User reviews describe the catalyzed Ice Breaker as "crazy" when combined with builds that consistently freeze or slow targets, turning it into an excellent ad-clearing tool with sustainable DPS capabilities, akin to a "special ammo Whisper of the Worm".
Acquisition:
The Ice Breaker is a random drop primarily from the final encounter (The Corrupted Puppeteer) of the Vesper's Host dungeon. During the initial 48-hour Contest Mode period, a completion guaranteed an Ice Breaker drop.
The dual-trigger ignition mechanic—precision kills OR shattering frozen targets—offers strong synergistic potential with both Solar (for capitalizing on ignitions) and Stasis (for setting up shatters) subclasses. For example, it pairs well with Stasis abilities like Touch of Winter Coldsnaps or Solar setups like a Young Ahamkara's Spine Hunter build for frequent ignitions.
In PvP, its 35 zoom, ability to one-shot body shot frozen players, and potential to one-shot some Supers make it noteworthy, though some users report it flinches more than other snipers. The catalyst is considered key to unlocking its full potential, significantly enhancing its ad-clear and sustained damage output, especially in Stasis-focused builds.
| Feature | Detail |
|---|---|
| Weapon Name | Ice Breaker |
| Type | Exotic Sniper Rifle |
| Element | Solar |
| Impact | 100 |
| Range | 72-87 |
| Stability | 38-48 |
| Handling | 40-50 |
| Reload Speed | 0 (Bypassed by "No Backpack") |
| Aim Assistance | 58 |
| Zoom | 35 |
| Rounds Per Minute | 49 |
| Magazine Size | 10 (Nominal) |
| Intrinsic Perk | Ice Breaker: Defeating a target causes them to explode. Precision final blows or shattering a frozen target triggers an ignition. |
| Ammo Perk | No Backpack: Final blows or assists with any other weapon or ability have a chance to create ammo for Ice Breaker. Defeating powerful combatants creates multiple rounds. |
| Catalyst Perk | Icing-Breaker: (Effect not fully detailed, but enhances Stasis synergy/ignitions) |
Legendary Arsenal: Detailed God Roll Analysis
Vesper's Host introduces four new Legendary weapons, each featuring the exclusive Origin Trait, Bray Legacy: "Damage with this weapon generates a small amount of ability energy for the one closest to a full charge". This trait provides a consistent, albeit small, boost to ability uptime, adding intrinsic value to each weapon in ability-focused builds.
Below is a detailed analysis of each legendary weapon, including recommended god rolls for PvE and PvP activities as of May 2025.
1. VS Chill Inhibitor
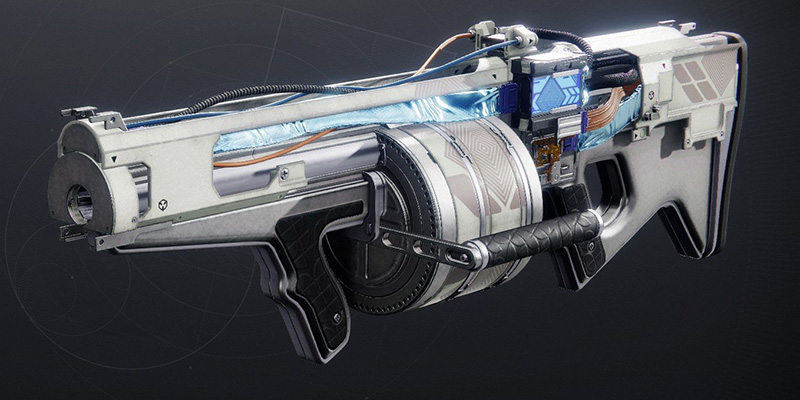
Weapon Overview: Heavy Grenade Launcher, Rapid-Fire Frame, Stasis Element, 150 RPM, 6 Magazine.
Source: Encounters 1 (Activation) and 2 (Raneiks Unified).
PvE God Roll & Rationale:
- Barrel: Quick Launch (+10 Velocity, +15 Handling)
- Magazine: Spike Grenades (Increases damage on direct hits)
- Perk 1 (Column 3): Envious Arsenal (Dealing damage with both other weapons before readying this weapon refills it from reserves). Alternative: Cascade Point (Rapid hits with other weapons greatly increase this weapon's rate of fire).
- Perk 2 (Column 4): Bait and Switch (Deal damage with all equipped weapons within a short time to give this weapon a 30-35% damage boost). Alternatives: Explosive Light (Increased damage from Orbs of Power), Chill Clip (Direct hits slow targets; more stacks freeze).
- Masterwork: Velocity
- Mod: Backup Mag (if not using Envious Arsenal extensively) or Boss Spec.
Rationale: This roll focuses on maximizing DPS. Spike Grenades are essential for direct hit damage. Envious Arsenal allows for overflowing the magazine, synergizing perfectly with Bait and Switch for a large burst of damage. The loop involves damaging with primary/special, swapping to a full Chill Inhibitor with Bait and Switch active, and emptying the magazine. Cascade Point offers extremely high RoF for burst but may suffer in total damage over longer phases. Chill Clip offers Stasis synergy for crowd control and champion stunning. This weapon fills a niche as a Stasis Heavy GL, an archetype not seen for some time.
PvP God Roll & Rationale:
- Barrel: Volatile Launch (+15 Blast Radius)
- Magazine: Spike Grenades (Still important for potential one-shot kills)
- Perk 1 (Column 3): Demolitionist (Kills generate grenade energy; activating grenade reloads weapon)
- Perk 2 (Column 4): Chain Reaction (Each final blow creates an elemental damage explosion)
- Masterwork: Blast Radius
- Mod: Quick Access Sling or Aerodynamics.
Rationale: In PvP, Heavy GLs rely on blast radius for multi-kills. Volatile Launch and a Blast Radius Masterwork maximize this. Spike Grenades can still secure a direct-hit kill. Demolitionist provides ability energy and a situational reload, while Chain Reaction is excellent for punishing grouped-up opponents.
2. VS Gravitic Arrest
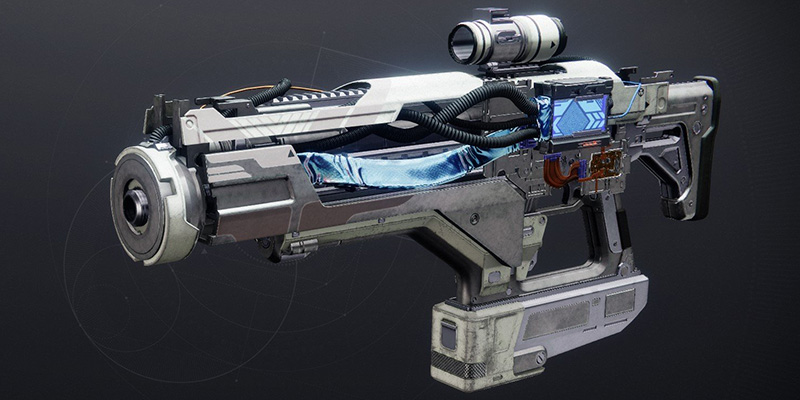
Weapon Overview: Fusion Rifle, Adaptive Frame (660ms Charge Time), Void Element, 6 Magazine.
Source: All encounters.
PvE God Roll & Rationale:
- Barrel: Smallbore (Range/Stability) or Fluted Barrel (Handling)
- Battery: Liquid Coils (Impact) or Enhanced Battery (Magazine)
- Perk 1 (Column 3): Repulsor Brace (Defeating a Void-debuffed target grants a Void Overshield) or Demolitionist (Grenade energy on kill; grenade use reloads).
- Perk 2 (Column 4): Withering Gaze (Weakens enemy on hits after aiming down sights for a short time) or Chain Reaction (Void explosions on kill).
- Masterwork: Reload Speed or Stability.
Rationale: This Void fusion rifle excels with subclass synergy. Repulsor Brace + Withering Gaze provides survivability via overshields and a damage debuff. Demolitionist + Chain Reaction offers excellent ad clear and ability regeneration. The choice depends on whether the user prioritizes survivability and single-target debuffing or ad control and grenade uptime.
PvP God Roll & Rationale:
- Barrel: Smallbore or Extended Barrel (Range)
- Battery: Projection Fuse (Range)
- Perk 1 (Column 3): Under Pressure (Improved stability and accuracy as the magazine gets lower)
- Perk 2 (Column 4): Closing Time (Boosts Range and Accuracy as magazine gets lower) or Successful Warm-Up (Kills increase charge/reload speed).
- Masterwork: Range or Stability.
Rationale: For PvP, consistency is key. Under Pressure is a top-tier perk for Fusion Rifles, greatly improving accuracy for crucial bolts. Closing Time synergizes directly with Under Pressure, further boosting stats when ammo is low, making for an extremely reliable weapon in duels. Successful Warm-Up is an alternative for more aggressive, chain-kill playstyles.
3. VS Velocity Baton
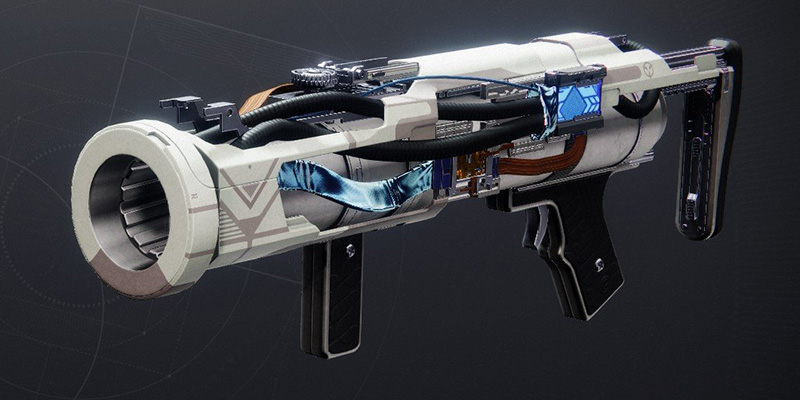
Weapon Overview: Special Grenade Launcher, Area Denial Frame (Burst fire, lingering pool), Void Element, 72 RPM, 1 Magazine.
Source: Encounters 1 (Activation) and 3 (Corrupted Puppeteer).
PvE God Roll & Rationale:
- Barrel: Quick Launch (+10 Velocity, +15 Handling)
- Magazine: High-Velocity Rounds (+10 Velocity, +10 Reload Speed)
- Perk 1 (Column 3): Demolitionist (Grenade energy on kill; grenade use reloads). Alternative: Unrelenting (Health regen on rapid kills).
- Perk 2 (Column 4): Attrition Orbs (Dealing sustained damage creates an Orb of Power) or Destabilizing Rounds (Final blows make nearby enemies Volatile). Alternative: Adagio (Damage boost after a kill, slower fire rate - though RoF is less relevant for single-shot GLs), High Ground (Damage bonus from elevated position or after 3 kills).
- Masterwork: Reload Speed
- Mod: Tactical Mag (Handling/Reload) or Major/Boss Spec.
Rationale: As an Area Denial Void GL, Velocity Baton excels at crowd control and utility. Demolitionist is fantastic for ability loops and bypassing reloads. Attrition Orbs on a lingering DoT weapon like this can generate many Orbs of Power, fueling the team. Destabilizing Rounds offers strong Void synergy by applying Volatile for add clear. Adagio provides a simple damage boost. This weapon is noted as a "PvE monster".
PvP God Roll & Rationale:
- Barrel: Quick Launch
- Magazine: High-Velocity Rounds
- Perk 1 (Column 3): Demolitionist
- Perk 2 (Column 4): Harmony (Final blows with other weapons improve this weapon's damage and performance)
- Masterwork: Velocity
- Mod: Quick Access Sling.
Rationale: Area Denial frames are niche in PvP, best for controlling space. Demolitionist provides some utility. Harmony allows for a quick swap to a more damaging grenade after securing a kill with another weapon. The strategy involves shooting where an enemy is expected, then engaging with a primary, hoping the lingering grenade or a Harmony-buffed shot finishes them.
4. VS Pyroelectric Propellant
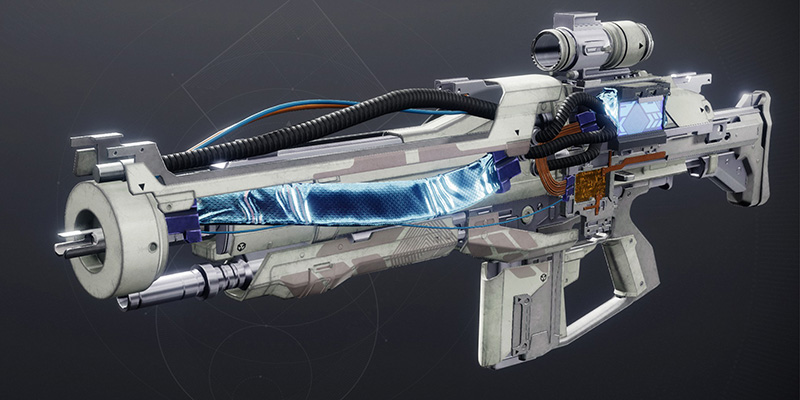
Weapon Overview: Auto Rifle, Adaptive Frame (600 RPM) or Precision Frame, Arc Element, 48 Magazine.
Source: Encounters 2 (Raneiks Unified) and 3 (Corrupted Puppeteer).
PvE God Roll & Rationale:
- Barrel: Hammer-Forged Rifling (Range) or Corkscrew Rifling (Range/Stability/Handling)
- Magazine: Appended Mag (Magazine Size) or Flared Magwell (Reload/Stability)
- Perk 1 (Column 3): Eddy Current (Increased reload/handling after sprinting or while amplified; improved when amplified) or Strategist (Class ability energy on kills). Reconstruction is also listed as a possibility.
- Perk 2 (Column 4): Jolting Feedback (Repeated damage inflicts Jolt; applied faster while amplified). Onslaught (Increased RPM after final blows) is an alternative.
- Masterwork: Range or Reload Speed.
- Mod: Backup Mag or Minor Spec.
Rationale: This Arc Auto Rifle shines with Arc 3.0 synergy. Eddy Current and Jolting Feedback are a potent combination, especially when Amplified, allowing for rapid Jolt application to clear crowds and stun Overload Champions. Strategist offers more ability energy. This weapon can be a workhorse primary for Arc builds.
PvP God Roll & Rationale:
- Barrel: Hammer-Forged Rifling or Smallbore (Range)
- Magazine: Ricochet Rounds (Range/Stability, bullets ricochet) or Accurized Rounds (Range)
- Perk 1 (Column 3): Fragile Focus (Bonus range until shield is destroyed)
- Perk 2 (Column 4): Target Lock (Damage increases the longer this weapon remains on a target) or Kill Clip (Damage boost after reloading on a kill).
- Masterwork: Range
- Mod: Counterbalance Stock or Targeting Adjuster.
Rationale: With Fragile Focus and Range investment, VS Pyroelectric Propellant can achieve impressive range for a 600 RPM Auto Rifle. Target Lock provides forgiveness in duels by slightly reducing TTK, while Kill Clip offers a more traditional damage boost after a kill, making it highly competitive in its archetype.
Spacewalk Armor Sets: Aesthetics, Stats, and Artifice Variants

Beyond the arsenal of weaponry, Vesper's Host rewards Guardians with the "Spacewalk Armor Set," a visually distinct collection for Titans, Hunters, and Warlocks. This five-piece set (helmet, gauntlets, chest armor, leg armor, and class item) boasts a "fantastic sci-fi aesthetic" that aligns with the advanced, and perhaps corrupted, Braytech facility theme of the dungeon.
The Spacewalk armor can be acquired in two primary versions:
- Standard Version: Drops from completing encounters in the Vesper's Host dungeon on Normal difficulty. These pieces typically come with "balanced stat rolls", suitable for general use.
- Artifice Version: This highly sought-after variant drops exclusively from completing encounters on Master difficulty. Artifice armor pieces are prized for possessing an additional mod slot. This fifth slot allows for an extra +3 stat mod (to any of Mobility, Resilience, Recovery, Discipline, Intellect, or Strength) or other specific Artifice mods, providing significant flexibility for fine-tuning builds and reaching desired stat tiers (e.g., "triple 100s"). Artifice pieces also often feature higher overall stat totals and more "spiky" distributions, making them exceptionally valuable for endgame build-crafting.
The distribution of armor pieces from encounters can vary, but a general pattern is:
- Encounter 1 (Activation): Often drops Arms, Chest, and Legs, though some sources suggest Helmet and Gauntlets.
- Encounter 2 (Raneiks Unified): Often drops Helmet, Arms, and Legs, while others indicate Chest and Leg armor.
- Encounter 3 (The Corrupted Puppeteer): Typically drops Chest, Legs, and the Class Item.
The primary allure of the Spacewalk set, particularly its Artifice version, lies in its potential for stat optimization. The extra mod slot on Artifice gear is a tangible advantage, allowing Guardians to push their builds closer to perfection. This makes farming Master Vesper's Host a significant long-term goal for dedicated players seeking to maximize their character's potential. The unique visual design also makes it a desirable option for transmogrification, allowing players to showcase their accomplishments.
Guardian Preparations: Builds and Loadouts
Successfully navigating the Vesper's Host dungeon requires careful preparation, including well-chosen builds and loadouts tailored to each class and the specific challenges of the encounters. This section offers guidance for both newcomers looking for accessible starting points and veterans aiming for advanced optimization.
For the Aspiring Operative (Beginner Tips)
For Guardians new to Vesper's Host or endgame dungeons in general, the focus should be on builds that offer a good balance of survivability, ease of use, and effective damage output without requiring overly complex rotations or hyper-specific gear.
General Principles for Beginner Builds:
- Prioritize Survivability: Staying alive is the first step to success. Aim for 100 Resilience on your armor, as this significantly reduces incoming damage in PvE. Incorporate healing into your build, either through subclass abilities (like Devour or Restoration) or armor mods that trigger healing on Orb of Power pickup (e.g., Recuperation).
- Orb Generation: Ensure your build can consistently create Orbs of Power. Use Siphon mods on your helmet matching your primary weapon type, and consider mods like Heavy Handed (Orbs on powered melee kills) or Firepower (Orbs on grenade kills) if your abilities are a core part of your ad clear or damage.
- Simple Damage Loops: Opt for Exotic armor and weapon combinations that provide straightforward damage boosts or utility. Supers like Thundercrash for Titans or Golden Gun (with Celestial Nighthawk) for Hunters offer high burst damage with relatively simple execution.
- Effective Ad Clear: Vesper's Host features high enemy density. Weapons with good ad-clearing potential (e.g., SMGs with Voltshot, Wave Frame Grenade Launchers like Forbearance, or Exotic primaries like Trinity Ghoul or Osteo Striga) are invaluable.
Entry-Level Builds by Class:
Arc (Thundercrash Focus):
- Subclass: Striker (Code of the Missile).
- Exotic Armor: Cuirass of the Falling Star (greatly increases Thundercrash damage and grants an overshield after impact).
- Abilities & Aspects: Thundercrash Super. Aspects like Touch of Thunder (enhanced grenades) and Knockout (defeating targets with melee attacks starts health regeneration and makes you amplified).
- Fragments: Spark of Shock (Arc grenades Jolt targets), Spark of Ions (defeating a Jolted target creates an Ionic Trace), Spark of Resistance (increased damage resistance when surrounded by enemies).
- Weapons: A primary with Voltshot (e.g., IKELOS_SMG_v1.0.3) for Jolt and ad clear. A solid shotgun or fusion rifle for major enemies. A reliable rocket launcher for additional boss damage.
- Gameplay: Use Voltshot and grenades to Jolt and clear ads, generating Ionic Traces for ability energy. Use Thundercrash on bosses or tough majors for significant burst damage, benefiting from the overshield to reposition safely.
Solar (Bonk Hammer Survivability):
- Subclass: Sunbreaker.
- Exotic Armor: Synthoceps (increased melee damage when surrounded, increased Super damage) or Loreley Splendor Helm (creates a Sunspot on critical health or barricade cast, granting Restoration – excellent for survivability).
- Abilities & Aspects: Hammer of Sol or Burning Maul Super. Throwing Hammer melee. Sol Invictus (Solar ability kills create Sunspots that heal and grant ability energy), Roaring Flames (Solar ability kills increase ability damage, stacks 3x).
- Fragments: Ember of Torches (powered melee hits make you Radiant), Ember of Empyrean (Solar weapon or ability final blows extend Restoration and Radiant effects), Ember of Solace (Radiant and Restoration effects have increased duration).
- Weapons: Weapons with Incandescent (e.g., Calus Mini-Tool) to spread Scorch and synergize with Solar effects.
- Gameplay: Constantly use your Throwing Hammer to create Sunspots for healing and ability regeneration. Synthoceps boosts hammer damage significantly when near enemies. Loreley provides a safety net with automatic Sunspot generation. This build offers incredible survivability.
Arc (Melee Assassin):
- Subclass: Arcstrider.
- Exotic Armor: Liar's Handshake (using Arc melee or being hit by melee allows a powerful counterpunch that heals) or Assassin's Cowl (powered melee final blows grant invisibility and restore health/shields).
- Abilities & Aspects: Gathering Storm Super. Combination Blow melee (kills increase melee damage and heal, stacks 3x), Gambler's Dodge (dodging near enemies fully recharges melee). Lethal Current (after dodging, next melee Jolt targets and creates a damaging aftershock), Flow State (defeating a Jolted target makes you Amplified).
- Fragments: Spark of Resistance (damage resistance when surrounded), Spark of Shock (grenades Jolt), Spark of Ions (Jolted kills create Ionic Traces).
- Weapons: A shotgun with One-Two Punch (hitting with all pellets briefly increases melee damage) like the IKELOS_SG_v1.0.3.
- Gameplay: Create an infinite loop: get a melee kill with Combination Blow to start stacks and heal, dodge near an enemy with Gambler's Dodge to get melee back, repeat. Use Liar's Handshake counterpunch or One-Two Punch shotgun for high damage on tougher targets. Invisibility from Assassin's Cowl provides safety for revives or repositioning.
Void (Invisibility & Support):
- Subclass: Nightstalker.
- Exotic Armor: Omnioculus (grants a second smoke bomb charge, smoke bombs make allies invisible and grant damage resistance) or Graviton Forfeit (increases invisibility duration, melee recharges faster while invisible).
- Abilities & Aspects: Shadowshot (Moebius Quiver for damage/debuff, Deadfall for ad control/Orb generation). Snare Bomb melee. Vanishing Step (dodging makes you invisible), Trapper's Ambush (can spend melee to make nearby allies invisible when diving).
- Fragments: Echo of Provision (damaging targets with grenades grants melee energy), Echo of Obscurity (finisher final blows grant invisibility), Echo of Persistence (Void buffs like invisibility have increased duration).
- Weapons: A good Void primary (e.g., Funnelweb, Age-Old Bond).
- Gameplay: Focus on using invisibility for safe revives, repositioning, and controlling enemy aggro. Use Smoke Bombs defensively for yourself and teammates. Shadowshot provides excellent debuff for boss damage or ad control.
Solar (Well of Radiance Support & Survivability):
- Subclass: Dawnblade (Attunement of Grace).
- Exotic Armor: Phoenix Protocol (kills and assists inside Well of Radiance return Super energy) for frequent Wells, or Sunbracers (Solar melee kills grant unlimited Solar grenade energy for a short time) for ad clear and Restoration.
- Abilities & Aspects: Well of Radiance Super. Healing Grenade or Solar Grenade (with Touch of Flame). Heat Rises (consume grenade to gain airborne benefits, Phoenix Dive heals), Touch of Flame (enhances Solar grenades).
- Fragments: Ember of Empyrean (Solar weapon/ability kills extend Restoration/Radiant), Ember of Benevolence (applying Restoration, Cure, or Radiant to allies grants increased grenade, melee, and class ability regeneration), Ember of Solace (Restoration/Radiant last longer).
- Weapons: A Solar primary with Incandescent.
- Gameplay: Prioritize placing Well of Radiance for boss damage phases and critical survivability moments. With Sunbracers, get a Solar melee kill then spam Solar grenades for massive ad clear and self-healing via Heat Rises + Phoenix Dive for Restoration x2.
Void (Devour Tank):
- Subclass: Voidwalker.
- Exotic Armor: Contraverse Hold (charging Void grenade grants damage resistance; charged grenade hits return grenade energy) or Nezarec's Sin (Void damage kills increase ability recharge rate).
- Abilities & Aspects: Nova Bomb (Cataclysm for damage, Vortex for area control). Vortex Grenade. Feed the Void (Void ability kills grant Devour, which restores full health and grenade energy on kills), Child of the Old Gods (cast Rift to send out a Void soul that weakens targets and grants ability energy when they are damaged).
- Fragments: Echo of Provision (grenade damage grants melee energy), Echo of Undermining (Void grenades weaken targets), Echo of Starvation (picking up an Orb of Power or Void Breach grants Devour).
- Weapons: A good Void primary (e.g., Collective Obligation if owned, or a legendary Void weapon).
- Gameplay: Maintain Devour by getting kills with abilities or Orbs of Power for constant healing and grenade energy. Use Vortex Grenades with Contraverse Hold for ad control and energy return. Child of the Old Gods provides passive weakening and ability regen.
Essential Mods for Survivability and Utility (Beginner Focus):
- Armor Stats: Prioritize Resilience (aim for Tier 7-10). Then focus on Discipline (grenade cooldown) and Recovery (health regeneration speed).
- Helmet: Harmonic/Kinetic/Elemental Siphon (matching your primary weapon type to create Orbs of Power on multi-kills). Heavy Ammo Finder.
- Arms: Bolstering Detonation (grenade damage grants class ability energy) or Focusing Strike (melee damage grants class ability energy), appropriate Loader mod for your special weapon.
- Chest: Relevant Damage Resist mods (e.g., Arc Resist, Solar Resist, Concussive Dampener – check common enemy damage types in Vesper's Host).
- Legs: Recuperation (replenishes health when you pick up an Orb of Power). Innervation (reduces grenade cooldown on Orb pickup) or Invigoration (reduces melee cooldown on Orb pickup). A weapon Surge mod matching your heavy weapon for boss damage.
- Class Item: Reaper (after using your class ability, your next weapon final blow spawns an Orb of Power). Bomber (reduces grenade cooldown when you use your class ability).
| Mechanic/Situation | Suggested Concise Callout | Explanation/What to Listen For |
|---|---|---|
| Scanner identifying panels (Activation/Embarkation) | "Operator, shoot [Location/Number] panel, it's stable." "Operator, DO NOT shoot [Location/Number] panel, it's disappearing/bad." |
Scanner confirms panel stability on minimap. Operator waits for confirmation. |
| Raneiks Servitor Numbers (Number Phase) | "Scanner has numbers: Raneiks-[Number One], Raneiks-." "Sequence is [Dot Position 1], then [Dot Position 2]." (If using dot sequence) |
Scanner clearly states the numbers from Servitor names. If sequence is used, clearly state it. |
| Operator Shooting Raneiks Panels | "Operator shooting panel [Number]." (Before each shot) | Operator announces which panel they are targeting from the sequence. |
| Atraks Clone Identification (Shield Phase) | "Scanner sees correct clone: [Location/Distinguishing Feature]." | Scanner clearly describes which Atraks clone is the correct one to kill for the core. |
| Atraks Panel Activation (Upper Arena) | "Scanner has pillar number: [Number]." "Operator, shoot all [Number] panels." |
Scanner calls the number from the pillar. Operator confirms they will shoot panels with that number. |
| Augment Refresh Needed | "[Player] needs refresh, timer at [Time]." | Player holding augment announces when their timer is low. |
| Nuclear Core Status | "Picking up core." "Core timer at [X]!" / "Radiation at [X]!" "Need core hand-off!" |
Clear communication about core possession, timer/radiation status, and need to juggle. |
| Atraks Bunker Mechanic | "Sector Purge incoming! Operator, open bunker!" "Bunker open, everyone in!" |
Warning for wipe mechanic, Operator confirms bunker status. |
| Atraks Anomaly Communion | "Puppeteer communing! Get the core to the pod!" | Alert for the DPS phase wipe mechanic, signaling need to dunk the special core. |
Using these, or similar clear callouts, will significantly reduce confusion and errors, especially when playing with unfamiliar teammates. Always confirm understanding if a callout is unclear.
Recovery Protocols: What to Do When Mechanics Go Awry:
Mistakes are inevitable, especially during learning phases. Vesper's Host has several mechanics that can lead to instant wipes if failed, limiting true "recovery" options for major errors.
- Major Mechanic Failure (e.g., Operator shoots wrong panel, Augment timer expires, Missed Atraks bunker/anomaly core dunk): Often, the only recovery is to wipe and retry. The key is to quickly identify what went wrong, discuss how to prevent it, and apply that learning to the next attempt. Don't get discouraged; view wipes as learning opportunities.
- Player Death: In a three-person team, any death is significant. Prioritize safe revives. If an augment holder dies, the augment drops. Another player should try to pick it up if safe, or note its location for retrieval after the immediate threat is handled. Knowing terminal locations to bank/retrieve augments is crucial. Invisibility (Hunter Nightstalker, Assassin's Cowl) or damage resistance/overshields during revives can be very helpful.
- Low DPS on Boss: If a DPS phase is underwhelming, some encounters might offer ways to extend it (e.g., the extra nuclear core dunk during Atraks's DPS phase). Otherwise, prepare for another mechanical cycle. Analyze why DPS was low (poor buff/debuff uptime, missed shots, wrong weapons) and adjust.
- Augment Management Under Pressure: If an augment carrier is struggling or dies frequently, consider if another player is better suited for that role in that specific encounter. Banking augments allows for these swaps.
- Leaving a Struggling Group: While persistence is good, if a group is consistently failing due to one or more players not understanding mechanics or performing their roles after multiple explanations and attempts, it is acceptable to politely leave and find a new group, especially if you feel you are performing your role correctly. This can save a lot of time and frustration.
The primary recovery strategy in Vesper's Host is learning from failure and executing mechanics more precisely in subsequent attempts.
For the Veteran Raider (Advanced Strategies)
Experienced Guardians looking to optimize Vesper's Host clears, aim for speedruns, or tackle Master difficulty will employ more sophisticated tactics, focusing on maximizing DPS, hyper-efficient role execution, and advanced movement.
Optimized DPS Rotations for Raneiks and The Corrupted Puppeteer:
Raneiks Unified:
- The DPS phase involves damaging multiple smaller Servitors after Raneiks splits. This favors burst area-of-effect (AoE) damage.
- Titan: A Stasis Titan using Glacial Quake with Synthoceps (for increased Super damage when surrounded by the Servitors) or Star-Eater Scales (for a general Super damage boost after collecting Orbs of Power) can deliver massive heavy attacks hitting multiple Servitors.
- General: High-damage Supers from other classes are effective. For weapons, heavy wave frame Grenade Launchers (like Dimensional Hypotrochoid with perks such as One For All, or the new VS Chill Inhibitor if it rolls with AoE perks like Chain Reaction) can excel, but note that using more than one heavy wave frame GL in the fireteam can sometimes lead to a net damage reduction due to projectile interference or buff stacking oddities. The Exotic Rocket Launcher Parasite, with its high single-shot damage buffed by stacks from prior kills, is a strong alternative for quickly eliminating groups of Servitors.
- Ensure the Suppressor splits Raneiks immediately at the start of the DPS window to maximize damage time.
The Corrupted Puppeteer (Atraks-1):
- This is a more traditional single-target DPS phase, often performed from within a Well of Radiance for survivability and a damage buff.
- Team Composition: A popular high-end strategy involves three Queenbreaker Exotic Linear Fusion Rifles firing from within a Well of Radiance, ideally with at least one Prismatic Titan running the Storm's Keep Aspect (which can enhance Arc weapon damage or provide other benefits while standing in a Rift/Well, depending on its exact May 2025 functionality).
- Warlock: Well of Radiance is almost mandatory. Supplement with healing grenades for extra survivability. Throwing Grenade Launchers (Special ammo) can contribute good sustained damage from within the Well.
- Titan: If not using Storm's Keep for Queenbreaker synergy, a Prismatic Titan could use Thundercrash with Cuirass of the Falling Star for burst, potentially swapping to Grand Overture for sustained fire. Grand Overture itself is cited as a strong option for Atraks.
- Hunter: A common high-DPS Hunter strategy involves a Celestial Nighthawk (for a massively powerful single Golden Gun shot) and Lucky Pants swap. The rotation typically involves casting Golden Gun with Nighthawk equipped, immediately swapping to Lucky Pants, firing the Golden Gun shot, then drawing a high-damage Hand Cannon (like Malfeasance or a Vorpal Weapon Warden's Law) and emptying its magazine while the Lucky Pants damage buff is active. A supplementary DPS weapon (Fusion Rifle, Bait and Switch Rocket) is used while the "Out of Luck" debuff from Lucky Pants is on cooldown.
- General High-Tier Weapon Options:
- Izanagi's Burden + Auto-Loading Holster Rocket Launcher (with Bait and Switch): Fire a Honed Edge x4 shot from Izanagi's, swap to rocket, fire, swap back to reload Izanagi's, repeat. Requires practice for optimal timing.
- Cold Comfort Rocket Dump: This Legendary Rocket Launcher, with Envious Assassin (overflowing the magazine based on kills with other stowed weapons) and its Origin Trait Restoration Ritual (emergency reload upon emptying magazine after finishers), can fire multiple rockets back-to-back for immense burst damage, especially when paired with a Gjallarhorn teammate and a debuff like Tractor Cannon.
- Cataclysmic Linear Fusion Rifle: With Fourth Time's The Charm and Bait and Switch, this remains a top-tier sustained DPS option if all shots are precision hits.
- Remember to always incorporate standard damage stacking: an empowering buff (Well of Radiance provides Radiance), a global debuff on the boss (Tether, Divinity, or Tractor Cannon), and individual weapon surges from armor mods. Prismatic users can also leverage Transcendence and Facet of Courage for additional unique damage buffs.
Mastering Movement: Advanced Tech for Skips and Speed:
Advanced movement techniques can significantly reduce clear times, crucial for speedruns or efficient farming.
- Eager Edge Skating: Using a sword with the Eager Edge perk, players can achieve massive forward momentum. This is viable on all classes:
- Titan: Strafe Lift with Lion Rampant exotic boots. Jump, heavy attack swing with Eager Edge, jump again immediately, and repeat light swings while airborne to maintain momentum.
- Hunter: Triple Jump with St0mp-EE5 exotic boots. Jump, heavy attack swing, jump, and use Shatterdive (if Stasis) very quickly for a large burst of speed. Light swings maintain momentum.
- Warlock: Burst Glide with Transversive Steps exotic boots. Jump, heavy attack swing. Icarus Dashes (Solar) can be used after swings to extend. The fastest is Wellskating: similar to Shatterdive skating, run off a ledge, heavy attack swing with Eager Edge, jump, and immediately cast Well of Radiance super within a few frames for a colossal speed burst. Needleskating with Prismatic (Needlestorm super) and Lightning Surge (slide melee) is another Warlock option, casting super almost immediately after the slide melee, even possible without Eager Edge.
- The key to Eager Edge skating is to stay off the ground as much as possible to maintain momentum.
- Sparrow Slipskating: Summoning a Sparrow while holding a sword, then dismounting, can proc Eager Edge. Combining this with skate inputs can generate high speed quickly.
- Slide Canceling (Warlock): With Incinerator Snap melee equipped, pressing the super key (without super energy) performs a normal melee. This can cancel slide momentum, allowing an immediate jump while carrying forward momentum, and can also negate impact damage similar to Icarus Dash.
- Dungeon Skips: Specific skips for Vesper's Host will likely be discovered by the community. General techniques include "out of bounds" exploits or using movement tech to bypass triggers. One example from other content involves a player dying in a specific load zone, being revived by a teammate while another blocks their spawn with objects (like Stasis crystals), causing them to respawn at a later checkpoint or boss arena. Rocket sparrow breaching (using a sparrow and rocket launcher to clip through doors) has been used in other content like Vault of Glass and might find applications. The traversal sections in Vesper's Host are prime candidates for such skips.
Damage Stacking: Maximizing Output with the Current Meta (May 2025):
Understanding how various damage buffs and debuffs interact is critical for achieving peak DPS. The fundamental components include:
- Empowering Buffs: These are player-applied buffs like Radiance (from Solar subclasses, Well of Radiance, Ember of Torches, etc.) or other effects that increase outgoing weapon damage (e.g., Lumina's Noble Rounds, Banner Shield). Only the strongest empowering buff applies.
- Global Debuffs: These are applied to the enemy, causing them to take increased damage from all sources. Examples include Shadowshot Tether (Hunter), Tractor Cannon, Divinity's cage, and Void Weaken effects (from grenades, Child of the Old Gods, etc.). Only the strongest debuff applies, though some (like Divinity's cage for crits) can offer benefits alongside a stronger percentage debuff. Felwinter's Helm and Tractor Cannon debuffs can have their durations refreshed by applying other Void Weaken effects (though not by Tether).
- Weapon Surges: These are armor mods (typically on leg armor) that increase the damage of weapons matching the elemental type of the active surge(s) when the player has Armor Charge. These stack with empowering buffs and global debuffs.
- Weapon Perks: Perks on the weapon itself, like Bait and Switch, Vorpal Weapon, Firing Line, Explosive Light, Killing Tally, etc., provide their own damage bonuses and stack multiplicatively with the external buffs listed above.
- Unique Buffs (Prismatic): The Prismatic subclass introduces unique buffs like Transcendence (activated by filling Light and Dark meters) and Facet of Courage (increased weapon and ability damage to targets afflicted with Light or Dark subclass debuffs). These are designed to stack with other damage effects, providing another layer for Prismatic users.
The Destiny 2 sandbox is a dynamic environment, with balance changes and new gear constantly reshaping optimal strategies. As of May 2025, several trends are emerging for tackling Vesper's Host efficiently.
The Evolving Meta: Current Trends in Vesper's Host (May 2025)
Top Weapon Combinations (Post-May 2025 Sandbox Update)
While specific sandbox changes for May 2025 are speculative, current top-tier PvE weapons and strategies provide a strong indication of what will likely remain effective or adapt for Vesper's Host. The emphasis is often on synergistic loadouts that balance ad clear, major/champion takedowns, and boss DPS.
- Rocket Launchers for Burst DPS: Legendary Rocket Launchers like Cold Comfort (with Envious Assassin + Bait and Switch, and its Restoration Ritual origin trait for ammo efficiency) remain premier choices for burst damage against bosses like Atraks. Pairing with a teammate using Gjallarhorn to provide Wolfpack Rounds significantly boosts the entire team's rocket damage.
- Linear Fusion Rifles for Sustained DPS: Cataclysmic (with Fourth Time's The Charm + Bait and Switch) continues to be a reliable option for sustained precision damage, particularly if the boss has long vulnerability windows or requires consistent crits. The Exotic Queenbreaker has seen specific use against Atraks in Vesper's Host, especially when multiple team members coordinate its use from within a Well of Radiance. Leviathan's Breath (Exotic Bow) is also a strong contender for heavy slot sustained damage.
Special Weapon Swaps & Utility
- Izanagi's Burden: Still a staple for opening burst damage when paired with an auto-loading holster rocket or grenade launcher.
- Witherhoard: Its area denial and damage-over-time capabilities make it excellent for ad control and supplemental boss damage.
- Divinity: Essential for creating a large crit spot and applying a weaken debuff, especially valuable for bosses with awkward crit locations or when using precision weapons like Linear Fusion Rifles or Sniper Rifles.
- Wave Frame Grenade Launchers (Special): Forbearance (Ambitious Assassin + Chain Reaction) remains king for ad clear. The new Vesper's Host VS Velocity Baton (Void, Area Denial) with perks like Demolitionist + Attrition Orbs/Destabilizing Rounds offers strong Void synergy and utility.
Vesper's Host Specific Weapons
- VS Chill Inhibitor (Heavy Stasis GL): Envious Arsenal + Bait and Switch is a powerful DPS roll. Its Stasis element and Rapid-Fire frame make it unique.
- VS Gravitic Arrest (Void Fusion): Repulsor Brace/Demolitionist + Withering Gaze offers strong Void build synergy.
- VS Pyroelectric Propellant (Arc Auto Rifle): Eddy Current/Strategist + Jolting Feedback makes it a solid Arc primary for ad clear and Jolt application.
Exotic Primaries for Ad Clear & Utility
Quicksilver Storm, Osteo Striga, and Riskrunner (especially if Arc damage is prevalent from enemies) remain excellent choices for managing large groups of enemies, which is crucial in Vesper's Host with its high enemy density.
The "double special" weapon economy, where players use two special ammo weapons alongside a heavy, remains a potent strategy for maximizing damage output, provided ammo can be sustained through finder mods, scavenger mods, or perks like Lead from Gold. Perks like Bait and Switch are highly valued on DPS weapons due to their significant (often 30-35%) and relatively easy-to-activate damage bonus. Loadouts are often tailored to specific encounters, with players swapping weapons to best suit the current objective (e.g., ad clear primary for initial phases, then swapping to a high-damage special/heavy combo for boss DPS).
Speedrunning Strats: Shaving Seconds off Your Clear Time
Speedrunning Vesper's Host involves a combination of flawless mechanical execution, optimized DPS, and advanced movement techniques to minimize time spent in each section.
- Movement is Key: Mastering Eager Edge skating, Wellskating, and other class-specific movement tech is fundamental for traversing areas quickly and potentially skipping sections or triggers.
- Activation: The core duplication glitch (if still active) could significantly speed up the initial core collection. Otherwise, hyper-efficient augment passing, rapid ad/Brig clear, and coordinated panel shooting are vital to beat the tight timer.
- Raneiks Unified: Minimizing time spent in the maze by knowing optimal paths and efficiently managing Power Reserves. For the boss fight, one-phasing Raneiks by maximizing burst AoE damage on the split Servitors is the goal.
- The Corrupted Puppeteer (Atraks-1): Streamlining the augment acquisition and panel phases, quick clone identification and elimination for cores, and achieving a one-phase or swift two-phase kill on Atraks. This involves precise coordination for the bunker mechanic and the anomaly core dunk.
- Aggressive Strategies: Speedruns often involve taking calculated risks, such as aggressive positioning to save time or relying on specific builds that can bypass certain defensive phases of enemies.
- Loadout Optimization: Swapping loadouts instantly (e.g., using DIM or in-game loadout slots) for different phases is common. For example, a movement exotic for traversal, then swapping to a DPS exotic for a boss fight.
- Communication & Coordination: Every player must know their role perfectly and execute it without hesitation. Callouts are minimal and precise. Speedruns often highlight mechanical bottlenecks that cannot be sped up (true time-gates) versus those that yield to skill and optimization.
Powerful Synergies: Effective Cross-Class Build Combinations
Optimizing team performance in a three-person activity like Vesper's Host relies heavily on cross-class synergy, where abilities and buffs from different Guardians complement each other to greater effect.
- Warlock (Well of Radiance): Provides a significant damage buff (Radiant) and healing, creating a safe zone for DPS.
- Hunter (Shadowshot Tether): Applies a powerful global debuff (Weaken), making enemies take more damage from all sources. Deadfall is good for Orb generation and ad control; Moebius Quiver for more direct damage and multiple tethers.
- Titan (Flexible Role): Can provide additional buffs (e.g., Banner Shield for a higher weapon damage bonus if Well isn't optimal, though less common in 3-mans), focus on burst DPS (Thundercrash), or run a strong ad-clear/survivability build (e.g., Solar Bonk Hammer, Strand Banner of War) to protect the Well/Tether users. A Titan might also carry Tractor Cannon for an alternative debuff if a Hunter isn't on Tether.
The Prismatic subclass allows for novel combinations. A Prismatic Warlock running Song of Flame Super can provide significant team-wide ability regeneration and Scorch/Ignition effects, acting as an alternative or supplement to Well of Radiance in certain scenarios.
Players can stack Facet of Courage (bonus damage to targets affected by Light/Dark debuffs) with other buffs/debuffs, enhancing personal damage output within a coordinated team setup.
One player, often a Stasis Warlock with Bleak Watcher turrets, can focus on freezing and controlling large groups of dangerous enemies. This allows the other two players to concentrate on mechanics or dealing damage to priority targets with less incoming fire. This is particularly valuable in high enemy density encounters or Master difficulty.
Specific Synergies for Vesper's Host
- For Atraks, the Storm's Keep Titan (Prismatic) + Queenbreaker + Well of Radiance combination leverages multiple buffs for high linear fusion rifle damage.
- Coordinating Void debuffs (e.g., from a Hunter's Tether or a Warlock's Child of the Old Gods/Echo of Undermining grenade) with Void weapons that have Repulsor Brace (like VS Gravitic Arrest) can provide consistent Void Overshields for the weapon wielder, enhancing survivability.
The key is to ensure the team has sources of empowering buffs, enemy debuffs, and strong individual DPS, while also covering survivability and ad clear. Prismatic subclasses add another layer of flexibility, potentially allowing individual players to cover multiple roles or bring unique buff/debuff combinations.
Insights from the Frontline: Streaming Community Tactics
The Destiny 2 streaming community is often a hotbed for innovation, rapidly dissecting new content like Vesper's Host and popularizing effective strategies and builds.
Streamers excel at providing real-time visual explanations of complex mechanics. For Vesper's Host, this would include showing how to identify correct panels with Scanner, the timing for Suppressor use against Raneiks, or safe positioning during Atraks's attacks. This visual learning is invaluable for many players.
- Rapid Build Iteration: Streamers and their communities quickly test and refine builds for new activities. For Vesper's Host, platforms like TikTok and YouTube showcase a variety of approaches even within a single class. For example, Hunters have been seen using Stasis builds with The Lament exotic sword for Atraks DPS, Prismatic builds leveraging Facet of Purpose and Storm's Edge for ability loops, and specialized loadouts incorporating shoot-to-loot weapons for remote Orb of Power collection.
- Loadout Flexibility and Swapping: High-level players, often showcased on streams, frequently swap loadouts mid-dungeon to optimize for specific phases. A Titan streamer, for instance, might use one loadout with an Inmost Light class item for neutral game ability spam during mechanics, then swap to a different class item (e.g., Star-Eater Scales for Super damage) and specific Surge mods with a weapon like Grand Overture right before a DPS phase on Atraks. For Raneiks, the same player might switch to a Stasis super and Parasite or Tractor Cannon. This highlights the importance of adaptable gear and quick inventory management.
- Discovery of Safe Spots and Cheese Strategies: While not always intended by developers, streamers are often among the first to find and share safe spots to avoid damage or "cheese" strategies that simplify encounters. These can range from specific perches to avoid boss attacks to ways to manipulate enemy AI.
- Emphasis on Communication and Role Execution: Successful streamed runs, especially during Contest Mode or for flawless clears, invariably demonstrate crisp communication and flawless execution of assigned roles, reinforcing best practices for all teams.
By observing streamers, players can gain insights into effective loadouts, positioning, mechanical execution, and emerging meta strategies for Vesper's Host, often accelerating their own learning curve.
Frequently Asked Questions (FAQ)
This section addresses common questions players may have about the Vesper's Host dungeon.
| Q1: How do I start the Vesper's Host dungeon? | You must first acquire the "Rogue Network" quest from Spider in the Last City's Seasonal Hub. Progressing this quest will grant access. You also need to own The Final Shape Dungeon Key or the relevant content pass that includes Vesper's Host. The dungeon is launched from Europa. |
| Q2: What are the main augments in Vesper's Host and what do they do? | There are three main augments, similar to Deep Stone Crypt but with some new functions:
|
| Q3: How does the "Integration" mechanic work in the Raneiks encounter? | If Raneiks maintains direct line of sight on you for too long (around 5 seconds), you'll get an "Integration" debuff and a countdown. You must break his line of sight by moving behind cover or through a door before the countdown ends to avoid instant death. |
| Q4: How do I survive the "Sector Purge" or "Shutdown" mechanic during the Atraks (Corrupted Puppeteer) fight? | When a warning message about an impending shutdown or sector purge appears, your entire fireteam must take shelter inside a specific bunker. This bunker is opened and closed by the player holding the Operator augment. Failure to enter the bunker in time results in a wipe. |
| Q5: What are "Power Reserves" in the Raneiks maze section? | This is a unique resource. Closing a door grants one Power Reserve, while opening a door costs one. These reserves are used to open specific doors, often leading to safe rooms, while Raneiks is chasing you. Manage them wisely by closing unnecessary doors. |
| Q6: How do I get the Ice Breaker Exotic Sniper Rifle? | Ice Breaker is a random drop from the final boss, The Corrupted Puppeteer (Atraks-1), in the Vesper's Host dungeon. It was a guaranteed drop for completing the dungeon during its initial Contest Mode period. |
| Q7: How do I get the Ice Breaker Catalyst? | The Ice Breaker catalyst, which adds the "Icing-Breaker" perk, is typically acquired by completing the "Rogue Network" questline associated with the dungeon. Some sources also suggest it might be linked to secret chest interactions within the dungeon that require specific puzzle completions. |
| Q8: What are the "god rolls" for the Vesper's Host legendary weapons? | Detailed god roll recommendations for VS Chill Inhibitor, VS Gravitic Arrest, VS Velocity Baton, and VS Pyroelectric Propellant for both PvE and PvP can be found in Section 4.3 of this guide. Key perks to look for often include Bait and Switch, Envious Arsenal, Demolitionist, Repulsor Brace, Withering Gaze, Attrition Orbs, Destabilizing Rounds, and Jolting Feedback, depending on the weapon and intended use. |
| Q9: Is Vesper's Host farmable for loot? | Typically, new dungeons in Destiny 2 allow for repeated clears to farm for legendary weapons and armor, especially when the dungeon is the weekly featured one. The final boss can usually be farmed for a chance at the Exotic. Specific lockouts or farmability rules can change, so check the current season's information. The secret chest that allows focusing (after completing "Rogue Network") provides another avenue for targeted loot acquisition. |
| Q10: What is the recommended Power Level for Vesper's Host? | For Normal difficulty, you should be at or near the pinnacle cap for the current season. For Master difficulty, you will need to be significantly higher, often 15-20 levels above the activity's base Power. Contest Mode had a specific cap. Always check the in-game Director for current Power recommendations. |
| Q11: What are the "Puppets" in the Corrupted Puppeteer (Atraks) fight and how do I deal with them? | Puppets are smaller clones of Atraks that are initially immune and will chase you, applying stacks of Radiation if you are close. The player with the Suppressor augment must use their grenade ability to create a decoy, and then shoot the decoy near the Puppets to make them vulnerable to damage. |
| Q12: How do I find the secret chests in Vesper's Host? | While this guide focuses on main encounters, sources detail complex puzzles for secret messages and chests. The second secret chest, used for focusing, is often in a "tripmine room" and requires the Operator buff obtained by shooting hidden panels throughout the dungeon. Exploring thoroughly and looking for out-of-place mechanics or symbols is key. |
Conclusion: Conquering the Corrupted Station
Vesper's Host stands as a testament to Destiny 2's evolving endgame, merging familiar mechanics with novel twists to create a challenging and rewarding three-player experience. From the initial summons by Spider to the climactic confrontation with a corrupted Atraks-1, this dungeon demands keen observation, precise execution, and seamless teamwork.
The core of Vesper's Host lies in its intricate augment system—Scanner, Operator, and Suppressor—each role critical and interdependent, especially under the pressure of timers and lethal consequences for error. The management of nuclear cores, the decoding of panel-based puzzles, and unique encounter-specific resources like Power Reserves add further layers of strategic depth. The dungeon's narrative, rooted in the dark legacy of Clovis Bray and the re-emergence of Atraks, provides a compelling backdrop that enriches the player's journey through the derelict Europa station.
The introduction of Contest Mode for its launch signaled an elevation of dungeon difficulty, emphasizing mechanical mastery over sheer Power. This design philosophy permeates the normal and Master versions, ensuring that Vesper's Host remains a true test of a fireteam's skill.
The rewards, headlined by the reimagined Ice Breaker Exotic Sniper Rifle and its catalyst, alongside a suite of powerful legendary weapons featuring the "Bray Legacy" Origin Trait and the stylish "Spacewalk" armor sets (including Artifice variants), provide ample incentive for Guardians to brave its depths repeatedly. Whether a newcomer seeking to conquer their first major endgame challenge or a veteran aiming for flawless clears and optimized loot, Vesper's Host offers a rich and engaging undertaking.

By understanding its core systems, meticulously learning each encounter's flow, preparing effective loadouts, and fostering clear communication, any fireteam can aspire to unravel the secrets of Vesper's Host and emerge victorious, laden with the spoils of the corrupted station. Good luck, Guardians.
Remember that practice makes perfect. Don't be discouraged by initial failures, as mastering the augment rotations and timing takes experience. Consider recording your runs to analyze mistakes and improve coordination on future attempts.