
Alright, Guardians, listen up! You're about to embark on "Dual Destiny," one of the most intricate and rewarding two-player experiences Destiny 2 has to offer. This isn't just another mission; it's a test of teamwork, communication, and raw skill, culminating in a powerful Exotic Class Item. Consider this your personal coaching session. We'll break down every step, every mechanic, and every challenge, transforming your dynamic duo into an unstoppable force. Let's gear up and get ready to claim your destiny!
Gearing Up for Your Dual Destiny
Before you can even set foot in this unique mission, there's a path to walk, Guardians. Unlocking Dual Destiny is a journey in itself, designed to test your resolve and prepare you for the cooperative challenges ahead. Once unlocked, ensuring your fireteam meets the specific requirements and is properly equipped will be paramount to your success.
Unlocking the Dual Destiny Mission
This coveted mission doesn't just appear on your Director; you and your partner need to earn your way in through a series of specific actions within the Pale Heart. Think of this as your first cooperative trial.
Hunting the Secret-Keepers
Following each successful Level 3 Overthrow, a message will flash on your screen: "A Secret-Keeper of the Witch Queen is near..." This is your cue. A special, named Wizard enemy will have spawned in a predetermined location within that zone. Your team must locate and eliminate this Wizard.
These Secret-Keepers have specific haunts:
- The Landing: Look for a southeastern cave, close to the entrance of the Lost Sector.
- The Blooming: Your target is in a distinct purple cave situated near the eastern part of the zone.
- The Impasse: Head to the southwest part of the zone, specifically where the Taken forces deploy a shield during the Overthrow activity.
Answering Savathun's Call (The Envoys)
With all three Secret-Keepers vanquished, your attention will be drawn to a conspicuous large green beam of light piercing the sky. This beacon will guide you towards the Refraction area of the Pale Heart, leading you into a crystal-laden cave dominated by a statue of Savathun.
Upon entering and approaching the statue, you'll receive a buff called "Savathun's Envoy." This buff is your key to the next step. New objective markers will appear, directing you towards two locations, each marked by floating Pyramid structures. Here, you'll encounter enemy forces and, eventually, two Subjugator minibosses, known as Expectors.
Each of these Subjugators, upon being defeated (or after taking a significant amount of damage initially), will drop a crucial item: an orb of Light from one, and an orb of Darkness from the other. Your task is to retrieve these orbs, one by one, carry them back to the crystal cave, and deposit them onto their corresponding Light and Dark plates near Savathun's statue. Successfully depositing both orbs will finally unlock the Dual Destiny mission node on your Pale Heart map.
Essential Mission Requirements
The name "Dual Destiny" is no accident, team. This mission is meticulously crafted for two Guardians operating in absolute harmony. Attempting it otherwise for your initial clear is not an option.
- Power Level Check: The mission has a recommended Power Level of 1995. While entry below this is possible, the challenge will be substantially greater. Ideally, both Guardians should be at or near this level.
- Subclass Synergy: Traditionally, one player must be equipped with a Light-based subclass (Void, Solar, or Arc), while the other must use a Darkness-based subclass (Stasis or Strand). However, the Prismatic subclass offers flexibility. Both players can opt to run Prismatic. If you choose this route, the game will randomly assign one of you the "Light Aligned" buff and the other the "Darkness Aligned" buff at the mission's outset.
Recommended Loadouts & Prismatic Builds
While your skill and communication are the true keys to victory, the right arsenal will undoubtedly make your journey smoother. Dual Destiny will throw a diverse array of challenges at you, from swarming enemy ranks to formidable minibosses like Tormentors and Subjugators, all leading up to the climactic final battle.
A Prismatic Warlock utilizing the Getaway Artist exotic gauntlets (for a potent Arc Soul) combined with a Stasis Turret aspect can provide exceptional area control and supplemental damage. Another strong option is pairing Swarmers with abilities that generate Threadlings, Devour for survivability, and the Facet of Balance Fragment for ability energy regeneration.
Prismatic Hunters can lean into ability-spam builds. Pairing this with Celestial Nighthawk for a high-damage Golden Gun shot can be devastating, though be aware that the Radiant buff from Well of Radiance won't stack with Golden Gun if your Warlock partner is using that Super. Alternatively, a melee-focused build with Liar's Handshake can also be very effective.
Titans can bring immense utility and damage. The Twilight Arsenal Super provides a powerful weaken effect. Combining the Consecration Solar aspect with Frenzied Blade (Strand melee) and the Synthoceps exotic arms can result in massive melee and ad-clear potential. For more consistent ability uptime, a build around Monte Carlo and the Cannon Brace exotic legs can be very effective.
The Dance of Light and Darkness: Core Mission Mechanics
This is where your partnership truly ignites, Guardians! Dual Destiny is ingeniously woven with unique mechanics that demand constant, crystal-clear communication and perfectly synchronized execution. Mastering these is the key to unlocking victory.
Understanding Your Light/Dark Alignment
From the very instant you materialize into the mission, one of you will be imbued with the "Light Aligned" buff (often indicated by a white aura or UI highlights), while your partner will receive the "Darkness Aligned" buff (typically shown with an orange or dark aura/UI elements). As mentioned, this assignment is based on your chosen subclasses (one Light, one Dark) or determined randomly if both of you are running Prismatic.
This alignment is not merely cosmetic; it is the fundamental language of the mission. It dictates:
- Environmental Interactions: The most common interaction involves pressure plates. Light Aligned players must stand on white or Light-aspected plates, while Darkness Aligned players must stand on orange, dark, or Darkness-aspected plates. Often, these plates must be activated simultaneously by both players to open doors, reveal paths, or trigger the next sequence in an encounter.
- Combat Roles: Your alignment can determine which specific enemies you can damage most effectively, particularly those with elemental shields that correspond to your Light or Dark attunement.
- Mote/Buff Interaction: It also governs which motes (like those dropped by specific enemies in symbol encounters) you can pick up, or even which unique symbols or puzzle elements are visible only to you.
Dominating the Symbol Encounters
Prepare for mechanics reminiscent of Destiny's raids, Guardians. These encounters hinge on precise, rapid-fire callouts and flawless execution from both partners. The typical flow involves one player acting as the "Reader" (or "Caller"), who can see a sequence of symbols appear, while the other player, the "Shooter," is presented with a field of interactable objects (often called cruxes or nodes) marked with a variety of these symbols.
The Core Loop of Symbol Encounters
- Mote Collection: To initiate the symbol mechanic or reveal the symbols/targets, players frequently need to defeat specific enemies aligned with Light or Darkness. These enemies might possess shields that can only be damaged by the Guardian with the corresponding Light or Dark alignment buff. Upon defeat, they drop motes of Light or Darkness.
- Reader Sees the Symbols: The player whose role it is to read (or the one who picks up the relevant mote) will observe a sequence of symbols materializing in their environment. These often appear on pedestals, plinths, or directly near their position.
- Reader Calls Out Symbols: The Reader must clearly and accurately communicate these symbols to their partner, the Shooter, in the exact order they appeared. This is non-negotiable for success.
- Shooter Locates & Shoots Symbols: The Shooter, hearing the callouts, must then find the objects/cruxes in their environment that bear the matching symbols and shoot them in that precise, called-out sequence.
| Symbol Visual | Common Callouts | Alternative Names |
|---|---|---|
| Pyramid/Triangle Ship | "Pyramid," "Fleet" | "Dorito," "Ship" |
| Squiggly Line/Snake | "Snake," "Worm" | "Squiggle" |
| Figure with smaller figure | "Witness," "Guardian" | "Dude Holding Kid" |
| Black Hole/Dark Circle | "Black Hole," "Dark Sun" | "Void" |
| Hive Symbol (Green) | "Hive," "Savathun" | "Green Symbol" |
| Traveler/Sphere | "Traveler," "Sphere" | "Ball" |
Navigating Timed Sections & Jumping Puzzles
The entire Dual Destiny mission operates under a timer, which is displayed on your HUD. While completing major encounters will typically add bonus time to this clock, its constant presence adds a layer of urgency to your actions. This background pressure can influence decision-making, sometimes leading to rushed callouts or hasty movements if not managed with a calm and efficient mindset.
You'll also encounter specific jumping puzzle sections designed to test your platforming prowess and coordination. These are not mere traversal segments; they are co-op challenges.
- Often, these puzzles will require players to stand on their respective Light and Dark plates to activate platforms or create pathways for each other.
- Be wary of environmental traps designed to push you off platforms and harassing enemies that will try to disrupt your jumps.
- At times, the path forward may not be immediately obvious, and the jumping sequences might even temporarily separate you and your partner, requiring individual execution before regrouping.
The First Clock Puzzle (9 Pillars/Shards)
This is your first major "clock" encounter, a significant mechanical test that prepares you for the even more complex version in the final battle. You'll enter an area with a large central structure, often a pyramid, to which nine distinct pillars or shards are connected by tethers of Light or Darkness.
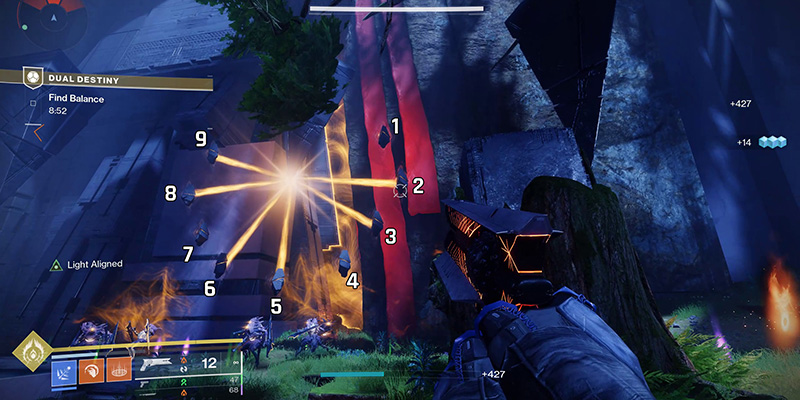
Decoding the 9-Pillar Clock
- Unique Perspectives: The core mechanic here is that each player will see a different set of three pillars/shards that appear unconnected or untethered from their individual viewpoint.
- The Objective: Your goal is to identify and collectively shoot the three pillars that are tethered or connected from both players' perspectives.
- The Strategy: The most common and often clearest method to solve this is to assign numbers 1 through 9 to the pillars (e.g., moving clockwise around the structure). Each player observes their clock face and calls out the numbers of the three pillars they see as unconnected or untethered. The three pillars whose numbers were not called out by either player are the correct ones to shoot.
Securing the Harmonic Sundering Buff
To damage and destroy the correct pillars, one of you will need a special buff called "Harmonic Sundering." This buff is obtained by defeating a powerful Tormentor enemy that will spawn during this encounter. The critical detail: Only the Guardian who lands the final blow on the Tormentor will receive the Harmonic Sundering buff. This is a key point of coordination.
Tormentor Takedown Tactics
Focus fire on their shoulder weak spots first to stagger them and prevent their devastating grab attacks. Use precision weapons like sniper rifles or linear fusion rifles.
Once both shoulders are broken, a large critical spot will open on their chest. Using Supers or heavy weapons can help burn down the Tormentor quickly.
Encounter-by-Encounter Breakdown for Victory
Alright, duo, this is where your training and understanding of the core mechanics truly pay off. We're going to walk through the major encounters of Dual Destiny, applying those principles of Light/Dark alignment, symbol communication, and clock-puzzle solving to achieve victory.
Opening the Path: Initial Challenges
Your journey into the heart of Dual Destiny begins with immediate tests of your coordination.
The Refraction Doors
As you load into the mission, your Light Aligned and Darkness Aligned buffs will be active. The very first obstacle is a barrier controlled by two plates. The Darkness Aligned player must stand on the orange/dark plate (often on the left), and the Light Aligned player must stand on the white/light plate (often on the right). Both of you must be on your respective plates simultaneously to lower the barrier and open the way forward.
First Symbol Encounter (2 Symbols)
- Initiate the encounter by having each player stand on their respective Light and Dark plates, which will appear in the area. This action will trigger the first wave of enemies.
- Among these enemies will be specific minibosses aligned to Light and Dark. Each player must defeat their corresponding aligned miniboss. These minibosses will drop motes of Light or Darkness.
- Light Player Reads, Dark Player Shoots: The Light Aligned player, after collecting their motes, will see two distinct symbols appear on pedestals near their position. They must clearly call out these two symbols, in order, to their partner.
- The Darkness Aligned player, after collecting their own motes, will see a field of interactable cruxes, each marked with a symbol. They must locate and shoot the two symbols called out by the Light player, in the correct sequence.
Second Symbol Encounter (3 Symbols)
Successfully shooting the correct symbols will trigger a teleportation, moving your duo to a new, often larger, arena. The mechanic repeats, but with a twist. This time, the Darkness Aligned player will be responsible for collecting motes and reading a sequence of three symbols. The Light Aligned player will then be the one to locate and shoot these three symbols in the called-out order.
Third Symbol Encounter (4 Symbols)
Another successful symbol phase, another teleport to the final room for this sequence of challenges. Roles swap again – the Light Aligned player is back in the Reader role. They will collect motes and identify a sequence of four symbols. The Darkness Aligned player must then shoot these four symbols in the precise order.
Traversal and Intermediate Puzzles
Between the major named encounters, Dual Destiny intersperses sections that test your platforming skills, combat endurance, and continued attention to the Light/Dark mechanics.
First Jumping Puzzle
Following the initial set of symbol rooms, you'll be presented with a jumping puzzle. This will likely lead you to an area guarded by Taken Phalanxes, near another set of Light and Darkness plates. As before, step on your respective plates simultaneously to activate the platforms necessary to proceed through the next leg of the jumping section. Expect traps and harassing enemy fire during these platforming challenges.
The 9-Pillar Clock Puzzle (Intrusion Encounter)
This is the "Tormentor's Test" detailed comprehensively earlier. It's a major encounter in its own right, demanding the defeat of a Tormentor to gain the Harmonic Sundering buff, followed by coordinated callouts and shooting of three sets of three specific pillars.
Further Traversal and Combat Waves
After successfully navigating the 9-pillar clock, your journey continues with more platforming and combat. This often involves activating Light and Darkness plates to power gravity lifts, which will then propel you to new areas. This pattern of combat, plate activation, and traversal will repeat until you are launched into the final boss arena.
The Grand Finale: Defeating the Subjugator Dual Bosses
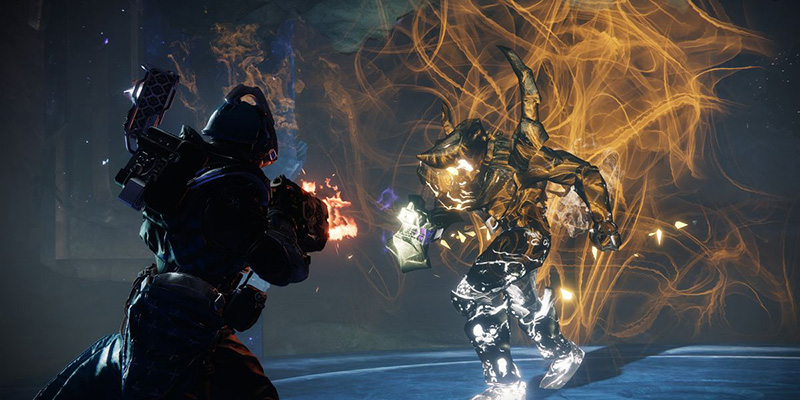
This is it, Guardians – the culmination of your efforts, a final battle that will demand mastery of every mechanic you've encountered thus far. You will face two formidable Subjugator bosses, Expector Selin and Inspector Yemiq. To begin this ultimate test, both players must stand on their designated Light and Dark platforms in the arena.
Phase 1: Expector Selin (The First Subjugator)
- Initial Damage Phase: Focus your fire on Expector Selin. Initially, only one Subjugator will be active and damageable at a time. Pour in damage until Selin becomes immune, often retreating to a nearby Darkness obelisk and enveloping itself in a protective shield.
- The Wizard Hunt: Upon Selin becoming immune, two powerful Servile Wizards will spawn – one aligned with Light, the other with Darkness. Each player must defeat the Wizard that matches their own elemental alignment.
- Symbol Callout (Light Player Reads): With both Wizards defeated, a set of three symbols will appear, usually arranged vertically, in front of or above the obelisk where Selin is shielded. The Light Aligned player will see these three symbols clearly and must call them out from TOP to BOTTOM. The Darkness Aligned player must locate and shoot the corresponding splinters in the exact order.
- Damage Selin Again: Correctly shooting the symbols will dispel Selin's shield, making the boss vulnerable once more. Unleash your damage until Selin either retreats again or reaches another health threshold.
Phase 2: Inspector Yemiq Joins the Fray
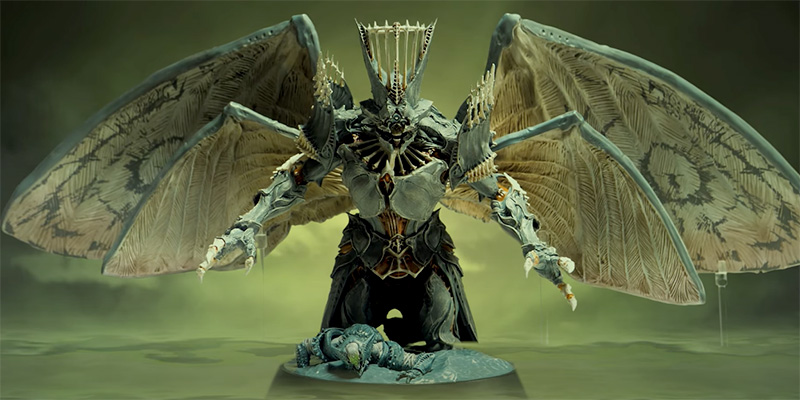
- Yemiq's Arrival: Once Expector Selin has taken sufficient damage, the second Subjugator, Inspector Yemiq, will enter the battle. Yemiq is often Strand-aspected and can use abilities that suspend you, making you an easy target, so be mobile.
- Focus Fire on Yemiq: Shift your attention to Inspector Yemiq. Damage this new threat until it, too, becomes immune and shields itself.
- Wizard Hunt (Round Two): Another pair of Light and Dark aligned Servile Wizards will spawn. Dispatch them according to your alignments.
- Symbol Callout (Dark Player Reads): The roles for symbol reading now reverse. This time, the Darkness Aligned player will see the three vertical symbols near Yemiq's shield and must call these out from TOP to BOTTOM. The Light Aligned player will then shoot the corresponding symbols in the correct order.
- Damage Yemiq Again: With the symbols correctly activated, Yemiq's shield will drop. Inflict damage until Yemiq also reaches a low health threshold or becomes immune again.
Phase 3: The Final High-Pressure 12-Pillar Clock Puzzle
This is arguably the most intense and demanding part of the entire mission, requiring flawless, rapid-fire communication and execution.
Rapid-Fire Callouts Strategy
- Pattern Recognition: Each player's clock will display a pattern of FOUR connected, lit, or active pillars. These patterns will change very rapidly, often every few seconds.
- The Objective: For each fleeting pattern that appears, your duo must identify the ONE SINGLE pillar that is lit/tethered on BOTH players' clocks at the exact same time.
- Optimal Communication: Player A (Full Caller) immediately calls out all four numbers they see lit on their clock. Player B (Match Identifier) simultaneously looks at their clock and quickly identifies the single matching number.
- The Coordinated Shot: Once the single shared lit pillar is identified, BOTH players must shoot that one specific pillar on their respective clocks before the pattern changes again.
- Repeat Three Times: This entire process must be performed successfully three times to disable the bosses' final immunity shields.
| Phase | Player A (Full Caller) | Player B (Match Identifier) | Joint Action |
|---|---|---|---|
| New Pattern (Cycle 1) | "Clock up! My four are: 3, 6, 9, 12!" | "Match is 9!" | Both shoot pillar 9 |
| New Pattern (Cycle 2) | "Next set! I've got 1, 4, 7, 10!" | "Match is 4!" | Both shoot pillar 4 |
| New Pattern (Cycle 3) | "Last one! My four: 2, 5, 8, 11!" | "Match is 11!" | Both shoot pillar 11 |
| No Match Found | "My four: 1, 5, 7, 12!" | "No match! Next cycle!" | DO NOT SHOOT, wait for next pattern |
Phase 4: The Final Burn
Once the 12-pillar clock puzzle has been successfully completed three times, the immunity shields on both Expector Selin and Inspector Yemiq will finally drop, leaving them vulnerable with their remaining health (approximately their final 30%). This is your chance! Unleash all remaining Supers and heavy ammo to burn down both Subjugators. Be mindful of any remaining ads or Ogres that may spawn to harass you during this final DPS phase. Defeating both bosses will complete the encounter and the mission!
Victory and Beyond: Claiming Your Rewards
You've done it, Guardians! The Subjugators lie defeated, their reign of terror in this chamber ended by your flawless teamwork. Now, it's time to claim the spoils of your hard-fought victory and understand how to further enhance the power of your new Exotic Class Item.
Securing Your Exotic Class Item
With the bosses vanquished, a new pathway will open, guiding you to the final reward chamber. Here, you'll typically see platforms and the shimmering promise of your Exotic loot.
The "Prepare for Battle" vs. "Choose Peace" Decision
As both you and your partner stand on your final designated platforms, you'll find yourselves briefly encased in shield cages. Before you can claim your reward, you'll be presented with a unique choice: "Prepare for Battle" or "Choose Peace."
- If you both "Prepare for Battle": This will initiate a friendly 1v1 Player-versus-Player duel between you and your teammate. The outcome has no bearing on who receives the Exotic Class Item. Both players will still be rewarded.
- If you both "Choose Peace": Opting for peace will result in both players perishing briefly, after which you'll be able to proceed to claim your rewards.
Guaranteed Drop (First-Time Completion)
Successfully completing the Dual Destiny mission for the very first time on a character guarantees the drop of an Exotic Class Item specific to that character's class:
These Exotic Class Items possess two distinct perk columns and can roll with a variety of powerful perks, many of which are reworked versions of effects from other existing Exotic armor pieces.
Understanding Exotic Class Item Perks & Attunement
These new Exotic Class Items are unlike any others in Destiny 2. They possess two distinct perk columns, and these columns can roll with a variety of powerful perks, many of which are reworked versions of effects from other existing Exotic armor pieces. This allows for unique and potent build-crafting possibilities.
The Attunement System – Focusing Your Farm
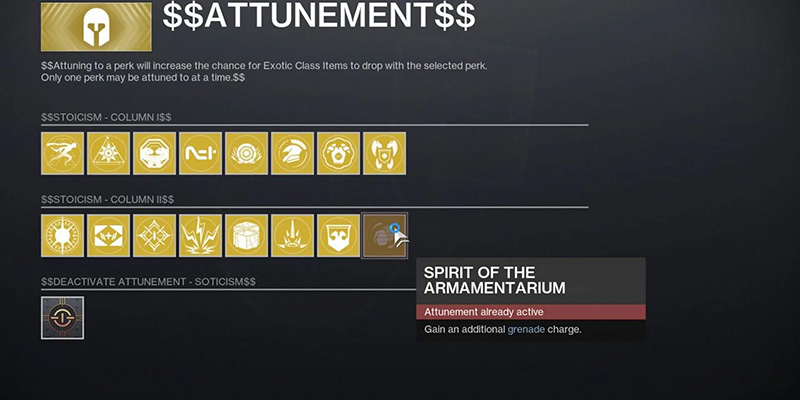
Once you have successfully completed Dual Destiny for the first time and obtained your initial Exotic Class Item, a new feature called "Attunement" becomes available. You can access this by interacting with your Ghost while in the Pale Heart destination.
The Attunement system allows you to select one specific perk from either of the two available columns that you are particularly interested in obtaining on future drops of that Exotic Class Item. This is an incredibly valuable tool for targeted farming. By attuning to a desired perk, you significantly increase the probability of that perk appearing on subsequent drops, reportedly shifting the odds from roughly 1-in-8 to over 50%.
Farming for Perfection: Strategies for More Rolls
Congratulations on securing your first Exotic Class Item! However, for many Guardians, this is just the beginning. The true endgame is the hunt for that perfect roll, with two synergistic perks that elevate your Prismatic build to its maximum potential.
Primary Farming Methods
- Repeat Dual Destiny Runs: The most direct and guaranteed way to obtain one Exotic Class Item drop per completion is to run the Dual Destiny mission again. An efficient and experienced duo can typically clear the mission in approximately 25 to 30 minutes.
- Pale Heart Chests: After your initial clear, Exotic Class Items gain a small chance to drop from any chest you open within the Pale Heart destination. This includes Overthrow event chests and regional chests hidden throughout the landscape. The drop chance is estimated around 2%, roughly one item for every 40 to 50 chests opened.
- Xur Inventory: Keep an eye on Xur's inventory when he appears each weekend. After you've completed Dual Destiny at least once, he may offer Exotic Class Items for purchase. Your Ghost's Attunement focus will also apply to items potentially purchased from Xur.
Optimized Chest Farming Strategy
One popular method for farming Pale Heart chests involves focusing on The Landing zone. Upon spawning into The Landing, wait for a distinct white flash and screen-shake effect; this often indicates that regional chests have respawned in the area. Equip a Ghost mod like Wombo Detector (which highlights nearby chests and resources) and follow an efficient route to collect as many chests as possible. Using a Skimmer, a sword with Eager Edge for enhanced movement, and the Strand Grapple ability can significantly speed up your collection efforts.
Pro-Tips for Flawless Teamwork & Execution
Dual Destiny will push your synergy and communication to their limits like few other activities in Destiny 2. Becoming a seamless, unbreakable, and well-oiled machine is the ultimate goal. Here's how your duo can elevate its game.
LFG Best Practices & Etiquette
If you don't have a regular partner for this challenging mission, Looking For Group (LFG) platforms are your gateway to finding one. However, the world of LFG has its own set of unwritten rules and expectations, especially for a mission as demanding as Dual Destiny.
Clarity is King in Your Post or Search
- "KWTD" (Know What To Do): Use this tag if you are experienced with the mission and expect your partner to be equally knowledgeable. Conversely, do not join a post marked "KWTD" if you are unfamiliar with the mechanics.
- "Teaching Run," "Learning," or "Looking for Sherpa/Guide": If you are new to Dual Destiny and need guidance, or if you are an experienced player willing to teach someone, use these tags. This sets clear expectations from the outset.
- Microphone Usage: For a mission as communication-intensive as Dual Destiny, using a microphone is highly recommended, if not essential, particularly for a first clear or if you're still learning.
The Pre-Mission Huddle
Before launching into Dual Destiny with an LFG partner, take a few minutes to chat. Confirm your Light/Dark subclass setup, quickly review your preferred symbol callouts, and briefly touch upon the general strategy for major encounters like the clock puzzles. A little preparation upfront can save a lot of frustration and wipes mid-mission.
Advanced Communication & Role Strategies
Beyond the basic callouts for symbols and plates, elite duos develop a deeper, almost intuitive rhythm. This comes from practice, shared understanding, and proactive communication.
Efficient and Precise Callouts
- Symbols: Use your pre-agreed lexicon. Keep callouts concise and clear. For example: "Pyramid, Snake, Witness." During the final boss's symbol phase, specify the order clearly: "Top is Pyramid, middle is Snake, bottom is Witness."
- Clock Puzzles: For the 9-pillar clock, a clear call would be: "My unconnected are 1, 5, and 7." For the high-pressure 12-pillar clock, use assigned roles: Player A: "My four lit are 2, 5, 8, 11!" followed by Player B: "Match is 8!"
Buff Management & Awareness
- Harmonic Sundering: As soon as the Tormentor falls, clearly communicate who received the killing blow and thus the buff. "I've got Sundering!" or "You have Sundering!"
- Light/Dark Alignment: Maintain constant awareness of your own and your partner's alignment. Quick confirmations like "I'm Light, you're Dark, right?" can be useful before plate mechanics.
Positioning and Movement
- Symbol Rooms: Typically, the Reader will position themselves on an elevated platform with a clear view of symbol displays, while the Shooter operates in the main arena.
- Clock Puzzles: Each player must take up position on their designated side of the room, facing their respective clock face.
- General Combat: Maintain enough proximity for quick revives if needed, but ensure enough separation to avoid both players being caught in the same AoE attack.
Common Pitfalls & How to Sidestep Them
Even the most skilled and communicative duos can encounter stumbling blocks in Dual Destiny. Forewarned is forearmed, Guardians. Here are some common traps and how to navigate or avoid them:
- Establish clear symbol callouts before starting
- Practice patience during complex mechanics
- Communicate buff status constantly
- Use strategic patience on final clock puzzle
- Rushing Tormentor kills without coordinating buff recipient
- Shooting wrong symbols due to unclear callouts
- Panicking on 12-pillar clock and shooting incorrectly
- Losing Light/Dark alignment buffs during encounters
Troubleshooting Common Issues
- Wizard Spawn Bugs: If Secret-Keeper Wizards don't appear after Overthrow completion, try re-running the Overthrow in that zone or completing all three zones again.
- Symbol Visibility Issues: If the Shooter cannot find a called symbol, ensure all prerequisite motes for that wave have been collected by both players.
- Buff Loss: If a player loses their Light/Dark alignment buff, the first troubleshooting step is for the affected player to die and respawn, which often restores the buff.
- Timer Management: If running low on time during the final encounter, remember that killing the specific Lucent Hive Lightbearer miniboss will add three precious minutes to your clock.
By internalizing these strategies, maintaining clear and constant communication, and approaching each challenge with focus and determination, your dynamic duo will not only conquer Dual Destiny but will also forge an even stronger bond as Guardians. The path to your Exotic Class Item awaits – now go forth and claim your well-deserved rewards!