
Pre-Flight Briefing
Mission Overview
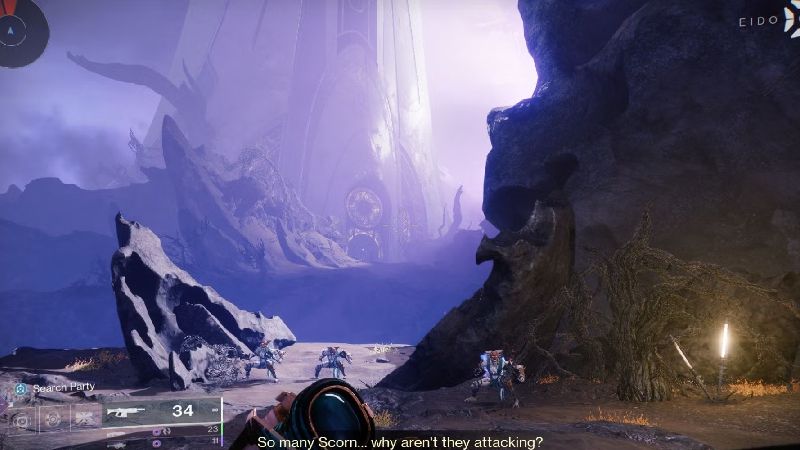
Guardians are once again called to the lawless expanse of the Tangled Shore, a familiar yet treacherous region not extensively patrolled since the Forsaken era. The primary target is the Fanatic himself, Fikrul, and his resurgent Scorn forces. This operation, codenamed "Kell's Fall," serves as the concluding chapter of the ongoing episodic narrative (Act III) and is the sole acquisition source for the new Slayer's Fang Exotic Shotgun.
This mission transcends a simple loot acquisition; it is a critical strike against a significant and persistent threat. Fikrul's Scorn have entrenched themselves within an abandoned watchtower on the fringes of the Shore, and Guardians are tasked with their decisive removal. The return to the Tangled Shore carries substantial narrative weight. Fikrul's enduring presence is intrinsically linked to the Scorn's nature as reanimated, dark ether-twisted Fallen, positioning this engagement as a confrontation with an almost undying adversary in a setting deeply connected to his origins.
Threat Levels: Normal vs. Expert Difficulty
Kell's Fall presents two distinct operational difficulties: Standard (Normal) and Expert. The Standard variant establishes a baseline challenge, with a recommended Power Level of 1955 or 1995 and features elemental surges (Void and Strand) along with a Void threat. The Expert difficulty significantly escalates the engagement, raising the Power Level to 2015 and imposing a mandatory -15 Power delta.
| Feature | Normal Difficulty | Expert Difficulty |
|---|---|---|
| Power Level | 1955 / 1995 | 2015 |
| Power Delta | N/A | -15 |
| Surges | Void, Strand | Void, Arc |
| Champions | None | Overload, Unstoppable |
| Shields | Standard | Solar, Void |
| Additional Modifier | None | "Scorched Earth" |
Essential Enemy Intel
A thorough understanding of enemy capabilities is crucial for success.
Scorn Forces
The ranks of the Scorn will include familiar threats. Ravagers will charge with their burning flails, their critical point being the flail itself. Suicidal Screebs will attempt to detonate in close proximity. Stalkers will provide covering fire with crossbows, and Lurkers will advance behind small shields.
- Chieftains: Deploy totems that grant invulnerability or buffs. Destroy totems first!
- Abominations: Heavy damage dealers with cranial weak points. Some require Revenant Empowerment to damage.
- Raiders: Cloaking snipers that relocate as smoke wisps. Listen for audio cues.
Dread Forces
The Witness's formidable Dread combatants are also present within Fikrul's fortress, adding a layer of tactical complexity to encounters.
- Grims: Swarming flying creatures that dampen ability regeneration
- Husks: Must be killed via glowing core to prevent Geis spawn
- Attendants (Stasis): Can slow and freeze Guardians with ice attacks
- Weavers (Strand): Pull Guardians out of position with Strand abilities
- Tormentors: Devastating scythe-wielding units with grab attacks
| Enemy Type | Faction | Key Threat | Counter-Tactic |
|---|---|---|---|
| Scorn Chieftain | Scorn | Invulnerability totems; Void shields | Destroy totem first; use Void for shields |
| Abomination | Scorn | High damage; some immune initially | Headshots; requires Revenant Empowerment |
| Grim | Dread | Swarming; ability dampening | AoE attacks; prioritize for uptime |
| Attendant (Stasis) | Dread | Slow/freeze fields | Prioritize; use cover; burst damage |
| Tormentor | Dread | Heavy melee; suppression | Keep distance; focus weak spots |
Armory Check
Recommended Loadouts
General principles for loadout selection in Kell's Fall revolve around adaptability and endurance. Survivability is paramount, particularly for solo operatives and teams tackling Expert difficulty. Builds incorporating healing mechanisms (such as the Devour Void buff or Solar Restoration effects) or damage resistance (Strand's Woven Mail, Stasis-derived Frost Armor) are highly advantageous.
Primary Weapons
Projectiles track targets and trigger poison explosions on kill or sustained damage, making it perfect for crowd control.
- Osteo Striga (Exotic SMG): Excels at add clear due to its toxic, homing projectiles that trigger area-of-effect poison explosions on kill or sustained weakspot hits. Synergizes well with Necrotic Grip Warlock gauntlets.
- Khvostov 7G-0X (Exotic Auto Rifle): Reliable and versatile, with every seventh shot dealing increased damage and ricocheting to nearby targets.
- Quicksilver Storm (Exotic Auto Rifle): Offers versatility with auto-fire mode launching micro-missiles and alternate grenade launcher mode.
- Sunshot (Exotic Hand Cannon): Premier choice for AoE add clear thanks to explosive rounds that trigger chain reactions.
Special Weapons
- Forbearance (Grenade Launcher): Top-tier for add clear, especially with Ambitious Assassin and Chain Reaction perks.
- Rocket-Assisted Frame Sidearms: Deliver impressive burst damage for high-priority targets and Champions.
- Fusion Rifles: Stasis options like Riptide with Chill Clip for Champion control; Cartesian Coordinate with Vorpal for damage.
- Trace Rifles: Acasia's Dejection (Solar) with Target Lock and Incandescent; The Navigator (Strand) for Woven Mail generation.
Heavy Weapons
- Rocket Launchers: Cold Comfort or Hezen Vengeance with Envious Assassin and Bait and Switch; Gjallarhorn for team buff support.
- Linear Fusion Rifles: Queenbreaker with catalyst; Cataclysmic with Fourth Time's the Charm and Bait and Switch; Arbalest for anti-barrier utility.
- Machine Guns: Commemoration with Reconstruction and Killing Tally for sustained add clear.
- Swords: The Lament or well-rolled legendaries for burst DPS during safe positioning opportunities.
Optimal Subclasses & Builds
Prismatic: Combines Devour for survivability and Stasis turrets (Bleak Watchers) for crowd control. Getaway Artist enhances Arc Soul uptime.
Solar (Well of Radiance): Unparalleled survivability and damage buff for fireteams during DPS phases.
Void (Devour): Excellent self-sustain for solo play and general survivability.
Prismatic: Relativism class item with embedded exotic perks creates loops of Woven Mail, Frost Armor, and Devour for exceptional resilience.
Void (Nightstalker): Invisibility is invaluable for revives, repositioning, and safely executing mechanics.
Solar (Gunslinger): High burst damage with Blade Barrage for boss encounters.
Prismatic: Synthoceps or Inmost Light-enhanced class item with Stasis Super enables ability spam and healing through melee.
Solar (Sunbreaker): "Bonk Hammer" build with Throwing Hammer provides excellent survivability and melee damage.
Void (Sentinel): Offensive Bulwark and Bastion provide on-demand overshields and increased damage.
Essential Mods
Mission Walkthrough
Approach & Initial Contact
Guardians will deploy on the periphery of a dilapidated Dreaming City watchtower, now claimed by the Scorn, situated within the Tangled Shore. The initial approach is uncontested by enemy fire, though Scorn forces can be seen observing from a distance. The path forward involves navigating ledges to the right to reach the watchtower's main courtyard.
Navigating the Labyrinth
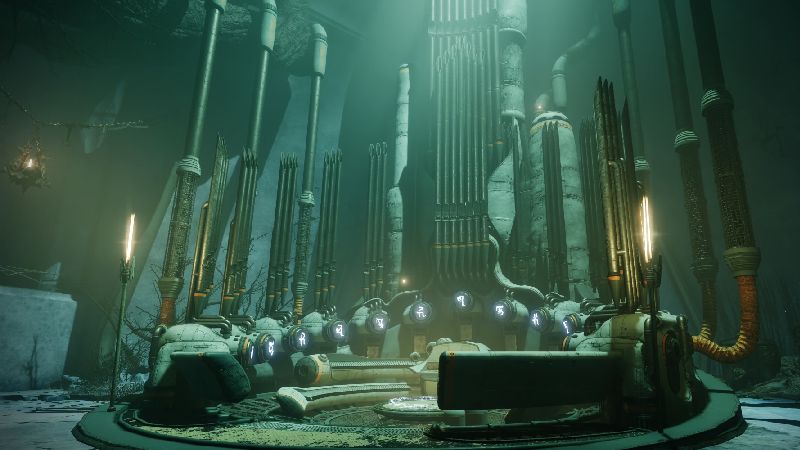
Upon entering the fortress, Guardians will discover a chamber dominated by a large pipe organ. While this organ plays a role in uncovering mission secrets later, it can be disregarded during an initial playthrough focused on mission completion.
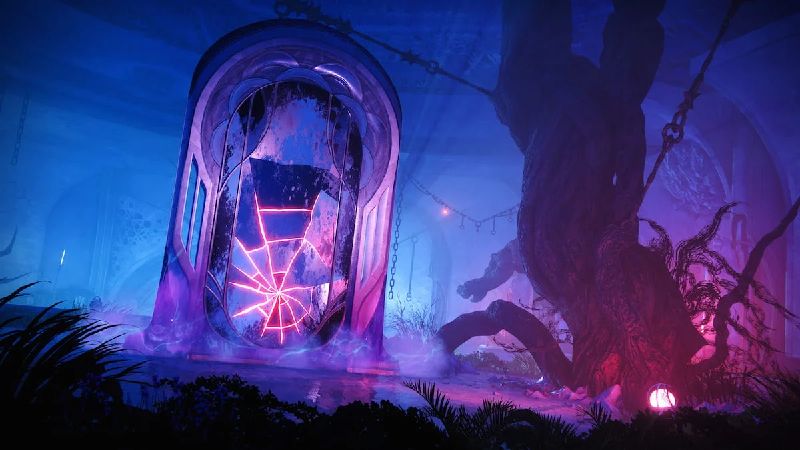
- Look for destructible walls with a telltale glow
- Shoot cracked mirrors (with red fissures) to enter the Mirror Realm
- Follow lit braziers as navigational aids
- Find another mirror to exit back to the material realm
Kaniks, the Mad Bomber
This encounter takes place in the Fighting Pits and introduces the crucial Revenant Empowerment mechanic.
Phase 1: Gaining Empowerment
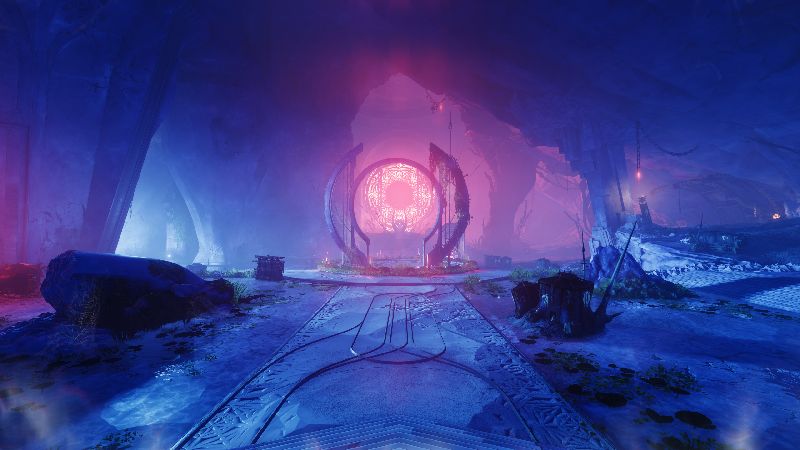
Upon initiating the encounter, waves of Scorn adds will spawn. A mirror situated near the center of the room will visibly crack; Guardians must shoot this mirror and pass through it to enter the Mirror Realm.
- Enter Mirror Realm through cracked mirror
- Defeat Revenant Essentia (Dread Weaver variants)
- Collect 10 stacks of Revenant Essence from their motes
- Return to material realm with Revenant Empowerment buff
- Use buff to damage previously immune Abominations
Phase 2: Defeating Kaniks
Once both Abominations are neutralized, Kaniks will spawn in the center arena with additional Scorn reinforcements. This is primarily a direct DPS check - employ your most potent Heavy weapons, Super abilities, and grenades to defeat Kaniks swiftly.
The Mindbender's Twisted Game
This encounter significantly escalates difficulty by introducing hard timers to Mirror Realm segments and testing both combat prowess and navigation skills under pressure.
Phase 1: Mirror Realm Timer Challenge
- Enter the Mirror Realm and damage the Mindbender to 2/3 health
- Locate the hole in the wall on the left side of the sanctum
- Clear defending Thrall and find one of two Brazier locations
- Light the Brazier, then backtrack halfway and turn left into small cavern
- Clear Hive Wizards and Acolytes, exit through mirror at cavern end
Phase 2: Material Plane Navigation
Light two nearby braziers to open the door. Return to the exit mirror but DON'T re-enter immediately. Look above the mirror for a ledge behind it - jumping to this ledge initiates the second damage phase.
Phase 3: Final Push
Damage the Mindbender again until retreat, then proceed through the exit door to another mirror. This transports you back to the initial sanctum with another active timer. Defeat the Mindbender before this timer expires while managing a large wave of adds including an Ogre.
The Trickster's Encore
Following the Mindbender's defeat, ascend the spiral staircase for a final confrontation with Araskes, the Trickster. This engagement largely mirrors her initial appearance with alternating vulnerability and immunity phases.
Final Confrontation: Vanquishing Fikrul
The ultimate battle unfolds within a vast, ominous throne room and serves as a comprehensive test of all mechanics learned throughout the mission.
Core Encounter Loop
- Clear initial Scorn waves, prioritize Void-shielded Chieftains and their totems
- When Fikrul charges his staff, immediately enter Mirror Portal to avoid wipe
- In Mirror Realm, defeat Revenant Essentia to collect 10 Revenant Empowerment stacks
- Exit Mirror Realm and focus all firepower on Fikrul to break his shield
- Continue DPS phase with Supers, Heavy weapons, and grenades
- Repeat cycle as needed while managing continuous add spawns
Solo Operative Strategies
Solo Philosophy: Survivability First
Successfully navigating Kell's Fall as a solo operative hinges on unwavering survivability. Any build intended for solo endgame content must incorporate consistent methods for health regeneration or provide substantial damage resistance. A defensive playstyle, judicious use of cover, and meticulous control over engagement pacing are crucial for lone Guardians.
Recommended Solo Builds
Prismatic Warlock (Top Tier)
- Exotic: Getaway Artist for enhanced Arc Soul
- Stats: Tier 10 Recovery and Discipline
- Abilities: Phoenix Dive, Arcane Needle, Vortex Grenade, Nova Bomb
- Aspects: Bleak Watchers (crowd control), Feed the Void (Devour healing)
- Strategy: Defensive positioning with Stasis turrets and constant Devour healing
Prismatic Hunter (High Tier)
- Exotic: Relativism class item with embedded exotic perks
- Key Weapon: Demolitionist Special Grenade Launcher
- Loop: Creates simultaneous Frost Armor, Woven Mail, and Devour for extreme tankiness
- Utility: High ability uptime fuels frequent Transcendence
Key Solo Adjustments
- Complete control over engagement pacing
- No coordination required for mechanics
- Can exploit safer positions
- Build focused entirely on personal survivability
- All mechanics must be executed alone
- No teammate backup for revives
- Concentrated enemy aggro
- Extended exposure during mote collection
Coordinated Fireteam Tactics
Role Delegation
Assigning specific roles can significantly streamline encounters and enhance overall efficiency in Kell's Fall.
Optimal Team Composition
Add Clear focuses on waves of enemies, Mechanics Runner handles Revenant Empowerment and Champions, DPS maximizes boss damage with support abilities.
Critical Communication Callouts
- "FIKRUL CHARGING STAFF! PORTAL NOW!" - Immediate wipe mechanic warning
- "Timer at one minute!" - Mindbender Mirror Realm timer
- "I'm empowered, taking left Abomination!" - Coordination during Mad Bomber
- "Overload Champion on me!" - Champion assistance needed
- "Chieftain totem active, right side!" - Priority target callout
Specific Team Strategies
- Mad Bomber: One player kites Kaniks while others clear adds, then converge for DPS
- Mindbender: Designate primary "mirror runner" for navigation while others provide cover
- Fikrul: Spread out in Mirror Realm for Champion management, converge with buffs for coordinated DPS
The Spoils of Victory
Slayer's Fang Exotic Shotgun

Fires ricocheting projectiles. Kills grant truesight, allowing you to see enemies through walls. Some Guardians report fusion rifle-like range and multi-kill potential.
Community Reception
Feedback from the Guardian community as of January 2025 suggests a mixed reception. While initially described as a "powerhouse," some players find it "lacklustre" compared to other Exotic options like Buried Bloodline or Tractor Cannon. The truesight utility on a close-range weapon has been questioned, though some report surprisingly effective long-range performance similar to a "max range, zero charge time fusion rifle."
Hidden Secrets
Pipe Organ Codes
The mysterious pipe organ in the fortress interior can be activated with specific codes discovered throughout Kell's Fall. Successfully entering valid codes spawns bonus loot chests or upgrades.
Hidden Anchors
Collecting hidden anchors throughout the mission likely unlocks catalyst upgrades for Slayer's Fang or other related rewards.
| Location | Anchor | Description |
|---|---|---|
| Mirror Gallery | 1 | Behind first Mirror Dimension entry point |
| Mirror Gallery | 2 | Right side entering Mindbender room |
| Mirror Gallery | 3 | Corner near Hive Wizard area |
| Throne Room | 1 | In front of Fikrul's throne |
| Throne Room | 2 | Right corner of central mirror, high up |
| Throne Room | 3 | Small room opposite exit mirror |
Mission Debrief
Key Takeaways
The successful completion of Kell's Fall hinges on several critical factors:
- Thorough understanding and execution of Mirror Realm mechanics and Revenant Empowerment acquisition
- Expert difficulty demands Champion-capable loadouts and emphasis on survivability
- Effective add management, particularly Scorn Chieftains and Dread Grims, is as crucial as boss DPS
- The Slayer's Fang Exotic Shotgun requires experimentation to unlock its full potential
- Hidden secrets provide additional rewards and enhance mission longevity through repeat runs
"The strongest steel is forged in the hottest flames. Today, you have proven yourselves tempered by fire and shadow alike."
Guardians who have navigated the treacherous depths of Fikrul's fortress and faced down one of the Scorn's most infamous leaders have achieved a significant feat. Kell's Fall stands as a true testament to a Guardian's skill, adaptability, strategic thinking, and raw firepower. Whether accomplished as a lone operative braving the darkness or as part of a coordinated fireteam, this victory is one to be savored. The Slayer's Fang is now a trophy of that success. The Last City and its people are safer thanks to these efforts. Eyes up, Guardians!