
Welcome, Guardian, to the Trials of Osiris. For many, these words evoke a mix of reverence, excitement, and perhaps a healthy dose of apprehension. Trials of Osiris stands as Destiny 2's pinnacle 3v3 player-versus-player (PvP) activity, a crucible where skill, strategy, and teamwork are tested under the most intense pressure. Available only on weekends, typically running from the daily reset on Friday until the weekly reset on Tuesday, Trials represents the ultimate competitive challenge within the Destiny universe.
Its significance stretches back to the original Destiny's House of Wolves expansion. Lore suggests its origins were tied to the enigmatic Warlock Osiris and his disciples, specifically Brother Vance, who used the guise of a competition to study mysterious energy signatures emanating from Guardian deaths on Mercury. While its initial purpose may have been rooted in arcane research, its modern incarnation, presented by the stoic Saint-14, serves as a high-stakes training ground, designed to hone Guardians for future conflicts, much like the broader Crucible or the Iron Banner.
Trials is infamous for its difficulty and the prestige associated with success. The ultimate achievement is going "Flawless" – securing seven consecutive match victories without a single loss. This grants passage to the coveted Lighthouse, a simulated sanctuary on Mercury where exclusive, high-tier rewards await. The journey demands more than just sharp aim; it requires intricate strategy, seamless teamwork, adaptability under fire, and unwavering mental fortitude.
The history of Trials reflects an ongoing effort by Bungie to balance its identity. From its high barrier to entry in Destiny 1, through various iterations and accessibility adjustments in Destiny 2, to the significant rework introduced in Episode: Heresy, the mode constantly evolves. This evolution highlights a fundamental tension: maintaining its status as a true pinnacle challenge while making it rewarding and engaging enough for a broader player base to participate. This guide aims to navigate that balance, providing the knowledge needed for players of all levels to step into the arena and improve. Trials will test you, Guardian, sometimes pushing you to your limits. But with dedication, the right strategies, and a willingness to learn, improvement is attainable for everyone.
What This Guide Offers: From Your First Match to the Lighthouse Steps
This guide serves as your comprehensive manual for navigating the Trials of Osiris in the post-Final Shape / Episode: Heresy era of Destiny 2. Whether you're a nervous newcomer taking your first steps into the arena, an intermediate player looking to improve consistency, or a seasoned veteran striving for regular visits to the Lighthouse, this resource is designed for you.
We will dissect every facet of the Trials experience, including:
- Fundamentals: The core rules, objectives, and entry requirements.
- Passage System: A detailed breakdown of the current Trials, Lighthouse, and Flawless passages and their strategic implications.
- Meta Analysis: An in-depth look at the prevailing weapon archetypes, specific god-roll recommendations for Legendary and Exotic gear, and optimal armor mod setups.
- Class Optimization: Tailored builds for Titans, Hunters, and Warlocks, covering top subclasses (including Prismatic), Aspects, Fragments, abilities, and Exotic armor choices.
- Map Mastery: Strategies for navigating Trials maps, including key positioning and essential callouts for effective team communication (using representative examples from the rotation).
- Advanced Tactics: Techniques for superior movement, positioning, and team coordination.
- Team Synergy: Recommendations for team composition, role definition, and communication protocols.
- The Flawless Pursuit: Specific strategies for tackling the high-pressure final matches of a Flawless run.
- Rewards Structure: A complete overview of all potential loot, from Saint-14's reputation track and Trials Engrams to Adept weapons and the exclusive treasures of the Lighthouse.
- Solo Queue Survival: Dedicated advice for players braving the Trials playlist alone.
- The Mental Game: Strategies for maintaining focus, managing tilt, and cultivating a resilient mindset.
- Tips from the Trenches: Practical advice gleaned from experienced players and streamers, including dedicated "Clutch Tips" sections for turning the tide in disadvantageous situations.
- Progressive Improvement Plan: A roadmap to guide your journey from novice to expert.
Complex tactics will be broken down with clear explanations and illustrative gameplay scenarios where appropriate. The goal is to provide actionable strategies that empower you to elevate your game, acknowledge the mode's inherent difficulty, and ultimately, find success within the Trials of Osiris.
Entering the Arena: Trials Basics & Requirements
The Rules of Engagement: Dominion Mode Breakdown
Trials of Osiris utilizes a specific 3v3 Elimination variant called Dominion. Understanding its unique ruleset is the first step towards success.
- Objective: The primary goal each round is to eliminate all three members of the opposing team. However, if the round timer progresses, a secondary objective comes into play: capturing a central Dominion flag/zone. Capturing this zone or eliminating the remaining opponents secures the round win. This overtime objective prevents stalemates and forces teams to engage rather than passively waiting out the clock.
- Match Structure: A match is won by the first team to secure five round wins. Each round has a maximum duration of 90 seconds.
- Dominion Zone Timing: The central capture zone becomes active 40 seconds into the round. Note: Earlier versions had a 30-second timer, but recent updates adjusted this. Once active, capturing the zone takes 20 seconds of uncontested control.
- Revive Mechanics: Guardians have only one life per round. Downed teammates do not automatically respawn but can be revived by an ally interacting with their Ghost orb. Crucially, the revive timer extends each time a specific Guardian is revived within a match. This makes later revives riskier and emphasizes the importance of staying alive and strategically controlling revive opportunities.
- Ammo Economy: Unlike standard Crucible modes, Special and Heavy ammo reserves are NOT carried over between rounds. Everyone starts each round fresh. Furthermore, revived players lose all of their Special ammo. This prevents snowballing based on special weapon dominance and places a premium on ammo management each round. A neutral Special ammo crate spawns 30 seconds into the round. Heavy ammo typically spawns only once per match, often after one team reaches three round wins.
Active Modifiers: Several modifiers distinguish Trials gameplay:
- Notswap: Swapping Exotic armor pieces mid-match will reset all ability and Super energy. Swapping weapon ammo types (e.g., Kinetic to Strand) also resets ability energy. This discourages mid-match loadout changes to counter specific opponents.
- First-Person Emotes: Emotes are locked to the first-person perspective, preventing their use for tactical third-person peeking around corners.
- Sword Restrictions: Swords cannot be equipped unless the player currently possesses Heavy ammo for them.
- Announcer: The stoic Saint-14 replaces Lord Shaxx as the match announcer.
Map Consistency: Trials takes place on a single, predetermined map for the entire weekend. This map rotates each week Trials is active. This consistency encourages deep map study and strategy development for that specific environment.
Power Level Advantage: Unlike most standard Crucible playlists, Power Level advantages are enabled in Trials. This means higher Power Level players deal slightly more damage and take slightly less damage from lower Power Level opponents. However, bonus Power from the seasonal Artifact is disabled. Being significantly under-leveled (e.g., 10-20 levels below the cap) can create a noticeable disadvantage.
The unique combination of Elimination rules, the Dominion objective, limited lives, extended revive timers, and round-based ammo resets fosters a highly tactical and deliberate pace. Success hinges on careful resource management – balancing aggression with survival, coordinating pushes, controlling sightlines, and making decisive plays with limited lives and ammunition.

Gaining Access: Expansion, Quest, and Power Level Needs
Before you can face the challenges of Trials, you must meet specific prerequisites designed to ensure a baseline level of experience and gear.
- Own the Latest Expansion: Participation in Trials requires ownership of the most current major Destiny 2 expansion. As of this guide's writing, this is The Final Shape. This requirement links Trials to the current state of the game and its content ecosystem.
- Complete the "Trials Access" Quest: Visit Saint-14 in the Tower Hangar to pick up this introductory quest. The quest typically involves several steps designed to familiarize players with competitive PvP and ensure they meet basic progression milestones:
- Complete your placement matches in the Competitive PvP playlist (usually 7 matches).
- Achieve 50 eliminations in the Competitive PvP playlist.
- Reach the Power Level Soft Cap for the current Season (base Power Level, excluding Artifact bonus). This ensures you aren't significantly under-leveled.
- The final step usually requires playing one Trials match, winning one round, and getting one elimination within Trials, rewarding you with the Astral Horizon Shotgun upon completion.
- Purchase a Trials Passage: Once the access quest is complete, you must purchase a Trials Passage from Saint-14 each time you wish to enter the playlist for a new run. The different Passage types and their costs are detailed in Section III.
These requirements act as a soft gatekeeper. Requiring the latest expansion ensures players are engaged with current content. The Competitive PvP objectives provide a necessary primer in 3v3 dynamics, while the Power Level requirement prevents extreme gear disparity from ruining the experience. It signals that Trials is an endgame activity intended for players who have invested some time and effort into the game.
The Weekend Ritual: When Trials is Active
Trials of Osiris is a weekend-exclusive event. Mark your calendars for its typical schedule:
- Start Time: Friday at the daily reset time (1700 UTC).
- End Time: Tuesday at the weekly reset time (1700 UTC).
Note: Exact local times may shift slightly depending on Daylight Saving Time transitions.
Trials is generally unavailable during specific periods to avoid overlapping with other major events or the start of new content seasons:
- The first week of a new Destiny 2 Season (especially if it includes a Power Level cap increase).
- The week a new Raid is launched.
- Any week when the Iron Banner PvP event is active.
You can find the Trials of Osiris playlist node within the Crucible section of the Director when the event is live. All Trials-related interactions, including purchasing Passages, focusing Engrams, and managing reputation, occur with Saint-14, located in the Tower Hangar.
Your Passage to Victory (or Practice): Understanding the Card System (Post-Heresy)
The way Trials tracks your progress and determines your rewards underwent a significant overhaul with Episode: Heresy, simplifying the system while offering distinct paths based on player goals. Gone are the days of multiple boons and strict loss tracking forcing resets. Now, there are two primary Passages available for purchase from Saint-14, plus a third earned through achieving Flawless.
Decoding the Passages: Trials vs. Lighthouse vs. Flawless
Understanding the function and matchmaking rules associated with each Passage is crucial for setting expectations and choosing the right path for your weekend goals.
| Feature | Trials of Osiris Passage | Lighthouse Passage | Flawless Passage |
|---|---|---|---|
| Target Player | Rep/Reward Farmers, Casual/Newer Players | Lighthouse Seekers, Adept Hunters, Streak Chasers | Top-Tier Players, Adept/Cosmetic Farmers |
| Matchmaking | Weekly Performance (SBMM-like) | Open (CBMM) -> Weekly Performance (SBMM-like) post-7 wins | Weekly Performance (SBMM-like, vs Flawless pref.) |
| Lighthouse Access | No | Yes (after 7 total wins) | Yes (earned via 7-0 on Lighthouse Passage) |
| Key Benefits | Bonus Rep, Rewards on Loss, Easier Matches | Lighthouse Access, Streak-Based Rewards, Adept Chance | Highest Adept/Cosmetic Drop Chance, Flawless Tracker |
| How to Obtain | Purchase (1500 Glimmer) | Purchase (5000 Glimmer) | Achieve 7 Consecutive Wins on Lighthouse Passage |
| Resetting | Anytime | Anytime (resets wins, keeps weekly streak record) | Automatically on Loss |
- Trials of Osiris Passage:
- Target Player: Designed for newer PvP Guardians, players primarily focused on farming reputation and base rewards, or those seeking a less intense experience.
- Effect: Functions similarly to Iron Banner. It offers a substantial bonus to Trials Reputation gained per win (scaling from 75 to 150 based on your rank with Saint-14). Losses also grant significantly increased reputation (reportedly 10x more than before the Heresy changes). There's a chance to earn base Trials weapons and engrams from match completions (wins grant higher chances).
- Lighthouse Access: This Passage does not grant access to the Lighthouse, regardless of the number of wins achieved.
- Matchmaking: Utilizes Weekly Performance-Based Matchmaking (PBMM), which functions similarly to Skill-Based Matchmaking (SBMM) found in modes like Iron Banner or Competitive. This aims to create more balanced matches based on recent player performance.
- Cost: 1500 Glimmer.
- Lighthouse Passage:
- Target Player: Guardians aiming to reach the Lighthouse, earn Adept weapons, and chase high win-streak rewards.
- Effect: Grants access to the Lighthouse upon achieving 7 total match wins on the card. Importantly, losses do not prevent Lighthouse access once 7 wins are reached; they only impact your potential win streak for reward scaling. The quality and quantity of rewards from the Lighthouse chest, as well as bonus rewards from subsequent wins on a completed card, are determined by the longest consecutive win streak achieved on any Lighthouse Passage that specific week. You can continue playing on a 7-win "Completed Lighthouse Passage" to farm potential post-match rewards (including Adepts if conditions are met).
- Lighthouse Access: Required to enter the Lighthouse after 7 wins.
- Matchmaking:
- Before 7 Wins (Incomplete): Uses Open Matchmaking (Connection-Based Matchmaking - CBMM), prioritizing connection quality over skill. Expect a wider range of opponent skill levels.
- After 7 Wins (Completed): Switches to Weekly Performance-Based Matchmaking (PBMM/SBMM) if everyone in the fireteam is on a Completed Lighthouse, Flawless, or Trials Passage. If anyone is on an incomplete Lighthouse Passage, it reverts to Open Matchmaking (CBMM).
- Cost: 5000 Glimmer.
- Flawless Passage:
- How to Obtain: Automatically granted upon achieving 7 consecutive wins (a true 7-0 streak) on a Lighthouse Passage.
- Effect: This signifies a Flawless run for the week. It enables progress on the "Flawless Win Streak" stat tracker. Wins while on a Flawless Passage have an increased (reportedly 75%) chance of dropping Adept weapons post-match. It also grants the highest chances for earning exclusive cosmetic rewards post-match and folds the repeatable Lighthouse chest rewards into potential post-win drops.
- Lighthouse Access: Granted by the initial 7-0 run on the Lighthouse Passage.
- Matchmaking: Places the fireteam into Weekly Performance-Based Matchmaking (PBMM/SBMM), attempting to match against other Flawless teams. Matchmaking may revert to Open/CBMM if queue times become excessive.
- Resetting: A Flawless Passage cannot be manually reset. It automatically becomes flawed (and likely reverts to a Completed Lighthouse Passage state for matchmaking/rewards) after the first loss.
This dual-passage system clearly reflects Bungie's strategy: the Trials Passage offers a lower-stress, consistent reward loop akin to Iron Banner, encouraging broader participation. The Lighthouse Passage maintains the high-stakes pursuit of pinnacle rewards, but crucially decouples access to the Lighthouse from the absolute requirement of a Flawless run, making the iconic destination reachable for more players. Win streaks and true Flawless runs are still heavily incentivized with the best rewards, preserving the prestige.
Choosing Your Path: Strategic Passage Selection
With two distinct passages to purchase, your choice should align with your objectives for the Trials weekend.
- Goal: Farm Reputation, Engrams, Base Rewards: If your primary aim is to rank up with Saint-14, collect Trials Engrams for focusing, and acquire base versions of Trials weapons and armor, the Trials of Osiris Passage is generally the most efficient choice. The performance-based matchmaking should theoretically lead to more winnable games over time, and the significant reputation gains on both wins and losses accelerate your progress on Saint-14's reward track.
- Goal: Reach the Lighthouse, Earn Adept Weapons, Chase High-Streak Rewards: If your sights are set on the Lighthouse, Adept gear, and the exclusive cosmetics tied to win streaks, you must use the Lighthouse Passage. Remember, 7 total wins grant Lighthouse access, but the quality of the rewards hinges on your longest consecutive win streak achieved that week.
- Hybrid Strategy: Some players may opt to start their weekend on a Trials Passage to warm up, get a feel for the map and meta, and earn some initial reputation. Once comfortable and ready to push for higher rewards, they can switch to a Lighthouse Passage.
- Resetting the Lighthouse Passage: Since Lighthouse rewards scale with your highest weekly win streak, deciding whether to reset after a loss depends on your goal. If you lose early (e.g., first or second match) and are aiming for a 5+ or 7-win streak for top-tier cosmetics or the best Adept chances, resetting the passage to try for a clean streak might be worthwhile. However, if your main goal is simply to reach the Lighthouse for a chance at any Adept weapon (possible even with a 1-win streak), or to farm rewards on a completed card, there's less incentive to reset after every loss, as losses no longer prevent reaching the 7-win threshold for Lighthouse access.
Matchmaking Demystified: SBMM, Open, Weekly Performance Pools Explained
The matchmaking system in Trials is multifaceted, attempting to balance connection quality, player performance, fireteam composition, and passage state. Understanding which pool you're likely swimming in can help manage expectations.
- Trials Passage Pool: This uses Weekly Performance-Based Matchmaking (PBMM), similar to Skill-Based Matchmaking (SBMM). It tries to match you against opponents with a similar recent performance level, aiming for more balanced games. Lobby balancing is also typically active here.
- Lighthouse Passage Pool (Incomplete Card): Before reaching 7 wins, this passage uses Open Matchmaking, which prioritizes connection quality (CBMM) above all else. This can lead to matches with significant skill disparities, as connection is the primary factor. Be prepared for potentially very easy or very difficult opponents.
- Lighthouse Passage Pool (Completed Card, Non-Flawless): Once you've secured 7 wins but haven't gone Flawless, if everyone in your fireteam is also on a completed card (or a Trials/Flawless passage), matchmaking shifts back to Weekly Performance-Based (SBMM-like). This is intended to provide a more consistent challenge while farming post-Lighthouse rewards.
- Flawless Passage Pool: Achieving a 7-0 streak places you and your fireteam into a dedicated Weekly Performance-Based (SBMM-like) pool that attempts to prioritize matching against other Flawless players. To prevent excessively long queue times, the system may relax its parameters and pull from the broader Open/CBMM pool if necessary.
- Fireteam Matchmaking: The system incorporates logic to try and match fireteams of similar sizes (solos vs. solos/duos, trios vs. trios). However, this isn't foolproof, and solos can still encounter coordinated three-stacks, particularly in the Open Matchmaking pool of the Lighthouse Passage. There were plans to introduce loss forgiveness for solo players matched against duos in Heresy Act 2.
Ultimately, matchmaking in Trials remains complex. While the system aims for specific experiences in different pools, factors like player population, time of day, and pure randomness mean your mileage may vary, especially within the Open Matchmaking (CBMM) environment of the Lighthouse Passage grind.
Forging Your Arsenal: Meta Weapons & God Rolls
Success in Trials isn't just about skill; it's also about bringing the right tools for the job. The Destiny 2 meta is constantly shifting due to balance patches, new weapon releases, and seasonal artifact mods, making adaptability crucial. While using off-meta weapons can be rewarding, understanding and utilizing (or countering) the current top performers significantly increases your chances of victory. Note: This analysis reflects trends observed around the Episode: Heresy / Final Shape timeframe (early-mid 2025 based on snippets); always check current community resources like DestinyTracker or light.gg for the absolute latest usage data.
The Current Trials Meta Landscape (Post-Final Shape/Heresy - May 2025 Context)
The Trials meta around this period saw continued dominance from reliable archetypes while adapting to recent balance adjustments. Key factors included:
- Pulse Rifle Adjustments: Nerfs targeted the range outliers like Redrix's Estoc and BxR-55 Battler, bringing their effective damage falloff more in line with other Lightweight and High-Impact Pulses. Buffs to Rapid-Fire Pulses aimed to increase their competitiveness. Despite nerfs, well-rolled Pulses remained potent, especially for team-shooting and lane control.
- Hand Cannon Viability: Adaptive (140 RPM) and Aggressive (120 RPM) Hand Cannons remained highly popular due to their dueling potential and versatility. Buffs to specific Hand Cannons (like Judgment) and perks (like Magnificent Howl) further solidified their place.
- Special Weapon Dynamics: Shotguns (Precision, Aggressive, Slug) and Sniper Rifles continued to be the primary special weapons, defining close-range engagements and long-range picks, respectively. Fusion Rifles remained a viable counter, particularly against aggressive pushes.
- Exotic Influence: Certain Exotic weapons and armor pieces significantly shaped playstyles. The combination of The Last Word and Radiant Dance Machines (before potential nerfs) offered extreme hip-fire lethality. Other popular choices included Ace of Spades, Thorn, The Chaperone, Conditional Finality, and Cloudstrike. Buffs to Trials Origin Traits also aimed to make Trials weapons more competitive.
The core principle remains: understand what weapons excel at specific ranges and scenarios within the 3v3 Elimination format, and choose loadouts that either leverage the meta's strengths or effectively counter them.
Top-Tier Weapon Archetypes
- Hand Cannons (140 RPM Adaptive / 120 RPM Aggressive): The quintessential dueling weapons. 140s offer a great balance of speed and impact, while 120s provide longer range and higher damage per shot, rewarding precision. Excellent for peek-shooting and primary engagements.
- Pulse Rifles (Various Frames): Excel at mid-to-long range engagements and team-shooting. High-Impacts and certain Lightweights (like the PR-55s, even post-nerf) offer strong Time-to-Kill (TTK) values and forgiveness. Rapid-Fires received buffs to compete better.
- Shotguns (Precision / Aggressive / Slug): Necessary tools for close-quarters combat (CQC), pushing objectives, and shutting down aggressive players. Precision frames offer consistency, Aggressives higher burst, and Slugs reward headshots with extended range.
- Sniper Rifles (Adaptive / Aggressive): Dominate long sightlines, provide instant pick potential, and control map flow. Essential for teams looking to play defensively or secure opening advantages.
- Fusion Rifles (Precision / Adaptive / Rapid-Fire): Effective mid-range counters, particularly against shotgun rushes. Require mastering charge time but offer high kill potential.
Legendary Weapon Deep Dive: Must-Have Guns & PvP God Rolls
Acquiring well-rolled Legendary weapons is crucial. Trials itself offers some of the best options, but other sources like raids, dungeons, and playlist activities also provide meta contenders. Focus on perks that enhance Consistency (Opening Shot, Eye of the Storm, Keep Away, Zen Moment, Tap the Trigger), Range, Handling (Snapshot Sights, Quickdraw, Surplus, Threat Detector), and Lethality (Kill Clip, Rampage, Desperado, Precision Instrument, Magnificent Howl).
| Weapon Name | Source | Archetype | Element | Barrel | Magazine | Perk 1 | Perk 2 | Masterwork | Notes/Synergies |
|---|---|---|---|---|---|---|---|---|---|
| Exalted Truth | Trials | 140 HC Adaptive | Void | Smallbore / Hammer-Forged | Accurized Rounds | Keep Away / Slideshot / Lone Wolf | Eye of the Storm / Opening Shot / Mag Howl | Range | S-Tier HC, great stats & perks. Mag Howl enables 2-taps. |
| Igneous Hammer | Trials | 120 HC Aggressive | Solar | Smallbore / Hammer-Forged | Accurized Rounds | Keep Away / Rapid Hit / Fragile Focus | Eye of the Storm / Opening Shot / Prec. Inst. | Range | Top-tier 120, excellent range & lethality perks. |
| Keen Thistle | Trials | 72 Sniper Aggressive | Solar | Fluted Barrel / Arrowhead | Accurized Rounds | Snapshot Sights / Lone Wolf | Opening Shot / Closing Time | Handling | High impact, great scope feel, strong perk combos. |
| Aisha's Care | Trials | Heavy Burst Pulse | Strand | Arrowhead / Smallbore | Accurized Rounds | Zen Moment / Slice | Headseeker / Desperado | Stability | Desperado drastically improves TTK; good Strand synergy. |
| Shayura's Wrath | Trials (Legacy) | 600 SMG Precision | Void | Hammer-Forged / Smallbore | Accurized Rounds | Killing Wind / Zen Moment | Kill Clip / Target Lock | Range | Former meta king, still potent with good range/consistency. |
| The Inquisitor | Trials (Legacy) | Precision Slug Shotgun | Arc | Hammer-Forged / Full Bore | Accurized Rounds | Perpetual Motion / Slideshot | Opening Shot / Fragile Focus | Range | Consistent slug shotgun, rewards precision. |
| Rose | Comp Playlist | 140 HC Lightweight | Kinetic | Smallbore / Hammer-Forged | Accurized Rounds | Slideshot / Perpetual Motion | Explosive Payload / Eye of the Storm | Range | Excellent stats, Lightweight frame bonus, top competitor. |
| Matador 64 | Grasp Dungeon | Precision Shotgun | Arc | Rifled Barrel / Smallbore | Accurized Rounds | Perpetual Motion / Threat Detector | Opening Shot | Range | Very consistent Precision Frame shotgun. |
| Redrix's Estoc | Crucible Engram | PR-55 Pulse | Kinetic | Arrowhead / Hammer-Forged | Ricochet Rounds | Keep Away / Lone Wolf / Outlaw | Headseeker / Desperado / Sword Logic | Stability | Top-tier stats even post-nerf, strong perks. |
| Beloved | Opulent Weapons | 90 Sniper Adaptive | Solar | Fluted Barrel / Arrowhead | Accurized Rounds | Snapshot Sights / No Distractions | Moving Target / Quickdraw | Handling | Community favorite scope, excellent handling. |
Exotic Weapon Showcase: Game-Changers for Trials
Exotic weapons often provide unique, powerful effects that can define a loadout and significantly impact a match. Choosing the right Exotic is a critical decision.
Top Primary Exotics:
- The Last Word: Unrivaled hip-fire TTK, devastating at close range, especially when paired with mechanics that buff hip-fire (like Radiant Dance Machines, pre-nerf). High skill ceiling.
- Ace of Spades: Memento Mori grants damage-boosting rounds after a kill, and radar stays active while aiming down sights. Extremely versatile and powerful 140 HC.
- Thorn: Damage-over-time rounds prevent enemy regeneration and can secure kills around cover. Soul Devourer enhances the weapon after kills.
- Khvostov 7G-0X: Highly stable Auto Rifle with good stats and the potential for Ricochet Rounds that bounce multiple times.
- Vigilance Wing: Excellent 5-burst Pulse Rifle that grants health regen and increased movement speed when an ally dies nearby. Strong dueling potential.
Top Special Exotics:
- The Chaperone: Precision slug shotgun that grants bonus precision damage after a precision kill. Rewards accuracy with exceptional range for a shotgun.
- Conditional Finality: Raid shotgun firing both Stasis (freeze) and Solar (ignite) pellets. Extremely potent CQC weapon capable of shutting down abilities and Supers.
- Cloudstrike: Sniper Rifle that generates a lightning strike on precision final blows, capable of collateral damage.
- Duality: Shotgun that fires a slug while ADS and a pellet spread from the hip. Versatile CQC option.
- Jötunn: Fusion Rifle that fires a tracking projectile dealing Solar damage and burning targets. Can be difficult to counter if unexpected.
- Witherhoard: Grenade Launcher that creates Taken Blight pools, dealing damage over time and denying area. Excellent for controlling space and objectives.
The choice of Exotic often dictates the rest of the loadout and the intended playstyle. A Last Word user will play aggressively up close, while a Cloudstrike user will focus on holding long lanes. Understanding the strengths and weaknesses of meta Exotics is key to both utilizing them effectively and countering them when faced by opponents.
Armor Mods for the Crucible: Optimizing Your Gear
While the Armor Charge system is less central in PvP than PvE, selecting the right armor mods is still vital for maximizing weapon performance, ability uptime, and survivability. Many PvE-focused mods are disabled or less effective in the Crucible.
| Armor Slot | Category | Mod Examples | Energy Cost | Priority/Notes |
|---|---|---|---|---|
| Helmet | Weapon Performance | Targeting Mods (Primary/Special) | 1-3 | Essential for AA, accuracy, ADS speed. Stacking provides diminishing returns on AA but improves scalars. |
| Ability Regen | Hands On, Dynamo, Ashes to Assets | 3-4 | Super energy on Melee/Class Ability/Grenade kills. Useful but competes with Targeting. | |
| Stats | Resilience, Recovery, Intellect Mods | 3-4 | Crucial for hitting stat tiers. | |
| Other | Flight Adjuster (AE Mod) | 1-3 | Stackable AE bonus, good for aerial builds. | |
| Arms | Weapon Performance | Loader Mods (Primary/Special), Dexterity Mods (Primary/Special) | 1-3 | Improves Reload/Handling. Essential for weapon feel. |
| Ability Regen | Impact Induction, Focusing Strike, Momentum Transfer, Grenade/Melee Kickstart | 2-3 | Ability energy on dealing/using other abilities. Kickstarts consume Armor Charge. | |
| Other | Fastball | 1 | Increases grenade throw speed. | |
| Chest | Weapon Performance | Unflinching Aim Mods (Primary/Special) | 1-3 | Reduces flinch while aiming. Crucial for winning duels under fire. |
| Stats | Resilience, Recovery, Intellect Mods | 3-4 | Hitting stat tiers. | |
| Other | Charged Up (Armor Charge capacity) | 3 | Niche use, generally not prioritized in PvP. Resist mods are disabled in PvP. | |
| Legs | Weapon Performance | Holster Mods (Special) | 1-2 | Passively reloads stowed special weapon. Very valuable. |
| Survivability | Recuperation, Better Already | 1-3 | Health regen on Orb pickup. Highly recommended for survivability. | |
| Ability Regen | Innervation, Invigoration, Absolution | 1-3 | Ability energy on Orb pickup. | |
| Other | Weapon Surges | 3 | Small damage buff in PvP, requires Armor Charge. | |
| Class Item | Ability Regen | Reaper, Utility Kickstart, Bomber, Outreach, Distribution | 1-3 | Orb generation / Ability regen tied to class ability use. Core mods for many builds. |
| Other | Time Dilation, Powerful Attraction | 2-3 | Extends Armor Charge / Collects Orbs on class ability use. Niche but potentially useful. |
Prioritize mods that enhance your chosen weapons' performance (Targeting, Unflinching, Loaders/Dexterity, Holsters) and synergize with your subclass abilities, particularly those linked to your class ability (Reaper, Kickstart, Bomber/Outreach). Survivability from Orb pickups (Recuperation) is almost always a valuable investment.
The Guardian Within: Class Optimization for Trials
Choosing the right class, subclass, abilities, and Exotic armor is paramount to maximizing your potential in Trials. While personal preference plays a role, certain builds consistently rise to the top due to their synergy, effectiveness in the 3v3 environment, and alignment with the current meta. Note: Stat priorities often aim for specific tiers (e.g., Tier 10 = 100 points) for maximum cooldown reduction or effect. Resilience breakpoints (tiers needed to survive specific weapon TTKs) are also important considerations.
Titan Builds: Striking Fear (or Bubbles) into Opponents
Titans often excel at controlling space, close-quarters combat, and providing team support or aggressive shutdowns. Resilience is typically a key stat for Barricade cooldown and survivability.
Void Sentinel (Control/Support):
- Subclass: Void Sentinel. A consistently strong choice.
- Super: Ward of Dawn (Zone denial, team buff) or Sentinel Shield (Aggressive roaming/blocking).
- Class Ability: Towering Barricade (Provides cover, grants Overshield with Bastion).
- Melee: Shield Bash (Suppression/Mobility) or Shield Throw (Ranged bounce).
- Grenade: Suppressor Grenade (Disables abilities) or Voidwall Grenade (Area denial).
- Aspects:
- Bastion: Casting Barricade grants Overshield to self and nearby allies. Barricade slowly regenerates health of those behind it.
- Offensive Bulwark: While Overshielded or in Ward of Dawn, grenade charges faster, melee range/damage increased, and melee final blows extend Overshield duration.
- Fragments: Echo of Persistence (Longer Void buffs like Overshield), Echo of Leeching (Melee final blows start health regen), Echo of Vigilance (Overshield on kill when shields depleted), Echo of Domineering (Suppressed targets reload equipped weapon/grant mobility).
- Exotic Armor:
- Peacekeepers: Auto-reloads stowed SMGs, buffs handling/movement when holding one. Excellent for aggressive SMG play.
- One-Eyed Mask: Marks target that damaged you; killing them grants Overshield and damage bonus.
- Citan's Ramparts: Allows allies to shoot through Towering Barricade, albeit with reduced health. Less dominant post-nerf but still offers unique utility.
- Precious Scars: Kills with weapons matching subclass grant Restoration x1 to self/allies. Revives grant mobile Overshield. Strong team support option.
- Stat Priority: Tier 10 Resilience (Barricade cooldown, flinch resist, HP), Tier 10 Recovery (Health regen delay, Rift synergy if applicable), moderate Discipline/Intellect.
Arc Striker (Aggression/Shutdown):
- Subclass: Arc Striker. Often considered S-Tier PvP.
- Super: Thundercrash (High-damage shutdown) or Fists of Havoc (Roaming area denial).
- Class Ability: Thruster (Quick lateral dodge for evasion/repositioning).
- Melee: Seismic Strike (Blind/AoE on hit) or Ballistic Slam (Dive attack). Can be combined with Knockout.
- Grenade: Lightning Grenade (Sticks to surfaces, pulses damage - enhanced by Touch of Thunder) or Pulse Grenade (AoE pulses).
- Aspects:
- Knockout: Breaking shields or critically wounding targets infuses melee with Arc energy (increased range/damage) and starts health regeneration on melee kills.
- Touch of Thunder: Enhances Pulse, Flashbang, Lightning, and Storm Grenades. (Lightning Grenades create second pulse).
- Fragments: Spark of Resistance (Damage resist when near enemies), Spark of Recharge (Faster ability regen when critically wounded), Spark of Magnitude (Longer lasting lingering grenades), Spark of Shock (Grenades jolt targets).
- Exotic Armor:
- Antaeus Wards: Reflects projectiles when sliding. Enables aggressive pushes.
- Dunemarchers: Increased sprint speed, melee chains lightning to nearby enemies.
- Peregrine Greaves: Massively increased damage for airborne shoulder charges (Seismic Strike/Shield Bash).
- Synthoceps: Increased melee lunge range and damage when surrounded. Also buffs Super damage.
- Stat Priority: Tier 10 Resilience, Tier 10 Recovery, moderate Strength/Discipline.
Prismatic Titan (Hybrid Utility/Freeze):
- Subclass: Prismatic. Often considered S-Tier PvP.
- Super: Thundercrash (Shutdown) or Twilight Arsenal (Void axes for team damage/control).
- Class Ability: Thruster.
- Melee: Shiver Strike (Stasis mobility/slow, returns 80% energy on miss).
- Grenade: Coldsnap Grenade (Stasis freeze) or Shackle Grenade (Strand suspend).
- Aspects:
- Diamond Lance: Defeating enemies with Stasis or rapidly defeating enemies with Kinetic/matching element generates a lance. Throwing it freezes targets.
- Knockout: (See Arc Striker) Can generate Diamond Lances with powered melee kills. Note: Unpowered melee kills no longer generate lances in PvP.
- Fragments: Facet of Blessing (Void - Melee final blows start health regen), Facet of Purpose (Picking up Orb grants Restoration/Woven Mail), Facet of Hope (Class ability regenerates faster while buffed), Facet of Command (Stasis/Void - Freeze/Suspend creates Shard/Breach), Facet of Grace (Kinetic damage grants Transcendent energy, ability final blows grant more).
- Exotic Armor:
- Exotic Class Item: Combine Spirit of the Ophidian (Handling/Reload) with Spirit of Alpha Lupi (Thruster grants heal burst) for a potent neutral game.
- Synthoceps: Buffs Shiver Strike and Super damage when surrounded.
- Peregrine Greaves: Buffs airborne Shiver Strike damage.
- Stat Priority: High Strength (for Shiver Strike uptime), High Recovery, High Resilience.
Hunter Builds: Agility, Invisibility, and Precision
Hunters thrive on mobility, utilizing their Dodge ability for repositioning, reloading, or gaining tactical advantages like invisibility. High Mobility is almost always prioritized for faster Dodge cooldown.
Void Nightstalker (Invisibility/Control):
- Subclass: Void Nightstalker. A consistently strong meta choice. A-Tier PvP.
- Super: Spectral Blades (Fast roaming, heavy attack suppresses) or Shadowshot: Deadfall (Single tether anchor for area denial).
- Class Ability: Gambler's Dodge (Dodging near enemies refunds melee) or Marksman's Dodge (Reloads weapon).
- Melee: Snare Bomb (Weakens targets, pings radar on detonation).
- Grenade: Scatter Grenade (Area denial) or Suppressor Grenade (Ability shutdown).
- Aspects:
- Vanishing Step: Dodging grants invisibility.
- On The Prowl: While invisible, gain enhanced radar and mark priority targets. Defeating marked targets creates weakening smoke cloud and grants ability energy. Note: PvP range/duration nerfed.
- (Alternative) Stylish Executioner: Defeating a weakened, suppressed, or volatile target grants invisibility and Truesight.
- Fragments: Echo of Persistence (Longer invis), Echo of Dilation (Enhanced radar/stats while crouched/invis), Echo of Leeching (Melee kills start health regen), Echo of Obscurity (Finisher grants invis).
- Exotic Armor:
- Radiant Dance Machines: Allows multiple dodges near enemies, enabling near-constant invisibility or other dodge effects.
- Graviton Forfeit: Increases invisibility duration, faster melee/grenade/class ability regen while invisible.
- Wormhusk Crown: Dodge grants a small health and shield bump.
- Gemini Jester: Dodge disorients nearby enemies and disables radar.
- Knucklehead Radar: Radar remains active while aiming down sights.
- Stat Priority: Tier 10 Mobility, Tier 10 Recovery, moderate Discipline/Intellect. Consider T8 Mobility if using a Lightweight frame weapon. Resilience typically T3-T7.
Solar Gunslinger (Damage/Buffs):
- Subclass: Solar Gunslinger. S-Tier PvP.
- Super: Blade Barrage (High burst damage) or Golden Gun: Marksman (Precision shutdown).
- Class Ability: Gambler's Dodge (Melee refund) or Acrobat's Dodge (Makes nearby allies Radiant on dodge).
- Melee: Weighted Throwing Knife (High precision damage, ignites on precision kill) or Lightweight Knife (Fast throw, grants Radiant on precision hit - improved tracking).
- Grenade: Healing Grenade (Team support) or Tripmine Grenade (Trap/Damage).
- Aspects:
- Knock 'Em Down: Enhances Super. While Radiant, final blows with throwing knives fully refund melee energy.
- On Your Mark: Precision final blows grant increased handling and reload speed (stacks x3). Dodge instantly grants max stacks.
- Fragments: Ember of Torches (Powered melee hits make you/allies Radiant), Ember of Empyrean (Solar weapon/ability kills extend Restoration/Radiant duration), Ember of Singeing (Class ability recharges faster when scorching targets), Ember of Solace (Radiant/Restoration last longer).
- Exotic Armor:
- Lucky Pants: Buffs Hand Cannon ready speed/accuracy; landing hits loads rounds with stacking damage bonus for next HC shot.
- Wormhusk Crown: Heal on dodge.
- St0mp-EE5: Enhanced movement (sprint, slide, jump).
- Athrys's Embrace: Weighted Knife gets second bounce, faster, and more damage after rapid precision hits.
- Stat Priority: Tier 10 Mobility, Tier 10 Recovery, moderate Discipline/Intellect.
Prismatic Hunter (Hybrid Aggression/Debuff):
- Subclass: Prismatic. S-Tier PvP. Note: Cooldowns nerfed.
- Super: Gathering Storm (Arc Staff throw) or Silence & Squall (Stasis).
- Class Ability: Gambler's Dodge.
- Melee: Combination Blow (Arc - Stacking damage, heal on kill) or Withering Blade (Stasis - Slows targets).
- Grenade: Magnetic Grenade (Void - Attaches, second explosion), Duskfield Grenade (Stasis - Slow field).
- Aspects:
- Stylish Executioner (Void): Defeating debuffed target grants invis/Truesight.
- Winter's Shroud (Stasis): Dodge slows nearby enemies.
- (Alternative) Threaded Specter (Strand): Dodge leaves a decoy that explodes.
- Fragments: Facet of Dawn (Radiant on powered melee hit), Facet of Protection (Resist near enemies), Facet of Purpose (Orbs grant Woven Mail/Restoration), Facet of Generosity (Orbs on Transcendent defeats), Facet of Ruin (Increased Shatter damage/radius).
- Exotic Armor:
- Exotic Class Item: Combine Spirit of the Assassin (Invis on finisher/powered melee kill) with Spirit of Cyrtarachne (Woven Mail on grapple) or Spirit of Gyrfalcon (Volatile Rounds after emerging from invis).
- Liar's Handshake: Enhances Arc melee counterattack damage, heals on hit.
- St0mp-EE5 / Wormhusk Crown / Radiant Dance Machines: General utility Exotics.
- Stat Priority: Tier 10 Mobility, Tier 10 Recovery, Discipline/Strength depending on build focus.
Warlock Builds: Support, Control, and Space Magic Supremacy
Warlocks often excel at controlling engagements through Rifts, potent grenades, and unique movement options. Recovery is typically the highest priority stat for Rift cooldown and survivability.
Solar Dawnblade (Movement/Healing/Support):
- Subclass: Solar Dawnblade. Consistently S-Tier PvP.
- Super: Well of Radiance (Team healing/damage buff, zone control) or Daybreak (High-mobility roaming Super).
- Class Ability: Healing Rift (AoE heal) or Phoenix Dive (Quick aerial heal/movement).
- Melee: Celestial Fire (Long-range projectiles) or Incinerator Snap (Short-range scorch wave).
- Grenade: Healing Grenade (Provides Cure/Restoration) or Solar Grenade (Lingering AoE).
- Aspects:
- Icarus Dash: Quick aerial dodge, grants Cure while Heat Rises is active.
- Heat Rises: Consume grenade to gain airborne benefits (float, shoot/throw while gliding), kills extend duration, grants melee energy.
- (Alternative) Touch of Flame: Enhances Healing, Solar, Firebolt, and Fusion Grenades.
- Fragments: Ember of Torches (Powered melee makes Radiant), Ember of Empyrean (Solar kills extend Restoration/Radiant), Ember of Benevolence (Faster ability regen when applying Cure/Restoration/Radiant to allies), Ember of Solace (Longer Radiant/Restoration duration).
- Exotic Armor:
- Ophidian Aspect: Increases weapon reload speed, handling, and melee range. Generalist powerhouse.
- Transversive Steps: Faster sprint, slide further, reloads equipped weapon while sprinting. Excellent for mobility.
- The Stag: Grants damage resistance while in Rift, Rift energy when critically wounded.
- Eye of Another World: Highlights low-health targets, passive boost to ability regeneration.
- Stat Priority: Tier 10 Recovery, Tier 10 Discipline, Tier 7+ Resilience, moderate Intellect.
Void Voidwalker (Devour/Control):
- Subclass: Void Voidwalker. A-Tier PvP.
- Super: Nova Bomb: Cataclysm (Large, slow-tracking projectile) or Nova Warp (Short-range teleporting explosion).
- Class Ability: Healing Rift.
- Melee: Pocket Singularity (Knockback projectile) or Child of the Old Gods (Void Soul buddy).
- Grenade: Axion Bolt (Seeking projectiles), Vortex Grenade (Lingering AoE pull), Scatter Grenade (Multiple submunitions).
- Aspects:
- Feed the Void: Void ability kills grant Devour (kills restore health/extend Devour).
- Child of the Old Gods: Casting Rift creates a Void Soul that weakens targets and grants ability energy (Empowering Rift) or health (Healing Rift) when it damages targets.
- Fragments: Echo of Persistence (Longer Devour/Invis/Overshield), Echo of Leeching (Melee kills start health regen for self/allies), Echo of Undermining (Void grenades weaken targets), Echo of Instability (Void grenade kills grant Volatile Rounds to Void weapons).
- Exotic Armor:
- Ophidian Aspect / Transversive Steps: Strong generalist options.
- Nezarec's Sin: Void kills (weapon or ability) increase ability energy regeneration rate.
- Secant Filaments: Casting Empowering Rift grants Devour. Damage dealt by you and allies from Rift Disrupts targets.
- Stat Priority: Tier 10 Recovery, Tier 10 Discipline, Tier 7+ Resilience, moderate Intellect.
Prismatic Warlock (Hybrid Control/Aggression):
- Subclass: Prismatic. S-Tier PvP.
- Super: Nova Bomb: Cataclysm (Void shutdown) or Winter's Wrath (Stasis freeze/shatter). Song of Flame (Solar support/damage).
- Class Ability: Healing Rift.
- Melee: Arcane Needle (Arc - 3 charges, unravels) or Penumbral Blast (Stasis - freezes).
- Grenade: Coldsnap Grenade (Stasis - seeking freeze projectile) or Storm Grenade (Arc - roaming storm, required for Getaway Artist).
- Aspects:
- Lightning Surge: While sliding, activate charged melee to blink forward, calling down lightning strikes. Pairs extremely well with Arcane Needle's multiple charges.
- Feed the Void: Void ability kills grant Devour. Essential for sustain in aggressive builds.
- (Alternative) Bleak Watcher: Hold grenade to convert into a Stasis turret that slows/freezes enemies. Excellent for area control.
- Fragments: Facet of Hope (Faster class ability regen while buffed), Facet of Dawn (Radiant on powered melee hits), Facet of Protection (Increased DR near enemies), Facet of Purpose (Orbs grant Restoration/Woven Mail). Consider Facet of Balance if using Dark/Light weapons.
- Exotic Armor:
- Transversive Steps: Enhances mobility, especially during Lightning Surge.
- Osmiomancy Gloves: Extra Coldsnap charge, grenade energy returned on direct hits. Synergizes with Coldsnap/Bleak Watcher.
- Getaway Artist: Consume Arc grenade for a powerful, sentient Arc Soul turret.
- Ophidian Aspect: General weapon performance boost.
- Stat Priority: Tier 10 Recovery, Tier 10 Strength (for Lightning Surge/Arcane Needle) or Discipline (for Coldsnap/Bleak Watcher), Tier 7+ Resilience.
Mastering the Maps: Strategy and Callouts
Knowing the map is paramount in Trials. Since the map is fixed for the entire weekend, dedicating time to learning its sightlines, choke points, cover locations, flank routes, and objective placement is essential for developing effective strategies and clear communication. Different maps favor different playstyles and loadouts. Large, open maps reward long-range weapons like Pulse Rifles and Snipers, while smaller, tighter maps encourage close-quarters combat with Shotguns and SMGs. Maps with significant verticality benefit mobile subclasses.
While the specific map rotation changes weekly and isn't fully predictable long-term, certain maps appear frequently. Mastering general principles and learning common callouts for recurring maps provides a strong foundation. Note: The following sections provide strategies and callout maps for representative examples often found in the Trials rotation. Always adapt based on the specific weekly map.
General Map Strategy Principles
Regardless of the specific map, certain strategic principles apply:
- Opening Moves: Have a default opening strategy for your team (e.g., push a specific lane, hold a defensive position, look for an early pick). Be prepared to adapt based on enemy actions.
- Control Key Areas: Identify and control strategically important locations – high ground, long sightlines, choke points leading to the objective zone, or areas controlling revive orbs.
- Use Cover Effectively: Avoid standing in open areas. Utilize natural and artificial cover to peek-shoot, regenerate health, and minimize exposure. Learn common angles and head-glitches.
- Team Shooting: Coordinate fire with teammates to quickly eliminate targets. Focus fire on single opponents to secure kills efficiently.
- Flanking and Rotations: Don't be predictable. Use flank routes to catch opponents off-guard, but ensure flanks are timely and don't leave teammates isolated. Rotate positions if a particular approach isn't working.
- Objective Play (Dominion Zone): Understand the zone's location and timing (spawns at 40s). Use the zone to force enemy movement or secure a win if the round goes to time. Playing around the zone, controlling access to it, is often more effective than standing directly on it until necessary.
- Heavy Ammo Control: On the round heavy ammo spawns (usually round 4 or later), controlling the heavy ammo crate is often critical to securing the round win.
Map Callouts: The Language of Teamwork
Clear, concise, and consistent callouts are vital for team coordination. Standardized callouts allow teammates to instantly understand enemy locations, threats, and intentions. While community callouts can vary slightly, most maps have generally accepted terms for key areas.
Best Practices for Callouts:
- Be Specific: Instead of "He's over there," use "One enemy, Top Mid" or "Sniper, Back Spawn."
- Be Concise: Relay information quickly. "Two push B" is better than "There are two guys trying to push into the B flag area right now."
- Call Out Numbers: Specify how many enemies are seen ("One," "Two," "All three").
- Call Out Health Status: Use terms like "Weak," "One-shot," "Absolute," or "Red bar" to indicate enemy health.
- Call Out Key Threats: Mention Snipers, Shotgun rushers, active Supers, or specific problematic players.
- Confirm Kills: Announce when an enemy is down ("Got one," "Sniper down").
- Call Out Your Actions: "Pushing left," "Holding angle," "Need help," "Reviving."
Below are sample callout maps for common Trials locations. Learn these and establish clear communication protocols with your team.
Sample Map Breakdowns (Illustrative Examples)
(Note: These are generalized strategies. Optimal play depends on team composition, opponent behavior, and the specific meta.)
Javelin-4
A smaller, symmetrical map with distinct inside and outside lanes, encouraging both CQC and mid-range fights.
Key Areas: B Flag/Mid control is crucial as it overlooks both main lanes. Inside Tunnel offers cover and CQC opportunities. Outside Beach provides longer sightlines but less cover. Windows offer powerful overwatch positions.
Strategies:
- Aggressive: Rush Inside Tunnel with shotguns/SMGs to control Mid early. Use grenades to flush enemies from cover near B.
- Defensive: Hold angles from Spawn areas or Windows overlooking Mid and Outside. Use Pulse Rifles or Snipers to control lanes. Bait enemies into unfavorable fights.
- Rotation: If one lane is heavily contested, rotate through Spawn or Mid to flank the other lane.
Endless Vale
A Vex map known for its verticality and distinct upper and lower levels.
Key Areas: Top Mid offers strong map control and sightlines. Bottom Mid provides cover and access to flanks. The central Pillar is a frequent point of contention. Island/Platform offers flanking angles but is exposed.
Strategies:
- Top Control: Secure Top Mid early with Pulse Rifles or Snipers. Use verticality to peek angles and support teammates below.
- Bottom Rush: Push aggressively through Bottom Mid with CQC weapons, using cover and Pillar to break sightlines. Watch for flanks from Tunnel or Island.
- Split Push: Send one or two players Top Mid while the rest apply pressure Bottom Mid, forcing the enemy to split their attention. Requires good coordination.
Midtown
A larger, asymmetrical map set in the Last City, featuring long lanes, buildings, and distinct zones.
Key Areas: B Flag/Statue is the central objective and heavily contested. Rug Shop and Cafe buildings offer cover and flanking routes around B. Sniper Lane provides a long sightline but is easily countered. Bridge offers high ground overlooking B.
Strategies:
- B Control: Fight for control of B Flag and the surrounding buildings (Rug/Cafe). Use grenades to clear corners and barricades/rifts for defense.
- Lane Holding: Use Snipers or Pulse Rifles to control Sniper Lane or the long sightline from Tower Spawn towards Market. Be wary of flanks through buildings.
- Flanking: Utilize the multiple paths through buildings and around the map edges to flank opponents focused on B or Sniper Lane.
Bannerfall
A Tower map with extreme verticality, multiple levels, and both interior and exterior fighting spaces.
Key Areas: Top Mid offers dominant sightlines across much of the map. Outside Platform provides flanking routes and long angles. Inside Stairs and Catwalk control interior movement.
Strategies:
- Vertical Dominance: Utilize Hunter jumps, Warlock Heat Rises, or Titan lift to gain high ground quickly and control Top Mid or Catwalk. Aerial play is strong here.
- Interior Control: Push Inside Stairs aggressively to control movement between levels and flank opponents playing Outside or Top Mid.
- Outside Pressure: Use long-range weapons from Spawn or Outside Platform to pressure Top Mid or catch rotations. Be mindful of snipers holding opposing angles.
Advanced Tactics: Elevating Your Gameplay
Mastering the fundamentals is essential, but reaching higher tiers in Trials requires incorporating advanced tactics into your repertoire. These techniques focus on maximizing efficiency in movement, positioning, and team coordination.
Movement Mastery: Beyond Point A to Point B
Effective movement in Destiny 2 PvP is about more than just speed; it's about unpredictability, efficiency, and survival.
- Slide Techniques: Sliding is crucial for quickly entering/exiting cover, challenging corners, and making yourself a harder target. Practice slide-shooting and slide-meleeing. Be aware that excessive sliding can make you predictable.
- Jumping and Aerial Play: Utilize jumps (especially Hunter Strafe/Triple Jump, Titan Lift control, Warlock Burst Glide/Icarus Dash) to traverse the map quickly, gain high ground, peek over cover, or evade fire. Master controlling your momentum in the air (air strafing) to make quick directional changes. Be mindful of Airborne Effectiveness (AE) stats on weapons and use mods/Exotics (like St0mp-EE5, Lion Rampant) if focusing on an aerial playstyle.
- Cover Usage: Think of cover as your lifeline. Practice "peek shooting" – quickly strafing out from cover to fire, then immediately returning. Use "shoulder peeking" (exposing only your shoulder initially) to gather information without fully committing. Understand how to use map geometry (corners, boxes, pillars) to minimize your exposed profile.
- Baiting and Dodging: Move erratically when crossing open lanes or pushing known sniper positions to bait shots and make yourself harder to hit. Use class abilities like Hunter Dodge or Titan Thruster reactively to evade fire or disengage.
- Momentum Preservation: Avoid unnecessary stops and starts. String movements together smoothly (sprint -> slide -> jump) to maintain momentum and cross distances efficiently.
Hunters excel at unpredictable vertical movement. Use Strafe Jump with high Mobility for sharp direction changes mid-air. Dodge is invaluable for breaking aim assist and escaping bad engagements. Consider St0mp-EE5 for increased slide distance and jump height, making your movement harder to track and allowing you to take unusual angles.
Warlocks should master Burst Glide for rapid horizontal movement. Icarus Dash (Solar) provides exceptional evasive capabilities and can be combined with Burst Glide for incredible speed (Burst Glide + Icarus Dash). Heat Rises allows for extended aerial engagements, providing unique attack angles many opponents won't expect.
Titans should perfect Strafe Lift for controlled aerial movement. Use Thruster for quick lateral dodges to avoid sniper lanes or disengage from fights. Shoulder Charge abilities can be used as movement tools even when not attacking. Lion Rampant extends your airtime significantly, allowing for unexpected aerial engagements and positions.
Positional Warfare: Owning the Angles
Where you stand is often more important than how fast you shoot. Superior positioning creates advantages and dictates engagements.
- Angle Advantage: Position yourself so you can see and shoot an enemy before they can clearly see and shoot you. Use off-angles and unexpected locations rather than predictable head-glitches.
- High Ground: Generally advantageous, providing better sightlines and making you harder to hit with certain attacks (like grenades or sliding shotguns). However, be aware of becoming an easy target for snipers.
- Map Control: Understand which parts of the map offer strategic advantages (sightlines, objective proximity, safe rotations) and work with your team to control these areas. Denying key areas to the enemy is as important as holding them yourself.
- Rotations: Be willing to abandon a position and rotate if it becomes disadvantageous or if a better opportunity arises elsewhere. Quick, coordinated rotations can catch opponents off guard.
- Playing Your Life: Especially in 1vX situations or when your team is down players, prioritize survival. Use positioning to delay the enemy, wait for cooldowns, or look for an opportunity to isolate an opponent rather than taking a direct, unfavorable fight.
Team Coordination: The Power of Three
Individual skill matters, but Trials is fundamentally a team game. Coordinated actions amplify effectiveness dramatically.
- Team Shooting: The cornerstone of effective PvP. Focus fire with teammates onto a single target to secure kills much faster than dueling individually. Call out targets clearly ("Focusing Warlock, Mid").
- Lane Coverage: Ensure all likely enemy approach routes are being watched by someone on your team. Avoid having multiple teammates hard-scoping the exact same lane, leaving flanks exposed.
- Pushing and Collapsing: Attack together as a unit. If one player gets a pick or weakens an enemy, collapse quickly to capitalize on the advantage. Similarly, retreat together if an engagement turns unfavorable. Avoid isolated pushes.
- Ability Synergy: Coordinate ability usage for maximum impact. Examples: Freeze/Slow followed by a high-damage attack, Suppressor Grenade before a Super push, Healing Grenade during a coordinated peek.
- Revive Strategy: Communicate revive intentions. Designate one player to attempt a revive while others provide cover fire or watch for enemy pushes. Baiting enemies into pushing a revive orb can create opportunities.
Team Synergy: Roles, Composition, and Communication
While individual skill is necessary, Trials victories are most often forged through effective teamwork. Building a cohesive unit involves understanding team composition, assigning roles, and mastering communication.
Building the Fireteam: Composition Archetypes
There's no single "best" team composition, as effectiveness depends on the map, the current meta, and player strengths. However, common archetypes include:
| Archetype | Focus | Weapons | Subclasses | Strategy |
|---|---|---|---|---|
| Aggressive Rush | Closing the distance quickly | Shotguns, SMGs, Fusions | Arc Titan, Void Hunter | Overwhelm opponents early in the round |
| Lane Control/Defensive | Controlling sightlines and map areas | Pulse Rifles, Scout Rifles, Snipers | Any with Barricades or Rifts | Get picks and force disadvantageous pushes |
| Balanced/Adaptive | Versatility and adaptation | Mix of ranges (Sniper, Hand Cannon, etc.) | Varied | Adapt strategy based on opponent and flow |
Consider the weekly map when choosing a composition. A map like Widow's Court heavily favors lane control, while The Cauldron demands strong CQC presence.
Defining Roles: Slayer, Support, Anchor
Within a team, players often naturally gravitate towards or are assigned specific roles based on their skills and loadouts:
Typically the most mechanically skilled player, focused on seeking engagements, getting opening picks, and applying pressure. Often uses aggressive loadouts and subclasses (e.g., Hand Cannon/Shotgun, Arc Titan/Void Hunter). Needs support but drives the team's offensive momentum.
Adapts to the needs of the round. May provide covering fire, use utility grenades/abilities (healing, suppression, slow), control revives, or flex between aggressive and defensive play. Often uses versatile loadouts (e.g., Pulse Rifle/Fusion, Solar Warlock/Void Sentinel). Crucial for enabling the Slayer and maintaining team cohesion.
Focuses on controlling key sightlines, gathering information, and securing picks from a distance. Often uses long-range weapons (Sniper, Scout) and may play more defensively. Provides stability and map control, calling out enemy movements.
These roles are not rigid, and players may need to adapt mid-match. However, having a general understanding of each player's strengths and preferred role helps streamline decision-making and coordination.
Communication is Key: The Language of Victory
Effective communication is arguably the single most important factor in high-level Trials play. Even average players communicating well can often defeat highly skilled players who lack coordination.
- Establish Clear Callouts: Use standardized, agreed-upon callouts for map locations (see Section VI.B). Ensure everyone understands the terms being used.
- Information Flow: Constantly share relevant information:
- Enemy locations ("Sniper Top Mid," "Two pushing Inside")
- Enemy health ("Warlock one-shot, Cafe")
- Enemy abilities/Supers ("Hunter popped Golden Gun," "Titan has Barricade up")
- Your own status/intentions ("Reloading," "Rotating flank," "Need help B," "Using my Super")
- Revive status ("Got the rez," "Don't push the orb, they're watching it")
- Keep it Concise and Actionable: Avoid unnecessary chatter. Focus on clear, brief calls that inform team decisions. "One weak, pushing Rugs" is better than "I think I got that guy low, he's probably going into the rug store area, maybe we should push him."
- Strategy Calls: Briefly discuss the plan at the start of the round ("Let's push Outside," "Hold spawns, look for picks"). Make mid-round adjustments as needed ("They're collapsing Mid, let's back up," "Got a pick, push the advantage!").
- Stay Positive and Focused: Avoid blaming teammates after losses or mistakes. Maintain a constructive and focused attitude. Tilt can spread quickly through team comms.
The Flawless Pursuit: Strategies for the Final Stretch
Achieving a Flawless 7-0 run is the pinnacle of Trials achievement. The final matches on a Lighthouse Passage (games 5, 6, and especially 7) are notoriously difficult, often pitting you against highly skilled, coordinated teams who are also vying for Flawless. Success in these high-pressure games requires refined strategies, adaptability, and mental resilience.
Navigating High-Win Games (5-7 Wins)
- Expect Stronger Opposition: As your win streak increases on a Lighthouse Passage, matchmaking generally pairs you with teams on similar streaks or with strong weekly performance. Assume your opponents are skilled, coordinated, and using meta loadouts.
- Information Gathering: The first round is crucial for gathering intel. Observe opponent loadouts, subclasses, positioning tendencies, and aggression levels. Identify their strongest player or primary strategy.
- Adapt Your Strategy: Don't rigidly stick to one game plan. Be prepared to adjust based on the opponent's playstyle. If your initial push fails, try a slower approach or a different flank. If they are hyper-aggressive, set traps or play defensively. If they hold lanes passively, coordinate a decisive push or utilize abilities to force them out of position.
- Prioritize Survival and Revives: Mistakes are punished more severely at higher wins. Play your life intelligently. Controlling revives becomes even more critical; securing a revive for your team or denying one to the enemy can swing the momentum of these tight matches.
- Super Management: Using Supers effectively can decide close games. Coordinate Super usage with your team. Know when to use a Super aggressively to break a stalemate or defensively to counter an enemy push or secure a revive. Track enemy Super energy to anticipate their plays. Don't hold onto your Super for too long, but don't waste it either.
- Minimize Unforced Errors: Avoid peeking the same angle repeatedly, challenging multiple opponents alone, or making risky revives under pressure. Play disciplined, calculated Destiny.
Closing Out the Flawless Run (Game 7)
The final match for Flawless carries immense pressure. Maintaining composure is key.
- Stick to Your Strengths: Now is not the time for wild experimentation. Rely on the loadouts, strategies, and coordination that got you this far.
- Communication Overdrive: Ensure communication is crystal clear. Call out everything, coordinate every push, and support each other constantly.
- Patience and Opportunism: Don't force plays. Wait for the enemy to make a mistake – an overextension, a missed shot, a poorly timed ability – and capitalize decisively.
- Clutch Potential: Believe in your ability to make clutch plays. Even if you're down rounds or players, a single well-played engagement can turn the tide.
Clutch Tips: Winning When Disadvantaged
Being outnumbered (1v2, 1v3) or down rounds requires smart play and sometimes a bit of heroism.
| Clutch Strategy | Description | When to Use |
|---|---|---|
| Isolate Opponents | Turn a 1vX into a series of 1v1s. Use cover, movement, and map knowledge to separate enemies. | Always your primary goal when outnumbered |
| Play Your Life | Delay, reposition, and regenerate health/abilities. The longer you stay alive, the more chances you have. | When you need time for teammates to respawn |
| Ability/Super Usage | A well-placed grenade or Super can quickly even the odds. | When you can secure a kill or create separation |
| Control Revives | If you get a kill in a 1vX, prevent enemy revives. If you're last alive, position near teammate orbs. | After securing a kill or when teammates are down |
| Baiting | Use movement or abilities to bait enemies into predictable angles, then counter-attack. | When opponents are overconfident or aggressive |
| Know When to Fold | Sometimes playing for information for the next round is better than dying needlessly. | In truly unwinnable situations with no Super |
Achieving Flawless is a significant accomplishment requiring skill, teamwork, and perseverance. Implement these strategies, stay focused, and learn from every match, win or lose.
Reaping the Rewards: Loot Structure Breakdown
The post-Heresy Trials of Osiris offers a multi-faceted reward structure, ensuring players can earn loot through various avenues, not solely relying on achieving Flawless streaks. Rewards flow from match completions, ranking up reputation with Saint-14, achieving win streaks, opening the Lighthouse chest, and completing weekly challenges.
- Match Completion Rewards: Both wins and losses contribute to progress.
- Wins: Grant Trials reputation (a base amount plus potential bonuses from the Trials Passage), provide a chance to earn Trials Engrams, and offer a chance at receiving base (non-Adept) Trials weapons. Playing in a full fireteam or with clanmates grants additional bonus reputation and potentially increased reward chances.
- Losses: Perhaps one of the most impactful changes, losses now grant substantially more reputation than before the rework (cited as 10x the previous base rate). Losses also carry a chance to award base Trials weapons, making participation worthwhile even during difficult matches.
- Saint-14 Reputation and Ranks: Engaging with Trials earns reputation points, primarily based on rounds won within matches, with match wins providing larger gains. Fireteam and clan bonuses further accelerate reputation progress.
- Rank Rewards: Each time a player ranks up their Trials reputation with Saint-14, they receive a Trials Engram. Specific major ranks (typically 4, 7, 10, 13, 16) award fixed bundles of materials (like Upgrade Modules, Enhancement Cores, Enhancement Prisms, Ascendant Alloys) or specific Trials Weapons that rotate seasonally or weekly. Completing the entire rank track (reaching Rank 16) and resetting allows players to claim a high-value reward like an Ascendant Shard or an Exotic Engram. This structured progression provides tangible goals for all players.
| Rank Tier | Rank Number | Reward |
|---|---|---|
| Guardian | 1-3 | Trials Engram (per rank) |
| Brave | 4 | Upgrade Module (x2) |
| Brave | 5-6 | Trials Engram (per rank) |
| Heroic | 7 | Enhancement Prism (x3) |
| Heroic | 8-9 | Trials Engram (per rank) |
| Fabled | 10 | Rotating Trials Weapon (e.g., Immortal SMG) |
| Fabled | 11-12 | Trials Engram (per rank) |
| Mythic | 13 | Upgrade Module (x2) |
| Mythic | 14-15 | Trials Engram (per rank) |
| Legend | 16 | Rotating Trials Weapon (e.g., Astral Horizon) |
| Reset | (10,000 Rep) | Ascendant Shard or Exotic Engram |
- Trials Engrams: These are the primary currency for acquiring specific Trials gear. By default, they decrypt into a random piece of Trials gear (weapons or armor) that the player has previously obtained. However, their main value lies in focusing. Players can take Trials Engrams to Saint-14 and spend additional Glimmer (and potentially other materials for Adept versions) to target specific weapons or armor pieces they desire, provided they have unlocked that item previously. Focusing costs can vary, with legacy items potentially costing more Engrams.
- Weekly Challenges: Two primary weekly challenges offer Pinnacle gear rewards (drops at a higher Power level) and guaranteed Trials armor pieces. These typically involve winning a total of 50 rounds across all matches and winning 7 total matches during the weekend. These challenges provide another reliable avenue for armor acquisition, particularly important early on.
Illuminating the Path: Reaching the Lighthouse
The Lighthouse, Trials of Osiris's iconic reward space, remains a primary objective for many Guardians, but the path to entry has been fundamentally altered. As repeatedly emphasized, the requirement is no longer an unblemished 7-0 Flawless run. Instead, achieving seven total wins on a Lighthouse Passage grants access. Losses on the card do not prevent entry, merely extending the number of matches required to hit the seven-win threshold. Once achieved, the Lighthouse becomes accessible as a launchable destination from the Director.
Inside the Lighthouse, players can access a special chest containing a variety of rewards, categorized into two types:
- Repeatable Lighthouse Chest Rewards: These rewards can be obtained every time a player completes a Lighthouse Passage (gets 7 wins) and opens the chest during a given week. The standard repeatable loot includes:
- Enhancement Prisms (1-2x)
- One base (non-Adept) Trials Weapon
- One piece of Trials Armor (This is a key repeatable source for armor)
- Osirian Ciphers (x3)
- A 45% chance to receive an Ascendant Shard
- Weekly Win Streak Rewards: These are more potent rewards tied to the longest consecutive win streak achieved by the player that week (not necessarily on the current Passage). These rewards are claimable once per account per week and are cumulative; claiming a higher tier reward automatically grants any unclaimed lower-tier rewards for that week. The rewards scale significantly with the streak:
- 1-Win Streak: Enhancement Cores (3-5x), Enhancement Prism (x1), Adept Mod (x1), Hardened By Trial emblem (first time only)
- 2-Win Streak: Osirian Ciphers (x2)
- 3-Win Streak: Osirian Ciphers (x2), Trials Armor piece
- 4-Win Streak: Osirian Ciphers (x2), Enhancement Cores (x5)
- 5-Win Streak: Yellow Trials Armor Glow, Osirian Ciphers (x1), Base Trials Weapon (x1), Trials Memento (x1), Trials Shader (from knockout list, 1 per week), Flawless Emblems (first time only)
- 6-Win Streak: White/Blue Trials Armor Glow, Enhancement Prism (x2)
- 7-Win Streak (Flawless): Red Trials Armor Glow, Adept Weapon (x1), Base Weapon (x1), Unlocks Flawless Passage for farming (Note: Minor variations exist between sources; this represents a consolidation. Glow colors also vary slightly by source.)
- Adept Weapon Chances from the Chest: Beyond the guaranteed Adept at 7 wins (Flawless), opening the Lighthouse chest offers two independent chances to receive the weekly Adept weapon. These chances are determined by:
- Highest Weekly Win Streak: 1-win streak = 30% chance, 2-win streak = 60% chance, 3+ win streak = 100% chance.
- Wins as a Full Fireteam (Trio): The number of wins on the Passage achieved while playing as a complete trio influences this chance. Achieving all seven wins as a trio guarantees at least one Adept weapon drop from the chest, regardless of the win streak. Because these chances are separate, it's possible to earn two Adept weapons from a single chest opening under favorable conditions (e.g., a 3+ win streak achieved while playing as a trio).
| Reward Type | Item(s) | Quantity/Chance | Notes |
|---|---|---|---|
| Repeatable (Per Visit) | Enhancement Prisms | 1-2x | Earned every time chest is opened. |
| Base Trials Weapon | 1x | ||
| Trials Armor | 1x | Repeatable armor source. | |
| Osirian Ciphers | 3x | ||
| Ascendant Shard | 45% Chance | ||
| Adept Weapon (Chance 1 & 2) | Varies by streak and team | Two independent chances based on win streak and fireteam wins. | |
| Weekly Streak (Once/Week) | 1-Win: Cores, Prism, Adept Mod, Emblem | See quantities above | Cumulative; claim once per account weekly. |
| 2-Win: Osirian Ciphers | x2 | ||
| 3-Win: Osirian Ciphers, Armor | x2 Ciphers, x1 Armor | ||
| 4-Win: Osirian Ciphers, Cores | x2 Ciphers, x5 Cores | ||
| 5-Win: Yellow Glow, Ciphers, Weapon, Memento, Shader, Emblems | See quantities above | Shader from knockout list. | |
| 6-Win: White/Blue Glow, Prisms | x2 Prisms | ||
| 7-Win (Flawless): Red Glow, Adept Weapon, Base Weapon | x1 Adept, x1 Base | Also unlocks Flawless Passage. |
The Pinnacle Arsenal: Adept Weapons
Adept weapons represent the ultimate prize for many Trials of Osiris participants. These are enhanced versions of standard Trials weapons, boasting slightly improved base stats (typically +3 to two stats when Masterworked), the ability to equip powerful Adept mods (unavailable on regular weapons), and unique visual flair. They are the tangible proof of success in Trials' upper echelons. The post-Heresy system provides multiple pathways to acquire these coveted items:
- Lighthouse Chest: This is the most direct source for players achieving 7 wins on a Lighthouse Passage. As detailed previously, the chest offers two independent chances for the weekly featured Adept weapon to drop, determined by the player's highest weekly win streak (scaling from 30% at 1 win to 100% at 3+ wins) and the number of wins achieved as a full fireteam (guaranteeing a drop if all 7 wins were as a trio). This means even players who don't go Flawless have a reasonable chance to earn Adepts through consistent play or teamwork.
- Flawless Passage Farming: Guardians who achieve a 7-0 Flawless run unlock the Flawless Passage. Subsequent wins while playing on this Passage have a chance to award additional Adept weapons directly as post-match drops. Some player reports suggest this method can be highly efficient, yielding numerous Adept drops, although it requires reaching Flawless first, which remains a significant challenge. It's unclear if a minimum streak is needed on the Flawless card itself to enable these drops, or if any win qualifies.
- Focusing at Saint-14: Once a player has obtained a specific Adept weapon at least once (from any source), they unlock the ability to focus Trials Engrams at Saint-14 to receive additional rolls of that specific Adept weapon. This provides a deterministic, albeit resource-intensive, method for farming desired perk combinations. The exact cost appears slightly inconsistent across sources, but generally involves spending multiple Trials Engrams (possibly 1 or 3), a significant amount of Glimmer (e.g., 50,000), and potentially Adept Ciphers (x10). Adept Ciphers are primarily earned from completing Grandmaster Nightfalls, creating an interesting link between endgame PvE and PvP pursuits. Some sources also suggest that having gone Flawless that week might alter the focusing requirements or enable it, though the core requirement seems to be the initial unlock.
- Weekly Rotation: It is critical to remember that only one specific Adept weapon is available from the Lighthouse chest and potentially post-Flawless farming each week. Players targeting a particular Adept must wait for its week in the rotation. The non-Adept version of the weekly featured weapon is also typically awarded for achieving 5 wins on any Passage.
| Method | Requirements / Drop Chance | Notes |
|---|---|---|
| Lighthouse Chest (Streak) | 7 Wins on Lighthouse Passage. Chance based on highest weekly streak: 30% (1-win), 60% (2-win), 100% (3+ win). | One of two independent chances per chest opening. Weekly rotating Adept only. |
| Lighthouse Chest (Trio) | 7 Wins on Lighthouse Passage. Chance scales with # Trio wins. Guaranteed Adept if all 7 wins were as Trio. | Second independent chance per chest opening. Rewards coordinated team play. Weekly rotating Adept only. |
| Flawless Passage Wins | Achieve 7-0 Flawless run. Subsequent wins on the Flawless Passage have a chance to drop Adepts post-match. | Requires reaching Flawless first. Can be highly efficient farm. Drop chance percentage unclear. Weekly rotating Adept only. |
| Focusing (Saint-14) | Must have earned the specific Adept weapon previously. Costs Trials Engrams (1-3?), Glimmer (50k?), possibly Adept Ciphers (x10). | Allows targeting specific Adepts once unlocked. Resource intensive. Costs may vary/require Flawless week status (needs confirmation). |
Trials Gear & Cosmetics Showcase
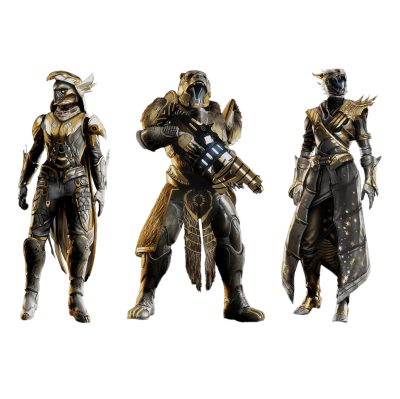
Beyond Adept weapons, Trials of Osiris offers a unique suite of gear and cosmetic items for players to chase.
- Weapon Pool: The Trials loot pool includes a selection of powerful weapons, often featuring unique perk combinations and the exclusive Trials Origin Traits: Alacrity (boosts Reload, Stability, Aim Assist, and Range when last Guardian standing) and One Quiet Moment (improves Reload and Stability after avoiding damage for a short time). Post-Heresy saw the introduction or reprisal of weapons like the Keen Thistle (Solar Aggressive Sniper Rifle), Exalted Truth (Void Adaptive Hand Cannon), and The Inquisitor (Arc Precision Slug Shotgun). Other potential weapons in the pool might include Aisha's Care (Pulse Rifle), Shayura's Wrath (SMG), Tomorrow's Answer (Rocket Launcher), and Yesterday's Question (Hand Cannon). Specific "god rolls" featuring desirable perks like Snapshot Sights, Opening Shot, Precision Instrument, Destabilizing Rounds, or Kill Clip are highly sought after.
- Armor Set: Episode: Heresy introduced a brand-new Trials armor set, designed with a distinct Osiris-inspired aesthetic. Acquiring new pieces of this armor set initially requires specific actions, as simply decrypting standard Trials Engrams may not yield pieces not already in collections. Reliable sources for unlocking new armor pieces include:
- Completing the weekly Pinnacle challenges (50 round wins, 7 match wins) - grants one armor piece per challenge, once per character per week.
- Opening the Lighthouse chest after achieving 7 wins on a Lighthouse Passage - provides one armor piece repeatably.
- The first visit to the Lighthouse each week after achieving a 3+ win streak - grants an armor piece, once per account.
- Winning matches while on a Flawless Passage - offers a chance (reportedly 25%) for an armor piece to drop, repeatably.
- Cosmetics System: Trials cosmetics like Ghost Shells, Sparrows, Ships, and Emblems are now primarily earned through a point-based system. Players accumulate points towards different cosmetic pools (e.g., one for vehicles, one for Ghost Shells) by completing activities like weekly challenges, winning matches, and opening the Lighthouse chest. Progress towards certain items, like Ghost Shells, might be faster for players achieving high win streaks or reaching the Lighthouse. A key feature is the knockout system: once enough points are accrued (e.g., 1000 points mentioned for a guaranteed drop), the player is guaranteed to receive a cosmetic they don't already own from that pool, preventing duplicate drops until the pool is exhausted. Earning an item resets the points for that pool. Specific items mentioned include a Trials-themed Ghost, Sparrow, Ship, new Emblems tied to high streaks or Flawless runs, unique Shaders distributed via the knockout list, and Trials Mementos for weapon crafting. Vehicle cosmetics might be more exclusively tied to high win streaks. This deterministic point system provides a long-term chase, rewarding consistent participation over pure luck.
- Armor Glows: Visual flair can be added to Trials armor via glows, tied directly to win streaks achieved during the week. Typically, a 5-win streak grants a Yellow glow, a 6-win streak grants a White or Blue glow, and a 7-win Flawless streak grants an intense Red glow. These glows are usually temporary, lasting for the week they are earned. Achieving permanent glows might involve acquiring specific ornaments or potentially multiple Flawless runs.
Strategies for Success
Maximizing rewards and achieving personal goals in Trials of Osiris requires strategic planning, whether playing solo or as part of a dedicated team.
Finding a Team
While solo queue is available, the 3v3 Elimination format heavily favors communication and coordination. Therefore, finding a reliable fireteam is highly recommended. Numerous resources exist for finding teammates, including the in-game Fireteam Finder, dedicated subreddits like r/Fireteams, community websites (The100.io, DestinyLFG), console LFG systems, and various Discord servers. Playing with a pre-made team not only improves strategic execution but also provides tangible benefits like bonus reputation and potentially guaranteed Adept weapons from the Lighthouse.
Solo Player Tips
Passage Strategy
The choice of Passage should align directly with the player's goals for the session.
- Use the Trials Passage for: Warming up, practicing against similarly skilled opponents (due to SBMM), farming reputation and Trials Engrams efficiently (thanks to bonus rep on wins and high rep on losses).
- Use the Lighthouse Passage for: Actively attempting to reach the Lighthouse, chasing the weekly Adept weapon, and pursuing win-streak-based rewards. Be prepared for potentially varied matchmaking initially (Open MM) and tougher matches after completion (SBMM).
Players might consider starting on a Trials Passage to farm some reputation and warm up, then switching to a Lighthouse Passage when ready to make a serious attempt at 7 wins.
Reputation Farming
To maximize reputation gains with Saint-14:
- Play consistently throughout the weekend event.
- Prioritize winning individual rounds within matches, as reputation scales with rounds won on the card.
- Utilize the Trials Passage for its inherent bonus reputation on wins.
- Play with clanmates and/or in a full fireteam to benefit from reputation bonuses.
The most efficient farm involves consistent play, ideally on the Trials Passage with bonuses active, focusing on maximizing round wins even in losing efforts.
Adept Farming
For players seeking multiple rolls of Adept weapons:
- Aim for a 3+ win streak on a Lighthouse Passage to guarantee (100% chance) at least one Adept drop from the chest's streak-based chance.
- Play as a full trio for all seven wins on a Lighthouse Passage to guarantee at least one Adept drop from the chest's team-based chance. Combining a high streak with trio play maximizes chest drops.
- Achieve a Flawless (7-0) run and continue playing on the resulting Flawless Passage. Wins on this card offer chances for Adept weapons to drop directly post-match. This requires reaching Flawless but can be very lucrative.
- Focus Engrams at Saint-14 once an Adept is unlocked, using accumulated Engrams, Glimmer, and potentially Adept Ciphers. This is targeted but resource-heavy.
The optimal Adept farm depends on skill and team availability. Trios offer reliability via the guaranteed chest drop. High solo/duo skill can leverage streak chances. Post-Flawless farming yields high volume but has the highest entry barrier.
Loadout Considerations
Ultimately, success in Trials requires choosing the right strategy for the desired outcome. Whether farming reputation on the Trials Passage or hunting Adepts via the Lighthouse and Flawless runs, aligning passage choice, team composition, and playstyle with the specific goal is paramount.
Verdict: Is Trials of Osiris Right for You?
The Trials of Osiris landscape following the Episode: Heresy rework presents a significantly different proposition than its predecessors. By easing access to the Lighthouse, bolstering rewards for participation, and diversifying the paths to coveted loot like Adept weapons, Bungie has broadened the mode's potential appeal while attempting to preserve its identity as a pinnacle PvP activity. But is it right for every Guardian?
Trials remains the definitive endgame PvP experience. The chase for Flawless runs, Adept weapon god rolls, high-stat armor, and exclusive cosmetics (like glows and emblems) continues to offer compelling objectives. The rework arguably enhances the experience for this group by providing more reliable Adept farming methods post-Flawless and clearer paths to cosmetic unlocks. The shift to performance-based matchmaking in the Flawless pool ensures continued high-level competition.
This demographic likely benefits most from the changes. The removal of the Flawless requirement for Lighthouse access makes the iconic space attainable. Significantly improved reputation gains, especially on losses, make consistent play feel rewarding rather than punishing. The ability to earn Adept weapons via win streaks or team play, without needing a perfect 7-0 card, opens up access to pinnacle loot previously out of reach for many. The Trials Passage offers a dedicated space for practice within a more balanced (SBMM) environment.
While Trials remains an intense PvP environment, the barrier to entry for some level of reward is lower than ever. Players less comfortable with high-stakes PvP can utilize the Trials Passage to farm reputation, earn Trials Engrams for focusing base weapons and armor, and contribute to the overall playlist health without the pressure of needing wins for progress. The generous loss reputation ensures time invested yields tangible progress towards vendor rewards.
Ongoing community feedback regarding matchmaking intricacies, particularly the solo player experience versus coordinated teams, indicates that perfect balance remains elusive. However, the general sentiment suggests the Heresy changes were a significant step towards making Trials a more sustainable and broadly engaging activity. For players seeking competitive PvP challenges and some of Destiny 2's most sought-after gear, Trials of Osiris, in its reworked form, offers compelling reasons to step into the arena, regardless of whether their ultimate goal is simply reaching the Lighthouse or achieving the coveted Flawless title.