
Welcome, Guardian, to the Garden of Salvation (GoS), a six-player raid introduced with the Destiny 2: Shadowkeep expansion. Set within the enigmatic and visually stunning Black Garden, this endgame activity pits fireteams against the Sol Divisive Vex in a test of mechanical precision, coordination, and combat prowess. Accessing the raid requires ownership of the Shadowkeep expansion. GoS is known for its unique mechanics, primarily the intricate tether system, and challenging encounters that demand constant communication and awareness from every fireteam member. While sometimes perceived as difficult or prone to bugs, particularly in pick-up groups or during Divinity acquisition runs, mastering the Garden offers significant rewards and a true sense of accomplishment. When featured as the weekly raid, GoS becomes farmable, allowing dedicated teams to pursue specific loot drops repeatedly.
The Allure of Divinity
Beyond the challenge and standard raid loot, the Garden of Salvation holds a unique prize: the Divinity Exotic Trace Rifle. Unlike most raid exotics, Divinity is not a random drop but is guaranteed upon completing a specific questline integrated within the raid itself. This Arc rifle carves a large critical hit spot onto enemies while applying a significant debuff, making it an invaluable support weapon in nearly all high-level PvE activities. Its power ensures that GoS remains a relevant and frequently run activity for Guardians seeking to add this essential tool to their arsenal.
What This Guide Covers
This comprehensive guide serves as your expert walkthrough for the Garden of Salvation. It will cover:
- Detailed explanations of the core mechanics: Tethering, Voltaic Overflow, and the Enlightened buff.
- Recommended loadouts, including weapons, subclasses, and essential mods (both general and raid-specific).
- Step-by-step strategies for all four main encounters, including role assignments and objectives.
- Locations and solutions for the seven in-raid Divinity quest puzzles.
- Locations of the two hidden chests.
- Strategies for completing the encounter-specific challenges.
- Troubleshooting tips for common bugs and glitches.
- Accessibility advice and a glossary of key terms.
Prepare yourself, Guardian. The Black Garden awaits.
Foundational Mechanics: Tools for Survival
Success in the Garden of Salvation hinges on mastering three unique mechanics. Understanding their intricacies and interactions is paramount.
The Tether: Your Connection to the Vex Network
The tether is the defining mechanic of this raid, used in nearly every section to open pathways, activate objectives, and initiate damage phases.
- Functionality: Throughout the raid, you'll encounter glowing blue Vex cubes ("tether boxes"). Shooting an inactive box causes it to open and project a beam of light, tethering the shooter. While tethered, a player cannot shoot and is shifted to a third-person camera view. This initial player can then connect the tether beam to nearby teammates, forming a chain. The ultimate goal is typically to extend this chain from the starting box to a designated endpoint – often a Vex conflux/relay or a distinct, plus-sign-shaped lock.
- Limitations & Handling: The tether has a maximum range. As players stretch the connection, the blue line will thin and eventually turn red, indicating it's about to break. Maintaining line of sight between connected players is also crucial; obstructions will sever the link. Practice judging the maximum distance you can maintain the tether.
- Activation/Deactivation: Precision is key when interacting with tether boxes. Shooting an inactive box turns it on; shooting an active box turns it off. To prevent accidental deactivation, especially during chaotic moments, establish a rule: only the player closest to the box or conflux should shoot it to initiate the tether. Boxes often deactivate automatically once their associated objective is met. Furthermore, many tether boxes are initially shielded by a transparent blue barrier, requiring the defeat of specific "Angelic" Hydra enemies before they can be interacted with, directly linking enemy elimination to mechanical progression.
- Team Coordination & Efficiency: Effective tethering demands clear communication and precise positioning. Agreeing on a fixed tether order (Player 1 always anchors, Player 2 connects to 1, etc.) can significantly speed up the process, even if fewer than six players are needed for a specific connection. Counter-intuitively, adding more players than necessary to a tether chain actually slows down the connection speed. Most tethers require three players, though some specific instances might necessitate four. Using only the required number optimizes speed. The combination of the tether's sensitivity to range, line of sight, the on/off toggle, and its non-intuitive player count scaling makes it arguably the most significant mechanical hurdle in GoS. Mastering it requires more than just understanding the concept; it demands disciplined execution and constant team coordination.
Voltaic Overflow: Handling the Harpy's Burden
This mechanic, primarily featured in the first and third encounters involving the Consecrated Mind boss, acts as a strict time-gate and forces player rotation.
- Source & Acquisition: The Consecrated Mind periodically spits out a distinct, glowing white Vex cube or charge. This charge lands on the ground and persists for only a few seconds (around 5 seconds). A player must run over and collect this charge before it expires; failure to do so results in an immediate team wipe.
- The Debuff: Collecting the charge grants the "Voltaic Overflow" debuff. This debuff lasts for a significant duration: 2 minutes and 30 seconds.
- The Catch: The critical rule is that a player cannot pick up a second Voltaic charge while already affected by the Voltaic Overflow debuff. Attempting to do so will instantly kill that player. The only way to remove the debuff prematurely is by dying.
- Management Strategy: Because the charges spawn relatively frequently (roughly every 30 seconds) and the debuff lasts so long (2:30 min), a single player cannot handle consecutive charges. This necessitates a strict rotation system among the designated players (usually a team of three). Establishing a clear pickup order before the encounter begins is essential to avoid confusion and accidental deaths. This forced rotation adds a layer of dynamic role management, particularly in Encounters 1 and 3, where players must track their own debuff timers and communicate effectively to ensure someone eligible is always ready for the next charge.
Enlightened: Piercing Vex Defenses
The Enlightened buff is crucial for dealing with specific enemy types in the second and fourth encounters.
- Acquisition: Guardians gain the Enlightened buff through two primary methods: successfully completing a tether connection to an active Vex conflux/relay (often requiring an Angelic kill first), or by depositing Voltaic Motes into the correct conflux during the final encounter. The buff typically lasts for 45 seconds.
- Function: Its sole purpose is to allow players to break the impenetrable white immunity shields sported by certain Vex enemies (including Goblins, Minotaurs, and Barrier Champions). Without the Enlightened buff, these enemies are effectively immune to damage.
- Management Strategy: Since the buff is temporary, fireteams must actively manage its uptime. This involves periodically refreshing the buff by re-tethering to a conflux or continuing to bank motes. This creates a core gameplay loop in Encounters 2 and 4: acquire the buff, use it to clear shielded threats, anticipate its expiration, and coordinate with teammates to refresh it before being overwhelmed. If the buff unexpectedly expires while shielded enemies are present, players can resort to body-blocking or using Stasis abilities to temporarily stall them. Certain challenges, like "A Link to the Chain" in Encounter 2, demand near-perfect synchronization of buff refreshes among the entire team.
Key Adversaries: Angelics, Champions, and More
Beyond the main bosses, several challenging enemy types require specific attention:
- Angelics: Distinctive yellow-bar Vex Hydras. Their primary function is often tied to progression; killing them typically unlocks nearby tether boxes or confluxes, allowing mechanics to proceed. They appear in most encounters and should be prioritized targets.
- Overload Minotaurs: Found in Encounter 1 and potentially Encounter 2. They teleport frequently and regenerate health rapidly. While high burst damage can sometimes suffice, using Overload mods or abilities to stun them is the most reliable counter. Stasis or blinding effects can also provide control.
- Barrier Hobgoblins: Appear in Encounter 2. They deploy durable shields that require Anti-Barrier rounds/abilities or the Enlightened buff to penetrate.
- Cyclops: Dangerous stationary Vex turrets that inflict massive Arc damage from long range. They are prevalent in the final corridor of Encounter 1 and during the portal phases of Encounter 4. Snipers are highly effective against them. Eliminating them quickly is critical for survival.
- Supplicants: Exploding Harpies that rush players. Likely encountered during the final defense phase of Encounter 2. Require careful kiting and elimination before they detonate.
- Shielded Vex: Standard Vex units (Goblins, Minotaurs) protected by white immunity shields. Only vulnerable to players with the Enlightened buff. In Encounters 2 and 4, they often attempt to reach confluxes/relays and sacrifice themselves, which can lead to a wipe if too many succeed.
Gearing Up: Recommended Loadouts & Builds
Choosing the right gear is crucial for navigating the Garden's challenges. GoS demands both potent ad-clear and strong single-target damage, along with utility for its specific mechanics.
Weapon Archetypes & Top Picks
Ad-Clear:
The raid features relentless waves of enemies in nearly every phase. Effective ad-clear is non-negotiable.
- Top Choices: Trinity Ghoul with its catalyst is exceptional for clearing groups with chain lightning. Witherhoard provides excellent area denial and passive damage.
- Strong Alternatives: Wave Frame Grenade Launchers (like the raid's own Forbearance, if obtained elsewhere) excel at clearing lines of enemies. High-performing SMGs (like Submission or the newer Imminence) and Auto Rifles (such as the raid's Reckless Oracle) are also viable. Perks like Incandescent can add significant AoE clear.
Single Target DPS (Boss Damage):
Boss damage phases often require sustained output or high burst.
- Linear Fusion Rifles (LFRs): Consistently strong options, especially when paired with Divinity. Cataclysmic (raid drop from Vow of the Disciple), Sleeper Simulant, and Reed's Regret are prime examples. The perk Bait and Switch is highly desirable for maximizing damage.
- Rocket Launchers: Can achieve top-tier DPS, particularly with Gjallarhorn support from one fireteam member. Look for well-rolled legendary rockets like Hothead or Cold Comfort.
- Sniper Rifles: Izanagi's Burden remains a staple for burst damage, often used in swap rotations with auto-loading grenade launchers or rockets. The raid snipers Succession and Omniscient Eye are solid legendary options. Snipers are also crucial for quickly eliminating distant threats like Cyclopses.
- Slug Shotguns: Primarily used in Encounter 3 (Consecrated Mind) for their ability to one-shot the boss's eyes reliably due to low zoom and good ammo economy. Heritage is a commonly cited option.
- Special Grenade Launchers: Often paired with Izanagi's Burden for damage rotations involving firing the GL while Izanagi's reloads its Honed Edge shot.
Utility Weapons:
- Divinity: Almost mandatory for optimizing boss damage. Creates a large, easy-to-hit critical spot and applies a debuff. A useful micro-optimization for Encounter 3 is having the Divinity user shoot the final eye to proc the debuff bubble sooner. Note that the bubble appears near the Sanctified Mind's feet ("tiptoes").
- Tractor Cannon: Provides an alternative debuff if Divinity is unavailable.
- Eager Edge Swords: Swords equipped with the Eager Edge perk dramatically improve mobility and make navigating the raid's jumping puzzles significantly easier. Highly recommended for traversal sections.
- Arbalest: Can be useful in Encounter 3 for dealing with potential Barrier Champions (if applicable modifiers are active) and its intrinsic disruption break.
Subclass Synergies for the Garden
Well of Radiance (Solar): The cornerstone of most raid DPS phases, providing essential healing and a potent damage buff. Often paired with Lunafaction Boots for faster reloads. Careful placement near objectives is key. Can also enable "Well-skating" for faster movement in Encounter 1. The Prismatic subclass's Song of Flame super is emerging as a powerful alternative, offering team-wide buffs and high damage potential.
Shadebinder (Stasis): Excellent for control-focused strategies. Osmiomancy Gloves combined with Bleak Watcher turrets can lock down entire areas and stall powerful enemies, enabling safer execution of mechanics.
Voidwalker (Void): Offers high burst damage with Vortex Nova Bomb, though care must be taken as Cataclysm (Slowva) variants can obstruct teammates' shots. The Devour aspect (Feed the Void) provides immense survivability.
Sentinel (Void): Ward of Dawn (Bubble) provides the crucial Weapons of Light damage buff. In specific high-coordination strategies, Banner Shield can replace Well of Radiance for an even higher (40%) damage buff, though it requires the Titan to hold the shield and not deal weapon damage.
Striker (Arc): Thundercrash paired with Cuirass of the Falling Star delivers massive burst damage, ideal for short DPS windows. Dunemarchers can enhance ad-clear capabilities in Encounter 1.
Sunbreaker (Solar): Provides strong ad-clear potential and the Hammer Strike (Throwing Hammer) melee offers a valuable debuff if needed.
Gunslinger (Solar): Offers top-tier burst DPS with Golden Gun, especially when using the Marksman variant with Celestial Nighthawk. Blade Barrage, combined with Star-Eater Scales, is another potent damage super. Note: The Gunpowder Gamble aspect has historically caused issues with tethers and should potentially be avoided.
Nightstalker (Void): Shadowshot provides a powerful debuff via Tether anchors, weakening bosses for the entire team, alongside excellent ad control capabilities. Invisibility offers clutch potential for revives and repositioning.
Revenant (Stasis): Useful for crowd control and enabling "Shatter Skating" techniques for rapid movement, particularly beneficial in Encounter 1.
Essential Combat Mods & Raid Mods Explained
General Mods: Prioritize Tier 10 Resilience for survivability. Discipline is generally the next most valuable stat for ability uptime. Standard armor mods for ammo economy (Finders, Scavengers), orb generation (Siphon mods), and ability regeneration (Innervation, Invigoration, Bomber) are always beneficial. Buildcrafting systems like Charged with Light or Elemental Wells (now largely superseded by subclass verbs/fragments) can provide further enhancements. Specific builds, like the Stasis Warlock using Firepower, Charge Harvester, and Stacks on Stacks, leverage these systems effectively.
Garden of Salvation Raid Mods: These mods offer powerful, raid-specific benefits and are crucial for optimizing performance, especially for challenges or achieving faster clears. They only function within the Garden of Salvation raid and can be slotted into the dedicated "Vex" (also referred to as "Undying") mod slot present on Garden of Salvation raid armor, Dreambane armor from the Moon, and armor from the Season of the Undying season pass. The primary compatibility factor remains the dedicated raid mod slot.
| Mod Name | Enhanced Version | Effect | Enhanced Effect | Stacking? | Recommended Use Case |
|---|---|---|---|---|---|
| Relay Defender | Enhanced Relay Defender | Increased weapon damage within 5m of an active Vex Relay. | Powerful increase to weapon damage within 5m of an active Vex Relay. | Yes (Normal) | Essential for DPS. Stand near the active relay in Encounters 2 & 4. Enhanced version is key for high damage output/one-phases. |
| Voltaic Mote Collector | Enhanced Voltaic Mote Collector | Gain an overshield after collecting 10 Voltaic Motes. | Gain an overshield after collecting 5 Voltaic Motes. | No | Increases survivability for Mote Collectors in Encounters 3 & 4. Enhanced version provides the shield much faster. |
| Resistant Tether | Enhanced Resistant Tether | Gain damage resistance while part of a tether chain. | Gain powerful damage resistance while part of a tether chain. | Yes | Situational. Useful during platform rebuilding (E4) or chaotic tether moments. Can add safety for Flawless attempts. Generally less impactful than others. |
| Voltaic Ammo Collector | Enhanced Voltaic Ammo Collector | Increased chance of Heavy ammo drops while Voltaic Overflow active. | Greatly increased chance of Heavy ammo drops while Voltaic Overflow active. | No | Beneficial for players frequently taking the Voltaic Overflow debuff (Encounters 1 & 3) to sustain Heavy ammo. |
The significant impact of mods like Enhanced Relay Defender on optimal strategies highlights their importance. However, acquiring these mods relies on raid completions and RNG from specific chests, and equipping them requires compatible armor. This can create a performance gap between fully kitted teams and those without access to these specialized mods, making optimized strategies potentially less accessible for newer or less geared fireteams.
Encounter 1: Evade the Consecrated Mind
The raid begins with a frantic chase sequence, introducing the core mechanics of tethering and Voltaic Overflow under pressure.
Objective & Strategy: The Chase Begins
The primary goal is to escape the invulnerable Consecrated Mind Harpy by opening a series of four Vex gates. This involves clearing enemies in sequential rooms, killing Angelic Hydras to unlock tether boxes, and using the tether mechanic to open the gates, all while managing the Harpy's lethal Voltaic Overflow attack.

Role Breakdown: Go Team vs. Stay Team
Divide the fireteam effectively. Common splits are two teams of three or a four-player "Go Team" and a two-player "Stay Team".
Go Team / Ad Clear Team (3-4 Players):
This group pushes forward into the newly opened room. Their tasks are to:
- Eliminate all Vex enemies swiftly, including challenging foes like Overload Minotaurs and Hobgoblins. Speed is critical. One player might focus on sniping high-priority targets like Cyclopses.
- Once the room is clear, locate and kill the Angelic Hydra that spawns.
- Find the tether box (which is unlocked by the Angelic kill) and form a chain (usually 3 players, never more than needed as it slows the tether) to the lock near the next gate, opening it.
Stay Team / Boss Team (2-3 Players):
This group remains in the previous room with the Consecrated Mind. Their critical function is managing the Voltaic Overflow mechanic. They must establish a rotation for picking up the Voltaic Charges dropped by the boss, ensuring no single player gets the debuff twice and that the charge is collected before it wipes the team. They also clear any remaining adds in their area, like Fanatics.
Navigating the Rooms & Tethering Gates
- Room 1: The initial tether to open the first gate is relatively straightforward. After the gate opens, be ready for two Cyclopses spawning near the start. The boss then becomes active and starts the Voltaic Overflow cycle.
- Rooms 2-4: The core loop repeats. The Go Team clears the next room, kills the Angelic, tethers the gate, and upon success, the Consecrated Mind teleports into that room. Crucially, due to the Voltaic Overflow debuff timers, the teams must swap roles after each gate opening. The previous Go Team becomes the Stay Team, and vice-versa. Tether box locations vary in each room. Remember to use the minimum required players (usually 3) for the tether to maximize speed, though one tether in Room 2 might need four.
- Room 4 - The Pause: This room presents a strategic opportunity. It contains three tether boxes, activated sequentially starting from the right, and requires four players to link. However, successfully linking just the first tether causes the boss to teleport behind the locked gate and cease its Voltaic Overflow attacks. The gate will then open automatically after approximately one minute. Linking the remaining two tethers is unnecessary. This one-minute pause is invaluable for allowing Voltaic Overflow debuffs to expire safely, making it a standard strategy, especially for Flawless attempts.
- Final Corridor Sprint: Once the fourth gate opens, the final phase begins. It's a desperate sprint down a long, open corridor packed with numerous Cyclopses and two Overload Minotaurs. The boss fires off a few last Voltaic Overcharges before retreating. Prioritize eliminating the Cyclopses immediately (Snipers recommended). Players may need to sacrifice themselves to collect the final Overcharges; as long as one Guardian reaches the end of the corridor, the encounter completes successfully.
Common Mistakes & Challenge: "Leftovers"
Avoid incomplete tethers, falling behind the pursuing boss, errors in the Voltaic Overflow rotation, and slow ad-clear which delays progression. A known bug can sometimes prevent the boss from initiating the Voltaic Overflow sequence altogether, halting progress.
The weekly challenge, "Leftovers" (also known as "Staying Alive"), requires keeping the second wave of Cyclopses (the pair that spawns after the first one in a room is killed) alive in every room. This demands precise add control and careful avoidance of splash damage near the designated Cyclops pair.
Divinity Puzzle 1: Beneath the Entrance
- Activation: Before starting the raid proper (before the Consecrated Mind is seen eating a Minotaur), locate the raid's entry platform in the Black Garden. Turn around, drop off the back edge, and find a hidden alcove directly underneath. Inside is a Vex node; interact with it. This activates the Divinity quest puzzles throughout the raid. Platforms will appear to help you jump back up.
- Puzzle Location: Proceed up the large staircase just before the room where Encounter 1 begins. High on both the left and right walls are openings leading into hidden vertical chambers.
- Solution: Divide the fireteam into two groups of three, one group entering each chamber. Locate the tether box at the bottom of the left chamber. Players must form a continuous tether chain, starting from the box, zigzagging up the platforms within the left chamber, extending across the gap between the two chambers (using openings near the main staircase), and then down the platforms in the right chamber to connect to a Vex lock/conflux. This requires careful positioning of all six players. A success message like "Security has been bypassed" will appear in the chat feed upon completion.
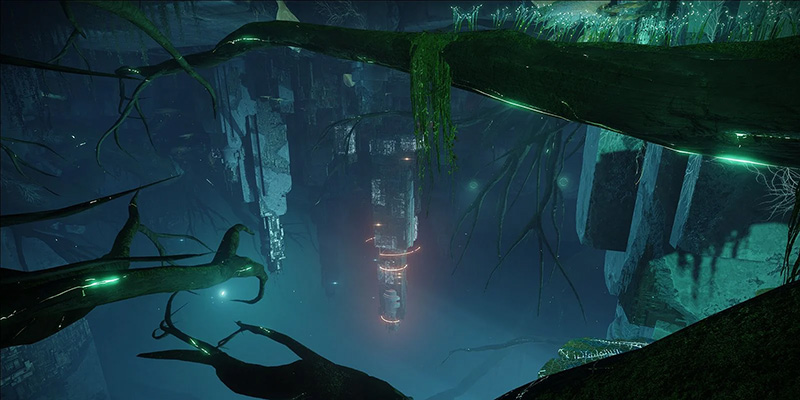
Interlude 1: The Undergrowth Path
Between the first and second encounters lies a significant jumping puzzle through a lush, overgrown Vex environment.
Jumping Puzzle Guide
After completing Encounter 1, drop down into the Undergrowth, an area characterized by massive tree roots and bioluminescent flora. The path involves navigating across these roots, utilizing stone platforms, and interacting with large, green Vex "buds". Shooting these buds causes them to unfold into temporary platforms, essential for crossing large gaps. Swords equipped with the Eager Edge perk are exceptionally useful here, allowing Guardians to cover large distances quickly and bypass tricky jumps. Warlocks benefit greatly from Icarus Dash or well-controlled Glides. For players significantly struggling with the platforming, it's possible to be pulled forward to the next encounter by having the rest of the fireteam start it without them.
Hidden Chest 1 Location
- Pathfinding: As you enter the Undergrowth after Encounter 1, the area typically splits. Take the pathway that hugs the left wall, proceeding across the large tree roots towards stone structures.
- Landmark: Ahead, you will spot a large, bronze-colored Vex machine. To its right, a square Vex elevator platform moves vertically.
- The Spot: Your target is a small opening in the wall located right next to the elevator shaft, at its lowest point of travel. You need to time your jump carefully to land on the elevator platform as it reaches the bottom, then quickly hop off into the adjacent hole before the elevator ascends again. The first hidden chest awaits just inside this alcove.
- Loot: This chest drops gear pieces already acquired from previous raid encounters and, importantly, Garden of Salvation Raid Mods. It cannot grant items new to your collection.
Divinity Puzzle 2: Field of Flowers
- Location: This puzzle is found in the expansive, open area situated after completing Encounter 1 but before the main Undergrowth jumping puzzle begins. It's often described as being in a field of flowers or near a prominent tree. Look for a cave entrance or drop-down, possibly on the right side of the area or near a tree in a shaded spot.
- Solution: Inside the designated cave or chamber, you'll find another tether puzzle. This requires careful positioning of the fireteam members to link a series of Vex nodes, likely arranged in a specific pattern within the room. One detailed strategy involves specific placements under rock formations and near glowing markers to complete the chain.
Encounter 2: Summon the Consecrated Mind (Undergrowth Defense)
This encounter shifts from a chase to a static defense, demanding mastery of the Enlightened buff cycle and coordinated add control across multiple locations.
Objective & Strategy: Defending the Relays
The core objective is to defend a series of Vex relays (also called confluxes or spires) from waves of Vex enemies attempting to sacrifice themselves. Allowing too many sacrifices results in a wipe. To combat the Vex effectively, teams must activate outer relays using the tether mechanic, granting the vital Enlightened buff needed to destroy shielded enemies. The encounter culminates in a final stand at a central relay.
Role Breakdown: Defenders & Floaters
Strategies vary, but generally involve assigning players to defend specific relays while others move between locations.
- Initial Phase (Capturing Relays): Teams often split to capture the initial relays (usually Bottom, Left, and Right). A common approach involves three teams of two. Alternatively, a larger group might push from relay to relay, leaving defenders behind.
- Defense Phase (Holding Relays): Once relays are active, players are assigned as "Anchors" or "Defenders" for specific relays. Other players act as "Floaters" or "Roamers," moving between relays using the Vex teleporter gates (activated upon first tethering a relay) to assist with heavy enemy waves or help refresh buffs.
- Safe Strategy: One particularly safe, albeit slower, approach involves using a Stasis Warlock with Osmiomancy Gloves to continuously freeze and control adds at one relay (e.g., Conflux 1), stalling enemy progression while other mechanics are handled.
Mastering the Enlightened Buff Cycle
This encounter revolves around the Enlightened buff.
- Unlock: Kill the Angelic Hydra guarding a relay's tether box.
- Activate: Use the tether box to form a chain (requires at least two players) to the relay itself. This grants the Enlightened buff to all tethered players.
- Utilize: The buff lasts approximately 45 seconds. Use this time to destroy the white shields of incoming Vex enemies. Prioritize shielded enemies attempting to sacrifice.
- Refresh: Monitor the buff timer. Before it expires, coordinate with teammates at a relay to re-tether and refresh the buff. The ideal time to refresh is during the brief "Undergrowth Defenses Subside" phase between enemy waves. Missing a refresh window can be fatal if shielded enemies overwhelm a relay.
Final Phase: Central Defense
After successfully activating the outer relays (typically four) and enduring several waves of increasingly difficult attacks (including waves where three Angelics spawn at a single relay), the barriers around the arena drop. All players must converge on the central (fifth) relay for a final multi-wave defense against Vex, including Angelics and potentially Supplicants. Maintain the Enlightened buff cycle throughout this final stand. Completing these waves successfully ends the encounter.
Common Mistakes & Challenge: "A Link to the Chain"
Frequent wipes occur due to Vex sacrifices, players disrupting tether chains, letting the Enlightened buff expire at critical moments, or miscoordination during buff refreshes. Accidentally shooting tether boxes can also cause failures.
The weekly challenge, "A Link to the Chain," drastically increases the difficulty by requiring all players in the fireteam to receive the Enlightened buff simultaneously (within a tight 3-5 second window) every single time it is refreshed. This demands exceptional coordination and communication, often necessitating a dedicated coordinator calling out the timing for tether activation. Teams must carefully manage player rotations between relays to ensure groups are formed and ready at multiple locations for synchronized tethering. This challenge fundamentally targets the core difficulty of the encounter – buff management and coordination – pushing it to an extreme level and highlighting the precision required even for standard clears.
Divinity Puzzle 3: Branching Out
- Location: Found during the jumping puzzle section that follows Encounter 2, leading towards Encounter 3. As you navigate the platforms and roots, stick to the far right side, specifically looking for pathways along large tree branches.
- Solution: Locate a tether box concealed beneath a large leaf or similar obstruction on a branch. Shooting this box reveals a series of 6 or 7 distinct red, diamond-shaped Vex nodes scattered nearby. The objective is to create a single tether chain that connects all of these nodes in sequence. This puzzle introduces the "loop" tether formation: all six Guardians form a line tether, and then the last person in the chain moves to connect the beam back towards the first person, closing the circuit.
Encounter 3: Defeat the Consecrated Mind
The Harpy returns, this time as a damageable boss. This encounter combines the Voltaic Overflow mechanic with a unique gaze attack and mote collection.
Objective & Strategy: Containing the Beast
The goal is to damage and ultimately defeat the Consecrated Mind by collecting Voltaic Motes dropped by slain Vex, depositing them at designated relays, managing the boss's lethal "Detained" gaze mechanic, and executing damage phases when the boss is drawn to a filled relay.
Role Breakdown: Mote Team vs. Eyes Team
Split the fireteam into two teams of three.
Mote Team (3 Players):
This team focuses on generating and banking motes. They stay near the currently active Vex relay (indicated by a light). They kill spawning Vex enemies (often Minotaurs) which drop Voltaic Motes. Players collect these motes (max 10 per player) and deposit them into the active relay. The objective is to bank a total of 30 motes in the active relay. Banking all 30 motes triggers the boss to move towards that relay, initiating the damage phase. This team must also defend the relay from any Vex attempting to sacrifice. Efficient mote collection patterns exist, such as one player banking 5, the next 10, the next 10, and the first player returning for the final 5 (5-10-10-5), or three players banking 10 each (10-10-10).
Eyes Team / Boss Team (3 Players):
This team directly engages with the Consecrated Mind. They must constantly follow the boss as it moves between potential relay locations around the arena. Their primary responsibilities are:
- Voltaic Overflow Management: One player must intercept the Voltaic Charge the boss periodically spits out.
- Detained Mechanic: The player who collects the charge is immediately afflicted with the "Detained" status, rooting them in place.
- Eye Callouts & Execution: While a player is Detained, the boss reveals sets of eyes. The Detained player sees which eyes glow red (typically an "Inner" set or an "Outer" set) and must quickly communicate this to their two teammates. The non-Detained teammates, positioned strategically (often left and right of the boss), must shoot only the correct (red) eyes within a very short time window. Shooting incorrect (white) eyes instantly kills the Detained player. Stay clear of the Detained player, as the trapping field has an area of effect.
- Rotation: Due to the Voltaic Overflow debuff acquired after successfully breaking free from Detained, the responsibility of collecting the charge and managing the eyes must rotate among the three Eyes Team members. If all three players have the debuff, they may need to swap a player with the Mote Team. Dying resets the debuff, offering a risky alternative for resetting the rotation.
Damage Phase Tactics
- Triggering DPS: Once 30 motes are successfully banked at a relay, the text alert "Consecrated Mind is drawn to the overloaded Conflux" appears. The boss will begin moving towards that specific relay.
- Execution: All six fireteam members should converge at the designated relay. As the boss arrives, it will expand, revealing numerous glowing red eyes on its chassis. The fireteam must quickly shoot all of these outer red eyes. Successfully destroying all outer eyes reveals a large, central white critical spot. Focus all damage on this central weak point.
- Positioning & Movement: During the damage phase, the boss will slowly retreat back towards the center of the arena. Players need to follow it, continuing to deal damage. Using weapons that allow firing while moving (like Xenophage) or damage buffs that persist while mobile (like Weapons of Light from a Bubble placed strategically) can be advantageous. Shadowshot Tethers can help slow the boss's retreat. Maintain a safe distance, as getting too close to the boss during this phase can trigger a wipe mechanic. Deploy Wells of Radiance and Ward of Dawn for safety and damage amplification. Using Slug Shotguns to break the initial outer eyes quickly is efficient; having the Divinity user break the final eye helps apply the debuff faster.
- Repeat: If the boss is not defeated in one phase, the entire cycle of mote collection, eye mechanics, and damage repeats. Most teams require two or three phases. Be aware of the enrage timer, which limits the number of damage cycles available (possibly four).
Common Mistakes & Challenge: "To the Top"
Common failures include letting Vex sacrifice at the relays, shooting the wrong eyes during the Detained mechanic, mismanaging the Voltaic Overflow rotation, dying to the boss's proximity damage during DPS, or simply having insufficient DPS.
The weekly challenge, "To the Top," requires the Mote Team members to always deposit exactly 10 motes each time they bank. This mandates the 10-10-10 banking strategy and punishes any deviation.
Divinity Puzzles 4 & 5: The Rotating Room
- Location: These puzzles are found in the large, circular transition room encountered after defeating the Consecrated Mind (Encounter 3) and before the jumping puzzle leading to the final boss arena.
- Puzzle 4 (Static Loop): Within this room, locate the tether box. This puzzle likely involves connecting a series of nodes spread throughout the room. It may require forming a 6-person tether loop and arranging the team to match a specific pattern or cover all nodes. Maintaining line of sight between players is crucial for completing the chain across the room's geometry.
- Puzzle 5 (Moving Loop): Using the same tether box as Puzzle 4, the fireteam forms another 6-person tether loop. The challenge here is to move as a cohesive unit, maintaining the tether loop, down one of the corridors that exits this circular room. This requires careful coordination to prevent the tether from breaking due to range or line-of-sight issues while navigating the environment. These puzzles demonstrate increasing mastery of the tether mechanic, progressing from static point-to-point connections to complex loops and coordinated movement while linked.

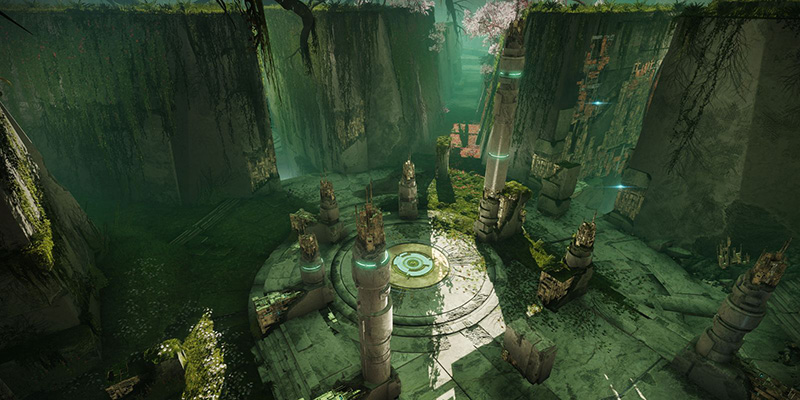
Interlude 2: The Climb to Sanctity
The path to the final confrontation involves another traversal section, culminating in the last Divinity puzzles.
Jumping Puzzle Guide
Navigate the platforms and Vex architecture leading upwards towards the Sanctified Mind's arena. This area features Vex statues, flora, and characteristic Vex milk waterfalls. A key part of the path involves ascending a large tree, often on the right side of the area. As always, Eager Edge swords significantly simplify traversal.
Hidden Chest 2 Location
- Pathfinding: After defeating the Consecrated Mind, proceed through the subsequent jumping puzzle area.
- Landmark: You will reach a large, picturesque open field containing Vex statues, trees, and waterfalls. The main path continues upwards, typically involving climbing a large tree on the right side.
- The Spot: As you ascend the hill past this prominent tree, look for two distinct openings in its trunk. Enter the opening on the left. Once inside, turn 180 degrees to face the entrance you just came through. The second hidden chest rests on a ledge directly above this entranceway. You can reach it by carefully jumping onto a thin tree stump inside the trunk and then ascending to the platform, or by finding an external path around the tree that leads to the top, allowing you to drop down.
- Loot: Similar to the first chest, this drops previously acquired raid gear and GoS Raid Mods. If GoS is the featured weekly raid, it can also drop red-border (Deepsight) versions of the weapons, aiding crafting progression.
Divinity Puzzle 6: Waterfall Ascent
- Location: This puzzle is situated in the final area before the Sanctified Mind boss fight, typically in a section characterized by Vex milk waterfalls. Look for a small room or alcove, possibly with Vex milk on the floor, or search high up near the ceiling.
- Solution: Find the tether box in this area. The objective is to connect the tether vertically upwards to a receiver node located high up, potentially embedded in the ceiling structure. Players may need to form a straight line or utilize ledges to gain height to successfully make the connection. Completing this puzzle activates the plates required for the final Divinity sequence.
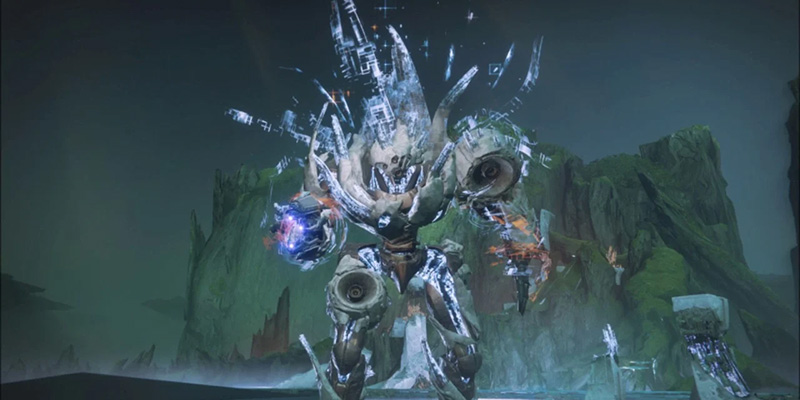
Encounter 4: Defeat the Sanctified Mind
The final battle against the Sanctified Mind, Sol Inherent, synthesizes many of the raid's mechanics into a complex and demanding encounter.
Objective & Strategy: The Final Confrontation
Defeat the Sanctified Mind by managing two types of Voltaic Motes (Blue and Orange), depositing them into corresponding Vex relays to enable a damage phase, rebuilding sections of the arena destroyed by the boss, controlling shielded enemies using the Enlightened buff, and executing a coordinated tether sequence to make the boss vulnerable.
Role Breakdown: Mote Teams & Builders
The most common strategy involves splitting the fireteam into three teams of two.
Mote Teams (Blue Team & Orange Team - 2 players each):
These two teams are responsible for gathering motes.
- Portal Entry: They enter portals opened by the Builders shooting weak spots on the boss (Right Shoulder for Orange/Dark, Left Hip/Leg for Blue/Light).
- Mote Collection: Inside the portal dimensions, they kill Vex enemies to collect the corresponding colored Voltaic Motes. Each team needs to collect at least 15 motes total (across both players), with a maximum carry capacity of 10 per player.
- Extraction: Once they have enough motes, they communicate ("Pull us!") to the teams outside, who then shoot the same boss weak point again to reopen the portal and bring them back to the main arena. Timing the pull correctly is crucial; pulling too early means lost motes. Be wary of explosive damage accidentally triggering pulls.
- Banking & Defending: Upon returning, they deposit their motes into the active relay/conflux of the matching color (Blue motes in Blue/Left relay, Orange motes in Orange/Right relay). Banking motes grants the Enlightened buff. They must then use this buff to quickly eliminate shielded Vex (especially Goblins) attempting to sacrifice at the relays. Mote banking can be flexible; if needed, only one player can be sent into a portal.
Builders (Team 1 - 2 players):
This pair remains in the main arena and manages the environment and portal mechanics.
- Platform Rebuilding: The Sanctified Mind periodically destroys sections of the arena floor (indicated by an orange glow). Builders must quickly identify these hazards and use nearby tether boxes to connect a beam to floating plus-sign shaped locks, restoring the platforms. Maintaining arena integrity, especially the central platforms, is vital for movement and survival. The best time to build is often while mote teams are inside the portals. Building on the opposite side from where motes are currently being banked helps prevent accidental tether interference.
- Portal Management: Builders shoot the boss's weak points (shoulder/hip) to open the portals for the Mote Teams and shoot them again to bring the teams back.
- Add Control: They clear adds in the main arena, paying special attention to Cyclopses that spawn on high platforms, as these pose a significant threat.
- Damage Phase Assist: Builders may need to participate in the tether sequence to initiate the damage phase.
Portal Mechanics, Mote Banking & Rebuilding
- Portals: Kill the initial Angelic enemy to activate the systems. Shoot the boss's right shoulder for the Orange/Dark portal, left hip/leg for the Blue/Light portal. Shoot the same spot again to pull the team back.
- Banking: Deposit motes in the relay matching their color. A total of 30 motes must be deposited in both active relays to enable the damage phase tether. The active relays change after each damage phase, so pay attention to which ones are lit. A fully charged relay will flash red.
- Rebuilding: Locate tether boxes near destroyed floor sections. Link them via tether chain to the corresponding floating plus-sign lock to restore the platform. This is crucial for preventing deaths and maintaining maneuverability.
Damage Phase: Single vs. Double Tether Strategy
- Initiation: Once both active relays hold 30 motes each, a new Angelic spawns; kill it quickly. The Sanctified Mind will then project a large, colored plus-sign lock in front of itself – either Blue or Orange.
- First Tether: A designated team (often Builders plus one Mote collector, or a dedicated 3-person tether team) must create a tether chain starting from the Vex relay matching the color of the boss's lock (Blue lock = Left relay, Orange lock = Right relay) and connect it to the lock on the boss. This requires at least three players. As soon as the tether connects, the boss becomes vulnerable to damage.
- Damage Application: Players not involved in the tether should immediately begin DPS. The boss will typically float upwards, exposing its large white critical spot in the chest/torso area. Deploy Well of Radiance / Ward of Dawn. Apply Divinity (aiming for the feet/tiptoes area) or a Tether debuff. Unleash heavy weapons like LFRs, Rockets, or Izanagi's Burden combos. The initial damage window is relatively short.
- Second Tether (Extending DPS): This is the key to maximizing damage. Immediately after the first tether connects, the same tether team must quickly reposition to the other colored relay. The boss will create a second plus-sign lock, this time corresponding to the second relay's color. The tether team must quickly link this second relay to the new lock. Successfully completing this second tether significantly extends the duration of the damage phase. While the tether team focuses on this second connection, the remaining players should continue dealing maximum damage, ensuring they stay clear of the tether team to avoid interference. Positioning the DPS group on the side opposite the first tether connection can help manage spacing.
- Repeat Cycle: After the damage phase ends, the mechanics reset. Teams must identify the new active relays, collect and bank motes, rebuild platforms, and execute another damage phase. The raid typically allows up to four full damage cycles before the boss enrages.
Common Mistakes & Challenge: "Zero to One Hundred"
Wipes are common due to: reckless portal opening, pulling mote teams back too early, losing motes through the floor (though Hobgoblin/Harpy waves provide extra motes to compensate slightly), failing to stop Vex sacrifices, neglecting platform rebuilding leading to falls, and failures during the damage phase tether (relay not full, targeting wrong color lock, players positioned too far apart, or general tether bugs). Low overall DPS can also lead to hitting the enrage timer.
The weekly challenge, "Zero to One Hundred," focuses entirely on the mote banking process. It requires that each relay (both Blue and Orange) be filled from 0 to 30 motes within a strict 10-second window, starting from the moment the first mote is deposited into that relay for that cycle. This necessitates a highly coordinated banking strategy where all 30 motes for a side are gathered before banking begins, likely with one player holding 10 and the other two players holding 10 each. Once the team is ready and positioned at the relay, all three players must deposit their motes in rapid succession to meet the 10-second requirement. This shifts the encounter's pressure point from steady collection to a high-stakes, synchronized burst deposit, increasing the risk of mote expiration but demanding precise execution at the final step.
Divinity Puzzle 7: The Final Sequence
- Location: This final puzzle resides in a hidden room or alcove accessible from the Puzzle 6 area, near the waterfalls just before the final boss. The room contains six distinct holographic plates on the floor.
- Solution: This is the most complex puzzle, testing sequence recall and coordinated movement under the tether mechanic. All six players must form a line tether (explicitly not a loop) connecting the tether box to a receiver across the room. Activating this initial tether illuminates blue nodes beneath the box and receiver, which project a specific sequence or pattern across the six floor plates. The fireteam must quickly observe this pattern and rearrange their positions while maintaining the tether chain, such that each player stands on the plate corresponding to their position in the tether line (e.g., the first person tethered from the box goes to the first plate indicated in the sequence, the second person to the second plate, and so on). This process must be repeated flawlessly for a total of seven distinct, changing patterns presented by the blue nodes. Success requires assigning numbers or positions to each player in the tether chain and clear, rapid communication to execute each sequence correctly before the pattern resets.
Victory & Spoils (Including Divinity)
Defeating the Sanctified Mind marks the completion of the Garden of Salvation raid.
Locating the Final Chests
Upon the final boss's defeat, a large Vex portal or door will open ahead. Proceed through and jump down into the large Vex milk lake below. In the center of this area, the main raid completion chest will materialize, offering standard raid loot.
Crucially, if the fireteam successfully completed all seven Divinity puzzles throughout the raid run, a second, distinct chest will also spawn in this final area. Its location is often cited as being off to the right side of the main chest.
Confirming Divinity Acquisition
Players who are on the final step of the "Divine Fragmentation" quest must personally interact with and open this second chest to claim their Divinity Exotic Trace Rifle. Simply being present when it spawns is not enough. If a player leaves the raid instance before opening the Divinity chest, they will not receive the weapon and will be forced to complete all seven raid puzzles again on a subsequent run.
Loot Table Overview
The Garden of Salvation offers a unique suite of Vex-themed rewards.
- Weapons: Accrued Redemption (Combat Bow), Ancient Gospel (Hand Cannon), Omniscient Eye (Sniper Rifle), Prophet of Doom (Shotgun), Reckless Oracle (Auto Rifle), Sacred Provenance (Pulse Rifle), Zealot's Reward (Fusion Rifle). These weapons have received perk pool updates and are now craftable, making targeted farming (especially during featured weeks) valuable.
- Armor: The "Transcendence" armor set for each class.
- Mods: Raid-specific armor mods (Relay Defender, Voltaic Mote Collector, etc.) drop primarily from the hidden chests.
- Exotic: Divinity Trace Rifle (from the quest chest).
- Other: Spoils of Conquest (used for purchasing raid gear), exclusive emblems ("Inherent Truth" for completion; "Dive into Darkness" was for the 24-hour completion and is no longer obtainable).
Accessibility & Troubleshooting
Navigating the Garden of Salvation smoothly requires more than just knowing the mechanics; effective communication, awareness of cues, and strategies for handling common issues are vital.
Communication Best Practices
Clear, concise, and timely communication is arguably the most critical skill for GoS.
- Tethering: Call out readiness, confirm connections, announce if the tether breaks or is about to break (red line). Use the agreed-upon tether order. Call out who is shooting the box.
- Voltaic Overflow: Clearly announce pickup intentions ("Picking up charge 1," "I have Overflow, cannot pick up"), countdown timers if necessary, and coordinate swaps.
- Enlightened Buff: Announce when buff is acquired, when it's running low, and coordinate simultaneous refreshes for challenges.
- Eyes Mechanic (E3): The Detained player must make immediate, unambiguous calls ("Inner!" or "Outer!"). Shooters confirm they heard and are targeting.
- Mote Team Pulls (E4): Mote teams need to clearly state when they are ready to be pulled back ("Pull Blue team!"). Builders confirm before shooting the weak point.
- Platform Rebuilding (E4): Builders should announce which platform they are rebuilding ("Rebuilding front right") to avoid collisions or interference.
- Divinity Puzzles: Especially for Puzzle 7, clear assignment of numbers/positions and echoing the required sequence is essential.
- General: Assigning specific roles beforehand reduces confusion. Having a designated lead or coordinator can streamline calls, especially during complex phases or challenges.
Tips for Visual/Auditory Cues
Leverage the game's feedback systems:
- Tether: Watch the beam color (Blue -> Red indicates range limit). Listen for the distinct sounds of tether forming and breaking.
- Voltaic Overflow: The charge has a unique visual appearance. A clear audio warning plays shortly before it detonates if uncollected. The debuff icon is visible on your HUD.
- Enlightened: A buff icon with a timer appears on your HUD. Your character model may have a slight visual glow. Shielded enemies have obvious white energy shields. Distinct sounds play on buff acquisition and expiration.
- Eyes Mechanic: Red vs. White eyes are visually distinct. Relies heavily on verbal callouts.
- Platform Destruction: Floor sections glow bright orange shortly before the boss destroys them.
- Damage Phase Tether (E4): The boss clearly displays a large Blue or Orange plus-sign lock. Visual confirmation when the tether successfully connects.
- Divinity Puzzles: These rely heavily on visual identification of nodes, tether paths, and projected patterns on the floor plates.
Navigating Common Bugs & Glitches
Garden of Salvation has a reputation for being buggy. Being aware of common issues can reduce frustration:
- Tether Failures: Tethers may refuse to connect even with correct positioning. Potential causes include: relay not being full due to missed sacrifices, players exceeding range limits, accidental double-shooting of the activation box, or interference from certain abilities like Stasis or Hunter's Gunpowder Gamble. Double-check all prerequisites and player positioning.
- Mote Physics Issues: Voltaic Motes (especially in E4) can sometimes fall through the floor upon spawning, becoming unrecoverable. While frustrating, the encounter design includes some buffer (Hobgoblin/Harpy waves drop extra motes). Sliding over ground motes might occasionally collect them, but isn't reliable. Avoid supers known to blast objects around near mote spawn points.
- Boss Visual Bugs (E4): The Sanctified Mind may display the incorrect color for the second damage phase tether lock. The consistent workaround is to always tether the opposite colored relay for the second lock, irrespective of the visual cue shown by the boss. The first lock's color cue is generally reliable.
- Encounter Start Issues (E1): Rare instances where the Consecrated Mind fails to start the Voltaic Overflow cycle, preventing the encounter from progressing.
- Troubleshooting Steps: If persistent bugs occur, having the fireteam return to Orbit and reload the raid instance can sometimes resolve them, though this is obviously disruptive, especially during a Divinity run. Before assuming a bug, meticulously re-verify that all mechanical requirements (e.g., relay fully charged, correct number of players tethering, within range) are being met. Patience and methodical execution are key. The frequency and impact of these potential issues mean that adaptability and troubleshooting are almost required skills for mastering GoS.
Controller Mapping Considerations
Destiny 2 offers custom button mapping options on consoles, allowing players to tailor controls to their preference. While no specific GoS layout is universally recommended, players can optimize for reaction time and comfort. Consider mapping frequently used actions like Jump, Primary Fire, Melee (potentially separating charged/uncharged), Grenade, and Class Ability to easily accessible buttons or combinations. Standard controller layouts can be found for reference. Additionally, adjusting general settings like Field of View (FOV), look sensitivity, ADS sensitivity scaling, and reticle color can improve visual clarity and aiming consistency during intense encounters.
Glossary: Garden Terminology
Understanding the specific language used in Garden of Salvation is key for effective communication.
| Term | Definition |
|---|---|
| Angelic | Unique, yellow-bar Vex Hydra enemy. Killing them is often required to unlock tether boxes or progress encounter mechanics. |
| Black Garden | The mysterious, overgrown Vex dimension where the Garden of Salvation raid takes place. |
| Builder | A designated player role in the final encounter (Sanctified Mind) responsible for using tethers to rebuild sections of the arena floor destroyed by the boss. |
| Conflux / Relay | Vex structures found throughout the raid. Used as endpoints for tethers (often granting the Enlightened buff) or as deposit locations for Voltaic Motes. |
| Consecrated Mind | The first major boss encountered, a giant Vex Harpy. Fought in Encounter 1 (chase) and Encounter 3 (defeat). |
| Detained | A mechanic specific to Encounter 3. The player who collects the Voltaic Charge becomes rooted in place and must rely on teammates shooting the correct boss eyes to survive. |
| Divinity | The Exotic Arc Trace Rifle awarded for completing a quest chain culminating in solving puzzles within the raid. Creates a large crit spot and debuffs targets. |
| Enlightened | A temporary (approx. 45s) buff gained by tethering to active relays or banking Voltaic Motes. Essential for breaking the white immunity shields of certain Vex enemies. |
| Eyes (Mechanic) | In Encounter 3, refers to the weak points on the Consecrated Mind revealed when a player is Detained. Correct (red) eyes must be shot based on the Detained player's callout (Inner/Outer). Also refers to the initial set of eyes shot to start the DPS phase. |
| Motes (Voltaic) | Collectible items dropped by Vex in Encounters 3 and 4. Must be deposited at corresponding relays to progress the encounter or enable the damage phase. Encounter 4 features distinct Blue (Light) and Orange (Dark) motes. |
| Sanctified Mind | The final boss of the Garden of Salvation raid, Sol Inherent. |
| Tether / Chain | The core raid mechanic. Involves shooting a Vex box to initiate a beam of light that can be linked between players to connect points, activate objects, or open pathways. |
| Tether Box | The glowing blue Vex cube that initiates a tether chain when shot by a player. |
| Tether Lock | The plus-sign shaped Vex construct that serves as an endpoint for tethers. Used to open gates (E1), rebuild platforms (E4), or initiate the boss damage phase (E4). |
| Voltaic Overflow | A debuff lasting 2 minutes and 30 seconds, acquired by picking up a Voltaic Charge. Prevents the holder from safely picking up another charge during its duration. |
| Voltaic Charge | The glowing white cube/object dropped periodically by the Consecrated Mind (E1 & E3). Must be collected quickly by a player (who then receives Voltaic Overflow) to prevent a team wipe. |
Conclusion: Mastering the Garden
The Garden of Salvation stands as a testament to intricate design within Destiny 2's raid portfolio. Its unique tether mechanics, demanding buff management cycles, and multi-stage encounters require a high degree of teamwork, communication, and individual execution. While its reputation for bugs and the complexity of the integrated Divinity quest can seem daunting, overcoming these challenges offers substantial rewards, including powerful craftable weapons, unique armor, and the coveted Divinity Exotic.
Success in the Black Garden is rarely immediate. It demands practice, patience, and a willingness to learn from mistakes – both individual and collective. Mastering the tether's nuances, coordinating buff refreshes under pressure, executing precise damage strategies, and navigating the Divinity puzzles requires dedication. Yet, the satisfaction of conquering the Sanctified Mind and emerging from the Garden with its secrets unveiled, Divinity in hand, remains one of Destiny 2's truly rewarding experiences. Embrace the challenge, communicate clearly with your fireteam, refine your strategies, and the Garden's rewards will be yours. Good luck, Guardian.