
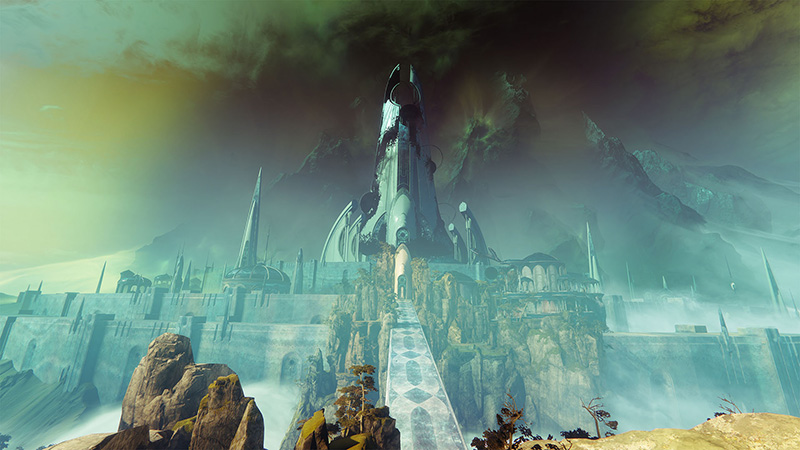
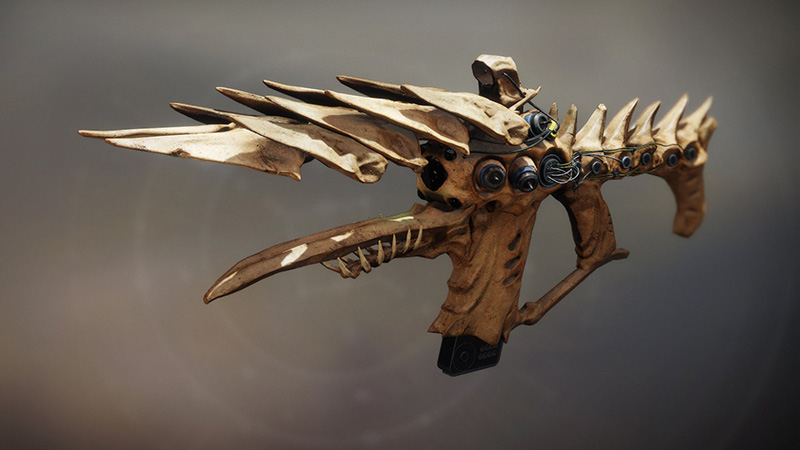
Beyond the Tangled Shore lies the Dreaming City, the hidden jewel of the Awoken, now ensnared by a creeping darkness. Within its heart, a secret kept for generations has been corrupted, twisted by the insidious power of the Taken. This is the domain of Riven of a Thousand Voices, the last known Ahamkara, a wish-dragon of immense power whose very existence fueled the city's magic and ultimately, its curse. Her siren song lured Uldren Sov to madness, orchestrating the events of Forsaken and the death of Cayde-6. Though Uldren fell, the true architect of the Scorn's rise and the Dreaming City's peril remained: Riven, Taken by Oryx during the Taken War and now a pawn in a larger, darker game.
Queen Mara Sov and Petra Venj call upon you, Guardians, to venture where few dare tread, to silence the wish-dragon and break her hold. But beware, for Ahamkara feed on desire, and Riven's death was merely the catalyst for her final, devastating wish. Granted upon her demise, this last wish ensnared the Dreaming City in a three-week curse cycle, forever looping the city through escalating stages of Taken corruption, a tragic consequence born from the Guardians' own desire to end the threat.
The Last Wish raid is more than a mere mission; it is an odyssey into the heart of Awoken mystery and Taken corruption. It stands as one of Destiny's grandest and most intricate endgame challenges, boasting more bosses than any raid before it. Its unique mechanics, from the enigmatic Wall of Wishes to the labyrinthine Vault and the legendary confrontation with Riven herself – a battle that can be faced through intricate strategy or overwhelming force – demand mastery, coordination, and courage. Prepare yourselves, Guardians, for the ultimate test awaits within the Dreaming City's corrupted core.
Preparation: Forging Your Legend
Before embarking on this perilous quest, careful preparation is paramount. While the gates of the Last Wish stand open to all Guardians regardless of Power Level, the challenges within respect strength and resilience. Victory favors the well-equipped and the well-prepared.
Power Level Considerations
Last Wish is a Power Enabled activity, meaning your Power Level directly impacts the damage you deal and receive. While its base recommendation is 1600 Power (a far cry from its original 550 recommendation), aiming higher towards the current Pinnacle Cap (2020 as of Episode: Heresy) will significantly ease the burden. Being under-leveled increases incoming damage and reduces outgoing damage, making encounters substantially harder. Remember that your Artifact provides bonus Power through XP gains, further bolstering your capabilities. While Power advantages are capped, being at or slightly above the encounter's level ensures a smoother experience. Reaching the Soft Cap (1960) is achievable through general play, while Powerful (Hard Cap - 2010) and Pinnacle (Pinnacle Cap - 2020) rewards are necessary for maximum effectiveness.
Class Builds & Subclasses
Coordination and complementary abilities are crucial for a successful fireteam. While flexibility is key, certain subclasses excel in Last Wish:
The Well of Radiance is practically indispensable for most encounters, providing vital healing and damage buffs during DPS phases and crucial survival moments. Consider Nova Bomb for burst damage on specific targets or Shadebinder for crowd control.
Shadowshot (Deadfall or Moebius Quiver) provides essential debuffs, weakening powerful foes and generating Orbs of Power. For pure damage, Golden Gun (with Celestial Nighthawk or Star-Eater Scales) offers immense burst potential, particularly effective against Kalli and Shuro Chi. Arcstrider, Revenant, and Threadrunner offer strong add clear and utility options.
Ward of Dawn (Bubble) grants Weapons of Light and a safe haven during DPS phases. Thundercrash (with Cuirass of the Falling Star) delivers massive burst damage. Sentinel Shield provides excellent defense and add clear. Berserker and Behemoth (especially for Riven cheese using Glacial Quake) offer powerful damage and utility.
Weapon Loadouts: The Ahamkara Hunter's Arsenal
Choosing the right tools for the job is critical. Loadouts should balance add clear, major/boss damage, and utility.
Primary Weapons
Focus on reliable add clear. Options include:
- SMGs (Osteo Striga, Funnelweb)
- Auto Rifles (Age-Old Bond)
- Pulse Rifles (Chattering Bone)
- Hand Cannons (Nation of Beasts, Sunshot)
- Bows (Tyranny of Heaven, Trinity Ghoul)
Special Weapons
Crucial for dealing with tougher enemies and contributing to boss damage. Top choices include:
- Fusion Rifles (Techeun Force, Riptide w/ Chill Clip)
- Sniper Rifles (The Supremacy, Izanagi's Burden, Whisper of the Worm)
- Shotguns (IKELOS_SG, Heritage, slugs for precision)
- Wave Frame Grenade Launchers (Forbearance, Empty Vessel) for add clear
- Witherhoard for excellent passive damage and add control
Heavy Weapons
The primary source of boss DPS:
| Weapon Type | Recommended Options | Best For |
|---|---|---|
| Linear Fusion Rifles | Cataclysmic, Taipan-4fr, Sleeper Simulant, Leviathan's Breath | Excellent sustained precision damage |
| Rocket Launchers | Apex Predator (w/ Reconstruction + Bait and Switch/Explosive Light), Gjallarhorn | High burst damage |
| Swords | The Lament, Falling Guillotine | Riven cheese strategy |
| Heavy Grenade Launchers | Koraxis's Distress (w/ Surrounded), Cataphract GL3 (w/ Bait and Switch) | Specific encounters or Riven cheese |
| Machine Guns | Thunderlord | Add clear, decent damage |
| Exotic Debuffs | Divinity, Tractor Cannon | Team DPS support |
Essential Mods & Consumables
Fine-tuning your build with mods is crucial for endgame success.
Armor Mods
- Stats: Focus on Resilience, then Recovery and Discipline/Strength based on your build.
- Ammo Economy: Equip Ammo Finder mods (Helmet), Ammo Scavenger mods (Legs), and Loader/Dexterity mods (Arms) for your primary DPS weapons.
- Damage: Slot appropriate Surge Mods on your Leg armor during DPS phases to match your heavy weapon's element (e.g., Solar Surge for Apex Predator/Lament).
- Utility: Powerful Friends and Radiant Light (if using Charged with Light mods) or mods like Recuperation (health on Orb pickup) and Time Dilation (extends Armor Charge duration) can be very beneficial. Ensure you have unlocked necessary mods via Guardian Ranks (Rank 6/7 required for most standard mods).
Weapon Mods
- Boss Spec: Increases damage against bosses and vehicles. Essential for most DPS weapons.
- Major Spec: Increases damage against powerful non-boss enemies (Majors/Ultras). Useful for Knights, Captains, etc.
- Minor Spec: Increases damage against rank-and-file enemies. Good for primary add clear weapons.
- Taken Spec: A unique mod dropping from Last Wish secret chests. Provides a 10% damage bonus against all Taken enemies, superior to Minor/Major/Boss spec when fighting Taken. Crucially, Taken Spec works anywhere in the game, not just Last Wish.
- Adept Mods: If using Adept weapons, consider mods like Adept Big Ones Spec for enhanced damage against bosses and majors.
Consumables
Raid Banners are non-negotiable. Purchase them from Petra Venj in the Dreaming City or Suraya Hawthorne at the Tower. Planting one before each encounter fully replenishes Super energy and all ammunition for the entire fireteam. Stock up!
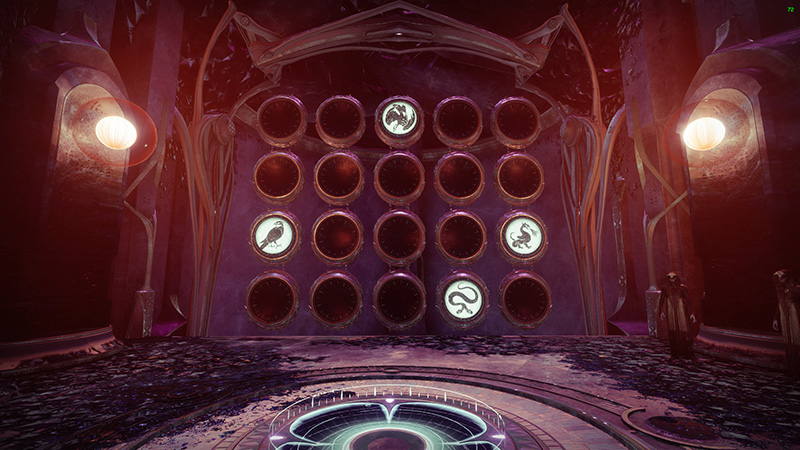
The Wishing Wall: Ahamkara Secrets
Deep within the Dreaming City, hidden from the main path, lies a chamber holding secrets whispered by the Ahamkara themselves – the Wall of Wishes. This enigmatic mechanism allows Guardians to input specific patterns, altering their journey through the raid or granting unique effects.
Location and Use
To find the Wall, venture towards the first encounter, Kalli. Before entering her arena, look to the left near the small lake. Ascend the grassy platforms clinging to the cliffs. This path leads to a hidden room dominated by a large wall grid featuring 20 circular panels, with a single activation plate on the floor.
To make a wish, shoot the wall panels. Each shot cycles the panel through 16 distinct symbols: four fish, four snakes, four dragons, and four birds, in that order. Carefully input the desired pattern across the grid. Once the pattern is set, step onto the central floor plate to activate the wish. A correct pattern results in a white flash, and the symbols fade; an incorrect pattern yields a red/orange flash, resetting the wall. You can input wishes solo, but be mindful that using a teleport wish (Wishes 4-7) prevents you from returning to the start or the Wall without joining another fireteam or using a different character.
The Fourteen Known Wishes
Fifteen wishes were hinted at, but only fourteen have been discovered and are usable by Guardians. Each corresponds to a specific pattern found scattered throughout the Destiny universe.
| Wish # | Name / Purpose | Effect |
|---|---|---|
| 1 | To Feed an Addiction | Grants one Ethereal Key (opens extra chest after Queenswalk; once per account) |
| 2 | A Wish for Material Validation | Spawns hidden chest between Morgeth & Vault (requires Glittering Key to open) |
| 3 | Others to Celebrate Your Success | Unlocks the "Numbers of Power" Emblem for the fireteam |
| 4 | To Look Athletic and Elegant | Wipes team & teleports to Shuro Chi encounter start |
| 5 | For a Promising Future | Wipes team & teleports to Morgeth encounter start |
| 6 | To Move the Hands of Time | Wipes team & teleports to Vault encounter start |
| 7 | To Help a Friend in Need | Wipes team & teleports to Riven encounter start |
| 8 | To Stay Here Forever (Music) | Plays the song "Hope for the Future" by Paul McCartney |
| 9 | To Stay Here Forever (Failsafe) | Activates Failsafe commentary throughout the raid |
| 10 | To Stay Here Forever (Drifter) | Activates Drifter commentary throughout the raid |
| 11 | To Stay Here Forever (Confetti) | Activates "Grunt Birthday Party" (confetti/cheers on precision kills) |
| 12 | To Open Your Mind | Adds a random cosmetic effect (flowers/crown) to players' heads |
| 13 | For the Means to Feed Addiction | Activates "Petra's Run" (wipe on any death sends team to orbit) |
| 14 | For Love and Support | Spawns hidden Corrupted Eggs throughout the raid (requires Wish-Ender bow to destroy) |
The Fifteenth Wish
While patterns exist for a fifteenth wish, it cannot be activated by players within the Last Wish raid itself. This wish gained significance during the Season of the Wish, where its pattern was used lore-wise to cleanse Riven's clutch of eggs, ultimately granting Crow passage into the Pale Heart of the Traveler, setting the stage for The Final Shape. It remains a fascinating piece of lore, forever tied to Riven's legacy but inaccessible within her own lair.
Encounter 1: Kalli, the Corrupted - The Siren's Song
Your first true test within the Last Wish is against Kalli, the Corrupted, one of Mara Sov's powerful Techeuns now twisted by Taken influence. This encounter demands coordination, spatial awareness, and the ability to execute mechanics under pressure.
Objective & Arena Layout
The primary goal is to activate six specific plates scattered around the arena, defeat the Taken Knights that spawn from them, damage Kalli during her vulnerability phase, and utilize hidden safe rooms to survive her devastating wipe mechanic.
The arena is a large, circular chamber. Kalli typically occupies the central platform. Surrounding this platform are nine plates arranged in three distinct sections. Each plate is marked with three symbols. Beneath Kalli's central platform lies a pit lined with rows of doors – these are the crucial safe rooms. While the base Power Level is 1600, Guardians closer to the Pinnacle Cap will find the encounter more manageable.
Mechanics Breakdown
- Symbol Identification: Upon entering, observe the six symbols hanging above the central area around the well. These six symbols correspond to the six "correct" plates out of the nine available that must be activated.
- Plate Activation: Divide the fireteam into three pairs. Each pair is responsible for finding and activating the plates matching two of the central symbols. Approach the correct plate. Each plate is divided into three sections; inspect these sections carefully. Two sections will have hazardous Taken Blights/bombs, while one section will be clear – this is the "safe" section. Stand only on the safe section of the correct plate. While standing on the correct section, bombs on the other sections will detonate harmlessly (typically three times).
- Knight Spawns: After the bomb detonations cease, a powerful Taken Knight will materialize at the activated plate. Eliminate this Knight swiftly. Killing the Knight successfully "completes" or "cleanses" that plate, causing its corresponding symbol in the center to vanish.
- DPS Phase: Once all six correct plates have been cleansed (all six Knights defeated), Kalli becomes vulnerable to damage in the center of the room. Converge on her location, deploy a Well of Radiance or Ward of Dawn, apply debuffs (Tractor Cannon/Shadowshot), and unleash your heavy weapons and Supers.
- Wipe Mechanic & Safe Rooms: After a set duration, Kalli will begin charging a devastating attack, signaled by the message: "Kalli prepares to wield her weapon". At this point, six random doors lining the central pit beneath her will open. Each Guardian must quickly identify an open door and enter it alone. Only one Guardian can survive per open room. Once Kalli unleashes her attack, players emerge from the safe rooms, and the cycle (plates, Knights, DPS, safe rooms) repeats until she is defeated.
Role Focus
- Plate Teams (3 Pairs): The core of the encounter. Each pair must locate their assigned symbol plates, identify the single safe section on each, stand on it until the Knight spawns, kill the Knight, participate in DPS, and crucially, find a unique open safe room during the wipe mechanic. Requires clear communication within the pair and awareness of the overall encounter flow.
- Add Clear (All Players): While plate mechanics are ongoing, Taken Thrall and other enemies will spawn. All players must contribute to managing these adds to prevent being overwhelmed, especially while moving between plates or during the DPS phase. Weapons like Thunderlord or other Machine Guns are effective.
- Support Floater (Optional): A flexible role, potentially assigned if the team composition allows. This player can assist pairs struggling with Knights or adds, provide revives, or simply add more firepower during DPS.
Strategies & DPS
Execute the mechanics as described. Communication is key for plate assignments and safe room coordination. For DPS, Linear Fusion Rifles are often favored due to Kalli possessing a significant critical hit multiplier. Rocket Launchers, Sniper Rifles, close-range options like Shotguns or Swords (being mindful of her stomp attack), and high-damage Supers (Golden Gun, Thundercrash) are all viable. Always use a Well or Bubble for damage phases.
With sufficient Power and coordinated burst damage, Kalli can be defeated before she initiates her first wipe mechanic, eliminating the need for safe rooms entirely. This often involves specific setups like multiple Sleeper Simulants with Tractor Cannon and a Well, or a full team of Star-Eater Scale Golden Gun Hunters. This requires high execution and optimized loadouts.
A less common method involves applying a damage-over-time effect (like Witherhoard or Anarchy) just as Kalli's shield drops before she teleports, then reapplying it when she reappears to kill her, potentially bypassing the plate and door mechanics. This requires precise timing. Anarchy can also potentially stun-lock her.
Wipe Prevention: Avoiding the Siren's Wrath
- Standing on Blighted Sections: The Taken blights/bombs on the incorrect sections of a plate will instantly kill any Guardian standing on them. Always confirm the safe section before stepping on.
- Knights Survive: If any of the six Taken Knights are not killed before the DPS phase begins, fewer than six safe doors will open during the wipe mechanic. This guarantees that some players will have nowhere to hide and will die. Knight kills are non-negotiable.
- Sharing Safe Rooms: Each open safe room can only protect one Guardian. If two players enter the same room, one will die. Establish a clear system for claiming doors (e.g., numbering 1-6, scanning left-to-right, top-to-bottom) or assign general zones.
- Entering Closed Doors: Only enter doors that are visibly open during the wipe mechanic. Closed doors offer no protection and will result in death.
- DPS Greed: Focusing too much on damage and ignoring the "Kalli prepares to wield her weapon" signal can leave insufficient time to locate and reach an open safe room. Prioritize survival over squeezing out extra damage.
- Super Interference: Be cautious when placing Wells of Radiance or using projectile Supers near Kalli or teammates. Accidentally hitting the Well sword or teammates can cause unintended deaths. Position Wells slightly offset from the direct center.
Challenge Mode: Summoning Ritual
Requirement: To complete the Summoning Ritual challenge, the fireteam must activate all nine plates (the six correct symbol plates AND the three incorrect symbol plates) and defeat the three Ogres that spawn from the incorrect plates before initiating the DPS phase. This must be repeated for every cycle if Kalli is not defeated in a single phase.
Strategy: This challenge demands precise timing and coordination. A common approach involves staggering the plate activations:
- Have four players activate four correct plates while two players simultaneously activate two incorrect plates.
- Quickly defeat the two spawned Ogres (usually near the center).
- Have one player activate the final incorrect plate.
- Wait approximately 10 seconds (to allow the third Ogre to spawn and be killed).
- Have the remaining two players activate the final two correct plates.
This sequence prevents the DPS phase from starting prematurely and ensures all three Ogres spawn correctly (activating all three incorrect plates simultaneously may bug out and only spawn two Ogres). An alternative involves assigning three teams to three plates each, activating outer plates first, then converging on middle plates, but requires careful checking that the middle plates aren't all incorrect. This challenge significantly increases the encounter's complexity and requires rapid Ogre elimination alongside standard Knight kills.
Encounter 2: Shuro Chi, the Corrupted - The Tech Witch's Test
Ascending from Kalli's lair, you face Shuro Chi, another of Queen Mara's corrupted Techeuns. This encounter is a frantic race against time, blending intense combat, shield-breaking mechanics, and intricate visual puzzles across multiple ascending floors.
Objective & Arena Layout
The objective is to damage Shuro Chi through six segments of her health bar, surviving her attacks and managing a strict wipe timer. This involves breaking her shield using coordinated Prism Weapon lasers, solving visual puzzles on wall plates to reset the timer, and ascending the tower structure after each phase.
The arena is a large, multi-levelled circular tower. You begin at the base and ascend through three main floors, each featuring damage plates near Shuro Chi and leading to a separate puzzle room. The final DPS opportunity occurs at the very top. The base Power Level remains 1600.
Mechanics Breakdown
- Wipe Timer ("Shuro Chi's Song"): A strict 4-minute timer begins the moment the encounter starts. If this timer reaches zero at any point, the fireteam wipes. Successfully completing the puzzle phase on each floor resets the timer back to 4 minutes. The timer significantly speeds up when the Prism Weapons appear and only returns to its normal rate once Shuro Chi's shield is broken.
- Add Clear: The encounter is packed with Taken enemies, including Thrall, Knights, Captains, and Ogres. Continuous add clear is essential for survival and to allow mechanics to be performed safely.
- Eye of Riven Interrupt: Taken Captains within the arena drop Eye of Riven orbs upon death. A designated player must pick up this orb. Shuro Chi will periodically charge a wipe attack, indicated by visible ripples emanating from her head. The player holding the Eye must use their temporary Super ability (granted by the Eye) to fire a projectile at Shuro Chi, interrupting this attack. Picking up an Eye applies a 90-second debuff preventing that player from picking up another Eye, necessitating a rotation of Eye holders. Stacking too many Eye debuffs (Taken Essence Antumbra) can be lethal.
- Shield Break (Prism Weapons): After clearing initial adds on a floor, three Prism Weapons (crystals) spawn on small plates near Shuro Chi. Three designated players must simultaneously step onto these plates (which inflict damage over time) and aim their crystal's laser beam at the player on the plate to their right. This creates a triangle of light that envelops Shuro Chi, breaking her shield. Coordination is key; jump onto the plates together to minimize damage taken. Breaking the shield quickly is vital as the wipe timer accelerates while the Prisms are active.
- DPS Phase: As soon as her shield shatters, Shuro Chi becomes vulnerable. The entire fireteam must immediately converge on her location (standing very close is recommended) and inflict maximum damage. The goal is to deplete one full segment of her health bar (approximately 1/6th of her total health) before she completes her next song/wipe attack.
- Puzzle Room: After a successful DPS phase, Shuro Chi retreats, and the path to a puzzle room opens. Inside, you'll find nine circular plates on the floor and three large picture plates on the far wall. Each picture plate displays an incomplete 3x3 grid pattern. The fireteam must identify the missing segments needed to complete the full picture. Four players must then simultaneously stand on the four floor plates that correspond positionally to these missing segments. This must be done correctly for all three picture plates. A crucial constraint: no player can stand on the same floor plate twice during the solving of the three puzzles on a single floor.
- Ascension: Successfully solving all three puzzles resets the 4-minute wipe timer and activates floating platforms leading upwards. Ascend to the next floor and repeat the entire cycle: add clear, Eye interrupt, shield break, DPS, puzzle room. After completing the cycle on the third floor, ascend one last time for the final DPS phase to defeat Shuro Chi.
Role Focus
- DPS Team (Entire Fireteam): Everyone must contribute significant burst damage during the very short vulnerability windows after her shield breaks. Close-range, high-impact weapons are preferred.
- Prism Team (3 Players): Requires precise coordination. Must jump onto damaging plates simultaneously, quickly form the laser triangle, and jump off once the shield breaks to minimize damage taken and save timer seconds.
- Eye Holders (Rotational, 1-2 per cycle): Needs keen awareness to spot the Captain, secure the Eye, watch Shuro Chi for the wipe signal (ripples), and land the interrupt shot accurately. Must track the 90-second pickup debuff and communicate rotations.
- Puzzle Solvers (4 Players per puzzle, rotational): Requires rapid visual pattern recognition and clear communication. Must quickly identify the four missing pieces for each image and coordinate standing on the corresponding floor plates simultaneously. Remembering which plates they've already stood on for that floor's puzzle set is vital.
- Add Clear (All Players): Constant responsibility for everyone between mechanic phases. Controlling adds prevents deaths and allows mechanics teams to focus.
Strategies & Puzzle Solutions
Puzzle Strategy: Assign four specific players as the primary puzzle team for each floor, with two floaters managing adds nearby. Use a clear callout system for the missing plates (e.g., "Top Left," "Middle Middle," "Bottom Right"). A numbered system (assigning players 1-4) is highly effective: Player 1 always takes the first missing plate (reading top-to-bottom, left-to-right), Player 2 takes the second, etc. The designated puzzle leader calls out the identified plates, confirms assignments, and gives a clear "Stand" or "Go" command for simultaneous activation. Players must remember they cannot reuse a plate within the same floor's three-puzzle sequence.
Movement: Utilize Eager Edge swords for rapid repositioning between add clear, Prism plates, and puzzle rooms. Warlock Well-skating or Titan skating can expedite ascents between floors.
Wipe Prevention: Silencing the Song
- Missed Interrupt: Failing to hit Shuro Chi with the Eye of Riven super when she signals her wipe attack = instant wipe. Eye holders must be vigilant.
- Insufficient DPS: Not depleting a full health segment during the DPS window results in a wipe. Optimize builds for burst damage.
- Puzzle Errors: Activating incorrect plates, players moving off plates too early (before "Command Accepted"), or failing to activate simultaneously wastes precious time and risks running down the clock. Using the same plate twice in one puzzle set also causes failure.
- Prism Plate Deaths: Lingering too long on the damaging Prism plates can kill the shield-breaking team. Coordinate the jump-on and jump-off.
- Eye Debuff Stacking: Accidentally picking up an Eye of Riven while still under the 90-second debuff can lead to lethal Taken Essence Antumbra stacks. Ensure clear rotation and communication.
- Environmental Hazards / Phalanx: Taken Phalanx shield blasts are notorious for knocking players off platforms or into puzzle plates unexpectedly. Prioritize eliminating Phalanxes, especially near puzzle areas. Avoid using melee abilities near ledges.
Challenge Mode: Which Witch / Coliseum Champion
Requirement: No Guardian in the fireteam can be hit by Shuro Chi's ranged Arc Blast attack (the projectile she fires, not her ground slam push or area lift attack) throughout the entire encounter.
Strategy: This challenge demands constant situational awareness. Maintaining Line-of-Sight (LOS) with Shuro Chi whenever possible allows players to anticipate and dodge the Arc Blast. The most dangerous moments are often right after her lift/slam attacks, as the blast can follow immediately. Players must be extremely careful with positioning, especially during DPS and puzzle phases. Crucially, deployable cover like a Titan Barricade or the Well of Radiance sword can be shot by Shuro Chi; if her Arc Blast hits these objects, it counts as a player being hit and fails the challenge. Position such abilities carefully or rely on mobile defenses/healing.
Encounter 3: Morgeth, the Spirekeeper - The Taken Ogre's Strength
Beyond Shuro Chi's domain lies a vast, open expanse watched over by Morgeth, the Spirekeeper, a colossal Taken Ogre bound by ethereal chains. This encounter tests the fireteam's ability to manage buffs, debuffs, and coordinated movement under pressure.
Objective & Arena Layout
The goal is to collect ten "Taken Strength" orbs scattered across the arena while preventing Morgeth from reaching 100% power. Players accumulating too much Strength become trapped and must be cleansed using an Eye of Riven. Once all ten Strengths are collected, a DPS phase begins where the fireteam must defeat Morgeth before his power overwhelms them.
The arena is a large, open area dominated by a central pit where Morgeth resides. Elevated platforms surround the pit, and a prominent broken bridge marks the entrance side. Taken enemies spawn around the perimeter. The base Power Level remains 1600.
Mechanics Breakdown
- Initiation: The encounter begins when a player picks up the first Taken Strength orb located directly beneath Morgeth in the central area.
- Taken Strength Orbs: Glowing white orbs, known as Taken Strength, will spawn periodically around the arena, often dropped by specific Taken enemies (like Knights) or appearing in waves. Designated players must collect these orbs.
- Strength Stacking Limit: A player can hold a maximum of two Taken Strength stacks at any time. Attempting to pick up a third orb while holding two results in instant death.
- Trapped Players ("Frozen"): When a player reaches two stacks of Taken Strength, they become vulnerable to being trapped or "frozen" by Morgeth in a large Taken bubble. Morgeth typically traps two players per cycle (one after the first wave of Strengths, one after the second), prioritizing players currently holding two stacks. If a trapped player is not freed within a short time, they will die.
- Cleansing Mechanic (Eye of Riven): A specific powerful Taken enemy (often a Captain or Vandal) will spawn and drop a special Taken Essence orb, often referred to as the Eye of Riven in this context. A designated "Cleanser" must pick up this Eye. Crucially, the Cleanser must have zero Taken Strength stacks when they pick up the Eye. The Cleanser then uses the Eye's power (usually grenade ability or shooting the trapped player) to free the trapped teammate. Upon cleansing, the trapped player's two stacks are transferred to the Cleanser.
- Morgeth's Strength Percentage: Morgeth passively gains strength over time, displayed as a percentage on the screen. This gain accelerates if Taken Strength orbs are left uncollected on the field for too long, causing him to enrage. If Morgeth reaches 100% strength, the fireteam wipes.
- DPS Phase Trigger: After a total of ten Taken Strength orbs have been collected by the fireteam (the tenth and final orb typically spawns back under Morgeth where the first one was), Morgeth becomes vulnerable, initiating the DPS phase.
- DPS Phase Execution: The fireteam should quickly gather (usually in a Well of Radiance or Ward of Dawn) and focus fire on Morgeth. His critical spot is the large, pulsating Taken blights on his back.
- Axion Darts (Umbral Blast): During the DPS phase, Morgeth launches volleys of seeking Axion Darts (sometimes called Umbral Blasts) at the fireteam. These must be shot down quickly to prevent deaths.
Role Focus
- Taken Strength Collectors (2-4 Players): Responsible for grabbing the Taken Strength orbs as they appear. Must strictly adhere to the two-stack limit and communicate their current stack count clearly. Often, the team splits responsibility between the left and right sides of the arena.
- Cleanser (1-2 Players): This player must initially avoid collecting any Taken Strength. Their job is to locate and kill the specific enemy carrying the Eye of Riven, grab the Eye, and quickly use it to free trapped teammates. Requires excellent awareness of teammate statuses and positioning. After cleansing, they will hold two stacks and become a potential target for the next trap.
- Add Clear (All Players): Everyone must contribute to controlling the waves of Taken adds (Thrall, Phalanxes, Ogres) that spawn throughout the encounter. Protecting the Collectors and Cleanser is paramount.
- Final Orb Grabber: Typically, the player who picked up the first orb (and thus likely has one stack remaining near the end) is designated to grab the tenth orb that spawns under Morgeth to trigger the DPS phase.
Strategies & DPS
A common and reliable strategy involves forcing the traps onto specific players to make the Cleanser's job predictable.
- Split the team, 3 left and 3 right.
- On one side (e.g., Left), have one player pick up two Strengths immediately when the first wave spawns. The other two players on Left take zero.
- On the other side (e.g., Right), have two players pick up one Strength each. The third player takes zero (this player becomes the initial Cleanser).
- Morgeth will always trap a player with two stacks before trapping a player with one stack. Therefore, the Left-side player with two stacks will be trapped first.
- The designated Cleanser (from Right side) grabs the Eye and cleanses the trapped Left player. The Cleanser now has two stacks.
- When the second wave of Strengths spawns, the players on Right who had one stack now pick up their second stack. The player on Left who was just cleansed (now has zero stacks) picks up one Strength. The other player on Left (who started with zero) picks up one Strength.
- Morgeth will now trap one of the Right-side players (who just reached two stacks). The player on Left who was cleansed earlier (and now has one stack) can potentially grab the next Eye of Riven (if needed and available) to cleanse, or another player who ends up with zero stacks takes over cleansing duties.
- This structured approach minimizes confusion about who gets trapped and who needs to cleanse.
DPS Locations: The two primary spots are the entrance bridge (offers safety and long sightlines, ideal for Whisper or LFRs) or directly behind Morgeth within a Well/Bubble (higher risk due to proximity but better for close-range weapons like shotguns, fusions, or Parasite).
DPS Weapons: The optimal choice depends heavily on whether Morgeth takes reduced critical damage.
- If Reduced Crit Damage: Focus on high total damage weapons that don't rely on precision hits. Grenade Launchers (especially with Bait and Switch), Rocket Launchers, Parasite (a coordinated 5-stack with Tractor Cannon and damage Supers can reportedly melt him), and The Fourth Horseman shotgun are strong options.
- If Normal Crit Damage: Precision weapons become viable again. Linear Fusion Rifles like Leviathan's Breath, Whisper of the Worm, and other high-impact snipers or LFRs targeting the back pustules work well.
- Always use damage buffs (Well of Radiance, Ward of Dawn) and debuffs (Tractor Cannon, Shadowshot).
Wipe Prevention: Resisting the Ogre's Pull
- Orbs Left Uncollected: Allowing Taken Strength orbs to linger on the ground causes Morgeth to gain strength rapidly and enrage, leading to a wipe. Prompt collection is necessary.
- Failed Cleanse: If a trapped player is not cleansed by the Eye of Riven holder before their timer expires, they die. The Cleanser must be swift and accurate.
- Cleanser Has Stacks: If the player attempting to cleanse holds one or more Taken Strength stacks when they use the Eye, they will die instead of freeing their teammate. The Cleanser must always have zero stacks before picking up the Eye.
- Morgeth Reaches 100%: If the team fails to collect all ten Strengths and initiate DPS quickly enough, or if DPS is too slow, Morgeth will reach 100% strength and wipe the fireteam.
- Axion Dart Fatalities: During the DPS phase, the seeking Axion Darts can easily kill Guardians focused on damaging the boss. Assign one or two players to prioritize shooting these down. Warlocks in a Well should be wary, as darts can still pose a threat. A Titan barricade placed behind the Well can help block them.
Challenge Mode: Forever Fight
Requirement: Complete the Morgeth encounter without killing any of the large Taken Ogres that spawn throughout the fight.
Strategy: This challenge dramatically increases the environmental danger. Ogres must be left alive, meaning their powerful knockback eye blasts are a constant threat. Players must focus fire solely on other adds (Knights, Captains, Thrall, Phalanxes). Avoid using weapons or abilities with large Area-of-Effect (AoE) damage near the Ogres, such as Dragonfly, Incandescent, Voltshot, certain grenades, or explosive Supers. Crowd control abilities like Stasis freeze/slow or Blinding Grenades can be invaluable for managing the Ogres' aggression without killing them. Strength Collectors and the Cleanser will need extra protection and careful positioning to avoid being pushed off ledges or into danger by the Ogres.
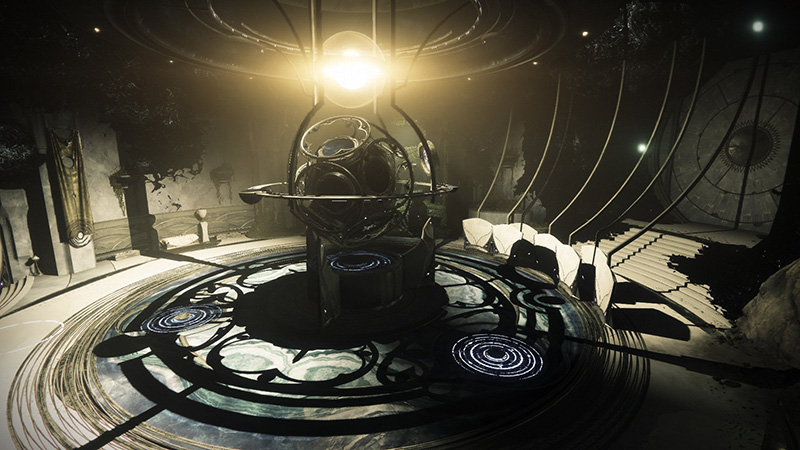
The Vault: Unlocking the Way Forward
Overview
The Vault serves as the penultimate encounter before facing Riven herself. It acts as a complex locking mechanism, demanding less in terms of raw damage output and more in terms of intricate teamwork, precise communication, and acute spatial awareness. Success in this encounter hinges on the fireteam's ability to process and relay information effectively under pressure. Failures often stem directly from miscommunication or delays in executing the core symbol-cleansing mechanic.
Core Mechanic - Symbol Reading and Cleansing
The encounter revolves around correctly identifying and "cleansing" symbols associated with three plates surrounding a central chamber. These plates are typically identified by nearby environmental features: Tower (often referred to as Left), Forest (Middle), and Rock (Right).
The fireteam typically splits into two groups:
- Readers (3 Players): These Guardians remain in the central chamber. Their primary responsibility is to observe a large holographic display that shows three specific symbols required for the current cycle.
- Runners/Cleansers (3 Players): Each Runner is assigned to one of the outer areas corresponding to the Tower, Forest, and Rock plates. Their main task is to locate Taken Blights spawning near smaller plates in their designated zone. Standing within the Blight cleanses the plate, revealing crucial information.
This division of labor creates a situation where vital information is distributed across the team. Readers know which symbols are needed, but only Runners can reveal potential matches by cleansing plates in the outer areas. This inherent separation forces a continuous loop of clear communication. Runners must announce which plate they are cleansing, allowing Readers to focus their attention.
When a Runner stands on a plate needing cleansing, two symbols appear near that plate: one to the Left and one to the Right from the Runner's perspective. The Runner calls out their location (e.g., "Cleansing Middle Plate"). The Readers in the center compare the two symbols displayed at the Runner's location to the three required symbols shown on the central display.
Once the Readers identify which of the Runner's two symbols matches one of the required central symbols, they must determine if that correct symbol is on the Runner's Left or Right side. They then provide a specific directional callout:
- "Penumbra": If the correct symbol is on the Left (counter-clockwise relative to the plate's center).
- "Antumbra": If the correct symbol is on the Right (clockwise relative to the plate's center).
Upon hearing the correct callout ("Penumbra" or "Antumbra"), the Runner locates a corresponding buff near their plate – a dark orb for Penumbra, a light orb for Antumbra. They pick up this buff and quickly return to the central chamber to deposit it in the receptacle matching their plate's location (Left, Middle, or Right). This process must be successfully completed three times per cycle – once for each of the three main plates – to advance the encounter. Accuracy and speed are crucial, as incorrect deposits empower the Vault's security mechanism, eventually leading to a wipe.
Managing the Might of Riven (Knights)
The Knights serve multiple functions that test the fireteam's coordination. Firstly, they divert the Runners' attention from the cleansing mechanic, forcing them to juggle combat and objective play. Secondly, they pose a lethal threat to any Guardian caught unaware. Most critically, if a Might of Riven Knight manages to reach the central chamber, it will slam its sword into one of the deposit receptacles, locking that plate and almost invariably causing a wipe. This makes Knight control a non-negotiable aspect of the encounter.
Runners must immediately call out the location of a spawning Knight (e.g., "Knight spawning Right!"). Often, the assigned Runner needs assistance from teammates, potentially even the Readers stepping out briefly, to neutralize the Knight before it travels too far. Heavy ammo, special weapons, or coordinated Super abilities are frequently necessary for quick deletion, especially when under time pressure to complete the cleansing cycle.
Vault Security Mechanism (Wipe Mechanic)
The encounter operates on a timer implicitly tied to the Vault's security system. Incorrect Penumbra/Antumbra deposits or allowing a Might of Riven Knight to reach the central chamber accelerates the activation of this security system, culminating in a fireteam wipe. Efficient execution of both cleansing and Knight elimination is paramount.
Role Focus: The Vault
Readers (3 Players)
- Primary Tasks: Remain in the central chamber. Identify the three required symbols on the central display. Listen attentively for Runner callouts indicating which plate is being cleansed. Quickly compare the Runner's symbols to the required ones and identify the correct match. Clearly and immediately call out "Penumbra" (Left) or "Antumbra" (Right) based on the correct symbol's position relative to the Runner.
- Secondary Tasks: Assist with clearing minor Taken enemies (Psions, Goblins) that spawn in the central chamber. Be prepared to briefly assist with Knight damage if one gets dangerously close to the center.
- Key Skills: Rapid visual identification, clear and concise communication, active listening.
Runners/Cleansers (3 Players - Left, Middle, Right)
- Primary Tasks: Proceed to the assigned outer plate area (Tower/Left, Forest/Middle, Rock/Right). Locate and stand on plates needing cleansing (indicated by Taken Blights). Clearly announce location when cleansing ("Cleansing Left Plate!"). Listen for the Reader's Penumbra/Antumbra callout. Pick up the corresponding buff (dark=Penumbra, light=Antumbra). Return to the center and deposit the buff in the correct receptacle. Prioritize locating and eliminating the Might of Riven Knight immediately upon its spawn. Call out Knight spawns instantly.
- Secondary Tasks: Manage local Taken ads in the assigned area. Communicate if overwhelmed or needing assistance with the Knight.
- Key Skills: Spatial awareness, efficient movement, ad control (especially Knight prioritization), clear communication, executing mechanics under pressure.
Wipe Prevention Callouts
Standardizing callouts minimizes confusion and reaction time. Essential Vault callouts include:
- "Knight Left/Middle/Right!" (Immediate priority)
- "Knight pushing Center!" (Emergency)
- "Cleansing Left/Middle/Right Plate!"
- "Reading Left/Middle/Right symbols now!"
- "Need Penumbra/Antumbra call for Left/Middle/Right!"
- "Left/Middle/Right is Penumbra!" or "Left/Middle/Right is Antumbra!"
- "Depositing Left/Middle/Right Penumbra/Antumbra!"
Challenge Mode - Keep Out
The Vault encounter challenge, Keep Out, imposes a strict condition: no Might of Riven Knight is permitted to enter the central chamber at any point during the encounter.
This challenge significantly raises the stakes of the existing Knight mechanic. It transforms a standard failure condition (Knight reaching the center) into an absolute, zero-tolerance requirement. Success demands extreme vigilance from the Runners, immediate and clear communication regarding Knight spawns, and potentially pre-emptive positioning or dedicated loadouts focused on rapid Knight elimination. Even a single Knight stepping across the threshold into the center room fails the challenge. This forces a higher level of coordination and emphasizes the ad control aspect inherent in the base encounter design.
"Time is money, friend!"
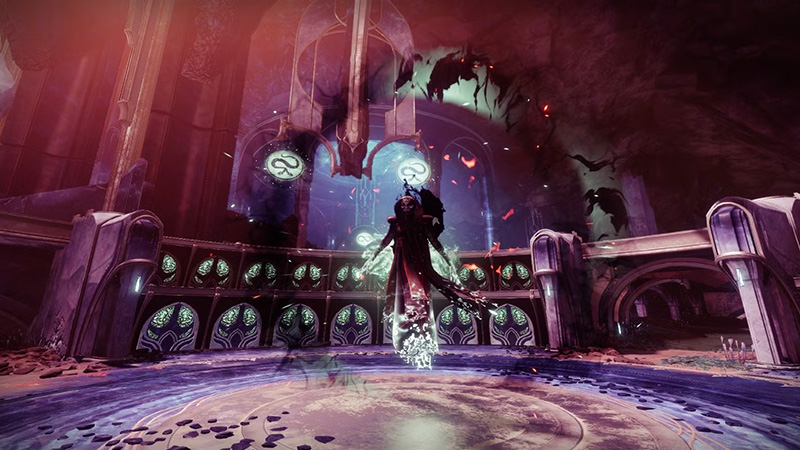
Riven of a Thousand Voices: The Ahamkara's Lair
This is the climactic encounter of the Last Wish raid: the confrontation with Riven of a Thousand Voices, the last known Ahamkara. This battle is renowned within the Destiny community for its complexity when performed as intended (the "legitimate" or "legit" strategy). However, due to this complexity, alternative "cheese" strategies focusing on overwhelming damage have become exceedingly popular. This guide will cover both approaches.
Legitimate Strategy ("Legit")
The intended method for defeating Riven involves splitting the fireteam, managing intricate mechanics across two separate arenas simultaneously, and coordinating precise actions based on information relayed between the two groups.
- Splitting the Team: The encounter begins with the fireteam dividing into two teams of three. One team starts in a room characterized by blue crystals, while the other starts in a room dominated by large, yellowish trees. Riven will initially appear in only one of these rooms. The team in the room without Riven will instead face waves of Taken enemies and eventually a specific target: the Eye of Riven.
- Riven's Attacks & Tentacles: When facing Riven directly, Guardians must contend with several lethal attacks. These include devastating fire breath covering large portions of the arena, powerful physical slams, and quick tentacle strikes targeting players. Constant movement and utilizing available cover are essential for survival. Periodically, Riven will slam one of her large tentacles onto the arena floor. Shooting the glowing pustules or weak points on the tentacle will cause her to briefly stagger, interrupting her attacks.
- The Eye of Riven Mechanic: The team not currently facing Riven must focus on clearing Taken reinforcements and locating a special Taken Captain known as the Eye of Riven. Defeating this Captain causes it to drop a Taken Strength orb. One player from this team must pick up the orb, gaining the "Eye of Riven" buff. This buff grants the unique ability to perceive hidden symbols on a central totem within their room, symbols invisible to other players.
- Symbol Reading & Eye Shooting: The player carrying the Eye of Riven buff must use a gravity lift to ascend towards the ceiling. From this vantage point, they can see the totem symbols clearly. Their crucial task is to identify a specific symbol (which one depends on the cycle) and communicate its location or identity to the other team – the team currently facing Riven. Simultaneously, Riven will present her face to the team engaging her, revealing ten eyes. Several of these eyes will begin to glow. The team facing Riven must identify which two specific eyes are glowing and shoot only those two eyes, nearly simultaneously. Shooting the wrong eyes, shooting eyes that aren't glowing, or failing to shoot the correct pair quickly enough results in an immediate wipe.
- Pairing Symbols and Eyes: The symbol called out by the Eye carrier in one room corresponds to a specific pair of Riven's eyes that the team in the other room needs to target. Fireteams absolutely must establish a clear, pre-agreed system for identifying Riven's eyes (e.g., numbering them L1-L5 for the left side, R1-R5 for the right side, from the perspective of facing Riven) and a corresponding mapping of symbols to eye pairs. The Eye carrier calls out the symbol, and the Riven team translates this callout into the correct L/R eye combination to shoot.
- Damage Phase: After successfully identifying and shooting the correct pair of eyes twice within a cycle, Riven will react by reeling back and exposing glowing pustules within her mouth. Shooting these specific mouth pustules will stun her, initiating the main damage phase. At this point, both teams typically converge in the room where Riven is stunned. This is the primary opportunity to deal significant damage. Abilities like Well of Radiance for survival and damage amplification, debuffs like Shadowshot or Tractor Cannon, and high-output damage Supers and Heavy weapons should be deployed, focusing fire on her mouth for critical hits.
- Ascendant Plane: Following the damage phase, all players are teleported into the Ascendant Plane for a frantic climbing sequence. Guardians must race upwards, navigating platforms, avoiding environmental hazards, and dodging projectiles from Taken Phalanxes. Along the path, Taken Strength orbs appear; collecting these extends a debuff timer displayed on screen. Reaching the top portal before this timer expires returns players to the main encounter arena to repeat the cycle of symbol reading, eye shooting, and damage. Failure to ascend in time results in death.
- Final Stand: Once Riven's health is depleted to its final segment (approximately 10-15%), she initiates a "Final Stand" sequence. All six players are brought together, and Riven presents her glowing eyes one last time. The team must quickly identify all glowing eyes (typically six) and coordinate to shoot the designated pairs simultaneously, just like during the main cycles. Successfully shooting all correct eyes triggers the start of the Queenswalk sequence. Failure at this stage results in a wipe.
Challenge Mode - The Floor is Lava
The Riven challenge, known as The Floor is Lava, requires that no player in the fireteam takes damage from Riven's fire breath attack at any point during the main encounter cycles (excluding the Final Stand). This demands constant situational awareness from every player. Guardians must learn to recognize the telegraphs for the fire breath attack, anticipate its area of effect, and prioritize moving to safe locations, even if it means sacrificing optimal positioning for mechanics or damage. This challenge layers a personal survival requirement onto the already complex team mechanics, punishing players who develop tunnel vision.
Cheese Strategy
Given the intricate nature and potential length of the legitimate strategy, various "cheese" methods have emerged and become the default approach for many fireteams. These strategies aim to bypass the majority of the mechanics by dealing massive, concentrated burst damage to Riven shortly after the encounter begins. The most common variants typically involve Swords or specific Rocket Launchers, depending on the prevailing game meta.
- The Setup: The entire six-player fireteam gathers in one of the starting rooms, usually the yellow/orange tree room (though the blue crystal room is used for some variants). Before starting, players typically use Rally Banners to ensure full Super energy and Heavy/Special ammunition. Buffing abilities like Well of Radiance and debuffs like Tractor Cannon or Shadowshot are prepared.
- Triggering the Encounter: One player initiates the encounter, often by shooting Riven's foot or claw as it appears near the edge of the room, or by using another specific trigger depending on the exact cheese method. The goal is to lure Riven to the team's location without triggering the standard mechanic cycle.
- Damage Application: As Riven leans into the room or presents a vulnerable area (like her mouth or claw, depending on the strategy), the fireteam executes a coordinated damage burst. A Well of Radiance is placed for protection and buffs. A debuff (Tractor Cannon, Shadowshot) is applied. Players then unleash their highest damage output simultaneously. Swords (historically Lament or Falling Guillotine) swung at her mouth/claw, or volleys of powerful Rocket Launchers (like Gjallarhorn or rockets with Cluster Bomb/Lasting Impression perks) are common choices. The Exotic Trace Rifle Divinity is often crucial, creating a large, easy-to-hit critical spot that also applies a debuff.
- The Wipe Mechanic (Cheese Context): The cheese is a race against time. If the team fails to deplete Riven's health sufficiently before she completes certain animations or initiates a standard wipe mechanic (like starting the eye sequence because damage was too slow), the attempt fails. Success relies entirely on rapid, overwhelming, and coordinated burst damage from all six players.
- Final Stand (Cheese Context): Even if the cheese is successful in bringing Riven to the Final Stand health threshold very quickly, the team must still complete the Ascendant Plane climbing sequence and then successfully execute the Final Stand eye shooting mechanic as described in the legit strategy. However, reaching this phase via the cheese method is significantly faster.
Role Focus: Riven of a Thousand Voices
Primary Tasks: Manage Riven when she appears in this room, dodging attacks and shooting her tentacle when slammed. Alternatively, manage Taken adds if Riven is in the other room. Listen for the Eye carrier's symbol callout from the other team. When Riven presents her eyes, quickly identify the correct pair based on the callout and shoot them simultaneously. Participate in the main DPS phase when Riven is stunned. Navigate the Ascendant Plane. Execute the Final Stand eye shooting.
Key Skills: Ad control, precise shooting (eyes, tentacles), clear communication reception, high DPS during damage phases, spatial awareness (Ascendant Plane).
Primary Tasks: Manage Taken adds when Riven is not present. Prioritize killing the Eye of Riven Taken Captain when it spawns. Designate one player to pick up the Taken Strength orb and become the Eye Carrier. The Eye Carrier ascends, identifies the required symbol, and clearly communicates it to the other team. The other two players manage remaining adds and prepare for Riven's potential appearance or the DPS phase. Participate in the main DPS phase. Navigate the Ascendant Plane. Execute the Final Stand eye shooting.
Key Skills: Ad control (especially Eye Captain), clear and accurate communication (Eye Carrier), high DPS during damage phases, spatial awareness (Ascendant Plane).
Primary Tasks: Gather in the designated room and prepare buffs/debuffs. Execute maximum coordinated burst damage on Riven at the correct moment. Navigate the Ascendant Plane. Execute the Final Stand eye shooting.
Key Skills: High personal DPS output, precise timing of buffs/debuffs and damage application, coordination, spatial awareness (Ascendant Plane), precise shooting (Final Stand eyes).
Wipe Prevention Callouts
Clear communication is vital, especially for the legit strategy:
// Legitimate Strategy Callouts
"Riven is Tree/Crystal room!"
"Eye Captain is down!"
"Grabbing Eye orb!"
"[Player Name] is Eye Carrier!"
"Eye Carrier ascending!"
"[Symbol] Symbol!"
"Ready for eyes!"
"Shooting!"
"Tentacle Slam!"
"Mouth open, STUN!"
"DPS Phase!"
"Climbing!"
"Ready for Final Stand Eyes!"

// Cheese Strategy Callouts
"Riven coming to Tree/Crystal!"
"Place Well NOW!"
"Tractor/Tether Applied!"
"DAMAGE! DAMAGE! DAMAGE!"
"She's low, prepare for climb!"
"Final Stand Eyes - [Callout pairs]!"
Queenswalk: Escorting the Heart
Defeating Riven is not the end of the raid. The fireteam must then escort her disembodied, still-beating heart out of the corrupted depths of the Dreaming City. This final sequence, often called the "Heart Run" or "Queenswalk," is a timed, relay-style escape through the Ascendant Plane.
The Timer - Fate's Chosen
The sequence begins when one player approaches and picks up Riven's Heart. This player immediately receives the "Fate's Chosen" buff, which is actually a debuff accompanied by a visible countdown timer starting around 15 seconds. If this timer reaches zero, the player carrying the Heart instantly dies, likely causing a wipe unless the Heart is immediately recovered.
Extending the Timer - Taken Strength
Scattered along the escape path are floating Taken Strength orbs, similar to those seen in the Morgeth encounter and Riven's Ascendant Plane climb. Picking up one of these orbs instantly resets the Fate's Chosen timer for whoever is currently carrying the Heart but simultaneously teleports the player who picked up the orb deep inside an ethereal representation of Riven's Heart.
Inside the Heart
The player teleported inside the Heart finds themselves in a unique space with their own separate countdown timer displayed. Their objective is to navigate this internal space and collect glowing white motes of light before their personal timer expires. Each mote collected adds time to the external Fate's Chosen timer, but this extra time is granted to the next person who enters the Heart. The goal is to collect as many motes as possible to maximize the time available for subsequent runners. Once the internal timer expires, the player is automatically teleported back out to join the main group.
This mechanic creates a crucial dependency chain. The amount of time the current Heart carrier has depends directly on how many internal motes the previous player collected while inside the Heart. If a player performs poorly inside, collecting few motes, the next player to enter will grant very little extra time when they pick up their Taken Strength orb. This can lead to a cascading failure, where subsequent Heart carriers have progressively shorter timers, making it increasingly difficult to reach the next Taken Strength orb before dying. Consistent performance from everyone entering the Heart is vital for success.
Passing the Heart
Critically, the player currently carrying the Heart (with the Fate's Chosen timer) cannot pick up the Taken Strength orbs themselves. Another member of the fireteam must anticipate the timer running low and intentionally grab the next Taken Strength orb just before it expires. This action resets the timer for the current carrier, teleports the orb-grabber inside the Heart, and transfers the Fate's Chosen buff/timer to a different player in the group (often prioritizing someone who hasn't held it recently, though the selection can feel random). This relay continues along the entire path.
The Path
While managing the timer and orb relay, the entire fireteam must navigate a treacherous path through the Ascendant Plane. This involves platforming sections, avoiding environmental hazards, and dealing with numerous Taken enemies, particularly Hobgoblin snipers and Phalanxes attempting to push players off ledges. Clear communication is essential for guiding the Heart carrier (whose screen may be obscured), coordinating who will grab the next orb, and calling out immediate threats.
The Dunk
The Queenswalk concludes when the fireteam reaches a final chamber containing a large Sphere surrounded by Techeuns. A player currently carrying Riven's Heart must reach this Sphere and interact with it to "dunk" the Heart, completing the encounter and the raid.
Challenge Mode - Keep Away / Summoning Ritual
Queenswalk has associated Triumphs that function as its challenge mode. One common challenge condition, potentially tied to the "Summoning Ritual" Triumph name or simply known as "Keep Away," requires players to avoid being slowed or damaged by the large, stationary Taken Blight spheres found along the path. These Blights create a hazardous area-of-effect. Successfully completing this challenge demands careful pathing, precise movement, and potentially designating players to quickly destroy the Blights before the Heart carrier gets too close. This adds another layer of execution requirement, focusing on environmental hazard avoidance during the already complex timer and relay mechanic. Another possible challenge involves completing the encounter without any single player picking up the same Taken Strength orb twice, requiring careful rotation management. Petra's Run (a flawless full raid completion) inherently includes a flawless Queenswalk.
Role Focus: Queenswalk
Primary Tasks: Follow the designated path as guided by teammates. Clearly and frequently communicate the status of the Fate's Chosen timer (e.g., "Timer at 10!", "Timer at 5!", "Need orb NOW!"). Rely entirely on teammates to manage Taken Strength orb pickups.
Key Skills: Following directions precisely, clear and loud communication regarding timer status.
Primary Tasks: Identify the location of upcoming Taken Strength orbs along the path. Coordinate with teammates to determine who will grab the next orb. Time the pickup to occur just before the current Heart carrier's timer expires. Once teleported inside the Heart, efficiently collect as many white motes as possible before the internal timer runs out.
Key Skills: Excellent timing, clear communication for coordination, spatial awareness, efficient movement within the internal Heart space.
Primary Tasks: Eliminate Taken enemies along the path, prioritizing threats like Hobgoblins and Phalanxes. Clearly guide the Heart carrier along the correct path, calling out jumps and turns. Identify and call out the locations of upcoming Taken Strength orbs. Actively avoid or destroy Taken Blights, especially if attempting the challenge.
Key Skills: Effective ad control, strong knowledge of the Queenswalk path, clear directional communication, hazard awareness.
Wipe Prevention Callouts
Queenswalk relies heavily on timed coordination:
"Heart timer at 10!" / "Timer at 5!" / "Timer critical!"
"[Player Name] getting the next orb!"
"Orb grabbed! [Player Name] inside!"
"Inside the heart, getting extensions!" (Optional confirmation)
"Watch out for Blight on the left/right!"
"Hobgoblins sniping from above!"
"Phalanx pushing on the bridge!"
"Path goes right here!"
"Dunk is just ahead!"
Secrets of the Dreaming City: Hidden Chests & Lore
Beyond the loot awarded for completing the main encounters, the Last Wish raid conceals two secret chests. These chests primarily contain raid armor pieces and the highly coveted Last Wish raid mods. Accessing them requires deviating from the main path and employing platforming skills or knowledge of hidden routes. Additionally, the Wishing Wall at the raid's start can grant access to extra chests via specific wishes.
Chest 1 (Post-Kalli, Pre-Shuro Chi)
After defeating Kalli, the first boss, the fireteam must cross a large chasm using platforms to reach the area leading to Shuro Chi. Before ascending the main, large staircase towards the Shuro Chi encounter start, players should explore the area below and to the sides of the bridge structure. A hidden path typically leads down and around one of the large pillars supporting the bridge. Following this path involves careful platforming along narrow ledges built into the cliff face. The first secret chest is located at the end of this hidden jumping section, tucked away on a ledge overlooking the chasm.
Chest 2 (Bridge/Rafters Section, Pre-Morgeth)
Following the defeat of Shuro Chi, Guardians navigate a lengthy jumping puzzle across broken bridges and shifting platforms within the Ascendant Plane. This section eventually leads towards the arena for the Morgeth encounter. Before dropping down into the large, circular arena where Morgeth resides, players should thoroughly explore the far side of the chasm they just crossed. Careful searching will reveal hidden ledges or Ascendant platforms (visible only while Ascendant, typically after Shuro Chi). Following these platforms leads to the second secret chest, often situated on a remote cliff edge or within a small alcove, well hidden from the main path.
The placement of these chests deliberately encourages exploration beyond the direct route between encounters. They reward players who possess curiosity, strong environmental awareness, and mastery of Destiny 2's movement and platforming mechanics.
Wishing Wall Chests
As mentioned in the initial sections of a full guide (not detailed again here), the Wishing Wall located before the Kalli encounter can be used to input specific patterns (Wishes). Several of these Wishes grant direct access to bonus chests, often by teleporting the fireteam to locations near the hidden chests or to entirely separate reward points. Consulting a Wishing Wall guide is necessary for these specific rewards.
Loot from Secret Chests
The primary rewards from these two hidden chests are pieces of Last Wish raid armor (Great Hunt set) and, importantly, the unique Last Wish raid mods. These chests are considered one of the best sources for mods like Taken Armaments and Taken Barrier. While there's a small chance for other items, they do not typically award Last Wish weapons, which are primarily tied to encounter completions.
Spoils of the Wish: Loot Table
Completing encounters and opening chests within the Last Wish raid rewards Guardians with powerful weapons and armor exclusive to this activity. Understanding which encounters drop specific pieces of gear is crucial for players looking to farm for particular items, such as a desired weapon roll or the Exotic fusion rifle, One Thousand Voices.
Encounter and Chest Drops
The following table summarizes the potential loot drops from each major encounter and the secret chests within the Last Wish raid. Note that armor drops can include any piece from the Great Hunt set unless specified otherwise.
| Encounter/Source | Possible Weapons | Possible Armor Slots | Exotic Chance |
|---|---|---|---|
| Kalli | Age-Old Bond (Auto Rifle), Transfiguration (Scout Rifle), Apex Predator (Rocket) | Arms, Class Item | No |
| Shuro Chi | Chattering Bone (Pulse Rifle), Transfiguration (Scout Rifle), Apex Predator (Rocket) | Chest, Legs | No |
| Morgeth | Age-Old Bond (Auto Rifle), The Supremacy (Sniper Rifle), Nation of Beasts (Hand Cannon) | Helmet, Arms | No |
| Vault | Chattering Bone (Pulse Rifle), Nation of Beasts (Hand Cannon), Tyranny of Heaven (Bow) | Chest, Legs, Class Item | No |
| Riven/Queenswalk | Chattering Bone (Pulse Rifle), The Supremacy (Sniper Rifle), Apex Predator (Rocket), Nation of Beasts (Hand Cannon), Tyranny of Heaven (Bow), Age-Old Bond (Auto Rifle), Transfiguration (Scout Rifle) | Any Slot | One Thousand Voices (Low Chance per Key/Chest) |
| Secret Chest 1 | Low Chance (Typically None) | Any Slot | No |
| Secret Chest 2 | Low Chance (Typically None) | Any Slot | No |
| Wishing Wall | (Varies by Wish - Some grant specific gear) | (Varies by Wish) | (Varies by Wish) |
Note: The Riven/Queenswalk loot is awarded from the chest(s) opened after completing the Queenswalk sequence, using the Ethereal Key(s) obtained from defeating Riven. Each key used provides one chance at the Exotic. Raid mods can also drop from encounter chests but are more common from Secret Chests.
This loot table serves as a quick reference, allowing players to efficiently target the encounters most likely to reward the specific gear they are pursuing. For instance, a player seeking the Nation of Beasts Hand Cannon knows to focus on completing the Morgeth and Vault encounters, or the final chests.
One Thousand Voices (Exotic Fusion Rifle)
The raid's unique Exotic weapon, One Thousand Voices, is a powerful Solar fusion rifle known for its explosive projectiles. It has a chance to drop exclusively from the chest(s) opened at the very end of the raid, after completing the Queenswalk. Historically, players received one Ethereal Key per character per week upon defeating Riven. Each key allows opening one of the chests in the final room, and each opened chest carries a small, independent chance of awarding the Exotic. The relatively low drop rate for One Thousand Voices establishes it as a highly sought-after "chase" item, providing a strong incentive for players to repeatedly complete the raid even after acquiring other desired legendary weapons and armor. This RNG element significantly contributes to the raid's long-term engagement and replayability.
Curated Rolls
While Destiny 2's loot system has evolved, Last Wish weapons originally featured fixed "curated" rolls alongside random rolls. These curated versions came fully Masterworked with a specific set of synergistic perks selected by the developers. Some curated rolls, like the Nation of Beasts with Outlaw and Dragonfly, remain highly regarded and may still be obtainable, offering a powerful alternative to random perk combinations.
Taken Armaments: Raid Mods
Last Wish introduced a set of unique armor mods that provide significant advantages, particularly when fighting Taken enemies or operating within the Dreaming City. These mods are highly prized for their powerful effects and represent a major component of the raid's valuable reward pool.
Acquisition
Last Wish raid mods can drop from completing the main encounters, but they are most commonly acquired from the two secret chests hidden within the raid. Farming these secret chests weekly is a popular method for players specifically seeking these mods.
The Mods
The following table details the key Last Wish raid mods and their effects. Compatibility notes refer to the armor systems prevalent in Destiny 2; these mods typically fit into dedicated raid mod slots on Last Wish or Dreaming City armor, or potentially universal slots depending on the armor generation.
| Mod Name | Effect | Armor Slot Compatibility (Typical) |
|---|---|---|
| Taken Barrier | Provides significantly increased damage resistance from Taken combatants when player shields are depleted. | Any Armor piece with a Raid Mod Slot or compatible Combat Style Slot |
| Taken Armaments | Defeating a Taken enemy with a grenade ability grants Heavy ammo to reserves. | Any Armor piece with a Raid Mod Slot or compatible Combat Style Slot |
| Taken Repurposing | Destroying a Taken shield (matching element or anti-barrier) grants grenade energy. | Any Armor piece with a Raid Mod Slot or compatible Combat Style Slot |
| Taken Invigoration | Defeating challenging Taken enemies (Majors/Ultras) grants class ability energy. | Any Armor piece with a Raid Mod Slot or compatible Combat Style Slot |
(Note: Some older mods like Enhanced Scanner Augment or Emperor's Blaze might have appeared in collections related to Last Wish due to past system overlaps but are not functionally part of the Last Wish mod set and relate to deprecated content.)
This table clarifies the function and source of these powerful mods. Understanding the utility of Taken Armaments (generating Heavy ammo) or Taken Barrier (enhancing survivability) motivates players to pursue them.
Utility Beyond the Raid
While extremely useful within the Last Wish raid itself, the true value of mods like Taken Barrier and especially Taken Armaments lies in their effectiveness across numerous other Destiny 2 activities. Since Taken enemies feature prominently in Gambit, various Strikes, seasonal activities, dungeons (like Shattered Throne or Prophecy), and even other raids, these mods provide substantial benefits well beyond the confines of Last Wish. Taken Armaments, in particular, can dramatically alter ammo economy in challenging content featuring Taken. This broad applicability makes acquiring these mods a valuable long-term goal for many players, significantly boosting the raid's enduring relevance and providing a strong incentive for repeated runs, even for those who have collected all the weapons and armor.
Mastering the Wish: Encounter Challenges
Each primary encounter within the Last Wish raid (Kalli, Shuro Chi, Morgeth, Vault, Riven) features an optional challenge mode. Successfully completing an encounter while fulfilling the specific conditions of its active challenge awards the fireteam an additional chest containing extra loot (often another weapon or armor piece) and contributes towards completing raid-specific Triumphs and Seals. Challenges demand a higher level of execution, stricter adherence to mechanics, or impose specific constraints on player actions.
Challenge Rotation and Activation
Historically, Last Wish challenges rotated on a weekly basis, with only one encounter's challenge being active per week. Players could determine the active challenge by checking modifiers in the Director before launching the raid or through in-game notifications upon entering the encounter. However, systems may have changed, potentially allowing players to pursue multiple or all challenges simultaneously. Verification in the current version of Destiny 2 is recommended.
Encounter-Specific Challenges
- Kalli - Summoning Ritual: The fireteam must correctly cleanse all nine safety plates in the arena (the small plates within the segmented sections) before initiating the damage phase against Kalli. This typically requires surviving multiple cleansing cycles and coordinating plate assignments perfectly.
- Shuro Chi - Which Witch: Players must avoid being hit by Shuro Chi's long-range, high-damage sniper projectile attack throughout the encounter. This demands constant vigilance, effective use of cover provided by pillars, and potentially quick reactions to eliminate Taken Captains providing her shields.
- Morgeth - Forever Fight: The fireteam must defeat Morgeth without killing any of the smaller Taken Ogres that spawn during the encounter. Managing the Taken Strength accumulation requires precise coordination, often involving players intentionally taking Strength buffs just before the previous holder reaches the lethal 10x stack, potentially even requiring planned deaths and revivals to juggle the buff safely.
- Vault - Keep Out: No Might of Riven Taken Knight is allowed to step into the central Vault chamber. This necessitates immediate identification, callouts, and elimination of Knights by the Runners, often requiring focused fire or Super usage.
- Riven - The Floor is Lava: No player can take damage from Riven's fire breath attack during the main cycles of the encounter. This requires high situational awareness, recognizing attack telegraphs, and prioritizing safe positioning over potentially optimal damage spots.
- Queenswalk - Keep Away / Summoning Ritual: As discussed previously, this typically involves avoiding the slowing/damaging effect of the stationary Taken Blight spheres along the path, or potentially fulfilling the Triumph condition of no player picking up the same Taken Strength orb twice.
Challenges serve as a demonstration of true encounter mastery. They often target common failure points or demand a level of precision and coordination significantly beyond that required for a standard clear. They push fireteams to refine strategies, perfect communication, optimize loadouts, and execute mechanics flawlessly under pressure, offering an additional layer of achievement for dedicated raid groups.
Guardian Loadouts: Class & Subclass Recommendations
While player skill and encounter knowledge are paramount, optimizing fireteam composition with synergistic classes, subclasses, and weapon loadouts can significantly improve the chances of success in Last Wish. Certain abilities provide crucial buffs, debuffs, survivability, or damage output tailored to specific encounter demands.
General Recommendations
- Well of Radiance (Solar): Considered almost essential for many encounters. Provides substantial healing, overshields, and a damage buff, critical for surviving intense damage phases (Morgeth, Riven) and high-pressure situations (Vault Knights, Queenswalk ad clear).
- Shadebinder (Stasis): Offers excellent crowd control via freezing and Stasis turrets, useful for managing dense groups of ads (Kalli, Shuro Chi, Vault center).
- Voidwalker (Void): Can provide significant burst damage with Nova Bomb, particularly useful for Riven cheese or quickly eliminating major targets. Devour enhances survivability during ad-heavy sections.
- Ward of Dawn (Void): Provides a strong alternative damage buff (Weapons of Light) and protection, though its buff does not stack with Well of Radiance. Excellent for creating safe zones. Sentinel Shield super offers ad clear and orb generation.
- Thundercrash (Arc): Delivers massive burst damage with the Super, making it a top choice for Riven cheese strategies or deleting high-priority targets like Vault Knights.
- Sunbreaker (Solar): Offers strong ad clear with abilities like Throwing Hammer and Hammer of Sol. Can apply a weaken effect with Hammer Strike (Melting Point) for coordinated burst damage.
- Shadowshot (Void - Deadfall or Moebius Quiver): Provides a powerful debuff that increases damage taken by enemies, crucial for maximizing DPS phases (Morgeth, Riven). Also generates Orbs of Power for teammates.
- Golden Gun (Solar - Marksman or Star-Eater Scales setup): Offers extremely high precision burst damage, valuable for Riven DPS or eliminating challenging majors quickly.
- Revenant (Stasis): Strong crowd control capabilities with Silence & Squall super and Duskfield grenades, effective for managing ads in encounters like Kalli, Shuro Chi, and Vault.
- Arcstrider (Arc - Gathering Storm): Provides good area-of-effect damage and ad clear with the super, useful in add-dense encounters.
Encounter-Specific Loadout Considerations
- Kalli/Shuro Chi: Prioritize strong ad clear (Auto Rifles, SMGs, wave-frame GLs, abilities) and reliable damage for majors (Fusion Rifles, Shotguns, Swords). Roaming Supers excel here.
- Morgeth: Require good long-range DPS (Linear Fusion Rifles, Sniper Rifles) for the boss damage phase. Well/Ward are crucial. Need ways to handle Ogres and Taken Captains efficiently.
- Vault: Runners need survivability and burst damage for Knights (Shotguns, Fusions, Glaives, relevant Supers). Readers benefit from reliable primary weapons and ad-clear abilities for the center room.
- Riven (Legit): Need balanced loadouts: ad clear for non-Riven room/phases, precise weapons for eyes (Scout Rifles, Pulse Rifles, Hand Cannons), and high burst DPS for the damage phase (LFRs, Rockets, relevant Supers). Eye carrier benefits from survivability.
- Riven (Cheese): Focus entirely on maximum coordinated burst damage. Essential: Well of Radiance, Ward of Dawn (optional), Shadowshot/Tractor Cannon. DPS: Thundercrash, Golden Gun, specific Swords (Lament), Rocket Launchers (Gjallarhorn, Palmyra-B), Linear Fusion Rifles (Cataclysmic, Stormchaser) - heavily meta-dependent. Divinity is highly recommended.
- Queenswalk: Mobility (lightweight weapons, movement abilities) is key. Need reliable ad clear for Taken along the path. Survivability helps prevent deaths in chaotic moments.
Recommended Weapon Archetypes
- Ad Clear: Submachine Guns, Auto Rifles, Pulse Rifles, Wave Frame Grenade Launchers, Machine Guns, Glaives. Strong ad-clear abilities are also vital.
- Major/Boss DPS: Linear Fusion Rifles (often the top choice), Rocket Launchers (especially with Gjallarhorn support), Heavy Grenade Launchers, Sniper Rifles (Izanagi's Burden, Whisper of the Worm in specific scenarios), Swords (for Riven cheese).
- Utility: Divinity (essential for Riven cheese, helpful elsewhere), Tractor Cannon (alternative debuff), Grenade Launchers with Blinding Grenades (excellent crowd control).
Choosing loadouts is not merely about personal preference; it's about fulfilling specific role requirements and creating synergistic effects within the fireteam. A well-composed team, where buffs (Well, Ward), debuffs (Tether, Tractor), and appropriate damage sources are present, is far more likely to succeed, especially during high-stakes DPS checks or demanding challenge modes. The interdependence of loadout choices highlights the importance of strategic team building.
Guiding the Way: Tips for Sherpas
Teaching the Last Wish raid (acting as a "Sherpa") can be a highly rewarding experience, but its mechanical complexity presents significant challenges for instructors and learners alike. The following tips aim to facilitate a smoother and more positive learning environment for Guardians new to the raid.
- Patience is Paramount: Last Wish is difficult. Wipes are inevitable, especially with new players. Maintain a calm, patient, and encouraging demeanor throughout the run. Avoid expressing frustration, as this can discourage learners. Remember that mastery takes time and repetition.
- Break Down Encounters Incrementally: Avoid overwhelming learners by explaining an entire encounter's mechanics at once. Introduce concepts piece by piece. For the Vault, start by explaining Reader vs. Runner roles, then the symbol matching, then the Knights. Build complexity gradually.
- Assign Clear, Manageable Roles: Start learners in roles with fewer initial responsibilities. In Kalli, perhaps assign ad clear first, then introduce plate mechanics later. In the Vault, the Reader role is often simpler initially than being a Runner responsible for Knights. Allow learners to master one aspect before adding more complexity.
- Establish Simple, Unambiguous Callouts: Agree on and consistently use clear, concise callouts for mechanics. Ensure everyone understands terms like "Penumbra/Antumbra" or the numbering system used for Riven's eyes. Avoid jargon where possible or explain it clearly.
- Explain the "Why," Not Just the "What": Help learners understand the reason behind a mechanic or the consequence of failure. Explaining why the Vault Knight must die quickly (it locks a plate and causes a wipe) fosters deeper understanding and better decision-making than simply saying "kill the Knight".
- Demonstrate Mechanics: Whenever feasible, perform a mechanic yourself while explaining it, or have experienced players demonstrate specific roles or actions. Visual learning aids comprehension.
- Foster a Question-Friendly Environment: Explicitly encourage learners to ask questions whenever they are unsure. Reassure them that there are no "stupid" questions, especially in a raid as complex as Last Wish. Address queries patiently and thoroughly.
- Consider the Learning Curve (Riven): For the Riven encounter, assess the group's experience and goals. Teaching the cheese strategy first can provide a quicker success and confidence boost. The legitimate strategy can be introduced afterwards or tackled by focusing on mastering one specific role (e.g., ad clear, eye shooting) per attempt.
- Acknowledge and Celebrate Progress: Recognize and praise improvements and small victories, such as successfully completing a mechanic cycle, reaching a new phase of an encounter, or executing callouts correctly. Positive reinforcement aids learning and morale.
Effective Sherpa'ing requires more than just knowing the raid inside and out; it demands strong communication skills, empathy, patience, and the ability to adapt teaching methods to the group's needs. It involves actively managing group dynamics and morale, especially during difficult stretches, transforming raid knowledge into effective instruction.
Stay Alive: Critical Callouts & Wipe Prevention
In Last Wish, clear, concise, and timely communication is not merely helpful – it is a fundamental requirement for success. The raid's mechanics frequently distribute critical information among players or demand perfectly synchronized actions. Standardizing callouts minimizes confusion, reduces reaction times, and directly prevents wipes caused by miscommunication or delayed information.
General Essential Callouts
These apply across most encounters:
"Reviving [Player Name] at [Location]"
"Need Heavy ammo" / "Using Synth/Banner"
"Placing Well of Radiance here!" / "Dropping Bubble!"
"Tether applied!" / "Tractor Cannon on target!"
"Timer low!" / "Running out of time!" (Especially Queenswalk)
"Need help with ads at [Location]!"
Encounter-Specific Critical Callouts
These are vital for specific mechanics:
- Vault:
- "Knight spawning!" (Highest priority)
- "Knight pushing Center!" (Emergency)
- "[Location] Plate needs cleansing!"
- "Reading symbols!"
- "Need Penumbra/Antumbra call for [Location]!"
- "[Location] is Penumbra!" / "[Location] is Antumbra!"
- Riven (Legit):
- "Eye Captain down!"
- "Eye Carrier [Player Name] going up!"
- "[Symbol] symbol!"
- "Ready for eyes!" / "Eyes are up!"
- "Shooting!"
- "Tentacle Slam!"
- "Stunned! DPS NOW!"
- "Climbing phase!"
- Riven (Cheese):
- "Riven is here!" / "Riven leaning in!"
- "Well down!" / "Bubble placed!"
- "DAMAGE!" / "BURN!"
- "Final Stand - Eyes are [Callout pairs]!"
- Queenswalk:
- "[Player Name] grabbing next orb!"
- "Heart timer at 10!" / "Timer at 5!" / "Timer critical!"
- "[Player Name] inside the heart!"
- "Need next orb runner ready!"
- "Clear Hobgoblins/Phalanxes on path!"
- "Watch the Blight ahead!"
How Callouts Prevent Wipes
Effective communication directly addresses the core challenges of Last Wish:
- Timeliness: Instantaneous callouts ("Knight Left!") allow teammates to react much faster than if they had to visually identify the threat themselves, crucial for time-sensitive mechanics like Vault Knights.
- Coordination: Callouts synchronize essential group actions, such as multiple players shooting specific Riven eyes simultaneously or coordinating orb pickups in Queenswalk.
- Information Sharing: They bridge the gap created by mechanics that distribute information. Vault Readers provide essential Penumbra/Antumbra data to Runners; Riven Eye Carriers relay symbol information to the eye-shooting team. Without these verbal transfers, the mechanics cannot be completed.
- Error Correction & Recovery: Announcing mistakes ("Missed my eye shot!") or needs ("Need help with this Knight!") allows the team to potentially adapt or recover before a wipe occurs.
The sheer density of required callouts and their direct, unavoidable link to succeeding at core mechanics elevates communication from a helpful practice to a fundamental pillar of the Last Wish raid design. In many situations, failing to communicate effectively is failing the encounter.
Know Your Role: Encounter Responsibilities
Clearly defined roles are essential for navigating the complexities of Last Wish. Understanding individual responsibilities within each encounter reduces confusion, ensures all necessary tasks are covered, and allows players to focus their attention more effectively. This section provides a quick-reference summary of primary roles for the major encounters, reinforcing the importance of structure and specialization.
Vault Roles
Focus: Stay in the central chamber. Identify the three required symbols. Listen for Runner location callouts. Determine Penumbra/Antumbra based on symbol matching. Communicate Pen/Ant calls clearly and quickly. Assist with central ads.
Focus: Operate in assigned outer area (Left/Middle/Right). Find and cleanse plates. Call out cleansing location. Listen for Pen/Ant call. Collect correct buff and deposit centrally. IMMEDIATELY locate and eliminate Might of Riven Knights. Manage local ads.
Riven Legit Roles
Focus: Engage Riven (dodge attacks, shoot tentacle) OR clear adds if Riven is elsewhere. Listen for symbol callout from other team. Identify and shoot correct eye pair. Contribute to DPS phase. Navigate Ascendant Plane. Execute Final Stand.
Focus: Clear adds. Prioritize killing Eye of Riven Captain. Designate one player as Eye Carrier. Eye Carrier ascends, reads symbol, calls out clearly. Others clear adds, prepare for Riven/DPS. Contribute to DPS phase. Navigate Ascendant Plane. Execute Final Stand.
Riven Cheese Roles
Focus: Gather in designated room. Deploy buffs (Well) and debuffs (Tether/Tractor). Execute maximum coordinated burst damage at the correct moment. Navigate Ascendant Plane. Execute Final Stand.
Queenswalk Roles
Focus: Follow the team's path. Call out timer status constantly.
Focus: Coordinate next orb pickup. Grab orb just before timer expires. Maximize mote collection inside the heart.
Focus: Eliminate Taken threats. Guide Heart Carrier. Call out orb locations. Avoid/manage hazards like Blights.
Explicitly defining and understanding these roles is crucial for success. Complex encounters like the Vault involve numerous simultaneous tasks (reading symbols, finding plates, matching symbols, killing Knights, managing ads). Expecting every player to track everything is inefficient and error-prone. Assigning roles allows players to specialize and focus their cognitive load on their primary responsibilities, trusting teammates to handle theirs. This structure leads to more reliable execution, fewer errors, and smoother clears overall.
Conclusion: Conquering the Last Wish
Last Wish remains a monumental achievement in Destiny's raid portfolio. It presents a series of intricate challenges that test a fireteam's capabilities across multiple dimensions. From the symbolic logic puzzle of the Vault to the multi-layered, communication-intensive battle against Riven, and culminating in the frantic, time-sensitive relay of the Queenswalk, the raid demands mechanical precision, strategic thinking, and, above all, flawless communication and teamwork.
Successfully navigating these trials yields significant rewards. Guardians can earn a unique and powerful arsenal of weapons, distinctive armor sets, and the coveted Exotic fusion rifle, One Thousand Voices. Perhaps even more valuable are the exclusive raid mods, such as Taken Barrier and Taken Armaments, whose potent effects extend far beyond the Dreaming City, enhancing gameplay across numerous activities. Furthermore, mastering the optional encounter challenges provides an additional layer of accomplishment and loot for dedicated teams seeking to prove their mastery.
Whether pursuing the intended intricate strategies, employing community-refined cheese tactics for efficiency, or striving for the perfection required by challenge modes, completing the Last Wish raid is a testament to a fireteam's skill, coordination, and perseverance. This guide provides the strategic framework and mechanical knowledge necessary, but ultimate success lies in practice, patience, clear communication, and the ability to learn and adapt as a team. Gather your allies, coordinate your efforts, and venture into the heart of the Dreaming City to claim the spoils of a conquered Ahamkara. Good luck, Guardian.