
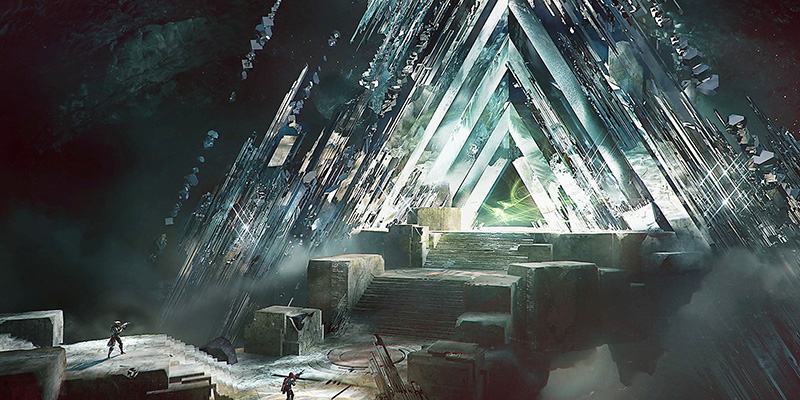
Welcome, Guardians, both new lights and weathered veterans, to the Vault of Glass. For many, these words evoke memories of Destiny's dawn – late nights, baffling mechanics, triumphant cheers, and the coveted Fatebringer. It was Destiny's first raid, a six-player challenge dropped onto Venus in September 2014, shortly after the game's launch. It wasn't just an activity; it was a rite of passage, a pinnacle experience Bungie themselves called the "most challenging" they had ever created at the time, promising Destiny's ultimate rewards.
Deep beneath the surface of Venus, within a reality-bending Vex stronghold, lies Atheon, Time's Conflux. The Vault is more than just a structure; it's described as a "Vex underworld," a "wound in time," and a place where past, present, and future converge. Here, the Vex experiment with ontological warfare, attempting to manipulate reality itself, to rewrite existence to ensure their ultimate victory – Convergence. This timeless realm, anchored across multiple timelines, houses entities like the Templar and its Oracles, which calculate and enforce Vex-favored realities, and the Gorgons, whose gaze can simply unwrite a Guardian from existence.
Many Guardians were lost to the Vault's temporal traps, most famously the fireteam of Kabr, the Legionless. While Pahanin escaped and Praedyth became lost in time's currents, Kabr faced assimilation by the Vex. In his final moments, he forged his Light and the remnants of a Gorgon he defeated into the Aegis, a relic shield capable of manipulating the Vault's strange energies and protecting those who wield it. It is this Aegis that allows us to defy the Vex's control.
Years after Guardians first conquered Atheon, the Vault of Glass returned to Destiny 2 in the Season of the Splicer (May 2021), largely unchanged aesthetically but featuring refined mechanics, new challenges, and updated rewards. It remains the only way to set foot on the Ishtar Sink of Venus in Destiny 2. This guide is your key to navigating its fractured timelines once more, whether you're seeking to reclaim old glories or forge new legends.
Preparing for the Descent: Power, Loadouts, and Mindset
Before you breach the Vault, proper preparation is key. While the Vex within operate outside conventional time, your gear and Power Level still matter.
Recommended Power Levels
| Difficulty | Recommended Power | Notes |
|---|---|---|
| Normal Difficulty | 1950+ | Entry possible below this, but enemy damage scales significantly |
| Master Difficulty | 2000+ | Additional Champions, higher enemy scaling, and modifiers active |
General Loadout Philosophy
Flexibility and role-awareness are paramount. While specific recommendations follow for each encounter, keep these general principles in mind:
Ad Clear
Many encounters feature dense waves of Vex. Weapons with area-of-effect damage or perks like Firefly, Voltshot, Incandescent, Destabilizing Rounds, or Kinetic Tremors are invaluable. SMGs (like IKELOS_SMG with Warmind Cells, though Cells are less meta now), Auto Rifles, and Grenade Launchers excel here. Witherhoard and Anarchy remain strong choices for passive damage and area control. Osteo Striga is also effective.
Major/Champion Damage
Encounters feature tough Minotaurs, Wyverns, Gatekeepers, and Champions (Overload Minotaurs, Barrier Hobgoblins on Master). Special weapons like Fusion Rifles, Slug Shotguns, and Sniper Rifles are needed. Heavy weapons like Rocket Launchers, Linear Fusion Rifles, or Machine Guns handle burst damage. Divinity is excellent for debuffing bosses and creating easy crit spots.
Oracle Damage
Oracles require sustained, accurate fire. Scout Rifles, Xenophage, Machine Guns, Sniper Rifles, or even Swords (though risky) can work. Specific Oracle Disruptor mods from the raid itself boost damage significantly.
Boss DPS
Atheon and Templar require focused burst damage. Rockets (especially with Gjallarhorn), Linear Fusion Rifles, and high-damage Supers are meta. Double Slug Shotgun swapping with Anarchy was previously top-tier but requires specific setups and coordination. Warlock grenade builds (Starfire Protocol/Verity's Brow) can be exceptionally strong for Atheon due to Time's Vengeance.
Subclasses & Exotics
Subclasses: Well of Radiance (Middle Tree Dawnblade) is almost mandatory for survivability and damage buffs in boss encounters and tough ad phases. Shadebinder (Stasis) with Bleak Watcher turrets offers excellent crowd control. Chaos Reach (Geomag Stabilizers) provides strong boss damage. Voidwalker (Nova Bomb) is also viable.
Exotics: Phoenix Protocol refunds Well energy, Lunafaction Boots boost reload/range for Well users, Starfire Protocol/Verity's Brow fuel grenade DPS.
Subclasses: Nightstalker is highly valuable. Golden Gun (Celestial Nighthawk) for boss damage. Revenant (Stasis) provides excellent crowd control and synergy with Focusing Lens (if applicable). Arcstrider for ad clear.
Exotics: Star-Eater Scales can boost Super damage. Omnioculus/Sixth Coyote enhance invisibility.
Subclasses: Ward of Dawn (Top Tree Sentinel) provides Weapons of Light buff and protection. Thundercrash (Middle Tree Striker) with Cuirass of the Falling Star delivers massive burst damage. Sunbreaker (Bottom Tree) offers good ad clear and some boss damage.
Exotics: Helm of Saint-14 enhances Ward of Dawn. Heart of Inmost Light boosts ability spam.
Stats
Prioritize Resilience (aim for 100 or Tier 10 for maximum damage resistance in PvE). Recovery is next most important for survivability (Tier 8-10 recommended). Discipline is valuable for grenade-focused builds (especially Warlocks). Intellect helps Super regeneration, useful but less critical than Resilience/Recovery due to Orb generation and Time's Vengeance. Mobility is primarily for Hunters (dodge cooldown). Strength is generally the lowest priority unless using specific melee builds.
Mods
| Mod Type | Recommendations |
|---|---|
| Combat Style Mods | Elemental Wells (now generating Orbs of Power) and Charged with Light builds for survivability and damage boosts. Font of Might (matching subclass/weapon element) is strong. |
| Armor Mods | Ammo Finders/Scavengers/Reserves for your key weapons. Stat mods to reach desired tiers. Damage Resistance mods (Concussive Dampener, elemental resists) are crucial for survivability, especially in Master. |
| Raid Mods | Oracle Disruptor mods significantly increase damage against Oracles. Superstructure Defender/Medic offer utility on plates/confluxes. Anti-Praetorian/Anti-Oracle grant Super energy. Vex Breaker/Destroyer/Striker generate Orbs of Power. |
| Artifact Mods | Always check the current Seasonal Artifact for relevant mods. Overload mods are needed for Confluxes and Gatekeepers. Anti-Barrier mods are needed for Master difficulty. |
Mindset and Communication
Vault of Glass demands teamwork and clear communication. Ensure everyone has a working microphone. Use concise, unambiguous callouts (agree on terms beforehand, especially for Oracles). Stay calm under pressure, prioritize survival over risky plays, and learn from wipes. Veterans should be patient with newcomers, and newcomers shouldn't hesitate to ask questions.
Encounter 1: Waking Ruins - Forming the Spire
Your journey begins outside the Vault proper, in the Waking Ruins. The massive Vex gate looms before you, sealed. To open it, you must construct a Vex Spire.
Objective
Activate and continuously defend three Vex Sync Plates to build a Spire that opens the Vault door.
Layout
Three Sync Plates: one lower left, one center near the door, one upper right. A central area where the Spire forms.
Roles & Strategy
- Split: Divide into three teams of two. Assign each team to one Sync Plate.
- Activate: Stand on the plate until it activates (white light flash/barrier forms). You can then step off, but must prevent Vex from entering the plate's circle.
- Defend: Waves of Vex Goblins and Hobgoblins will spawn and approach the plates. Prioritize killing any Vex attempting to step onto the plate.
- Praetorians: Void-shielded Minotaurs (Praetorians) are the primary threat. ONLY Praetorians can deactivate a captured plate. Call them out and kill them quickly, ideally before they reach the plate. Use Void damage for shields and close-range weapons like Shotguns. Hovering near spawns can help intercept them early.
- Cyclopses: Stationary Cyclopses will spawn periodically, often in elevated positions towards the center/back. They deal high damage from afar. Assign players with long-range weapons (Snipers, Linear Fusions, Xenophage) to eliminate them quickly.
- Maintain Control: If a Praetorian steps on a plate, it turns red, and the Spire's construction reverses. Kill the Vex on the plate and stand on it again to recapture it.
- Completion: Once all three plates are held continuously for long enough (approx. 5 minutes), the Spire will fully form and fire a beam, opening the Vault door.
Loadout Recommendations
Good ad clear primaries (SMG/Auto), a Void weapon for Praetorian shields (Shotgun recommended), and a long-range option for Cyclopses (Sniper/Linear Fusion/Scout). Swords can work but are riskier. Stasis can offer control.
Troubleshooting
- Plates Constantly Lost: Ensure Praetorians are killed before reaching the plate. Improve callouts and focus fire. Don't stand on the plate unless capturing/recapturing.
- Cyclops Wipes: Assign dedicated Cyclops killers with appropriate weapons. Call them out immediately. Use cover around plates.
- Solo Strategy (Advanced): It's possible to solo this encounter by making Minotaurs headless (destroying their head), causing them to ignore plates and chase the player. Requires careful aggro management.
Challenge Mode (Break No Plates)
Complete the encounter without losing a single sync plate to the Vex. Requires diligent Praetorian and Cyclops elimination.
Encounter 2: Defend the Confluxes
After navigating the initial descent (and potentially finding the second hidden chest via the secret path), you arrive in the Templar's Well. The first true encounter involves defending Vex Confluxes from sacrificing enemies.
Objective
Prevent Vex from sacrificing themselves at the Confluxes across three waves.
Layout
A large arena with the Templar (initially shielded/inactive) at the far end. Stairs lead down to a central pit containing a cleansing pool. Confluxes spawn on platforms: Middle (below entry), Left, and Right.

Enemy Types
Goblins, Hobgoblins, Fanatics (explode leaving damaging pools), Wyverns ("angry chickens"), Overload Minotaurs (Champions).
Mechanic: Marked for Negation & Cleanse
- Ritual of Negation: Periodically, the Templar performs this ritual (text prompt appears). Any player Marked for Negation when this occurs will die.
- Cleanse Pool: To remove the Mark, step into the pool of light in the central pit below the Templar. A "CLEANSED" message confirms removal. The pool has a cooldown after use, so multiple marked players must cleanse together.
Phases & Strategy
Phase 1: Middle Conflux
Defend the single Conflux below the entrance. All six players can focus here initially. Kill Fanatics away from the team. Prioritize Wyverns – kill them before they reach the Conflux. After a time, the Conflux disappears, and a large wave of Fanatics ("Templar summons its legions") floods the arena; either fight or retreat to high ground until they despawn.
Phase 2: Left & Right Confluxes
Two Confluxes appear on the left and right platforms. Split into two teams of three. One team defends Left, one defends Right. Overload Minotaurs begin spawning. Again, prioritize Wyverns and Overloads. Survive the Fanatic legion wave afterward.
Phase 3: All Three Confluxes
Left, Middle, and Right Confluxes are active simultaneously. Split into three teams of two (like the entrance). Manage adds, Wyverns, and Overloads across all three points. Intense ad clear and Champion handling are crucial. Survive the final legion wave to complete the encounter.
Loadout Recommendations
Overload weapons mandatory. Strong ad clear (Witherhoard, Anarchy, Salvager's Salvo, SMGs, Stasis turrets). Burst damage for Wyverns/Overloads (Rockets, Fusions, Supers). Avoid Swords due to Fanatic pools. Warmind Cells can be effective but are less common now.
Troubleshooting
- Wipes to Sacrifices: Improve ad clear efficiency. Focus fire on Wyverns/Overloads before they reach the Conflux. Use Supers strategically. Spawn-killing Vex can help manage Fanatic pools.
- Wipes to Marked for Negation: Be extremely cautious around Fanatic pools. Call out immediately if marked. Coordinate simultaneous cleansing. Kill Fanatics at a distance.
- Overwhelmed by Ads: Utilize crowd control Supers (Tether, Stasis). Use Blinding Grenades. Maintain good positioning and cover.
Challenge Mode (Wait For It...)
Only defeat Wyverns while they are actively sacrificing at a Conflux. Strategy: Weaken Wyverns significantly as they approach, then use burst damage (Supers, Heavy) to finish them only during the sacrifice animation. Requires patience and careful damage management. If a Conflux despawns before the Wyvern sacrifices, you can kill the lingering Wyvern without failing.
Encounter 3: Destroy the Oracles
With the Confluxes secured, the Templar summons its Oracles – shimmering Vex constructs that manipulate reality. You must destroy them in the order they appear.
Objective
Survive five waves of Oracles, destroying them in the correct sequence each wave, while managing Vex enemies.
Layout
Same arena as Confluxes. Seven possible Oracle spawn locations distributed around the arena.
Mechanic: Oracle Sequence & Negation
- Spawning: Oracles (glowing blue/gold cubes) spawn one by one, accompanied by distinct chimes.
- Sequence Preview: The spawn sequence will play through twice, allowing the team to identify the order.
- Destruction Phase: After the preview, all Oracles from that wave's sequence appear simultaneously. The team must destroy them in the exact order they appeared during the preview within a short time limit (approx. 10 seconds).
- Failure: Destroying an Oracle out of order, or failing to destroy them all in time, marks the entire team for Negation. The failed sequence will immediately repeat. Marked players must cleanse at the central pool before the Templar's Ritual of Negation, or the team wipes.
Enemy Threats
Vex Hobgoblins spawn on elevated platforms around the arena, posing a significant sniper threat. Minotaurs also spawn, requiring close-range attention. Fanatics continue to spawn, requiring careful management of the Marked for Negation debuff.
Strategy & Roles
- Assign Positions/Oracles: Assign each player responsibility for specific Oracle spawn locations. Ensure all 7 locations are covered. Players should position themselves for clear sightlines on their assigned Oracles and nearby enemy spawns.
- Callout System: Establish a clear callout system before starting. Common systems include:
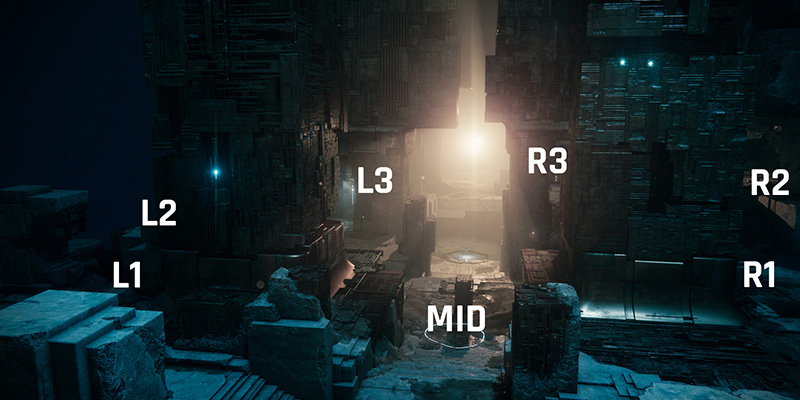
- Numbered Locations: L1, L2, L3 (left side, front to back), R1, R2, R3 (right side, front to back), Mid. Players call the order their assigned Oracle appears (e.g., "L2 is One," "Mid is Two," "R1 is Three").
- Descriptive Locations: "Close Left," "Far Right," "Mid," "Stairs Left/Right," "Dark Left/Right". Again, call the sequence number.
- Simplified Numbers: 1-7 assigned to fixed locations. Call out the number sequence (e.g., "Sequence is 4, 1, 6").
- Recommendation: For LFG or newer teams, descriptive locations (Close/Far + L/M/R) tend to be more intuitive. Experienced teams often prefer numbers for speed. Agree on one system!
- Execution: During the preview, assigned players call out the sequence number when their Oracle spawns. During the destruction phase, players shoot their assigned Oracle only when its number in the sequence is reached. Call out when your number is destroyed (e.g., "One is down," "Two is down") to help pacing.
- Enemy Management: Between Oracle waves, prioritize killing Hobgoblins immediately. Designate players (often those with fewer/easier Oracle spots) to focus on Hobgoblins and Minotaurs. Manage Fanatics to avoid unnecessary Marks.
Loadout Recommendations
Weapons effective at medium-long range for Oracles (Xenophage, Scouts, Machine Guns, Snipers). Oracle Disruptor mods are highly effective. Sniper Rifles are excellent for Hobgoblins. Shotguns/Fusions for Minotaurs. Ad clear weapons for Goblins/Fanatics.
Troubleshooting
- Incorrect Order Wipes: Reinforce the callout system. Ensure players only shoot their assigned Oracle when it's their turn. Have players call out when they destroy their Oracle. Slow down if needed, especially on later waves.
- Missed Oracles (Time Limit): Ensure players have appropriate weapons (use Oracle Disruptor mods). Improve target acquisition speed. Make sure all locations are covered.
- Hobgoblin Deaths: Immediately focus Hobgoblins after each Oracle wave. Use Snipers or Anti-Barrier weapons (Master). Assign dedicated Hobgoblin killers.
- Marked for Negation: Emphasize avoiding Fanatic pools. Coordinate cleansing if mistakes happen.
Challenge Mode (The Only Oracle For You)
Players cannot destroy the same Oracle spawn location twice during the encounter. Requires players to rotate positions/assignments between waves. A common strategy is a clockwise rotation after each wave.
Encounter 4: The Templar
The master of the Well, the Templar, finally engages directly. This fight combines Oracle mechanics with a direct boss confrontation, introducing the Aegis Relic.
Objective
Defeat the Templar boss.
Layout
Same arena. The cleanse pool is replaced by the Aegis Relic spawn point.

Mechanics
Initiation
Picking up the Aegis Relic starts the fight.
Templar Shield
The Templar is protected by an impenetrable shield.
Aegis Relic
- Abilities: Melee (RB/R1), Ground Slam (RT/R2 in air), Shield Bash (RT/R2 on ground), Block/Cleanse (LB/L1/Grenade - creates protective bubble), Super (LT+RT/L2+R2 - fires projectile).
- Role: The Relic Holder is crucial. Killing enemies charges the Super faster. The Relic Super is the only way to break the Templar's shield.
- Cleanse Note: Unlike D1, the Aegis Cleanse does not remove Marked for Negation in D2 Templar fight. Players must still use the central pit (which now houses the Relic spawn) to cleanse.
- Dropping Relic: If dropped, must be picked up within ~5-10 seconds or wipe.
Oracles
Waves of 3 Oracles spawn periodically. Must be destroyed in sequence, just like the previous encounter. Failure marks team for Negation, requiring cleanse at the central pit.
Teleporting
After its shield breaks and a DPS window occurs, the Templar attempts to teleport to a new location. The destination is marked by a large red ring and beam of light.
Blocking Teleports
The Relic Holder (or any player, though typically the Relic Holder) must stand inside this red ring to block the teleport. Blocking extends the DPS phase. Each blocked teleport spawns additional, powerful enemies (Minotaurs). If the Templar successfully teleports, its shield regenerates, requiring another Relic Super.
Roles & Strategy
Relic Holder
Pick up Relic, kill adds to charge Super, destroy initial Oracle wave (optional, can assist), use Super on Templar shield, block teleports (usually 1-3 blocks is manageable), break Detainment bubbles with slam, assist with add clear/Oracles between phases. Needs good awareness and movement. Invisibility (Hunter) is very helpful for blocking teleports safely.
DPS Team (5 Players)
Destroy initial Oracle wave in sequence. Group up for DPS once shield drops (common spot top right or near spawn). Unload damage on Templar's eye (crit spot). Quickly shoot teammates out of Detainment bubbles. Manage adds (especially Minotaurs from blocked teleports) and subsequent Oracle waves between DPS phases. Use Well/Bubble for survivability/buffs.
Loadout Recommendations
Relic Holder: Survivability, potentially Anarchy/Witherhoard for passive damage.
DPS Team: High burst damage (Rockets + Gjallarhorn, Linears like Sleeper/1k Voices, double Slug Shotguns + Anarchy/Witherhoard), Divinity optional. Well of Radiance/Ward of Dawn essential. Oracle weapons still needed if not doing one-phase strat.
Troubleshooting
- Failed Teleport Blocks: Relic Holder needs to be fast and aware of teleport locations. DPS team must protect Relic Holder from adds. Free detained Relic Holder instantly. Crouching/moving weirdly on teleport spots can sometimes cause blocks to fail.
- Detainment Wipes: Call out "Detained!" immediately. Designate players to quickly shoot bubbles. Relic Holder can slam bubbles.
- Oracle/Negation Wipes: If not doing one-phase, treat Oracles like the previous encounter. Cleanse Marks promptly at the Relic spawn pit.
- Low DPS: Optimize loadouts. Use damage buffs (Well, Bubble) and debuffs (Tether, Tractor Cannon, Artifact mods). Ensure crits on Templar's eye. Extend DPS by blocking teleports (if add control allows).
Challenge Mode (Out of Its Way)
Defeat the Templar without allowing it to teleport at all. This requires the "No Teleport Kill" strategy described above. Relic Holder must block every teleport attempt while the team burns the boss down quickly. Often combined with the Oracle skip strategy.
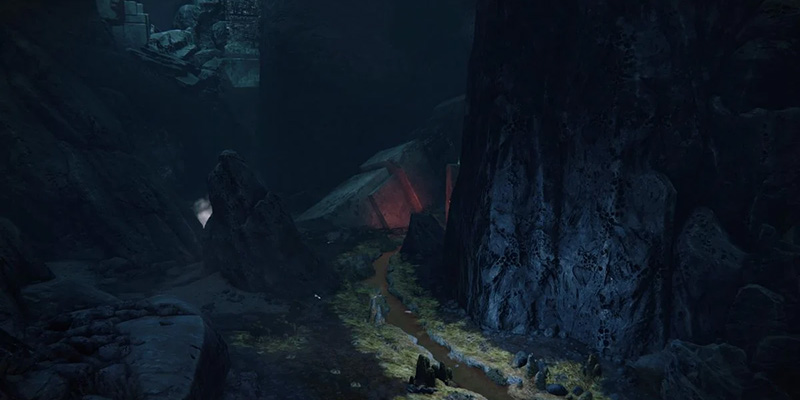
Encounter 5: The Gorgon's Labyrinth
Having defeated the Templar, you delve deeper, entering a maze patrolled by the deadly Gorgons. Stealth and careful navigation are your only weapons here.
Objective
Navigate the maze from the entrance to the exit without being detected by any Gorgons.
Layout
A dark, cavernous maze with multiple paths and large rock formations. Patrolled by several Gorgons (glowing Harpies).
Gorgon Mechanics
- Detection: Gorgons patrol set paths (though paths differ from D1). They detect players primarily through line of sight. Sprinting or double jumping near them will also alert them, causing them to investigate. Crouching reduces detection. Hunter invisibility is very effective.
- Gorgon's Gaze: If a Gorgon spots a player, it emits a screech, the screen turns red, and a "Gorgon's Gaze" debuff appears.
- Wipe: The fireteam has a very short window (a few seconds) to destroy the specific Gorgon that detected them. Failure results in an instant team wipe. Gorgons have extremely high health, making this very difficult. Killing a Gorgon strengthens remaining ones.
Safe Path Strategy
- Start: From the entrance drop, move forward, generally hugging the left wall initially.
- First Rock: Wait for the first patrolling Gorgon to move past a large central rock. Cross to the right wall, potentially hiding behind a smaller rock near it. Wait for path to clear, then run/jump onto the large central rock.
- Rock Hopping: Climb up the large rock. Jump across to a ledge/smaller rock on the left wall. From there, jump across again to another rock platform further along the left. You should be above most Gorgons now.
- Exit Drop: Look right/forward towards the exit (a dark opening in the wall). When the coast is clear below, drop down and head straight for the exit tunnel.
- Team Movement: Move as a tight group. Follow a designated leader. Use crouch-walking primarily. Use Hunter invisibility for risky crossings.
Hidden Chest (Temporal Cache #3)
Requirement: Destroy 3 hidden Vex Cubes (floating Conflux-like objects) within the maze.
Cube Locations:
- Near the start, potentially climbing left cliff face or near the twin rocks used for hiding. Look back/right into a small crack/gap in the wall. Requires a Sniper/Scout.
- From the large slanted rock (part of safe path), turn around. Cube is under a low ceiling/ledge.
- Near the exit path. Drop down past the exit, hug the right wall, follow the cave network as it curves left. Look up/right. Alternatively described as far back on the left, on the ceiling.
Chest Access: Destroying all 3 cubes opens a previously locked circular door ("A door has been opened..." message appears). The door stays open even after a wipe.
Chest Location: From the maze start, go right into a small cave network. Hug the right wall. Pass the first room to find a brightly lit room with the now-open circular door. Chest is inside on a raised platform. There's a rally banner spot here. This chest drops previously acquired VoG gear, mods, and Spoils.
Loadout Recommendations
Nightstalker Hunter with Omnioculus/Sixth Coyote for invisibility is highly recommended. Weapons are less critical, but a Sniper/Scout helps hit distant Vex Cubes. Swords can aid movement but risk detection if used carelessly. High burst damage weapons (Wardcliff Coil, Rockets, Supers) are needed only if attempting the Gorgon kill challenge/Triumph.
Troubleshooting
- Getting Detected: Reinforce stealth rules: crouch, single jumps only near Gorgons, stay together, follow the leader. Use invisibility strategically. If detected, immediately focus fire on the alerted Gorgon (low success chance).
- Finding Cubes/Chest: Use a map/video guide. Have one experienced Hunter focus on cubes while others wait safely near the start or exit path. Remember the door stays open after wipe.
Challenge Mode (Too Fast, Two Gorgons)
Defeat 2 or more Gorgons within 3 seconds of each other. Requires immense coordinated burst damage. Wardcliff Coil volleys and/or high-damage Supers (Tether + Golden Gun/Nova Bomb/Thundercrash) are common strategies. Extremely difficult.
The Chasm and the Glass Throne Approach
Emerging from the Labyrinth, a familiar platforming challenge stands between you and the final confrontation.
Mechanic
Navigate a series of disappearing and reappearing Vex platforms across a large chasm.
Strategy
- Observe the platform spawn/despawn pattern and timing.
- Jump across the platforms towards the lit ledges on the far side below.
- Shortcut: It's often possible to jump after the second or third platform appears, then use your character's jump abilities (glide, lift, triple jump) to cross the remaining distance directly to the far ledge. Test your jump capabilities carefully.
- Once on the far ledge, follow the narrow path along the wall.
- You'll eventually drop to a platform near a large triangular door – the entrance to the Glass Throne.
- The door opens only when the entire fireteam (or remaining members if some leave) gathers near it.
Encounter 6: The Gatekeepers (Awaken the Glass Throne)
You've reached the heart of the Vault: the Glass Throne room. Before Atheon appears, you must master the Vex timegates and the Aegis once more.
Objective
Activate and defend portals leading to past (Mars) and future (Venus) timelines, use the Aegis Relic to defeat shielded Praetorians within these timelines, manage a Relic rotation due to a debuff, and finally defend a central Conflux in the main throne room.
Layout
The Glass Throne room features a large central structure, stairs leading up to Atheon's spawn, and two Sync Plates towards the entrance. Left Plate activates the Left Portal (Mars/Past - Red Desert). Right Plate activates the Right Portal (Venus/Future - Green Jungle).
Roles
Typically split into:
- Plate Holders (2 Players): Stay in the Throne Room, activate and defend their assigned Sync Plate (Left or Right) from Vex Goblins and Overload Minotaurs. Kill Gatekeeper Hydras that spawn centrally. Manage Relic handoffs.
- Relic Rotation Team (4 Players): Cycle the Aegis Relic between the Throne Room, Mars, and Venus to defeat shielded Praetorians and defend Confluxes inside the portals.
Mechanics & Strategy
- Start: Damage the Gatekeeper Hydra in the center to begin. Kill it to spawn the Aegis Relic.
- Initial Deployment: One Relic Rotator (Player A) picks up the Aegis. The two Plate Holders activate their respective portals. One Relic Rotator enters Mars (Player B), another enters Venus (Player C). The fourth Relic Rotator (Player D) stays in the Throne Room initially.
- Inside Portals: Players B and C defend the Conflux in their respective timeline (Mars/Venus).
- Praetorian & Wyvern Spawn: A shielded Praetorian (Minotaur) spawns on one side (e.g., Mars). A Wyvern spawns on the other (e.g., Venus).
- Callout & Relic Entry: The player who sees the shielded Praetorian calls out their location (e.g., "Praetorian Mars!"). The current Aegis holder (Player A) enters that portal (Mars).
- Praetorian Kill & Aegis Handoff: Player A uses the Aegis (melee, Super) to break the Praetorian's shield and kill it. Player A now has the "Teleport Destabilized" debuff (45s lockout). Player A drops the Aegis. Player B (original Mars defender) picks up the Aegis. Player A stays in Mars to defend the Conflux.
- Relic Exit & Handoff: Player B carries the Aegis out of the Mars portal back to the Throne Room. Player B now also receives the "Teleport Destabilized" debuff. Player B passes the Aegis to Player D (the waiting Throne Room rotator) who is not on lockout.
- Opposite Portal Entry: A Praetorian now spawns in the other portal (Venus). Player D takes the Aegis into the Venus portal.
- Repeat Cycle: Player D kills the Venus Praetorian, gets lockout, drops Aegis. Player C (original Venus defender) picks up Aegis, exits, gets lockout, passes Aegis to Player A (whose lockout should have expired). Player A takes Aegis back into Mars for the next Praetorian. This 4-player rotation continues.
- Throne Room Defense: Plate Holders must constantly defend plates from Goblins and Overload Minotaurs. They must also quickly kill the Gatekeeper Hydras that spawn periodically in the center to keep portals open.
- Final Phase: After 6 Praetorians are defeated (3 on Mars, 3 on Venus), the portals close, and a Conflux spawns in the center of the Throne Room. The entire team gathers to defend this central Conflux from waves of Vex, including Wyverns and Praetorians. Use the Aegis to break Praetorian shields. Survive until the encounter completes.
Loadout Recommendations
Overload weapons essential. Good ad clear for inside portals and Throne Room. High burst damage for Wyverns/Gatekeepers (Xenophage, Rockets, Supers). Stasis subclasses (especially Shadebinder Warlock) are excellent for controlling Praetorians/Wyverns inside portals. Relic Holders need good survivability.
Troubleshooting
- Relic Rotation Failure: Clear, concise communication is paramount. Call out Praetorian location ("Praetorian Mars!"). Call out Relic status ("Relic coming out Mars!", "Need Relic Throne!"). Ensure the player receiving the Relic is not on lockout. Practice the handoff timing.
- Portal Defenders Dying: Use Stasis/Blinding for crowd control. Prioritize the Praetorian/Wyvern. Plate Holders can sometimes shoot into portals to assist.
- Plate Defenders Overwhelmed: Kill Overloads quickly. Focus fire Gatekeeper Hydras immediately. Use Supers/Heavy for tough waves.
- Final Conflux Wipe: Save Supers (Well/Bubble) for this phase. Focus fire major threats (Wyverns, Praetorians). Relic holder should actively break shields.
Challenge Mode (Strangers in Time)
Defeat the Praetorian (in one portal) and the Wyvern (in the other portal) within a few seconds (approx. 3-5 seconds) of each other for every wave they spawn. Requires tight coordination. Strategy: Wyvern killer weakens the Wyvern. Relic holder calls a countdown (e.g., "3, 2, 1, Kill!") when ready to kill the Praetorian. Both players execute their target simultaneously. Stasis is extremely helpful for freezing/delaying targets to sync kills. This challenge does not apply to the final Conflux defense phase in the Throne Room.
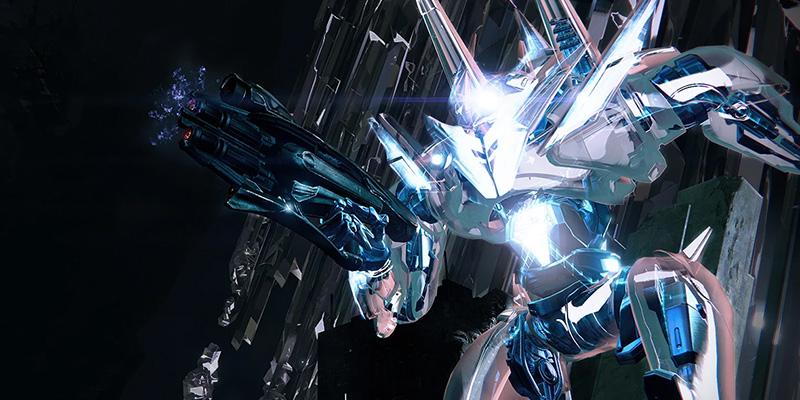
Encounter 7: Atheon, Time's Conflux

The architect of the Vault, the nexus of timelines, Atheon awaits. This final battle tests everything you've learned: Oracles, the Aegis, portal mechanics, and coordinated damage.
Objective
Defeat Atheon, Time's Conflux.
Layout
Same Glass Throne room as Gatekeepers.
Mechanics & Strategy
- Start & Initial Phase: Shoot the central Vex cube to spawn Atheon. Kill Harpies that spawn, but leave one alive on the left platform and one on the right platform to prevent continuous respawns. Avoid damaging Atheon initially.
- Teleport: After about a minute (or after the third Harpy wave), Atheon teleports 3 random players to either Mars (Left) or Venus (Right).
- Portal Team Duties (3 Players):
- Call Location: Immediately call out "Mars" or "Venus".
- Grab Aegis: One player grabs the Aegis that spawns nearby.
- Kill Adds: Quickly eliminate the 3 Vex enemies (Minotaur + Goblins on Venus; 3 Hobgoblins on Mars). Relic holder should prioritize this for Super energy. Non-relic holders should avoid shooting adds.
- Marked by the Void & Cleanse: All portal players are blinded by "Marked by the Void". Relic holder must periodically use the cleanse bubble (guard) to restore vision.
- Destroy Oracles: Listen for sequence callouts from the Throne Team. Destroy 3 waves of 3 Oracles each, in the correct order. Position near the portal exit, facing spawn, for consistent callout perspective. Xenophage one-shots Oracles. Relic Super/slam can also destroy them.
- Throne Team Duties (3 Players):
- Open Portal: Listen for "Mars" or "Venus" callout. One player stands on the corresponding Sync Plate (Left for Mars, Right for Venus) to open the portal. Can leave plate once open.
- Kill Supplicants: The other two players (and the portal opener once free) focus on killing the waves of exploding Supplicants that spawn and rush the area, especially near the portals. Use high ground for safety.
- Read Oracles: One player acts as the Reader/Spotter. Stand back (near spawn or on high ledges) for a full view of the 6 Oracle spawn points above Atheon. Observe the sequence of 3 Oracles that appear for each wave. Call out the sequence clearly and accurately to the Portal Team. Use agreed-upon callouts (e.g., Far Left, Close Mid, Far Right or 1-6). The sequence repeats once for confirmation.
- Time's Vengeance & DPS:
- After the Portal Team destroys the third Oracle wave, "Guardians make their own fate" appears. All 6 players gain the "Time's Vengeance" buff (30 seconds). This buffs damage and ability/Super regen immensely.
- Portal Team exits through the portal. Stand near the portal before the last Oracle dies to exit quickly.
- Relic holder MUST cleanse the returning Portal Team immediately upon exit to remove Marked by the Void.
- Group up on the central floating island for DPS.
- Relic holder maintains the cleanse bubble over the team for protection and continued vision.
- Maximize damage: Use Supers (Thundercrash, Nova Bomb, Golden Gun), Grenades (Solar Warlock builds shine here), Rockets, Linears, etc. Atheon moves more in D2, making crits harder; Divinity helps.
- Detainment: Around 15s or 10s left in Time's Vengeance, one random player (potentially only from portal team) gets the "Imminent Detain" debuff. Player glows white/red. They have ~5 seconds to move away from the group. Failure traps nearby allies too. Teammates must shoot the bubble quickly to free the trapped player(s). Relic slam/super can break the bubble.
- Repeat: When Time's Vengeance ends, Atheon becomes immune. Reset positions, clear remaining Supplicants/Harpies (leave one on each side again), and prepare for the next teleport cycle. Repeat until Atheon is defeated. There's likely an enrage timer or limited number of phases.
Loadout Recommendations
Oracle killers need reliable weapons (Xenophage, Scouts, Snipers, Machine Guns). Throne team needs good Supplicant clear (SMGs, Autos, Grenade Launchers). DPS phase benefits from Rockets (Gjallarhorn), Linears (Sleeper), high-damage Supers, and potentially Divinity. Grenade builds (Solar Warlock) are top-tier. Well of Radiance and Ward of Dawn are highly valuable.
Troubleshooting
- Oracle Callout Confusion: Agree on a simple, unambiguous system before starting. Ensure Portal Team faces the correct direction (towards spawn). Reader needs clear line of sight.
- Portal Team Wipes (Blindness/Adds): Relic holder must cleanse frequently. Kill adds quickly upon arrival.
- Throne Team Wipes (Supplicants): Use high ground. Kill Supplicants aggressively before they get close. Be aware of surroundings during portal opening/reading.
- Detainment Wipes: Everyone must check for the debuff around 15s left on Time's Vengeance. Affected player must move away immediately. Team must break bubble quickly.
- Low DPS: Optimize loadouts. Maximize Time's Vengeance uptime (Portal Team exit quickly). Use buffs/debuffs. Ensure Relic cleanse bubble is up.
Challenge Mode (Ensemble's Refrain)
Each of the 3 teleported players must destroy exactly one Oracle per wave (total of 3 Oracles per player per teleport cycle). Strategy: Assign sequence numbers (1st, 2nd, 3rd Oracle) to each teleported player. Relic holder often takes the 3rd Oracle, requiring them to drop the Relic, shoot, and pick it back up quickly. Requires excellent communication and reliable Oracle destruction from all three players. Sniper rifles or Xenophage recommended.
Vault of Glass Challenges: Mastering the Mechanics
Each main encounter in Vault of Glass features an optional challenge mode that awards an extra chest upon completion. On Master difficulty, completing the weekly challenge is required to earn the Timelost weapon for that week. Completing challenges also increases the initial drop chance for Vex Mythoclast.
| Encounter | Challenge | Description |
|---|---|---|
| Confluxes | Wait For It... | Only defeat Wyverns while they are actively sacrificing at a Conflux. |
| Oracles | The Only Oracle For You | A player cannot destroy the same Oracle spawn location more than once during the entire encounter. |
| Templar | Out of Its Way | Defeat the Templar without allowing it to teleport. |
| Gatekeepers | Strangers in Time | Defeat the Praetorian and Wyvern inside the portals within a few seconds (3-5s) of each other for each wave they spawn. |
| Atheon | Ensemble's Refrain | Each of the 3 teleported players must destroy exactly one Oracle per wave (3 waves total per teleport). |
Secrets of the Vault: Hidden Chests & Paths
Beyond the main encounters, the Vault holds hidden caches and routes rewarding exploration. Finding all four hidden chests grants the "Temporal Caches" Triumph. These chests drop raid mods and previously acquired VoG gear.
| Hidden Chest | Location | Requirements |
|---|---|---|
| Temporal Cache #1 | Immediately inside the main Vault entrance after forming the Spire, on the left. | Complete the Spire formation encounter. |
| Temporal Cache #2 | In the secret path before Templar's Well. After taking an alternate route down with platforms through green, viney corridors. | Instead of going left towards Templar's Well, jump off the cliff, turn 180 degrees, and enter a hidden hole in the cliff face below the ledge you jumped from. |
| Temporal Cache #3 | In a cave network on the right side of the Gorgon's Labyrinth near the start. | Destroy 3 hidden Vex Cubes in the Gorgon's Labyrinth to open a door in the cave network. |
| Temporal Cache #4 | After the jumping puzzle, before the Gatekeeper encounter door. On a high ledge above the entryway arch. | Climb a tall pillar/structure on the left side of the entryway area, then look left towards the hidden ledge. |
Spoils of Time: Vault of Glass Loot Table
The Vault of Glass isn't just a test of skill and coordination; it's a treasure trove filled with iconic weaponry and armor forged in the temporal energies of the Vex network. Knowing where to focus your efforts is key to acquiring the specific gear you desire. Below is a breakdown of the potential rewards from each major encounter within the Vault. Remember that secret chests can drop items you've already acquired from these main encounters.
| Encounter | Possible Weapon Drops | Possible Armor Drops |
|---|---|---|
| Confluxes | Vision of Confluence (Scout Rifle), Found Verdict (Shotgun), Corrective Measure (LMG) | Arms, Class Item |
| Oracles | Praedyth's Revenge (Sniper Rifle), Vision of Confluence, Found Verdict | Arms, Legs |
| Templar | Fatebringer (Hand Cannon), Vision of Confluence, Corrective Measure | Arms, Chest |
| Gatekeepers | Hezen Vengeance (Rocket Launcher), Fatebringer, Found Verdict | Helmet, Legs |
| Atheon, Time's Conflux | Vex Mythoclast (Exotic Fusion), Praedyth's Revenge, Corrective Measure, Hezen Vengeance | Helmet, Chest |
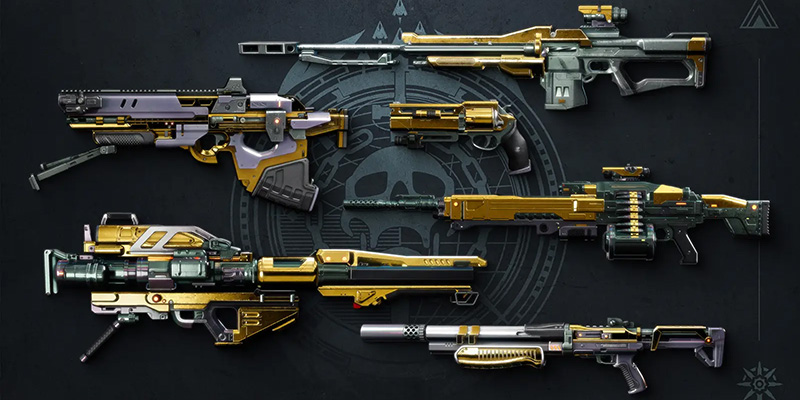
Armory of the Vault: Weapon Deep Dive & God Rolls
The weapons unearthed from the Vault of Glass are legends reborn, familiar names returning with updated perk pools and, crucially, the unique Timelost Magazine Origin Trait. This trait provides bonus Super energy on final blows with the weapon. Furthermore, upon casting your Super, the weapon's magazine size is doubled, and it reloads from reserves, an effect lasting a generous 20 seconds. This creates powerful synergistic opportunities, rewarding aggressive Super usage with enhanced weapon uptime and burst potential, a distinct advantage these weapons hold. Adding to their allure, all legendary Vault of Glass weapons are now craftable, allowing Guardians to deterministically pursue their perfect roll after unlocking the pattern.
Let's delve into each legendary weapon:

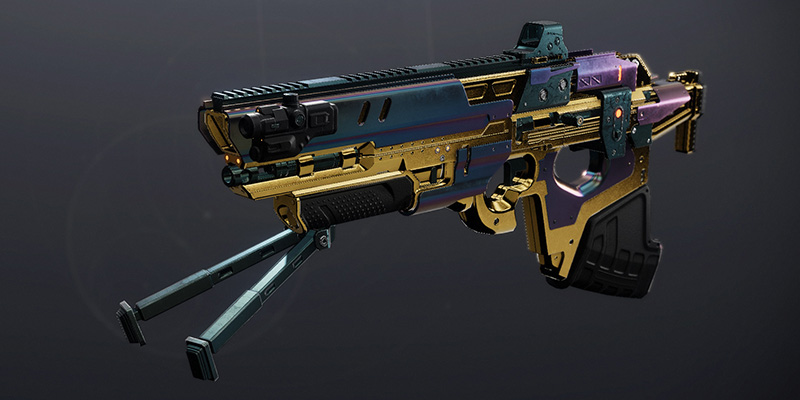
Fatebringer (Kinetic Hand Cannon, Adaptive Frame)
- Legacy & Feel: A name that resonates deeply with veterans, Fatebringer returns as a formidable Kinetic workhorse. Its Adaptive Frame (140 RPM) provides a balanced feel familiar to many Guardians.
- PvE Rolls: The classic Explosive Payload + Firefly combination remains incredibly potent for add clear, offering both area-of-effect damage and satisfying explosions on precision kills. Modern options include Kinetic Tremors paired with Firefly, Frenzy, or One For All, providing sustained AoE or damage boosts suitable for various endgame activities. Rewind Rounds offers excellent ammo efficiency for sustained fire, while niche builds might explore Osmosis + Elemental Honing. The Timelost version boasts a curated Explosive Payload/Firefly roll.
- PvP Rolls: Explosive Payload is highly valued for the increased flinch it inflicts on opponents. Combine this with consistency perks like Opening Shot, Keep Away, or Eye of the Storm. Precision Instrument offers a stacking damage bonus for landing consecutive shots. Prioritize barrels, magazines, and a Masterwork that enhance Range.
- Analysis: Fatebringer solidifies its top-tier status among Legendary Hand Cannons, especially with the addition of Kinetic Tremors and the ability to craft the perfect roll. Explosive Payload continues to be a defining perk in both PvE and PvP scenarios.
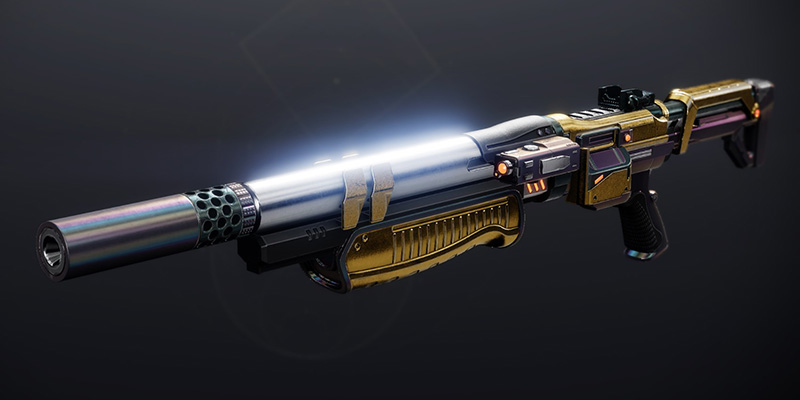
Found Verdict (Arc Shotgun, Aggressive Frame)
- Role: An absolute monster in the Crucible, Found Verdict remains a premier PvP shotgun choice. Its Aggressive Frame delivers high impact damage, though at a slower fire rate. Its PvE utility is present but often more specialized.
- PvE Rolls: The standout combination is Pugilist + One-Two Punch, creating exceptional synergy for melee-focused builds by enhancing melee damage and providing ability regeneration. For general use or as a swap weapon, Auto-Loading Holster paired with Vorpal Weapon (for majors/bosses) or Frenzy offers convenience and utility. Rewind Rounds + Vorpal Weapon is a less common but potential option for sustained damage.
- PvP Rolls: The undisputed god roll for PvP is Slideshot + Opening Shot. This combination maximizes the weapon's effective range and consistency upon sliding into engagements. Alternatives like Threat Detector + Opening Shot offer improved handling when near enemies. Barrel choices like Rifled Barrel, Smoothbore, Smallbore, or Full Choke, combined with Accurized Rounds and a Range Masterwork, are critical for pushing its one-hit kill potential. Note that the Timelost version's acquisition is unique, requiring the Maestro Glasser Triumph initially.
- Analysis: A dominant force in PvP thanks to its frame and excellent perk pool. Crafting allows Guardians to meticulously build the ideal PvP roll. Its PvE applications are strong in specific melee builds but less universal otherwise.
Vision of Confluence (Solar Scout Rifle, Precision Frame)
- Role: Excels in high-level PvE content like Grandmaster Nightfalls where range and precision are paramount. Offers strong synergy with Solar subclasses but tends to struggle in faster-paced PvP environments. The Precision Frame (180 RPM) offers good stability and a comfortable rhythm.
- PvE Rolls: The classic Rewind Rounds or Surplus paired with Firefly evokes the D1 feel and provides solid add clear. For Solar 3.0 synergy, Incandescent combined with damage perks like Frenzy, Explosive Payload, Kill Clip, or Firefly is extremely effective. Heal Clip combined with a damage perk offers valuable survivability.
- PvP Rolls: Zen Moment + Explosive Payload offers stability under fire and added flinch. Killing Wind + Kill Clip can be potent for chaining kills. Focus on perks and masterworks that boost Range and Stability.
- Analysis: A very solid PvE scout rifle, made even better with the addition of Incandescent for powerful Solar builds. Craftability ensures players can obtain their preferred PvE combination. Its PvP performance is hampered somewhat by the scout rifle archetype in the current meta.
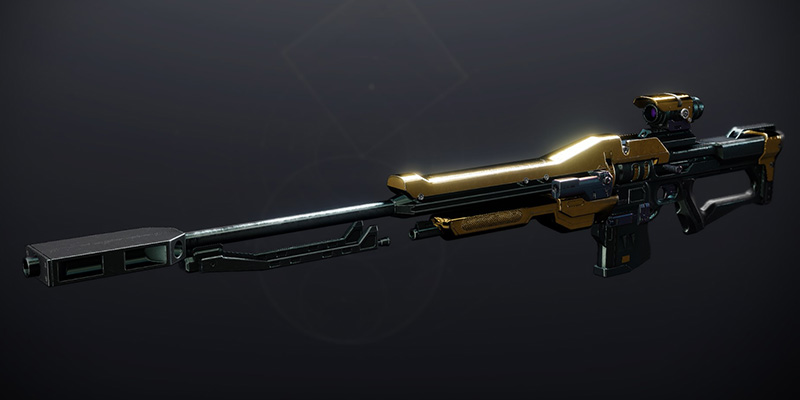
Praedyth's Revenge (Kinetic Sniper Rifle, Rapid-Fire Frame)
- Role: A top-contender for the best Legendary PvE sniper rifle, offering both high sustained and total damage potential. Its Rapid-Fire Frame (140 RPM) allows for quick follow-up shots and feels responsive. It also possesses decent PvP handling characteristics. It stands as a strong competitor to The Supremacy from Last Wish.
- PvE Rolls: For sustained DPS, Rewind Rounds + High-Impact Reserves or Frenzy is exceptional, minimizing reloads during damage phases. For maximizing total damage or burst, Fourth Time's the Charm paired with Bait and Switch, Elemental Honing, or Precision Instrument are powerful options. Kinetic Tremors combined with a damage perk provides excellent utility against Champions or tightly grouped enemies.
- PvP Rolls: Quickdraw or Moving Target paired with Opening Shot provides a snappy and consistent feel for picking off opponents. No Distractions is a good alternative for countering flinch. Focus on Handling and Range stats. Its high base Aim Assistance is a notable advantage.
- Analysis: An outstanding PvE sniper, particularly due to combinations like Rewind Rounds/HIR or FTTC/Damage Perk, making it ideal for various boss encounters. Crafting makes securing these top-tier DPS rolls feasible.
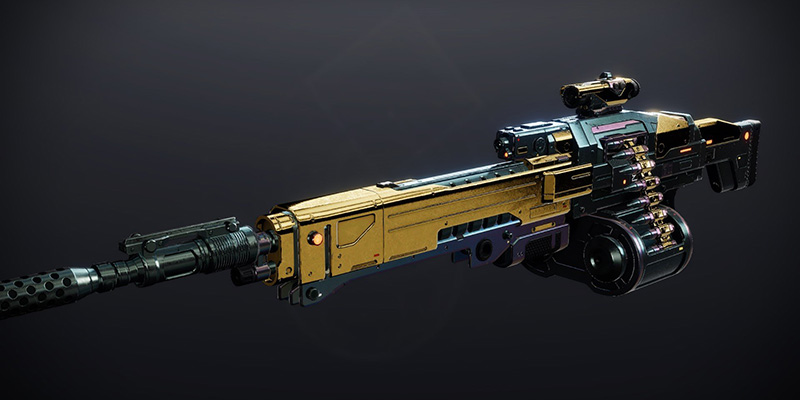
Corrective Measure (Void Machine Gun, Adaptive Frame)
- Role: A powerful and versatile Void LMG, excellent for clearing large groups of enemies and providing sustained fire. It holds its own against other popular Void LMGs like Commemoration. Its Adaptive Frame (450 RPM - Note: Sources vary, but RPM and common consensus point to Adaptive) offers a good balance of damage and stability.
- PvE Rolls: For ammo economy and damage/utility, look for Rewind Rounds, Subsistence, or Demolitionist in the third column, paired with damage perks like Killing Tally, One For All, Adrenaline Junkie, or the classic Firefly in the fourth. Destabilizing Rounds paired with Killing Tally, Demoralize, or One For All offers fantastic synergy with Void 3.0 subclasses, spreading Volatile effortlessly.
- PvP Rolls: Dynamic Sway Reduction paired with High-Impact Reserves or Tap The Trigger enhances stability and consistency for holding down lanes. Focus on Stability and Range.
- Analysis: An exceptional Void LMG choice, elevated by the addition of Destabilizing Rounds for potent Void builds and the continued effectiveness of combinations like Demolitionist/Adrenaline Junkie or Rewind Rounds/Killing Tally. Being craftable and benefiting from the Timelost Magazine Origin Trait makes it highly desirable.
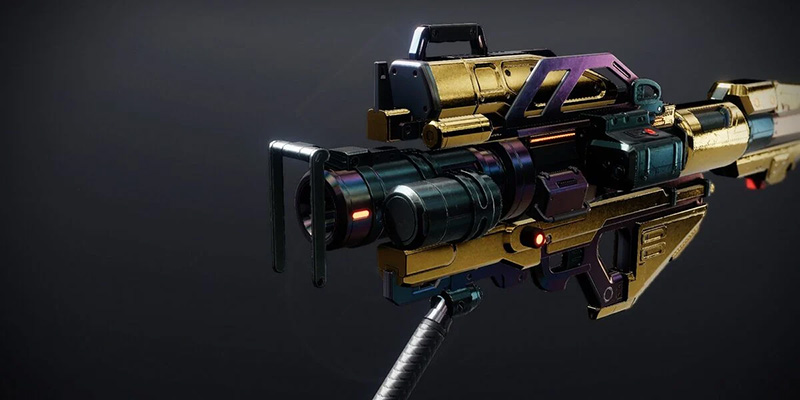
Hezen Vengeance (Solar Rocket Launcher, Aggressive Frame)
- Role: With its perk refresh, Hezen Vengeance surged to become one of the absolute best Legendary Rocket Launchers for PvE burst damage. Aggressive Frames inherently deal high damage per rocket.
- PvE Rolls: The combination of Envious Arsenal + Bait and Switch or Elemental Honing is arguably the peak DPS roll, allowing for multiple rockets to be loaded and fired with a significant damage buff. Auto-Loading Holster or Impulse Amplifier are strong alternatives in the third column, paired with Bait and Switch, Elemental Honing, Lasting Impression, or Explosive Light. For maximum ammo dump potential (at the cost of burst DPS), Overflow + Bipod can load multiple rockets. Demolitionist + Adrenaline Junkie serves grenade-focused builds.
- PvP Rolls: Impulse Amplifier or Tracking Module for consistency, paired with Cluster Bomb or Vorpal Weapon (for shutting down Supers) are the preferred options. Maximize Velocity and Blast Radius stats.
- Analysis: The refresh transformed Hezen Vengeance into a meta-defining DPS weapon, primarily due to the Envious Arsenal + Bait and Switch/Elemental Honing synergy combined with the potent Timelost Magazine Origin Trait. Crafting this god roll is a high priority for many endgame players.
VoG Weapon God Roll Summary
| Weapon Name | Recommended PvE Combo (Col 3 + Col 4) | Recommended PvP Combo (Col 3 + Col 4) | Brief Rationale/Use Case |
|---|---|---|---|
| Fatebringer (Kinetic) | Explosive Payload + Firefly / Kinetic Tremors + Frenzy/OFA | Explosive Payload + Opening Shot/EotS | Top-tier HC for add clear (PvE) and dueling/flinch (PvP). |
| Found Verdict (Arc) | Pugilist + One-Two Punch / Auto-Loading Holster + Vorpal | Slideshot + Opening Shot | Melee builds/utility (PvE), dominant close-range consistency (PvP). |
| Vision of Confluence | Incandescent + Frenzy/Explosive Payload / Rewind + Firefly | Zen Moment + Explosive Payload | Excellent Solar synergy/add clear, GM utility (PvE), stable long-range dueling (PvP). |
| Praedyth's Revenge | Rewind Rounds + HIR/Frenzy / FTTC + Bait and Switch/EH | Quickdraw/Moving Target + Opening Shot | Top-tier sustained or total damage sniper (PvE), snappy/consistent picks (PvP). |
| Corrective Measure | Destabilizing Rounds + Killing Tally/OFA / Rewind + Killing Tally | Dynamic Sway Reduction + HIR/Tap Trigger | Excellent Void synergy/add clear, strong ammo economy (PvE), stable lane holding (PvP). |
| Hezen Vengeance | Envious Arsenal + Bait and Switch/Elemental Honing / ALH + BnS | Impulse Amplifier/Tracking + Cluster/Vorpal | Premier burst DPS rocket (PvE), Super shutdown/consistency (PvP). |
Timelost Treasures: Master Difficulty Rewards
For Guardians seeking the ultimate challenge and the finest rewards the Vault of Glass has to offer, Master difficulty awaits. Be warned: this is a significant step up from the Normal mode.
Overview of Master Vault of Glass
Master VoG features a Power Level requirement of 1350, placing its enemy combatants at a level comparable to Grandmaster Nightfalls. While there's no strict entry requirement, fireteams should aim for an average Power Level of at least 1340, with 1350 or higher being ideal for comfort, especially during the demanding Atheon encounter. Enemies are substantially tougher, more aggressive, and critically, Champion enemies (Overload and Barrier) are present in nearly every encounter, not just Confluxes and Gatekeepers. While the core mechanics remain unchanged, the increased lethality and enemy density demand flawless execution, optimized builds, and constant communication.
Timelost Weapons Explained
The primary incentive for braving Master difficulty is the acquisition of Timelost weapons.
- What they are: These are the Vault of Glass's unique version of Adept weapons, obtainable only from Master mode.
- Benefits: Timelost weapons offer several distinct advantages:
- They can equip powerful Adept mods, providing enhanced stats or effects.
- When Masterworked, they gain an additional +3 bonus to every stat except Impact.
- Crucially, they typically drop with two selectable perks in both the third and fourth columns. This dramatically increases the odds of obtaining a desirable or "god" roll on a single drop, offering significant flexibility. Depending on the number of weapon patterns unlocked, there's even a chance for a third selectable perk in one of the columns.
- Each Timelost weapon features a unique, non-applicable shader.
- Acquisition: The primary way to earn a specific Timelost weapon is by completing its corresponding weekly rotating encounter Challenge on Master difficulty. The weapon available changes with the weekly reset. Once a Timelost weapon has been earned through its challenge, additional copies can be purchased from the final chest after defeating Atheon on Master difficulty for the cost of 25 Spoils of Conquest. The exception is the Timelost Found Verdict, which requires Guardians to first complete the "Maestro Glasser" Triumph (completing all Master challenges) before it can be purchased or potentially drop.
The enhanced rewards, particularly the dual perk selections, directly justify the significantly higher challenge of Master difficulty. They represent the pinnacle of Vault of Glass loot, offering tangible benefits and easing the grind for perfect rolls, providing a clear goal for dedicated fireteams.
Weekly Timelost Weapon Rotation (Example)
| Master Challenge Encounter | Associated Timelost Weapon (Example Rotation) |
|---|---|
| Confluxes (Wait For It...) | Vision of Confluence (Timelost) |
| Oracles (The Only Oracle For You) | Praedyth's Revenge (Timelost) |
| Templar (Out Of Its Way) | Fatebringer (Timelost) |
| Gatekeepers (Strangers In Time) | Hezen Vengeance (Timelost) |
| Atheon (Ensemble's Refrain) | Corrective Measure (Timelost) |
High-Stat Armor
Beyond weapons, Master Vault of Glass is an excellent source of high-stat armor. Each week, the armor drops tend to focus on a specific stat (e.g., high Discipline or high Resilience), making it a valuable resource for fine-tuning builds.
Master Difficulty Triumphs & Seal
Completing Master Vault of Glass contributes significantly to raid Triumphs and the prestigious "Fatebreaker" title:
- Master Glasser: Awarded for completing the raid on Master difficulty. Grants the coveted Vaultstrider Exotic Ship. This Triumph also increases the Vex Mythoclast drop rate.
- Maestro Glasser: Awarded for completing all five encounter challenges (Confluxes, Oracles, Templar, Gatekeepers, Atheon) on Master difficulty over time. This Triumph is required to initially unlock the Timelost Found Verdict. This Triumph also increases the Vex Mythoclast drop rate.
- Fatebreaker Seal: Both Master Glasser and Maestro Glasser are mandatory Triumphs for earning the Fatebreaker raid Seal and Title, signifying complete mastery over the Vault of Glass.
Echoes of the Vex: Collectibles and Cosmetics
For the dedicated Guardian who seeks not only power but also prestige and style, the Vault of Glass offers a selection of unique cosmetic items to commemorate their journey through time.
Exotic Ship: Vaultstrider
This sleek, Vex-inspired ship is a testament to conquering the Vault's highest difficulty. It is awarded upon completing the Master Glasser Triumph, which requires a full clear of the raid on Master difficulty. Flying the Vaultstrider is a clear signal of a Guardian's dedication and skill.
Emblems
Several emblems can be earned within the Vault:
- Infinite Reflections: The most accessible emblem, awarded for completing any version (Normal or Master) of the Vault of Glass raid.
- Corrective // Protective: A mark of true mastery, this emblem is awarded for completing the Flawless Vault of Glass Triumph, requiring the fireteam to clear the entire raid without any member dying. This Triumph also increases the Vex Mythoclast drop rate.
- Note on Past Emblems: Emblems like Exotemporal (Day One Challenge completion), Share a Glass (carrying new players, now likely unavailable), and Spoils of Ishtar (tied to past Bungie Store purchases) were limited-time or external rewards and may no longer be obtainable.
Shaders
Add a touch of Vex aesthetic to your gear:
- Bitterpearl: Perhaps the most sought-after shader, often compared to the iconic Chatterwhite from Destiny 1. It is obtained by finding and destroying all hidden collectible Vex shards scattered throughout the raid.
- Other Shaders: Sources also mention Continuum Alloy and Omnichromia as potential shader drops from the raid, though specifics on their acquisition are less commonly detailed. The Corrective // Protective shader shares its name with the Flawless emblem and is likely tied to it.
VoG Collectibles Summary
| Item Type | Item Name | Acquisition Method / Triumph |
|---|---|---|
| Exotic Ship | Vaultstrider | Complete the "Master Glasser" Triumph (Master Difficulty Completion) |
| Emblem | Infinite Reflections | Complete any version of Vault of Glass |
| Emblem | Corrective // Protective | Complete the "Flawless Vault of Glass" Triumph (No Deaths) |
| Shader | Bitterpearl | Find all hidden collectible Vex shards within the raid |
| Shader | Continuum Alloy | Potential raid drop |
| Shader | Omnichromia | Potential raid drop |
| Shader | Corrective // Protective | Likely tied to Flawless completion / Triumph |
Chasing the Mythoclast: Farming the Ultimate Prize
The ultimate prize within the Vault of Glass, the weapon whispered about since the days of the original Destiny, is the Vex Mythoclast. This Exotic Solar Fusion Rifle remains one of the most unique and sought-after weapons in the game.
Vex Mythoclast Overview
The Mythoclast defies easy categorization. Its primary firing mode, Timeless Mythoclast, allows it to fire full auto like an Auto Rifle. Defeating targets grants stacks of Overcharge via its Temporal Unlimiter perk. Once fully Overcharged, Guardians can swap firing modes, holding the trigger to charge and fire powerful, single-shot bolts akin to a Linear Fusion Rifle. This hybrid nature, combined with its Solar element and Exotic status, makes it a potent and versatile weapon, particularly after receiving buffs that enhanced its performance.
The Drop Rate Dilemma
Acquiring the Mythoclast is purely down to chance, dropping exclusively from defeating Atheon, Time's Conflux at the raid's conclusion. The exact drop rate has been a subject of intense community discussion and analysis:
- Estimates & RNG: While Bungie doesn't publish official rates, community surveys and analyses have attempted to pin down the number. Early estimates hovered around 3%, while later, potentially more robust analyses, often converged on approximately 5% as the base drop chance per eligible clear. Regardless of the exact percentage, the Random Number Generator (RNG) is notoriously fickle. Stories abound of Guardians receiving it on their very first clear, while others endure dozens, even hundreds, of looted clears (first clear per character class per week, or farmable clears during featured weeks) without success.
- Triumph Influence: It is confirmed that completing specific, challenging Triumphs within the Vault of Glass increases the initial drop rate for Vex Mythoclast. The Triumphs explicitly listed in game data as providing this boost are: Flawless Vault of Glass (Corrective // Protective emblem), Master Glasser (Vaultstrider ship), and Maestro Glasser (Timelost Found Verdict unlock). Each completed Triumph provides a small but meaningful increase to your odds on subsequent eligible clears. While some older community discussions or forum posts might express skepticism or state otherwise, the functionality tied to these Triumphs is intended and implemented.
- Bad Luck Protection: Whether VoG has additional "bad luck protection" (a system where the drop chance slightly increases with each unsuccessful looted clear) beyond the Triumph boosts is uncertain and debated within the community. Unlike some other raid exotics where such systems were explicitly confirmed or added later, VoG's protection seems primarily tied to completing the difficult Triumphs.
The combination of a relatively low base drop rate, the significant impact of RNG, and the confirmed (but challenging to achieve) boosts from Triumphs makes the Mythoclast chase a highly variable experience. It underscores the weapon's status as a prestigious, luck-dependent reward.
Farming Strategies (When VoG is the Featured Raid)
The most efficient way to increase your chances is through focused farming, but this is only possible under specific conditions:
- Farmability Window: Vex Mythoclast can be farmed repeatedly by killing Atheon multiple times on the same character only when Vault of Glass is the designated featured weekly raid in the Director. During non-featured weeks, you only have one chance per character class (up to three chances per account) per weekly reset. Claims that it's never farmable are incorrect, as farming during the featured week is a standard community practice. There is some community belief, though unconfirmed, that the drop rate during these farmable runs might be lower (e.g., 1%) compared to the first weekly clear's base rate (e.g., 5%).
- Checkpoint Swapping: The standard farming method involves using the Atheon checkpoint. One player holds the checkpoint on an alternate character (e.g., their Titan if they plan to farm on their Warlock). This player loads the raid on the alternate character, the other five players join, the checkpoint holder switches to their desired farming character and rejoins. The team then wipes inside the encounter to ensure everyone saves the checkpoint. The player with the alternate character can then leave and rejoin on their farming character. After each Atheon kill, the player whose alternate character holds the checkpoint simply switches back to that alternate, loads the raid, invites the team, switches back to their farming character, rejoins, and the cycle repeats.
- Efficient Atheon Kills: Speed is crucial for farming. Popular strategies include the "one-player Oracles" method: five players intentionally die before the encounter starts (or jump off immediately after), leaving one player alive. This player is guaranteed to be teleported and must solo the Oracle sequence (often using Xenophage or another high-damage, easy-to-use weapon) while the others respawn and handle callouts/portal defense. This allows all six players to be present for the damage phase immediately. High-damage Supers and builds are essential. Verity's Brow Warlocks are particularly effective, as grenades deal triple damage to Atheon. Thundercrash Titans with Cuirass of the Falling Star also contribute significant burst damage. The goal is consistent, fast kills, ideally achieving a one-phase kill to maximize runs per hour.
Acquiring the Vex Mythoclast Catalyst
Once you've secured the Mythoclast itself, the journey isn't quite over. The Catalyst significantly enhances its performance.
- How it Works: The Catalyst quest requires activating five hidden Vex plates scattered throughout the Vault of Glass raid environment. These plates must be activated sequentially by shooting specific floating Vex cubes near them, and importantly, this must be done in a single, continuous run of the raid – you cannot use checkpoints from different instances. Successfully activating all plates opens a hidden portal near the standard exit of the Gatekeeper encounter, leading to a chest containing the Catalyst.
- Team Requirement: Due to the plate locations, timers involved, and the need to progress through the raid, obtaining the Catalyst cannot be done solo. It requires a coordinated fireteam familiar with the plate locations and activation sequences.
- Catalyst Effect: The Masterworked Catalyst grants Vex Mythoclast increased stability and, more importantly, provides bonus damage and accuracy for a short duration after securing a kill while in its default full-auto firing mode. This makes the weapon noticeably more lethal and consistent.
Mastering the Vault: Efficiency Tips and Advanced Strategies
Clearing the Vault of Glass is one accomplishment; mastering it requires efficiency, optimized strategies, and seamless teamwork, especially on Master difficulty.
General Efficiency (Standard Difficulty)
- Loadout Synergy: Coordinate with your fireteam. Ensure you have answers for both Barrier and Overload Champions. Designate roles for add clear (Fatebringer excels here) and boss damage (Hezen Vengeance, Praedyth's Revenge). Leverage the Timelost Magazine trait by coordinating Super usage.
- Role Optimization: Clear roles for each encounter prevent confusion. Who holds the Relic? Who calls Oracles? Who defends which plate or portal? Smooth execution hinges on everyone knowing their job and communicating effectively.
- Understanding Spawns & Timers: Anticipating where enemies will appear (like Praetorians at the entrance, Wyverns at Confluxes, Hobgoblins during Oracles) allows for better positioning and faster takedowns. Knowing encounter timers (like Ritual of Negotiation or Gorgon detection) prevents wipes.
Hunters with Omnioculus provide invaluable team support in Master difficulty, offering smoke bomb invisibility for revives and dangerous traversal sections. For Atheon damage phases, Celestial Nighthawk Golden Gun or Star-Eater Scales with Blade Barrage provide exceptional burst damage options.
Warlocks using Verity's Brow with Solar grenades are essential for Atheon damage phases, as grenades deal triple damage to him. Well of Radiance remains crucial for survivability in Master difficulty. For general content, Starfire Protocol with Fusion grenades and Empowering Rift creates excellent damage loop potential.
Thundercrash Titans with Cuirass of the Falling Star deliver massive burst damage to bosses like Templar and Atheon. Heart of Inmost Light enhances ability uptime, particularly useful for Void or Stasis builds dealing with Champions. Ward of Dawn remains a reliable alternative to Well of Radiance for protection.
Advanced Master Difficulty Strategies
Master VoG demands a higher level of play.
- Survival is Paramount: Enemies hit significantly harder. Maximize Resilience (100 is highly recommended), use Damage Resistance mods (Chest mods like Arc Resistance, Melee Resistance, Sniper Resistance, plus Concussive Dampener), and incorporate healing sources like Well of Radiance, Healing Rifts, Restoration effects, or invisibility from Omnioculus Hunters. Effective use of cover is non-negotiable.
- Champion Management: Champions are relentless. Having multiple ways to stun both Barrier and Overload Champions is crucial. Coordinate focus fire to eliminate them the moment they are stunned. Weapons like Chill Clip Fusion Rifles (e.g., Riptide) are invaluable as they can handle both Champion types (freeze stuns Overloads, shatter deals with Barriers). Conditional Finality is also excellent, particularly for freezing Praetorians during the Gatekeeper challenge.
- Damage Optimization: Simply meeting mechanics isn't enough; DPS checks are tighter. Utilize meta damage strategies: Verity's Brow Warlocks throwing empowered Solar grenades at Atheon (who takes 3x grenade damage), optimized rocket rotations (like Envious/BnS Hezen Vengeance), or Linear Fusion Rifles paired with Divinity. Pay attention to weekly elemental surges and build accordingly. Consider having one player run Aeon exotic arms to generate Heavy ammo for the team.
Encounter Specific Tips (Master)
- Confluxes: Play defensively. Weaken Wyverns significantly before they reach the conflux for the challenge, then finish them with Supers. Manage the constant waves of Barrier and Overload Champions carefully.
- Oracles: Precision and speed are key. Use weapons that one-shot Oracles reliably (Xenophage, Indebted Kindness sidearm, close-range Riptide). Eliminate Hobgoblin snipers and Overloads immediately as they pose major threats. Glaives offer defensive utility; Scouts provide range. Coordinate clockwise rotations and callouts flawlessly. Invis Hunters can aid survival during rotations.
- Templar: An invisible Hunter Relic runner (Omnioculus) drastically increases safety for challenge attempts. Focus fire on the Templar during damage phases, managing adds and Overloads.
- Gatekeepers: Crowd control is vital. Stasis (turrets, Duskfields) and Strand (Suspend) are excellent for managing adds and freezing/suspending Praetorians and Wyverns for the challenge kill timing. Conditional Finality's freeze is also clutch here. Coordinate portal teams effectively.
- Atheon: The Verity's Brow grenade strategy is extremely effective. Manage Supplicant harpies constantly as they explode lethally. Oracle destruction must be swift and accurate – Sniper Rifles work well. Ensure clear callouts. For easier DPS phases or challenge attempts, consider having non-teleported players jump off at the start to control who gets sent through time.
Mastering these encounters involves a significant shift from Normal mode. It's less about just doing the mechanics and more about proactive threat assessment, resource management (ammo, abilities, Supers), maximizing survivability, and executing optimized damage strategies under pressure.
Time-Saving Techniques
While full speedruns employ highly specialized tactics, regular teams can adopt some principles for faster clears, especially when farming:
- Efficient Movement: Techniques like Warlock Well-skating (using a Sword and Well of Radiance for rapid forward momentum) can significantly speed up traversal through areas like the Gorgon's Labyrinth. Knowing the optimal paths through jumping puzzles saves time.
- Optimized Encounter Flow: Minimize downtime. Clear Oracles quickly to trigger Templar vulnerability faster. Start Atheon DPS immediately after the final Oracle is destroyed.
- Commonly Used Skips: The Sparrow breach under the entrance plates is a well-known technique to bypass the opening encounter entirely, useful for reaching secret chests or farming later encounters solo or with a small team. Advanced Atheon DPS strategies like pre-throwing Verity's Brow grenades just before the damage phase begins maximize uptime.
Adopting these efficiency mindsets, even without complex glitches, allows teams to significantly reduce their clear times, making farming runs far less tedious.
Conclusion: The Legend Endures
The Vault of Glass remains an enduring pillar of the Destiny experience. From the initial descent past the Templar's Well to the final confrontation with Atheon in the Glass Throne, it offers a unique blend of intricate mechanics, demanding combat, and a palpable sense of stepping into legend. The allure of its rewards – the iconic roar of Fatebringer, the surgical precision of Praedyth's Revenge, the overwhelming power of Hezen Vengeance, the reality-bending Vex Mythoclast, and the prestigious Timelost variants – continues to draw Guardians back into its temporal depths.
Whether you are a seasoned veteran seeking to conquer Master difficulty and claim the Fatebreaker title, a newcomer eager to experience Destiny's first raid, or a dedicated collector hunting for that perfect god roll or the elusive Mythoclast, the Vault of Glass provides a compelling and rewarding challenge. Gather your fireteam, synchronize your watches, prepare your loadouts, and step through the Vex gate. The Spoils of Time await those bold enough to claim them.