
Getting Started: What You Need
Two Types of Upgrades
The Graviton Spike has intrinsics (stat boosts) and catalysts (four different types, each needing three fragments). Here's how the difficulty requirements break down:
Difficulty Requirements
The Arc Bud System
You'll interact with these blue-glowing flowers all over Kepler. The process is always the same:
- Shoot the Arc bud with your Graviton Spike's Arc mode
- Switch to Stasis and blast the crystal that appears inside
- This slows down nearby spinning fans for a few seconds
- Quickly transform into Matterspark and zip through the fan
You'll also use Mattermorph (manipulates objects), Relocator Cannons (portable teleporters), and Relocator Pads (teleport destinations) throughout these puzzles.
Intrinsic Upgrades (Legendary Difficulty)
These three upgrades give you Temporal Manipulation II, III, and IV. You can grab them in any order.
Temporal Manipulation II - Curtilage Divide
Head to Curtilage Divide and find the eastern wall near the hanging box with a Relocator pad. The Arc bud sticks out from a small building to the left of the pad.
Before activating it, you need Mattermorph. From the hanging box, walk directly away from the laser wall and look up - you'll see Mattermorph on a higher ledge. Grab it and come back.
Now shoot the Arc bud, destroy the crystal, and use Mattermorph on the metal plates left of the laser barrier. Enter Matterspark form, go through the still fan, and pick up your first intrinsic.
Temporal Manipulation III - Caldera
Fast travel to Caldera and head away from the Altar of Relativity. Pass the Dean, drop off the left ledge, then turn around and duck under the metal overhang. You'll find a Matterspark tunnel in the wall.
Go through the tunnel, turn left in the small room, hop on the boxes (still in Matterspark), and take the second tunnel. When you exit, look up and right for a broken grate leading to a third tunnel. The Arc bud and fan are at the end.
Temporal Manipulation IV - The Gorge
Start at Assimilated Easement, go right and head south through the magic Nine train by the Calculus mission node. Travel down hallways and across gaps until you reach a Matterspark tunnel on your right. Head to the large chamber's western section.
Look for a red and white building with lasers blocking the door and a Relocator pad outside. Go right of the building, through the door, jump up and right, then follow the path to the Arc bud.
Catalyst Fragments: Fabled Difficulty
You need 12 total fragments for four catalysts: Rapid Hit, Subsistence, Transcendent Zen, and Temporal Alignment. The first six are available on Fabled.
Rapid Hit Catalyst (3 Fragments)
Fragment 1 - Outer Steppes
You can reach the final campaign mission area on Fabled without actually running the mission. Go through the Matter Spark portal under Caldera and travel to where you fought the Archon, then continue to the Servitor boss area.
Before hitting the Arc bud, destroy two Rosetta disruptors. The first hides in plants along the left wall. The second sits on top of the long black structure - climb all the way up and onto the steel roof.
After destroying both, activate the Arc bud at the far end, go through the fan, hit the Aionian terminal to drop the shield, and grab the fragment.
Fragment 2 - Augur's Bethel
From Curtilage Divide, head to Augur's Bethel. Past the red heating pipe, turn right to the back wall and take the Matterspark portal. Cross the large pipe room to the other end.
Find the spinning gear in the room right of the Arc bud. You can see three fuses behind it. Activate the bud to slow the gear, then shoot all three fuses.
Grab the Relocator cannon from the other side of the room, return to the main area, and jump up onto the pipes, then the higher pipes. Shoot the Relocator conduit, take the pad down and right to collect the fragment.
Fragment 3 - Singularity
Navigate deep into the Singularity past the first Relocator puzzle until you can grab Mattermorph. Use it to reveal the room on the right and clear the enemies.
The Arc bud's on the back wall. Look for a hidden passage below and right of the bud - there's another spinning fan beyond it. Standard bud activation slows the fan so you can collect the fragment.
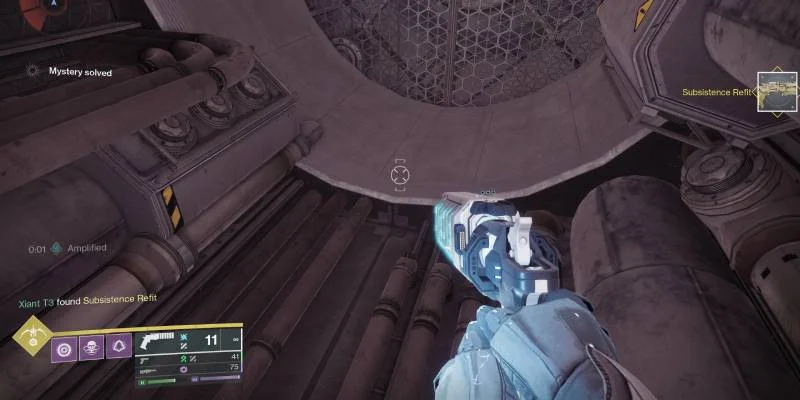
Subsistence Catalyst (3 Fragments)
Fragment 1 - Deeper Singularity
Don't fast travel after getting the third Rapid Hit piece. Keep going past the Mattermorph puzzle and through the room with the big Minotaur boss. In the next room, instead of going left and down, look up.
Jump onto the platform above the large fungal growth, turn around, and jump to the smaller platform above it. Go through the tiny hole, look left for the Arc bud across from the stone fan. Standard process gets you the fragment in the well-lit chamber.
Fragment 2 - Curtilage Divide (Exile's Accord)
From Curtilage Divide, take the nearby Matterspark portal, keep left through the next portal, turn around and take the magic Nine train deeper. Go left onto the train tracks until you see the Arc bud next to its fan, guarded by lasers.
Drop the cannon near the fan, activate the bud, grab the cannon, shoot the pad behind the lasers, then quickly get to the teleporter in the hidden corner.
Fragment 3 - Power Plant (Northwest Outer Wastes)
Head to the large chamber where you turned on the second reactor during campaign. Clear enemies, grab the Relocator cannon and Mattermorph from near the computer terminal and blue column.
Use Mattermorph to move the rock blocking the Relocator conduit, shoot the starting conduit to activate the pad, take it down into the cage with the Vex device. Enter Matterspark and shock the device to close it.
Go to the room's center where the Arc bud sits across from the cage. Activating the Vex device removed the shield blocking your path to the final piece.
Mythic Difficulty: The Hard Stuff
The remaining six fragments all need Mythic difficulty. Arc buds won't even show up on lower difficulties. Mythic puts you 50 Power below enemies minimum and boss fights become brutal damage sponges.
Transcendent Zen Catalyst (3 Fragments)
Fragment 1 - Caldera
From Caldera landing zone, turn right at the stairs and keep right past the Exile's Accord jump. The Arc bud's near the signal locator from the campaign.
Go through the fans to reach a room with four locked doors and a broken Aionian panel. Each door spawns a yellow-bar enemy. Jump onto the air duct where they can't reach you and pick them off. Open the third door to activate the panel and grab the fragment.
Fragment 2 - Aionian Campus
From Caldera, head northeast to the Aionian campus. In the far corner of the first area, take the Matterspark portal, go left from the exit, up stairs, then right into tunnels. The Arc bud's beyond the chamber with green mist.
Activate the bud to access the Mattermorph node (you might be able to grab it through the grates). Head to the chamber where you found the big Harpy during campaign. The bud's on your left, Mattermorph objects behind the fan. Standard process, then use Mattermorph to move rocks and find the fragment inside.
Fragment 3 - Singularity Boss Fight
Go through Singularity to the first encounter area, turn left, use Mattermorph for the Matterspark path. Keep right in the next encounter room, go up the back ramp, and take the Matterspark tunnel on the right wall.
The fan here sits on the floor and will shred you if you're not careful. At the bottom is a yellow-bar Vandal at 270 Power. Even at max level, you're only 220 against him. If you're solo and die, he disappears and won't respawn - you'll have to restart from Caldera.
Temporal Alignment Catalyst (3 Fragments)
Fragment 1 - Caldera (Two Routes)
Go left from Caldera landing zone to the spinning fan in the distance. Activate the nearby bud, go through the fan, and take the Matterspark tunnel to the computer room.
Fragment 2 - Far North Gorge
Head to the Gorge and keep right at every intersection to reach the northernmost section. Navigate through Matterspark rooms and platforming until you hit enemies.
In the big chamber, get to the hanging stone blocks near the ceiling. The first well-lit block has a Relocator pad. Another block in the dark has the Relocator cannon on its back side.
From the pad, you can see the Arc bud on the opposite wall. Activate it to slow the fan below, jump down, shoot the cannon through, then return to the pad. Watch out for the Hobgoblin when you teleport. The fragment's in the dark back corner.
Fragment 3 - Deep Singularity
Take the same route as the third Transcendent Zen fragment, but go left instead of right when you reach the Matterspark tunnel choice. Continue to the massive chamber with the Relocator puzzle.
Kill at least the Tracer Shanks to make platforming easier. Platform along the left walls across the chasm. When you reach the large wall above the laser grid, keep going right until you can't anymore.
Look down at the small platforms hanging over the death pit. Jump down, look left, and jump to the hanging platform with the large column. Find the Fallen terminal on the other side and activate it to open access to the fan.
Go back to the opposite end of the room. The Arc bud's now visible next to an opening in the pipe works. Jump in, activate the bud, and the fragment's just beyond the fan.
Uber Boss: Mythic Difficulty Enemies
Most dangerous encounter in the guide. Scales to 270 Power while you're capped at 220. Use cover extensively and bring heavy weapons. Dies immediately if you die solo - restart required.
High-mobility enemies that interfere with platforming. Priority targets for elimination. Use abilities and supers rather than trying to outgun them with primaries.
Positioned to ambush you during teleporter sequences. Always check your landing zone before using Relocator pads. Use sniper-style weapons to engage at range.
What You Get for All This Work
Once you collect everything, you'll have a fully upgraded Graviton Spike with all four catalysts unlocked. You'll also complete the Gravitic Doctorate Triumph needed for the Fated Weapon Title.
Master of temporal manipulation with the ultimate dual-element hand cannon setup.
A Word About Mythic Difficulty
The boss scaling on Mythic is honestly broken. Enemies have absurd health pools that make fights drag on forever. You'll run out of special and heavy ammo before some bosses are even half dead.
For the really tough fights, focus on abilities and supers over weapons. Team up when possible - some encounters are nearly impossible solo. The Transcendent Zen Vandal boss in particular will test your patience and might make you question your life choices.
But hey, that's what makes the rewards feel worth it, right? You can collect these in any order within their difficulty tiers, though the guide routes them geographically to save time. Good luck out there, Guardian.
- Incredibly powerful fully upgraded weapon
- Unlocks prestigious title progress
- Can be collected in any order within tiers
- Geographic routing saves travel time
- Mythic difficulty scaling is brutal
- Some encounters nearly impossible solo
- Boss fights become massive damage sponges
- May test your sanity and life choices