
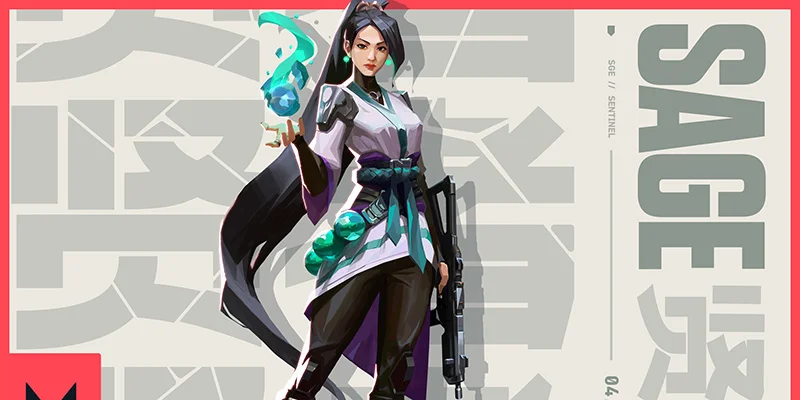
Who is Sage and Why Play Her?
Sage sits in a weird spot in Valorant's agent roster. She's technically a Sentinel, but she plays more like a support hybrid who can lock down areas while keeping her team alive. Back in the beta days, she was absolutely broken (her slows and walls were basically unstoppable), but after some nerfs, she's settled into this flexible role that works on pretty much every map.
You'll find her particularly dominant on Icebox where she's basically a must-pick, but honestly, there's no map where she genuinely struggles. If you like controlling the flow of rounds and being the backbone of your team, Sage is your agent.
Breaking Down Sage's Abilities
Healing Orb (Signature Ability)
Your healing orb is what makes you the team mom. Press E, aim at a damaged teammate you can see, and left-click to start healing them. They'll go from 1 HP to 100 HP over 5 seconds, which is pretty insane value.
Right-clicking heals yourself, but here's the catch: you only get 30 HP over 10 whole seconds. Riot clearly wants you healing teammates, not yourself. The cooldown lets you squeeze out two heals per round if you time it right, though your teammates will definitely ask about it every five seconds when it's on cooldown.
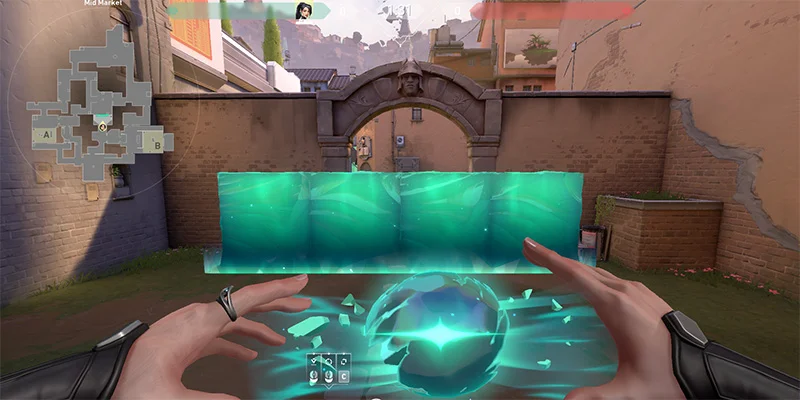
Barrier Orb
Your wall splits into four sections, each with 800 HP (that's about 20 Vandal shots per section). The thing takes 3.3 seconds to harden after you place it, starting at half health, so don't drop it right in front of rushing enemies unless you want to watch it crumble instantly.
Pro tip: hitting the ability key again while placing snaps the wall to perpendicular or adjacent angles, which is way faster than manually rotating with right-click. Also, melee does extra damage to the wall, so watch out for knife-wielding eco rushers.
Slow Orb
Slow Orb Properties
These create a gooey field that makes everyone move like they're walking through molasses. The slow affects both ground speed and air speed, so no, you can't bunny hop through it. Walking makes no noise in the slow, but running and jumping are loud as hell.
The orb spreads to cover the same area no matter where it lands. Throw it in a corner and it pushes out more in the open direction to compensate. Once you leave the slow field, you're back to full speed instantly (no lingering effect like some other abilities).
Resurrection (Ultimate)
You can bring back a dead teammate at full health where they died. While you're reviving them, they go through this animation where they can't do anything but can still take damage.
Here's something interesting: they actually get their 100 HP the second you start the rez, so in desperate situations you can use them as a meat shield (brutal, but sometimes necessary).
Core Gameplay Strategies
Playing Defense Like a Wall (Literally)
On defense, you're the gatekeeper. Your job is making attackers regret their life choices when they try to push your site. Here's where to focus on each map:
| Map | Priority Area | Wall Strategy |
|---|---|---|
| Split | Mid Control | Lock down mid early and often |
| Haven | B Site | Wall B mid so your team can rotate freely between A garage and C |
| Icebox | B Site | B site walls are basically mandatory (either blocking plant or backsite) |
| Pearl | A Pit / B Long | A pit wall catches many off guard, plus B long plant walls work great |
| Ascent | Short | Short is your domain |
| Fracture | A Main | A main needs your attention early |
Your 40-second wall basically deletes a part of the map from existence. Attackers either wait it out or go somewhere else. If you combo a wall with slows at the same spot, most teams won't even try to push through. Breaking a wall while slowed is asking to get destroyed.
Attacking with Sage
On attack, your walls serve different purposes:
- Getting on site: Block those common defender angles so your team can push in
- After the plant: Wall off defuse attempts or common retake paths
- Hiding the spike: Some walls can completely block vision of the planted spike
- Safe planting: Create a little fort for your teammate to plant in peace
The Art of Wall Boosts
This is where Sage gets spicy. You can use your wall to get up to weird spots that nobody expects. Most players aim at head level for someone on the ground, so when you're peeking from on top of a wall, you catch them completely off guard.
These plays (popularized by a content creator named Grim, hence "Grim walls") turn your defensive tool into an offensive weapon. You can boost onto boxes, ledges, weird corners, basically anywhere that gives you an unexpected angle. Combine this with a Jett or Omen who can get up high too, and you've got some nasty setups.
Who Gets the Heal?
Healing priority isn't rocket science, but you'd be surprised how many Sage players mess this up:
Your healing checklist:
- Whoever has the lowest HP and you can actually see
- If multiple people are hurt, heal whoever's closest (faster to start the heal)
- First person to ask if everyone's equally damaged
- Your duo partner or top fragger (let's be real, this happens)
Also, consider who's about to take a fight. Your entry fragger at 70 HP probably needs it more than your lurker at 50 HP who's chilling in spawn.
Making Slows Actually Useful
Shutting down ultimates:
Your slows can completely ruin enemy ults:
- Killjoy Lockdown becomes way harder to escape
- Breach's Rolling Thunder catches everyone
- Brimstone's Orbital Strike actually gets kills
- Raze nades become unavoidable
- Viper's Snake Bite melts people who can't leave
- Brimstone and Phoenix mollies turn deadly
- Gekko abilities hit way more consistently
- Clove's decay (Meddle ability) becomes brutal
Smart slow usage:
- In 2v1 retakes, slow the enemy while your teammate defuses
- Before pushing sites, slow common camping spots (like Icebox A backsite)
- Layer slows on broken wall sections to stop the push
- Stack both orbs back-to-back for extended area denial
Round-by-Round Decisions
Pistol Round Priorities
Yeah, 400 credits for a wall on pistol round sounds expensive, but pistols do way less damage to walls, making them last forever. The map control you get is usually worth more than having heavy shields. Your call, but the wall usually wins out.
Managing Your Money
As Sage, you're probably buying abilities over guns more than anyone else. Your typical shopping list:
That 600 credit heavy shield versus 400 credit wall choice? Take the wall. Your team needs that utility more than you need 25 extra HP.
When to Use Your Rez for Economy
Rounds three and four are prime economy rez territory. You just clutched a 1v3? Rez someone after the round ends purely for the money. Sounds dumb, but going from two guns to four guns next round can win you the half.
Reading the Room (And Not Wasting Utility)
Stop Panic-Walling
New Sage players hear footsteps and immediately throw up a wall. Stop. Are they actually committing or just making noise? Using your wall too early tells them exactly where you are and leaves you defenseless for the real push 20 seconds later.
If you must wall against a rush, place it deeper in the site rather than right at the entrance. You lose a bit of ground, but the wall actually has time to harden and do its job.
Deciding When to Rez
Every rez needs a quick mental checklist:
- Teammate died somewhere you can protect
- You have map control
- The money makes it worth it
- Numbers advantage makes it safe
- Enemy Brimstone has ult and knows where the body is
- They died in Narnia behind enemy lines
- It's a 1v5 (just save yourself the embarrassment)
- There's an Op watching the body
Don't force your team to play scared just so you can get a rez off. Let them know you have ult, but if they die somewhere stupid, that's on them.
Map-Specific Jobs You Can't Skip
Some walls are basically required on certain maps. Mess these up and your team will (rightfully) flame you:
Essential Map Walls
| Map | Must-Have Walls | Why It's Critical |
|---|---|---|
| Icebox | B plant area, Backsite angles, Art position | Controls entire site flow |
| Pearl | B long plant, A pit control | Denies key sightlines |
| Haven | B mid, C entrance | Enables safe rotations |
These aren't suggestions. These are your job.
Next-Level Sage Plays
Wall Geometry Matters
Don't just slam walls perpendicular to doorways. Angling your wall can force enemies to break two sections instead of one to get through. Try this at Haven double doors - diagonal placement doubles their breakthrough time compared to a straight wall.
You're Not Just a Healer
Use your kit aggressively:
- Self-heal keeps you in fights longer
- Walls create your own angles
- Slows control enemy movement
- Your ult can swing rounds solo
Team Communication is Everything
Good Sage players never shut up (in a good way):
- Call out heal cooldowns before people ask
- Coordinate walls with your team's plan
- Tell people when and where you can rez
- Let teammates know where you're throwing slows for combos
Your survival keeps the whole team going. Yes, you support your team, but dying first trying to heal someone is worse than letting them die and staying alive to help the rest of the round.
Mistakes That'll Get You Flamed
Using the Same Wall Every Round
If you wall the same spot three rounds in a row, enemies will prefire you through it. Mix up your placements. Standard defense one round, creative angle the next.
Healing Yourself Over Low Teammates
You at 70 HP healing yourself while your Jett sits at 10 HP next to you? That's a reportable offense (not really, but your team will hate you). Your 30 HP self-heal is trash compared to giving an ally 100 HP.
Saving Ult for the "Perfect" Moment
That perfect 2v5 comeback rez opportunity? It's not coming. Use your ult when it provides any value - numbers, economy, or just tilting the enemy team. An unused ult is a wasted ult.
Not Comboing with Your Team
Your slows by themselves are annoying. Your slows plus a Raze nade are deadly. Talk to your team and set up combos. That's free round wins you're passing up.
Final Thoughts
Sage is way more than a walking heal station. She reshapes maps, controls timing, and gives second chances when teammates mess up. You've got one of the most flexible kits in the game, so use all of it.