
Tired of static defenses that crumble under pressure? Enter Newcastle, the Heroic Protector who brings the fortress to the fight! He's not just a shield; he's a dynamic bastion of hope for any squad aiming for victory. This guide will take players on a journey from understanding Newcastle's core mechanics to mastering advanced shield-play, life-saving revives, strategic positioning, decisive push/hold tactics, synergistic team compositions, and optimal loadouts. Prepare to become the unyielding shield your squad needs.
His mobility is not just for escape; it's for advancing cover and repositioning defenses. This implies that playing Newcastle effectively requires more than just placing a shield and waiting; it demands constant assessment and reaction to the flow of battle. The "Mobile Fortress" isn't just a catchy phrase; it's a core gameplay philosophy that implies dynamism and proactive decision-making, a key theme that makes him more versatile in various combat scenarios and potentially fitting into more aggressive team compositions than one might initially assume for a "Support" legend.
Meet Newcastle: The Heroic Protector
Before fortifying the battlefield, it's essential to understand the man behind the shield and the inherent advantages he brings.
A Glimpse into Jackson Williams' Story
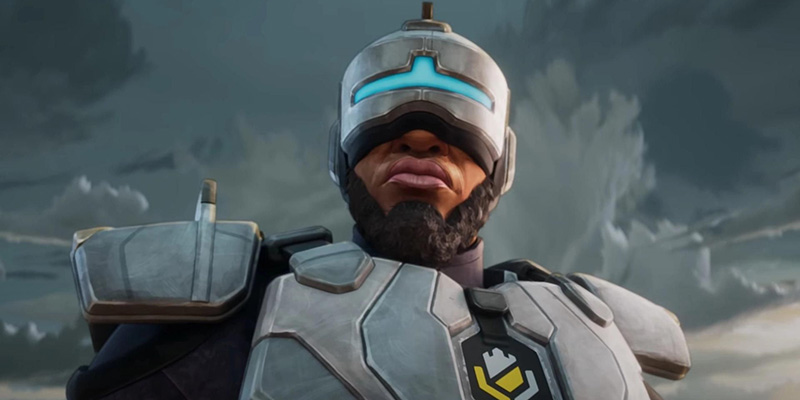
Lamont Craig Harris took on the mantle of "Newcastle" to enter the Apex Games and pay off the debts threatening his home, Harris Valley. However, the true identity behind the armor is Jackson Williams, the 41-year-old brother of Anita Williams (Bangalore), hailing from Gridiron. He adopted this persona to protect his family and community, a narrative that perfectly encapsulates his "heroic protector" role in the Games.
Class: Support – The Backbone of the Squad
As a Support class legend, Newcastle provides foundational benefits that enhance team longevity. This class grants access to special blue Support Bins, which contain extra healing and survival items, and crucially, allows Newcastle to craft expired ally banners at Replicators, even if the timer has run out. These perks are invaluable for sustaining the team through long matches and recovering from difficult situations.
The Fortified Passive: Built Tough
Newcastle possesses the Fortified passive, which reduces all incoming body damage by 15% and grants immunity to slow effects from weapon fire. This makes him inherently more durable. However, a critical detail is that Fortified no longer reduces headshot damage. This is a significant factor, especially considering Newcastle's larger hitbox compared to many other legends. While Fortified offers a degree of resilience, it doesn't make him an invulnerable tank. Smart shield usage and positioning are paramount to mitigating his vulnerability to focused fire, particularly headshots.
Newcastle's Defensive Arsenal: Mastering the Abilities
Newcastle's power lies in his unique set of defensive tools. Understanding their mechanics is the first step towards becoming a true mobile fortress.
Tactical Ability: Mobile Shield – Your Advancing Cover
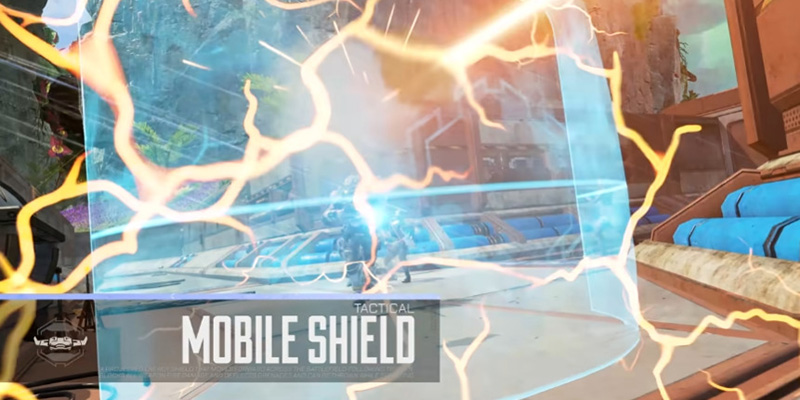
The Mobile Shield is Newcastle's bread-and-butter defensive tool, a controllable drone that projects a moving energy shield.
Mechanics Deep Dive:
- Deployment: It can be thrown up to 25 meters, allowing Newcastle to project cover for advancing teammates or secure forward positions.
- Health: The shield is divided into an upper and lower segment, each possessing 500 HP (for a total of 1000 HP if both are hit sequentially). This segmented health means enemies must focus fire to break through, and partial cover can remain even if one segment is destroyed.
- Duration & Cooldown: It lasts for 20 seconds or until destroyed, with a relatively short 15-second cooldown, making it frequently available.
- Redirection: The shield can be repositioned by pressing the tactical key again while aiming at a new location. It moves at the speed of a player crouching with weapons out and does not change its facing direction when simply moved to a new location.
- Damage: The drone itself deals 20 damage if it directly hits an enemy upon the initial throw.
Basic Uses:
Providing moving cover for offensive pushes or defensive retreats, blocking specific sightlines, and creating temporary safe spots for quick heals or revives.
- The Mobile Shield can be destroyed by an enemy Crypto's EMP.
- It is capable of deflecting grenades.
The segmented health of the Mobile Shield implies that focused fire from an enemy team can bring it down, but also that partial cover can remain even if one segment is destroyed. This encourages strategic angling and awareness of where damage is coming from. Newcastle can't just "set and forget" his shield against competent opponents; he needs to use its destructibility to his advantage by, for example, baiting fire to one segment while peeking from another.
Ultimate Ability: Castle Wall – Instant Fortification
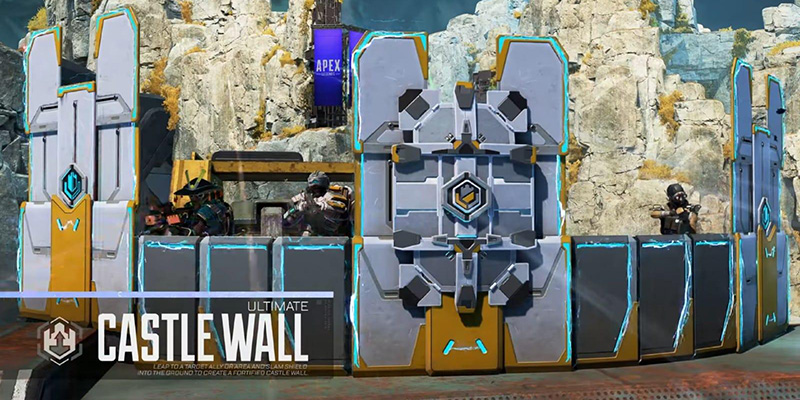
The Castle Wall is Newcastle's signature ability, allowing him to leap into action and create a massive, fortified stronghold.
Mechanics Deep Dive:
- Deployment: Newcastle leaps to a targeted ally or area, slamming down and erecting a multi-segmented wall.
- Range: The leap covers up to 35 meters normally. When targeting a squadmate or their Death Box, this range extends significantly to 75 meters. Crucially, no line of sight is needed when targeting allies, only a valid landing area, ensuring they can be protected even in precarious situations.
- Health & Structure: The wall consists of nine segments, each boasting 750 HP. Enemies can destroy individual segments with two melee attacks. If a longer segment is destroyed, any connected shorter segments will also crumble. Newcastle has the ability to retract specific segments, creating tactical shooting windows.
- Electrification: Upon deployment, the outward faces of the Castle Wall are electrified for 30 seconds. Enemies attempting to climb over an electrified segment take 20 damage and are stunned, serving as a powerful deterrent.
- Landing Effects: Landing near enemies causes a knockback effect, briefly disrupting them.
- Cooldown: The Castle Wall has a 2-minute cooldown.
Basic Uses:
Creating robust defensive positions, securing critical areas (especially in final rings), providing substantial cover in open spaces, and blocking chokepoints.
The recent buff to Castle Wall, allowing it to block grenades from the front, significantly increases its utility as a standalone defensive tool. Previously, this was a major weakness often requiring a Wattson teammate for comprehensive ordnance denial. This change makes Newcastle more self-sufficient in holding positions against grenade spam. However, its continued vulnerability to aerial attacks like Gibraltar's or Bangalore's ultimates, and to Crypto's EMP disabling its electricity, means strategic placement considering all angles of attack and potential enemy abilities is still vital. While stronger, skilled opponents will exploit the Wall's remaining weaknesses, reinforcing the need for 360-degree awareness.
Passive Ability: Retrieve the Wounded – The Heroic Rescue
Newcastle's passive, Retrieve the Wounded, embodies his role as a protector, allowing him to perform clutch revives under pressure.
Mechanics Deep Dive:
- Action: When initiating a revive on a downed ally, Newcastle can simultaneously drag them.
- Protection: During the drag and revive process, he deploys his Revive Shield, which protects both himself and his downed teammate from incoming fire. The crucial aspect here is that the Revive Shield's health and strength are directly determined by the tier (Common, Rare, Epic, Legendary) of Newcastle's currently equipped Knockdown Shield.
- Control: Once the revive is initiated, Newcastle does not need to continue holding the "Use" key. This frees up his right hand (on controller) or mouse to look around, assess threats, and even reposition his Mobile Shield if necessary.
Basic Uses:
Safely repositioning downed teammates out of danger and reviving them, especially when they are caught in exposed locations.
The "no need to hold use key" feature for Retrieve the Wounded is a subtle but significant quality-of-life improvement. It directly enhances Newcastle's ability to multitask – for instance, repositioning his Mobile Shield or scanning for threats – during the critical moments of a revive, thereby increasing the chances of a successful and safe pickup. This encourages more dynamic revive attempts and allows for higher-level plays.
| Ability Icon | Ability Name | Type | Description | Key Stats | Core Function |
|---|---|---|---|---|---|
 |
Mobile Shield | Tactical | Throw a controllable drone that creates a moving energy shield. | Segments: 2 (500 HP each). Duration: 20s. Cooldown: 15s. Range: 25m throw. Damage: 20 (drone hit). | Provide mobile cover, block sightlines. |
 |
Castle Wall | Ultimate | Leap to an ally or target area and slam down, creating a fortified stronghold. | Segments: 9 (750 HP each). Range: 35m (75m to ally). Electrified: 30s (20 dmg + stun). Cooldown: 2m. | Create instant, robust fortifications. |
 |
Retrieve the Wounded | Passive | Drag downed allies as you revive and protect them with your Revive Shield. | Shield HP: Matches equipped Knockdown Shield. Control: No need to hold revive key. | Safe, repositioning revives. |
Advanced Mobile Shield Techniques: The Art of Dynamic Defense
The Mobile Shield is far more than a simple barrier; in skilled hands, it becomes a versatile tool for outplaying opponents and controlling engagements.
Fine-tuned Deployment & Redirection: The Shield's True Potential
Mastering the Mobile Shield begins with understanding its deployment and nuanced redirection mechanics.
- Throw Mastery: The shield can be deployed up to 25 meters away, enabling Newcastle to cover advancing teammates or secure forward positions before his team arrives.
- The "Imaginary Line" for Redirection: The key to precise control lies in understanding an invisible 180° line relative to the drone.
- If Newcastle is positioned behind this line (relative to the shield's facing), aiming and reactivating the tactical will cause the shield to slide to the new location without rotating.
- If Newcastle is in front of this line, or aims past it, reactivating will cause the shield to rotate to face the new direction. This distinction is paramount for high-level control. - Finessing Rotations: Achieving a full 180-degree turn while behind the shield requires either stepping briefly outside its rear protection or making several smaller, incremental turns. A more fluid way to achieve full rotation is to stand just in front of the drone but still within the shield's energy barrier.
- Angled Deployment for Advances: For diagonal movements while maintaining cover, initially deploy the shield at an angle (e.g., 30 degrees) towards the opposite side of the intended path. Then, when redirecting, the marker will more easily fall within the "slide" zone, allowing the shield to move diagonally without exposing the player.
"Shield Dancing": Outmaneuvering Your Opponents
"Shield Dancing" refers to the art of rapidly and continuously repositioning the Mobile Shield during an engagement.
"It's not your bubble, it's my bubble"
- Execution: This technique requires quick thinking and mastery of the redirection mechanics. It involves actively moving the shield to block incoming fire from different angles, cover exposed flanks, deny enemies advantageous angles, or even audaciously take away a piece of cover an opponent is attempting to use.
- Effectiveness: This makes Newcastle a much harder target to pin down and can dictate the flow of close-quarters fights, turning predictable engagements into confusing scrambles for the enemy.
Peeking Strategies: The "Shoot-and-Scoot" Fortress
The Mobile Shield is ideal for aggressive peeking, allowing Newcastle to deal damage while minimizing his exposure.
Peeking Techniques
Quickly moving in and out of the shield's cover to take shots. This is particularly effective with high-damage single-shot weapons like the Peacekeeper or Mastiff shotguns.
- Jiggle-Peeking: Quickly moving in and out of the shield's cover to take shots. This is particularly effective with high-damage single-shot weapons like the Peacekeeper or Mastiff shotguns.
- Strafe-Peeking: Strafing from one side of the shield to the other, firing, and then returning to the safety of the energy barrier.
- Sliding with Shotgun Bolts: After peeking and firing a shotgun (especially the Peacekeeper), sliding back behind the shield not only provides cover but can also assist with the reload cycle if timed with shotgun bolt mechanics.
Offensive Pushing: Leading the Charge (Safely)
The Mobile Shield is a potent tool for enabling aggressive team pushes.
- Advancing with the Shield: Throw the shield forward and continuously redirect it as the team advances across open terrain or pushes into an enemy-held position.
- Creating a "Beachhead": Use the shield to establish a temporary safe point from which the team can initiate an attack or stage a breach.
Creating Temporary Safe Zones: A Moment to Breathe
In the chaos of battle, the Mobile Shield can create crucial pockets of safety.
- For Healing/Reviving: Deploy the shield to provide immediate, albeit temporary, cover for using healing items or initiating a revive, especially if the Castle Wall is on cooldown.
- Tactical Retreats (The "Retreat Shield" Tactic): A clever disengagement technique involves throwing the shield towards the enemy, then turning to flee while redirecting the shield to cover Newcastle's back. This provides protection during a vulnerable retreat, allowing for safer rotations or disengagements. Newcastle isn't just about holding ground; he's also about safely yielding ground when necessary.
Door Dominance: Blocking and Breaching Support
The Mobile Shield offers unique interactions with doorways.
- Door Blocking: Position the shield to block a doorway. This is more durable than a standard door and can prevent enemies from simply kicking it down, buying valuable time for heals, revives, or preparing a defense.
- Supporting Breaches: When attacking a fortified building, deploy the Mobile Shield to provide cover for teammates as they breach doors or windows.
Arc Star Shenanigans: Offensive Utility
The Mobile Shield can be combined with Arc Stars for surprising offensive plays.
- Sticky Shield Push: Attach an Arc Star to the front of the Mobile Shield and then direct the shield into a room or towards entrenched enemies. Since the shield can pass through some objects like fences, this can deliver an Arc Star unexpectedly, causing damage and stun. This allows Newcastle to initiate or contribute to aggressive plays in ways not typical for "defensive" legends, making him a surprisingly good breacher or entry support.
- Self-Protect Arc Bait: An advanced trick involves tossing an Arc Star at Newcastle's own feet with the shield deployed in front, then quickly pulling the shield back towards himself. This protects Newcastle from the blast while stunning enemies caught on the other side of the shield.
Strategic Castle Wall Deployment: Building Your Victory
Newcastle's Ultimate, the Castle Wall, is a game-changing ability that can instantly transform the battlefield, but its effective use requires foresight and tactical acumen.
Maximizing Wall Defenses: It's More Than Just a Barrier
The Castle Wall is a complex structure with several features to leverage.
- Segmented Strength: The wall is composed of nine distinct segments, each with 750 HP. Enemies require two melee attacks to destroy a single segment. Understanding this allows players to anticipate how quickly sections might fall under focused fire.
- Creating Firing Lines: Newcastle can retract specific segments of his wall, creating unexpected firing angles for his team. This transforms a purely defensive structure into an offensive battlement.
- Awareness of Structural Weakness: If enemies destroy the longer, foundational segments, any connected shorter segments will also collapse. This means savvy opponents might target these key points.
- Terrain Considerations: Be mindful that on extremely uneven ground or near significant drop-offs, parts of the Castle Wall may not construct properly, leaving gaps in the defense.
- Mid-Air Orientation: While leaping to deploy the Castle Wall, Newcastle can turn mid-air to adjust the final orientation of the wall just before landing. This allows for precise placement even during a dynamic, long-range deployment.
- Compact Deployment: In confined spaces, the Castle Wall can deploy in a more compact configuration, sometimes offering nearly 180 degrees of protection around Newcastle.
Aggressive Jumps & Repositioning: The Unseen Offensive Utility
The leap component of Castle Wall is often as valuable, if not more so, than the wall itself.
- Mobility First: The jump can be used for rapid repositioning, escaping unwinnable engagements, or accessing advantageous high ground and other hard-to-reach locations.
- Closing Gaps Aggressively: Leap directly towards enemies to quickly close the distance and establish a forward fighting position, with instant cover upon arrival.
- Extended Range to Allies: Targeting teammates or their death boxes extends the leap range to an impressive 75 meters, enabling dramatic saves or swift banner recoveries, even without direct line of sight.
- Disruptive Landing: The knockback effect upon landing can disorient nearby enemies, creating a brief window of opportunity for Newcastle or his team.
- Creating Multiple Angles of Attack: Use the ultimate to jump to a different angle on an enemy team, forcing them to divide their attention and creating crossfire opportunities.
Players need to think beyond just "dropping a wall for cover." They should consider if the leap itself offers a greater advantage (e.g., taking high ground, flanking) than just the wall. This makes cooldown management even more critical.
Defensive Fortification: The Immovable Object (Almost)
When a defensive stand is necessary, the Castle Wall excels.
- Area Lockdown: Ideal for securing buildings, chokepoints, or critical map positions, especially during mid to late-game rotations or when anticipating ring movements.
- End-Game Dominance: In the final circles where natural cover is often scarce, the Castle Wall provides substantial, life-saving protection. The electrified exterior is particularly potent in these shrinking zones, forcing enemies into unfavorable movements or taking damage.
- Instant Door/Entrance Blocking: The Castle Wall can be placed without a leap (by targeting the ground nearby) to instantly block doorways and entrances, buying crucial seconds for healing, reviving, or setting up an ambush.
Countering Enemy Abilities & Pushes: The Heroic Intervention
A well-timed Castle Wall can be a powerful counter to enemy aggression and certain abilities.
- Halting Aggression: A strategically placed wall can stop an enemy push dead in its tracks, forcing them to reroute or allowing Newcastle's team to reset, heal, or execute a counter-flank.
- Projectile and Grenade Blocking (Front Only): A significant buff in Season 21 allows the Castle Wall to block incoming bullets AND grenades from its front-facing side. This makes it a formidable barrier against frontal assaults.
- Limitation: It remains vulnerable to aerial attacks like Gibraltar's Defensive Bombardment or Bangalore's Rolling Thunder if they land behind or on top of the wall. Ordnance and abilities can also still affect the area from the sides, above, or behind the wall.
- Specific Legend Ability Interactions: Understanding these interactions is key to maximizing the Castle Wall's effectiveness.
| Enemy Legend | Enemy Ability | Interaction with Castle Wall | Strategic Implication/Counter-play for Newcastle |
|---|---|---|---|
| Mad Maggie | Riot Drill | Damages Castle Wall segments and players behind it. Electricity does not stop the drill. | Position to minimize drill impact or be ready to repair/reposition. The wall won't fully negate this threat. |
| Mad Maggie | Wrecking Ball | Bounces off an energized Castle Wall. May break a non-energized segment. | Energized wall is a good counter. Be wary if the wall isn't electrified. |
| Fuse | Knuckle Cluster | Can stick to the wall. Frontal grenade blocking may stop direct impact, but explosions can still damage if angled over/around. | Be aware of cluster trajectory. Wall offers good, but not absolute, protection. |
| Fuse | The Motherlode | Can trap players behind the wall if aimed correctly, especially indoors, turning the "safe" side into a hazard. Wall doesn't stop flames from spreading. | Placement is key. Avoid getting boxed in by Fuse's ultimate. Can be used offensively by Newcastle to trap enemies with his wall if they are already burning. |
| Bangalore | Rolling Thunder | Missiles landing from above or behind the wall will still damage. Wall offers no top protection. | Seek overhead cover if possible when a Bangalore ult is incoming, or be prepared to move. |
| Caustic | Nox Gas Grenade/Traps | Gas will seep under/around the wall. The wall does not neutralize gas. | The wall provides LoS block but not gas immunity. Reposition if gassed. Can be used synergistically if Caustic is an ally. |
| Conduit | Energy Barricade (Mines) | Castle Wall impact destroys Conduit's mines. | Offensive use of Castle Wall to clear Conduit's ultimate, enabling a push. |
| Crypto | Drone EMP | Disables the electrical charge of the Castle Wall. Does NOT destroy the wall itself. | Enemies can push more safely over a non-electrified wall. Consider deploying wall after an EMP if possible, or be ready for a push if electricity is disabled. |
| Enemy Newcastle | Castle Wall | Landing your Castle Wall on an enemy's Castle Wall destroys the enemy wall. | Aggressive counter-play to dismantle an enemy Newcastle's fortification. |
| Wattson | Interception Pylon | Castle Wall's grenade blocking (front) reduces need for Pylon for frontal nades, but Pylon offers 360° protection & shield regen. | Synergistic. Pylon covers other angles and aids shield economy. |
Mastering the Revive: Clutch Plays with Retrieve the Wounded
Newcastle's passive, Retrieve the Wounded, is one of the most impactful revive mechanics in Apex Legends, capable of turning the tide of fights if used correctly.
The Linchpin: Knockdown Shield Tier
The effectiveness of Retrieve the Wounded is directly tied to the quality of Newcastle's equipped Knockdown Shield.
- Direct Correlation: The Revive Shield deployed during the drag and revive mirrors the health and strength of Newcastle's own Knockdown Shield. A purple (Epic) or gold (Legendary) Knockdown Shield makes the revive significantly more resilient to incoming fire.
- Priority Loot: It is crucial for the team to prioritize giving Newcastle the highest-tier Knockdown Shield available. This is a non-negotiable aspect of maximizing his passive's life-saving potential. The ability can feel underwhelming with a white or blue Knockdown Shield, especially under heavy fire. This creates a unique loot priority dynamic within a team; sacrificing a better KD shield for Newcastle can significantly boost overall team survivability. Teammates need to be willing to pass up higher-tier KDs for Newcastle, recognizing the amplified team benefit.
- Gold Knockdown Shield Synergy: If Newcastle possesses a Gold Knockdown Shield, his revived allies will also gain a significant amount of health and shields upon revival, making his already potent revive even more game-changing.
The Fortress Revive: Combining Abilities for Maximum Safety
For the safest revives, especially in contested situations, Newcastle should layer his abilities.
Optimal Revive Sequence
In high-pressure situations, use Castle Wall for instant fortification before reviving.
- Mobile Shield First: Whenever possible, deploy the Mobile Shield before initiating a revive, particularly if the downed teammate is in an open area. This provides initial cover for Newcastle during the approach and drag, and a safe spot for the teammate once they are revived and vulnerable.
- Castle Wall for Ultimate Protection: If a teammate is downed in a highly exposed or heavily contested location, the Castle Wall is the ultimate solution. Use its leap to reach the ally and instantly erect a robust fortress around them before starting the revive. This is the go-to strategy for high-pressure revives where the Mobile Shield might not be enough.
The Art of the Drag: Strategic Repositioning
The ability to drag a downed teammate is a fundamental aspect of Newcastle's revive.
- Dragging to Safety: Actively drag downed teammates out of the direct line of fire, behind better natural cover, or towards potential escape routes. Avoid reviving in the exact spot they were downed if a safer location is reachable within the drag distance.
- Dragging to Loot (Post-Fight): After a fight has concluded, drag teammates towards nearby death boxes while reviving. This allows them to quickly armor swap and prepare for potential third parties.
Leveraging the Third-Person Perspective
During the revive animation, Newcastle automatically switches to a third-person camera perspective.
- Information Gathering: This viewpoint is invaluable for gathering intel. Newcastle can see around corners, spot approaching enemies, and call out threats to his (hopefully still active) teammates without further exposing himself.
- Baiting Enemies: The revive animation can be used to bait aggressive enemies into pushing. By observing their approach in third-person, Newcastle can choose to cancel the revive at the last moment and catch the pusher off-guard.
The Crucial Decision: Commit or Cancel?
Knowing when to commit to a revive and when to cancel is a critical skill.
- Assess the Threat: Continuously evaluate the viability of the revive. If multiple enemies are aggressively pushing and likely to eliminate both Newcastle and his downed ally, canceling the revive to fight, reposition, or use the Mobile Shield defensively might be the better call.
- Crack an Enemy, Then Revive: A high-level tactic involves trying to "crack" (break the shields of) an approaching enemy before fully committing to the revive. This creates panic and hesitation in the enemy, buying precious seconds for the revive to complete. This tactic highlights Newcastle's role not just as a passive reviver but as an active combatant who creates the conditions for safe revives.
- Post-Revive Support: Remember that revived teammates (unless revived with a Gold Knockdown Shield by Newcastle or as a Support class legend) return with low health. Be prepared to provide immediate cover with the Mobile Shield or body blocking, or allow them crucial seconds to heal.
Noise Factor & Counterplay
- Audible Revive: The deployment of the Revive Shield can be quite noisy, potentially alerting nearby enemies to the revive attempt. In extremely stealth-sensitive situations, unequipping the Knockdown Shield before starting the revive can minimize this sound, but this comes at the immense cost of protection and is a very high-risk, high-reward consideration.
- Vulnerability During Revive: Newcastle's turning speed is reduced while dragging and reviving, making him vulnerable if enemies manage to get up close and personal.
- Grenade Counter: Grenades, particularly Arc Stars, are a common and effective counter. Enemies will use them to force Newcastle off the revive, damage both players, or deny the revive spot.
Positional Prowess: Commanding the Battlefield
Effective positioning is the cornerstone of Newcastle's "mobile fortress" playstyle. It's not just about where shields are placed, but where Newcastle himself is in relation to his team and the enemy.
General Principles: The Foundation of a Fortress
- Defender, Not Frontline Aggressor: Newcastle's primary role is to support and defend. He should generally let more aggressive teammates initiate engagements, then react and provide cover or reinforcement with his abilities. Rushing into a firefight first and getting downed negates his entire supportive toolkit. His optimal positioning is often slightly behind his more aggressive teammates, allowing him to react to threats, provide cover for advances or retreats, and have a better overview for revives and ultimate placement. This necessitates strong team communication.
- Maintain Situational Awareness: Newcastle's shields are directional and offer no protection from flanks, attacks from above, or from behind. It's crucial to avoid tunnel vision and be constantly aware of all potential angles of attack, especially when relying on deployed cover.
- Reactive Movement: Unlike static defenders who lock down a single area, Newcastle excels at reacting to enemy pushes and repositioning his defenses dynamically. He shouldn't remain in one spot if it becomes compromised or ceases to be advantageous.
Using Shields to Create Angles and Control Space
Newcastle's shields are tools for manipulating the battlefield geometry.
- Mobile Shield for Head Glitches and Angles: Deploy the Mobile Shield near existing natural cover to create strong head-glitch positions or unexpected firing angles that offer superior protection.
- Castle Wall for Area Denial and Influence: The Castle Wall is a powerful tool for claiming significant map control, dictating enemy movement paths, and fortifying advantageous positions. The electrified front is particularly effective for denying pushes or forcing enemies through specific chokepoints.
- Aggressive Shield Control: A surprisingly aggressive micro-play involves punching enemies out of Newcastle's own tactical shield if they try to use it for cover. This reclaims the space, can disrupt their aim, and allows Newcastle to maintain control over his deployed cover and line up shots, especially with a shotgun. This adds a physical, close-quarters element to shield play.
Decision Making: Adapting to the Game's Rhythm (Early, Mid, Late Game)
Newcastle's positioning and ability usage should adapt to the different phases of a match. The transition from early to late game sees his abilities shift from general utility and escape to critical area denial and fortification tools that can single-handedly win endgames.
- Focus: Survival, efficient looting, and, critically, securing a good quality Knockdown Shield.
- Positioning: Stick close to the team. Use the Mobile Shield for safer passage between points of interest or during initial, often chaotic, skirmishes. The Castle Wall can be used to quickly claim a building for an early defensive stance or to disengage from an unfavorable fight.
- Push/Hold: Generally, the early game calls for a more cautious approach. Hold positions and play defensively unless a clear advantage (e.g., an isolated enemy, an opportunity for a third-party) presents itself.
- Focus: Strategic rotations, securing advantageous positions for upcoming ring closures, and engaging in controlled fights.
- Positioning: The Castle Wall becomes invaluable for securing strong points in anticipated ring locations or providing substantial cover during rotations through open, exposed areas. The Mobile Shield is key for supporting coordinated pushes on enemy teams or making aggressive plays with a plan.
- Push/Hold: This phase offers more flexibility. Pushing is viable if the team has a clear plan and Newcastle can support with advancing shields. Holding strong positions using the Castle Wall, especially with ring advantage, is often optimal. Be ready to use the Castle Wall's leap capability to quickly rotate to a new power position or to aggressively reinforce a teammate's push.
- Focus: Maximum fortification, decisive area denial, and game-winning clutch revives.
- Positioning: The Castle Wall is paramount. Use it to create a dominant fortress within the confines of the final ring. Consider more compact placements in very tight final circles to maximize protection. The Mobile Shield can be used for micro-adjustments, safer peeking from within the Castle Wall setup, or blocking specific angles. The electrified exterior of the Castle Wall is extremely powerful in these scenarios, forcing enemy movement into kill zones or dealing consistent damage as the ring shrinks.
- Push/Hold: Primarily, the strategy is to hold the best available position. Pushing is highly risky unless an enemy team is forced into a terrible spot by the closing ring. Revives become incredibly impactful. The Castle Wall can even be used to share buildings or divide space if necessary in complex endgames. Newcastle players should conserve their ultimate more judiciously as the game progresses, recognizing its heightened value in final circles.
Open Terrain vs. Urban Environments:
- Open Terrain: The Castle Wall is crucial for creating substantial cover where none exists. The Mobile Shield allows for safer advances or retreats across exposed ground.
- Urban Environments: The Mobile Shield excels in narrow corridors and doorways, allowing for peeking and holding tight angles. The Castle Wall can block off entire hallways, secure individual rooms, or be used with its leap to gain access to rooftops for a high-ground advantage.
The Flow of Battle: When to Push, When to Hold
Knowing when to advance with aggression and when to establish a defensive line is crucial for any Newcastle player. His "mobile fortress" identity means he's adept at both, provided the decision is tactical.
Identifying Push Opportunities: Seizing the Moment
Newcastle can effectively support offensive maneuvers when the conditions are right.
- Capitalizing on Enemy Weaknesses: An ideal time to push is when an enemy player is confirmed to be low on health ("cracked"), actively healing, attempting a revive, or has been isolated from their squad. Newcastle can deploy his Mobile Shield to provide advancing cover for the team as they move to secure the kill.
- Coordinated Team Plays: If the squad has a clear offensive strategy, such as a coordinated flank, an ultimate ability combination, or a breach plan, Newcastle can support the push with his shields. His Castle Wall leap can also be used to aggressively join the fray, establishing a forward operating base instantly.
- Third-Partying Engagements: When another fight is identified, Newcastle can use his Mobile Shield for a covered approach or his Castle Wall jump to quickly and safely enter the engagement zone, aiming to clean up weakened opponents.
- After a Successful Knock or Revive: Securing a crucial knock on an enemy or successfully reviving a teammate can create a significant shift in momentum. This is often a prime opportunity to press the advantage, using the Mobile Shield to advance on the now disadvantaged enemy team.
Establishing a Defensive Hold: Becoming the Immovable Object
There are times when digging in and holding ground is the superior strategy.
- Using Abilities to Secure a Position: Deploy the Castle Wall to fortify a strategically important building, a narrow chokepoint, or advantageous high ground, particularly if the team has ring advantage or anticipates the next zone closure. The wall's electrified exterior serves as a strong deterrent against direct pushes.
- Deterring Aggression: A well-placed Mobile Shield or a preemptive Castle Wall can effectively stop an enemy push in its tracks, forcing them to reconsider their approach, burn utility, or attempt a risky flank.
- Playing for Zone Advantage: If the team has secured a strong position within the next ring, Newcastle's kit is designed to make it incredibly difficult for other teams to dislodge them. This involves layering shields, controlling sightlines, and being ready for revives.
The decision to push or hold with Newcastle is heavily influenced by the availability and strategic value of his Ultimate, the Castle Wall. A ready ultimate allows for more aggressive repositioning options or the establishment of a much stronger defensive hold. If the ultimate is on cooldown, pushing options are more reliant on the Mobile Shield for support, which is less robust for a full-scale assault, and holding a position without the Castle Wall is also significantly weaker.
The Reactive Playstyle: Responding, Not Just Waiting
Newcastle excels when played reactively, rather than passively.
- Countering Enemy Pushes: He is particularly effective at responding to enemy aggression. The ideal tactic is often to wait for the enemy team to commit to their push, then deploy shields at optimal angles to neutralize their advance and turn the tables.
- Supporting Teammates Under Pressure: If a teammate comes under heavy fire or is being aggressively pushed, Newcastle can use his Castle Wall leap to quickly reinforce their position and provide substantial cover. Alternatively, a well-aimed Mobile Shield can give them the breathing room needed to disengage, heal, or reposition.
Balancing Aggression and Defense: The Mobile Fortress Mindset
The core of Newcastle's playstyle is this balance.
- Not a Passive Defender: While his abilities are inherently defensive, Newcastle's mobility, particularly with his ultimate, allows him to actively support aggressive plays. He enables aggression by providing moving cover and safe fallbacks, rather than leading the charge himself.
- Calculated Risks: Any offensive push involving Newcastle should always incorporate the use of his shields to mitigate risks. Pushing into open areas without a plan for deploying cover is a recipe for disaster.
- Knowing Your Limits: A crucial aspect of playing Newcastle is understanding when a fight is unwinnable or when a position is compromised. Utilize the Castle Wall jump for a strategic retreat or the Mobile Shield "retreat tactic" to disengage and preserve the team's resources.
Synergistic Squads: Best Team Compositions for Newcastle
While Newcastle is a strong legend, his true potential is unlocked when paired with teammates whose abilities complement his supportive and defensive kit. Communication is the absolute cornerstone of any successful Newcastle composition.
Key Synergies & Legend Archetypes:
Newcastle's versatility allows him to fit into multiple team archetypes, but his effectiveness is amplified when his teammates understand how to play around his abilities (e.g., using his shields, waiting for his revive).
Legend Archetypes
These legends create openings or draw enemy fire, allowing Newcastle to follow up with cover, support, or fortification.
Examples: Wraith (Dimensional Rift for safe engagement/disengagement, which Newcastle can follow with his ultimate to secure the new position), Octane (Launch Pad for team rotations, with Newcastle providing landing cover or a quick ult jump to the pad's destination), Ash (Phase Breach for aggressive pushes, Newcastle can ult to the breach point to fortify), Ballistic (Tempest ultimate buffs the team for a push, Newcastle provides advancing cover), Mad Maggie (Riot Drill and Wrecking Ball can break enemy defensive setups, Newcastle supports the ensuing push).
Why it works: These legends initiate fights or create chaos. Newcastle ensures they can do so with greater safety or have a secure fallback position. His Retrieve the Wounded passive is invaluable for aggressive teammates who might get downed during their plays.
Pairing Newcastle with other legends who excel at area denial and fortification can create truly formidable strongholds.
Examples: Wattson (Perimeter Security fences and Interception Pylon complement Castle Wall, though the Pylon's grenade interception is less crucial for Newcastle's frontal defense due to his ult buff) - the buff to Castle Wall reduces some of the previous reliance, Catalyst (Dark Veil and Piercing Spikes add layers of control and area denial), Gibraltar (Dome of Protection offers versatile, immediate cover, while Defensive Bombardment provides zoning), Rampart (Amped Cover synergizes exceptionally well with Castle Wall for layered defense, providing amped shots from behind Newcastle's barricade).
Why it works: These compositions excel at creating "super defensive" setups that are extremely difficult for enemy teams to push, making them ideal for holding late-game positions or controlling critical buildings.
Legends who provide crucial battlefield information allow Newcastle to place his shields more strategically, anticipate enemy movements, and make more informed decisions about pushes or defensive setups.
Examples: Bloodhound (Eye of the Allfather and Beast of the Hunt reveal enemy positions, enabling tactical shield placement and safer revives), Crypto (Surveillance Drone for safe scouting, EMP to initiate fights or counter defensive setups, though his EMP destroys Mobile Shields and disables Castle Wall electricity), Vantage (Spotter's Lens and Sniper's Mark provide long-range information and a team damage buff), Valkyrie (Skyward Dive for strategic rotations, with scans during her ultimate providing intel on landing zones).
Why it works: Intel helps Newcastle proactively defend key areas or support pushes into known enemy locations. Bloodhound is often cited as a strong and straightforward recon pairing for Newcastle.
The choice of a third legend alongside Newcastle often dictates the team's primary strategy. If paired with another defender, the team leans towards holding positions. If paired with an aggressor, Newcastle becomes the mobile support for their pushes.
Example Team Compositions & Strategies:
| Paired Legend | Legend's Key Abilities (Relevant to Synergy) | How They Complement Newcastle's Kit | Example Playstyle Focus |
|---|---|---|---|
| Wraith | Dimensional Rift, Into the Void | Enables safe team repositioning/pushes; Newcastle can ult to portal exit to fortify. | Aggressive Push / Reposition |
| Octane | Launch Pad, Stim | Provides fast team rotations; Newcastle can provide landing cover or ult to pad location. | Aggressive Flanking |
| Bloodhound | Eye of the Allfather, Beast of the Hunt | Reveals enemy positions for strategic shield placement and safer engagements/revives. | Intel-Driven Aggression |
| Rampart | Amped Cover, Sheila (Ultimate) | Amped Cover behind Castle Wall creates heavily fortified positions with amplified damage output. | Defensive Hold / Siege |
| Mad Maggie | Riot Drill, Wrecking Ball | Breaks enemy defenses; Newcastle supports the push with shields and can fortify breached areas. | Aggressive Siege |
| Wattson | Perimeter Security, Interception Pylon | Enhances area denial; Pylon protects from non-frontal ordnance and recharges shields, complementing Castle Wall's frontal defense. | Ultimate Defensive Hold |
| Crypto | Surveillance Drone, Drone EMP | Provides safe recon; EMP can initiate fights (destroys NC Mobile Shield, disables Castle Wall electricity). Can retrieve banners for NC to craft. | Intel-Driven / Calculated Push |
- The Mobile Assault (Wraith, Bloodhound, Newcastle): Wraith initiates with portals or flanks. Bloodhound scans to reveal enemy positions. Newcastle uses Mobile Shield to support Wraith's push or Castle Wall to secure the new position or provide a fallback. Revives are well-protected.
- The Immovable Fortress (Wattson, Rampart, Newcastle): Newcastle lays down Castle Wall. Rampart adds Amped Cover behind it for protected, amplified shots. Wattson secures flanks with fences and her pylon protects from ordnance from other angles and recharges shields. Extremely strong for holding buildings or final circles.
- The Aggressive Siege (Mad Maggie, Fuse, Newcastle): Fuse and Maggie use their ordnance to break enemy fortifications. Newcastle provides Mobile Shield for the advance and Castle Wall to take and hold the breached position.
- The Calculated Reposition (Valkyrie, Crypto, Newcastle): Valkyrie for macro rotations with her ultimate. Crypto scouts ahead safely with his drone and can use his EMP to initiate fights or disrupt enemy defenses. Newcastle uses his Castle Wall to secure new positions after the rotation or to provide a defensive anchor if an EMP push is engaged. Crypto can also safely retrieve ally banners for Newcastle to craft at a Replicator.
Arming the Fortress: Meta Weapon Loadouts
Newcastle's abilities allow him to create cover and control engagement distances, influencing optimal weapon choices. He excels with weapons that allow for effective peeking from behind his Mobile Shield or Castle Wall segments.
Core Philosophy: Weapons for Shield Play
The best weapons for Newcastle are those with high burst damage for quick peeks or good poke potential to wear down enemies from the safety of his fortifications. His kit naturally favors a "peek-and-shoot" playstyle, making weapons that deliver significant damage in short exposure times exceptionally strong.
Close-Range Dominance (for Shield Fights & Peeking)
Peacekeeper: Rewards precision aiming and is excellent for powerful peek shots from cover.
EVA-8: A more forgiving option with a higher fire rate, strong in the current meta.
R-99: Boasts one of the highest fire rates, shredding enemies up close.
Volt: Offers easier recoil control and solid hip-fire accuracy, making it reliable in dynamic fights.
Mid-Range Versatility (for Holding Angles & Supporting Pushes)
Assault Rifles
| Weapon | Strengths | Weaknesses | Best For |
|---|---|---|---|
| Nemesis Burst AR | Dominant meta pick, excellent burst damage | Requires ramp-up time | Mid-to-long range domination |
| Hemlok Burst AR | Strong burst, good ammo efficiency | Less forgiving than full-auto | Controlled engagements |
| R-301 Carbine | Reliable, easy recoil control | Slightly power-crept by burst ARs | Consistent damage output |
| VK-47 Flatline | High damage per shot | More recoil than R-301 | Raw damage potential |
| Havoc Rifle | High damage potential | Charge-up time | Pre-firing from cover |
Marksman Weapons
Excellent for poking at enemies from the safety of shields, creating pressure, and cracking enemy shields before a coordinated push.
- G7 Scout: Versatile semi-auto rifle with good fire rate
- 30-30 Repeater: Can deliver devastating headshots, especially with the Skullpiercer Rifling Hop-Up
Current Meta Loadout Examples (Season 25 Focus)
| Playstyle Focus | Primary Weapon | Secondary Weapon | Key Attachments | Rationale/Synergy with Newcastle's Kit |
|---|---|---|---|---|
| Aggressive Peeker | Peacekeeper / EVA-8 | R-99 / Volt | Shotgun Bolt, Laser Sight (SMG), Extended Mag (SMG) | High burst from shotgun for peeking cover, SMG for close-range shred if pushed or when advancing with Mobile Shield. |
| Versatile Defender | Nemesis Burst AR / Hemlok Burst AR | Peacekeeper / EVA-8 | Barrel Stabilizer (AR), 2x-4x Optic (AR), Shotgun Bolt | Strong mid-range presence from AR behind Castle Wall, with shotgun for close-quarters defense. |
| Poke & Hold | 30-30 Repeater (w/ Skullpiercer) / G7 Scout | R-99 / Volt | 3x HCOG/2x-4x Optic (Marksman), Extended Mag (SMG), Laser Sight (SMG) | Chip damage and shield cracks from range using marksman rifle from cover, SMG for close threats or finishing. |
| Meta Favorite Combo | Nemesis Burst AR | R-99 | Barrel Stabilizer (Nemesis), 2x-4x Optic (Nemesis), Extended Mag (R-99), Laser Sight (R-99) | Combines top-tier mid-range AR with top-tier CQC SMG, covering most engagement scenarios effectively from Newcastle's cover. |
| Close Quarters Option | Akimbo P2020s (if available) | Nemesis / Mid-Range AR | Extended Mags (P2020s), Barrel/Optic (AR) | Akimbo P2020s offer surprisingly high CQC burst, backed by a versatile AR for other ranges. |
Attachments Priority:
Essential Attachments
Conclusion: Become the Unyielding Shield of Your Squad
Newcastle stands as a unique and powerful force in the Apex Games, a true mobile fortress capable of turning the tide of battle through strategic shield placement, life-saving revives, and dynamic area control. His strength lies not just in the resilience of his barriers, but in the intelligent and proactive manner in which they are deployed. He is a legend of high agency and impact, whose effectiveness scales directly with player skill, game sense, and crucial teamwork.
Mastering Newcastle is a journey that involves understanding the nuances of his Mobile Shield's redirection, the strategic implications of his Castle Wall's leap and fortification, and the art of the well-timed, well-protected revive. It demands constant situational awareness, decisive action, and clear communication with the squad. He is not a passive support character who simply drops cover and hopes for the best; he is an active enabler, a proactive defender who creates opportunities for his team to seize victory.