Getting your settings right in Call of Duty: Black Ops 7 makes all the difference between smooth, responsive gameplay and a frustrating mess. This guide walks you through every setting you need to configure for maximum FPS and better visibility, covering everything from budget builds to high-end rigs.
Understanding Your System: CPU vs GPU Bound
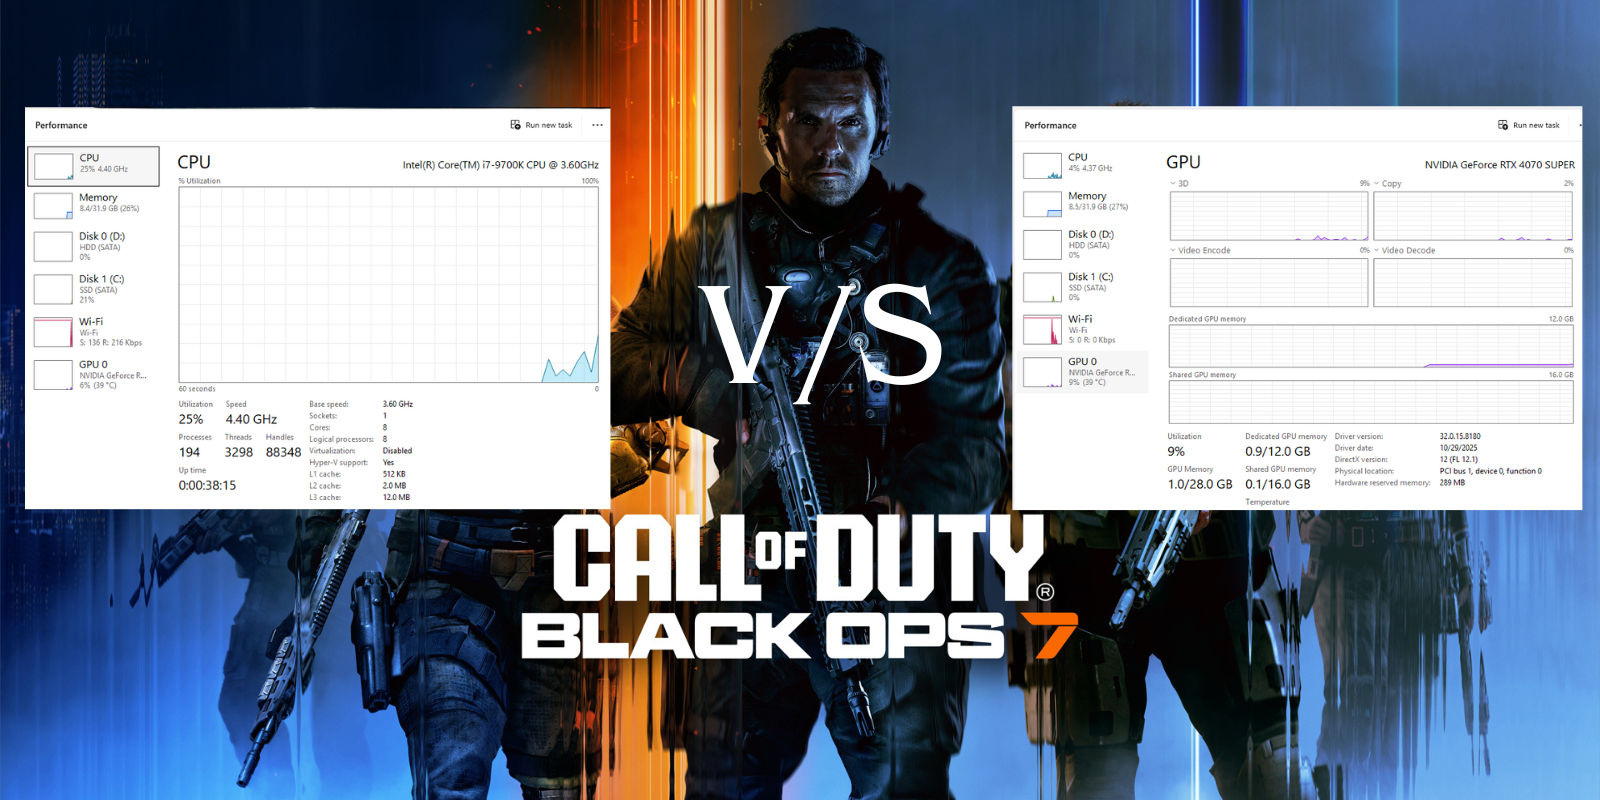
Before diving into specific settings, you need to understand whether your system is CPU bound or GPU bound, as this determines several critical configuration choices.
What Does CPU/GPU Bound Mean?
If your CPU is significantly more powerful than your GPU, your system is GPU bound - meaning your graphics card is the limiting factor. Conversely, if your GPU is substantially more powerful than your CPU, you're CPU bound - your processor is the bottleneck.
Alternative Method Using In-Game Telemetry
You can also determine this by enabling GPU time and CPU time displays in the game's telemetry settings. Whichever shows a higher value indicates your bottleneck.

Initial Setup and Config Files
Using PowerShell Script (Advanced Method)
Black Ops 7 stores configuration files in a new location compared to previous titles. The config now lives in: AppData\Local\Activision\Call of Duty\players (no longer in the Documents folder).
- Search "scripts" in your Start menu and enable PowerShell script execution
- Search for PowerShell, right-click and run as Administrator
- Copy the IWR code from the GitHub repository
- Press 4 for Call of Duty, then Enter
- Press 1 for Call of Duty: Black Ops 7, then Enter
Worker Render Count Configuration
This setting is critical for performance and depends on your CPU configuration:
- Standard CPUs: Set to your core count minus one (8-core CPU = set to 7)
- Intel CPUs with E-Cores: Only count performance cores, ignore efficiency cores (14900K has 8 P-cores = set to 7)
- AMD Dual CCD CPUs (7950X3D, 9950X3D): Disable CCD1 in BIOS, run on CCD0 only (8 cores = set to 7)
- 6-Core CPUs (like 13600K): Set to 5
The reason for minus one: Zero counts as a number in the system.
Display Settings: Foundation for Performance
Display Mode Selection
Full Screen Exclusive (Recommended for Single Monitor): This gives you the best performance and should be your default choice if you use one monitor. The game runs with dedicated system resources and minimal interference.
Full Screen Borderless (For Multi-Monitor Setups): Use this if you run multiple screens and need to switch between them frequently. Not as good for pure performance, but better for multitasking.
Aspect Ratio Configuration
Automatic (Recommended): Black Ops 7 generally picks appropriate settings for your display automatically. This ensures proper scaling without manual intervention.
16:9 (Competitive Standard): For competitive play, 16:9 remains the standard aspect ratio used across esports competitions.
Ultrawide Support: The game supports ultrawide monitors, but competitive players typically stick to 16:9 for consistency with tournament standards.
Display Gamma and Brightness
Gamma Settings:
- 2.2: Standard gamma setting for most users
- 2.4: More digital vibrance and color saturation
Brightness Configuration: Set between 55-65 based on personal preference and room lighting. Brightness at 55 gives better visibility in dark areas without washing out the image.
NVIDIA Reflex Low Latency: Critical Performance Setting
This setting dramatically impacts input latency and system responsiveness.
VSync and Frame Rate Management
VSync Settings
VSync Gameplay: OFF (Strongly Recommended)
VSync introduces significant input delay by forcing the game to wait for complete frame rendering before displaying. Only enable VSync if you get severe screen tearing (visible horizontal lines splitting the image during fast movement).
VSync Menus: OFF - There's no reason to have VSync on for menu navigation. Leave this disabled.

Custom Frame Rate Limit
Unlimited (Maximum Performance): Running unlimited frame rates lets your system produce as many frames as possible, reducing input latency through higher frame throughput.
Custom Capped (Smooth Consistency): For more consistent frame times, you can cap your FPS. The recommended method:
- Determine your average FPS across all maps and game modes
- Subtract 30 FPS from that average
- Set your cap to this value
Example: If you consistently hit 150 FPS, cap at 120 FPS for smoother frame pacing.
Quality Settings: Resolution and Upscaling
Resolution Configuration
Native Resolution (Competitive Standard): Running at your monitor's native resolution gives you the clearest image and best competitive visibility.
- Best for competitive play regardless of system power
- Highest frame rates available
- Standard for serious competitive players
- Lower GPU workload means better FPS
- Not recommended for competitive play
- Drastically cuts frame rates
- No competitive advantage
- Reserve for casual gameplay only
1440p (2560x1440): Good middle ground offering better visual quality while maintaining competitive frame rates on mid to high-end systems.
Dynamic Resolution
Recommended: OFF
Dynamic resolution automatically lowers visual quality to maintain target frame rates. This creates an inconsistent visual experience where your game alternates between looking sharp and blurry. Turn it off and dial in your settings manually instead.
Upscaling and Sharpening Technologies
This is one of the most important visual settings, with several technologies available depending on your graphics card.
General Upscaling Guidance: Only use upscaling if you're GPU bound and need additional frames. If you're CPU bound, upscaling won't help much. Use native resolution whenever possible for clearest visuals.
NVIDIA DLSS Frame Generation
Recommended: Situational
Frame generation creates interpolated frames between rendered frames, artificially increasing FPS numbers. However, this can introduce visual artifacts and doesn't reduce actual input latency.
- Game feels smooth and responsive with it on
- No stuttering or visual artifacts occur
- You need the FPS boost
- Game feels unresponsive or "mushy"
- You get stuttering
- Visual artifacts appear
- You prioritize response time over FPS numbers
Ray Tracing
Recommended: OFF
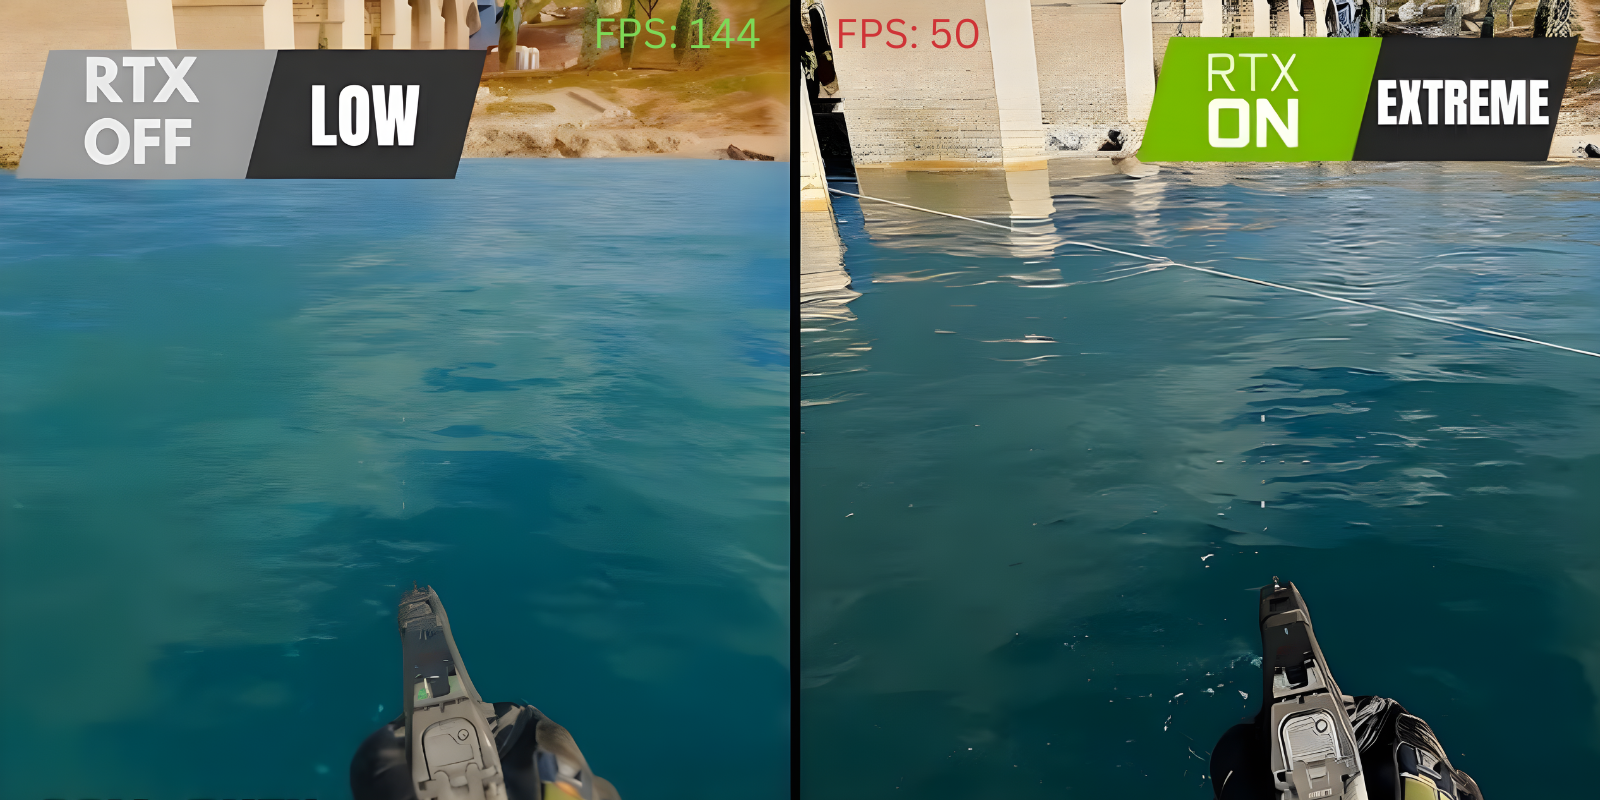
Ray Tracing Reflections drastically cuts FPS for minimal competitive benefit. The realistic lighting and reflections give you no advantage in spotting enemies and tank performance. Always disable ray tracing in competitive multiplayer.

VRAM Management
VRAM Scale Target
This controls how much video memory on your graphics card the game uses.
Volumetric Quality Scale Target: OFF - There's no competitive benefit to turning on this resource-hungry feature.
Details and Textures: Visual Quality
Texture Resolution Quality
- Normal (Recommended Balance): Great visual quality with minimal performance hit. The difference between Normal and High is barely noticeable in fast-paced gameplay
- High (High-End Systems): If you have a powerful graphics card and want maximum texture detail, High works fine with moderate performance cost
- Low (Budget Systems): For lower-end computers struggling with performance, Low keeps things playable without extreme visual degradation
- Very Low: Avoid unless absolutely necessary - visual quality becomes terrible and may hurt enemy visibility
Texture Filter Anisotropic
Recommended: Ultra or High
This setting has virtually no FPS impact (1-2 frames maximum) while making textures at angles and distances look way better. Always set to Ultra unless you're on an extremely limited system.
Depth of Field
Recommended: OFF
Depth of field blurs background elements to simulate camera focus. This has no place in competitive gaming. It literally makes parts of your screen blurry, hurting enemy detection. Always turn it off.
Detail Quality
Recommended: Normal
Normal gives you clean visuals with solid performance. This affects overall geometric detail in the environment.
- For Maximum FPS: Set to Low
- For Better Visuals with Performance Headroom: Set to High
Particle Resolution
Recommended: Very Low
Particle effects (explosions, smoke, muzzle flashes) don't need high resolution in competitive play. Very Low cuts visual clutter and improves performance with minimal visual downside.
Shader Quality
Recommended: Medium
Shaders control how surfaces react to lighting and rendering. Medium gives you good balance:
- Low: Better performance, acceptable visuals
- Medium: Balanced performance and quality
- High: Better visuals, notable performance cost
On-Demand Texture Streaming
Recommended: Minimal
The game forces you to use either Minimal or Optimized. You can't fully disable texture streaming in Black Ops 7. Minimal reduces background streaming load while maintaining acceptable texture quality.
Shadow and Lighting Configuration
Shadow Quality
Recommended: Normal
Shadows give you competitive information. They can reveal enemy positions around corners and indicate movement. Normal quality makes shadows visible and useful without excessive performance cost.
- Low: Maximum performance with reduced shadow detail
- High: Better shadow quality for systems with headroom
Screen Space Shadows, Lighting, and Reflections
All Recommended: OFF
These additional rendering effects eat resources without meaningful visual or competitive benefit. Most critically, Screen Space Reflections makes:
- Glass surfaces harder to see through
- Water less transparent
- Reflective surfaces visually cluttered
Turning this off dramatically improves visibility when looking through windows, viewing underwater areas, and generally spotting enemies behind transparent or reflective surfaces.
Static Reflection Quality
Recommended: Low
Basic environmental reflections at low quality maintain visual coherence without performance hit.
Environment Settings
| Setting | Recommendation | Reason |
|---|---|---|
| Terrain Quality | High | Solid visuals with acceptable performance |
| Volumetric Quality | Low | Reduces fog/smoke performance load while maintaining visibility |
| Deferred Physics Quality | Low or OFF | Physics simulations aren't competitively relevant |
| Weather Grid Volumes | OFF | Weather effects waste resources with no competitive advantage |
| Water Quality | OFF | Improves underwater visibility and performance |
View Settings: FOV and Visual Preferences
Field of View (FOV)
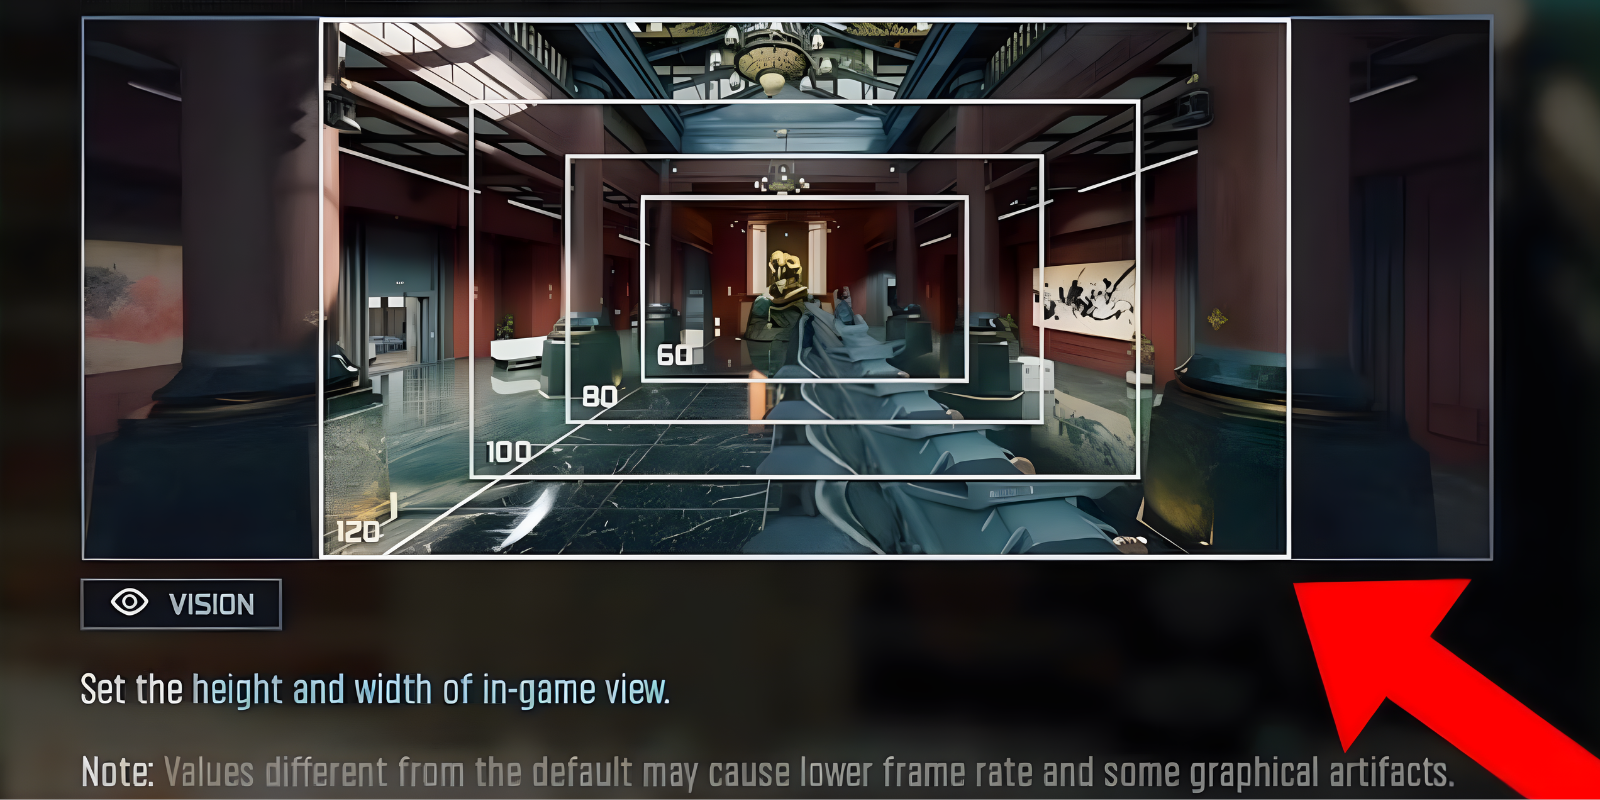
Maximum: 120
FOV determines how much you see peripherally. Higher FOV gives you more awareness:
Pick based on comfort, but understand that higher FOV gives you competitive advantages in situational awareness.
- Affected FOV: Always enabled - applies FOV to weapon models, reducing visual recoil
- Weapon Field of View: Wide - gives cleaner weapon positioning on screen
- Third Person Field of View: Maximum for third-person modes
- Vehicle Field of View: Wide for vehicle gameplay sections

Motion Blur Settings
World Motion Blur: OFF
Weapon Motion Blur: OFF
Motion blur makes moving images appear smeared/blurry to simulate camera motion. This has no place in competitive gaming:
- Reduces visual clarity during movement
- Makes tracking targets harder
- Gives you no competitive benefit
- Causes visual fatigue
Always turn off both world and weapon motion blur.
Camera Settings
Camera Movement: Least
Reduces camera shake and movement effects. Less camera movement gives you more stable, predictable visuals during gameplay.
Inverted Flashbang
Recommended: Personal Preference
When flashbanged:
- OFF: Screen flashes white (traditional)
- ON: Screen flashes black instead
Some players prefer black flash as it feels less disorienting. Others find black flash creates panic as it resembles game crashes. Pick based on what feels more comfortable.
Post-Configuration Steps: Critical Final Stage
After changing all graphics settings, you must complete these steps for changes to fully take effect:
- Go to Settings > Display tab and click "Restart Shader Pre-Loading"
- Click Restart and press Escape repeatedly to back out to main menu
- Exit to desktop completely (don't just minimize)
- Relaunch Call of Duty: Black Ops 7 through your platform
- Let shaders install completely at top-left corner of screen until 100%
- Wait for completion notification before starting to play
Graphics Driver Updates
Always maintain current graphics drivers:
- NVIDIA Users: Update through GeForce Experience or NVIDIA website
- AMD Users: Update through AMD Adrenalin software or AMD website
Look for game-specific driver updates mentioning Call of Duty: Black Ops 7 in patch notes


