
In the high-octane battlegrounds of Marvel Rivals, where heroes clash with earth-shattering powers, victory often hinges on more than just racking up eliminations. True dominance is achieved through strategic objective play, understanding the intricate rules of engagement, and outmaneuvering opponents when it truly counts. This report delves into two pivotal game modes: Domination and Convergence, providing a detailed breakdown of their mechanics, critical numerical data, and advanced strategies to not only secure objectives but also to prevent those dreaded enemy snowballs. Prepare to elevate your game from a skilled combatant to a master tactician.
Domination Mode
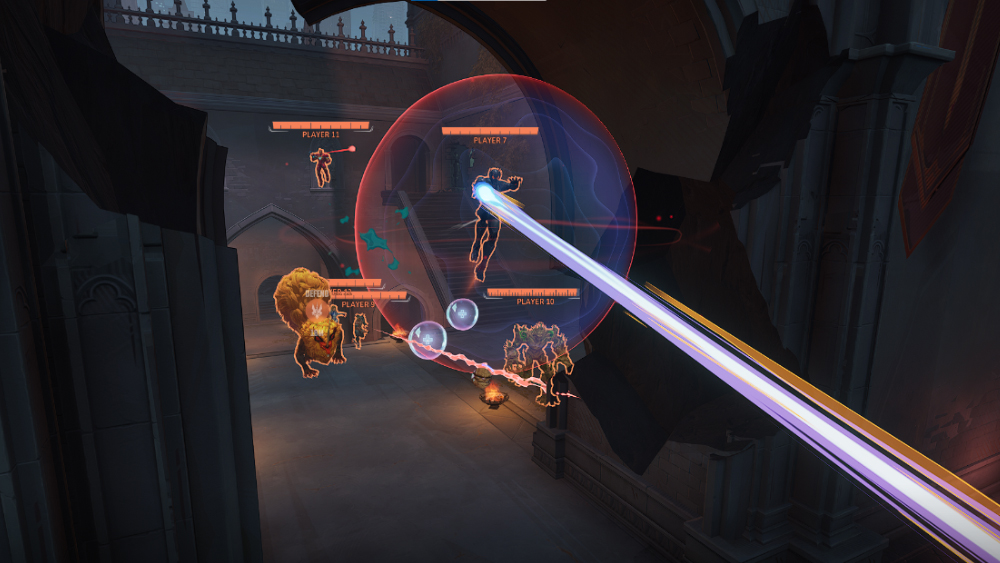
Domination is a test of endurance, map control, and relentless pressure, where two teams vie for supremacy over a single, crucial piece of territory.
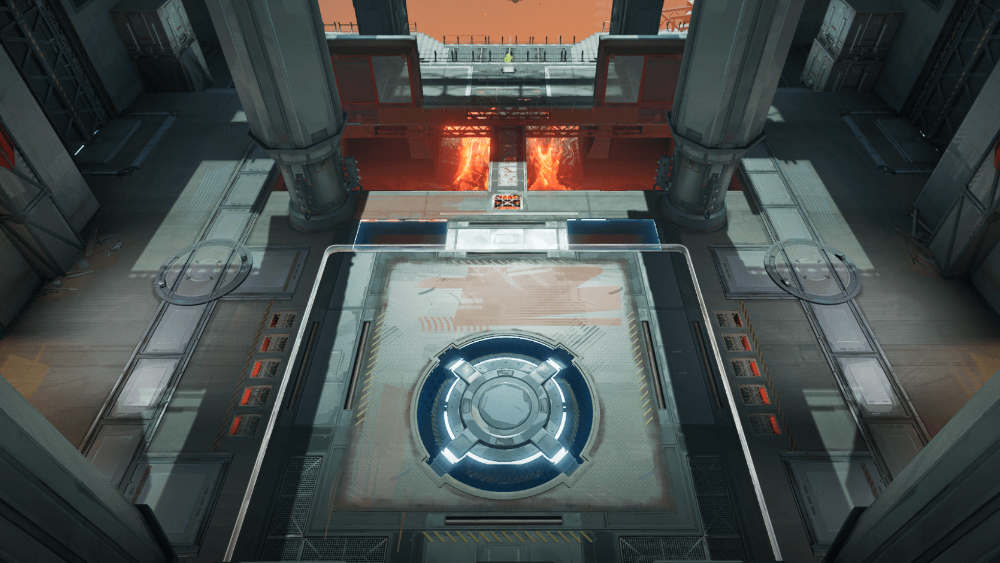
Core Objective
In Domination, two teams of six heroes battle to capture and maintain control of a designated "Mission Area" on the map. The ultimate goal for each round is straightforward: be the team that holds this Mission Area until its progress bar fills to 100%. Victory in a Domination match is awarded to the first team to win two out of a possible three rounds.
Zone Activation and Initial Strategy
This initial phase is often signaled by an in-game prompt such as "Prepare to Head to the [Map Area]" or "Awaiting Mission Area Unlock".
This 30-second window is far more than a simple countdown; it represents a critical strategic period. Teams that utilize this time to establish early map control, particularly by securing advantageous high-ground positions overlooking the soon-to-be-active point, gain a significant operational edge. Effective use of these initial moments can directly translate into capturing the point first. This early success not only grants immediate progress but also provides an initial advantage in ultimate ability generation, potentially setting the stage for an early lead that can be difficult for the opposing team to overcome. The advice to "always fight to take the high ground overlooking the objective" rather than walking straight to the point at the start underscores the importance of proactive positioning during this preparatory phase.
Capture Mechanics
To capture a neutral Mission Area, or to flip one controlled by the enemy, a team must have at least one player inside the zone while no enemy players are present. Once a team has successfully cleared the area of opponents and initiated the capture, their progress bar will begin to fill.
After a point is captured, the controlling team's progress towards victory accumulates at a rate of 1% every 1.2 seconds. This translates to a total of 120 seconds, or 2 minutes, of uncontested control required to take a point from 0% to 100%.
| Parameter | Value/Rule |
|---|---|
| Mission Area Activation | 30 seconds post-match start |
| Requirement for Capture | Be the only team with players in the objective area |
| Progress Rate (Once Captured) | 1% per 1.2 seconds |
| Time to 100% (Uncontested) | 120 seconds (2 minutes) |
| Effect of Multiple Players on Progress Speed Once Captured | No increase |
The impact of multiple players on the initial capture speed of a neutral point in Domination is not explicitly detailed in available information, leading to some player discussion. However, it is confirmed that once a point is captured, having additional team members on the point does not increase the 1% per 1.2 seconds progress rate.
Defending and Contesting
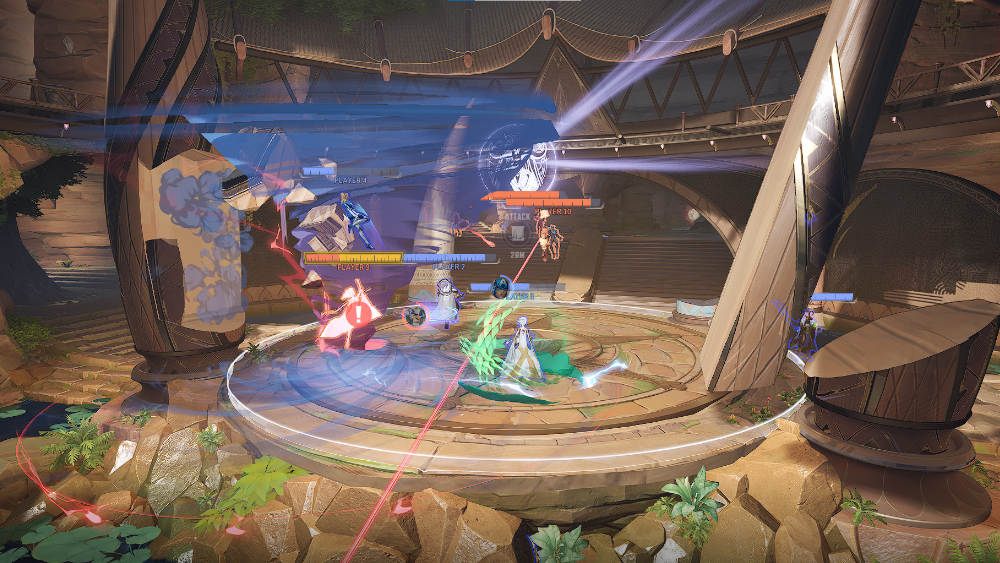
If an enemy player enters the Mission Area while it is controlled by the opposing team, the capture progress is immediately "frozen" or halted. Crucially, only a single member of the contesting team needs to be within the zone's boundaries to stop the enemy's progress. Should the team that originally controlled the point be entirely pushed out, the contesting team will then begin to capture the Mission Area for themselves, effectively "flipping" control.
The relatively slow progress rate of 1% per 1.2 seconds (totaling 120 seconds for a full capture) makes stalling tactics exceptionally potent. Given that just one enemy player can freeze all progress, even a brief incursion onto the point can significantly delay a win. This buys invaluable time for the contester's teammates to respawn, regroup, and launch a coordinated retake attempt.
This "off-point" defense allows for better control of sightlines and chokepoints, superior use of environmental cover, and quicker responses to enemy flanks, all while minimizing the team's vulnerability to area-of-effect (AoE) attacks concentrated on the point itself. Typically, only one or two players might remain on or very near the point to maintain the capture if it's uncontested, freeing up others for more dynamic roles.
Overtime Mechanics
Overtime is a high-stakes mechanic triggered if a team is on the verge of winning (e.g., at 99% progress) and the opposing team successfully contests the Mission Area. When Overtime activates, a special "Golden Bar" appears on the HUD. This bar will deplete as long as no enemy heroes are inside the Mission Area. If an enemy player manages to enter the zone, the Golden Bar's depletion pauses until they are eliminated or forced out. The longer the match remains in Overtime, the faster this timer will deplete when the point is uncontested, increasing the pressure. Adding to the intensity, player respawn times are significantly increased during Overtime.
Map Reorganization
This mid-round map transformation is a major tactical inflection point. It can instantly invalidate established defensive setups, open new flanking routes, or alter the availability of crucial cover and high-ground positions. Teams that can anticipate these changes based on map knowledge, or those that adapt their strategies and hero positioning more rapidly to the new layout, will gain a substantial advantage for the remainder of the round.
Domination Pro Tips
- Utilize multiple entry points when approaching the objective to divide enemy attention, reduce susceptibility to AoE damage, and make it harder for Vanguards to block incoming threats.
- Prioritize and control high-ground areas, especially during the initial phase of a round, as this provides superior lines of sight and engagement advantages.
- Strategically destroy environmental structures that the enemy team is using for cover, and maintain awareness and control of health pack locations, denying them to opponents whenever possible.
- Avoid overextending from the objective. While proactive defense is good, ensure your team stays close enough to provide backup if teammates on the point are overwhelmed.
- Consider heroes with strong area-denial capabilities, as they can be exceptionally effective at securing and holding the Mission Area.
Convergence Mode
Convergence mode offers a dynamic, multi-stage challenge, blending the single-point control of Domination with the mobile objective escort of Convoy.
Hybrid Gameplay
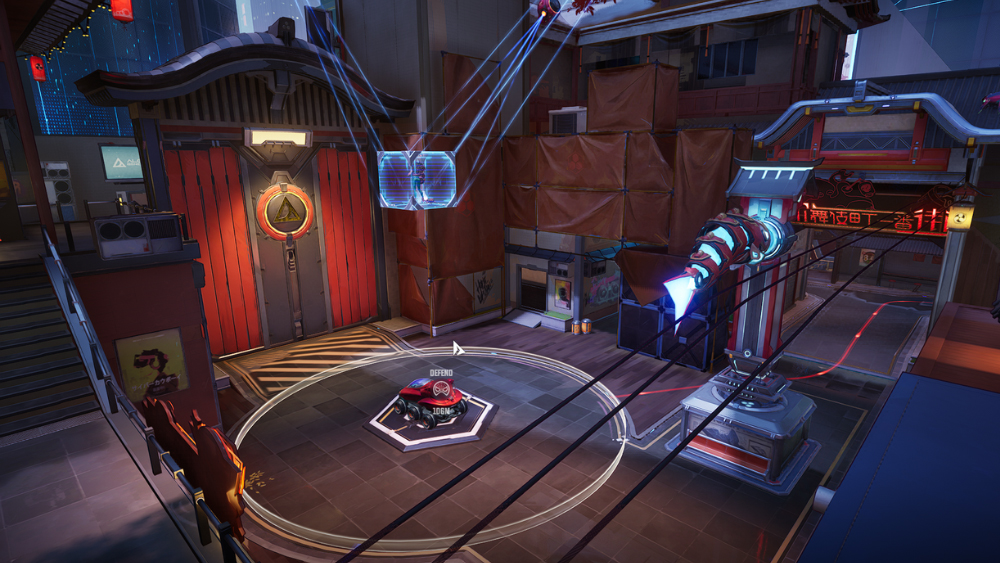
Convergence is aptly named, as it merges core gameplay elements from two distinct modes. The attacking team's mission is twofold: first, they must capture a specific Mission Area, much like in Domination, to "rescue" or "release" a vehicle (e.g., Spider-Zero on the Shin-Shibuya map). Once the vehicle is active, the mode transitions, and attackers must then escort this vehicle past two designated checkpoints to achieve victory. Throughout both phases, the defending team's objective is to prevent the attackers from succeeding.
Phase 1: Securing the Asset
The initial phase of Convergence requires attackers to seize control of a Mission Area. This capture process can be segmented, meaning attackers might need to secure sections of the point progressively (e.g., reaching 33%, then 66%, then 100% control) to fully unlock the vehicle.
A key difference from a standard Domination start is that the defending team in Convergence is typically allowed to leave their spawn area early to establish defensive positions around this initial Mission Area. Attackers, conversely, are often held in their spawn for a brief period (similar to Convoy's start, which can be around 30-40 seconds). This defender setup advantage can make the initial approach difficult for attackers, as they may face a single, heavily guarded chokepoint.
| Parameter | Value/Rule |
|---|---|
| Objective | Capture Mission Area to release vehicle |
| Capture Style | Section-based (e.g., 33%, 66%, 100%) |
| Defender Setup Time | Yes, defenders can establish positions on the map early |
| Attacker Spawn | Held initially (e.g., 30-40 seconds, similar to Convoy) |
| Key Challenges for Attackers | Often a single chokepoint to breach; entrenched defenders due to early setup |
Phase 2: Vehicle Escort
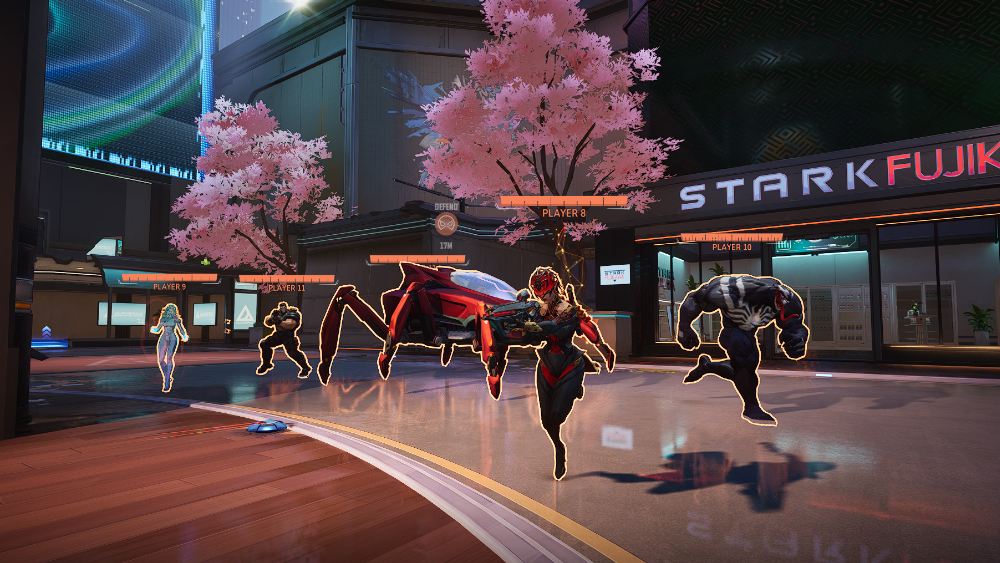
Once the vehicle is successfully released, the gameplay shifts to an escort mission. The vehicle will move forward automatically as long as one or more attacking players are nearby and it is not being contested by defenders.
A significant mechanic in this phase is the multi-attacker speed bonus. The vehicle's movement speed increases with the number of attackers in its immediate vicinity, though this bonus typically caps. Specific speed data indicates:
- Base speed (1 attacker): 1 meter/second
- +1 hero (2 total on payload): 1.67 m/s
- +2 heroes (3 total on payload): 1.93 m/s
- +3 heroes (4 total on payload): 2.26 m/s
Defenders can halt the vehicle's progress by positioning themselves near it, thereby "contesting" it. If defenders manage to eliminate the attackers on the vehicle or outnumber them sufficiently, they can gain control and begin to push the vehicle backward. However, the vehicle can only be pushed back as far as the most recently captured checkpoint.
| Parameter | Attackers | Defenders |
|---|---|---|
| Objective | Escort vehicle past 2 checkpoints | Prevent escort, push vehicle back if possible |
| Vehicle Movement | Automatically moves if uncontested with attackers nearby | Contest by proximity; can push vehicle backward if attackers are cleared |
| Multi-Attacker Speed Bonus | Yes (Caps at +3 heroes for 2.26m/s total speed) | N/A |
| Pushback Limit for Defenders | Vehicle can only be pushed back to the previously captured checkpoint | N/A |
| Checkpoints | 2; reaching them adds bonus time to the match clock | N/A |
Strategic Adaptation
Success in Convergence demands adaptability. Attackers must transition their mindset from the methodical section control required for the initial capture to a more aggressive, mobile escort strategy, often utilizing heroes who can provide barriers or healing to protect the moving vehicle. Defenders, likewise, must shift from holding a static point to employing dynamic disruption tactics, aiming to split the attacking team's focus and engage them from multiple angles to halt the vehicle's advance.
Convergence Pro Tips
- Be prepared to adapt hero choices and overall team strategy as the game transitions between the capture and escort phases.
- During the escort phase, attackers should prioritize surrounding the vehicle with heroes who can provide healing or create protective barriers to sustain the push.
- Defenders should focus on disrupting the attacking team, attempting to split their formation and engage from multiple angles to overwhelm those protecting the vehicle.
- On maps with long sightlines, such as Shin-Shibuya, leveraging ranged heroes can provide a significant advantage in both attacking and defending scenarios.
- Consider team compositions tailored to the current phase: dive compositions might excel at quickly capturing the initial point, while area control setups can be formidable for defending the vehicle's path.
Universal Pro Tips
Beyond mode-specific tactics, certain principles are universally applicable for achieving consistent success and, crucially, for preventing an enemy team from "snowballing" out of control.
Preventing Enemy Snowballs
A "snowball" effect, where one team gains an early advantage that rapidly compounds, is a common frustration, particularly in modes like Domination. Losing a single team fight can lead to an ultimate ability disadvantage, being pinned in spawn, and players dying in a staggered fashion, all of which fuel the enemy's momentum. However, this is often preventable.
Stop the Stagger
If teammates are caught in a clearly losing engagement (e.g., a 2v6), it is generally better not to join them and also die, thus feeding the enemy more ultimate charge and staggering your own respawn timer further. Instead, allow them to be eliminated. If you find yourself in such an outnumbered situation, the best course of action is often to be eliminated quickly (some players even opt to jump off the map to deny the enemy any ultimate charge from the kill) so that your respawn timer aligns more closely with your teammates.
Flex Your Roster
Rigidly sticking to a single hero or a preferred playstyle, regardless of the enemy team's composition or the demands of the map, is a common path to defeat. True strength lies in adaptability. If the enemy team is excelling with long-range poke damage, persisting with close-range melee tanks might be unwise. If opponents are utilizing heroes with exceptionally high ammunition uptime, heroes like Groot or Rocket might struggle, and a switch to a composition with greater healing output or shield capabilities could be necessary.
Play Your Life
In objective-based modes, your presence on the battlefield is a resource. Prioritizing survival over chasing risky eliminations, especially if dying would lead to a stagger or leave an objective undefended, is crucial. Unnecessary deaths are often more detrimental to your team's success than the potential benefit of a single kill, particularly if those deaths result in lost objective control time or create a numerical disadvantage for your team during critical moments.
Ultimate Economy Management
Ultimate abilities are game-changers, but their effectiveness is heavily reliant on timing and coordination. Track the enemy team's ultimate economy; try to deploy your ultimates when the enemy lacks the specific abilities to counter them effectively. Avoid wasting powerful ultimates on fights that are already lost, unless doing so serves a specific strategic purpose, such as forcing a full enemy reset to buy time.
| Principle | Key Action(s) | Why it Matters |
|---|---|---|
| Stop Staggering | Regroup before re-engaging; die quickly/together if a fight is lost | Prevents continuous ult feed to the enemy; allows for full team fights |
| Flex Your Roster | Adapt hero picks and overall team composition to counter the enemy's strategy | Addresses compositional weaknesses; can turn unfavorable matchups into advantageous ones |
| Play Your Life | Prioritize survival; make smart use of cover; avoid unnecessary, isolated deaths | Maintains team numbers on the field; denies enemy ultimate charge; enables consistent objective play |
| Manage Ultimates | Track enemy ultimates; coordinate usage with teammates; save for impact plays | Maximizes the value of powerful abilities; can turn the tide of key fights or secure objectives |
| Communicate Effectively | Call out enemy positions, ultimate statuses, and coordinate pushes or retreats | Enables cohesive teamwork; prevents misunderstandings and the wasting of valuable resources |
Advanced Tactical Elements
Beyond snowball prevention, consistent high-level play involves mastering several interconnected tactical elements:
- Consistently seek and maintain high-ground advantages
- Utilize walls, structures, and environmental elements for cover
- Master the use of corners to engage and disengage safely
- Control engagement angles near objectives
- Secure health pack locations for your team
- Actively deny health packs to the enemy
- Learn and exploit flank routes
- Strategically destroy destructible environmental elements
Team Synergies and Role Understanding
Develop a strong understanding of the three primary hero roles—Vanguard (space control, damage absorption), Duelist (pressure application, high damage), and Strategist (team support, healing)—and strive to build balanced team compositions that leverage these roles effectively. Furthermore, actively look for opportunities to utilize powerful Team-Up Abilities, which are triggered by specific hero combinations and can offer significant tactical advantages.
Preventing snowballs and achieving consistent success involves more than just managing ultimates and avoiding staggers; it's about winning the constant micro-battles for all available resources on the map. This includes controlling health pack spawns, securing and denying advantageous positions like high ground, managing ability cooldowns for crucial moments, and even using "time" as a resource by effectively stalling on objectives to run down the enemy's clock or delay their capture progress.
Conclusion
Mastering the intricacies of Domination and Convergence in Marvel Rivals requires a blend of mechanical skill, strategic understanding, and unwavering teamwork. By internalizing the rules of engagement, the critical timings, and the flow of each phase, players can transform from reactive combatants into proactive architects of victory.
The 30-second initial setup in Domination, the 1% per 1.2-second progress rate, and the game-altering 50% map reorganization are not just numbers but tactical opportunities. Similarly, understanding Convergence's shift from sectioned point capture to the nuanced multi-attacker escort, complete with speed bonuses and checkpoint time extensions, allows teams to anticipate and dictate the flow of battle.
Perhaps most critically, the ability to prevent and reverse enemy snowballs by eliminating staggers, flexing hero compositions, prioritizing survival, and managing the ultimate economy separates good teams from great ones. These principles, applied consistently, will not only lead to more wins but also to a more rewarding and strategically rich gameplay experience.
Go forth, apply this knowledge, experiment with diverse strategies, communicate relentlessly with your team, and become the Rival that all opponents learn to fear. The battlefield awaits your command!