
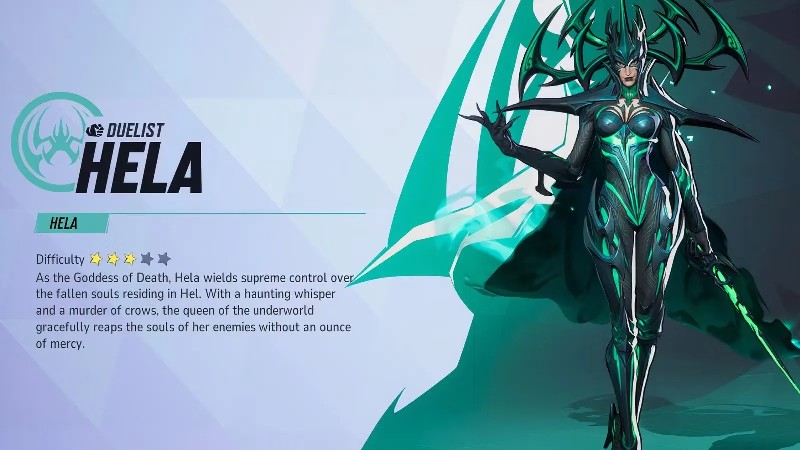
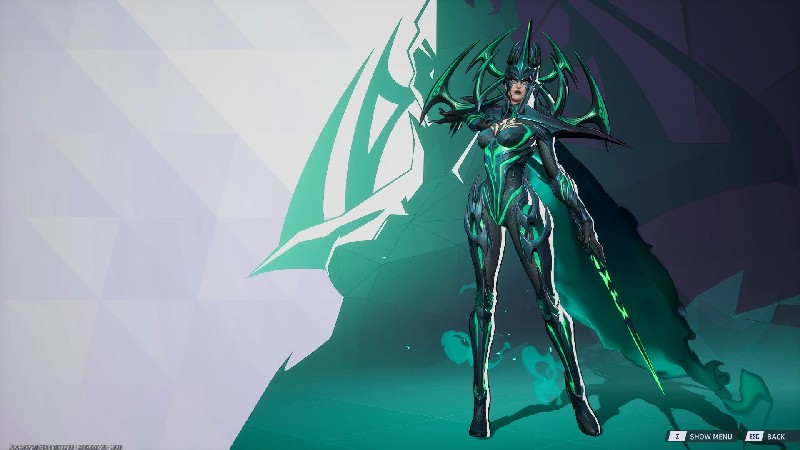
Alright, pal, let's talk Hela! If the goal is to be the queen of long-range pain, dishing out insane damage and making enemies think twice before peeking, then this is the right place. Hela isn't just a "Duelist"; she's a game-changer, a "hitscan and ranged hero" who can absolutely take over if her secrets are known. She's got a reputation for being "incredibly overpowered" and "the best hitscan in this game", and for good reason. But don't worry, everything will be broken down, simple and fun.
This guide will cover everything from her basic moves to the slick tricks the pros use. Think of this as a personal Hela boot camp. By the end, her abilities will be understood inside out, how to position like a ghost will be clear, the right targets will be picked, and the tables will even be turned on those pesky counters. There's even that recent buff she got – more ammo for her Nightsword Thorn! More daggers, more damage, more wins!
Hela's Toolkit
Hela is officially classified as a Duelist, but it's more accurate to think of her as a long-range sniper assassin. Her primary role is to secure an advantageous position, often on high ground or at an off-angle, and eliminate key enemy targets before they can react. She truly is the "primary damage dealer and elimination confirmer" for her team. With a 3/5 difficulty rating, she requires some dedication to master, but the payoff is immense. Officially, Hela has 250 HP. Some older guides might mention 275 HP, but sticking to the latest official numbers is crucial, as this lower health pool makes expert positioning even more vital; she can be quite fragile if caught out of position.
Abilities Deep Dive
Here's a breakdown of Hela's abilities, explained as if demonstrating them in-game:
| Ability Name | Default Key | Brief Description | Cooldown | Key Mechanic/Damage |
|---|---|---|---|---|
| Nightsword Thorn | LMB | Throws hitscan daggers | N/A | 70 damage (140 headshot), 10 ammo, 2 rps. Falloff: 18m-30m (to 80%) |
| Piercing Night | RMB | Fires 4 thorns that stick and detonate after 3s | 8s | 10 initial damage/projectile + 35 damage/round AoE (3m radius) |
| Astral Flock | SHIFT | Transforms into an invulnerable crow and dashes 18m | 15s | Mobility, escape, repositioning |
| Soul Drainer | E | Lobs an explosive sphere, stunning enemies and pulling them slightly | 10s | 0.3s stun, 1 initial + 40 spell field damage (3m radius) |
| Hel's Descent | SPACE (Hold) | Fall slowly while airborne | Passive | Enhanced air control, 6 m/s horizontal, 3.5 m/s descending |
| Nastrond Crowstorm | Passive | Defeating an enemy spawns a crow that explodes after 1.8s | Passive | 80 damage (5m radius) |
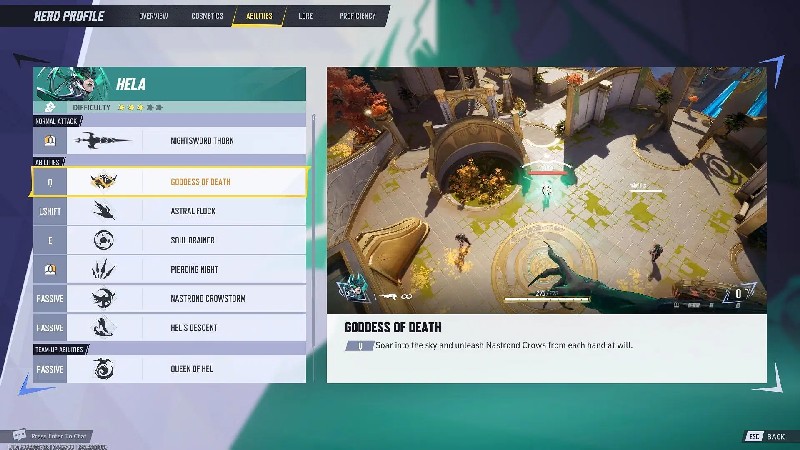
| Goddess of Death | Q (Ult) | Soars into the sky with 1000 temp HP, fires explosive crows for 10s | 4000 E | 125 AoE damage/crow (6m radius), brief invincibility on cast |
| Queen of Hel | Passive | With Thor/Loki: Final blows can revive them or grant bonus HP; Hela gets 15% Dmg | Passive | Team-Up synergy |
Primary Fire: Nightsword Thorn (LMB)
This is the core of Hela's damage. She throws hitscan daggers, meaning they connect instantly with whatever the crosshair is on. Each dagger inflicts 70 damage. Thanks to that recent buff, there are now 10 shots available before needing to reload, up from the previous 8. This is a significant boost to her sustained damage output and pressure.
The key is to aim for the head. Headshots deal a massive 140 damage, allowing Hela to eliminate most non-tank heroes (those with 275 HP or less) in just two shots, even from considerable distances. Damage falloff begins at 18 meters, reducing to 80% of maximum damage at 30 meters. That 18-meter mark is the sweet spot for dealing maximum pain. Her fire rate is 2 rounds per second.
Secondary Fire: Piercing Night (RMB)
This ability is a bit more nuanced but incredibly useful. Hela fires 4 Nightsword thorns that will stick to enemies or any surface they hit. These thorns detonate after a 3-second delay. Each projectile deals an initial 10 damage upon impact, and the subsequent explosion inflicts 35 damage per round within a 3-meter radius. The cooldown is a relatively short 8 seconds. This is excellent for applying pressure to tanks, finishing off enemies hiding behind cover, or for some clever anti-dive maneuvers discussed later.
Astral Flock (Mobility/Escape)
This is Hela's primary tool for repositioning or making a swift escape. Upon activation, Hela transforms into an invulnerable Nastrond Crow and dashes 18 meters. Pressing SHIFT again allows for an early exit from the crow form.
Soul Drainer (Stun/Setup)
With this ability, Hela lobs an explosive Hel sphere. While its direct damage is minimal (1 initial damage, 40 spell field damage), its true value lies in the 0.3-second stun it applies to all enemies caught within its 3-meter radius. It also has a slight effect of pulling enemies towards the center of the blast.
The cooldown is 10 seconds, though some older sources might list 12 seconds. This ability is perfect for setting up headshots, creating distance from an aggressor (peeling), or assisting a teammate under pressure.
Playing Fundamentals
If there's one word to live by as Hela, it's POSITIONING. She's a glass cannon; a ghostly presence is the goal.
- High Ground is Your Throne: Astral Flock is the best friend for claiming elevated positions. From high ground, sightlines are superior, it's easier to shoot over enemy shields, and opponents will struggle to reach Hela.
- Off-Angles are Deadly: Don't just cluster with the team. Seek out those sneaky off-angles to strike the enemy backline when they least expect it. This divides their attention and makes Hela a nightmare to manage.
- The 18-Meter Rule: Remember that 18-meter optimal range for Nightsword Thorn? Strive to keep enemies within that sweet spot. It's distant enough for safety from many heroes yet close enough for daggers to hit with full force.
- Hug That Cover (Jiggle-Peeking): Hela is not a tank. Walls and cover should be used religiously. There's a half-second delay between Nightsword Thorn shots – that's ample time to "jiggle-peek." Step out, fire, then step back into safety. This technique makes Hela incredibly elusive while still dishing out consistent damage.
Core Shooting Mechanics
- Headshots, Headshots, Headshots: Two headshots will eliminate most non-tank heroes. This should be a constant focus. Practicing flicks and tracking is essential. Some professional players even recommend dedicated aim trainers like Kovaaks, with a specific focus on "dynamic clicking" exercises tailored for hitscan heroes like Hela.
- Tap-Fire, Don't Spray: Treat Nightsword Thorn like a semi-automatic rifle. Tap-fire each shot instead of holding down the fire button. This aids in ammo conservation (even with the new 10-shot capacity!) and, crucially, improves accuracy. Use the brief interval between shots to precisely line up the next one.
- Pace Your Shots: Avoid spamming. Taking a moment to adjust aim between shots often leads to a higher rate of confirmed kills. Some players also find that incorporating strafing movements can help line up shots, rather than relying solely on reticle movement.
Target Priority
Knowing who to shoot is just as important as how to shoot. A critical aspect of high-level Hela play is prioritizing "final hits" over simply accumulating high damage numbers or eliminations. Constantly shooting at tanks, for instance, might inflate damage statistics, but it often serves primarily to charge the enemy support heroes' ultimates, a phenomenon often described as "feeding support ults" and can be detrimental to the team's success. The real impact comes from securing "final blows" or "valuable picks", which means efficiently removing an enemy player from the fight.
- Melt Supports First: Enemy Strategists (healers) like Luna Snow and Mantis should be high on the priority list. They often lack quick escape mechanisms once targeted. Eliminating them cripples the enemy team's sustainability.
- Swat Those Flyers: Hela excels at shutting down flying heroes. Make them regret taking to the skies.
- Peel for Your Backline: Avoid tunnel vision on the enemy backline. If allied supports are being dived, use Hela's range and Soul Drainer to assist them. Eliminations in the allied backline are just as impactful as those in the enemy's.
Pro Tips & Advanced Techniques
Mastering Hela involves understanding the subtleties of her kit and how to exploit them.
Mastering Cooldowns
This cannot be stressed enough: Hela's cooldowns, particularly for Astral Flock (15s) and Soul Drainer (10s), are long. They cannot be spammed.
Think carefully before using "bird out" (Astral Flock). Is it absolutely necessary? Is there a safe destination? Skilled players will severely punish a wasted Astral Flock. When Astral Flock is on cooldown, adopt a much safer playstyle, positioning near health packs or protective allies.
Save Soul Drainer for moments when it really counts – to guarantee a kill setup, to stop a dive, or to interrupt a crucial enemy ability.
Advanced Soul Drainer Uses
Soul Drainer is more than just a stun; it's a versatile tactical tool.
- Peel for Yourself & Allies: If an enemy Thor is charging, or a Spider-Man is attacking an allied support, Soul Drainer can stun them, creating space or securing the elimination.
- Confirm Kills: The 0.3s stun duration is just enough time to line up a critical headshot on the immobilized target. Practicing the Soul Drainer -> Headshot sequence is vital.
- Interrupt Ultimates: Soul Drainer has the capability to stop certain enemy ultimates. This can be a massive game-changer if executed correctly. Be vigilant for enemies channeling powerful abilities.
- Offensive Choke Control: Lob Soul Drainer into a choke point where enemies are grouped or attempting to retreat. The stun and pull effect can disrupt their formation and set them up for allied attacks.
- Synergy with Nastrond Crowstorm: If an elimination occurs and a Nastrond Crow (from the passive) spawns near another enemy, hitting that enemy with Soul Drainer can keep them within the crow's explosion radius.
Astral Flock Acrobatics
Astral Flock serves as both a lifeline and a means to access superior vantage points.
- Plan Your Escape: Always have an escape route in mind before needing to use Astral Flock. The crow form provides invulnerability, but the animation is visible, and skilled opponents will anticipate the landing spot.
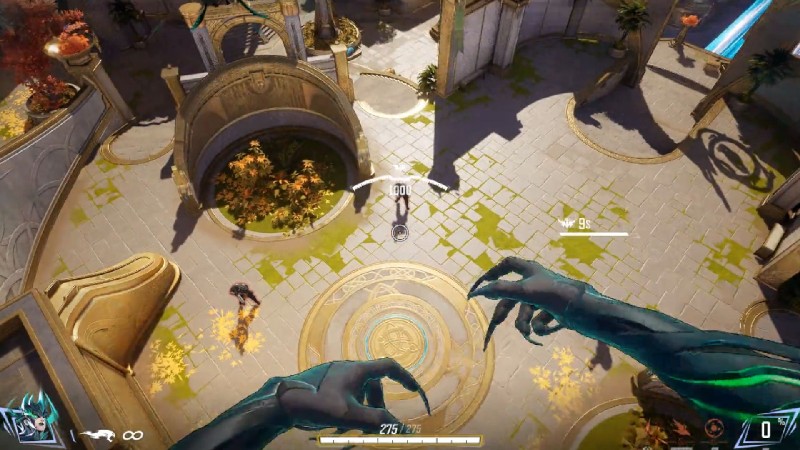
- Vertical Advantage: Use Astral Flock to ascend straight up, then hold Space (Hel's Descent) to float and rain down attacks. This maximizes airtime and can catch enemies off guard.
- Surprise Attacks Over Walls: Jump off high ground around a corner while holding Space (Hel's Descent). This allows for peeking and shooting over walls or shields at unsuspecting victims. This specific technique, combining a passive movement ability with map geometry after an active reposition or jump, showcases how even simpler parts of Hela's kit can be used for advanced offensive maneuvers, adding layers to her skill expression.
Piercing Night Tactics
Piercing Night (RMB) should not be underestimated; it offers more than just supplementary damage.
- Anti-Dive Deterrent: If a melee character like Spider-Man or Iron Fist dives, stick them with Piercing Night, then immediately use Astral Flock to create distance. As Hela repositions, the blades will detonate on the diver, softening them up for a counter-attack.
- Area Denial/Flushing Out: Fire Piercing Night into common hiding spots or behind cover to force enemies out or deal damage if they choose to remain. The delayed explosion can catch players off guard.
- Tank Buster: Against large Vanguards, landing all four projectiles from Piercing Night is more manageable and sets them up for significant burst damage. Combining this with a primary fire body shot can achieve a quick ~250HP damage combo.
Goddess of Death - Strategic Bombing
Hela's ultimate, Goddess of Death, can single-handedly win engagements, but its effective use hinges on timing, awareness, and a degree of risk management.
- Reactive Survival: The ultimate's instant activation and brief invincibility allow it to be used defensively to survive an enemy ultimate or unavoidable burst damage. Don't hesitate to use it to stay alive if it means remaining in the fight, especially considering the 1000 temporary HP gained.
- Bait Out Defensives: Hela announces her ultimate with a vocal cue ("Hel Unleashed!") and a distinct transformation animation. Alert enemies will often use their defensive ultimates (like those of Luna Snow or Mantis) in response. It's strategically sound to try and bait these abilities out or wait until they are on cooldown before committing Goddess of Death.
- Objective Denial & Chokepoint Control: Deploy the ultimate to clear enemies from an objective or to lock down a critical chokepoint. The area-of-effect explosions are highly effective for this. Positioning above objectives allows for greater area denial.
- Pre-Ult Astral Flock: For an optimal vantage point, use Astral Flock to gain altitude before activating Goddess of Death. This provides a wider field of view and makes it more difficult for enemies to find cover.
Essential Combos
Hela's combat effectiveness isn't about overly flashy, complex button sequences, but rather about smart, efficient takedowns that flow from one ability to the next.
The Classic Headshot Setup
Land Soul Drainer to stun the target, then immediately line up one or two precise headshots. This is the go-to combo for deleting squishier heroes.
The Anti-Dive Special
As an enemy commits to a dive, stick them with Piercing Night, use Astral Flock to create distance and gain a better position. By the time Hela turns back, the Piercing Night blades are likely detonating, and she's ready to finish them off with primary fire.
Tank Shredder (Situational)
If assistance is needed to burn down a tank, especially one caught out of position, landing all four Piercing Night projectiles followed by consistent Nightsword Thorns can inflict surprising damage. A full Piercing Night application plus one Nightsword Thorn body shot can deal approximately 250HP.
Counters & How to Deal With Them
Even the Goddess of Death has her unfavorable matchups. Understanding these threats and how to counteract them is crucial for consistent success.
| Counter Hero Type/Name | Why They Counter Hela | Hela's Counter-Strategy |
|---|---|---|
| Shield Heroes (Magneto, Dr. Strange, Groot) | Negate primary fire effectiveness by blocking shots. | Reposition to off-angles/high ground with Astral Flock; wait for shield break; use Piercing Night creatively. |
| Dive Heroes (Jeff, Spider-Man, Hulk, Venom) | Exploit low HP and close-quarters weakness, especially when Astral Flock is on cooldown. | Use Soul Drainer/Piercing Night for peel; maintain distance; preemptive Astral Flock; aim for predictable dive patterns (esp. Spider-Man). |
| Other Snipers (Hawkeye, Punisher) | Can challenge Hela in long-range duels, especially with good positioning or burst. | Utilize jiggle-peeking and superior positioning; aim for the first headshot; disengage with Astral Flock if disadvantaged. |
Detailed Counter-Strategies
Against Shields
- Avoid shooting the shield directly (most of the time). Instead, use Astral Flock to reposition to an off-angle or high ground where the shield offers no protection.
- Exercise patience and wait for allied abilities to break the shield or for the enemy to lower it.
- Attempt to use Piercing Night to stick enemies positioned behind the shield if an opening presents itself, or target the shield generator itself if the specific enemy hero has one.
Against Divers
- This is where Soul Drainer and Piercing Night become invaluable for self-peel. Stun the diver with Soul Drainer (E), stick them with Piercing Night (RMB), then use Astral Flock to create distance.
- Maintain optimal distance. Hela's 18m+ effective range is her best initial defense.
- Use Astral Flock preemptively if a dive is anticipated, especially if tracking enemy cooldowns effectively.
- Against Spider-Man specifically: practice anticipating his movements and landing shots during his web swing or dive. His trajectory can become predictable. A well-timed Soul Drainer or a couple of accurate headshots can halt his aggression effectively.
Team Synergies & Compositions
Hela can function as a lone wolf assassin, but her lethality is amplified significantly with the right teammates.
Key Teammates (The Dream Team)
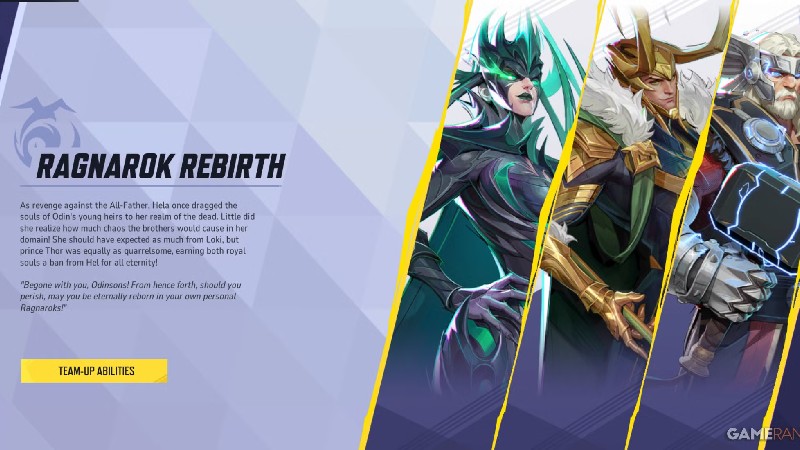
This is an obvious and powerful synergy due to Hela's Queen of Hel passive. Securing instant revives or bonus health for her divine siblings provides immense value. Thor offers frontline presence, while Loki can create diversions and provide supportive utility.
Magneto's shields, such as Metallic Curtain and Bulwark, create safe firing windows for Hela. This is invaluable against enemy poke damage and allows Hela to hold aggressive angles for longer periods.
Mantis is considered one of the best Strategist pairings for Hela. Her healing sustains Hela's relatively low health pool, and her sleep ability can incapacitate enemies, setting them up for easy eliminations by Hela. Mantis's Allied Inspiration can also further amplify Hela's already formidable damage output.
Luna Snow provides strong healing, and her crowd control abilities can immobilize enemies, making them easier targets for Hela's precise shots. Luna's ultimate can also be a lifesaver for Hela or reset a team fight, creating another opportunity for Hela to utilize Goddess of Death effectively.
Additional Synergies
- Flankers/Disruptors (Spider-Man, Star-Lord, etc.): Pairing Hela with a proficient flanker "tears apart the enemy team's attention". While the enemy team is occupied dealing with a Spider-Man in their backline, Hela is free to snipe targets. If Spider-Man launches an enemy into the air with an uppercut, it creates an easy follow-up shot for Hela.
- Adam Warlock (The Soul Mate): Adam Warlock often prefers similar positioning to Hela, and his Soul Bond ability can be a crucial lifesaver, preventing Hela from being instantly bursted down by enemy divers.
Strategic Approaches
Now, when discussing "builds" for Hela, it's important to clarify: Marvel Rivals does not currently feature an in-match system where talents or perks are selected to alter Hela's abilities, unlike some other hero shooters. Instead, a Hela "build" refers more to the strategic approach adopted and how her existing kit is leveraged in conjunction with the team.
The Pure Sniper Approach
The Aggressive Off-Angle Assassin
The Team-Enabling Playmaker (especially with Thor/Loki)
Final Tips
Remember, friend: Positioning, Aim, Cooldowns. Master these three pillars, and becoming a Hela deity is within reach. Prioritize those final blows, especially on supports and flyers. Don't just pad damage statistics. Use Astral Flock wisely – it's a lifeline. And get creative with Soul Drainer and Piercing Night for setups and self-peel. The Ultimate, Goddess of Death, is powerful, but timing and team play make it truly devastating. Use it to survive, to secure objectives, or to turn the tide after enemy defenses are down.
- Incredible burst damage potential with headshots
- Excellent range and positioning flexibility
- Strong anti-air capabilities
- Game-changing ultimate ability
- Powerful team synergies with Asgardians
- Low health pool requires expert positioning
- Long cooldowns on key abilities
- Vulnerable to dive heroes and shields
- Completely dependent on aim and skill
- Requires strong game sense and awareness
Hela is a high-skill, high-reward hero. It will undoubtedly take practice, especially that pinpoint aim. Don't get discouraged! Every match is a learning opportunity. Watch VODs of top Hela players, review personal gameplay footage, and always ask, "What could I have done better?". This commitment to continuous learning and critical self-assessment is the path to true mastery with a character as demanding and rewarding as Hela.
"Channel that inner Goddess of Death, and make them fear the crows!"
Now go out there, channel that inner Goddess of Death, and make them fear the crows! This can be done!