
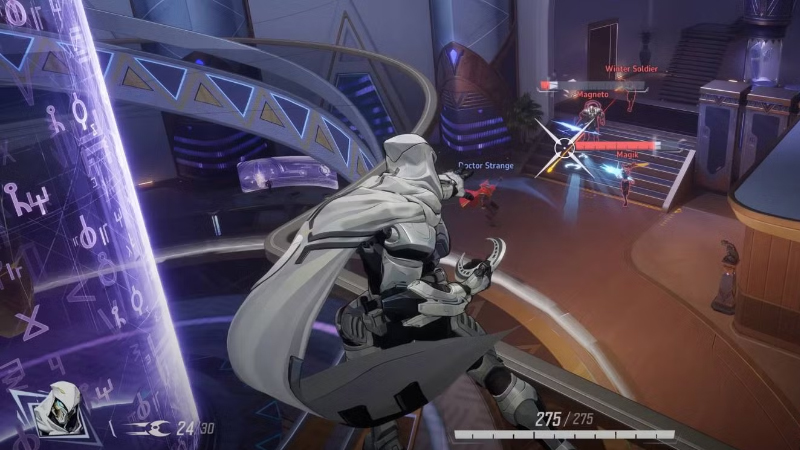
Moon Knight is a versatile Duelist hero who excels at punishing grouped enemies with bouncing projectiles and swift mobility. Mastering him means balancing fearless aggression with smart positioning – exactly what we'll cover in this guide.
Core Fundamentals and Playstyle
Moon Knight is all about area damage and mobility. As the avatar of Khonshu, he dishes out vengeance with attacks that bounce between foes, making him deadly when enemies cluster together. In a nutshell, he's a crowd-clearing Duelist: if the other team huddles up, Moon Knight can melt multiple opponents at once with ease. This gives him a unique role – unlike most Duelists, he thrives on hitting several targets instead of just dueling one.
Weaknesses to Consider
Despite his mobility, Moon Knight isn't invincible. He has only average health (250 HP) and struggles in prolonged single-target duels, especially against long-range sharpshooters or aerial enemies. His projectiles travel slower than a true sniper's (even after recent buffs), so trying to out-snipe a Hawkeye or Black Widow usually ends badly. Likewise, heroes that attack from above like Storm or Iron Man can be hard for him to hit, since his Ankh needs a surface and his shots don't track fliers well. And if a stealthy flanker like Wolverine or Iron Fist gets in his face, Moon Knight can be in trouble – he has few tools at point-blank besides a brief knock-up melee. Stick near your team when brawlers dive you so they can peel or heal; Moon Knight alone is vulnerable in close quarters. In short, avoid isolated duels against your bad matchups. Play to your strengths: mobility, area denial, and burst damage on groups.
Finally, manage the risk-reward. Moon Knight is high-impact but high-risk. When his Ancient Ankh is available and enemies bunch up, he's devastating; when Ankh is on cooldown or foes stay spread out, he's much less threatening. So play patiently and reactively – wait for the right moment when opponents group or overextend, then unleash your combo. Don't force plays when your tools aren't ready or enemies are prepared. By playing smart and capitalizing on chaos, you'll truly "haunt" the enemy team like the moon's knight of vengeance!
Most Effective Abilities and Combos
Moon Knight's kit might seem complex, but it flows together once you know the tricks. Here's a breakdown of his core abilities and some combo moves to maximize damage:
Primary Attack – Crescent Darts
Moon Knight's bread-and-butter. He hurls a burst of three crescent darts in a straight line, dealing moderate damage (25 each, 75 total per burst). The magic happens when these darts hit a target: they ricochet up to 3 times onto other nearby enemies (or other valid targets)! In a tight group, a single volley can hit multiple people, softening an entire team at once. Keep in mind each bounce does 20% less damage than the last, but it's still free damage on everyone clumped up. The key with Crescent Darts is to aim at clustered foes – shooting a lone target wastes the bounce potential. If you see a big enemy (say a tank) next to their teammates, focus the big guy: your darts will ping-pong off that large hitbox into others. This not only racks up damage, it charges your Ultimate extremely fast (since each hit grants Ult energy). Combo tip: you can fire a Moon Blade immediately after your primary burst to cancel the brief recovery animation, turning a three-dart volley into a seamless four-hit combo. The burst of a full dart volley plus a quick Moon Blade can surprise enemies with nearly instant damage before they can react.
Secondary Attack – Moon Blade
This is a heavier throwing blade that flies in a line and hits harder (about 80 damage). It's on a short cooldown and it also bounces up to 3 targets like the darts. Moon Blade is great for finishing off a wounded enemy or spiking someone who thinks they're safe behind a friend. Because it has a brief cooldown, weave it between your primary attacks. As mentioned, fire Moon Blade immediately after a Crescent Dart burst – not only do you cancel downtime, you also add extra bounce hits into the mix. Choose your primary target for Moon Blade wisely (usually the squishiest or highest priority enemy in the group), since the first hit does full damage before the bounce falloff kicks in. Advanced perk: After a recent patch, hitting multiple enemies with Moon Blade grants Moon Knight bonus health (up to +100 temporary HP). This acts like a short-lived shield that starts decaying after 3 seconds. Skilled players use this to survive clutch moments – for example, if you see three enemies grouped, tossing a Moon Blade into them not only hurts them but can instantly boost your health, helping you tank any counter-fire as you follow up. It's a small edge, but it can turn a losing trade into a winning one if used at the right time.
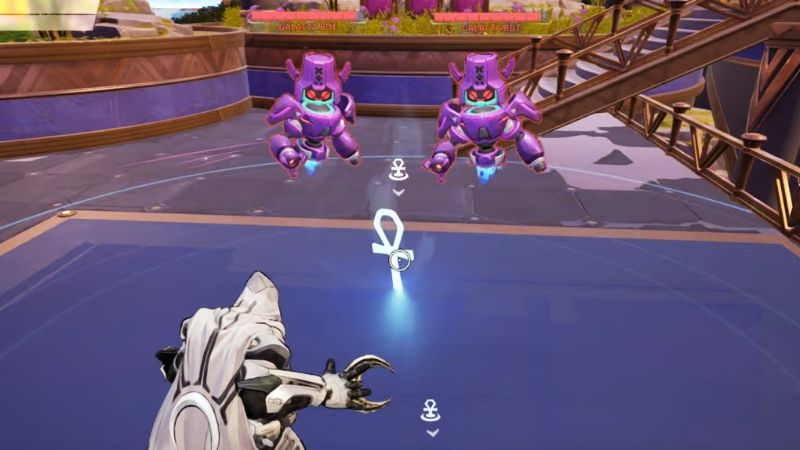
E Ability – Ancient Ankh
This is Moon Knight's signature gadget and a cornerstone of his playstyle. Activating it throws an Ankh talisman which sticks to any surface (walls, ceilings, floors) and creates a glowing spell field around it. Enemies near the impact are pulled slightly toward the Ankh's center and take a bit of damage – it's like a mini gravity well. The Ankh's true power is that it acts as a bounce anchor: both your Crescent Darts and Moon Blade can ricochet off the Ankh to any enemy within its field. In practice, this means you can shoot your projectiles at the Ankh (even if no enemy is there) and they will curve out to hit enemies near it. This dramatically extends your effective range and area damage – you can hit foes around corners or spread bounce damage in a wider radius using a well-placed Ankh. Always try to have an Ankh out in a fight. You can maintain up to two Ankhs at once on the map, and they persist until destroyed. Good Moon Knight players throw Ankhs in sneaky spots – for example, sticking one just above a doorway or behind a crate where enemies won't notice it, but still within range to affect the fight. Enemies can destroy your Ankhs if they see them, so hiding them slightly out of direct line of sight is ideal (you don't want the enemy to immediately shoot your precious Ankh!).
F Ability – Moonlight Hook (Grappling Hook)
Moon Knight fires a grappling hook that pulls him to the target location. Essentially, it's a mobility tool to reposition quickly – akin to a grappling gun in other games. The hook can latch to walls or ceilings, yanking you toward that point. Importantly, if you aim the hook at the ground (beneath you), it will slingshot you upward into the air instead, giving you a super-jump. Use this to soar to high ledges or rooftops that even your double jump can't reach. The grappling hook has a moderate cooldown (recently shortened to 15s) and a bit of a wind-up, so it's not always ideal as an "escape" in the middle of a close fight – enemies can still shoot you as you zip away. Think of it more as a tool to engage or relocate: for example, after respawning you can grapple back to the frontline faster, or reposition from one sniper nest to another. It's also great for quickly diving onto low-health enemies: one combo is to double jump from high ground and glide (Shift) toward a weak enemy, then grapple mid-air down onto them to close the gap and finish them. Just be cautious: the hook's range isn't infinite (25m), and you commit to the motion once fired. Top players typically use the vertical slingshot trick to confuse enemies – one second you're on the ground, next second you hook-launch straight up, making foes lose track of you.
Shift – Night Glider (Cape Glide)
By holding your jump or shift button (depending on platform), Moon Knight glides, slowing his fall. This isn't a long-distance flying power, but it lets you cover some ground horizontally while airborne and gives you more hang time. Use Night Glider to position yourself mid-air for better shots or to reach a rooftop across a gap. For example, you might double jump off a high ledge, then glide to float across an open area and land on an otherwise inaccessible platform. It's also useful if you get knocked upward or launched – you can glide to avoid falling directly into danger. In combat, gliding lets you rain down darts from above while making it harder for ground-bound enemies to hit you immediately. Just note that you're a bit of a sitting duck for true snipers while gliding (moving slowly in the air), so don't overuse it if a Hawkeye has you in his sights. Instead, glide between cover or use it when you're not being watched. This ability synergizes wonderfully with Moonlight Hook: grapple-launching into the sky and then gliding can let you travel a surprising distance or position at a perfect angle before dropping your Ultimate.
Space – Rising Leap (Double Jump)
Simple but vital – Moon Knight can perform a second jump in mid-air. It has a short cooldown (~6s), meaning you can't spam it repeatedly without touching ground, but it's available often. The double jump is fantastic for dodging ground-level threats (e.g. jump over an Iron Fist rushing at you) and for reaching high ground quickly. One common move: jump once, use Rising Leap to get even higher, then immediately glide or hook to cover a huge vertical distance. These chained mobility options make Moon Knight incredibly slippery when used well. Always be aware when your double jump is off cooldown – it can save your life by leaping over an incoming attack or getting you onto a ledge to break line of sight. Keep in mind that while airborne you can still shoot, so an advanced tactic is to double jump and glide at a choke point and fire bouncing darts down from above, essentially acting like a hovering turret for a moment. Just be ready to drop or dash to cover once your leap/glide ends.
V Key (or Melee) – Triple Eclipse (Truncheon Combo)
If enemies get too close for comfort, Moon Knight isn't completely helpless – he has a three-hit melee combo with his truncheons, where the third hit knocks the enemy into the air briefly. The melee strikes aren't your main source of damage, but they can interrupt an enemy and create a gap. If a flanker like Wolverine is on top of you, a quick Triple Eclipse combo can pop them up on the third hit, buying you a moment to run or pull out your guns to finish them mid-air. Use melee sparingly (you'd usually rather shoot and kite), but remember it's there. One neat trick: the knock-up from the third hit can set up an easy shot – for example, melee an enemy to juggle them, then as they fall, fire a Moon Blade at them for a guaranteed hit while they're still mid-air and unable to dodge.
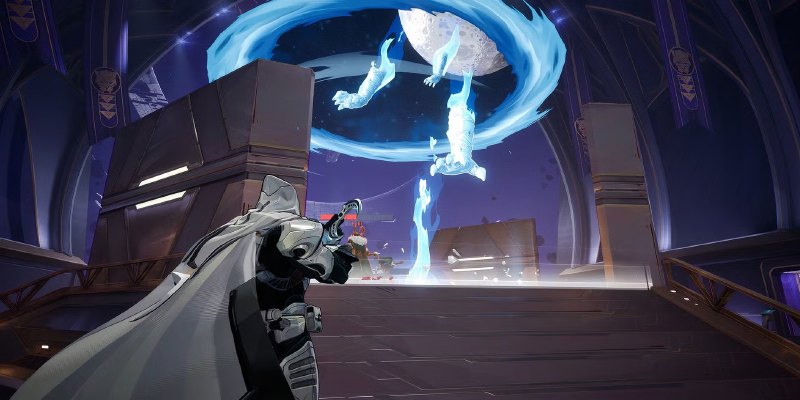
Ultimate – Hand of Khonshu
Moon Knight's Ultimate ability is a massive AoE barrage. He opens a portal above a target area, and Khonshu's spectral arms rain down a flurry of talons that damage all enemies in a radius. It basically creates a storm of multi-hit damage over a circle (roughly 8m radius) for a few seconds. Enemies caught inside will take heavy cumulative damage – it's absolutely lethal if they stay in it for the full duration. After recent buffs, the Ultimate now lasts about 4.5 seconds and drops 18 hitting talons in that time, dealing damage so fast that even healing ults struggle to keep up. However, landing a good ult requires timing. Savvy opponents will see the telltale portal and try to dash out of the area, since the talons don't all hit at once (it's a brief barrage). That means if you just throw it onto mobile enemies in open space, they might escape with minor scratches – and you've wasted a powerful cooldown.
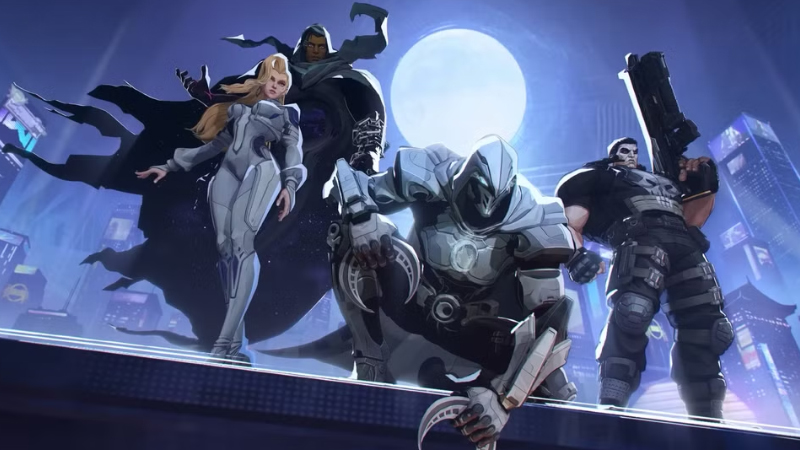
Team-Up Ability – Full Moon (with Cloak & Dagger ally)
If your team drafts Cloak & Dagger as a Strategist support, you unlock a special team-up ability called Full Moon. This is essentially an invisibility field – Moon Knight can activate it to surround himself in a small dark aura (4m radius) that turns him invisible for 6 seconds as long as he stays within it. It also now provides 25 HP per second healing to Moon Knight inside the area. Full Moon is a fantastic defensive tool: you can pop it when a fight gets messy to vanish from enemy view and recover some health. Be aware, however, that unlike, say, Invisible Woman's stealth, the enemy can see the dark shroud area on the ground – they'll know you're "somewhere in there" even if they can't see you exactly. That means smart opponents may spray the area with attacks or wait at the edges. Don't stand predictably in the center of your invis field; you can still move around within it to dodge. One huge perk of Full Moon: you can fire your weapons without breaking the invisibility! This allows for cheeky plays – for instance, activate Full Moon, then freely lob Crescent Darts out from your "cloak" while enemies struggle to target you. It's like having a personal smoke screen. Use this to duel flankers who jump you (they can't lock on when you're invisible, giving you the edge) or to set up an ambush: go invis, reposition (maybe drop off a ledge behind the enemy), then unleash an Ult or a flurry of darts before they even realize where you are. Full Moon's cooldown is fairly short (30s), so don't hesitate to use it whenever you need to shake off pressure or set up a big play.
Optimizing Moon Knight's Role in Ranked Play
If you're aiming to become a true playmaker in your Marvel Rivals matches and climb the competitive ladder, your effectiveness as Moon Knight depends heavily on how you approach engagements, use your kit, and synergize with your team. Understanding the nuances of Moon Knight’s strengths – and how buffs have amplified them – can help you consistently perform in ranked matches. Think of it as mastering all of his available tools and playing to his specific win conditions.
Leverage Ricochet Damage for Maximum Value
Moon Knight thrives in teamfights, where his Crescent Darts can bounce between clustered enemies for massive value. You should be actively seeking out scenarios where multiple enemies are packed together – chokepoints, objective fights, or tight indoor areas. Long-range solo duels aren’t his strong suit; instead, use his ricochets to weaken entire squads and soften the field for your allies. This type of AoE chip damage makes it much easier for your team to secure kills or force retreats.
Make the Most of His Ultimate
One of Moon Knight’s biggest advantages is how quickly he can generate his Ultimate, Hand of Khonshu. Prioritize poking tanky enemies in grouped situations – they act as perfect ricochet setups and quickly charge your Ult. Thanks to recent buffs, his Ult deals more damage and lasts longer, turning it into a fight-ending tool. Use it decisively, but don’t hold out for the dream 5-man – disrupting a 2–3 enemy group at the right time can be more valuable. It’s a momentum tool that can swing the tide in your favor, leading to objective control and snowballing wins.
Team Synergy Over Individual Scaling
Moon Knight shines brightest when paired with teammates who complement his aggressive, close-quarters playstyle and help mitigate his vulnerabilities. He thrives in chaotic teamfights where his bouncing crescent darts and area-of-effect pressure can wear down multiple opponents at once. Supports who offer strong healing and crowd control – like Mantis, with her reliable sustain and stuns, or Cloak & Dagger, who bring both utility and survivability – are especially valuable in keeping him active in extended engagements. Because Moon Knight can struggle against high-mobility or aerial heroes that are hard for him to reach or pressure effectively, having a hitscan duelist like Punisher in the lineup is key to covering that gap. Punisher’s ability to track and eliminate evasive targets allows Moon Knight to focus on dominating the ground game. In short, he brings AoE damage, disruption, and teamfight control – so he performs best when surrounded by allies who can provide sustain, peel, or focused single-target pressure to round out the squad and keep the fight flowing in your team’s favor.
Exploit Patch Buffs
Moon Knight has benefited from a series of buffs across recent patches, making him a much stronger pick in the current meta than he was at launch. These updates have enhanced nearly every part of his kit in subtle but impactful ways, and understanding them can significantly boost your effectiveness in ranked matches. For starters, the increased speed of his Crescent Darts allows for more reliable mid-range poking, especially against mobile or strafing targets, giving you more consistent pressure during neutral engagements. Meanwhile, his Moon Blade now grants a temporary health buff on hit, which adds a layer of survivability during close skirmishes and allows for more aggressive plays when timed properly. His grappling hook has also seen improvements, now pulling faster and making both engagements and disengagements feel smoother and more responsive – an essential change for a hero who relies on positioning to stay alive. Most importantly, his Ultimate, Hand of Khonshu, has received significant enhancements: it now lasts longer and delivers more hits, increasing both its burst potential and its utility as a zoning tool. This allows you to be more flexible in how you deploy it, whether you're trying to wipe grouped enemies, cut off their retreat path, or control an objective during a pivotal moment. Collectively, these buffs mean Moon Knight is now more consistent, more survivable, and more dangerous across all stages of a match. Taking full advantage of these changes is key to mastering him and securing your impact in teamfights.
Moon Knight thrives when played with purpose and awareness. His effectiveness comes from smart positioning, tight team coordination, and constant pressure through ricochet damage. Focus on engaging in clustered fights where his abilities can hit multiple enemies, and use his mobility to stay unpredictable and hard to pin down. Charging and deploying his Ultimate at the right moments can shift the flow of battle, especially when used to zone key areas or catch grouped opponents off-guard. By understanding his role in the team and capitalizing on the strengths of his kit, you can turn Moon Knight into a relentless presence that wears down the enemy and sets your team up to secure victory.
Strong and Weak Matchups
Every hero has allies they shine with and enemies that give them headaches. Here's how Moon Knight stacks up:
Best Synergies – Who to team up with
This duo is literally designed to work together (their team-up "Lunar Force" grants Moon Knight the invisibility Full Moon ability). Cloak & Dagger are arguably Moon Knight's #1 partners in crime-fighting. Why? First, Full Moon invisibility is a game-changer for Moon Knight's survivability and setup, as we covered – it lets him disengage from danger or line up an ult unseen. But beyond the team-up ability, Cloak & Dagger's kit provides just about everything Moon Knight could ask for. Dagger can heal Moon Knight from range and even call down a "Dagger Storm" (AoE heal) on him to keep him alive in a duel. That means if Moon Knight is up on a ledge, Dagger can still support him without being next to him – crucial since Moon Knight often perches away from his team. Cloak, on the other hand, has a "Terror Cape" ability that blinds enemies, which is perfect for peeling those who try to jump Moon Knight. If a flanker is about to KO Moon Knight, Cloak can blind them, giving Moon Knight a chance to either go for the kill or reposition to safety. In short, Cloak & Dagger keep Moon Knight safe, hidden, and healed, allowing him to play aggressively.
Mantis is another fantastic support with a different approach. She offers consistent healing with her Healing Flower, which helps Moon Knight stay in the fight longer. But more importantly, Mantis provides two things Moon Knight loves: a damage boost and a long stun. Mantis's Allied Inspiration can buff Moon Knight's damage output, making his bouncing blades hit even harder. A buffed Moon Knight can literally delete squishy enemies in one volley if the numbers stack right. And then there's Mantis's clutch move: Spore Slumber, a spore cloud that sedates (sleeps) an enemy for 3.5 seconds. If Mantis lands this on an enemy, it's basically a free kill for Moon Knight – you can line up a full combo or even drop your Ultimate directly on the snoozing target. They'll take the full brunt of Khonshu's talons before they even wake up.
Tanks can be great buddies for Moon Knight, especially ones with crowd control. Groot stands out because of his Ultimate synergy: Strangling Prison. This ability roots multiple enemies in place with entangling vines. The moment Groot shouts "I am Groot!" and roots a few enemies, a Moon Knight following up with Hand of Khonshu is devastating – the enemies cannot escape the talon barrage and will be obliterated. Even outside of that dream combo, Groot can throw up Thornlash Walls (think of them like bramble barriers). Moon Knight can shoot over Groot's walls safely, and fun fact: his bouncing shots can even activate the vines on those walls to attack enemies. This creates a nasty zone where enemies are slowed/damaged by vines and pelted by Moon Knight's darts.
On the surface, Punisher might seem like an odd pair with Moon Knight since they're both Duelists. But actually, their skillsets complement each other's weaknesses well. Punisher brings high single-target firepower and some utility that Moon Knight lacks. For example, Punisher's rifle can pick off flying heroes or distant snipers that Moon Knight finds annoying. If Storm or Iron Man are hovering about, Punisher can gun them down, securing the skies so Moon Knight can focus on ground targets. Punisher also has a zipline ability; he can even set up a zipline for Moon Knight to use, effectively sharing mobility and allowing Moon Knight to reposition to another high ground quickly.
Worst Counters – Who to watch out for
- Hawkeye and Black Widow: Long-range marksmen that outrange Moon Knight and can headshot him before he can respond effectively
- Hela: Brutal burst damage that can delete Moon Knight in seconds, plus aerial mobility to escape retaliation
- Storm and Iron Man: Flying heroes that negate Moon Knight's bounce mechanics and attack from unreachable angles
- Wolverine and Iron Fist: Melee dive heroes who excel in close combat where Moon Knight is weakest
- Stay near teammates for protection and peeling assistance
- Use cover and flanking routes to avoid sniper sightlines
- Coordinate with team to focus problem heroes
- Use Full Moon invisibility to escape dangerous situations
Hawkeye and Black Widow (Duelist Snipers): These long-range marksmen are nightmares for Moon Knight if played well. Hawkeye can deal massive burst damage from afar, potentially killing Moon Knight in just a few well-placed arrows. Widow likewise can headshot you out of nowhere. They outrange Moon Knight comfortably and their projectiles (or hitscan in Widow's case) are faster than his, making it very hard to trade shots. Hawkeye in particular has multiple tools that counter Moon Knight: his Hypersonic Arrow can knock Moon Knight out of the sky and slow him (so if you're gliding or jumping, one arrow can send you plummeting). He also has an ultimate that reveals enemies and even sees through stealth – meaning your Full Moon invisibility won't save you if Hawkeye pops Hunter's Sight. Basically, a good sniper will force Moon Knight to constantly take cover, denying him the chance to output damage.
Hela (Duelist Burst DPS): Hela is a brutal counter because she combines long-range damage with mobility. She has one of the highest damage outputs in the game – a couple hits from her Nightsword projectiles can down Moon Knight almost instantly. Essentially, she can out-burst you in a straight fight. On top of that, Hela's Astral Flock lets her take to high ground or escape in a pinch. So if you try to engage her, she might just fly up where you can't chase (remember, Moon Knight can't effectively hit someone directly above him in open air). Hela is like an anti-Moon Knight artillery: she punishes you for peeking and is hard to pin down.
Storm and Iron Man (Aerial Mobility heroes): These heroes illustrate the "fliers" Moon Knight struggles against. Storm can literally fly and attack from above with lightning, and Iron Man uses his jet boots to hover and rain down damage. The problem for Moon Knight is twofold: (1) His Ankh and bounce mechanics rely on enemies being on surfaces or near walls/floor. Flying enemies don't stay nicely in your Ankh radius – they can hover out of range, so your darts won't bounce to them easily. And (2) hitting a fast-moving aerial target with slow projectiles is hard. Your Crescent Darts and Moon Blade are not hitscan; a good flyer will dodge or be out of reach before your shots connect.
Melee Dive Heroes (Flankers like Wolverine, Iron Fist): These guys can be problematic in a different way. Wolverine, Iron Fist, Black Panther, etc., who have high mobility and are built to dive the backline, thrive in close combat where Moon Knight is weakest. If one of these gets the jump on you, you might not even have time to react – their damage is upfront and you have limited close-range tools. Your best bet against dive characters is prevention and team assistance. Keep an Ankh handy as a booby trap – as mentioned, tossing it at your feet when a flanker comes in can disrupt their combo and pull them off you momentarily. Immediately after, use Full Moon (if you have it) to go invisible and start healing, or double jump and grapple out of there towards your team.
Advanced Tips and Pro Tricks
Feeling comfortable with the basics? Great – now let's talk about how to elevate your Moon Knight gameplay to the next level. These are the kinds of tricks and tactics you'll see top-ranked Moon Knight players using to dominate matches:
Hide Your Ankhs Cleverly
Here's a pro strat – throw Ankhs where enemies don't immediately notice, but still within range to do their job. For instance, instead of tossing an Ankh right into the middle of a point (where it's obvious and will get shot), stick it on the inside of a doorway frame or behind a payload object. The enemy might not see the glowing field unless they really look, and you can still bounce your shots off it to hit them. Another trick: you can throw Ankhs vertically above choke points (e.g. attach to the ceiling of a hallway enemies are running through). Many players forget to look up. Then when you bounce darts off that Ankh, it's like death raining from above and they're scrambling to figure out "where is that coming from?!" Also, remember that Ankhs persist indefinitely until destroyed. That means you can even set up an Ankh in advance of a fight. Some top players will toss an Ankh in a likely fight location before the engagement (say, above the enemy's intended escape route or behind where they'll take cover). When the fight moves there, that Ankh is already waiting to facilitate carnage.
Ultimate Combo Timing
We've mentioned combining Ult with ally CC, but as a solo player you should also master the timing and lead for a good Ult. The talons start falling almost immediately after you cast, but there is a short 1.5 second delay for the full field to form. A pro-tip is to watch enemy animations and cooldowns: for example, if you see an enemy use a movement ability (dash, blink, etc.), that's your window. They likely can't use it again for a few seconds, so Ult them right then. By the time they realize and want to escape, they're still on cooldown and get caught for at least a majority of the talon strikes. Also, don't telegraph your Ultimate. If you always pop up in the same spot and shout "The Moon haunts you!" (or whatever his voiceline is), people will pre-run. Try flanking or ulting from unexpected angles. Some advanced players will even drop down from above or behind the enemy team and ult from their backline, corralling them forward into your team.
The Groot Wombo-Combo (and other team combos)
In coordinated play, one of the dirtiest tricks is the Groot + Moon Knight combo we discussed. It's worth reiterating because if you can pull it off in ranked, it's basically a free teamfight win: Groot's root Ult + Hand of Khonshu = instant multi-kill. If you're lucky enough to have a Groot on your team, politely ask them to combo ults with you. Even at high ranks, people will happily coordinate when it means wiping the enemy. Aside from Groot, any AoE stun works – e.g. Invisible Woman's forcefields (if she can trap enemies in her bubble for a moment, you can nuke them) or Magneto's magnetic field if he has one. Keep an eye on ally abilities: if you see an enemy frozen, rooted, or stuck in a gravity well, slam that Ult down!
Bounce Shot Trickery
Experienced Moon Knight players get very crafty with bounce angles. Remember, your darts and blades can bounce off ANY enemy or Ankh or even Loki's illusions if present. You can use this to hit people around corners by intentionally bouncing off a near target or decoy. For instance, if an enemy is hiding behind a shield or corner and there's an enemy minion/illusion or even an enemy player out in front, aim for the front target so the shot ricochets into the one hiding. This takes practice and map knowledge (knowing the max bounce range ~7m), but it's extremely satisfying to kill someone who thought they were safe. Similarly, if a Loki on the enemy team pops decoys, capitalize on that – your darts will bounce between illusions and real targets, effectively turning Loki's trick against his own team! Always be thinking, "how can I make this shot bounce to hit that guy over there?" and you'll uncover lots of creative lines. It's almost like billiards – top Moon Knights bank shots off one enemy to hit another.
Use Moon Blade's Self-Heal Aggressively
One new advanced tactic after the Season 2 patch is leveraging the Moon Blade temporary health mid-fight. Since each enemy hit gives +25 HP (up to +100), if you're about to engage in a brawl or you see a flank incoming, try to tag a group of enemies with Moon Blade preemptively. Gaining, say, +75 bonus HP right as a fight begins can make a big difference – it might let you survive one extra hit from a sniper or brawler. Think of it as Moon Knight's overshield technique. Advanced players might coordinate this with a support: e.g. Mantis could boost your damage, you peek and Moon Blade bounce off a couple enemies to get shield health, then you dive in with that buffer. It's a high-level optimization, but in ranked every bit helps. Just be mindful of the timing (the bonus health starts decaying after 3 seconds). You want to engage quickly after getting it so you make use of that extra life.
Full Moon Sneak Attacks
If you do have the Cloak & Dagger synergy, exploit the heck out of it. A fun pro move is using Full Moon to reposition for a surprise Ultimate. You can Full Moon, turn invisible, then walk behind the enemy team or to a high ledge above them, and then cast Hand of Khonshu from an unexpected angle while still invisible. The enemy might not even realize it's being cast until talons are already falling. Since shooting doesn't break your invis, you could even start firing bouncing darts at them to sow chaos before dropping the ult – all while they can't target you easily. Just beware AOE damage or reveal effects. Another defensive pro tip: if you find yourself dueling a strong lock-on hero like Iron Fist, popping Full Moon in the middle of the fight can cause them to completely lose target, giving you the upper hand. Top players use Full Moon almost like a personal Zhonya's (to borrow a MOBA term) – a short window where you're untouchable and can reposition/heal. Except you can still deal damage during it, which is even better!
Communication & Mind Games
Lastly, a pro skill that's not mechanical: communication. In ranked, especially at higher tiers, calling targets and coordinating plans is huge. As Moon Knight, you often have a vantage (literally) of the battlefield. Call out clumped enemies: "3 grouped left, I'm bouncing them." Ping when your Ult is ready and ask for a stun if someone can ("Mantis stun now, I'll ult!"). If you get dived, yell for help immediately – don't try to be a hero solo. You'd be amazed how much more effective you become when your team plays around your strengths. Also, use the kill feed and sound cues for mind games. If you eliminate someone with a bounce they might not even realize where you were – reposition after every pick so they can't predict you. Sometimes just the fear of Moon Knight is enough – after you ult a team once, they'll be paranoid and clump less (which is both good and bad for you; good because they're altering their play, bad because your job is harder). A top player will use this to their advantage: if they're scared to group, they might trickle in one by one, making them easy pickings for your team in other ways. Essentially, control the flow of the game. You're the one who makes them panic "Group up or spread out? Where's Moon Knight?" Keep them guessing and on the back foot.