
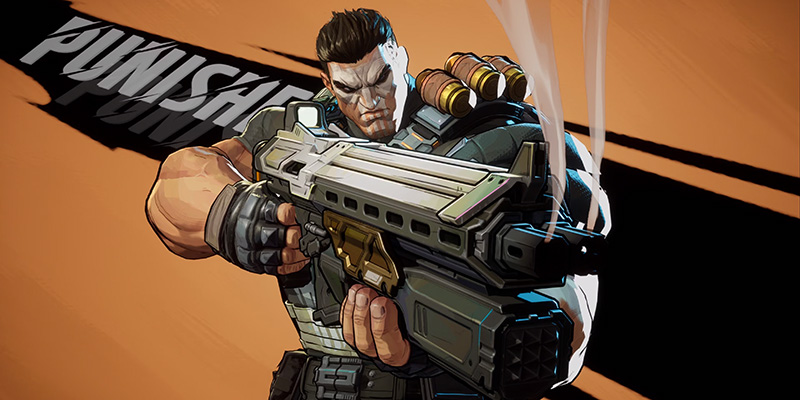
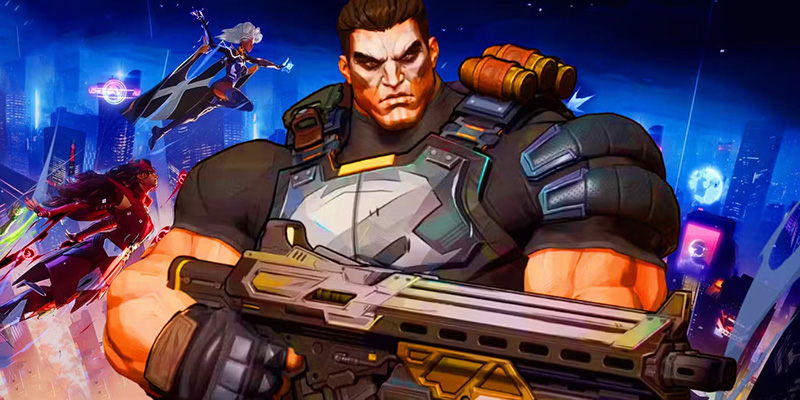
Getting Started with Punisher
Hey there, future Punisher pro! So, you wanna learn how to make Frank Castle absolutely sing in Marvel Rivals? You've definitely come to the right place. I'm here to give you the lowdown, the real-deal strats, and all the tips you need to go from "just another duelist" to a game-changing force of nature. We're talking about making enemies regret ever seeing your name on the load-in screen. This guide is all about making you a Punisher menace!
Now, let's talk about Frank's current spot in the Season 2.5 meta because, honestly, he's lookin' way better. Let's be real, Punisher had a bit of a rocky road. For a good while, if you weren't practically glued to a Rocket Raccoon for his team-up, you were kind of... well, struggling, especially in those higher-ranked games. But hold onto your Kevlar, because the May 30th, 2025 balance patch was an absolute game-changer for our boy Frank!
He got some serious love in that update. His main rifle, Adjudication, now hits harder, carries more bullets in a clip, and is noticeably more accurate. On top of that, he's quicker on his feet when he pops his Ultimate, Final Judgment. What this all means is that he's transformed into a much more self-sufficient duelist. He's not just "viable" anymore; he's a genuine threat, especially in those crucial mid-range fights and for swatting those annoying fliers out of the sky like they owe him money. Some folks are even whispering that he's on track to be a top ban if this performance keeps up! Right now, he's generally chilling as a solid B-Tier pick, meaning he's capable and balanced in a lot of situations.
What's really interesting about these changes is what it tells us about how the developers see Frank fitting into the game. For the longest time, if you wanted to climb the ranks with Punisher, you pretty much had to have a Rocket Raccoon by your side for that sweet "Ammo Overload". But the May 30th patch flipped the script. They didn't just buff his Adjudication rifle's ammo and punch; they also made him the main man, the anchor, in his new team-up with Black Widow, giving him direct stat boosts. This all points to Frank becoming a much more independent threat, someone who can pull his weight without relying on one specific buddy, which is awesome for your drafting flexibility and makes him a more reliable pick overall.
Arsenal Overview
Alright, let's get you kitted out. Understanding Frank's arsenal is absolutely key to dishing out maximum punishment. He's practically a walking armory, and knowing precisely when to use each piece of gear is what separates the rookies from the legends who make enemies rage quit.
Primary Fire: Adjudication (Rifle) & Deliverance (Shotgun) (LMB)
Auto-reload when weapon is not in use. Switch freely between rifle and shotgun for different engagement ranges.
Adjudication (Automatic Rifle)
This bad boy is your workhorse, pal.
- The Nitty-Gritty: It spits out bullets doing 19 damage per shot, and thanks to the recent patch, it now holds a beefy 40-round magazine (up from 30, a huge buff!). It fires off 10 rounds per second. Keep in mind, the damage starts to dip after 20 meters, dropping to 70% of its max power by the time you're hitting targets 40 meters out. The good news is the spread also got a slight reduction, making it more reliable.
- When to Use It: Think mid-range mayhem. This is your go-to for laying down consistent pressure, picking off those squishy damage dealers and supports, and, very importantly, making fliers wish they'd never learned how to leave the ground. Those recent buffs have made it even more effective for swatting aerial pests.
- Pro Tip from Me to You: While it's a hitscan weapon (meaning your bullets land exactly where you're aiming, instantly), that damage falloff is absolutely real. Don't try to play sniper across the entire map with it; you'll just be tickling them and wasting ammo.
Deliverance (Shotgun)
When the fight gets up close and personal, this is your definitive answer.
- The Nitty-Gritty: This beast fires 14 pellets per shot, and each one of those pellets does 10 damage. It holds 8 rounds in the magazine and fires about 1.43 rounds per second. The damage falloff is brutal and starts quickly – at 8 meters, and by 15 meters, you're only doing 40% of its potential damage.
- When to Use It: Close-quarters combat, pure and simple (we're talking 10 meters or less). This thing absolutely melts tanks if they get too bold. And get this: a well-aimed headshot at point-blank range can one-shot heroes with 250HP. That's fight-winning, game-changing potential right there!
- Pro Tip from Me to You: You'll want to practice your flick shots with this one. Enemies up close are usually zipping around like crazy. You need to be able to snap your aim to them in an instant.
Scourge Grenade (RMB)
This is way more than just a simple smoke screen.
- The Nitty-Gritty: You toss a grenade that deals a quick 45 damage in a 5-meter radius. More importantly, it creates a smoke screen to block vision AND it knocks you back a good 9 meters. The cooldown is a nice and short 8 seconds.
- When to Use It: Primarily for creating space! This is your "get off me!" button. If a dive hero like Spider-Man or Black Panther jumps on you, pop this grenade right at your feet. You'll go flying backward, they'll be stuck in the smoke, and that gives you precious time to switch to your shotgun, reposition, or for your team to peel for you. It's also fantastic for blocking enemy sightlines during a ranged duel, giving you an edge.
- Secret Tech Alert: Some clever players have figured out you can use the Scourge Grenade to get a little vertical boost. If you jump and aim it at your feet, it can launch you up onto ledges. Definitely worth practicing in a custom game to find some sneaky new angles!
Vantage Connection (Shift)
Your personal zipline network for zipping around the map.
- The Nitty-Gritty: You shoot out a hook that creates a zipline, ranging from 5 to 35 meters long. You'll dash along this zipline at a speedy 25 meters per second. You can have up to 3 of these ziplines active on the map at any given time. The catch? The cooldown is a hefty 20 seconds, so use it wisely.
- When to Use It: Mobility, mobility, mobility! This is your tool for getting to high ground, opening up flanking routes, escaping immediate danger (if you've pre-placed it), or just getting back to the fight much faster after respawning.
- Pro Tip from Me to You: Here's a golden nugget: using an already placed zipline has NO COOLDOWN. This is huge! Set up a network of ziplines in key areas. Also, if you jump off the zipline before you reach the end, you'll carry some serious momentum, letting you make unexpected leaps and cover more ground.
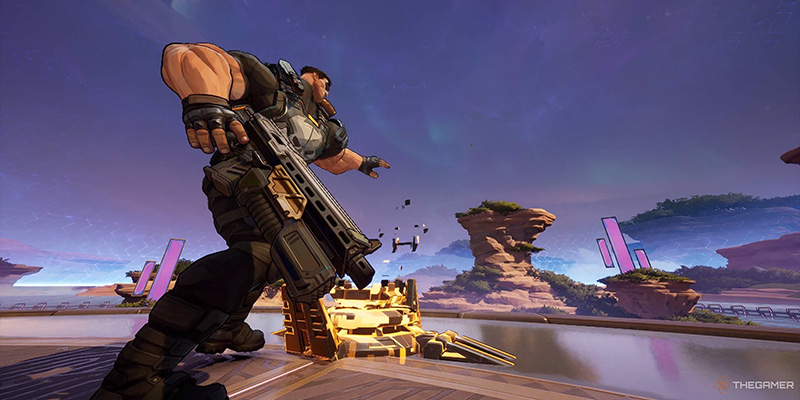
Culling Turret (E)
Time to lock and load, turret style.
- The Nitty-Gritty: You deploy a stationary turret with 600 HP that you then operate. It fires explosive bullets – and here's a key detail: the damage (12 per round) comes from the explosion on impact, not the projectile itself. You get 200 rounds of ammo and it fires at 12.5 rounds per second. Just like Vantage Connection, the cooldown is 20 seconds.
- When to Use It: This is your go-to for holding down chokepoints, shredding enemy shields (it's great for this!), and generally laying down massive area denial to make enemies think twice about pushing. The turret itself will block damage from the front, acting as a temporary shield for you, but remember, you're still vulnerable from the sides and especially from behind.
- Pro Tip from Me to You: For more consistent damage, aim the turret at the enemy's feet. Even if you slightly miss the direct hit, the splash damage from the explosion will likely still connect. Be very mindful of the long deploy animation; don't try to pop this if you're already taking heavy fire, or you'll be a sitting duck. Some players swear there's a brief window of invulnerability when you deploy it, which can be clutch for dodging things like Jeff the Land Shark's ultimate if your timing is perfect.
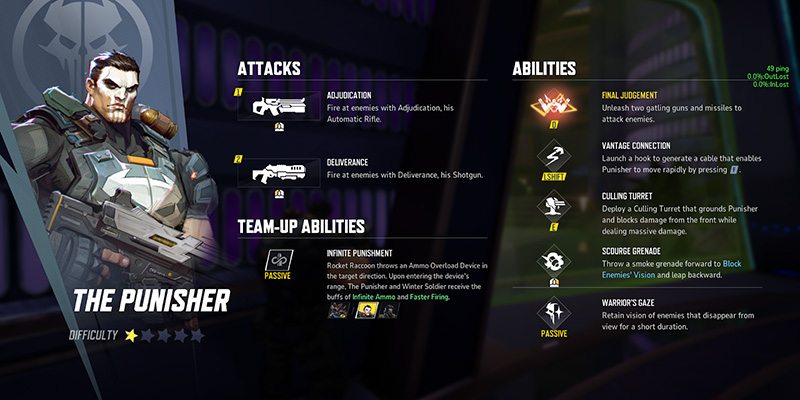
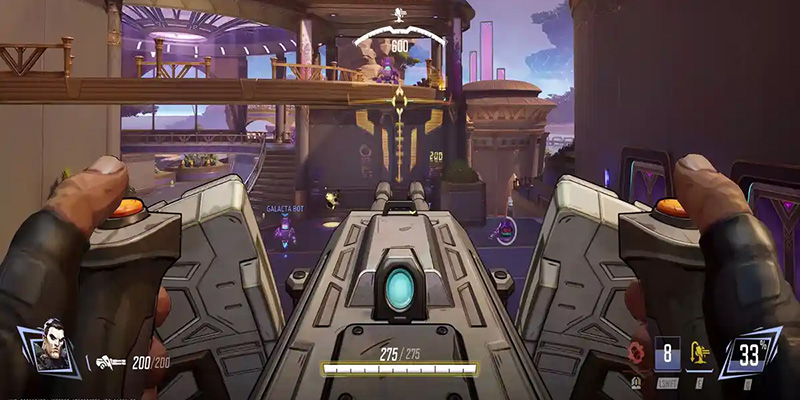
Final Judgment (Q - Ultimate)
Prepare for the iconic line: "Judge, Jury, Executioner!"
- The Nitty-Gritty: When you pop this, you unleash pure devastation. You get dual Gatling guns (each bullet doing 8 damage, firing at an insane 33.33 rounds per second, with infinite ammo for the duration) AND shoulder-mounted missiles (each missile hits for 50 damage, firing 8 per volley, with a maximum of 3 missiles locking onto a single target up to 40 meters away). This lasts for a glorious 10 seconds. The energy cost to activate it is 3400.
- Movement Speed Buff! This is a big one from the recent patch! You're now only slowed by 10% when you're idling (not firing) and 30% when you're actively firing (this is down from a much clunkier 20% and 40% slow). This makes a HUGE difference in your ability to reposition and track targets during your ult.
- When to Use It: This is your team-fight turner. This ultimate SHREDS. It has enough raw power to even kill enemies through defensive ultimates like Luna Snow's healing blizzard. Another massive plus: you are completely immune to crowd control (CC) effects like stuns or knockbacks once Final Judgment is active.
- Pro Tip from Me to You: Even with the movement buff, you're still a larger, slower-moving target when ulting. Make absolutely sure your team is ready to support you, ideally with a shield from a Vanguard like Magneto or Doctor Strange to protect you while you rain down fire. Don't just stand out in the open like a free kill.
Warrior's Gaze (Passive)
Think of it as legal wallhacks!
- The Nitty-Gritty: Any enemy who ducks out of your line of sight will remain visible to you (they'll glow red) for 3 seconds. This triggers if they were within a 30-meter radius when they initially broke line of sight. And here's a cool detail: once that vision is triggered, it can effectively have infinite range until the 3-second duration runs out.
- When to Use It: This is amazing for tracking those slippery enemies trying to escape with low health, for anticipating when someone is about to peek a corner, and for catching flankers completely off-guard. Here's a nasty combo: hit an enemy with your Scourge Grenade to smoke them out, then use Warrior's Gaze to continue seeing them through the smoke while they can't see you. They'll never know what hit 'em!
| Ability | Key | Use It For... | Cooldown |
|---|---|---|---|
| Adjudication (Rifle) | LMB | Mid-range sustained damage, anti-air | N/A (Reload) |
| Deliverance (Shotgun) | LMB | Close-range burst, tank busting | N/A (Reload) |
| Scourge Grenade | RMB | Escaping, creating space, blocking vision | 8s |
| Vantage Connection | SHIFT | Mobility, repositioning, flanking, fast returns | 20s |
| Culling Turret | E | Area denial, shield breaking, choke holding | 20s |
| Final Judgment (Ult) | Q | Team fight impact, breaking defenses, CC immune | 3400 Energy |
| Warrior's Gaze | PASSIVE | Tracking enemies briefly through walls | N/A |
Core Gameplay & Role
Alright, let's get down to brass tacks. Knowing the abilities is one thing, but understanding your job and how to move around the battlefield is what makes a Punisher truly terrifying.
Your Job on the Team: The Damage Engine
Frank is a Duelist, and his number one priority is to dish out high, consistent damage. Think of yourself as a walking, talking wall of bullets that the enemy team has to break through or get shredded.
- Anti-Flier Specialist: With those sweet buffs to the Adjudication rifle, you are now a prime candidate for shooting down any airborne threats like a cocky Iron Man or a Storm trying to call down the thunder. Make them regret ever taking to the skies! This is a crucial role, as fliers can devastate an unprepared team.
- Tank Buster Extraordinaire: Your Deliverance shotgun absolutely eats tanks for breakfast, lunch, and dinner when they get up close. If a Vanguard like Hulk or The Thing gets a bit too bold and pushes into your space, it's your job to make them pay dearly.
- The Pressure Cooker: You excel at keeping constant pressure on the enemy team. Enemies simply cannot ignore a Punisher who's accurately lighting them up. This forces them to use cooldowns, reposition awkwardly, or back off entirely, creating space for your team.
Positioning 101: Where to Be, Where Not to Be
- Mid-Range Dominance: This is your sweet spot, especially when you're wielding the Adjudication rifle. You want to be close enough to ensure your bullets are hitting hard but far enough away that you have time to react to threats like divers or flankers.
- With Your Team (Mostly!): You're not a lone wolf assassin like some other Duelists. Stick relatively close to your Vanguards so you can use their shields and body-blocking for protection, and stay within range of your Strategists so they can keep you healed up. A common and effective position is just to the side of your main team formation. This allows you to utilize your team's protection while still getting clear angles to shoot around the enemy's barriers.
- Avoid Overextending Like the Plague: Punisher really struggles if he gets caught out of position and isolated. His mobility on Vantage Connection is fantastic for planned repositioning or executing a flank, but it's not a reliable "get out of jail free" card if you're already surrounded, mainly due to its long 20-second cooldown.
- High Ground is Your Best Friend: Always be looking for opportunities to use Vantage Connection to take elevated positions. High ground gives you much better sightlines over the battlefield, makes you a harder target to hit, and often provides natural cover.
The Rifle vs. Shotgun Dance: Mastering the Swap
This is absolutely crucial, my friend! Knowing when to have your Adjudication rifle out and when it's time to switch to the devastating Deliverance shotgun is a core skill that separates good Punishers from great ones.
- Anticipate, Don't Just React: See a flanker trying to sneak around the side? Start thinking about that shotgun. Hear the distinct audio cue of a dive character like Spider-Man or Venom heading your way? Get ready to swap to Deliverance and give them a nasty surprise.
- Don't Get Caught Mid-Swap: Be aware that there's a "fairly lengthy animation" when you swap weapons. Try not to do it when you're in the middle of a direct firefight unless you have some cover or you've just used your Scourge Grenade to create some breathing room.
Advanced Tips & Tricks
Alright, you know the basics, now let's get into the juicy stuff – the tips and tricks that'll make you a true Punisher connoisseur. These are the plays that make enemies scratch their heads and wonder what just hit them.
Zipline Wizardry: More Than Just Point A to Point B
Your Vantage Connection isn't just for getting around; it's a versatile tool for outsmarting and outmaneuvering your opponents.
- Rollouts from Spawn – The Speedy Return: This is a must-do. As soon as you respawn and leave the safety of the spawn room, fire a zipline towards the current objective or where the fight is happening. This creates a super-fast highway for you to get back into the action. Remember, you can have up to three ziplines active at once, so on subsequent trips, you can chain them together to create even quicker return paths. This minimizes your downtime and maximizes your uptime dealing damage.
- Momentum is King – The Zipline Jump: This is a pro-level trick you need to master. If you jump off the zipline before you reach the end anchor point, you'll carry your momentum forward, launching you through the air. This allows for surprise leaps onto high ground, aggressive pushes into unexpected angles, or covering much more horizontal distance than just riding the zip to its end. Practice this; it's a game-changer for your mobility.
- Escape Routes & Tactical Repositioning – Plan Ahead: Don't just think about using ziplines to engage. Pre-set ziplines in key defensive spots before a team fight breaks out. If you get dived by an enemy, you'll have a pre-planned escape route ready to go. You can also use these to quickly switch your angle of attack mid-fight, keeping the enemy guessing. Think of them as escape routes and tactical options, not just engage tools.
- Aggressive Zips – The Surprise Attack: You can shoot while ziplining, though it can be tricky to aim. A well-placed, aggressive zipline can let you rapidly flank the enemy team and surprise their backline, especially if you have your Deliverance shotgun ready for close-range devastation. This is a risky maneuver, as you're a predictable target on the zip, but the payoff can be huge if you catch them off guard.
- Angle Matters for Connection: When you're shooting your zipline, try to aim it straight ahead or slightly upwards. If you aim too far downwards, the hook might not connect, or the zipline might be too close to the ground for you to use.
Smokin' 'Em Out: Smart Scourge Grenade Plays
That smoke grenade is more versatile than you might think.
Optimal Scourge Grenade Usage
Master these four techniques to maximize your Scourge Grenade utility beyond just escape.
- The Defensive Pop – Your Panic Button: This is its most common and life-saving use. If you get jumped by a diver or caught in a bad spot, aim the Scourge Grenade at your feet and fire. The explosion will knock you backwards, creating instant space, and the smoke cloud will obscure you from enemy vision, giving you a chance to escape or turn the tables.
- Offensive Smoke – Blocking Sightlines: Don't just use it defensively. You can throw it at an enemy sniper's perch or into a chokepoint the enemy is holding to temporarily obscure their vision. This can allow your team to advance safely, or give you an opportunity to reposition for a better angle.
- The Warrior's Gaze Combo – Dirty Tactics: This is a beautiful, nasty trick. Smoke an enemy, then immediately take advantage of your Warrior's Gaze passive. You'll be able to see them glowing through the smoke, while they're completely blind to your position. Free damage!
- The Vertical Boost – Sneaky Hops: Remember this one? Jump and then immediately throw the smoke grenade at your feet. The slight knock-up can give you just enough extra height to reach ledges or platforms that would normally be out of reach. This can open up some very unexpected turret spots or new sightlines for your rifle.
Turret Tactics: Your Portable Pain Machine
The Culling Turret can be a game-changer if used correctly, but a death trap if deployed carelessly.
- Choke Control & Shield Shredding – The Obvious Plays: These are its bread-and-butter uses, but they're still incredibly effective. Plop your turret down to deny an enemy team access to an area, or focus its fire on enemy barriers like Groot's walls or Magneto's shield to melt them quickly.
- Aim for the Feet – Splash Damage is Your Friend: The turret's projectiles explode on impact, and the damage comes from that explosion. By aiming at an enemy's feet, you increase the chances of dealing damage even if your direct aim is slightly off, as the splash from the ground explosion will still likely hit them.
- Brief Invulnerability Window – Clutch Dodges: This is a higher-level trick. The animation when you deploy your turret provides a very short window where you might be untargetable or immune to certain effects. Some players use this with precise timing to dodge incoming ultimates like Jeff the Land Shark's bite or Groot's entangling roots. This requires excellent timing and awareness.
- The Mobile Turret – Payload Power: This is a fantastic tip for Convoy or payload-escort maps: you can actually place your Culling Turret on the moving objective itself! This allows you to have the firepower and frontal protection of your turret while still advancing or defending the objective.
- Awareness is Key – Don't Get Tunnel Vision: Remember, while the front of the turret protects you, you are completely exposed from the sides and, most importantly, your back. It's easy to get focused on what's in front of you and forget about flankers. Keep your ears open and be ready to dismount if you're taking damage from an unexpected angle.
- Don't Overuse It – Know When It's a Liability: Some high-level players actually advise using the turret sparingly, especially in very mobile fights or against teams that can quickly focus you down (one even joked "Unbind E"). Its long startup and recovery animations can leave you vulnerable if you deploy it at the wrong moment.
Ultimate Impact: Timing, Positioning, and Making "Final Judgment" Count
Your ultimate is one of the most impactful in the game if used correctly.
- Team Support is Absolutely Crucial: Yes, you become a walking death machine, but you're still vulnerable. Always try to pop your ult when you have backup from your team, ideally a shield from a Magneto or Doctor Strange, or focused healing from your Strategists.
- Pre-Position with Ziplines for Surprise: Don't just activate your ult in the middle of your team. Use your Vantage Connection to get to a good flanking position or an unexpected high-ground spot before you hit Q. The surprise factor can be devastating.
- Embrace Your CC Immunity: Once Final Judgment is active, you are immune to all crowd control effects. Use this to your advantage! If you anticipate an enemy is about to use a big CC ultimate like Groot's root or Jeff's chomp, you can activate your ult to become immune and potentially turn their play against them.
- The Mobility Buff Matters – Don't Be Static: With the recently reduced movement speed penalty during your ult, you can now adjust your position much more effectively while firing. Don't just stand still like a statue. Use this enhanced mobility to track targets, maintain optimal engagement range, or even sidestep some incoming fire.
- Target Priority Still Applies: Even though you're spraying a hail of bullets and missiles everywhere, try to consciously focus your Gatling gun fire on key targets like enemy healers or exposed DPS heroes. The missiles will auto-target enemies within range, but your primary damage from the guns is still under your direct control.
- Don't Waste It – Reposition if Needed: Your ult lasts for 10 seconds. If enemies scatter and hide behind cover the moment they hear your voice line, don't just stand there holding down the fire button at empty space. Use the duration and your improved movement to reposition and find new targets.
Passive Aggression: Leveraging Warrior's Gaze
This passive is subtle but incredibly powerful.
- Pre-Aiming Corners Like a Psychic: If an enemy ducks behind cover, Warrior's Gaze will let you see exactly where they are for those crucial few seconds. This allows you to perfectly pre-aim your crosshair for when they inevitably peek back out.
- Tracking Low HP Runners – No Escape! This is essential for confirming kills on enemies who are trying to disengage with a sliver of health. They can run, but they can't hide (for long).
- The "Jiggle Peeking" Advantage: You can gain valuable information about enemy positions without fully exposing yourself. By quickly peeking and then ducking back, Warrior's Gaze can trigger, revealing enemies even if they only briefly broke your line of sight.
Matchups & Counters
Knowing who to shoot first and who to respectfully run away from is half the battle in Marvel Rivals, my friend. Frank Castle has his favorite targets, the ones he loves to see on the enemy team, and then there are his nemeses, the heroes that can give him a really hard time.
Punisher's Hit List: Who Frank Loves to See on the Enemy Team
- Tanks: Your Deliverance shotgun absolutely eats their massive health bars for breakfast when you get up close
- Fliers: Your Adjudication rifle is a flier's worst nightmare with consistent hitscan damage
- Groot: You're one of the best heroes for breaking his Ironwood Walls quickly
- Low Mobility Heroes: Any hero who has to stand still becomes a prime target for sustained fire
- Hela: Out-pokes you with precision damage and self-sustain
- Dive Heroes: Characters that can close distance fast are a huge problem
- Shield-Heavy Comps: Multiple layers of shields can nullify your damage
- Hawkeye: Another long-range marksman who can effectively duel you
Watch Out For!: Heroes That Give Punisher a Hard Time
Hela
This is often a tough matchup. Hela is a precision DPS hero with good self-sustain, and she can often out-poke you. This is partly because Punisher has a relatively larger hitbox, making him easier for her to land consistent headshots, and her own abilities are very strong at range. Her Nightsword Thorn capacity also got a buff recently, meaning more sustained damage from her.
Namor
Similar to Hela, Namor can be a poke menace from range, and his Monstro summons can be incredibly annoying to deal with, adding extra damage and bodies to the fight. While his Blessing of the Deep (a defensive ability) had its cooldown increased, his ultimate, Horn of Proteus, got bigger, making it more impactful.
Dive Heroes (Spider-Man, Black Panther, Psylocke, Venom, etc.)
Characters that can close the distance on you fast are a huge problem. You lack strong, immediate peel for yourself beyond your Scourge Grenade, and if they catch you with that on cooldown, you're in trouble.
| Target/Hero | Punisher's Edge / Their Edge | Quick Tip for You |
|---|---|---|
| Tanks (General) | SHOTGUN MELTS! High sustained DPS. | Get in their face (safely!) with Deliverance. Use rifle to pressure shields from range. |
| Fliers (e.g., Iron Man, Storm) | ADJUDICATION is your best friend. Hitscan advantage. | Track smoothly; they can't hide in the sky from you. Prioritize them. |
| Hela | Her precision vs. your larger hitbox. Her sustain. | Hug cover, use smoke to reposition, or call for backup. Avoid open duels. |
| Namor | Similar to Hela, can out-poke. Summons. | Avoid his direct line of sight; shotgun if he gets close. Shoot his Monstro spawns. |
| Dive Heroes (e.g., Spider-Man) | They'll be on you FAST. Your limited escape. | Scourge Grenade to make space, then blast 'em with Deliverance. Pre-set escape zips. |
| Groot | Your sustained fire eats his walls. Shotgun hurts him. | Focus fire on walls when needed. Shotgun him up close if he overextends. |
| Shield Vanguards (Magneto, Dr. Strange) | Their shields block your poke. | Coordinate fire. Turret can pressure shields. Black Widow team-up helps pierce. |
| Hawkeye | His range and burst vs. your sustained fire. | Use cover, smoke to break LoS. Your hitscan can win if you track well at mid-range. |
Team Synergies
Even a certified one-man army like Frank Castle needs a good team to back him up, or at least make his job easier. Let's talk about who makes Punisher an even more terrifying force on the battlefield.
"Operation: Microchip" (Team-Up with Black Widow): Your New Best Friend
This is it, folks. This is Punisher's new primary team-up ability as of Season 2.5, and it completely replaced the old "Ammo Overload" he had with Rocket Raccoon.
This combo absolutely bullies flying characters and grouped enemies. Black Widow's piercing shots hit multiple targets while you become a tankier, harder-hitting frontline presence.
- How it Works – You're the Anchor! In this team-up, Punisher is the Team-Up Anchor. This is fantastic news for you because it means you get some very nice direct buffs: +25 Maximum Health (that's right, say hello to a 300 HP Punisher!) and a clean +5% damage boost across the board.
- What Black Widow Gets: In return for your anchoring prowess, Black Widow unlocks a new Pulse Rifle ability for her Red Room Rifle. When she aims down sights (ADS) and the team-up is active, her shots will pierce straight through enemies.
- Why This Combo is Hot: This synergy is absolutely fantastic against enemy teams that like to group up tightly, and it's a nightmare for tanks trying to body-block for their squishier teammates. It's especially potent on maps with long sightlines where Widow can get clean shots, and it's a great answer to pesky flier compositions. Imagine Black Widow's piercing shots hitting multiple targets, while you, with your extra health and damage, become an even more solid and dangerous frontline presence. Some players are already saying this team-up absolutely bullies flying characters because Widow's piercing pulse rifle is semi-automatic, hits hard, and has a relatively short 10-second cooldown, allowing for constant punishment.
- How to Counter This Team-Up: Enemy shields (like those from Magneto or Doctor Strange) and walls (hello, Groot) can still block Black Widow's piercing shots, so they remain effective counters. Also, high mobility heroes or dedicated dive characters can pressure Black Widow, forcing her out of her aimed-down-sights stance, or they might try to focus you down to break the anchor buffs.
The Ghost of Ammo Overload: Life After Rocket
For a very long time, the Punisher and Rocket Raccoon duo, with their "Infinite Punishment" or "Ammo Overload" team-up, was THE meta combo for Frank. It granted you infinite ammunition and a faster firing rate, which was utterly insane with your shotgun or Culling Turret.
You'll definitely need to be more mindful of your ammunition now, especially with the shotgun and turret, but the larger magazine size on Adjudication certainly helps with sustained rifle fire.
Best Mates: Other Heroes Who Love Having a Punisher Around
Even without a specific team-up ability, some heroes just naturally pair well with Frank's brand of justice.
- Shield Vanguards (Magneto, Doctor Strange): This is a classic and highly effective pairing. As Punisher, you want a sturdy shield to stand behind so you can freely unload your arsenal without taking too much heat. Magneto is particularly excellent here, with his resource-based shield that can absorb a lot of damage, his useful knockback ability, and he can even throw his protective bubble on you if you decide to get aggressive with your ultimate. Doctor Strange's Shield of the Seraphim is also fantastic, especially against enemy hitscan threats.
- Hela: Now, while Hela can be a tough counter against you, having her on your team creates an immense amount of poke pressure that can overwhelm opponents. You both have very consistent damage output, which can force enemies to burn through their defensive cooldowns quickly. Her long-range damage capabilities also help cover your rifle's damage falloff weakness at extreme ranges. Cycling your ultimates (her Necro-blades and your Final Judgment) can be absolutely devastating and lead to team wipes.
- Strategists with Good Peels & Sustain: Since you're not a hyper-mobile character who can easily escape danger on your own, healers who can keep you topped up on health and, crucially, peel divers off your back are invaluable. Think of heroes like Luna Snow with her freezes and healing, or Mantis with her sleep darts and strong single-target heals.
Finding Your Place: Punisher in Poke Compositions
Punisher absolutely shines in what we call Poke Compositions. These team setups focus on dealing damage from a safe distance, gradually wearing down the enemy team's health and resources before committing to a full, decisive fight.
- Your Adjudication rifle is perfect for this role, allowing you to constantly chip away at enemy health pools and break down shields from mid-range.
- How Poke Comps Generally Play: They play it slow and steady, focusing on controlling important angles and maintaining map control. They wait for an opportunity, like getting a pick on an out-of-position enemy, before pushing their advantage.
- Weaknesses of Poke Compositions: Poke comps are often vulnerable to well-coordinated Dive Compositions. Dive heroes can bypass your frontline tanks and get directly onto your backline squishies (like you and your healers), disrupting your formation and potentially eliminating key targets before a fight even properly begins.
Map Strategies
Alright, every good hunter knows their territory inside and out. Let's take a look at a few maps where The Punisher can really lay down the law and make his presence felt. As a general tip for any map: always be on the lookout for high ground and long sightlines that favor your Adjudication rifle and Culling Turret. Chokepoints are also your turret's best friend for area denial.
Arakko (New Convoy Map - Season 2.5)
This is the brand-new Convoy map introduced in Season 2.5. We've already seen some top-tier Punisher play on this map from pro players like Kragie, so it's definitely a map where Frank can shine.

- Zipline Hotspots: Keep an eye out for opportunities to set up your Vantage Connection ziplines for quick flanks, to reach unexpected elevated positions overlooking the convoy path, or for fast rotations. The map features destructible elements like the "Robot Wailing Wall", which, when destroyed, might open up unique angles or pathways for your ziplines.
- Prime Turret Placements: Since it's a Convoy map, placing your Culling Turret to cover the payload's advance (if you're attacking) or to defend crucial chokepoints (if you're defending) will be key. The "Robot Wailing Wall" area, which is located after the second checkpoint for attackers but is easier for defenders to access early in the match, might offer some interesting defensive turret setup locations.
- Overall Strategy: Watching VODs of players like Kragie on Arakko will be invaluable. His gameplay often emphasizes controlling engagements by choosing smart positions, capitalizing on enemy weaknesses through precise aim, and generally dictating the flow of fights. Study how they use the map's geometry to their advantage.
Yggdrasill Path (Convoy Map)
This map is a goldmine for a Punisher who knows how to use his ziplines.
- Zipline Heaven: This map is fantastic for Punisher's signature zipline rollouts from spawn. Make use of the various side routes and the balcony access points that map guides often highlight. There's a particularly juicy spot on the second section of the map involving a destructible glass pane that covers an elevated walkway – this is a prime Punisher perch.
- Strategic Turret Spots: The "choke point" (which is the second objective area) has multiple routes the enemy can take. A well-placed Culling Turret can cover the main path, allowing you and your team to focus on watching the flanks. The final stretch of this map has somewhat limited maneuverability, so a turret placed directly on the payload or covering a key flank can be incredibly strong.
- Community Tip: There was a Reddit thread where a player mentioned using Punisher's zipline to sneakily get to the capture point on "the new map". While "new map" is relative to when the post was made, the principle of using ziplines for sneaky objective captures or back-caps applies to many maps, especially those with verticality or less-traveled routes near the objective.
Midtown (Convoy Map)
Midtown is all about verticality and flanking opportunities.
- Ziplines for Flanks & Off-Angles: Midtown is characterized by its many corners, numerous side rooms, and accessible high-ground paths. This is where your Vantage Connection truly shines. Use it to set up flanks, take unexpected off-angles with your turret or rifle, and generally keep the enemy team on their toes.
- Turret Setups with a View: Look for elevated positions that overlook common engagement areas or chokepoints. This is especially true around the first and third objective points, which tend to have longer sightlines. The second point is a bit more cramped, so you'll need to be more careful and creative with your turret placements there to avoid getting easily flanked.
Royal Palace (Domination Map)
This Domination map heavily emphasizes control of high ground.
- Own the High Ground: The key to Royal Palace is often controlling the high ground areas that overlook the central mission area. Use your ziplines aggressively to secure these spots for yourself and your team. The Throne Room section of the map, in particular, has a very important central high ground that offers a commanding view.
- Turret for Area Denial on the Point: In Domination mode, a well-placed Culling Turret covering the objective point itself, or a key entrance/exit leading to it, can be incredibly effective for denying enemy pushes and securing captures.
General Zipline Wisdom for All Maps
- Spawn to Objective – The Lifeline: Always, always set up a zipline from your spawn towards the objective as soon as you can. It's your express lane back to the fight.
- Chain Your Ziplines – The Super Highway: Remember you can have up to three. Use them to create even faster and more versatile travel routes across the map.
- Momentum Jumps – The Skill Shot: Practice jumping off your ziplines early to carry your momentum. This is how you make those really surprising leaps and reach spots others can't.
Final Tips
Alright, soldier, we've covered a lot of ground. You're armed with the knowledge, the tactics, and hopefully, a burning desire to go out there and dish out some serious punishment. Let's wrap this up with the golden rules.
Your Main Takeaways: The Golden Rules for Punisher
- Master Your Weapons – The Core Skill: This is non-negotiable. You must know when to use your Adjudication rifle and when it's time for the Deliverance shotgun. Your rifle is now significantly stronger and more reliable for mid-range engagements thanks to those May 30th buffs, so don't neglect it.
- Position Smart – Live Longer, Kill More: Remember, mid-range is often your sweet spot. Stick with your team, use cover effectively, and don't be a hero trying to 1v6 the enemy. That's a quick trip back to the respawn screen.
- Zipline Like a Pro – Your Mobility Key: Your Vantage Connection is your ticket to outmaneuvering opponents. Set up your network of ziplines. Master the momentum jump. Always have escape routes planned. This is your key to mobility, survival, and surprise attacks.
- Smoke Wisely – Your Get-Out-of-Jail Card: Your Scourge Grenade is your primary disengage tool and a fantastic utility for blocking sightlines or even getting a sneaky vertical boost. Don't waste it; its 8-second cooldown can feel like an eternity in a hectic fight.
- Ult with Backup – Don't Be a Martyr: Final Judgment is incredibly powerful, but you need your team to cover you while you're unleashing hell. The recent mobility buff helps, but you're still a prime target for focused fire. Coordinate with your Vanguards for shields and your Strategists for heals.
- Embrace the New Synergy – "Operation: Microchip": Team up with Black Widow whenever possible. That extra HP and damage for you, plus her new piercing shots, is your new go-to power combo in Season 2.5.
- Be the Pressure – Make Them Uncomfortable: Your fundamental job as Punisher is to consistently output high levels of damage. Make the enemy team uncomfortable. Force them to react to you.
Go Get 'Em!
You've got the intel, you've got the tools, and now you know Frank Castle is an absolute beast in the right hands. Especially after that May 30th patch, his time to shine is NOW. He's more versatile, his rifle hits harder and more reliably, and he's less of a sitting duck during his ultimate. So, get out there, jump into some matches, practice these tips, and start dishing out some serious, well-deserved punishment. Show the enemy team what happens when they cross Frank Castle! Good luck, have fun, and go dominate those games! We've seen the kind of impact a good Punisher can have, leading to some truly epic victories.
The evolution of Punisher in Season 2.5, particularly after that crucial May 30th patch, really positions him as a duelist whose skill ceiling is increasingly tied to your game sense and cooldown management, rather than just raw mechanical aim. This might seem counterintuitive given his "1-star" difficulty rating, but hear me out. The removal of the "Ammo Overload" team-up with Rocket means you can't just rely on infinite ammo as a crutch anymore. The buffs to his Adjudication rifle reward consistent tracking, good positioning, and smart ammo management. His most powerful utility abilities, Vantage Connection and Culling Turret, are on long 20-second cooldowns, making their timely and strategic use absolutely critical to your success. Misuse them, and you'll be severely punished. While his core gunplay is straightforward and familiar to anyone with shooter experience, maximizing his overall impact now requires a much deeper understanding of map control, positioning, matchup knowledge, and proactive ability setup. This elevates his strategic depth considerably. The ongoing discussions within the community reflect this; players are recognizing his higher potential but also the increased level of thought and planning required to truly unlock it and dominate.