
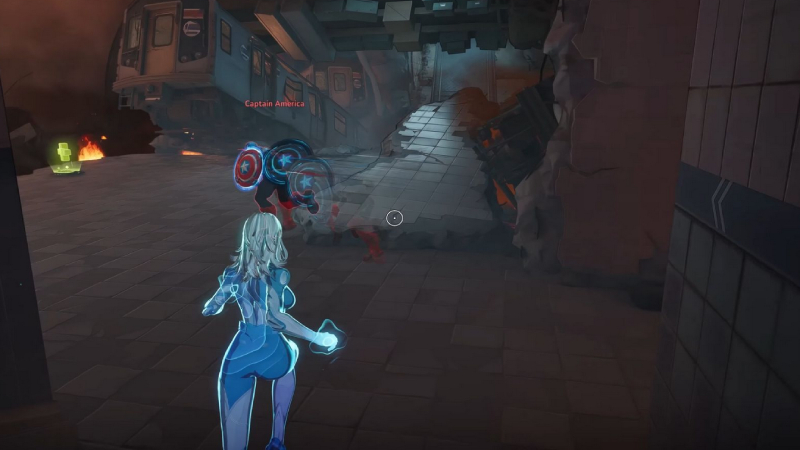
Alright, Agent, welcome to the War Room! If a player is looking to climb the ranks and truly dominate in Marvel Rivals, then understanding the battlefield is non-negotiable. This isn't just about knowing where the objective is; it's about mastering the terrain, predicting enemy movements, and turning the environment itself into a weapon. Think of it this way: a hero with all the powers in the multiverse but no idea where they're going is just a very flashy, very lost target. This hub is the ultimate boot camp, designed to transform any player from a map rookie into a seasoned tactician.
This intel briefing will arm players with the universal truths that govern every single map in Marvel Rivals. Forget dry lists of locations; this is a deep dive into official call-out systems, the most common and sneakiest rotation paths, the real mechanics behind forward spawns and those crucial respawn timers. Also covered are the rules of strategic demolition with destructible terrain and, of course, the prime spots for sending opponents flying to their doom with environmental kills. All this intel is fresh, incorporating the latest from Season 2.5, ensuring every strategy is cutting-edge.
The sheer number of maps and game modes available, from Convoy and Convergence to Domination and more, can feel like a lot to take in. However, by focusing on these universal fundamentals first, players build a powerful, transferable skillset. Instead of trying to memorize every nook and cranny of over ten maps individually, understanding core concepts—like how spawn points generally operate or the tactical uses of destructible cover—provides a solid foundation. This approach makes the diverse map pool far less daunting and significantly speeds up the learning curve, allowing players to adapt more quickly and effectively to any battlefield they drop into.
Universal Map Fundamentals
Mastering these core concepts is the key to unlocking a higher level of play on any map. These are the foundational principles that separate the contenders from the pretenders.
Spawn Smarts: More Than Just a Starting Line
A player's spawn point isn't merely their entry into the match; it's a dynamic strategic asset. Understanding its mechanics is fundamental for maintaining offensive pressure, orchestrating effective defenses, and regrouping efficiently after a lost fight.
Official Call-out Naming
The community and game design naturally lead to simple, effective call-outs. Basic, universally understood terms include "Point" for the current objective, "Main" for the most direct or largest path to that objective, "Left" and "Right" to denote flanking routes or enemy positions relative to the objective or team, and "Backline" to refer to the area where support characters typically position.
These simple terms allow for rapid information sharing. A call like "Magneto on Point, low HP!" or "Enemy Psylocke flanking Left, targeting our Luna!" can be the difference between a successful defense and a team wipe. As players become more familiar with specific maps, they will naturally add landmarks like "Bridge," "Tunnel," or "Statue" to their vocabulary, but mastering the basics is the first step. Consistently using clear call-outs, even if others aren't, can significantly influence a team's coordination.
To assist in this, here's a foundational vocabulary for map communication:
| Call-out | What it Means | Why It's Crucial | Example |
|---|---|---|---|
| "Point" | The main objective area. | Focuses team attention on the primary goal. | "Hulk on Point, need backup!" |
| "Main" | The most direct/largest path to the objective. | Indicates primary enemy approach or your team's push direction. | "Enemy team pushing Main hard!" |
| "Left/Right Flank" | Paths to the side of the main objective approach, relative to your team's view. | Warns of off-angle attacks or provides opportunities for flanks. | "Psylocke on Left Flank, watch out healers!" |
| "High Ground" | Elevated positions offering better sightlines and/or cover. | Key strategic positions to control or contest for map dominance. | "Punisher on High Ground, suppress him!" |
| "Backline" | Area behind your team's frontline, usually where support characters are. | Alerts to threats against vulnerable, high-value teammates. | "Enemy Black Panther diving Backline, protect Luna!" |
| "[Landmark]" | A distinct, easily identifiable map feature (e.g., "Statue," "Bridge," "Shop"). | Provides precise location information for enemies or objectives. | "Enemy Jeff at the Statue!" |
This standardized communication is vital. Without it, teams operate with incomplete information, leading to confusion, missed opportunities, and ultimately, losses. By providing this basic vocabulary, players are empowered to give and receive crucial information quickly and accurately. This directly translates to better team coordination, more effective target prioritization, and quicker threat assessment, all of which are cornerstones of successful team play and significantly increase the chances of winning engagements and controlling objectives.
Common Rotation Paths
Every map in Marvel Rivals is designed with a network of pathways: main arteries leading directly to objectives, chokepoints where combat naturally funnels, and alternative or flanking routes that offer strategic advantages. Understanding these "arteries" is like having a sixth sense for enemy movements. It allows players to anticipate pushes, set up devastating ambushes, or choose less-guarded paths for their own assaults. Knowing where the enemy is likely to emerge from is a massive advantage. For instance, on the Yggsgard: Yggdrasill Path map, being aware of the "side spawn door" (referred to as the Red Route in some guides) can help a team prepare for or execute a critical flank.
The existence of these multiple rotation paths means that a static defense focused solely on one approach is easily bypassed. Effective map control demands awareness and often presence across multiple angles of attack. Teams cannot simply camp on the objective and expect to win; they must control the routes leading to it. This reality elevates the importance of heroes with strong mobility (like Spider-Man or Iron Man) or scouting abilities, as they can more effectively monitor these pathways or rapidly shift positions to respond to threats from different directions.
Forward-Spawn Logic
In objective-based modes like Convoy and Convergence, successfully capturing an objective or reaching a designated checkpoint will often shift a team's spawn point closer to the next objective. This mechanic, known as "forward-spawning," is designed to maintain the game's tempo, reduce downtime after successful pushes, and reward teams for making progress.
This leads to a common strategic debate: the "Push Forward" meta. Many experienced players advocate for pushing past a recently captured objective to establish control over a forward chokepoint or secure tactically advantageous ground closer to the enemy's new, further-back spawn point. The goal is to delay the enemy's regrouping efforts, extend the time it takes for them to return to the fight, and thereby buy more time for the objective (like a convoy) to advance. After a successful team fight and objective capture, teams should assess if they can safely advance to the next logical chokepoint. This can stagger enemy respawns and create a significant momentum swing.
The key is to control strategically important ground that offers good defensive capabilities or sightlines, not just to chase kills indiscriminately.
A game-changing tip, especially for newer players, is the "Respawn Teleport Trick". If a player respawns in an old spawn zone after the objective has shifted and their team's designated spawn point has moved forward, they should not manually run the entire distance. By waiting in that old spawn area for a few moments, the game will often automatically teleport them to the new, correct forward spawn location. This can save 10-15 crucial seconds, which can be the difference between joining a fight in progress to turn the tide or arriving too late.
This forward spawn logic creates a dynamic game-within-a-game. It's a constant tug-of-war not just for the immediate objective, but for map control and positioning between objectives. The decision of how far to push after an objective capture is a critical strategic choice, balancing the potential reward of further delaying the enemy against the risk of overextending and losing that advantage. This makes a thorough understanding of map layouts, particularly identifying defensible forward positions and chokepoints, absolutely essential.
Respawn Timers
While the game doesn't display a precise universal base respawn timer for all situations, the underlying principle is fundamental to hero shooters: dying removes a player from the battlefield for a significant period. This downtime is a window of opportunity for the opposing team. Discussions and observations suggest that respawn times can vary, potentially increasing as a game progresses or under specific conditions, similar to mechanics in MOBAs. One player noted an enemy being dead as an example of a window to secure objectives. For characters like Hulk, the unique transformation sequence upon death and respawn (reverting to Bruce Banner, then transforming back to Hulk) can make his effective time off the field feel longer, which is a tactical consideration for both Hulk players and their opponents.
Effectively managing and exploiting respawn timers is a hallmark of advanced play. "Staggering" enemy deaths—killing them one by one so they respawn and return to the fight at different times—is a powerful tactic. A staggered enemy team struggles to mount a coordinated defense or attack, as they are constantly at a numbers disadvantage. When an enemy is eliminated, it's vital to communicate this ("Got their Hela! Push now, they're down one!"). This numbers advantage should be leveraged immediately to capture objectives, secure better map positioning, or push for more kills if the opportunity is right.
The increase in respawn times during Overtime significantly raises the stakes for each elimination. Survival becomes paramount, and securing a pick on an enemy player can create a massive swing in momentum, often deciding the outcome of the round. This dynamic means that heroes with high survivability or abilities capable of securing quick, decisive eliminations become even more valuable during these high-pressure Overtime phases. The respawn system is a core game mechanic that dictates tempo and heavily influences strategic decisions, especially around objectives.
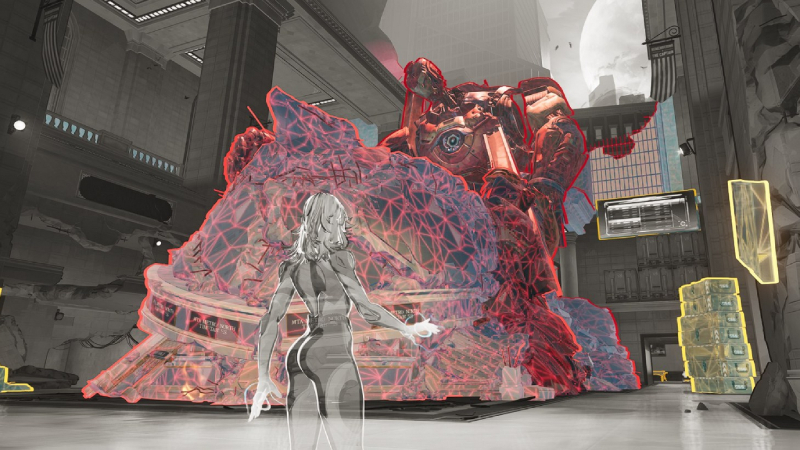
Destructive Art: Remodeling the Battlefield
One of Marvel Rivals' most visually exciting and strategically deep features is its destructible environments. Blowing holes in walls or obliterating cover isn't just for spectacle; it's a fundamental way to reshape the battlefield and gain a tactical edge.
Destructible Terrain Rules
The primary tool for identifying what can be shattered is Chrono Vision, typically activated by pressing the "B" key on PC. This action turns the map grey, while all destructible elements are highlighted in yellow, making them easy to spot. This simple mechanic opens up a world of strategic possibilities.
Strategic demolition can be used in several key ways:
- Creating New Paths and Flanks: This is perhaps the most impactful use. Breaking down specific walls can open entirely new routes to objectives or create unexpected angles to attack the enemy backline. A prime example cited is on the Tokyo 2099: Shin-Shibuya map, near the first objective, where a breakable wall can expose a common rotation path for the defending team, allowing attackers to intercept them.
- Removing Enemy Cover: If an enemy hero, like The Punisher, is entrenched behind a destructible barrier, a well-placed attack can strip away their protection, leaving them vulnerable.
- Opening New Sightlines: Similarly, destroying obstacles can provide ranged heroes with new lines of sight to critical areas or objectives, allowing them to exert pressure from unexpected positions.
- Reshaping Terrain for Advantage: Ultimately, players are actively altering the map's geometry to better suit their team's composition, strategy, or the current tactical situation.
The game even adds a layer of thematic detail with hero-specific destruction patterns. The way terrain crumbles can vary slightly depending on the hero and the ability used—Hulk's powerful punches will create different debris patterns than sustained gunfire from The Punisher, with rubble exhibiting "carefully crafted motion patterns that reinforce each hero's identity". From a technical standpoint, a "two-tiered fragmentation system" is used for static structures, meaning large pieces of rubble break into smaller ones, which helps manage game performance during large-scale destruction.
A crucial tip is to use Chrono Vision at the start of rounds or during lulls in combat to quickly scout for key destructible walls near chokepoints or objectives. Communicating intent with the team, such as "Let's break the left wall here to create a flank onto the point!" can lead to coordinated environmental manipulation.
| Destruction Tactic | Benefit | Quick Example (Map/Situation) |
|---|---|---|
| Open New Flank Route | Surprise the enemy, bypass heavily defended chokepoints. | Tokyo 2099: Shin-Shibuya – Break the wall left of the first point to attack defenders rotating back. |
| Remove Enemy Cover | Expose entrenched enemies, forcing them to reposition or be eliminated. | Any map – An enemy is using a destructible barrier for cover; destroy it. |
| Create New Sightline | Enable snipers or other ranged DPS to target key areas or enemies. | Destroy a pillar or other obstacle that is blocking a view towards the objective. |
| Deny/Alter Enemy Path (Less Common) | Deny a route by making the enemies using it more vulnerable to flanks or poking damage. | Destroying a wall on the enemy's way to the objective can make them less likely to use it. |
Understanding these tactical uses of destruction is vital. Players who see destructibles merely as eye-candy are missing a significant strategic layer. By linking the act of destruction to a specific gameplay advantage—creating a flank, exposing an enemy, opening a sightline—players can actively reshape the engagement to favor their team. This mastery of environmental manipulation can create openings and opportunities that simply wouldn't exist on a static map, elevating the importance of heroes with potent destructive capabilities and teams that communicate effectively about altering the terrain. The maps in Marvel Rivals are not fixed; they are dynamic battlegrounds waiting to be molded.
Recursive Destruction (Midtown Special)
Adding another layer to environmental interaction, Marvel Rivals introduced "Recursive Destruction," a mechanic notably present on the Midtown map as of Season 1. This feature is essentially the opposite of standard destruction: it allows players to rebuild certain destroyed structures.
These specific points are identifiable using Chrono Vision (B-key); instead of highlighting in yellow like standard destructibles, Recursive Destruction points appear in RED. A key condition is that these areas only become available for rebuilding after the convoy has reached a specific checkpoint in their vicinity. To trigger the rebuilding process, players simply need to attack the red-highlighted destroyed structure.
For example, on Midtown, if defenders are pushed back to a new defensive line after losing a checkpoint, they can check for red Recursive Destruction points. If available, shooting these points will rebuild the structures, potentially re-establishing crucial cover or altering the attackers' approach routes.
Recursive Destruction introduces a fascinating "counter-play" to the standard environmental destruction on maps where it's implemented. The battlefield can be altered, then reverted, adding another dimension to the strategic back-and-forth between teams. It creates a mini-game of demolition and reconstruction around pivotal areas, making control of these zones even more fiercely contested and requiring teams to be aware of not just what can be destroyed, but also what can be rebuilt.
Environmental Hazards: Using the Map as a Weapon
Sometimes, the most effective weapon isn't a hero's ability but the map itself. Many battlefields in Marvel Rivals are peppered with environmental hazards—ledges, pits, and other deadly features—that can lead to instant eliminations if an opponent is knocked into them.
Top Environmental Kill Spots
Recognizing and utilizing these hazards is a key skill. Specific maps offer prime opportunities:
- On Intergalactic Empire of Wakanda: Birnin T'Challa, particularly the Stellar Spaceport or Warrior Falls sub-maps, the open edges of the platforms are notorious for environmental kills. Abilities like Jeff the Land Shark's Ultimate or Invisible Woman's force push are highly effective here.
- Tokyo 2099: Spider-Islands features a pit of water in the middle zone, providing a convenient, watery grave for displaced enemies.
- The Super-Soldier Factory area of Hydra Charteris Base: Hell's Heaven contains a pit of lava, offering a fiery end for the unwary.
- On Yggsgard: Yggdrasill Path, the ledge along the second point's path is a well-known spot for securing knock-off kills with displacement abilities.
An environmental kill is often more valuable than a standard elimination because it's instantaneous, removes an enemy from the fight immediately, and can swiftly turn the tide of an engagement without expending ultimate abilities. To spot these opportunities, players should look for obvious cliffs or open edges lacking railings, deep pits (filled with water, lava, or just bottomless voids) near common engagement zones, and, less commonly, breakable floors that might give way to a lethal drop.
Certain heroes excel at creating these "oops!" moments due to their knockback or displacement abilities. Key heroes to consider for this playstyle include Hulk (various attacks), Invisible Woman (Force Push), Jeff the Land Shark (Ultimate), Spider-Man, and Emma Frost (multiple abilities in her Diamond form and her ultimate).
When piloting a hero with such abilities, players should constantly be aware of their surroundings, positioning themselves so that their knockbacks can send an enemy careening towards a nearby hazard. Conversely, when facing these heroes, maintaining awareness of one's own positioning relative to the map edges is crucial to avoid becoming an easy environmental kill.
| Hazard Type | How to Spot It | Prime Locations (Examples) | Best Hero Abilities to Use |
|---|---|---|---|
| Open Ledges/Cliffs | No railings, sheer drops near objectives or chokepoints. | Birnin T'Challa: Stellar Spaceport edges. Yggdrasill Path: 2nd point path ledge. | Hulk's attacks, Invisible Woman's Force Push, Jeff the Land Shark's Ultimate, Spider-Man's kit. |
| Pits (Lava, Water, Bottomless) | Obvious holes in the ground, often in central areas or along paths. | Tokyo 2099: Spider-Islands: Zone 2 water pit. Hydra Charteris Base: Hell's Heaven (Super-Soldier Factory) lava pit. | Same as above; any strong displacement ability. |
| Destructible Floors (Rare) | Floors that can be broken away to reveal a significant, often lethal, drop. | (General concept; less common for direct kill-drops via destruction, more often creates new paths. Specific map examples are less prevalent in sources). | Abilities that cause large area-of-effect destruction. |
This table highlights that map awareness extends beyond just sightlines and cover; it includes understanding the offensive and defensive implications of proximity to environmental hazards. Successfully utilizing these hazards can swing team fights, conserve more valuable ultimate abilities (as a regular ability might suffice for the kill), and create memorable, game-changing plays. This adds another layer of skill to gameplay, rewarding creative positioning and ability usage. Heroes with reliable displacement abilities become particularly potent on maps where these hazards are plentiful and strategically located near common points of conflict.
Season 2.5 Map Intel
The battlefields of Marvel Rivals are constantly evolving, and staying ahead means keeping up with the latest intelligence. Season 2.5 brought significant updates, including a brand-new map and various refinements.
New Map Briefing: Hellfire Gala: Arakko (Convoy)
Season 2.5 ushered in a new theater of war: the Hellfire Gala: Arakko map. Lore-wise, this map depicts Arakko, the sister island to Krakoa, which has been tragically transformed by Ultron into a cold, mechanical world after he stole Cerebro and evolved into the formidable X-Tron. Heroes must now join forces with Krakoa to liberate Arakko from Ultron's metallic grip.
Arakko is a Convoy mode map. The attacking team's objective is to escort the "Avatar of Krakoa" (the payload) through two designated checkpoints, ultimately reaching the final destination at the "Great Ring." As is standard for Convoy, the payload moves faster when more attacking players are nearby. The defending team's goal is to halt this progress, as they can recapture the Avatar of Krakoa to move it backward, though it cannot regress past already secured checkpoints.
Several map-specific achievements offer clues to potential hotspots and key features on Arakko:
- "Robot Wailing Wall": This is a significant landmark where players can shatter robots to earn the "Whispers in Pieces" achievement. It's noted as being easier for defenders to locate and, for attackers, it appears after the second checkpoint. This suggests it could be a crucial defensive position or a heavily contested area in the map's later stages.
- Vegetation Restoration: A visual cue of progress for the attacking team is the restoration of vegetation on the mechanical surface each time a checkpoint is reached, tied to the "Digital Ecosystem" achievement.
Players can access Arakko through the Practice vs AI queue, perfect for learning its intricacies, as well as through the standard matchmaking rotation. Given its novelty, players should expect a period where strategies are still being discovered. Paying close attention to sightlines around the Robot Wailing Wall and the chokepoints leading to the Great Ring will be crucial for early success. The introduction of any new map invariably influences team compositions and strategies as the community collectively learns its optimal routes and engagement points. The "Robot Wailing Wall," being specifically highlighted and linked to an achievement, is likely to become a focal point for engagements, especially as attackers push towards the final objectives.
General Map & Mode Fixes
Beyond the new map, the Season 2.5 patch notes also detailed several general improvements and fixes across various maps and modes. These included:
- Resolution of various terrain issues that could cause characters to get stuck or clip into unintended areas.
- Fixes for broken collision problems and instances of floating objects.
- Addressing multiple map-related sound effect glitches.
These are primarily quality-of-life enhancements. While not direct strategic changes, they contribute to a smoother and more reliable gameplay experience. Fewer bugs mean less frustration from getting caught on map geometry or having a critical sound cue fail to play. A more stable and predictable game environment allows strategies to unfold more consistently, with outcomes determined by skill rather than glitches. If players previously avoided certain map spots due to known bugs, it's worth re-exploring them, as these issues may now be resolved. The ongoing commitment from the developers to refine the playability of existing maps is a positive sign for the game's long-term health, ensuring that player skill and strategic execution, rather than map-based anomalies, are the primary determinants of success.
Pro Secrets Decoded
Observing high-tier gameplay is more than just watching impressive mechanical skill; it's an opportunity to deconstruct the flawless execution of fundamental principles. Analysis of professional player VODs and coaching insights reveals universal truths applicable to all players seeking to improve.
Positioning is Paramount
A consistent observation from high-level play is the meticulous attention to positioning. Top players are constantly adjusting their location based on the objective's status, known enemy positions, their own and enemy ability cooldowns, and the availability of cover or high ground. They are rarely caught standing still in exposed areas. Effective positioning minimizes risk while maximizing impact. It translates to taking less avoidable damage, securing better sightlines for offense or support, and being optimally placed to assist teammates or contest objectives. Players should cultivate the habit of constantly asking: "Why am I standing here? Is there a safer, more impactful position available?" This continuous evaluation relative to teammates, opponents, and the current objective is key.
Cooldown Management & Tracking
Professional players exhibit a strong internal clock for their own abilities and a keen awareness of when opponents have likely expended crucial cooldowns, especially ultimate abilities. Knowing that one's own escape mechanism or primary damage/healing ability is ready before committing to an engagement, or recognizing that an enemy Hela has just used her ultimate and is temporarily less threatening, creates critical windows of opportunity. As a starting point, players should focus on managing their own key cooldowns. Before engaging, a quick mental check to ensure vital abilities are available is essential. With experience, this awareness can extend to tracking major enemy ultimates, allowing for more informed decision-making about when to be aggressive or defensive.
Map Awareness & Objective Focus
Top-tier players seldom lose sight of the overarching game state and the primary objective. They demonstrate a clear understanding of when to push an advantage, when to establish a defense, when to stall for time, and when it's necessary to regroup. Their rotations are not random; they are purposeful and dictated by the needs of the objective. While securing eliminations is important, objectives win matches. A common mistake at lower ranks is "tunnel visioning" on kills while the enemy team freely captures the point or pushes the payload. Players should make a habit of regularly glancing at the objective timer, progress bar, and the kill feed. Decisions should be based on the overall strategic situation, not solely on the immediate skirmish.
The gameplay of professionals underscores that mastery of these fundamentals—positioning, cooldown management, and objective awareness—is more critical for consistent success than raw mechanical skill alone. These elements are deeply interwoven with comprehensive map knowledge. Effective positioning is impossible without understanding map layouts, cover options, and sightlines. Cooldown management dictates when and where fights can be taken or utility can be deployed effectively on the map. Objective focus is inherently tied to the map's objectives and the strategic routes required to control them. Therefore, aspiring players should study not just what pros do, but how they use the map itself to enable these fundamental aspects of high-level play.
Pre-Flight Checklist: Mastering Any Map
Before deploying into any engagement, whether on a familiar battlefield or a brand-new one, running through a quick mental checklist can provide a significant edge. This promotes active learning and strategic thinking from the very outset of a match.
- What's the Game Mode? (Convoy, Domination, Convergence, etc.) This immediately defines the primary win condition and influences overall strategy.
- Identify Main Chokes & Flanks: Where are fights likely to concentrate? What are the less obvious routes for surprise attacks or rotations?
- Spot Key High Grounds: Which heroes or roles benefit most from controlling these elevated positions? How can they be contested or denied to the enemy?
- Locate Health Packs: Knowing the placement of health packs is crucial for sustaining during prolonged fights or when retreating.
- Scan for Destructibles: Which walls or pieces of cover look like they can be strategically removed or altered?
- Look for Environmental Hazards: Are there any nearby ledges, pits, or other map features that could be used for environmental kills?
- Communicate Your Initial Plan/Observations! Even a simple "Let's try the left flank this first push" or "Watch out for a sniper on that high ground" is vastly better than silence.
This systematic approach to analyzing a map, even if performed rapidly, allows players to move from reactive gameplay to proactive, strategic engagement. It helps in making better initial positioning choices, planning routes more effectively, and anticipating likely enemy actions, giving a crucial advantage over teams that simply run in without a plan.
Go Get 'Em, Tiger!
With this intel, any player is now equipped with the core principles of map mastery in Marvel Rivals. This knowledge is a powerful weapon, but it's not static. The game is a living entity—it evolves, new strategies emerge, and personal understanding will deepen with every match played.
The key is to take these fundamentals—spawn smarts, the art of strategic destruction, environmental awareness, and the focused thinking of top-tier players—and actively apply them. Experiment with different routes, communicate plans and observations with the team, and don't be afraid to try unconventional approaches. The battlefield is a canvas, and these principles are the brushstrokes. Now, it's time to go out there and paint a masterpiece of victory!