
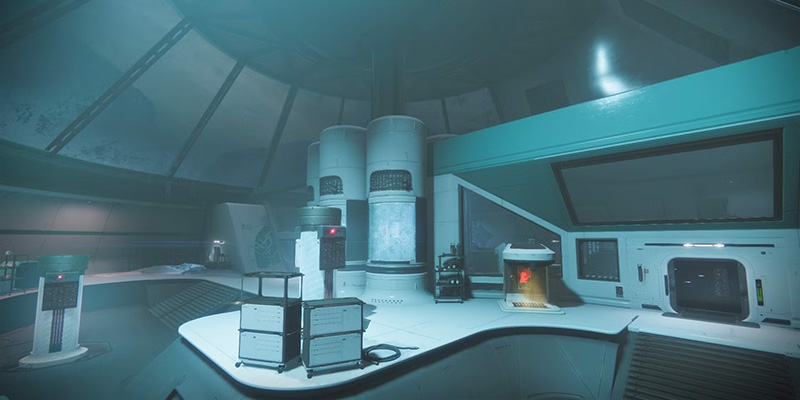
Guardians are called to Europa, the frozen moon of Jupiter, for a critical mission: infiltrating the Deep Stone Crypt. This facility, a relic of humanity's Golden Age, holds the secrets to the creation of the Exo race and harbors dangers both old and new. This guide serves as the tactical playbook for navigating the Crypt's defenses, confronting its guardians, and securing its volatile technology. Success demands coordination, firepower, and a clear understanding of the unique mechanics employed within this Braytech installation.
The Deep Stone Crypt is inextricably linked to the ambitions and controversial legacy of Clovis Bray I, founder of the Braytech corporation during the Golden Age. Driven by a desire for immortality, Bray established this facility on Europa, far from prying eyes, to perfect the process of transferring human consciousness into Exo bodies.
Bray's research led him to discover a Darkness artifact he named "Clarity Control" deep beneath Europa's ice. By utilizing Vex radiolaria exposed to this artifact, he created Alkahest, a substance key to stabilizing Exominds and overcoming Dissociative Exomind Rejection (DER).
Centuries later, the Fallen House of Salvation, under the command of Eramis, sought to exploit the Crypt's secrets. Eramis dispatched her lieutenant, Atraks-1 – the first known Fallen to undergo the Exo transformation – to secure the facility. The immediate threat Guardians face is stopping Atraks-1 and the newly revived Taniks from unleashing the Crypt's power and preventing the activation of Clovis Bray's catastrophic failsafe: the Morning Star orbital nuclear bombardment platform.
Armory Check: Gear, Loadouts, and Augments
Proper preparation is paramount for success within the Deep Stone Crypt. While power level advantages are less critical now than at the raid's launch, appropriate gear, synergistic loadouts, and a thorough understanding of the Augment system are essential.
Recommended Power Levels & Gear
The Deep Stone Crypt originally launched with a recommended Power Level of 1230 for initial encounters, rising to 1250 for the final confrontation. Currently, while there isn't a strict power level requirement preventing entry, having higher Resilience for damage reduction and well-rolled, Masterworked armor is highly beneficial. Masterworked armor provides additional stat points and allows for the use of more armor mods, enhancing survivability and ability uptime. Arc Resistance mods are particularly useful due to the prevalence of Arc damage from Fallen enemies and certain boss attacks.
Class & Subclass Recommendations
While flexibility is encouraged, certain subclasses provide significant advantages:
Code of the Protector (Top Tree Sentinel) offers Ward of Dawn (Bubble), providing both protection and the crucial Weapons of Light damage buff, invaluable during DPS phases. Code of the Siegebreaker (Top Tree Sunbreaker) serves as a strong backup DPS option with Hammer of Sol, particularly for the final encounter if burst damage is needed. Stasis (Behemoth) offers utility, especially in add control and potentially bypassing mechanics in low-guardian scenarios.
Attunement of Grace (Well of Radiance) is arguably the most sought-after support super, providing substantial healing and a damage buff vital for most encounters. Attunement of Chaos (Bottom Tree Voidwalker) with Nova Bomb offers high burst damage for bosses. Attunement of Control (Middle Tree Stormcaller) with Geomag Stabilizers can also provide significant DPS. Stasis (Shadebinder) excels at controlling large groups of enemies.
Way of the Sharpshooter (Bottom Tree Gunslinger) combined with the Celestial Nighthawk Exotic helmet delivers massive precision burst damage, ideal for boss phases. Way of the Pathfinder (Bottom Tree Nightstalker) provides excellent utility through invisibility for revives or repositioning, and Shadowshot (Tether) for debuffing enemies and generating Orbs of Power.
Key Weapon Archetypes & Exotics
Loadouts should be adaptable based on the encounter and assigned role.
Weapons effective against numerous weaker enemies are crucial. Submachine Guns (Riskrunner for Arc damage, IKELOS_SMG for Warmind Cells) and Auto Rifles (Gnawing Hunger) are strong choices. Builds utilizing Warmind Cells can significantly speed up add clear in encounters like Security and Descent. Overload Rounds are necessary for Overload Captains present in the Crypt Security and Nuclear Descent encounters; ensure appropriate weapons or mods are equipped. Void shields are the only elemental shield type present.
- Crypt Security: Xenophage is highly effective for destroying the fuses quickly and safely from a distance. Shotguns or Sniper Rifles are useful for dealing with the Sentinel Servitors.
- Atraks-1: Swords are the premier choice for burst damage against the Atraks-1 clones. The Lament is the top recommendation due to its healing and shield-piercing capabilities. Falling Guillotine is a solid Legendary alternative. Sniper Rifles help deal with distant Servitors and Shanks. The raid Exotic, Eyes of Tomorrow, is exceptionally potent in this encounter, capable of destroying clones very rapidly.
- Nuclear Descent (Taniks, Reborn): Primarily an add clear and mechanics encounter. Swords (Lament, Falling Guillotine) are useful for dealing with tough Fallen Captains. Warmind Cell builds remain effective.
- Taniks, The Abomination: The meta strategy involves Slug Shotguns (such as Heritage, First In, Last Out, or Bonechiller) paired with Anarchy for sustained damage during the DPS phase. Divinity is extremely valuable, providing a large, easy-to-hit critical spot and a debuff. Xenophage serves as a reliable alternative if Divinity or Anarchy/Slugs are unavailable. Tractor Cannon is used in some specialized low-guardian strategies for its debuff. Cloudstrike was previously a strong option but was adjusted and is less effective now.
Deep Dive: The Augment System
The Deep Stone Crypt's encounters are built around a system of three unique buffs, known as Augments. Mastering their functions and transfer is key to victory. These roles force communication and coordination within the fireteam.
| Augment Name | Icon Color / Shape | Primary Function | Key Encounters Used | Acquisition Method |
|---|---|---|---|---|
| Operator | Red / Spiky Hat Person | Shoot red interactables (panels, keypads, debuffs, bubbles) to activate/deactivate systems or free players | All Encounters | Terminal (Security Start) or Operator Vandal |
| Scanner | Yellow / Vase Shape | See hidden information (glowing panels, correct boss clone, correct deposit bins) and communicate it | All Encounters | Hacker Vandal |
| Suppressor | Blue / 8-bit Eye | Stand under drones and shoot Taniks to stun him, enabling core deposits | Taniks Reborn, Taniks Abom. | Suppressor Vandal |
Operator (Red Icon): The Operator interacts with specific Braytech systems, usually by shooting red-glowing panels or objects. Their duties include: opening doors and shooting basement panels in Crypt Security; managing elevator pods, resetting the Replication debuff timer, and opening airlocks in Atraks-1; controlling nuclear core spawns in Taniks, Reborn; and freeing teammates from Taniks's detainment bubbles in the final fight.
Scanner (Yellow Icon): The Scanner perceives hidden information crucial for mechanics. They identify: the correct panels to shoot in the Crypt Security basement; the correct fuse to destroy in Crypt Security; the single vulnerable Atraks-1 replicant among decoys; and the correct bins for depositing nuclear cores during both Taniks encounters. The Scanner relays this information to the Operator or core runners.
Suppressor (Blue Icon): This role is active only in the third and fourth encounters (Taniks, Reborn and Taniks, The Abomination). The Suppressor stuns Taniks, which is necessary to allow teammates to deposit nuclear cores. To perform the stun, the Suppressor must stand underneath one of three specific floating security drones while Taniks is nearby and glowing blue, then shoot him. This must be repeated under three different drones per cycle.
Augmentation Terminals: These white, glowing stations are found throughout the raid. A player holding an Augment can interact with an empty terminal to deposit it. Any other player (without an Augment) can then approach any terminal in that encounter area to retrieve the deposited Augment. A terminal can only hold one Augment at a time, and players cannot directly swap buffs at a terminal; it must be empty before depositing. In certain encounters (Security, Atraks-1), Sentinel Servitors will spawn and disable nearby terminals until they are destroyed. Additionally, in the Taniks encounters, completing certain mechanic steps (like depositing cores) will randomly disable one player's active Augment, indicated by a "Deactivated Augment" debuff. This forces the player to deposit the deactivated buff and have another teammate pick it up, necessitating role swaps.
Infiltration Route: Europa Approach (Sparrow Run)
- Objective: Navigate the treacherous Europan blizzard from the landing zone to the entrance of the Deep Stone Crypt facility.
- Difficulty Rating: Low (Navigation/Environmental Hazard)
The raid begins exposed on Europa's surface during a severe snowstorm. The primary mechanic here is survival against the elements.
Mechanics
- Frostbite: While outside the protective heat bubbles, Guardians accumulate stacks of the Frostbite debuff. Reaching 10 stacks results in immediate death. This environmental hazard forces constant forward momentum. Think of it like holding your breath underwater – linger too long, and it's lights out.
- Heat Bubbles: Scattered along the path are red-glowing domes providing "Shelter from the Storm". Entering a bubble rapidly removes Frostbite stacks and provides temporary safety. These bubbles often contain Fallen enemies that must be cleared before the bubble is truly safe. The design inspiration for this mechanic came from sections of The Legend of Zelda: Ocarina of Time.
Path & Tips
Guardians must use their Sparrows, or the Pikes provided near the start, to race from one heat bubble to the next before Frostbite reaches lethal levels. The path generally trends leftward from the starting point. Following visual cues like distant lights or Fallen structures can help guide the way through the low visibility.
A common strategy for teams struggling with navigation or survival is to designate one player as a scout. This player races ahead to locate the next bubble. If they perish due to Frostbite or enemies, their Ghost marker appears at the last safe bubble they visited, allowing the fireteam to revive them quickly without losing significant ground.
The final heat bubble before the Crypt entrance is heavily defended by Fallen Brigs and Dark Council Guards, requiring a coordinated fight to clear the path forward.
Hidden Chest 1 Location
The first of the raid's two hidden chests is located within this opening Sparrow section. While the exact path can vary slightly depending on approach, it typically involves deviating from the main bubble-to-bubble route after the fifth heat bubble. Players should look for a specific cliff edge or a less obvious snowy path leading away from the direct route towards the final bubble. Following this hidden path leads to the chest. This chest can be acquired solo, making it a popular target for players seeking Spoils of Conquest or raid mods without a full fireteam.
- Loot: This chest drops raid-specific mods, Spoils of Conquest (originally 10 per character per week, though Spoils may have been removed from chests later), and any Deep Stone Crypt armor or weapons the player has previously obtained from completing encounters.
Encounter 1: Crypt Security
- Objective: Breach the initial security layer of the Deep Stone Crypt by destroying six protected fuses in a specific sequence.
- Difficulty Rating: Medium-Low (First major mechanical check).
Upon entering the "Restricted" area, the fireteam finds itself in a large chamber divided into two main sections, often called "Light" (brighter, white lighting) and "Dark" (dimmer lighting), separated by a central structure housing the six target fuses (three visible per side). Beneath this main floor lies a basement level containing ten crucial control panels (five under Light, five under Dark), visible through glass sections in the floor above. Augmentation Terminals are located in the Light room, the Dark room, and the Basement.
Roles and Initial Setup
The standard strategy involves splitting the six-Guardian fireteam into two teams of three: one for the Light side, one for the Dark side. Key roles must be assigned:
- Operator (1): Typically starts on the Light side. This player will be responsible for entering the basement and shooting panels.
- Scanners (2): One designated Scanner for the Light side and one for the Dark side. They identify panels and, later, fuses.
- Ad Clear / DPS (3): These players focus on eliminating spawning Fallen enemies (including Overload Champions) and Sentinel Servitors, and later damaging the fuses.
Establish clear callouts for the ten basement panels before starting. Numbering them (e.g., L1-L5 for Light side, D1-D5 for Dark side, relative to basement entrance) is common and effective.
Walkthrough: Panel Phase
- Initiation: The Operator picks up the red Operator Augment from a terminal (usually Light side). This starts the encounter and locks the doors between the rooms and the basement. The Operator should wait before entering the basement.
- Scanner Acquisition: A Hacker Vandal, marked with a yellow aura, spawns (often on the Dark side first). The designated Scanner on that side defeats it and picks up the yellow Scanner Augment.
- Panel Identification (Side 1): The Scanner looks through the glass floor panels near the room's pillars to view the basement below. They must identify the two control panels on their side glowing yellow and communicate their locations (using the agreed-upon callouts) to the Operator. Think of it like playing Battleship – calling coordinates for the Operator to hit.
- Buff Transfer: The Scanner deposits the Scanner Augment into the terminal in their room. Crucially, Sentinel Servitors will spawn periodically and disable the terminals. These must be killed quickly by the Ad Clear players to allow buff transfer.
- Panel Identification (Side 2): The Scanner on the other side picks up the Scanner Augment from their terminal. They repeat step 3, identifying and calling out the two glowing panels on their side.
- Operator Action: Once all four panel locations are confirmed, the Operator shoots the red panel next to the basement door to open it and descends. They then shoot the four called-out panels. The Operator has approximately one minute inside the basement before the floor ignites, killing them. Shooting an incorrect panel also triggers this deadly "cooker". Waiting until all four calls are ready minimizes time spent in the basement.
Walkthrough: Fuse Phase
- Role Swap: Once the four panels are correctly shot, the damage phase on the fuses begins. A role swap is required: 1. The Operator returns to the basement entrance and deposits the red Operator Augment into the Basement terminal. 2. An upstairs player (usually an Ad Clearer) picks up the Operator Augment from a top-floor terminal. 3. The player currently holding the yellow Scanner Augment deposits it into a top-floor terminal. 4. The original Operator (now without a buff, waiting in the basement) picks up the yellow Scanner Augment from the Basement terminal.
- Fuse Identification: The player in the basement now holding the Scanner Augment looks at the display on the central pillar near the terminal. This display shows miniature versions of the six large fuses upstairs. One of these mini-fuses will be glowing yellow.
- Callout and Damage: The Basement Scanner calls out the location of the glowing mini-fuse (e.g., "Dark Left," "Light Middle," "Dark 1," "Light 3," using agreed terms). The upstairs team focuses fire on the corresponding large fuse until it shatters. Xenophage is highly effective for destroying fuses quickly. Shooting the wrong fuse results in a wipe.
- Repeat: The Basement Scanner identifies the next glowing mini-fuse, calls it out, and the upstairs team destroys it. This repeats until all six fuses are destroyed. If the damage phase ends before all fuses are broken (shields regenerate), the buffs must be swapped back (Basement Scanner deposits Yellow, upstairs Operator deposits Red) to repeat the Panel Phase.
| Phase | Role | Primary Task | Key Actions |
|---|---|---|---|
| Panel | Operator | Shoot correct basement panels | Wait for calls, enter basement, shoot 4 panels within time limit, deposit buff |
| Panel | Scanner | Identify & call out glowing basement panels | Pick up buff, look through floor glass, call out 2 panels, deposit buff |
| Panel | Ad Clear | Kill Fallen, prioritize Sentinel Servitors | Prevent terminal lockdown, protect Scanner/Operator |
| Fuse | Operator | (Held by former Ad Clearer) Provide support/DPS | Damage correct fuse, potentially use Super for buff/safety |
| Fuse | Scanner | (Held by original Operator in Basement) Identify & call out glowing fuse | Pick up buff, watch mini-fuse display, make clear callouts |
| Fuse | Ad Clear | Damage correct fuse | Focus fire on called-out fuse |
Challenges
- Red Rover: This weekly challenge mandates that all six Guardians act as the Operator and shoot at least two panels each before the encounter ends. This requires completing the encounter over three full phases and necessitates a strict rotation plan for the Operator augment. Failure occurs if anyone takes the Operator buff twice, dies as Operator, shoots more than two panels, or if the fireteam size is less than six. This challenge tests the entire team's understanding of the Operator role and panel locations, shifting focus from efficiency to forced participation.
- Resource Contention: Complete the encounter using only two of the three available Augmentation Terminals (Light, Dark, Basement). This restricts buff passing options and requires careful planning of the transfer route between Scanners and the Operator swap.
For teams finding the coordination challenging, a simplified strategy involves having only one designated Scanner for the Panel Phase. This player picks up the buff, identifies both panels on their side, passes the buff, and the second Scanner identifies both panels on their side. The Operator then goes down and shoots all four. This reduces the number of buff passes but increases the time the Operator might need to wait or spend in the basement. Regardless of strategy, clear, consistent, and pre-agreed callouts for panels and fuses are paramount to avoid confusion. Non-role players should prioritize eliminating Sentinel Servitors and Overload Champions swiftly.
Encounter 2: Atraks-1, Fallen Exo
- Objective: Defeat Atraks-1, the first Fallen Exo, by destroying her numerous replicants across two arenas while managing a lethal debuff.
- Difficulty Rating: High (Often considered the most challenging encounter, especially for less experienced teams).
This encounter represents a significant step up in complexity and execution requirement, demanding precise timing, rapid damage, and flawless debuff management across split teams.
Layout
The battle spans two distinct locations connected by four space elevator pods located at the back of the initial room:
- Ground Floor (Europa Bunker): The starting area, featuring multiple levels and cover points where four Atraks-1 replicants can appear. Contains augment terminals.
- Space Station (Orbital Platform): A larger, more open area above Europa where another four Atraks-1 replicants appear. Contains augment terminals and four crucial airlock chambers used for debuff cleansing.

Roles and Initial Setup
Divide the fireteam into two teams of three: Ground Team and Space Team.
- Operator (1): Starts on the Ground floor. They acquire the Operator Vandal's buff, then immediately take a pod to the Space Station and remain there.
- Scanner (1 per team, initially Space): The Space team acquires the Scanner buff first as the initial damage phase always starts there. The buff is passed between teams.
- DPS / Replication Carriers (Remaining 4): Focus on damaging Atraks clones and managing the Replication debuff.
Walkthrough: Encounter Flow
- Start & Augment Acquisition: Approach the purple orb near the pods to begin. Fallen adds spawn in both arenas. An Operator Vandal appears on the Ground floor, and a Scanner Vandal appears in the Space Station. The designated Operator grabs their buff and ascends to Space. The Space Scanner grabs their buff. The Operator should shoot the pod control panels to send them back down for the Ground team's use later.
- Servitor Phase: Waves of adds, including Wretches and Shanks, spawn. Eventually, six Sentinel Servitors appear (three Ground, three Space). These disable augment terminals. All six must be destroyed to trigger Atraks-1's wipe mechanic, "Extinction Protocol".
Pro Tip
Experienced teams often leave one Servitor alive until everyone is positioned for optimal damage, then kill it to start the phase controllably.
- Damage Phase (Space First): Once Extinction Protocol begins, the eight Atraks-1 replicants start casting a wipe. The Space Scanner must quickly identify the one replicant glowing bright yellow and call out its location (e.g., "Space Left," "Space Back Middle"). The Space team converges and deals maximum burst damage (Swords like The Lament are ideal). Continue damaging even after the clone visually disappears, as damage can still register briefly.
- Replication Debuff Spawns (Space): Successfully damaging the correct clone prevents the wipe and causes the clone to vanish, leaving behind a volatile purple orb – the Atraks-1 Replication. A player without the Operator augment must immediately walk over this orb to pick it up. This grants the "Replication" debuff with a 40-45 second timer. If this timer expires, the carrier dies, a new Atraks clone spawns, and the fireteam wipes.
- Augment Pass (Space -> Ground): Immediately after the Space damage phase, the Space Scanner deposits the yellow Scanner Augment into a terminal.
- Damage Phase (Ground): The Ground Scanner picks up the Scanner Augment from their terminal. They identify the glowing yellow Atraks-1 clone on the Ground floor and call its location. The Ground team bursts it down.
- Replication Debuff Spawns (Ground): This clone also drops a Replication orb. A Ground team member (not the Scanner) picks it up. This player must now take an elevator pod up to the Space Station to have their debuff cleansed.
- Augment Pass (Ground -> Space): The Ground Scanner deposits the Scanner Augment back into a terminal for the Space team to retrieve.
- Repeat Cycle & Debuff Management: This cycle (Space DPS -> Pass Scanner -> Ground DPS -> Pass Scanner -> Debuff Management) repeats. The Operator, stationed in the Space Station, is responsible for managing all active Replication debuffs (potentially up to four at once near the end of a cycle): - Timer Reset: If a player with the Replication debuff is running low on time (e.g., below 15 seconds) or cannot reach an airlock, the Operator can shoot the glowing orb above the player's head. This drops the orb to the ground, refreshing its timer when the player picks it back up. This is crucial for preventing wipes due to expired timers. Players should communicate their timer status clearly (e.g., "Replication at 10!"). A designated "refresh spot" near the Operator can streamline this process. - Airlock Ejection: To permanently remove the debuff, the Operator must coordinate with debuffed players. The Operator identifies an available airlock (keypad next to it will be glowing red) and shoots the panel to open the door. The player(s) with the Replication debuff step inside the airlock. The Operator then shoots the glowing orb off the player(s) head(s) while they are inside. The orb gets ejected into space, and the player must quickly exit the airlock before it closes. Airlocks have a cooldown; the same airlock cannot be used twice in the same cycle, but two players can use the same airlock simultaneously for purging. Typically, four Replication orbs need to be ejected per full damage cycle.
Walkthrough: Final Stand
- Trigger: Occurs when Atraks-1's overall health bar reaches the final segment (around 20%).
- Relocate: All six Guardians must immediately ascend to the Space Station. Ensure the Operator has sent pods down.
- Rapid DPS: Multiple Atraks-1 clones (potentially all eight) appear and begin the wipe mechanic simultaneously. The Scanner identifies the glowing clone(s) in sequence. The entire fireteam must rapidly burst down each identified clone until Atraks-1's health is fully depleted. Replication orbs still drop, but the primary focus is dealing enough damage to end the fight quickly. If timers become critical, the Operator can still attempt to cleanse players in airlocks.
| Role | Primary Task | Key Actions |
|---|---|---|
| Operator | Manage Replication debuffs, control pods & airlocks | Stay in Space, shoot players to reset debuff timer, shoot airlock panels, shoot players inside airlocks to eject debuff, send pods down |
| Scanner | Identify & call out glowing Atraks-1 clone | Pick up buff, locate correct clone during wipe mechanic, call location clearly, deposit buff for transfer |
| Carrier | Pick up Replication orb, manage timer, get cleansed | Grab orb after clone kill, communicate timer status, go to Operator for reset or airlock, enter airlock when opened |
| DPS | Damage correct Atraks-1 clone, clear adds | Focus fire on called-out clone, kill Servitors and other adds |
Challenges
- Copies of Copies: Complete the encounter without ejecting any Replication orbs via the airlocks. This forces the Operator to continuously refresh the debuff timers for all carriers throughout the entire fight. Successfully one-phasing the boss (killing Atraks before needing a second cycle of Servitors/damage) is the most common strategy, as juggling multiple debuffs for extended periods is extremely difficult. This challenge fundamentally alters the core safety mechanic, demanding exceptional Operator performance and team coordination.
- 5 Seconds to Paradise: Destroy all six Sentinel Servitors within five seconds of each other. This requires the fireteam to weaken all Servitors across both arenas and then execute a coordinated final blow on all of them nearly simultaneously.
Atraks-1 is mechanically intensive and punishes mistakes severely, making it the raid's primary difficulty gate. For newer teams:
- Prioritize clear, concise communication, especially from the Scanner and Replication carriers about timers.
- Focus on maximizing burst damage during the short DPS windows (use Swords, Supers) to potentially reduce the number of cycles needed. The "one-phase" strategy, while advanced, simplifies debuff management if successful.
- Assign fixed roles and ensure the Operator is comfortable and attentive. Practice the timer reset and airlock procedures.
- Ensure efficient add clear to prevent being overwhelmed, especially protecting the Scanner and Operator.
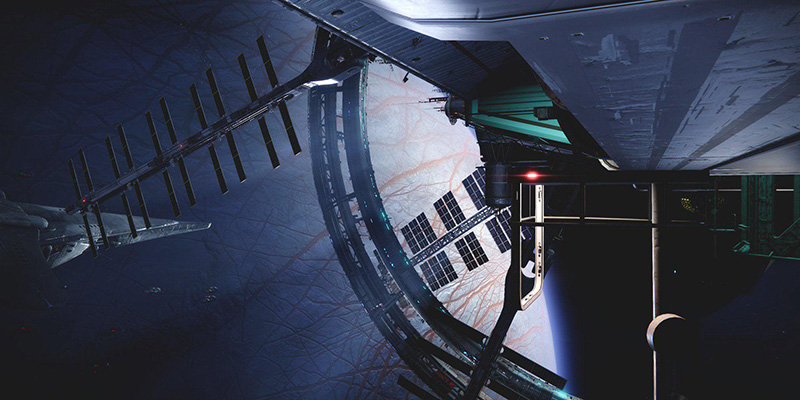
Traversal: Morning Star Debris (Space Walk)
- Objective: Traverse the damaged exterior of the Morning Star space station to reach the next section of the raid.
- Difficulty Rating: Low (Platforming/Traversal)
Following the intense battle with Atraks-1, this section offers a change of pace, focusing on navigation and platforming across the wreckage orbiting Europa. It's renowned for its stunning visuals and sense of scale.
Jumping Puzzle Guide & Hazards
Guardians must make their way across a series of disconnected platforms, damaged station segments, pipes, and occasionally hazardous moving components like spinning fans or blades. The primary hazard is falling into the void of space. Some sections require precise jumps and awareness of momentum.
Key points along the path include:
- An initial section where taking a lower path might be safer than balancing on narrow beams.
- Navigating around or through large spinning fan blades.
- Towards the end, before the final ascent, a Fallen Ketch will arrive and deploy Shanks onto the platforms. These must be cleared, and caution is advised as the Ketch itself can deal significant damage. Using cover like Rifts or Barricades, or Hunter invisibility, is recommended here.
While often referred to as a jumping puzzle, it's more accurately described as a traversal section, emphasizing movement and environmental navigation over complex puzzle-solving.
Hidden Chest 2 Location
The second hidden chest of the raid is located within this space walk section. Finding it requires deviating from the main path, typically by looking down and dropping onto hidden platforms or ledges below the primary route. One common location described is on a metal platform underneath the main path, often discoverable after navigating the second set of spinning blades or just before the final area with the Brigs. Keen observation and a willingness to explore vertically off the beaten path are required.
- Loot: Similar to the first chest, this drops raid-specific mods, Spoils of Conquest (subject to potential changes since launch), and previously acquired Deep Stone Crypt gear. Collecting both hidden chests contributes to the "Cryptkeeper" Triumph.
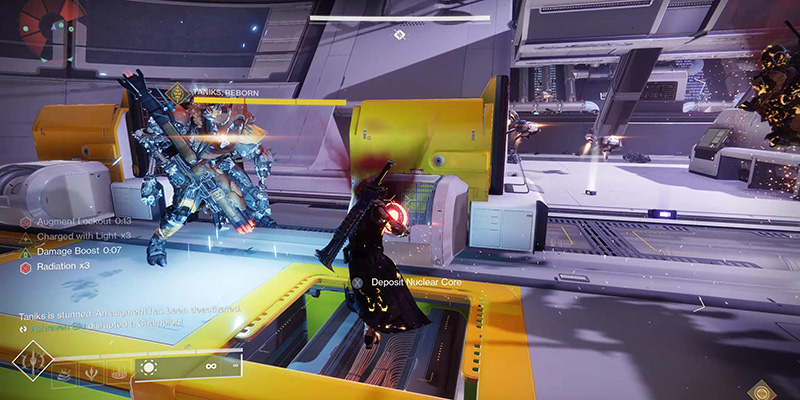
Encounter 3: Taniks, Reborn (Nuclear Descent)
- Objective: Disable the nuclear cores aboard the plummeting Morning Star space station to prevent the destruction of Europa. Lore Context: This is the station's failsafe, triggered by the Clovis Bray AI after detecting the breach.
- Difficulty Rating: Medium
With the Morning Star now on a collision course, the fireteam must race against time in the station's Rapture Control room to disarm its nuclear payload. This encounter introduces the third Augment, Suppressor, and requires the coordinated use of all three roles.
Layout
The encounter takes place in a multi-level, somewhat circular room. Key features include:
- Nuclear Core Terminals (4): Locations where nuclear cores spawn. Two are on the upper catwalks, two on the lower floor walls. Keypads are located near these terminals.
- Deposit Bins (6): Containment units where nuclear cores must be deposited. Two bins are located in each of the three main sections of the room.
- Security Drones (9): Three floating white/blue spherical drones are positioned in each of the three main sections. These are used by the Suppressor.
- Augmentation Terminals: Available for buff swapping.
Roles and Initial Setup
All three Augments – Operator, Scanner, and Suppressor – are required. Teams often split into three pairs, with each pair initially responsible for acquiring one buff and handling associated mechanics, or designate specific buff holders and core runners.
- Operator: Manages core spawns.
- Scanner: Identifies correct deposit bins.
- Suppressor: Stuns Taniks to enable deposits.
- Core Runners (No Augment initially): Transport nuclear cores.
Walkthrough: Core Mechanics
- Acquire Augments: As the encounter starts, Fallen enemies spawn. After a short time, augmented Vandals will appear carrying the Operator, Scanner, and Suppressor buffs. Defeat them and have the designated players collect the appropriate Augments.
- Scanner Identifies Bins: The Scanner locates the two deposit bins (out of six) that are currently glowing yellow and communicates their locations to the team (e.g., "Blue Right," "Orange Left").
- Operator Manages Core Spawn: An alarm will sound, and red keypads near the four nuclear core terminals will light up (usually three will glow). The Operator must quickly shoot one of the glowing red keypads. This action prevents a third core from spawning, ensuring only two cores appear. Failure to shoot a panel in time results in three cores spawning, which can complicate the process or lead to a wipe if not managed.
- Core Acquisition & Transport: Two nuclear cores materialize. Two players (typically those without Augments) must pick them up.
- Radiation Debuff: Picking up a core applies the stacking "Radiation" debuff. If the stack count reaches x10, the carrier dies. Carriers must monitor their stacks and call for a teammate to take the core if they approach x9 or x10. Passing the core resets the debuff progression for the original carrier. Higher player mobility stats can help traverse the room faster while carrying the core.
- Suppressor Stuns Taniks: While cores are being transported, Taniks (who appears holographically or physically in the room) will interfere, disabling the deposit bins ("Offline"). The Suppressor must enable deposits by stunning Taniks. To do this, the Suppressor stands directly underneath one of the three Security Drones in the section Taniks currently occupies. When positioned correctly, Taniks will glow blue. The Suppressor shoots Taniks while under the drone. This process must be repeated under all three drones in sequence to fully stun Taniks and enable the bins.
- Core Deposit: Once Taniks is stunned, the core carriers can approach the two bins identified by the Scanner and deposit the nuclear cores.
- Augment Deactivation & Swap: Immediately after the cores are deposited, one random player holding an Augment will receive the "Deactivated Augment" debuff. They must quickly go to an Augmentation Terminal and deposit the deactivated buff. Another player (often their pre-assigned partner or a designated floater) must then pick up the buff from a terminal to continue the role.
- Repeat Cycle: The fireteam repeats steps 1-8 two more times, depositing a total of six nuclear cores (two per cycle).
- Escape Sequence: After the sixth core is deposited, a hatch opens in the center of the room. The entire fireteam must jump down and sprint through a collapsing corridor towards a closing blast door at the far end. Taniks pursues the team down this corridor. At least one Guardian must make it through the door before it closes to complete the encounter; failure means a wipe.
| Role | Primary Task | Key Actions |
|---|---|---|
| Operator | Manage nuclear core spawns | Wait for alarm, identify glowing red keypad near core terminal, shoot ONE keypad to ensure only 2 cores spawn |
| Scanner | Identify correct deposit bins | Pick up buff, locate 2 yellow glowing bins, communicate locations clearly |
| Suppressor | Stun Taniks to enable core deposits | Pick up buff, locate Taniks, stand under 3 nearby drones sequentially (while Taniks glows blue), shoot Taniks under each drone |
| Core Runner | Pick up, transport, and deposit nuclear cores; manage Radiation | Grab core, move to correct bin, monitor Radiation stacks (call for swap if high), deposit when Suppressor stuns Taniks |
Challenge: Of All Trades
This weekly challenge requires every member of the six-Guardian fireteam to have held and used each of the three Augments (Operator, Scanner, Suppressor) at least once before the encounter is successfully completed. Since there are six core deposits needed (three cycles of two cores), this naturally provides opportunities for rotation. Careful planning is essential. Teams can assign numbers (1-6) and rotate buffs sequentially, or use a pair-based system where pairs swap primary buff responsibilities each cycle. Depositing an augment before cores are dunked, before an augment gets deactivated, or having fewer than six players will fail the challenge. This challenge tests the entire team's understanding and execution of all three core raid roles.
This encounter layers all three Augments, increasing complexity. For clarity:
- Ensure the Scanner uses simple, consistent callouts for the bins.
- The Operator's task (shoot one panel) is relatively straightforward once identified.
- The Suppressor needs clear communication regarding Taniks's location and when to initiate the stun sequence.
- Core runners must be vocal about their Radiation stacks to facilitate swaps. Assigning specific partners for core running can help manage this.
- The random Augment Deactivation forces role flexibility. Teams should anticipate this and have backups ready or be prepared for anyone to potentially fill any role.
Encounter 4: Taniks, The Abomination

- Objective: Defeat Taniks in his final, monstrous form, fused with wreckage from the Morning Star.
- Difficulty Rating: Medium-High
Emerging from the wreckage of the Morning Star at the Crypt's entrance, Taniks makes his last stand. This final battle remixes the mechanics of the previous encounter within a dynamic boss fight arena, demanding mastery of all three Augments under constant pressure.
Layout
The arena is the crash site of the Morning Star, a large, roughly circular area littered with debris. It's divided into three main sections, often designated by landmarks or associated Augment spawns:
- Spawn / Flag / White: The area closest to the rally flag banner, where the Operator Vandal spawns.
- Blue / Pipes: An area characterized by blue lighting and pipes, where the Scanner Vandal spawns.
- Orange / Garage: An area with orange lighting, where the Suppressor Vandal spawns.
Each section contains two of the six nuclear core deposit bins and a set of three Security Drones for the Suppressor role. Augmentation Terminals are also present for swapping buffs.

Roles and Initial Setup
As before, all three Augments are required. The standard approach is to split into three teams of two, with each pair assigned to one of the three main sections (Spawn, Blue, Orange).
- Operator Team (Spawn): One player takes Operator, the other is primarily core running/ad clear.
- Scanner Team (Blue): One player takes Scanner, the other is core running/ad clear.
- Suppressor Team (Orange): One player takes Suppressor, the other is core running/ad clear.
Walkthrough: Core Mechanics
- Start & Augment Acquisition: Approach the central wreckage to trigger Taniks's emergence. Fallen adds will spawn, followed shortly by the augmented Vandals in their respective zones (Operator near Spawn, Scanner near Blue, Suppressor near Orange). Defeat them and acquire the buffs.
- Taniks Positioning & Scanner Callouts: Taniks will move towards one of the three main sections. The Scanner must identify which deposit bins are active – it will always be the four bins located in the two sections Taniks is NOT currently in. The Scanner communicates these locations (e.g., "Dunk at Spawn and Blue," or specific bin numbers/sides if using the 4-core strategy).
- Thruster Phase: Taniks unleashes attacks (large purple beams, void explosives) and exposes four glowing thrusters on his Shank body. The fireteam must shoot these thrusters.
- Core Strategy Selection: - 2-Core Strategy (Standard/Learning): Shoot and destroy two of the four thrusters. This drops two nuclear cores. This entire cycle (steps 2-9) must be completed twice to deposit four cores before initiating the DPS phase. This method is generally safer for learning teams as it involves fewer moving parts simultaneously. - 4-Core Strategy (Advanced/Faster): Shoot and destroy all four thrusters quickly and roughly simultaneously. This drops all four nuclear cores at once. This allows for a single, potentially longer DPS phase and can bypass the need for Scanner callouts if the team knows the active bins are always in the two sections Taniks isn't occupying. However, it requires much tighter coordination for core pickup, detainment management, suppression, and depositing within the Radiation timer limits. This is often used for speedruns or experienced teams aiming for a one-phase kill.
- Core Transport & Radiation: Players designated as core carriers (preferably not the Operator or Suppressor) grab the dropped cores. They must manage the stacking Radiation debuff (x10 = death) by passing the core to a teammate if necessary. High mobility stats are beneficial. Players should decide and call out which specific bin they are heading towards.
- Operator Duty - Detainment: Taniks will randomly trap core carriers (and potentially nearby players) inside large purple detainment bubbles/fields. The Operator must quickly shoot the glowing circles or weak points on the bubble to free the trapped player(s). Failure to do so quickly will likely result in the carrier dying to Radiation. The Operator needs a clear line of sight and should position themselves accordingly. Taniks typically detains players twice per core cycle.
- Suppressor Duty - Stun: Similar to the previous encounter, the Suppressor must stun Taniks to allow core deposits. They stand under the three security drones located in the section Taniks currently occupies, shooting him once under each drone while he glows blue. Crucially, proper timing is essential to avoid deactivating the Operator while a teammate is detained. The widely accepted strategy is for the Suppressor to wait until the Operator has successfully freed the second detained player before completing the third drone stun.
- Core Deposit: Once Taniks is stunned, the core carriers deposit their cores into the active bins identified by the Scanner (or the known open bins if using 4-core strategy).
- Augment Deactivation & Swap: After the cores required for the DPS phase are deposited (either the second pair in 2-core, or all four in 4-core), a random Augment will be deactivated. The affected player must deposit their buff at a terminal for a teammate to pick up.
Walkthrough: Damage Phase
- Initiation: Begins after four nuclear cores have been successfully deposited.
- Positioning: Taniks teleports to the center of the arena and creates two concentric rings of swirling debris and energy. Guardians must position themselves between these two rings to deal damage safely. Standing inside the inner ring causes damage, while touching the outer debris ring is instantly lethal.
- DPS: Deploy Well of Radiance and/or Ward of Dawn for buffs and protection. Apply Divinity debuff. Unleash maximum damage using preferred loadouts (Slug Shotguns + Anarchy meta is common).
- Knockback ("Boop"): Partway through the DPS window, Taniks will perform an attack that knocks all players outwards, away from the safe zone. Players must quickly and carefully jump back into the safe zone between the rings, avoiding the lethal outer debris.
- Duration: The standard 2-core strategy typically allows for two DPS intervals (one before the boop, one after). The 4-core strategy extends this, often allowing three DPS intervals (two boops). The DPS phase ends when Taniks becomes immune and teleports away.
- Repeat or Final Stand: If Taniks's health is not depleted to the final stand threshold, the encounter resets to the core mechanic phase (Step 1). Teams typically have three full DPS phases before Taniks enrages and wipes the fireteam.
- Trigger: Initiated when Taniks's health reaches the final segment, roughly 15-20%.
- Behavior: Taniks abandons the core mechanic and begins rapidly teleporting between the three main sections (Spawn, Blue, Orange). He attacks relentlessly with beams and area-of-effect attacks (often called "purple rain").
- Objective: The fireteam must deal continuous damage to Taniks as he teleports, avoiding his attacks. Supers, heavy ammo, and any remaining abilities should be used here.
- Enrage Timer: There is a limited time to defeat him during final stand. If he is not killed before he completes a set number of teleports (often cited as five or six) or a hidden timer expires, he will wipe the fireteam.
| Role | Primary Task | Key Actions |
|---|---|---|
| Operator | Free detained core carriers | Acquire buff (Spawn), maintain vantage point, quickly shoot circles on purple bubbles trapping teammates |
| Scanner | Identify active deposit bins | Acquire buff (Blue), locate 2 (or 4) glowing bins in sections Taniks isn't in, communicate locations (Can assist with cores/DPS) |
| Suppressor | Stun Taniks to enable core deposits | Acquire buff (Orange), locate Taniks, stand under 3 nearby drones sequentially (while Taniks glows blue), shoot Taniks under each. Crucial: Wait for 2nd detain break before final stun |
| Core Runner | Shoot thrusters, transport cores, manage Radiation, deposit cores, DPS | Damage thrusters, grab core, call out destination bin, monitor Radiation (pass if needed), deposit when Taniks stunned, DPS during damage phase |
Challenges
- The Core Four: Complete the encounter by spawning four nuclear cores simultaneously during each core phase. This requires destroying all four of Taniks's thrusters together.
- Ready, Set, Go!: Deposit pairs of nuclear cores within five seconds of each other. This demands tight coordination between the two (or four) core carriers during the deposit step.
- Short Circuit: Complete the encounter with only one designated player depositing all nuclear cores throughout the fight. This necessitates extremely efficient core passing between teammates to manage Radiation for the single depositor and likely requires multiple core cycles.
The final encounter is a demanding test of all mechanics learned throughout the raid.
- The 2-core strategy is recommended for learning, as it breaks the core phase into more manageable chunks.
- The 4-core strategy, while potentially faster and simplifying the Scanner's job, significantly increases the pressure on the Operator (more potential detains in a short window), the Suppressor (timing the stun correctly relative to detains and deposits), and the core runners (managing Radiation and reaching bins quickly).
- Clear communication is absolutely vital, especially regarding bin locations (Scanner), detainment status (Operator/Carriers), Radiation levels (Carriers), and Suppressor stun timing.
- Positioning during the DPS phase is critical to avoid instant death from debris.
- The final stand is a pure DPS check; saving Supers and heavy ammo is advisable.
Mission Complete: Rewards & Intel
Successfully navigating the Deep Stone Crypt and defeating Taniks, The Abomination yields unique and powerful rewards, including sought-after weapons, armor, and an exclusive Exotic.
Deep Stone Crypt Loot Table
The following table details the potential weapon and armor drops from each major encounter. Note that armor pieces are specific to the Guardian's class (Titan, Hunter, Warlock).
| Encounter | Possible Weapon Drops | Possible Armor Drops (Class Specific) | Exotic Chance |
|---|---|---|---|
| Crypt Security (Encounter 1) | Trustee (Scout Rifle) | Arms, Legs, Class Item | None |
| Atraks-1 (Encounter 2) | Heritage (Shotgun), Succession (Sniper Rifle) | Arms, Legs, Class Item | None |
| Taniks, Reborn (Encounter 3) | Posterity (Hand Cannon) | Arms, Chest, Class Item | None |
| Taniks, Abomination (Encounter 4) | Commemoration (Machine Gun), Bequest (Sword) | Head, Chest, Legs | Eyes of Tomorrow |
Note: Hidden chests can drop raid mods and any gear previously acquired from encounters.
Eyes of Tomorrow (Exotic Rocket Launcher)
- Description: A Heavy slot, Solar element Exotic Rocket Launcher capable of tracking and firing a volley of multiple rockets simultaneously. Its intrinsic perk, "Eyes on All," tracks and fires at multiple targets at once, and grants increased damage for a short duration after killing four or more enemies with a single volley.
- Source: Eyes of Tomorrow has a chance to drop only after defeating the final boss, Taniks, the Abomination. It does not drop from any other encounter or chest.
- Drop Chance & Farming: The base drop chance is relatively low (exact percentage not officially stated but generally considered around 5-10% initially). Bungie implemented a "bad luck protection" system where the drop chance slightly increases for every full clear of the raid on a character where the Exotic has not yet dropped. Additionally, completing specific weekly raid Triumphs associated with Deep Stone Crypt can further increase the drop chance for that week. The most effective way to farm Eyes of Tomorrow is to repeatedly defeat Taniks, the Abomination when Deep Stone Crypt is the featured weekly raid. During this week, loot restrictions are lifted, allowing multiple attempts at the final boss drop per character. This featured week provides the best opportunity for dedicated players to acquire the Exotic.
Spoils of Conquest & Final Cache
Deep Stone Crypt introduced a system using Spoils of Conquest, a currency earned from completing raid encounters (typically 5 Spoils per encounter after the first weekly clear) and potentially from hidden chests (though this may have been patched out for DSC chests). Spoils can also be earned from other Destiny 2 raids. There is a cap on how many Spoils a player can hold in their inventory (e.g., 240).
After defeating Taniks, the Abomination, a special chest called the "Cache of the Crypt" appears. This cache allows players to spend their Spoils of Conquest:
- Purchase Known Gear: Players can buy additional random rolls of any Deep Stone Crypt weapon or armor piece they have already unlocked in their collections for 20 Spoils of Conquest each.
- Gamble for New Gear (Crypt Caches): Players can spend 60 Spoils of Conquest to purchase a "Crypt Cache." Each cache corresponds to a specific encounter's loot pool (e.g., Cache of the Security, Cache of Atraks). Opening a cache guarantees a random item (weapon or armor) from that encounter's loot pool, providing a chance to obtain an item the player hasn't acquired yet.
This Spoils/Cache system provides players with targeted farming options and a measure of bad luck protection, allowing them to work towards specific desired items rather than relying purely on random drops per encounter. It represents a significant improvement in raid reward structure compared to older Destiny raids.
Other Rewards
Completing specific Triumphs associated with the Deep Stone Crypt unlocks exclusive cosmetic rewards:
- Retrocausality Exotic Sparrow: Awarded for the "Not a Scratch" Triumph (finish the opening Sparrow section without any Pikes being destroyed).
- No Love Lost Exotic Ghost Shell: Awarded for the "Rock Bottom" Triumph (collect all five hidden Exo Stranger logs throughout the raid).
- Crypt Reawakened Emblem: Awarded for completing the raid for the first time.
- Long Slow Whisper Emblem: Awarded for completing the raid within the first 24 hours of its release (no longer obtainable).
- Cryptic Legacy Shader: Awarded for the "Survival of the Fittest" Triumph (completing the raid flawlessly - without any player deaths).
Appendix: Cryptographer's Codex
This section provides a quick reference for common terms and a brief story recap.
Terminology Guide
Navigating raids often involves specific jargon and callouts. Understanding these terms is crucial for effective communication, especially in Looking For Group (LFG) settings.
| Term/Callout | Meaning/Context | Encounter(s) Used |
|---|---|---|
| Augment / Buff | The Scanner, Operator, or Suppressor role/ability | All |
| Operator | Red augment; shoots panels, bubbles, debuffs | All |
| Scanner | Yellow augment; sees hidden panels, clones, bins | All |
| Suppressor | Blue augment; stuns Taniks via drones | Taniks Reborn, Taniks Abom. |
| Augment Terminal | Station used to pass/swap Augments | Security, Atraks, Taniks (Both) |
| Deactivated Augment | Random buff disabling after core deposit, forces swap | Taniks (Both) |
| Light / Dark | Sections of the Crypt Security room (based on lighting) | Crypt Security |
| Basement | Lower level in Crypt Security containing panels | Crypt Security |
| Panels | Numbered keypads in the basement shot by Operator | Crypt Security |
| Fuses | Six large cylinders in the main room; the encounter objective | Crypt Security |
| L1-5 / D1-5 | Common callout system for basement panels (Light 1-5, Dark 1-5) | Crypt Security |
| Servitor / Sentinel | Enemy that disables Augment Terminals | Crypt Security, Atraks-1 |
| Ground / Space | The two main arenas for the Atraks-1 fight | Atraks-1 |
| Pods / Elevators | Transport between Ground and Space arenas | Atraks-1 |
| Clone / Replicant | Copies of Atraks-1 that must be damaged | Atraks-1 |
| Replication / Orb / Debuff | Purple orb dropped by clones; gives timed debuff | Atraks-1 |
| Airlock | Chambers in Space used to eject Replication debuff | Atraks-1 |
| Eject / Purge / Cleanse | Act of removing Replication debuff via Operator/Airlock | Atraks-1 |
| Reset (Timer) | Operator shooting Replication carrier to refresh debuff timer | Atraks-1 |
| Cores / Nuclear Cores | Orbs carried and deposited in Taniks encounters | Taniks Reborn, Taniks Abom. |
| Bins / Boxes / Chests | Deposit locations for Nuclear Cores | Taniks Reborn, Taniks Abom. |
| Radiation | Stacking debuff from carrying Nuclear Cores (x10=death) | Taniks Reborn, Taniks Abom. |
| Thrusters | Four glowing parts on Taniks (Abom.) shot to spawn cores | Taniks Abom. |
| Detain / Bubble / Trap | Purple sphere Taniks traps core carriers in | Taniks Abom. |
| Stun / Suppress | Action performed by Suppressor to enable core deposits | Taniks Reborn, Taniks Abom. |
| Drones | Floating spheres Suppressor stands under to stun Taniks | Taniks Reborn, Taniks Abom. |
| Spawn / Blue / Orange | Common callouts for the three main sections of Taniks Abom. arena | Taniks Abom. |
| DPS | Damage Per Second; phase focused on damaging the boss | Crypt Security, Atraks-1, Taniks Abom. |
| Wipe | Entire fireteam death, resetting the encounter | All |
| Adds | Additional, non-boss enemies | All |
| One-Phase | Defeating a boss within a single damage cycle | Atraks-1, Taniks Abom. |
| Final Stand | The last phase of a boss fight when health is critical | Atraks-1, Taniks Abom. |
Brief Lore Recap
The Deep Stone Crypt operation involves confronting the dark legacy of Clovis Bray I and the immediate threat of the House of Salvation. Guardians breach the facility, overcoming its ancient security systems. Inside, they encounter Atraks-1, the first Fallen Exo, created using the Crypt's technology, and disrupt her plans. This breach triggers the Clovis AI (Clovis-I, Bray's own consciousness uploaded into an Exomind) to activate the Morning Star protocol, intending to nuke the entire site from orbit. Guardians race aboard the station to disable the nuclear cores, only to have the station crash back to Europa. From the wreckage emerges Taniks, revived by Atraks and now fused with station hardware into a monstrous Abomination, powered by the Crypt's energies. The final battle ensures Taniks is permanently eliminated and the immediate threat to Europa is neutralized. However, the Crypt itself, and Clarity Control within, remain.
Final Encouragement
The Deep Stone Crypt is a challenging but rewarding endeavor, blending intricate mechanics with spectacular environments and significant lore payoffs. Mastering the Augment system and coordinating effectively are the keys to success. Study this briefing, communicate clearly with the fireteam, adapt to the challenges, and claim the spoils of victory. The secrets of the Crypt await. Good luck, Guardians.