
Welcome, Guardians, to the twisted labyrinth of Emperor Calus's mind! The Duality dungeon, introduced in the Season of the Haunted, isn't just another romp through Cabal corridors; it's a deep dive into the psyche of one of Destiny 2's most enigmatic and opulent figures. Prepare yourselves for a journey that blends intense combat, intricate puzzles, and a narrative exploring Calus's deepest regrets and fears – his relationship with Gahlran, the tombs of his ancestors, and most poignantly, his daughter Caiatl.
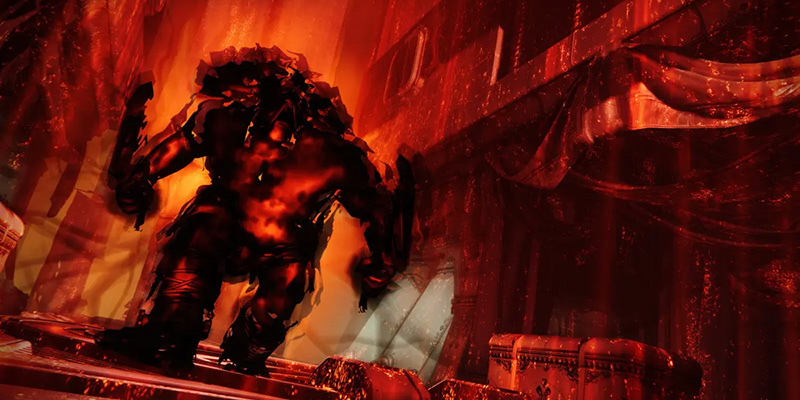
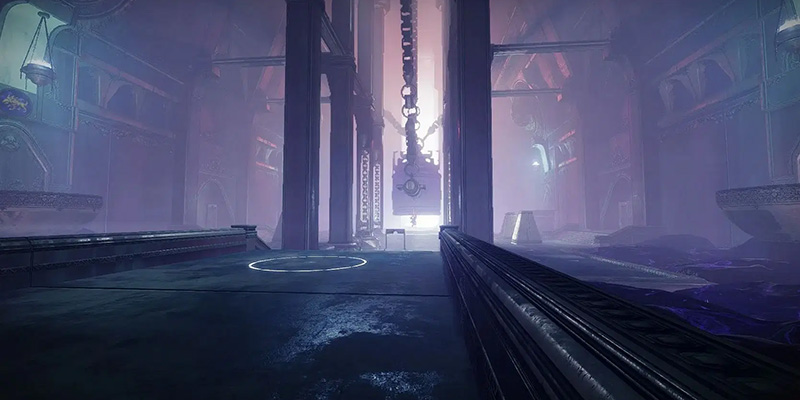
This dungeon takes place within the derelict Leviathan, now returned and infested, but the true battleground is Calus's consciousness, a mindscape fractured into serene blue 'reality' and chaotic red 'nightmare' realms. You'll be navigating this duality, quite literally, using the dungeon's core mechanic: the Bells of Conquest. These resonant devices transport you between the two realms, allowing you to bypass obstacles in one reality that exist in the other.
But fear not! This guide will equip you with the knowledge, strategies, and encouragement needed to conquer Calus's inner demons and claim the treasures within. Let's ring the bell and begin.
I. Gearing Up: Preparation is Key
Before you plunge into the depths of Calus's mind, ensuring your Guardian is properly equipped is paramount. Duality throws a relentless barrage of Cabal at you, often in tight spaces or during high-stakes DPS phases, so preparation can mean the difference between triumph and a frustrating wipe screen.
A. Recommended Power Levels
| Difficulty | Power Level | Notes |
|---|---|---|
| Normal | 1600 | Being under-leveled makes the high enemy density feel even more oppressive |
| Master | 1840 | Adds Champions (Barrier and Unstoppable), Match Game, and tougher enemies. Recommended 1820+ Power. |
B. Optimal Class Builds & Subclasses
Solar Warlocks with Well of Radiance are often considered top-tier for Duality. Well provides crucial healing and damage buffs during chaotic DPS phases. Healing Grenades, combined with aspects like Touch of Flame and Heat Rises, plus fragments like Ember of Empyrean (Solar weapon/ability kills extend Restoration/Radiant) offer incredible self-sustain.
Recommended Exotics: Starfire Protocol (for grenade spam), Sunbracers (for add clear), or Karnstein Armlets (for melee healing).
Alternatives: Voidwalker with Devour for survivability, or Prismatic builds leveraging Getaway Artist or combining elements for healing and damage.
Solar Titans, particularly with the Loreley Splendor Helm, offer immense survivability through Sunspots and Restoration. Combining Throwing Hammer (Bonk) with Synthoceps provides great add clear, damage, and healing via Sol Invictus and Ember of Torches.
Alternatives: Banner of War Strand Titan is exceptionally strong for melee damage and survivability. Thundercrash (with Cuirass of the Falling Star) offers high burst DPS for bosses. Prismatic builds can combine Thundercrash with other useful abilities.
Solar Hunters using Blade Barrage or Golden Gun (especially with Celestial Nighthawk or Star-Eater Scales) excel at burst DPS. Knock 'Em Down and Knife Trick provide Radiant and Scorch synergies.
Alternatives: Arcstrider with Combination Blow and Assassin's Cowl or Liar's Handshake offers high melee damage and survivability. Void Hunters with Omnioculus or Gyrfalcon's Hauberk provide invisibility for repositioning, revives, or Volatile Rounds add clear.
C. Essential Mods
- Resilience: Aim for Tier 10 (100) Resilience. The damage reduction is absolutely critical for surviving the constant onslaught of Cabal fire.
- Resistance Mods: Equip Solar and Arc Resistance mods due to Incendior flamethrowers and Psion sniper void blasts/Arc weapons. Concussive Dampener is also generally useful.
- Ammo Economy: Ammo Finder mods (Helmet) for your Heavy/Special weapons and Ammo Scavenger mods (Legs) are crucial.
- Damage Boosts: Weapon Surge mods (Legs) matching your primary DPS weapon's element. Lucent Blade (Chest, requires Arc affinity) is essential if using Swords for DPS.
- Ability Regeneration: Mods like Heavy Handed, Firepower, Ashes to Assets, Hands-On, and Bomber help maintain ability uptime, which fuels survivability and damage builds.

II. Arming Yourself: Loadout Recommendations
Choosing the right weapons is just as important as the right build. Duality throws a mix of long-range threats (Psion snipers) and close-quarters brawls (Gahlran, Bellkeepers), often simultaneously. Versatility and strong add clear are key.
A. General Principles
- Mix Ranges: Have options for both close-quarters combat and engaging distant threats like snipers or Bellkeepers across the room.
- Area of Effect (AoE): Weapons that can clear multiple enemies quickly are invaluable due to the high add density. Witherhoard, Wave-Frame Grenade Launchers (like Forbearance), and weapons with perks like Incandescent or Voltshot excel here.
- Bell Activation: While most weapons work, single-shot, high-impact weapons like Snipers, Shotguns, Fusion Rifles, or even Rocket Launchers can activate bells instantly.
- Backpack Management: Incendior Bellkeepers drop explosive backpacks upon death unless disintegrated. These packs can be detonated by enemy fire or boss stomps, often leading to instant death.
B. Top Weapon Choices
Exotic Primary/Special
- Witherhoard: Excellent passive damage, area denial, and add clear. Pairs well with legendary heavy weapons.
- Osteo Striga: Top-tier add clear, especially with the catalyst.
- Arbalest: Useful for shield-breaking (especially on Master with Match Game) and decent damage.
- Gjallarhorn: High burst damage, but risky in close quarters encounters like Gahlran or Caiatl DPS. Better suited for Vault mini-bosses or coordinated team play.
- Lament: Often the recommended Exotic Heavy for its high damage, healing, and blocking capabilities, making it incredibly safe for solo or chaotic encounters. Requires Lucent Blade mod for optimal DPS.
- Tractor Cannon: Useful debuff for team play, especially paired with Titan hammers or Hunter damage supers.
Legendary Special
- Fusion Rifles: Riptide (Stasis, Chill Clip great for utility/Bellkeepers), The Epicurean (Void, craftable), Cartesian Coordinate (Solar), Deliverance (Stasis), Glacioclasm (Void) are all excellent for killing Bellkeepers safely and providing good backup DPS.
- Wave-Frame Grenade Launchers: Forbearance (Arc), Deafening Whisper (Void), Explosive Personality (Solar). Unmatched add clear, can damage Phalanxes behind shields. Essential for managing crowds in the Vault.
- Lingering Dread (Stasis GL): Dungeon-specific drop. Can roll Blinding Grenades + Chill Clip for incredible crowd control, or Spike + Auto-Loading/Vorpal for damage.
- Snipers: Useful for instantly activating bells from afar and dealing with Psion snipers. Succession is a popular choice.
- Glaives: Enigma (Void), Lubrae's Ruin (Solar). Can stagger Phalanxes, provide defensive shield, and synergize with certain builds/mods.
Legendary Heavy
- Linear Fusion Rifles: Stormchaser (Arc, dungeon drop, 3-burst), Cataclysmic (Solar, Vow raid, craftable), Taipan-4fr (Void, world drop, craftable). Top-tier DPS options, especially for Caiatl.
- Swords: Falling Guillotine (Void), Crown-Splitter (Titan Void), Bequest (DSC raid Arc). Good alternatives to Lament if focusing on legendary options or specific elemental synergies.
- Rocket Launchers: Good burst damage, but risk self-damage in close quarters. Apex Predator, Cold Comfort, etc. Pair with Gjallarhorn in a team.
- Machine Guns: Fixed Odds (Solar, dungeon drop), Commemoration (Void, DSC raid), Corrective Measure (Void, VoG raid). Excellent for add clear, especially in the Vault encounter, and killing Bellkeepers quickly.
C. Encounter-Specific Loadouts (Examples)
| Encounter | Loadout Type | Kinetic | Energy | Heavy | Notes |
|---|---|---|---|---|---|
| Gahlran (1st Boss) | Safe/Solo | Witherhoard | Fusion Rifle | Lament | Focuses on survivability and consistent damage |
| Team DPS | Divinity | Sniper or Fusion | Linear Fusion Rifle | Requires coordination to maintain distance | |
| Titan Melee | Primary | Fusion Rifle | Tractor Cannon | Pair with Synthoceps + Hammer. High risk, high reward | |
| Vault (Encounter 2) | Add Clear Focus | Kinetic Primary | Wave-Frame GL | Machine Gun or Lament | Prioritizes clearing corners quickly and safely |
| Solo Titan | Auto Rifle or SMG | Glaive or Fusion | Tractor Cannon | Pair with Hammer for add clear and damage | |
| General | Osteo Striga | Fusion Rifle | Linear Fusion or Rocket | Good balance for add clear and mini-boss damage | |
| Caiatl (Final Boss) | Safe/Solo | Witherhoard or Primary | Fusion Rifle | Lament | Balances safety and DPS |
| Max DPS | Witherhoard or Sniper | Fusion Rifle | Linear Fusion Rifle | Requires precise execution and good survivability | |
| Utility | Sniper | Void SMG | Linear Fusion or Lament | Sniper for bells/keepers from range, Xenophage can one-shot Bellkeepers |
III. Navigating the Nightmare: Full Walkthrough
Alright Guardians, gear checked, builds locked in – it's time to delve into the fractured mindscape of Calus. This walkthrough will guide you step-by-step through each section and encounter.
A. Entering the Echo: Opening Puzzle
The Plunge
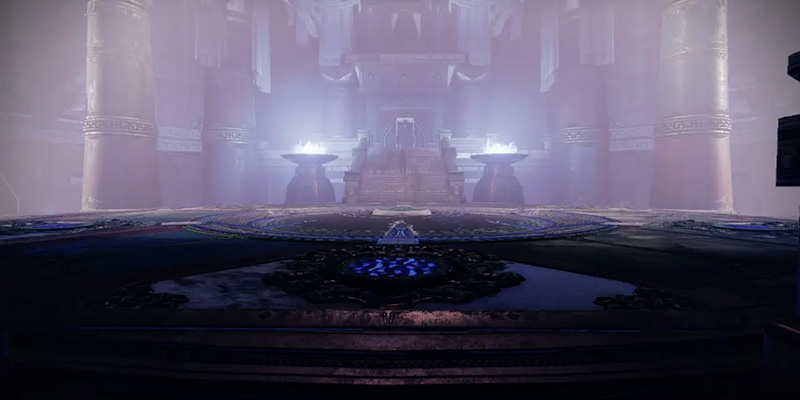
The journey begins in a corrupted version of the Leviathan's Tribute Hall. Approach the imposing statue of Calus where Eris Morn waits. She'll open a pathway into his consciousness – jump down the hole that appears beneath the statue.
First Bell
You land in a locked room. Look through the grate ahead; you'll spot the first Bell of Conquest, glowing red with Nightmare energy. Shoot it. This transports you into the Nightmare Realm (distinguished by its red hue and distorted visuals) where the grate is gone, allowing passage.
Bell Mechanics 101:
- Normal Realm → Nightmare Realm: You can shoot the bell from anywhere in the Normal (blue) Realm to transport.
- Nightmare Realm → Normal Realm: You must be standing within the glowing circle on the floor around the bell when you shoot it to return safely. Being outside this circle when shooting the bell from the Nightmare Realm is an instant wipe.
- Bellkeepers: In encounters (not this opening puzzle), special yellow-bar Cabal called Bellkeepers will often guard bells. Both Bellkeepers near a specific bell must be defeated before that bell can be activated.
- Nightmare Collapsing Timer: During encounters, entering the Nightmare Realm starts a timer (usually 1 minute). If this timer hits zero while you're still in the Nightmare, you wipe. You must kill Bellkeepers and shoot the bell (from within the circle) to return to the Normal Realm before it expires. Killing specific enemies (Standard Bearers) often extends this timer.
Ascent
After shooting the first bell and entering the Nightmare, walk up to it, stand in the circle, and shoot it again to return to the Normal Realm. Now, Cabal Loyalists will appear. Clear them out. Your goal is to ascend. Look for ledges along the walls and beams in the center of the room. Climb upwards.
Second Bell & Memory
Reach the highest point. Look across the room; you'll see another bell through a grate. Shoot it to enter the Nightmare Realm again.
Descent
From the top platform in the Nightmare Realm, jump across the gap to the opening where the next bell awaits. Shoot it to return to Normal. Clear the enemies. Look left; another bell is visible through a grate/closed door. Shoot it. In the Nightmare, the path forward along the left wall opens up. Follow it to the next bell, shoot it (within the circle!) to return to Normal.
Continue Downward
Keep descending, swapping realms as needed to bypass obstacles. You'll encounter more enemies and bells hidden behind grates.
Final Room Before Encounter 1
Clear the final group of Cabal in this room. Defeating them opens a hatch or door in the floor, leading down into the Nightmare of Gahlran encounter. Equip your loadout for the fight and jump down!
B. Encounter 1: Nightmare of Gahlran, Sorrow Bearer
Objective
Collect two Standard Essences from the Nightmare Realm, deposit them in the Normal Realm, defeat Visions of Gahlran in side rooms, then damage the main Nightmare of Gahlran boss during a timed window. Repeat until defeated.
Arena Layout
A large central chamber featuring two Bells of Conquest: one on an upper walkway/platform (often called "Top Bell" or "Bridge Bell") and one on the lower floor (often "Bottom Bell" or "Stairs Bell"). Four side rooms branch off the main area, two accessible near each bell platform. In the Normal Realm, these rooms have deposit plates marked with symbols: War Beast, Axe, Chalice, and Sun. In the Nightmare Realm, Psion Standard Bearers spawn in two of these four locations.
| Gahlran Symbol Locations (Common Callouts) | |
|---|---|
| Upper Left (near Top Bell) | Chalice |
| Upper Right (near Top Bell) | Sun |
| Lower Left (near Bottom Bell) | Axe |
| Lower Right (near Bottom Bell) | War Beast |
Step-by-Step Guide
- Enter Nightmare: Start the encounter by shooting either the Top or Bottom Bell. You'll be transported to the Nightmare Realm. The Nightmare Collapsing debuff appears (60-second timer). The Nightmare of Gahlran spawns but is immune.
- Find Standard Bearers: Check the four side rooms (visually or using radar). Two random rooms will contain glowing Psion Standard Bearers.
- Kill Bearers & Collect Essence: Defeat the two Psion Standard Bearers. Each kill extends the Nightmare Collapsing timer by 15 seconds. They drop Standard Essences (e.g., "Axe Standard," "Sun Standard"). - Team Strategy: Two players each grab one Standard Essence. The third player focuses on Bellkeepers. - Solo Strategy: Grab one Standard Essence, kill Bellkeepers, exit. Repeat for the second Standard. (Or use the advanced extended DPS strat outlined below).
- Kill Bellkeepers: Two Incendior Bellkeepers spawn in the Nightmare Realm near the location of the bell you did not use to enter (i.e., the bell opposite your entry point). Both must be killed to allow you to shoot the bell and exit the Nightmare Realm. Use Fusion Rifles to prevent backpack drops.
- Return to Normal Realm: Go to the now-active exit bell (the one whose Bellkeepers you just killed). Ensure all fireteam members are inside the circle on the ground. Shoot the bell before the Nightmare Collapsing timer expires. Aim to leave with about 10-15 seconds remaining to be safe.
- Deposit Standards: Back in the Normal Realm, navigate to the side rooms corresponding to the symbols on your collected Standard Essences (e.g., take "Axe Standard" to the Axe room) and deposit them at the plates. Depositing opens the door behind the plate.
- Enter Side Rooms & Kill Adds: Enemies, including a large Colossus and Bellkeepers, will spawn behind the opened doors. Kill them quickly. - Team Strategy: Have at least one player enter each of the two opened side rooms. - Solo Strategy: Enter one of the opened rooms.
- Kill Visions of Gahlran: Inside the side room(s), locate and shoot the bell within that room. This transports only the players inside that room back to a Nightmare version of that specific side room. Multiple smaller Gahlran clones, "Visions of Gahlran," will appear (around 5-6 per side). Kill all of them quickly. They drop red "Unstable Essence" orbs that grant a temporary damage buff against Nightmares.
- Damage Phase (DPS): Once all Visions across both activated side rooms are defeated, the main Nightmare of Gahlran in the central arena becomes vulnerable to damage. The remaining Nightmare Collapsing timer from when you shot the side-room bell becomes your DPS window. Quickly regroup in the center, drop a Well of Radiance or Ward of Dawn, and unleash damage.
- Exit Before Wipe: Keep a close eye on the Nightmare Collapsing timer! Bellkeepers will have respawned near the exit bell in the main Nightmare arena. Leave enough time (again, ~10-15 seconds) to kill them and shoot the bell (while inside the circle!) to return safely to the Normal Realm.
The entire cycle repeats until the Nightmare of Gahlran is defeated.
Boss Strategy & DPS
- Positioning: Gahlran is aggressive and mobile, often closing the distance for powerful melee attacks. During DPS, a Well of Radiance or Ward of Dawn placed centrally provides vital protection and buffs. Be extremely wary of his lunges and stomps, which can easily send you flying into walls for an instant kill or off the map. High Resilience helps, but awareness is key. Avoid standing directly beneath him when he jumps or lunges.
- Weapon Choice: Swords, especially The Lament, are highly effective due to Gahlran's close-range nature. Lament offers excellent damage, healing on hit, and the ability to block, significantly increasing survivability. Pair with Witherhoard for passive damage. Rocket Launchers are generally too risky due to potential self-damage. Linear Fusion Rifles can work if the team can maintain some distance and stagger him, often requiring Divinity.
- Damage Buffs: Utilize damage Supers like Thundercrash, Nova Bomb, or Blade Barrage for burst. Collect the red Unstable Essence orbs dropped by Visions for a temporary damage increase. If the seasonal artifact includes the "Glaive of Dreams" mod, equipping a Glaive (even if not used for direct DPS) can significantly extend the duration of the Unstable Essence buff, allowing for much longer damage windows. Stack Radiant, Font of Might, or Weapon Surges where possible.
This advanced technique can grant extra time for the main DPS phase but requires precise execution and carries some risk:
- First Nightmare Entry: Kill both Psion Standard Bearers. Pick up only one Standard Essence. Leave the other essence on the ground.
- Return & Deposit: Kill Bellkeepers, return to Normal Realm, deposit the single Standard.
- First Vision Phase: Enter the corresponding side room, shoot the bell, kill the Visions of Gahlran. Before leaving this Nightmare side room, quickly go back to where the second Standard Essence was dropped in Step 1. Pick it up now. The Psion Standard Bearer for that symbol will have respawned – leave this Psion alive.
- Return & Deposit Again: Kill Bellkeepers in the main Nightmare area, return to Normal Realm, deposit the second Standard.
- Second Vision Phase: Enter the second side room (corresponding to the standard deposited in Step 4). Shoot the bell. Kill the Visions of Gahlran in this room. Crucially, the Psion Standard Bearer you left alive in Step 3 will also be in this Nightmare side room with you.
- Extend Timer: Kill this final Psion Standard Bearer during the Vision-killing phase. This grants an extra 15 seconds to your Nightmare Collapsing timer, which carries over into the main boss DPS phase immediately following. Do not pick up the standard it drops, as it can cause issues.
- Proceed to DPS: Once Visions are dead, exit the side room into the main Nightmare arena and begin the extended DPS phase on Gahlran.
Danger: Gahlran's devastating stomp and lunge attacks can instantly kill you via physics impact against walls or by knocking you off the arena entirely. This is a primary cause of wipes, especially during the close-range DPS phase.
Solution: Constant situational awareness is non-negotiable. Keep Gahlran in your sights. Use Lament's block function for protection. Utilize movement abilities (Hunter Dodge, Warlock Icarus Dash, Titan Thruster) to evade lunges or correct positioning after a knockback. Avoid standing directly under him, as his downward attacks are particularly dangerous. Max Resilience provides a buffer, but dodging the hit entirely is preferable. Stay away from edges during DPS.
Danger: The relentless Nightmare Collapsing timer adds immense pressure. Fumbling mechanics, slow add clear, or getting lost can lead to running out of time and wiping, especially during the Standard collection or DPS phases.
Solution: Efficiency is paramount. In a team, assign clear roles: two on Standards, one on Bellkeepers. Use high-damage, quick-clearing weapons and abilities against Psions and Bellkeepers. Learn the optimal paths between side rooms and bells. Always budget the last 10-15 seconds of the timer for killing Bellkeepers and safely exiting the Nightmare Realm. If attempting the solo extended DPS strat, practice it thoroughly. When in doubt, especially solo, prioritize survival and leave the Nightmare Realm early rather than risking a wipe.
C. Transition: The Crypt and Statue Puzzle
Path Forward
After collecting your loot from Gahlran, proceed through the now-open path. You'll enter "The Crypt," a section involving platforming across gaps using large, ornate Cabal coffins embedded in the walls. This section requires careful jumping and potentially swapping realms using bells to reveal pathways or bypass obstacles.
Statue Room
After the crypt, you arrive in a large, circular room dominated by a central bell and four imposing statues of Cabal Legionaries/Gladiators, initially facing random directions.
Statue Puzzle Solution
- Objective: Rotate the four statues in the Normal Realm so they all face inwards towards the central bell.
- Mechanic: Shoot the central bell to enter the Nightmare Realm. In this realm, the statues are already correctly facing the center. Locate an interactive switch, button, or dial (often shaped like Calus's head) on the base of each statue's plinth. Bellkeepers might spawn and need to be dealt with to exit.
- Rotation Logic: Interacting with a switch in the Nightmare Realm rotates the corresponding statue in the Normal Realm by 90 degrees counter-clockwise.
- Execution: Observe which statues are facing incorrectly in the Normal Realm. Note how many 90-degree counter-clockwise turns each needs (1, 2, or 3). Enter the Nightmare Realm. Go to the switches of the incorrect statues and press them the required number of times. For example, if a statue needs a 180-degree turn, press its switch twice.
- Completion: Once you've interacted with the necessary switches, kill any Bellkeepers, return to the Normal Realm (remember the circle!), and check if all statues are facing inward. If correct, the floor/platform beneath the central bell will retract or open, revealing a passage downwards to the next encounter.
D. Encounter 2: Unlock the Vault
Objective
Defeat three powerful, shielded Nightmare mini-bosses (likely Abomination or similar tanky Cabal variants) one after another. To make a mini-boss vulnerable, you must collect two specific Standard Essences from the Nightmare Realm and deposit them at the correct plates in the Normal Realm.
Arena Layout
A large, multi-level arena, roughly square or circular. There are two bells: one usually near the entrance on the lower level ("Bottom Bell") and another at the opposite end, up a large flight of stairs ("Top Bell"). Only one bell is active at a time in the Normal Realm. The center of the room features a circular arrangement with six deposit plates. Four distinct corner areas/balconies are accessible via stairs; these correspond to the four standard symbols (War Beast, Axe, Chalice, Sun). In the Nightmare Realm, Standard Bearers (tough Centurions or Colossi) spawn in these corner areas. Crucially, the walls near each corner area in the Normal Realm display the symbol associated with that corner, serving as your primary orientation guide.
Step-by-Step Guide
- Start Encounter: Trigger the fight by moving forward or engaging the initial wave of enemies. The first Nightmare mini-boss (often Arc shielded) appears but is immune. Two symbols will illuminate above two of the six central plates, indicating the required Standard Essences. Expect continuous waves of challenging adds, including numerous Phalanxes, Legionaries, Psions, and War Beasts.
- Kill Normal Realm Bellkeepers: Two Bellkeepers spawn in the Normal Realm, typically near the location where the inactive bell would be. Eliminate them.
- Enter Nightmare Realm: Locate the currently active bell (the one without Bellkeepers nearby) and shoot it to transport to the Nightmare Realm. The Nightmare Collapsing timer begins (~1 minute).
- Navigate to Correct Corners: Identify the corner areas corresponding to the two required symbols by checking the wall markings in the Normal Realm beforehand. Head towards those locations in the Nightmare Realm.
- Clear Corner & Spawn Standard Bearer: Each target corner area will be heavily defended by adds (Phalanxes, Legionaries, often a Colossus at the back). You must defeat all enemies within the corner section to trigger the spawn of the Standard Bearer (a powerful Centurion) at the rear/top of that area.
- Kill Bearer & Collect Essence: Defeat the Standard Bearer. Killing the correct Bearer (matching a needed symbol) extends the Nightmare Collapsing timer (+10-15 seconds). Killing an incorrect Bearer may penalize your timer. Once defeated, grab the Standard Essence it drops. - Team Strategy: Split up, with players heading to the two required corners simultaneously. - Solo Strategy: Tackle one corner at a time. This means two separate trips into the Nightmare Realm per mini-boss.
- Kill Nightmare Realm Bellkeepers: Two Bellkeepers will spawn in the Nightmare Realm, again near the location of the bell opposite your entry point. Kill them to enable the exit bell.
- Time-Saving Tip (Bellkeeper Spawn Trick): To make Bellkeeper kills faster, especially solo, try this: Before entering the Nightmare Realm, stand near the corner/symbol you intend to clear first. Then, shoot the bell located on the opposite side of the arena to enter the Nightmare. This causes the Bellkeepers in the Nightmare Realm to spawn much closer to your current position (near the bell you didn't shoot), allowing you to kill them quickly either just before or just after grabbing the Standard, saving valuable travel time on the clock.
- Return to Normal Realm: Go to the correct exit bell, ensure you're within the circle, and shoot it before the timer expires.
- Deposit Standards: Back in the Normal Realm, navigate to the central plates corresponding to the symbols you collected and deposit the Essences.
- Damage Mini-Boss: Once both required Standards are deposited, the current mini-boss's shield will drop, making it vulnerable. Focus fire and defeat it. There is no time limit for this DPS phase itself, but adds will continue to spawn relentlessly, making survival a priority.
- Repeat for Next Boss: After the first mini-boss falls, the second one (often Void shielded) spawns, immune. Two new symbols appear above the central plates. Repeat the entire cycle (Steps 2-10) for this boss.
- Repeat for Final Boss: Once the second mini-boss is down, the third and final one (often Solar shielded) spawns, immune. Two final symbols appear. Repeat the cycle (Steps 2-10) one last time.
Defeating the third mini-boss concludes the encounter. A loot chest appears, and the central floor opens to allow progress.
Vault Strategy & Tips
- Add Control is Everything: This encounter is arguably more about managing the overwhelming number of adds than the mini-bosses themselves. Phalanxes are particularly dangerous due to their pushback ability. Utilize roaming Supers (like Hammer of Sol), Machine Guns, Wave-Frame Grenade Launchers, high-clearing Exotics (Osteo Striga, Witherhoard), and potent grenades. Weapons like Skyburner's Oath that ignore Phalanx shields are very effective. Aiming for Phalanx feet or using explosive damage can bypass shields. Glaives can help stagger and control them.
- Safe Positioning: The top landing of the large staircase leading to the upper bell can offer a relatively safer position to deal with adds in the Normal Realm, as Phalanxes may struggle to push you effectively there. However, be mindful of snipers and projectiles from other enemies. Corners are dangerous; clear them quickly and efficiently.
- Nightmare Realm Efficiency: The timer demands speed and precision. Eager Edge swords provide excellent mobility for traversing the arena quickly. Focus fire on the Standard Bearer and Bellkeepers. Especially when solo, don't get bogged down killing every single minor add if time is running short. Killing the Colossi guarding the Standard Bearers takes significant time and ammo; assess if it's necessary based on your timer and survivability. Use the Bellkeeper spawn trick (see Step 7) to optimize movement.
- Symbol Certainty: Always double-check the required symbols before entering the Nightmare Realm. Use the prominent wall markings in the Normal Realm for reliable orientation. Killing the wrong Standard Bearer wastes precious time and timer extensions.
- Mini-Boss Damage: Since the DPS phase itself isn't timed, prioritize staying alive amidst the respawning adds. Use reliable damage options like Swords, Linear Fusion Rifles, or burst Supers. Don't expose yourself unnecessarily.
Danger: Being constantly pushed, staggered, or outright killed by the relentless tide of Cabal Phalanxes and their impenetrable shields. They can easily shove you off ledges, into walls for physics deaths, or prevent you from reaching objectives.
Solution: Employ weapons and tactics that negate their shields. Wave-Frame Grenade Launchers hit the ground behind them. Skyburner's Oath shoots through them. Radiant weapon effects can allow shots to pierce. Aiming for their feet or using AoE damage works well. Glaive melees or stasis can stagger them. Maintain distance whenever possible and use cover effectively, especially the upper stairwell. Never stand near an edge when Phalanxes are around. Max Resilience helps absorb hits.
Danger: The combination of the Nightmare Collapsing timer, the need to navigate to specific corners, clear numerous tough adds, kill Bellkeepers, and return can lead to confusion, mistakes, and wipes. Getting lost or killing the wrong Standard Bearer is fatal to a run.
Solution: Preparation is key. Before entering the Nightmare, confirm the two required symbols and mentally map your route using the reliable wall markings. Utilize the Bellkeeper spawn trick (shooting the far bell) to streamline Bellkeeper kills. Prioritize targets in the Nightmare: Standard Bearer > Bellkeepers > necessary adds for survival/Bearer spawn. If solo and feeling pressured, opt for the safer (though slower) strategy of collecting only one Standard per Nightmare cycle.
E. Transition: The Depths & Treasure Room
Path Forward
After defeating the third Vault mini-boss, drop down through the newly opened floor. You'll face another transition section involving platforming and bell mechanics. This often involves navigating narrow beams or precarious ledges that might only be solid or visible in one realm.
Treasure Room
You'll emerge into a vast chamber filled with piles of gold and opulent clutter, dominated by a massive, mysterious cube covered in a white tarp.
Path to Final Boss
Find the exit from the Treasure Room and continue forward. There might be a final short platforming or realm-swapping segment.
Equip your final boss loadout, take a deep breath, and slide down into the arena to face the Nightmare of Caiatl.
F. Encounter 3: Nightmare of Caiatl, Princess-Imperial
Objective
Collect four Standard Essences (two at a time) from the Nightmare Realm and deposit them in the Normal Realm to activate the giant Bell of Conquest. Trigger the DPS phase by shooting the chains near the deposit plates. In the DPS Nightmare Realm, quickly kill six Bellkeepers, then intercept Caiatl as she walks towards one of three smaller bells. Stun her by ringing the bell she approaches while standing inside its circle to gain the mandatory Waking Resonance damage buff. Repeat this stun-and-damage cycle for all three bells. Repeat the entire process until Caiatl is defeated.
Arena Layout
A long, rectangular hall. The starting area contains four deposit plates for the standard symbols (Sun, Axe, War Beast, Chalice). Further down the hall are three smaller, usable Bells of Conquest (typically referred to as Left, Right, and Middle/Back). At the far end stands the massive, inactive Bell of Conquest structure where Caiatl initially spawns. The Nightmare Realm layout for standard collection is similar to Gahlran's side rooms or the Vault's corners – a central area with four branching paths/platforms leading to Psion Standard Bearers.
| Caiatl Standard Bearer Locations (Nightmare Realm) | |
|---|---|
| Top Left | Sun |
| Top Right | Axe |
| Bottom Left | War Beast |
| Bottom Right | Chalice |
Step-by-Step Guide (Pre-DPS Phase)
- Start Encounter & Clear Adds: Engage the initial waves of Cabal (Psions, Legionaries, Centurions) that spawn near the plates and bells. Bellkeepers will appear near the three small bells.
- Identify Required Symbols: Two symbols will illuminate above two of the four deposit plates, indicating the first pair of Standards needed.
- Kill Normal Realm Bellkeepers: Eliminate the Bellkeepers guarding the three small bells in the Normal Realm. This allows entry into the Nightmare Realm.
- Enter Nightmare Realm: Shoot any one of the three small bells. The Nightmare Collapsing timer starts.
- Kill Standard Bearers & Collect Essences: Navigate the Nightmare Realm to the corner platforms corresponding to the two required symbols. Defeat the Psion Standard Bearers located there. Colossi or other challenging adds may also be present. Killing the correct Bearers extends the timer. Collect the two Standard Essences. - Team Strategy: Two players grab one standard each. - Solo Strategy: Grab one, kill Bellkeepers, exit, repeat for the second.
- Kill Nightmare Realm Bellkeepers: Six Bellkeepers spawn in the Nightmare Realm – two near each of the three small bell locations. All six must be killed to enable the exit bell.
- Return to Normal Realm: Go to the appropriate exit bell, stand inside the circle, and shoot it before the timer expires.
- Deposit Standards: Return to the starting area and deposit the two collected Essences at their corresponding plates.
- Repeat for Second Pair: Two new symbols will illuminate above the remaining plates. Repeat steps 3 through 8 to collect and deposit the final two Standard Essences.
Step-by-Step Guide (DPS Phase)
- Prime the Bell of Conquest: Once all four Standards are deposited, the large chains hanging near the deposit plates will glow with purple or red energy. Take this opportunity to reload, regenerate abilities, and gather ammo if needed, as adds continue to spawn.
- Enter DPS Nightmare Realm: Shoot one of the glowing chains or the crystal attached to it. This triggers the giant Bell of Conquest at the far end of the hall, teleporting the entire fireteam into the Nightmare Realm version of the arena for the DPS phase.
Time-Saving TipImmediately after shooting the chain, you can shoot one of the small bells. This bypasses the short delay and teleports you into the DPS realm faster, giving you crucial extra seconds to deal with the Bellkeepers before Caiatl even fully spawns or starts moving.
- PRIORITY ONE: Kill DPS Realm Bellkeepers: As soon as you teleport in, six Nightmare Bellkeepers spawn – two guarding each of the three small bells. These must be eliminated immediately. Failure to kill the keepers at a bell prevents you from ringing it to stun Caiatl. - Team Strategy: Assign each player to one bell (Left, Right, Middle) and have them instantly kill the two keepers at their assigned bell. - Solo Strategy: Often recommended to kill the two Middle bellkeepers first, as this gives a central vantage point to react to Caiatl's movement. Use powerful specials like Fusion Rifles, Snipers, or quick Supers.
- Track Caiatl's Path: Nightmare Caiatl spawns at the far end (near the giant bell structure) and begins slowly walking towards one of the three small bells. Quickly identify which bell (Left, Right, or Middle) is her target.
- Intercept and Prepare to Stun: Move rapidly to the bell Caiatl is approaching. You must get there before she does. Double-check that the two Bellkeepers guarding that specific bell are dead. Position yourself inside the glowing circle around the bell.
- Execute the Stun & Gain Waking Resonance: When Caiatl gets very close to the bell, stepping inside or near the circle's edge, shoot the bell. A successful stun will interrupt her, and grant the crucial Waking Resonance buff for approximately 10-12 seconds to all Guardians standing inside the bell's circle when it rang. This buff is mandatory for dealing significant damage; without it, your damage is reduced by around 90%.
- Damage Window: Unleash your highest DPS during the Waking Resonance buff window. Use Supers, Heavy weapons, and optimized rotations.
- Rotate to the Next Bell: As the Waking Resonance buff is about to expire (or even slightly before, to get a head start), Caiatl will recover from the stun and begin walking towards one of the remaining two small bells (the choice appears random). Quickly identify her next target bell and repeat steps 5 (Intercept), 6 (Stun & Buff), and 7 (Damage).
- Stomp Baiting Tip: If you need a few extra seconds to kill Bellkeepers or let teammates catch up, you can run close to Caiatl as she's walking. This often baits her into performing a stomp animation, briefly pausing her advance. Use this strategically, but be careful not to get stomped into danger yourself.
- Third Bell and Phase End: Repeat steps 5, 6, and 7 for the third and final small bell. After the damage window at the third bell concludes, Caiatl will retreat towards the giant Bell of Conquest structure and teleport the fireteam back to the Normal Realm, ending the DPS phase.
If Caiatl is not defeated, you must repeat the entire encounter cycle, starting from the Pre-DPS Phase (Step 1: Clear adds, identify symbols...) all the way through the DPS Phase (Steps 1-9).
Caiatl Strategy & DPS Optimization
- Bellkeeper Blitz: The absolute highest priority at the start of the DPS phase is killing the six Bellkeepers as fast as humanly possible. Use your most effective tools: Fusion Rifles, Snipers, Glaives, Supers. Assigning players to bells in a team is crucial for speed. The "shoot small bell early" trick buys precious time.
- Waking Resonance is Non-Negotiable: You must be inside the bell's circle when stunning Caiatl to receive the buff. Communicate positioning. If you miss the buff, don't waste heavy ammo or Supers; focus on survival or clearing Psion snipers.
- Optimal DPS Weapons: Linear Fusion Rifles like Stormchaser or Cataclysmic (especially with Bait and Switch) offer top-tier damage from a relatively safe distance. The Lament sword is a very popular and safe choice, providing strong DPS, healing to counteract sniper fire, and blocking capability. Witherhoard adds valuable passive damage. Whisper of the Worm can be extremely potent, especially when paired with seasonal artifact mods boosting sniper damage.
- Movement and Positioning: Speed and anticipation are key. Be ready to sprint to the next bell as soon as Caiatl starts moving. Leaving the current bell slightly before the buff expires helps you stay ahead of her. Use the bell structures themselves as cover from the deadly Psion snipers. Master the stomp-baiting technique to control the pace if needed.
- Dealing with Psion Snipers: These enemies are a major threat during the DPS phase, capable of quickly killing you while you focus on Caiatl. If time permits between bell stuns, try to eliminate them. Otherwise, rely on cover (bells), healing sources (Lament, Well of Radiance, Healing Grenades, Restoration effects), or brief invisibility. Equipping Solar Resistance mods is highly advisable.
Danger: Being too slow to eliminate the six Bellkeepers at the start of the DPS phase. If Caiatl reaches her targeted bell before its keepers are dead, you cannot stun her, and the DPS phase ends prematurely, wasting an entire cycle.
Solution: This requires immediate, coordinated action. Use the "shoot small bell early" trick for more setup time. Assign players to specific bells and use high-burst damage (Fusions, Snipers, Supers) instantly upon arrival. Practice identifying targets quickly. Solo players need maximum efficiency, often killing the middle two first then rapidly acquiring and eliminating the next pair based on Caiatl's path.
Danger: The infamous Incendior backpacks dropped by Bellkeepers are a silent killer. If Caiatl stomps near one – even a backpack left over from the pre-DPS phase – the resulting explosion is almost always lethal.
Solution: Proactive prevention is best. Use Fusion Rifles (Riptide, Epicurean, etc.) or abilities that disintegrate enemies to kill Bellkeepers, preventing backpacks from ever dropping. If backpacks are present, make it a priority to scan the area around the bells and shoot any dropped packs from a safe distance before Caiatl gets close or between bell stuns. Spatial awareness of where keepers died is crucial.
Danger: Successfully stunning Caiatl but realizing you or teammates were outside the bell's activation circle, therefore missing the essential Waking Resonance buff. This renders your DPS negligible for that 10-12 second window.
Solution: Constant communication and awareness. Verbally confirm players are "in the circle" or "on the plate" before shooting the bell. If playing solo, double-check your own positioning. If you miss the buff, do not waste Heavy ammo or Super energy. Instead, use that time to clear Psion snipers, reposition for the next bell, or simply focus on staying alive. Missing one bell's worth of damage is far better than dying or wasting precious resources.
Secrets of the Mindscape: Collectibles and Loot
Beyond the challenging encounters, Duality hides secrets and rewards for diligent Guardians. Tracking these down not only grants lore insights and triumphs but can also improve your chances at the dungeon's coveted Exotic weapon.
Hidden Chest Locations
Duality contains two secret chests. These chests award gear (weapons or armor) that you have already unlocked from completing the main encounters in the dungeon. They are a good source for extra rolls of desired items.
- Chest #1 (Post-Gahlran / Statue Room): Located in the large statue puzzle room after defeating Gahlran but before solving the puzzle. As you enter the room, look across to the far side. On one of the upper ledges (often described as the left side), you'll spot a doorway that's slightly ajar or cracked open. Jump across the gap to this platform and head inside the opening to find the chest.
- Chest #2 (Post-Vault / Treasure Room): Found after completing the Vault encounter (defeating the three mini-bosses). You'll enter a large chamber filled with treasure and dominated by a massive cube covered in a white tarp. Drop down and walk underneath this central structure. Turn around to face the direction you entered from. The chest is hidden within a small crawlspace or alcove under a walkway against that wall.
Repressed Memories (Mind Heist Triumph)
Scattered throughout the dungeon are 12 "Repressed Memories" of Calus, appearing as small, interactable objects. Collecting all 12 unlocks the "Mind Heist" Triumph, which is required for the "Discerptor" Seal and, importantly, permanently increases your drop chance for the Heartshadow Exotic sword.
Quick Reference: Repressed Memory Locations Summary
- First Large Room (Normal Realm): Upper right wall alcove, behind open door.
- First Large Room (Nightmare Realm): Same location as #1, but accessed in the Nightmare Realm.
- Second Large Room (Descent, Nightmare Realm): Behind a large pillar on a low platform, across the gap from where you enter that section.
- Pre-Gahlran Room: On top of or near the large structure/bed above the hole leading down to the Gahlran encounter.
- Gahlran Arena: Inside the side room marked with the War Beast symbol.
- Crypt (Post-Gahlran): Far left side of the first coffin room, requires activating levers and jumping around a pillar to reach an open coffin/platform.
- Crypt (Near End): In a hidden tunnel underneath the platform you land on before jumping across a large gap into a narrow tunnel.
- Statue Puzzle Room (Nightmare Realm): On the platform/in the alcove where Secret Chest #1 is located in the Normal Realm.
- Vault Arena: High up on a wall near the Dog (War Beast) symbol area, requires platforming up extended coffin ledges.
- Treasure Room (Post-Vault): Underneath the central tarp-covered cube, near Secret Chest #2.
- Final Transition (Nightmare Realm): In the platforming section with high, narrow beams leading towards Caiatl, look to your right upon entering the beam area.
- Pre-Caiatl Room: Just before sliding down the slope into the boss arena, jump onto a small ledge to the right of the entrance, then jump up again into a crawlspace directly above the doorway.
Complete Loot Table
Understanding what drops where is crucial for farming specific gear.
| Encounter | Weapon Drops | Armor Drops | Notes |
|---|---|---|---|
| 1: Nightmare of Gahlran | Lingering Dread (Stasis GL), The Epicurean (Void Fusion) | Deep Explorer Helmet, Arms, Legs | |
| 2: Unlock the Vault | Stormchaser (Arc LFR), Unforgiven (Void SMG), New Purpose (Stasis Pulse) | Deep Explorer Chest, Arms, Class Item | |
| 3: Nightmare of Caiatl | Heartshadow (Exotic Void Sword - Chance), Fixed Odds (Solar MG), Lingering Dread, New Purpose, Stormchaser, The Epicurean, Unforgiven | All Deep Explorer Armor Pieces | Caiatl can drop any weapon/armor from Encounters 1 & 2, plus Fixed Odds |
| Secret Chests (Statue & Treasure) | Any Legendary Weapon or Armor piece already unlocked from encounter completions | N/A | Good for extra rolls |
Weapon Deep Dive & Pattern Farming
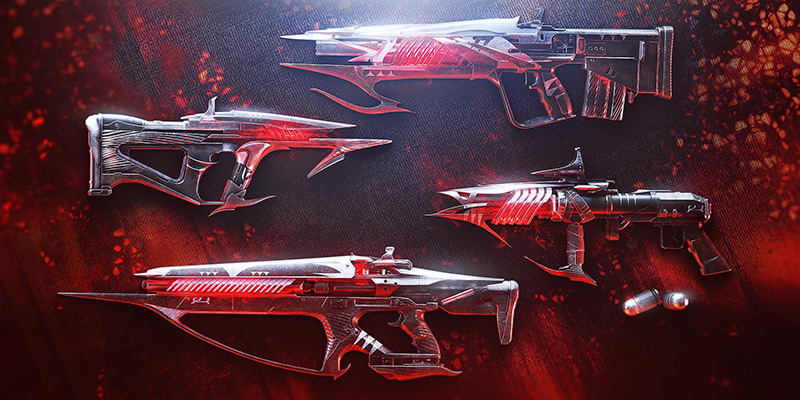
Duality offers a suite of powerful Legendary weapons, two of which are craftable. All legendary weapons feature the Bitterspite Origin Trait: Taking damage accelerates this weapon's next reload, stacking up to 5 times.
Standout Legendaries
- Stormchaser (Arc Linear Fusion Rifle): A unique 3-round burst LFR that was meta-defining upon release. Still a potent DPS option, especially with rolls like Rapid Hit or Clown Cartridge paired with Firing Line or Vorpal Weapon. Drops from Vault & Caiatl.
- Unforgiven (Void Submachine Gun): An Aggressive Frame (720 RPM) SMG perfect for Void 3.0 builds. Look for Demolitionist paired with Adrenaline Junkie, Golden Tricorn, or Rampage. Repulsor Brace is also a strong option for Void synergy. Drops from Vault & Caiatl.
- Lingering Dread (Stasis Grenade Launcher): A versatile Special GL. Can roll with Blinding Grenades for crowd control or Spike Grenades for damage. Excellent perk combinations include Auto-Loading Holster + Chill Clip (fantastic utility), Vorpal Weapon, or Demolitionist. Drops from Gahlran & Caiatl.
- The Epicurean (Void Fusion Rifle - Craftable): A solid Precision Frame Fusion Rifle. Being craftable allows you to guarantee your god roll. Perks like Surplus or Feeding Frenzy combined with Rangefinder, Swashbuckler, or Backup Plan are desirable. Drops from Gahlran & Caiatl.
- Fixed Odds (Solar Machine Gun - Craftable): A High-Impact Frame MG great for Solar builds. Craftable allows perfect roll acquisition. Field Prep paired with Incandescent (for Scorch synergy) or Firing Line/Rampage are top choices. Drops only from Caiatl.
- New Purpose (Stasis Pulse Rifle): A High-Impact Frame Pulse Rifle. Can roll strong perks like Perpetual Motion or Feeding Frenzy combined with Desperado (post-rework needs evaluation), Headstone, or Focused Fury. Drops from Vault & Caiatl.
Weapon Pattern Farming
- Craftable Weapons: Only The Epicurean and Fixed Odds from Duality have unlockable patterns for crafting at the Enclave.
- Farming Limitation: Unlike some newer dungeons or raids, Duality loot (including red border pattern weapons) is only farmable when Duality is the featured weekly dungeon in the Director's rotator playlist. The weekly reset occurs every Tuesday at 10 AM PDT / 1 PM EDT / 6 PM BST / 7 PM CEST.
- Non-Featured Weeks: Outside of its featured week, you can only get one drop per encounter checkpoint per character class (Hunter, Warlock, Titan) per week. Secret chests also only award loot once per character per week.
Featured Week Farming Method
When Duality is the featured dungeon, you can farm encounters repeatedly for loot. The common method involves:
- Reach the desired encounter checkpoint (e.g., Caiatl for Fixed Odds) on a character (Character A).
- Have a friend join, then switch to another character (Character B) and have them join the friend, saving the checkpoint on Character B.
- Switch back to Character A, rejoin the friend, and complete the encounter to get loot.
- Leave the activity. Relaunch the dungeon on Character B (who holds the checkpoint).
- Switch back to Character A and rejoin Character B.
- Complete the encounter again, get loot, and repeat from Step 4.
Heartshadow Exotic Sword Guide
The ultimate prize of the Duality dungeon is the Exotic Void Sword, Heartshadow.
- Acquisition: Heartshadow has a random chance to drop only from defeating the final boss, Nightmare of Caiatl.
- Exotic Perks: Its unique heavy attack, "Exhumation," turns the wielder invisible upon activation and simultaneously fires a spread of seeking Void projectiles. While invisible from this effect ("Wraithwalk"), the sword deals increased damage. If the projectiles hit an enemy while Wraithwalk is active, they apply a Weaken debuff.
- Drop Rate & Enhancement: The base drop rate is notoriously low. You typically get one chance per character class per week (three total chances weekly). However, you can permanently increase your odds of receiving Heartshadow by completing specific Triumphs associated with the "Discerptor" Seal.
Heartshadow Catalyst
- Unlocking: The Catalyst quest becomes available after you have obtained the Heartshadow sword itself. You must re-enter the Duality dungeon with Heartshadow potentially equipped.
- Mechanic: Three specific, powerful Nightmare enemies will now spawn in hidden locations within the dungeon, typically accessible only during Nightmare Realm phases.
- Location 1 (First Ascent): In the first large climbing room, during the second Nightmare phase (after reaching the top and shooting the bell across), head right and drop to the lower platform leading to Memory #2's location. A Nightmare enemy spawns here. Kill it quickly (a timer starts) and pick up the Standard it drops. Bank the Standard at the deposit point behind the bell at the end of this Nightmare section.
- Location 2 (Crypt): In the Crypt jumping puzzle area after Gahlran, a Nightmare enemy spawns on one of the platforms, usually across a gap. Kill it, grab the Standard (no timer here), and find the nearby deposit point.
- Location 3 (Final Transition): In the final platforming section with narrow beams (where Memory #11 is), shortly after the Treasure Room. A Nightmare enemy spawns here. Kill it, grab the Standard, and bank it at the deposit point located on the platforms just before the final slide down into Caiatl's arena.
- Reward: After banking the third Standard, a chest will appear nearby containing the Heartshadow Catalyst.
- Catalyst Effect: The Masterworked Catalyst increases the duration of the invisibility granted by the heavy attack.
- Masterworking: Requires approximately 400 kills with Heartshadow. Standard farm locations like the Shuro Chi checkpoint in Last Wish or the Grasp of Avarice entrance are effective for completing this quickly.
The Ultimate Challenge: Solo and Solo Flawless Guide
For many Guardians, the true pinnacle of mastering a dungeon lies in completing it alone, and even more so, doing it flawlessly without dying. Duality presents a formidable solo challenge, demanding near-perfect play and optimized builds.
Why Attempt Solo (Flawless)?
- The Ultimate Test: It's a significant personal achievement, showcasing mastery over mechanics, buildcrafting, and execution under pressure.
- Triumphs and Rewards: Solo completion is required for the "Solo Thoughtstealer" Triumph, contributing to the "Discerptor" title/Seal. Achieving a Solo Flawless run (completing the entire dungeon solo, without dying, and without leaving the activity) awards the exclusive "Untouched by Opulence" emblem.
- Heartshadow Drop Rate: Completing the Solo and Master Triumphs significantly increases your chances of obtaining the Heartshadow Exotic sword.

General Solo Principles for Duality
- Survival First, Speed Second: This cannot be overstated for Duality solo. Prioritize staying alive above all else. Max out Resilience (Tier 10 is highly recommended). Utilize every available source of healing: Restoration (Solar subclasses), Devour (Void), Well of Life mods, Heal Clip perk, Exotics like Loreley Splendor or Karnstein Armlets, and especially The Lament sword's healing on hit. Equip relevant damage resistance mods (Solar, Arc, Concussive Dampener).
- Embrace Patience: Duality's encounters (outside the timed Nightmare phases) do not have enrage mechanics. Take your time. Clear adds methodically before proceeding with mechanics. Farm for ammo in safe spots if needed (adds spawn indefinitely in the Vault's Normal Realm, for instance). Don't feel pressured to rush a DPS phase if your health is low or abilities are on cooldown. Knowing when to disengage or delay is a crucial solo skill.
- Mechanics Mastery: You need an intimate understanding of every mechanic: Bell timings, the Nightmare proximity rule, Bellkeeper spawn locations and triggers, Standard Bearer locations and spawns, boss attack patterns, and safe zones. Practice each encounter until the flow is second nature.
- Target Prioritization: Your priorities shift constantly solo. Bellkeepers must die before you can use a bell. Psion snipers in the Caiatl fight are lethal and need managing. Phalanxes in the Vault can instantly end a run with a push. Learn which threats to eliminate immediately and which can be kited or ignored temporarily.
- Loadout Self-Sufficiency: Choose weapons and builds that allow you to handle everything yourself. This means strong add clear, reliable single-target damage, good ammo economy, and built-in survivability. Lament is frequently recommended for its blend of damage and healing. Fusion Rifles are crucial for managing Bellkeeper backpacks safely. Wave-frame GLs excel at add control, especially against Phalanxes.
- The Duality Difficulty Spike: Duality consistently ranks among the toughest solo flawless dungeons. This isn't due to a single overwhelming factor, but the combination of intense pressure points: the strict Nightmare Collapsing timer forcing rapid execution, the mandatory Bellkeeper kills under pressure, the Nightmare bell proximity rule punishing missteps, the sheer density of dangerous adds (snipers, pushy Phalanxes), lethal boss attacks (Gahlran's physics, Caiatl's stomp + backpacks), and numerous environmental hazards (gaps, exploding backpacks). Unlike dungeons where cautious, passive play is viable, Duality demands constant, high-stakes action within tight time windows, placing immense cognitive load on the solo player and offering frequent opportunities for run-ending mistakes.
Class-Specific Strategies & Builds (Solo Flawless Focus)
Solar (Well of Radiance): Often considered the safest and most consistent choice. Max Resilience, Healing Grenades, Touch of Flame aspect (for enhanced Healing Grenades), Heat Rises + Icarus Dash (for aerial survivability and movement). Ember of Empyrean is key for extending Restoration x2 via Solar weapon kills. Exotics: Sunbracers (add clear), Karnstein Armlets (melee healing), or potentially Starfire Protocol (if grenade damage is still strong). Well provides a safe haven during DPS. Weapons: Witherhoard, a Solar weapon (like Calus Mini-Tool or BXR Battler) to proc Empyrean, Fusion Rifle (for Bellkeepers), Lament or LFR for DPS. Prismatic builds using Song of Flame and Getaway Artist are also viable.
Void (Devour): Excellent survivability through constant Devour uptime. Child of the Old Gods provides Weaken and ability energy. Nova Bomb offers good burst DPS. Exotics: Contraverse Hold (grenade focus), Necrotic Grip (pairs well with Osteo Striga or Thorn for add clear and Devour chaining). Requires careful management to keep Devour active.
Solar (Bonk Hammer / Loreley): Historically the go-to Titan build for solo Duality due to unmatched survivability from Loreley Splendor Helm and Restoration from Sunspots. Max Resilience is mandatory. Use Throwing Hammer with Synthoceps for high melee damage (can one-shot Bellkeepers at Roaring Flames x3) and healing on pickup. Aspects: Sol Invictus, Roaring Flames. Fragments: Ember of Torches (Radiant on melee), Ember of Solace (longer Restoration), Ember of Searing (melee energy). Weapons: Fusion Rifle or Shotgun (Conditional Finality is good), Tractor Cannon (debuff), Lament or LFR for DPS. Check post-nerf effectiveness, but likely still very strong.
Strand (Banner of War): A powerful modern option. Banner of War aspect provides healing and melee damage buffs. Pair with Synthoceps for maximum melee damage or Strongholds for sword guarding/healing. Use grapple melee (Flechette Storm) for AoE and movement. Weapons: Quicksilver Storm (was strong, check post-nerf), Fusion/Shotgun, Sword (Lament or legendary) or LFR. Navigator Exotic Trace Rifle can provide Woven Mail.
Arc (Thundercrash/Skullfort): Can work, focusing on add clear with Insurmountable Skullfort for infinite melees and using Cuirass of the Falling Star swap for burst DPS. Survivability is lower than Solar/Strand, requires more careful play.
Arc (Assassin's Cowl / Liar's Handshake): High melee damage with Combination Blow. Assassin's Cowl provides invisibility and healing on powered melee final blows, offering excellent survivability in add-dense areas. Liar's Handshake provides massive burst melee damage. Requires aggressive CQC playstyle. Weapons: One-Two Punch Shotgun, Fusion Rifle, Tractor Cannon or DPS Heavy. Gathering Storm is a strong DPS super, especially buffed by Star-Eater Scales.
Solar (Blade Barrage / Golden Gun): Focuses on high burst DPS supers. Use Knock 'Em Down and Knife Trick for Radiant uptime. Survivability comes from Healing Grenades and Ember of Empyrean (requires Solar weapon kills) or dodging near enemies with Ember of Searing for class ability energy. Exotics: Celestial Nighthawk (Golden Gun), Star-Eater Scales (Blade Barrage/Golden Gun), Assassin's Cowl (if using Knife Trick for final blows). Requires careful positioning during DPS as survivability is lower.
Void (Omnioculus / Gyrfalcon's Hauberk): Invisibility provides safety for repositioning, grabbing standards, or escaping danger. Omnioculus grants damage resistance while invisible and refunds smoke bombs. Gyrfalcon's provides Volatile Rounds after emerging from invis for strong add clear. Weaker DPS potential compared to Solar/Arc, relies more on weapon DPS. Tether can debuff bosses.
The most common solo flawless killers in Duality are often not the bosses themselves, but environmental factors and minor mistakes under pressure:
- Backpack Explosions: Caiatl stomping a forgotten Bellkeeper backpack is arguably the #1 run ender.
- Physics Deaths: Getting knocked into a wall by Gahlran or Phalanxes, or pushed off ledges.
- Timer Expiry: Mismanaging time in the Nightmare Realm during Standard collection or DPS phases.
- Bell Proximity Wipe: Forgetting to stand in the circle when exiting the Nightmare Realm.
Always use Fusions/disintegration on Bellkeepers. Always scan for and destroy dropped backpacks. Always maintain spatial awareness near edges and bosses. Always budget time for Nightmare exits. Always double-check you are in the circle before shooting an exit bell.
Tips, Tricks, and Avoiding Wipes
Mastering Duality involves more than just following the steps; it's about optimizing movement, understanding hidden dangers, and knowing the shortcuts.
Time-Saving Tips & Shortcuts
- Caiatl Early Teleport: As mentioned in the Caiatl DPS section, shooting a small bell immediately after shooting the chains to start the DPS phase teleports you into the Nightmare Realm faster. This gives you valuable extra seconds to kill the Bellkeepers before Caiatl arrives, making the first stun much easier and safer.
- Gahlran Extended DPS (Solo): The solo strategy involving killing both Psions, grabbing one standard, leaving the second Psion alive during the first vision phase, grabbing the second standard, and then killing the respawned Psion during the second vision phase grants ~15 extra seconds for the main boss DPS window. This is complex and can bug out if not done perfectly, but significantly helps solo damage output.
- Vault Bellkeeper Spawn Manipulation: Standing near the standard you need but shooting the opposite bell to enter the Nightmare Realm causes Bellkeepers to spawn closer to you upon entry, saving travel time.
- Caiatl Stomp Baiting: Intentionally getting close to Caiatl during her walk between bells in the DPS phase can trigger her stomp animation, pausing her movement. This buys crucial time for killing Bellkeepers or allowing teammates (or yourself, solo) to get into position for the stun. Requires careful timing to avoid being killed by the stomp itself.
- Efficient Bell Activation: Use single-shot, high-impact weapons (Snipers, Fusions, Shotguns) to activate bells instantly, saving primary ammo and time. Hand Cannons can also work quickly with a shot + melee combo.
- Movement: Eager Edge swords are fantastic for quickly traversing the large arenas, especially the Vault and during Nightmare phases. Hunter dodges, Warlock Icarus Dash, and Titan Thruster/Shoulder Charge also aid mobility.
Critical Backpack Management
- The Threat: Incendior Bellkeepers drop explosive fuel tanks upon death unless disintegrated. These backpacks can be detonated by any explosive damage, enemy fire, or, most lethally, boss stomps (especially Caiatl's). Backpack explosions are often instant death.
- Prevention: The absolute best method is to kill Bellkeepers with Fusion Rifles (Riptide, Epicurean, Deliverance, Cartesian Coordinate, etc.) or abilities that cause disintegration (some Solar ignitions - careful near bells, Strand kills, Void Volatile). This prevents the backpack from dropping entirely.
- Mitigation: If backpacks do drop (e.g., killed with kinetics, non-disintegrating abilities, or swords), make it a conscious habit to locate and destroy them from a safe distance before they become a hazard. This is especially vital in the Caiatl arena before and during DPS phases. Look around after clearing keepers.
Common Wipe Mechanics & How to Avoid Them
- Nightmare Collapsing Timer: Running out of time in the Nightmare Realm.
- Avoidance: Prioritize speed and efficiency. Kill Standard Bearers (correct ones!) and Bellkeepers quickly. Learn routes. Always budget 10-15 seconds for exit. Leave early if unsure.
- Nightmare Bell Proximity Rule: Shooting a bell to exit the Nightmare Realm while standing outside the activation circle.
- Avoidance: Internalize this rule: Always be inside the circle when shooting a bell in the Nightmare Realm. Double-check positioning before firing.
- Bellkeepers Blocking Bells: Trying to activate a bell while its associated Bellkeepers are still alive.
- Avoidance: Bellkeepers are priority targets whenever you need to use a bell they are guarding. Kill both before attempting activation.
- Physics Deaths / Knockback: Being thrown into walls or off ledges by Gahlran, Phalanxes, boss stomps, or Bellkeeper attacks.
- Avoidance: Maintain spatial awareness, especially near edges. Use high Resilience. Utilize movement abilities for recovery. Block with swords (Lament). Stagger enemies before they can push.
- Caiatl Reaching Bell Unstunned: Failing to kill Bellkeepers and ring the correct bell before Caiatl arrives during the DPS phase.
- Avoidance: Extreme speed and coordination at the start of DPS. Use the early teleport trick. Assign players to bells. Use stomp baiting strategically.
- Backpack Explosions (Caiatl Stomp): Caiatl stomping near a dropped Incendior backpack.
- Avoidance: Use Fusion Rifles/disintegration on Bellkeepers. Actively destroy any dropped backpacks before DPS or between bell stuns.
Conclusion: Duality's Place and Your Path to Mastery
Duality stands as a unique and memorable entry in Destiny 2's dungeon lineup. Its exploration of Calus's psyche offers compelling lore, while the core Bell mechanic provides engaging, realm-swapping gameplay. However, its difficulty, particularly for solo players, is undeniable and places it high on the challenge ranking.
Difficulty Comparison
Compared to other dungeons, Duality is generally considered significantly harder than the foundational dungeons like Shattered Throne and Pit of Heresy, which are shorter and mechanically simpler. It's often ranked above Prophecy, Grasp of Avarice, and Spire of the Watcher due to its punishing timers, high add density, and complex, unforgiving DPS phases. Its difficulty is frequently compared to Warlord's Ruin, with Duality perhaps being faster but more punishing of mistakes, while Warlord's might be longer with tankier bosses. Most rankings place Duality below the grueling endurance tests of Ghosts of the Deep and the intense mechanics of Vesper's Host, making it one of the top 3 or 4 most difficult dungeons to solo flawlessly. The key differentiators are the mandatory timed sections and the severe consequences for small errors like backpack mismanagement or missing a bell stun.
The Road to Solo Flawless
Attempting a solo flawless run of Duality is a true test of skill, patience, and preparation. Don't be discouraged by initial failures – this dungeon is designed to push you.
- Start with Solo: Before aiming for flawless, focus on simply completing the dungeon solo. Learn the encounters inside and out without the pressure of perfection. Master the routes, enemy spawns, and safe spots. Get comfortable with your chosen build's survivability loop.
- Practice Encounters: Use checkpoints to practice specific encounters repeatedly. Focus on consistency in executing mechanics under pressure, especially killing Bellkeepers quickly and managing the Nightmare timer. Practice the Caiatl DPS phase until you can reliably kill keepers, track her, and hit the stuns.
- Refine Your Build: Experiment with different loadouts and mods to find what offers the best balance of survivability and efficiency for you. Lament and a good Fusion Rifle are common recommendations for a reason.
- Manage Frustration: Wipes will happen, often due to backpacks or physics. Take breaks. Analyze what went wrong. Don't let frustration lead to reckless plays. Remember, patience is key.
- Celebrate the Victory: Earning that "Untouched by Opulence" emblem is a badge of honor. The journey is challenging, often frustrating, but ultimately incredibly rewarding.
Duality offers a unique blend of psychological exploration, challenging mechanics, and fantastic loot. Whether you're diving in with a fireteam for the first time, farming for that perfect weapon roll during its featured week, or steeling yourself for the ultimate solo flawless challenge, approach Calus's mindscape with preparation, patience, and persistence. Good luck, Guardian – may your wits be sharp and your aim true as you navigate the Duality within.