
Ahoy, Guardian! Gather 'round and listen well, for tales tell of a cursed cave deep within the Cosmodrome's Skywatch, a place whispered in legend, brimming with riches beyond imagining, yet guarded by traps most foul and the lingering specter of greed itself. Prepare to chart a course into the Grasp of Avarice, a dungeon unlike any other, steeped in pirate lore, Bungie's own mischievous history, and the siren song of that most coveted treasure: the mighty Gjallarhorn.
Our journey begins where many a Guardian's obsession first took root – the infamous Loot Cave. Yes, that Loot Cave, the site of endless Hive extermination back in Destiny's dawn, a testament to player ingenuity (or perhaps, impatience). But this delve goes deeper than mere nostalgia. Bungie, in their infinite jest, has woven the very essence of that historic grind into the dungeon's fabric. Grasp of Avarice is a wickedly clever, often hilarious, cautionary tale about the corrupting power of avarice, a direct nod to those Guardians who traded adventure for endless engrams by a cave mouth. The dungeon's mechanics, its narrative, even its name, all serve this central theme: what price are you willing to pay for treasure?
Fear not, for this guide is your trusty treasure map, meticulously charted to navigate every peril. We shall detail the perplexing entrance puzzle, guide you through the Rusted Gangplank's deadly booby traps, provide strategies for the ravenous Ogre Phry'zhia, map out the explosive Sparrow race, unravel the complexities of the Fallen Shield's cannons, and lay bare the tactics needed to overcome the final pirate captain, Avarokk the Covetous. Along the way, we'll pinpoint every secret chest, catalogue the complete loot table, integrate the full Gjallarhorn quest and catalyst steps, and offer counsel for those daring enough to brave the depths solo or chase the glory of a flawless run, and even tips for the swiftest speedrunners. Prepare to face down Fallen pirates consumed by greed, corrupted Hive drawn to the cave's dark promise, and the echoes of Wilhelm-7, a Guardian whose quest for riches led to ruin. The design itself is a playful jab, Bungie acknowledging the player's desire for loot while simultaneously turning that desire into the dungeon's primary hazard. The Burden of Riches mechanic, where survival depends on grabbing more potentially useless engrams, is a direct reflection of the original Loot Cave farm, making this dungeon a unique piece of interactive commentary. So, sharpen your steel, check your Ghost's charge, and let's dive into the Grasp of Avarice! Fortune, danger, and perhaps a touch of self-reflection await!
Gearing Up for Plunder: Preparation Checklist
Before setting sail into this den of danger, a wise pirate checks their gear and prepares for the trials ahead. Neglect this step, and you might find yourself decorating a spike trap or feeding the space-sharks.
Power Level: What You Really Need
Understanding Power Level requirements is crucial, especially when tackling the dungeon's harder variant.
| Difficulty | Power Level | Notes |
|---|---|---|
| Normal | 1600 (Floor) | Being above 1620 offers little advantage. Focus on build synergy. |
| Master | 2010-2030 | Being under-leveled is severely punishing. Includes Match Game and Champions. |
Loadout Focus: The Guardian's Arsenal (Weapons)
Choosing the right tools for the job can mean the difference between a chest full of treasure and a watery grave.
General Utility & Add Clear:
- Witherhoard: Excellent for passive damage on bosses and area control.
- Blinding Grenade Launchers: Invaluable for controlling dangerous enemy groups. Pardon Our Dust (Kinetic) is recommended.
- Riskrunner: Shines during the Sparrow Race due to Arc damage resistance and chain lightning.
- Forbearance: Wave Frame GL with Chain Reaction for excellent add clearing.
- Reliable Primaries: Strong SMGs or Auto Rifles like BxR-55 Battler, Tinasha's Mastery, or Rufus's Fury.
Boss Damage (DPS):
- Linear Fusion Rifles: Sleeper Simulant, Taipan-4fr, Cataclysmic, Reed's Regret, Threaded Needle, or Stormchaser.
- Rocket Launchers: Gjallarhorn (buffs teammates' legendary rockets), Hothead, Royal Entry, Palmyra-B, Hezen Vengeance, or Scintillation.
- Swords: Particularly effective against the Ogre boss. Lament offers high damage, barrier piercing, and healing.
- Other Options: One Thousand Voices, Lord of Wolves, Still Hunt, or Legend of Acrius.
Loadout Focus: Class & Subclass Synergy
Solar (Well of Radiance): Go-to support option with healing and damage buff. Pair with Lunafaction Boots or Phoenix Protocol. Healing Grenades add survivability.
Void (Voidwalker): Devour aspect grants health on kills. Contraverse Hold enhances Vortex Grenades. Karnstein Armlets provide healing on melee kills.
Stasis (Shadebinder): Bleakwatcher turrets provide exceptional crowd control, freezing enemies for safety, especially when solo.
Prismatic: Offers flexibility with combinations like Apotheosis Veil/Star-Eater Scales Solipsism or Getaway Artist paired with Bleak Watcher.
Void (Sentinel): Ward of Dawn grants Weapons of Light buff and safety. Consider Ursa Furiosa or Helm of Saint-14.
Solar (Sunbreaker): "Bonk Titan" build offers incredible survivability through Sunspots and Restoration. Enhanced by Synthoceps, Wormgod Caress, or Loreley Splendor Helm.
Arc (Striker): Thundercrash with Cuirass of the Falling Star provides high burst super damage.
Prismatic: Allows combining aspects like Consecration with other elements. Consider No Backup Plans for Void Overshields with shotguns.
Void (Nightstalker): Invisibility is king for survival, allowing safe repositioning, revives, and Burden depositing. Shadowshot super provides valuable debuffs. Pair with Omnioculus, Orpheus Rig, or Gyrfalcon's Hauberk.
Arc (Arcstrider): Lethal Current and Flow State with Combination Blow paired with Assassin's Cowl or Liar's Handshake offers high damage and survivability.
Solar (Gunslinger): High super damage with Golden Gun (Celestial Nighthawk) or Blade Barrage (Star-Eater Scales/Shards of Galanor). Access to Restoration for healing.
Stasis (Revenant): Renewal Grasps enhance Duskfield Grenades for damage resistance and crowd control.
Essential Gear Mods
Fine-tuning your armor mods is crucial for maximizing effectiveness.
Damage Amplification:
- Weapon Surges: Match these to your primary heavy weapon's element for significant damage boost.
- Debuffs: Ensure your team has reliable debuffs like Divinity, Tractor Cannon, or Hunter Tether.
- Weapon Mods: Boss Spec for heavy weapons, Major Spec for special weapons, Minor Spec for primaries.
Survivability:
- Stats: Prioritize Tier 10 Resilience for 30% passive damage reduction and high Recovery.
- Damage Resistance Mods: Match to encounter threats: Arc Resist for Sparrow Race/Final Boss, Solar Resist for Ogre, Sniper Resist for Final Boss Shank.
- Subclass Effects: Leverage Woven Mail (Strand), Restoration/Cure (Solar), Devour/Void Overshields (Void), or Amplified speed boost (Arc).
- Orb Generation & Pickup: Use Siphon mods on helmet, and pickup mods like Recuperation or Better Already on legs.
Ammunition Economy:
- Finders/Scouts: Equip Heavy and Special Ammo Finder mods to increase ammo drops.
- Reserves: Use chest mods to increase reserve capacity for your heavy weapon.
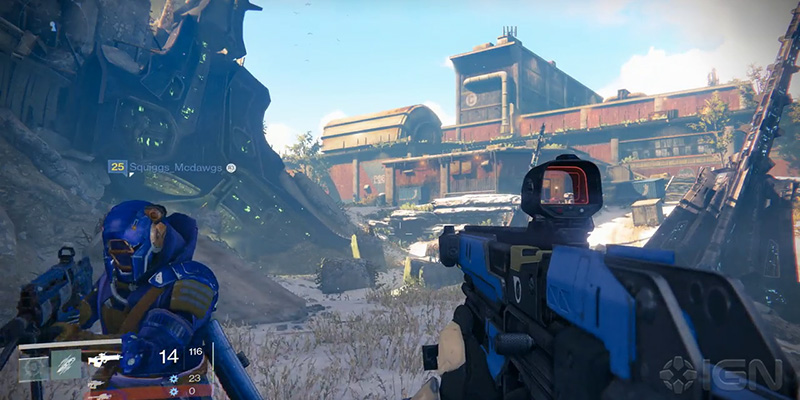
Breaching the Hoard: The Loot Cave Entrance
The path to untold riches begins, fittingly, at the mouth of the legendary Loot Cave in the Cosmodrome's Skywatch. As you approach, you'll find Hive and Fallen locked in combat – clear them out, but pay close attention to the enemies pouring from the cave itself.
Mechanic Deep Dive: Burdened by Riches
This is the core mechanic you'll contend with throughout the dungeon. As you defeat enemies (primarily Hive in this section), they drop glimmering engrams that initially resemble Exotics before turning a volatile red. Picking one up grants the Burdened by Riches debuff, starting a 30-second countdown timer.
Strategy & Trap Warning: Feeding the Crystal
Your objective here is to "feed" a large white crystal located inside the Loot Cave.
- Farm Engrams: Continuously kill the Hive spawning from the cave entrance. Use area-of-effect weapons like Witherhoard or grenades placed at the spawn point for efficient farming.
- Collect Stacks: Gather the Burdened by Riches engrams, keeping a close eye on your 30-second timer. Aim to get at least 10 stacks quickly to recharge your Super.
- Deposit: Enter the cave and stand near the large white crystal. While near it, your Burdened by Riches timer will pause, and your stacks will drain into the crystal (two stacks at a time), causing it to visibly grow.
- Repeat: Continue farming engrams and depositing them at the crystal until a total of 50 stacks have been deposited.
- Success: Once 50 stacks are deposited, the crystal will flash brightly, and the floor beneath it will dramatically collapse, opening the way deeper into the dungeon.
Gjallarhorn Catalyst Note (Step 1)
This opening perfectly sets the stage, turning the player's ingrained desire for loot (engrams) into a deadly mechanic, forcing a cycle of collection and deposit that directly mirrors the old farming methods while introducing the core gameplay loop of the dungeon. The super recharge adds a tempting risk-reward element, pushing players to gather more "riches" for power, echoing the fate of Wilhelm-7.
Wilhelm's Folly: Navigating the Rusted Gangplank
With the Loot Cave breached, you descend into a network of damp caverns and rusting Golden Age facilities – the path Wilhelm-7 and his ill-fated fireteam trod. This section is a gauntlet of environmental puzzles and devious traps, demanding careful observation and precise movement. Be sure to grab Wilhelm-7's Message Bottle #1 shortly after dropping down.
The First Trap Room
You'll emerge into a room with a large, sealed circular door ahead and two smaller doorways on the right. One of these right-hand doors is usually marked with warning signs.
Solution: Open the unmarked right-hand door (or the left-most of the two right doors). Grab Wilhelm-7's Message Bottle #3 hidden in an alcove in the ceiling of this switch room.
Collapsing Platforms Puzzle
Proceed through the now-open circular door and pipe into a chamber with a pit spanned by rickety platforms.
Solution: Jump onto the left-most collapsing platform. Let it fall slightly, then look down and to your right. Jump into the hidden alcove/room underneath the collapsing platforms to find the correct switch. Activate it. Grab Wilhelm-7's Message Bottle #2, found near the crystal bridge before this section.
Ascending the Silo
Return to the previous room (where you entered the pipe) and begin climbing the walls using protruding platforms, ledges, and air conditioning units. Near the top, you'll see six large circular fan tunnels/openings.
Solution: Most sources indicate the correct tunnel is the back right one (relative to where you first entered the room). Step on the pressure plate inside this specific tunnel to open the path forward. Grab Wilhelm-7's Message Bottle #4 near this spike trap platform.
Waterway/Dam Puzzle
This section involves navigating a series of rooms along a walkway or dam structure, flipping switches to open subsequent doors.
Solution: Generally, you need to proceed to the furthest accessible open door, enter, activate the switch/console inside, and repeat. This process gradually allows you to work your way down the structure.
- Reach the far end (right side from entrance) and find a hatch to jump up through to a switch. This opens the front middle door and spawns a Shrieker.
- Return towards the start and enter the now-open front middle door. Activate the switch inside.
- This opens the back middle door, allowing you to proceed.
Collectibles: Grab Wilhelm-7's Message Bottle #5 from a vent in the last room on the left before the next large circular room.
The Circular Room Puzzle & Scorch Cannon Primer
You'll enter a large, circular, multi-level room with Fallen and Hive fighting, featuring numbered sections (1-4) on the walls. This introduces the Scorch Cannon mechanic properly.
Switch Sequence:
- Find and activate the switch in section 1 (usually on the right side from entrance). This opens the door at section 3.
- Go to section 3, clear enemies, activate the switch inside. This opens the door at section 1 again.
- Return to section 1, activate the switch. This opens the door at section 2.
Scorch Cannon Mechanics:
- Tap Fire: Fires a standard explosive projectile.
- Hold Fire: Charges the shot through multiple tiers (listen for audio cues/dings). A fully charged shot (usually 2-3 dings) delivers maximum effect. The shot detonates automatically if held too long. You can use melee/grenades while holding a charge.
Opening the Path: Take the Scorch Cannon to section 4. Locate the Fallen battery deposit station (looks like an orb dunk site). Fire a fully charged shot (or 3 regular shots) into the station to power it up and open the large final door/gate.
Collectibles: Find Secret Chest #1 on a platform attached to the central pillar between sections 3 and 4. Requires jumping from a collapsing wall platform.
Trap Warning: The Indiana Jones Barrel Run
Survival: Quickly duck into one of the small alcoves on the sides of the staircase to avoid being flattened. Wait for it to pass, then continue upwards.
Final Steps to the Ogre
At the top of the stairs, you enter a large, seemingly dead-end, flooded room that looks like a ruined garage or cargo bay.
Collectibles: This area contains Wilhelm-7's Message Bottle #6. To get it, open the door on the right side of the room, carefully jump over the pressure plate inside, and find the message hidden in a floor vent behind a panel. This is also where the second Reaver Vandal for the Gjallarhorn catalyst spawns. Damage the Vandal, grab the Cursed Engram, then proceed through the main exit vent. The second catalyst chest is located in the next room, in a depression along the back wall to the right after dropping from the vent.
Progression: To continue to the first boss, locate a stack of boxes in the main flooded room. Climb these boxes to reach an open ventilation shaft overhead. Navigate the vent system (typically right then left) to emerge into the Ogre's arena.
This entire Rusted Gangplank section serves as an extended puzzle and platforming challenge, filled with homages to classic adventure tropes and potentially Bungie's own game history. It deliberately contrasts with typical Destiny level design through its sheer density of lethal traps, establishing the dungeon's unique, slightly sadistic, yet playful personality. Finding the Wilhelm-7 messages scattered throughout these hazards reinforces the theme of a perilous treasure hunt gone wrong.
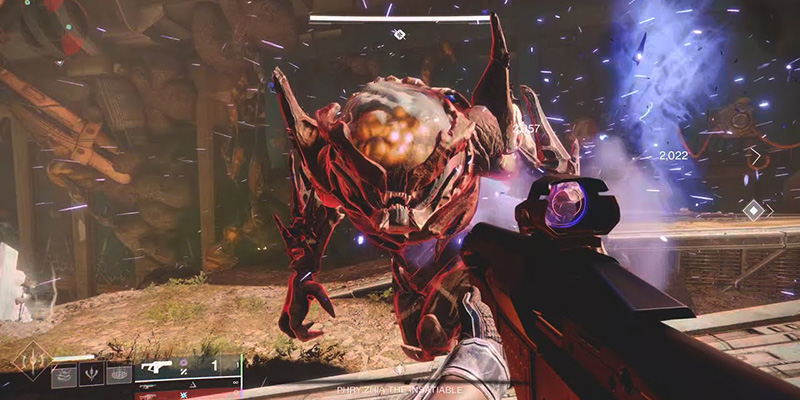
Encounter I: Phry'zhia, the Insatiable
Prepare for your first major combat challenge against Phry'zhia, the Insatiable, a massive, laser-eyed Hive Ogre. This fight takes place in a large, square arena with a chasm at the entrance, reminiscent of the final area in the Devil's Lair strike.
Arena Overview & Strategy
Layout: A large square room. The boss, Phry'zhia, generally stays near the center back. A crystal for depositing Burdened by Riches sits near the entrance chasm. Two "garage" rooms, one on the left and one on the right, house Hive enemies and are sealed by doors requiring Scorch Cannon activation. A Scorch Cannon Vandal spawns on a balcony at the back of the room.
Core Strategy: The loop involves using the Scorch Cannon to open side rooms, killing Hive inside to gather Burdened by Riches, depositing these riches at the central crystal to make the Ogre vulnerable, and then damaging the boss during a brief window. Repeat until Phry'zhia falls.
Mechanics Step-by-Step
- Initiate: Plant a rally banner near the entrance chasm, then jump across to start the fight.
- Get the Cannon: Head towards the back, eliminate the Scorch Cannon Vandal, and grab the Scorch Cannon. Use cover to avoid the Ogre's beam.
- Open a Door: From a safe position (like behind the low walls near the back), aim the Scorch Cannon at the terminal above one of the side room doors (start with either left or right). Fire a fully charged shot (hold until 3 dings/max charge) to open the door.
- Gather Riches: Enter the opened room. Kill the Hive Acolytes and Knights inside. They will drop Burdened by Riches engrams. Collect as many as you can safely, remembering the 30-second timer and the 10-stack ability recharge. There should be around 14 engrams per room. Use your recharged Super to clear adds quickly if needed.
- Deposit at Crystal: Exit the side room and make your way back to the crystal near the entrance chasm. Stand near it to deposit your stacks.
- Repeat for Other Side: Once clear, return to the back, kill the respawned Scorch Vandal if necessary, and repeat steps 3-5 for the other side room.
- Trigger DPS Phase: Continue collecting and depositing Burdened by Riches until the crystal is fully charged. This requires a total of 25 stacks. A message will appear: "Phry'zhia, the Insatiable Succumbs to Temptation".
- Damage Phase: Phry'zhia becomes vulnerable to damage. It may move slightly from its central position. Find a safe spot to unleash damage.
- Rinse and Repeat: After a short damage window, Phry'zhia will become immune again and return to its central position. The Scorch Vandal and Hive in the side rooms will respawn. Repeat the entire cycle (Steps 2-8) until the Ogre is defeated. Expect 3-5 phases for a typical run, potentially more if solo or under-geared.
Loadout Focus: Ogre-Melting Weapons
This is your first major DPS check. Bring the heavy hitters.
- Linear Fusion Rifles: Sleeper Simulant, Taipan-4fr, Cataclysmic, Threaded Needle. Excellent sustained damage, especially with Vorpal Weapon or Bait and Switch perks.
- Swords: Lament is particularly strong here due to the close-quarters nature of safe DPS spots (like side rooms) and its self-healing. Guarding negates the Ogre's stomp.
- Rocket Launchers: Gjallarhorn or strong legendary rockets can work, but require careful positioning to avoid self-damage and make the most of limited DPS windows.
- Other Exotics: Witherhoard adds valuable passive damage over time. One Thousand Voices can deal significant damage if you have ammo.
- Special Weapons: A fusion rifle like Cartesian Coordinate or Null Composure is good for burst damage. A blinding GL helps manage adds between DPS phases. Double Special ammo weapons can help maintain heavy ammo reserves.
This encounter firmly establishes the dungeon's boss fight rhythm: manage adds, execute mechanics involving Burdened by Riches and Scorch Cannons, survive environmental threats (the Ogre's beam), and capitalize on short DPS windows. Phry'zhia's name, "the Insatiable," directly reflects the greed theme, as you must satiate the crystal's "hunger" for riches to make the boss vulnerable. Success hinges on balancing mechanical execution with survivability and damage output.
Need for Greed: The Sparrow Race (Disarm the Mines)
Get ready for a change of pace, Guardian! After the Ogre, you'll find yourself facing a high-octane Sparrow race against time, a clear homage to the Sparrow Racing League and the infamous Scourge of the Past raid's Sparrow section. This encounter, titled "Disarm the Mines," is often a major roadblock, especially for solo flawless attempts.
Objective & Mechanics
- Goal: Ride your Sparrow through a treacherous, enemy-filled course and defuse four Fallen mines, labeled A, B, C, and D.
- Defusal: Simply drive through the glowing circle representing the mine at high speed. You do not need to stop or slow down.
- The Timer: Each mine has an extremely short fuse. Failing to reach and defuse the next mine in time results in a wipe.
- Time Extensions: Scattered along the path are round, glowing buttons on the ground (often referred to as Scourge buttons or lights). Driving over these buttons extends the timer only for reaching the next mine. They do not add time cumulatively. The timer resets to a default value each time a mine is defused.
The Optimal Route & Button Locations
Mastering the route and knowing button locations is key. While slight variations exist, this path is generally considered efficient:
- Start -> Mine A: Exit the initial door (activated by the left button in the previous room). Immediately bear RIGHT to hit Button 1 on the rocks. Then, cut hard LEFT, passing under the large crashed airplane wing to reach Mine A.
- Mine A -> Mine B: Enter the large, cylindrical crashed ship section. Stay along the LEFT wall to hit Button 2 located just before a narrow opening. Exit through the central, narrower round opening towards Mine B.
- Mine B -> Mine C: After defusing Mine B, immediately bear LEFT again, heading up the rocky embankment and back inside another section of ship wreckage. Avoid the right path near the river, as it often contains a dangerous Fallen Walker. Inside this next wreckage section, hit Button 3. Another button may be in the tunnel shortly after, and another near a crate/tree by the river just before Mine C. Mine C is located in the large, open, rusted-out room beyond this wreckage.
- Mine C -> Mine D: Pass through the triangular opening after Mine C, where Fallen enemies are present. Bear RIGHT, ignoring the central ramp. Aim for the ramp on the far right side of this area; Button 4 is at the top/end of this ramp. Immediately after hitting Button 4, aim for the LEFT of the two large gravity lifts/launchers ahead. This launcher will shoot you towards the giant crystal skull cave entrance. While airborne, aim slightly towards the skull's LEFT eye (your left as you fly towards it) to hit the final Button 5 located inside the eye socket. You should land directly on or near Mine D just inside the skull cave entrance, defusing it.
Trap Warning: Death Comes Fast!
This section is lethal for several reasons:
- Enemy Fire: The entire course is lined with Fallen Dregs and Vandals who will relentlessly shoot at you. Your Sparrow can be destroyed very quickly.
- Crash Landings: Hitting obstacles or landing badly after jumps, especially the final launch into the skull, can instantly destroy your Sparrow or kill you. The final launch is notoriously inconsistent.
- The Timer: The short fuse on each mine is the primary failure state. Missing a button or taking a suboptimal route can easily lead to running out of time.
Tips for Survival and Success
- Sparrow Choice: If you own the Always On Time Sparrow (from the Exotic Kiosk, originally from Scourge of the Past raid), use it. Its hidden perk significantly reduces enemy accuracy against you, making survival much easier. However, it is NOT required. Any 160-speed Sparrow can complete the encounter with practice.
- Refresh Your Ride: The single most important survival tip is to summon a new Sparrow whenever yours starts smoking or takes significant damage. A fresh Sparrow has full health. Do this before critical jumps or mine approaches.
- Movement Techniques: Use the Sparrow's side dashes frequently to dodge incoming fire; this seems to disrupt enemy tracking. Tap or mash the boost button instead of holding it down for potentially better speed and control. Avoid pushing forward on the analog stick during the final skull jump, as it can cause you to nosedive.
- Safety First (Especially Solo): Don't be afraid to hop off your Sparrow near a mine point, quickly clear the most dangerous enemies (using abilities, a Blinding Grenade Launcher, or Riskrunner), summon a fresh Sparrow, and then proceed. Since the timer resets at each mine, taking a few extra seconds to clear threats can be safer than risking destruction mid-transit.
- Armor Mods: Equip double Arc Damage Resistance mods on your chest armor.
- High-Skill Alternatives: For speedruns or skilled solo players, Sword skating using Eager Edge combined with Hunter's Shatterdive or Warlock's Well/Burst Glide can traverse the entire section much faster than a Sparrow, bypassing most enemies and timers. Strand grapple can also be used to recover from missed jumps or falls.
Once you successfully defuse Mine D inside the skull cave, the encounter ends. Take a moment to catch your breath before proceeding. This encounter is a pure test of vehicle control, route memorization, and execution under pressure, offering a thrilling, if sometimes frustrating, break from the dungeon's usual mechanics.
Encounter II: The Fallen Shield
Emerging from the skull cave, you'll enter a vast, open area dominated by a large, shielded Fallen structure floating in the center. This encounter, often called "Fallen Shield" or "Shield Shutdown," requires disabling this structure by using Fallen technology against itself. While there's a health bar displayed, you aren't fighting a traditional boss here; the objective is to destroy four shield cores.
Arena Layout & Cannon Mechanics
- Layout: The arena is comprised of a large central island housing the shielded Fallen structure, surrounded by approximately 5-6 smaller, rocky islands at varying elevations.
- Connecting the Isles: Each island is typically equipped with a Fallen gravitational cannon/launcher. These are used for traversing the large gaps between islands and for the encounter's main objective.
- Activating Cannons: Follow the thick orange wires/cables leading from each cannon to its corresponding activation terminal (a Fallen device similar to those used for Scorch Cannons earlier). Shoot the terminal with a Scorch Cannon shot to activate the launcher.
- Using Cannons: To launch yourself, hold the fire button on the Scorch Cannon while aiming at the terminal. This charges the shot but delays detonation, giving you time to run onto the cannon's launch platform. Release the fire button once you're positioned on the pad to activate the launch.
- Aiming Cannons: Most cannons can be rotated. Interact with the cannon controls (usually a console nearby) to cycle through preset angles, allowing you to aim at different islands or the shield cores on the central structure.
Imagine the central structure as the hub of a wheel. The surrounding islands are like points on the edge or spokes. You'll typically start on an outer island. Look for orange energy cables leading from the cannon on your island to a nearby terminal – shoot this terminal with a Scorch Cannon (hold, run to pad, release) to travel. Identify another island that has a glowing, immune Servitor. Aim your current cannon (interact to rotate) towards that island and launch yourself over. Repeat this process to navigate. Each island will have adds (Dregs, Vandals, Captains), a Scorch Vandal, a deposit crystal (usually inside a small Fallen structure), and the immune Servitor. The goal is to use the island's cannon to eventually launch the defeated Servitor at one of the four glowing orange domes (shield cores) on the central structure.

Mechanics Step-by-Step
The core loop involves finding an active Servitor, disabling its shield using Burdened by Riches, destroying it, and launching its corpse at the central shield.
- Find the Target: Identify an island with an immune Servitor (white shield). Note which islands have already had their Servitor destroyed (look for remaining Fallen or the absence of an immune Servitor).
- Travel There: Use the Scorch Cannon (dropped by Vandals on most islands) and the cannon launchers to reach the target island. Remember to hold the charge for travel time.
- Gather Riches: Once on the island, kill the Fallen adds (Dregs, Captains). They will drop Burdened by Riches engrams.
- Deposit Riches: Locate the white crystal on the island (often inside a small dome structure) and deposit 20 stacks of Burdened by Riches. Manage your timer!
- Disable Shield & Kill Servitor: Depositing the 20 stacks will drop the nearby Servitor's immunity shield. Quickly destroy the now vulnerable Servitor.
- Prepare the Payload: Approach the defeated Servitor's spherical corpse and push it (walk into it) onto the island's cannon launch platform.
- Aim and Fire: Interact with the cannon controls to aim it at one of the glowing orange domes/cores on the central shield structure that hasn't been destroyed yet. Once aimed, use the Scorch Cannon on the launcher's terminal to fire the Servitor corpse at the core, destroying it.
- Repeat: Find the next island with an active immune Servitor and repeat steps 2-7 until all four shield cores are destroyed. There seems to be no specific order required for the islands.
- Ascend: Once the fourth core is destroyed, the encounter is complete. All cannons will automatically reorient towards the central structure. Use any cannon to launch yourself upwards into the now-open structure to reach the final boss arena.
Loadout Focus: Crowd Control is Key
Since there's no boss DPS phase here, focus entirely on efficient add clear and survivability.
- Weapons: Bring weapons excellent at clearing groups of Fallen: Witherhoard, Forbearance, Trinity Ghoul, Riskrunner (synergizes with Arc damage from Fallen), Machine Guns, or Grenade Launchers with Chain Reaction/Voltshot/Incandescent. You don't need LFRs, Rockets, or Swords optimized for single-target damage.
- Subclasses: Prioritize subclasses with strong add-clearing capabilities or survivability. Void (Devour, Volatile Rounds), Solar (Ignitions, Restoration), Arc (Jolting, Blind), or Stasis (Freezing/Slowing) are all viable depending on your build. Supers like Well of Radiance, Ward of Dawn, or roaming add-clear supers can be helpful for controlling island engagements.
- Water Hazard: Be extremely careful when pushing the Servitor corpse near edges. If it rolls off the island into the abyss or water, it's lost, and you'll likely need to find and destroy an additional Servitor to complete the encounter.
- Burden Timer: Don't forget about the Burdened by Riches timer while clearing adds and collecting engrams on each island. Deposit frequently or keep collecting.
- Cannon Trajectory: Misjudging a cannon launch can send you flying into a wall or off the map entirely. Be especially careful when launching yourself after activating the cannon.
Gjallarhorn Catalyst Note (Step 3)
This encounter area houses the third and final Reaver Vandal needed for the Gjallarhorn catalyst.
- Vandal Location: The Vandal spawns on the island distinguished by multiple waterfalls.
- Chest Location: The corresponding catalyst chest is located on top of the central Fallen Shield structure itself.
- Procedure: This is the trickiest catalyst chest. After disabling the main Fallen Shield (destroying all 4 cores), do not launch up to the final boss area yet. Go to the waterfall island, damage the Reaver Vandal until it drops a Cursed Engram, grab the Burdened by Riches debuff, then quickly use the island's cannon launcher to get back to the central island. You'll need to platform/climb up the central structure to reach the chest on top before the timer expires. Having a teammate pre-aim and activate the cannon for you can help. Opening this chest grants the Gjallarhorn catalyst.
This encounter tests coordination (if in a team), spatial awareness, and efficient execution of the established mechanics across a large, dynamic arena. It shifts the focus from direct boss damage to objective completion, requiring mastery of the Scorch Cannon launchers and the Burdened by Riches cycle in a new, multi-stage format.
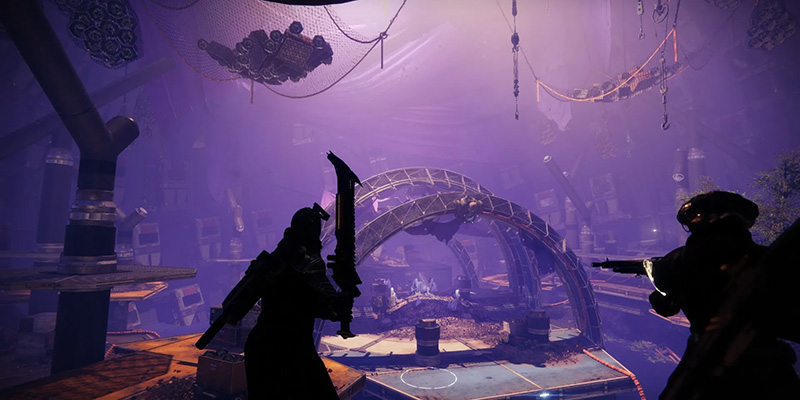
Encounter III: Captain Avarokk, the Covetous
Prepare for the final confrontation! Deep within Wilhelm-7's hoard, likely inside the wreckage of a crashed Fallen Ketch perched atop a colony ship, you face Captain Avarokk, the Covetous, and his loyal crew. This battle is the ultimate test, combining mechanics from previous encounters with challenging new mini-bosses in a lethal arena.
Arena Overview & Strategy
- Layout: A large, circular main platform serves as the primary combat area. A crystal for depositing Burdened by Riches sits prominently in the center. The boss, Captain Avarokk (a Fallen Captain), initially spawns near this crystal. Raised platforms or designated zones line the outer edge, often referred to as Left, Middle, and Right sections (relative to the entrance/back tower). Each of these three sections houses a Scorch Cannon battery terminal. A tower structure at the back of the arena provides valuable cover.
- Trap Warning: Deadly Water! The water surrounding the central platform is instant death. Avoid falling in at all costs, especially when collecting engrams or during DPS.
- Core Strategy: Similar to the Ogre fight, the goal is to collect Burdened by Riches engrams and deposit them at the central crystal to trigger a DPS phase. However, the engrams are generated differently, and dangerous mini-bosses must be dealt with first.
Mechanics Step-by-Step
- Initiate & Kill Mini-Bosses: Approach the center of the room to start the encounter. Captain Avarokk spawns immune. Simultaneously, two powerful yellow-bar mini-bosses appear: R-M80, Loyal to Avarokk (a deadly Sniper Shank) and Grisprax, Bosun of Avarokk (an invisible, tanky Marauder). - PRIORITY ONE: You must defeat these two mini-bosses before proceeding with the mechanics. They are extremely dangerous and will disrupt DPS phases if left alive. - Target Order: Focus down the Sniper Shank (R-M80) first. Its ranged damage is incredibly high and can easily kill you, especially if solo. Then, deal with the Invisible Marauder (Grisprax). - Tactics: Use Heavy ammo, Supers, powerful abilities, or even the Scorch Cannon (it deals decent damage, ~40k per fully charged shot, and conserves heavy ammo) to eliminate them quickly. Use the 10-stack Burden recharge from Grisprax (see below) or initial adds to fuel Supers. Use the back tower for cover. - Grisprax's Drop: The Marauder drops 10 Burdened by Riches engrams upon death. Collect these immediately to reset your timer and potentially gain ability energy. Consider depositing these 10 stacks first before generating more.
- Get the Scorch Cannon: A Scorch Cannon Vandal will spawn on one of the side platforms. Kill it and take the cannon. It will respawn periodically if needed.
- Generate Engrams: Aim the Scorch Cannon at one of the three battery terminals (Left, Middle, or Right outer sections). Fire a fully charged shot. - Engram Drop: Activating one battery causes 10 Burdened by Riches engrams to rain down in each of the three zones (Left, Middle, Right), totaling 30 engrams per activation.
- Collect Riches: Quickly move around the arena, collecting the dropped engrams. You need a total of 60 stacks to initiate the DPS phase. - Efficiency: Activating two battery terminals (e.g., Left and Right, avoiding the exposed Middle section) will generate the required 60 engrams if you collect them all. - Safety: Prioritize survival. Don't overextend for engrams near the deadly water. Watch your.30-second timer vigilantly. Use the 10-stack ability recharge to clear adds (mostly Dregs spawning on the sides) or use defensive abilities.
- Deposit at Crystal: Return to the central crystal and stand near it to deposit your 60 stacks. - Safety During Deposit: This is a vulnerable moment. Use the crystal for cover, strafing around it to avoid Avarokk's attacks. Drop a Well, Bubble, or Rift for protection. A Glaive shield can also block damage. Clear nearby Dregs if possible.
- Damage Phase: Once 60 stacks are deposited, the crystal is full, and Avarokk becomes vulnerable. He will typically teleport to the area near the entrance stairs (sometimes described as front or back-middle). - Positioning: Drop Well/Bubble near the crystal or DPS platform. Alternatively, use the back tower or elevated side platforms for safer, ranged DPS. - Unleash Damage: Use your highest DPS weapons and abilities. Coordinate buffs and debuffs if in a team.
- Repeat Cycle: After the DPS phase ends, Avarokk becomes immune again. Crucially, the mini-bosses (Shank and Marauder) and the Scorch Vandal will respawn. You must repeat the entire cycle, starting with killing the mini-bosses (Step 1). Expect multiple phases unless your team has extremely high, coordinated burst damage.
Loadout Focus: Boss Burn & Mini-Boss Management
This fight demands both high single-target DPS for Avarokk and the ability to quickly neutralize the dangerous mini-bosses.
- Boss DPS: Similar options to the Ogre fight work well.
- Linears: Sleeper Simulant, Taipan, Cataclysmic. Reliable and ammo-efficient.
- Rockets: Gjallarhorn paired with legendary rockets is strong burst.
- Swords: Lament offers good damage and survivability, but the deadly water makes close-range DPS risky. Best used with extreme caution or strong healing (Well/Bubble).
- Other: Witherhoard for passive damage/add control. High-impact supers (Golden Gun, Thundercrash, Nova Bomb).
- Mini-Boss Control: You need something to burst down the Shank and Marauder quickly. Heavy ammo, charged supers (use the 10-stack recharge!), or sustained Scorch Cannon fire are options. Blinding Grenades can help control the Marauder.
- Add Clear: Riskrunner helps with Dregs and provides Arc resistance. Wave Frame GLs or primaries with Voltshot/Incandescent work well. Use abilities frequently.
- Ammo Economy: Double Special weapon loadouts can help generate more Heavy ammo bricks. Use Ammo Finder mods.
Invis is invaluable during engram collection and deposit phases. Nightstalker with Omnioculus or Gyrfalcon's Hauberk provides safety, while Tether debuffs Avarokk. Assassin's Cowl with Arc or Strand melees offers healing on kills. Consider Star-Eater Scales/Celestial for burst damage.
Well of Radiance creates safe DPS zones. Stasis turrets can freeze mini-bosses and adds. Void with Devour provides constant healing during add phases. Consider The Stag for damage resistance, Phoenix Protocol for Well uptime, or Karnstein Armlets for melee healing.
Loreley Splendor with Solar provides near-constant healing through Sunspots. Bubble creates a safe deposit and DPS area. Thundercrash offers high burst damage. Consider Heart of Inmost Light for ability uptime or Synthoceps/Wormgod for melee damage boosts.
Lore Note: Wilhelm's End
After defeating Captain Avarokk, a large pod behind the final chest location will open. Inside lies the skeletal remains of Wilhelm-7, fused with the very crystals that represent his avarice, clutching the final Message Bottle (#12). Collecting this completes the "Richest Dead Man Alive" Triumph and unlocks a Gjallarhorn ornament. His final recorded words echo his paranoia: "Hey, what's that I hear? You sneaking around? You're here to take what's mine! Don't you touch nothing! It's all mine!".
This final encounter is a true culmination, demanding mastery of every mechanic introduced earlier while adding the significant pressure of the mini-bosses. It forces players to prioritize threats, manage resources (ammo, abilities, Burden timer), and execute the core loop flawlessly under fire. The increased engram requirement and the ever-present danger of the mini-bosses and environmental hazards make it a fittingly challenging climax to this tale of greed.
Buried Treasure: Secret Chest Locations
Beyond the loot dropped from encounters, two hidden Secret Chests await discovery within the Grasp of Avarice. These chests reward additional loot, but with a specific condition.
Important Loot Notes
- Loot Pool: Secret chests only drop gear (weapons or armor) that you have already acquired from completing the main encounters in the dungeon during the current weekly lockout. If you haven't gotten Eyasluna from an encounter drop yet that week, it won't drop from a secret chest.
- Farming: When Grasp of Avarice is the featured weekly dungeon, encounter chests become farmable for repeat drops of items already in your collections for that character. However, secret chests remain on a once-per-character-per-week lockout.
- Artifice Armor: Secret chests do not drop Artifice armor, even when opened on Master difficulty. Artifice armor only comes from completing the main encounters on Master difficulty.
Secret Chest #1: The Cylindrical Room
- Location: Found in the large, circular room where you are first introduced to the Scorch Cannon mechanic (the room with numbered sections 1-4).
- Access: Look for the large, vertical metal beam or pillar situated between the doorways marked '3' and '4'. On the outer side of this pillar (facing the curved outer wall of the room), high up, is a small platform holding the chest. To reach it, locate a small, single platform embedded in the outer wall between sections 3 and 4. Jump onto this wall platform – be quick, as it collapses after a second or two! – and immediately jump across and slightly up towards the pillar to land on the chest platform.
Secret Chest #2: The Skull's Eye
- Location: Found at the very end of the Sparrow Race section, inside the giant crystal skull cave that marks the finish line.
- Access: After successfully defusing Mine D inside the skull's mouth, turn around to face back out the way you came. Look to your left (which corresponds to the skull's right eye from an outside perspective, but its left eye from your perspective looking out). You will see crystal formations along the cave wall. Climb up these crystals to reach the opening of the skull's left eye socket. The chest rests inside the eye socket on a pile of crystals.
These chests reward attentive exploration and platforming skill, fitting the dungeon's treasure-hunting theme. Their loot mechanic encourages players to fully clear the dungeon first to maximize the potential rewards from these hidden caches on subsequent runs.
The Pirate's Booty: Complete Loot Table
A true pirate always knows the value of their plunder! Here's a breakdown of the treasures you can haul from the depths of the Grasp of Avarice.
Weapon Drops per Encounter
This table details the Legendary weapons that can drop from each main encounter chest:
| Encounter | Weapon Drops | Weapon Type | Element | Ammo |
|---|---|---|---|---|
| 1: Phry'zhia (Ogre) | Matador 64, Hero of Ages | Shotgun, Sword | Arc, Arc | Special, Heavy |
| 2: Fallen Shield (Servitors) | Matador 64, Hero of Ages, Eyasluna | Shotgun, Sword, Hand Cannon | Arc, Arc, Stasis | Special, Heavy, Primary |
| 3: Captain Avarokk (Captain) | Matador 64, Hero of Ages, Eyasluna, 1000 Yard Stare | Shotgun, Sword, Hand Cannon, Sniper Rifle | Arc, Arc, Stasis, Void | Special, Heavy, Primary, Special |
Note that the final boss can drop any weapon from the previous encounters.
Armor Drops per Encounter
Each class gets a unique Thorn-themed armor set. Here's where each piece typically drops:
| Encounter | Hunter Armor (Twisting Echo Set) | Titan Armor (Descending Echo Set) | Warlock Armor (Corrupting Echo Set) |
|---|---|---|---|
| 1: Phry'zhia (Ogre) | Legs, Class Item | Legs, Class Item | Legs, Class Item |
| 2: Fallen Shield (Servitors) | Chest, Arms | Chest, Arms | Chest, Arms |
| 3: Captain Avarokk (Captain) | Any Armor Piece | Any Armor Piece | Any Armor Piece |
The final boss encounter has a chance to drop any armor piece for your class.
Other Notable Rewards
- Gjallarhorn (Exotic Rocket Launcher): Obtained via the "And Out Fly the Wolves" quest, which requires completing the dungeon.
- Gjallarhorn Catalyst: Obtained by opening three specific hidden chests within the dungeon using the Burdened by Riches mechanic after acquiring Gjallarhorn.
- Gjallarswift (Exotic Sparrow): A potential reward associated with the dungeon.
- Emblems:
- Absolutely Cursed: Awarded for your first completion of the dungeon.
- Piratical Ambitions: Awarded for completing the dungeon solo without dying (Solo Flawless).
- Shader:
- Ensilvered Snare: Potentially awarded for a fireteam flawless completion.
Weapon God Rolls (Brief Overview)
While specific god rolls depend on playstyle and current meta, here are some highly sought-after perks for the dungeon's legendary weapons:
PvE: Rapid Hit/Outlaw + Headstone/Kill Clip/Demolitionist
PvP: Rangefinder/Perpetual Motion + Moving Target/Snapshot Sights/Kill Clip
PvE: Lead from Gold/Threat Detector + One-Two Punch/Golden Tricorn
PvP: Perpetual Motion/Threat Detector + Opening Shot/Killing Wind. Widely considered a top-tier PvP shotgun.
PvE: Triple Tap/Fourth Time's the Charm + Firing Line/Focused Fury/Golden Tricorn. Dragonfly for add clear.
PvP: Quickdraw/Snapshot Sights + Moving Target/Snapshot Sights. No Distractions is also good.
PvE: Relentless Strikes/Tireless Blade + Chain Reaction/One For All/En Garde. Generally considered weaker than other sword options.
PvP: Tireless Blade + Assassin's Blade. Lacks Eager Edge, limiting utility.
The loot pool itself is a major draw, deliberately featuring fan-favorite weapons from Destiny 1 like Eyasluna, Matador 64, and 1000 Yard Stare, perfectly aligning with the 30th Anniversary celebration's nostalgic theme. This, combined with the ultimate prize of Gjallarhorn and the endgame chase for Artifice armor, makes Grasp of Avarice a highly rewarding dungeon to run repeatedly.
The Ultimate Prize: Gjallarhorn Quest & Catalyst
No treasure hunt in Grasp of Avarice is complete without claiming the legendary Gjallarhorn, Destiny's most iconic Exotic Rocket Launcher. Its return is tied directly to this dungeon via the "And Out Fly the Wolves" quest.
Acquiring the Quest ("And Out Fly the Wolves")
- Requirement: You must own the Bungie 30th Anniversary Pack.
- Dares of Eternity: Complete at least one run of the Dares of Eternity activity. Your first login after purchasing the pack should launch you into it automatically.
- Visit Xur: Go to the Eternity destination on your Director map and enter Xur's Treasure Hoard. Speak with Xur. Navigate to his second vendor page (where he sells quests/items).
- Pick Up Quest: Acquire the quest "And Out Fly the Wolves" from Xur.
Dungeon Steps for the Quest
- Speak to Shaw Han: Travel to the Cosmodrome and talk to Shaw Han. This will update the quest and unlock the Grasp of Avarice dungeon node on the Cosmodrome map.
- Complete Grasp of Avarice: Launch and complete the Grasp of Avarice dungeon. Normal difficulty is sufficient. Defeating the final boss, Captain Avarokk, will drop a Wolfpack Round component, progressing the quest.
Post-Dungeon Quest Steps
With the dungeon conquered, you're on the home stretch:
- Return to Shaw Han: Go back to the Cosmodrome and speak with Shaw Han again.
- Collect Wolfpack Rounds: The quest now requires you to collect 7 Wolfpack Rounds by defeating powerful Fallen (enemies with yellow health bars) anywhere in the Cosmodrome.
- Recommended Farm: The Exodus Garden 2A Lost Sector (located near Shaw Han's camp, behind him) is an excellent place to farm these, as it contains numerous powerful Fallen. It may take 2-3 runs to get all 7 rounds.
- Report to Shaw Han: Once you have all 7 Wolfpack Rounds, return to Shaw Han. He will give you the Rocket Housing component.
- Consult the Gunsmith: Travel to the Tower and speak with Banshee-44. He'll identify the final component needed: the Trigger Mechanism.
- Back to the Lost Sector: Banshee directs you back to the Exodus Garden 2A Lost Sector in the Cosmodrome. Complete the Lost Sector one more time, ensuring you defeat the final boss and loot the chest to obtain the Trigger Mechanism.
- Assemble Gjallarhorn: Return to Shaw Han's camp in the Cosmodrome. Don't talk to him directly; instead, enter the small building/garage nearby. Interact with the tool chest inside to assemble the Gjallarhorn components.
- Claim Your Prize: Speak to Shaw Han one final time. He will present you with the fully restored Gjallarhorn. Congratulations!
Catalyst Guide: Reaver Vandals & Cursed Chests
But the journey isn't over! The Gjallarhorn's Exotic Catalyst significantly enhances its power, and it's also found within Grasp of Avarice.
- Prerequisite: You must have already obtained the Gjallarhorn itself. The catalyst quest won't activate otherwise.
- Objective: Locate and open 3 specific hidden chests within the Grasp of Avarice dungeon. These chests are guarded by special Reaver Vandals.
- Mechanic:
- Find the Reaver Vandal near its corresponding chest.
- Damage the Vandal (you don't need to kill it) until it drops one or more Cursed Engrams (these function like Burdened by Riches engrams).
- Quickly pick up a Cursed Engram to gain the Burdened by Riches debuff and its 30-second timer.
- Run to the nearby hidden chest and open it before the timer expires.
- Important Notes: This must be done in a single dungeon run; checkpoints do not preserve catalyst chest progress. It can be completed on Normal difficulty.
- Vandal/Chest Locations:
- Chest 1 (Loot Cave Entrance Area):
- Vandal: Across the water from the initial drop-down point, usually with Dreg bodyguards.
- Chest: On a metal platform/walkway directly above the path where you first enter the large cavern. Damage Vandal, grab engram, jump back across and up to the chest.
- Chest 2 (Pre-Ogre Area):
- Vandal: In the large, flooded room just after the rolling barrel trap staircase.
- Chest: After entering the overhead vent from the flooded room, follow it until you drop into the next area (near a collapsed column). The chest is in a depression/alcove along the back wall, to the right as you land. Damage Vandal, grab engram, proceed through vent, drop down, find chest.
- Chest 3 (Fallen Shield Area):
- Vandal: On the outer island characterized by multiple waterfalls.
- Chest: Located on top of the central Fallen Shield structure. This requires completing the Fallen Shield encounter first. Then, get the debuff from the Vandal, use a cannon to launch back to the central island, and quickly platform/climb to the top of the structure to open the chest. Opening this third chest awards the Gjallarhorn Catalyst.
- Chest 1 (Loot Cave Entrance Area):
- Catalyst Cheese: It's possible for players who haven't opened the first two chests to join a fireteam that has already reached the third chest location (after completing the Fallen Shield encounter). If someone in the instance has opened the first two chests in that run, the third Vandal and chest will be active. The joining player can then simply get the debuff from the Vandal and open the third chest to receive the catalyst.
Catalyst Perks & Masterworking
- Perk ("More Wolves"): Increases Gjallarhorn's magazine size from 1 to 2 rockets. Additionally, when an enemy is defeated by the Wolfpack Rounds (the cluster missiles spawned on detonation), it spawns a faster, more powerful missile at the target's location. These secondary missiles deal significantly more damage.
- Masterworking: Requires 400 kills with Gjallarhorn after obtaining the catalyst. This can be farmed efficiently at locations with high enemy density and easy Heavy ammo, such as the Shuro Chi checkpoint in the Last Wish raid or during the unlimited heavy ammo sections of Dares of Eternity.
The Gjallarhorn quest cleverly weaves the dungeon's mechanics and themes together, making the acquisition of Destiny's most famous weapon feel earned. The catalyst hunt further encourages mastery of the Burdened by Riches timer and rewards thorough exploration, reinforcing the dungeon's identity as a treasure hunt filled with secrets.
One Guardian Army: Solo & Solo Flawless Guide
For the truly audacious pirate, the ultimate challenge lies in conquering the Grasp of Avarice alone, perhaps even without succumbing to death – the coveted Solo Flawless clear. This requires not just skill, but immense patience, careful planning, and a build focused on survival.
General Solo Philosophy: Patience is a Virtue (and a Necessity)
- Slow Down: This is the most crucial advice. There is no enrage timer on bosses, no time limit outside the Burdened by Riches debuff and the Sparrow Race. Rushing leads to mistakes, and mistakes lead to restarts.
- Prioritize Survival: Staying alive is more important than maximizing DPS. It's better to take 5-6 safe damage phases than to die trying for a risky 2-phase.
- Abuse the 10-Stack Recharge: Remember that 10 Burdened by Riches stacks fully recharge your abilities and Super. Use this liberally. Pop your Super for emergency add clear or to survive a dangerous situation; you'll likely get it back during the next mechanic cycle.
- Master the Burden Timer: Internalize the 30-second limit. Always know where your next engram or the deposit crystal is. Dying to the timer on a flawless run is soul-crushing.
- Practice Makes Perfect: The Sparrow Race is a common run-killer. If you die there, don't immediately reset. Spend some time practicing the route and Sparrow management until you can clear it consistently.
Class-Specific Strategies & Builds
Survivability is paramount for solo runs. Choose subclasses and exotics that provide healing, damage resistance, or invisibility.
- Solar (Well of Radiance): Excellent for creating safe zones during DPS or while depositing Burdens. Healing Grenades add on-demand recovery. Pair with Phoenix Protocol or The Stag.
- Void (Devourwalker): Constant healing from Devour procs makes add-heavy sections much more manageable. Karnstein Armlets or Contraverse Hold enhance this.
- Stasis (Shadebinder): Bleakwatcher turrets offer invaluable crowd control, freezing dangerous enemies.
- Prismatic: Can combine elements for survivability and damage. Getaway Artist provides an Arc Soul buddy. Apotheosis Veil/Star-Eater Solipsism offers burst potential.
- Solar (Sunbreaker): Top-tier choice for solo. Constant Sunspots provide healing and ability energy. Restoration effects keep health topped off. Loreley Splendor Helm offers near-invincibility via Sunspots on demand. Synthoceps or Wormgod Caress boost melee damage significantly.
- Void (Sentinel): Ward of Dawn (Bubble) creates safe zones for DPS or depositing. Offensive Bulwark provides benefits while having an Overshield. Bastion aspect grants Overshields from Barricades.
- Prismatic: No Backup Plans can grant frequent Overshields with shotguns. Consecration provides strong AoE melee. Can incorporate Diamond Lance for freezing.
- Void (Nightstalker): Invisibility on demand (via Smoke Bomb or Dodge) is incredibly powerful for repositioning, escaping danger, and safely depositing Burdens. Use with Graviton Forfeit, Omnioculus, or Gyrfalcon's Hauberk. Tether provides crucial boss debuff.
- Arc (Arcstrider): Assassin's Cowl combined with Combination Blow provides invisibility and healing on powered melee kills, offering high survivability and strong add clear. Liar's Handshake offers more melee damage.
- Solar (Gunslinger): Can provide Restoration via Healing Grenades or Ember of Empyrean. High burst DPS supers (Golden Gun/Blade Barrage) paired with Star-Eater Scales or Celestial Nighthawk.
- Strand: Grapple can save you from falls during platforming or the Sparrow Race. Woven Mail provides significant damage resistance. Assassin's Cowl works well with Strand melee for invis/healing.
- Stasis (Revenant): Renewal Grasps offer damage resistance within Duskfield Grenades.
Encounter-Specific Solo Tips
- Entrance: Camp inside the cave with Witherhoard, Well, or Bubble. Easy ability recharge.
- Traps: Take it extremely slow. Memorize the safe paths. One mistake ends the flawless run.
- Ogre (Phry'zhia):
- Positioning: DPS from the upper right platform or inside the side garages. DO NOT DPS from the crystal; it's too exposed. Use boxes for cover constantly.
- Weapons: Lament is excellent here due to healing and close-range safety. Witherhoard adds passive damage. LFRs work well from safer distances.
- Survival: Use Stasis turrets for crowd control. Use healing abilities/invis frequently.
- Sparrow Race:
- Practice: This is the biggest run-killer. Practice the route until consistent.
- Gear: Riskrunner + Arc Resist mods. Always on Time helps, but isn't mandatory.
- Tactics: Refresh Sparrow health often. Consider hopping off to clear adds with Blinding GLs if needed. Memorize button locations. Strand grapple is a safety net.
- Fallen Shield:
- Pacing: Take your time. Clear all adds on an island before depositing Burdens.
- Control: Use crowd control abilities (Stasis, Blinding Nades, Void).
- Safety: Don't let the Servitor roll away. Manage the Burden timer.
- Final Boss (Avarokk):
- Mini-Bosses: KILL THEM FIRST, EVERY CYCLE. Prioritize the Shank. Use Supers, Heavy, or Scorch Cannon.
- Positioning: Use the back tower for cover during mechanic phases. Deposit Burdens safely using Bubble, Well, Rift, or Invis while strafing around the crystal. DPS from elevated side platforms or the back tower.
- Weapons: Witherhoard for passive damage/adds. Strong LFRs or Rockets for DPS. Lament is risky due to water but possible with Well/Bubble. Glaive block helps during deposits.
- Survival: High Resilience, Arc/Sniper resist mods. Utilize subclass healing/invis/overshields constantly.
Loadout Focus: Essential Solo Exotics & Mods
- Hunter: Assassin's Cowl, Omnioculus, Gyrfalcon's Hauberk, Star-Eater Scales, Celestial Nighthawk.
- Titan: Loreley Splendor Helm, Synthoceps, Wormgod Caress, Heart of Inmost Light (if applicable), Helm of Saint-14.
- Warlock: Karnstein Armlets, Contraverse Hold, The Stag, Phoenix Protocol, Sunbracers (for Solar).
- Weapons: Witherhoard, Lament, Riskrunner, a good Blinding GL, top-tier LFR (Taipan, Cataclysmic) or Rocket Launcher (Gjallarhorn, Hothead).
- Mods: Max Resilience, relevant Resist mods (Arc, Solar, Sniper), Orb generation (Siphons, Heavy Handed/Firepower), Orb pickup (Recuperation, Better Already), Weapon Surges.
Soloing Grasp of Avarice, especially flawlessly, is a significant achievement. It demands not only mechanical skill but also meticulous buildcrafting focused on self-sufficiency and unwavering patience. Mastering the Burdened by Riches timer and navigating the treacherous Sparrow Race are often the defining challenges that separate success from yet another restart.
Richest Guardian Alive: Speedrun Tactics
For those Guardians who feel the need for speed and crave leaderboard glory, Grasp of Avarice offers fertile ground for speedrunning. This approach shifts focus dramatically from survival to pure efficiency, utilizing high-skill movement techniques, encounter skips, and optimized burst damage strategies.
Movement is Key
- Sword Skating: This is paramount. Using a Sword with the Eager Edge perk allows for massive forward momentum boosts, enabling Guardians to cross large distances and skip entire sections. Techniques vary by class:
- Warlock: Wellskating (activating Well of Radiance during an Eager Edge swing).
- Hunter: Shatterskating (using Shatterdive immediately after an Eager Edge swing). Requires specific timing and practice.
- Titan: Can utilize Eager Edge but lacks the synergistic movement abilities of other classes for maximum distance.
- Strand Grapple: Adds another layer of high-speed aerial maneuverability, useful for correcting skates or reaching specific points quickly.
Encounter Skips & Optimizations
Speedruns aim to minimize time spent on non-essential tasks.
- Rusted Gangplank (Traps): Significant portions of the trap-filled Rusted Gangplank can be bypassed using precise Eager Edge skates and jumps. For example, the waterway section with multiple switch rooms can potentially be skipped by skating directly to the end switches.
- Sparrow Race: While Sparrows are the intended method, Sword skating is significantly faster for skilled players. This bypasses the need to hit timer extension buttons and avoids enemy fire hazards almost entirely. Requires mastering aerial Eager Edge chains.
- Fallen Shield: Optimization focuses on speed:
- Fastest possible travel between islands using cannons or skating.
- Rapid add clear to spawn Burdened by Riches quickly.
- Efficient collection and deposit of the 20 engrams.
- Quickly killing the Servitor and launching it accurately.
- Coordination is key for team runs to handle different islands simultaneously.
- Final Boss (Avarokk) Setup:
- Kill the mini-bosses (Shank, Marauder) as fast as humanly possible using coordinated supers and heavy weapons.
- Immediately grab the Scorch Cannon and activate two required battery terminals (e.g., Left and Right) with fully charged shots.
- Have designated players collect the 60 engrams rapidly, potentially using movement abilities or specific routes to grab them from multiple zones efficiently.
- Deposit instantly once 60 are collected to trigger DPS.
Damage Strategies: One Phase or Bust
Speedruns almost always aim for one-phase boss kills to save maximum time. This requires extreme burst damage and coordination.
- Ogre (Phry'zhia):
- Lament: Still a viable option due to high burst damage up close. Requires team to quickly close distance.
- Supers + LFRs/Rockets: Coordinated high-damage supers (Golden Gun, Thundercrash, Nova Bomb) combined with optimized LFRs (like Sleeper Simulant) or Rocket Launchers, stacked with debuffs (Tether/Divinity) and buffs (Well/Bubble).
- Captain Avarokk: This requires even more intense burst.
- Buff/Debuff Stacking: Essential. Typically involves Well of Radiance, Ward of Dawn (Weapons of Light), Hunter Tether or Tractor Cannon, and potentially Font of Might or seasonal artifact buffs.
- Weapon Combos: Common strategies include:
- Izanagi's Burden + Auto-Loading Rocket Launcher swap rotations.
- Optimized Linear Fusion Rifles (Sleeper Simulant, potentially Arbalest for shield break + LFR).
- Cascade Point weapon setups for rapid firing (e.g., with Sniper Rifles like Still Hunt or potentially other weapons).
- Specialized builds like the one-hammer Titan kill, which involves intricate setup combining multiple buffs (Roaring Flames, One-Two Punch, Wormgod Caress, Focusing Lens, Bubble buff, Turn the Tide glitch) and debuffs (Tractor Cannon, Stasis freeze) to achieve millions of damage in a single hammer throw. This is highly complex and requires perfect execution.
- Still Hunt paired with Golden Gun (Celestial Nighthawk) can achieve very fast kills.
Farming Tactics
When Grasp of Avarice is the weekly featured dungeon, its encounters (especially the final boss) become farmable for legendary loot. Speedrun strategies, particularly efficient one or two-phase kills of Captain Avarokk, are employed to maximize loot drops per hour. This usually involves saving a checkpoint at the final boss and repeatedly clearing it with an optimized fireteam.
Speedrunning Grasp of Avarice transforms the dungeon experience. It shifts the focus from the narrative and careful exploration to pure mechanical optimization, movement mastery, and achieving overwhelming burst damage. It's a high-skill endeavor that pushes the game's systems and player execution to their absolute limits, often relying on techniques and strategies far removed from standard or solo play.
Conclusion: Weighing Anchor
As our expedition through the Grasp of Avarice concludes, let's assess its place in the Destiny 2 dungeon pantheon and appreciate the unique treasures it holds beyond mere loot.
Difficulty Compared: Grasp vs. Other Dungeons
Grasp of Avarice generally sits in the lower-to-mid tier of dungeon difficulty, particularly for solo and flawless attempts.
- Easier Than: Newer, more complex dungeons like Vesper's Host (often cited as hardest), Ghosts of the Deep (long, high enemy density, tough bosses), Duality (complex mechanics, punishing timers, high combat difficulty), and Warlord's Ruin (heavy DPS checks, challenging bosses).
- Comparable To: Pit of Heresy (often considered easier due to only one main boss), Shattered Throne (oldest, mechanically simple, but lacks rally banners), and Prophecy (mechanically straightforward but Taken enemies can be annoying). Some find Grasp easier than Prophecy, others harder, often depending on tolerance for the Sparrow section. Spire of the Watcher is sometimes ranked similarly or slightly harder due to tanky bosses and Vex enemies.
- Key Difficulty Drivers: While the core mechanics (Burdened by Riches, Scorch Cannons) are relatively simple, the dungeon's challenge comes from:
- The Burdened by Riches timer, adding constant pressure.
- The Sparrow Race, a significant skill check and common failure point.
- Enemy density in boss encounters, requiring good add clear.
- The mini-bosses in the final encounter add complexity.
- Master Difficulty significantly ramps up the challenge with its high Power Level requirement, Match Game shields, and Champions.
Overall, Grasp is often recommended as a good entry point for players new to dungeons or attempting their first solo clears, offering a balanced challenge without the extreme mechanical complexity or punishing DPS checks of some later entries.
Lore & Aesthetics: Appreciating the Details
Grasp of Avarice is more than just a sequence of encounters; it's a rich tapestry woven with thematic depth, clever references, and a unique atmosphere.
- Themes: The dungeon masterfully executes its central theme of greed and its consequences. It serves as a direct, humorous meta-commentary on Destiny's loot-driven nature and the infamous D1 Loot Cave exploit. The tragic tale of Wilhelm-7, documented through messages in bottles, provides a dark narrative core, exploring obsession and the loss of humanity (and Ghost-manity) in pursuit of treasure. Some lore theories even suggest Ahamkara influence, twisting desires for loot into a deadly trap.
- Aesthetics & Design: The dungeon boasts a strong pirate/treasure hunt aesthetic, reflected in the Fallen enemies' appearance, the search for hidden chests, the Wilhelm-7 messages in bottles, and the overall narrative. This blends effectively with the familiar Cosmodrome ruins and the mysterious, glowing crystal formations found deep within the cave system. The level design incorporates numerous booby traps and environmental puzzles, evoking classic adventure stories like The Goonies and Indiana Jones. Bungie's history is also referenced, with potential nods to older games like Marathon, Abuse, or Crimson: Steam Pirates. The enemy naming conventions add a layer of humor (Phry'zhia = "Fires ya", R-M80 = "Arr, Matey"). The soundtrack is widely praised as exceptional and highly atmospheric, enhancing the adventurous tone.
- Lore Connections & Easter Eggs:
- Loot Cave: The entire premise connects back to the D1 Loot Cave. Interacting with the pile of bones in the patrol version of the Loot Cave triggers the classic message: "A million deaths are not enough for Master Rahool".
- Wilhelm-7: His story, told through 12 collectible messages, offers a grim perspective on Guardian obsession and the potential dangers lurking beneath the surface of the Cosmodrome. His final state, fused with crystals, is a potent image.
- Engrams: The dungeon plays with the nature of engrams, presenting them as unstable, potentially parasitic constructs tied to greed, rather than simple loot containers.
- Fallen: Introduces Captain Avarokk and his crew, tying the Fallen's scavenger nature into the pirate theme. The term "Bosun" for Grisprax is accurate nautical terminology.
- Colony Ship: The final encounter takes place within the wreckage of a Golden Age colony ship, explaining the presence of advanced technology and potentially the source of the original engrams.
- Appreciating the Details (Practical Tips):
- Visit the Loot Cave in Cosmodrome patrol and interact with the bones.
- Collect all 12 Wilhelm-7 messages for the full story and the Gjallarhorn ornament.
- Pay attention to the environmental storytelling – the decaying Golden Age tech mixed with Fallen scrap and Hive corruption, the mining equipment suggesting prior excavation.
- Listen to the fantastic soundtrack during encounters.

Parting Words for Aspiring Treasure Hunters
Grasp of Avarice remains a standout dungeon experience in Destiny 2. Its clever blend of engaging (if sometimes frustrating) mechanics, rewarding loot (headlined by Gjallarhorn), nostalgic references, and a surprisingly dark underlying narrative makes it highly memorable and replayable. It successfully balances accessibility on Normal difficulty with a significant challenge on Master, catering to a wide range of players. While not the most mechanically intricate dungeon Bungie has designed, its strong thematic identity, self-aware humor, and direct integration of lore into gameplay set it apart.
So, heed the call of adventure, Guardian. Brave the traps, master the mechanics, claim the legendary Gjallarhorn, and perhaps learn a little something about the price of greed along the way. May your Sparrow be swift, your aim true, and your coffers overflow!