
Originally debuting in Destiny 1's The Taken King expansion, the King's Fall raid stands as one of the franchise's most iconic and challenging endgame activities. Reprised for Destiny 2 during the Season of Plunder, this six-player raid pits Guardians against Oryx, the Taken King, aboard his massive ship, the Dreadnaught. This guide provides a comprehensive walkthrough of each encounter, details the locations of hidden chests and the Deepsight Resonance puzzle, outlines challenge mode strategies, and offers loadout recommendations to help your fireteam conquer the Taken King.
Preparing for the Fall: Recommendations and Key Concepts
Before venturing into the Dreadnaught, fireteams should ensure they meet the recommended Power Level (1955 for Normal difficulty as of recent checks, though specific requirements may vary by season). While skill can compensate, being under-leveled significantly increases difficulty. Prioritizing stats like Resilience (for damage reduction), Recovery (for health regeneration), and Discipline/Strength (for ability uptime) is crucial, aiming for tiers as close to 100 as possible.
Loadout Philosophy: A balanced fireteam composition is key
Generally, a mix of high single-target damage (boss DPS), area-of-effect damage (add clear), and support capabilities is recommended.
- Boss DPS: Linear Fusion Rifles (LFRs) like Taipan-4FR, Cataclysmic, or Sleeper Simulant remain meta choices for many encounters due to their high precision damage potential. High-impact Sniper Rifles, such as Izanagi's Burden or Whisper of the Worm, are also potent options, especially when paired correctly. Rocket Launchers, particularly Gjallarhorn or options with Auto-Loading Holster/Lasting Impression, excel in encounters allowing for burst damage.
- Add Clear: Machine Guns (like Thunderlord, Xenophage, or the raid's own Qullim's Terminus) offer sustained fire for numerous enemies. Grenade Launchers, especially those with Wave Frame or Blinding Grenades (like Forbearance or Salvager's Salvo), are excellent for controlling groups. Powerful Exotic primaries like Witherhoard, Trinity Ghoul, or Osteo Striga can also manage large waves of adds effectively.
- Support: Divinity remains invaluable, providing a crucial debuff that increases damage taken by the target and creates an easy-to-hit critical spot. Tractor Cannon offers a shorter-duration debuff but can be useful. Subclasses like Well of Radiance (Warlock) for healing and damage buffs, Ward of Dawn (Titan) for protection and buffs, and Shadowshot (Hunter) for debuffs and orb generation are staples.
Key Raid Mechanics (Recurring):
- Plates: Circular platforms that players often need to stand on to activate mechanics or progress encounters.
- Brands/Auras: Buffs often providing immunity or enabling specific actions, sometimes needing to be transferred between players.
- Torn Between Dimensions: A debuff making a player translucent, allowing them to interact with specific objects or platforms invisible to others.
- Deepsight Resonance Runes: Hidden symbols activated to unlock a bonus chest.
Encounter 1: Hall of Souls (Opening the Portal)
Objective:
Collect six pairs of Relics (glowing orbs) and deposit them simultaneously into statues lining a central hallway to power a portal to the Dreadnaught proper.
Mechanics:
- Team Split: Divide the fireteam into three pairs: Left Relic Team, Right Relic Team, and Center Add Clear Team.
- Initial Relics: The first two Relics spawn near the entrance on columns. One player from Left and one from Right grab a Relic.
- Simultaneous Dunk: Relic carriers cannot shoot. Escorts protect them. Both carriers must dunk their Relics into the first active statue within a short time window of each other (approx. 5 seconds). Failure resets progress by one step.
- Subsequent Relics: After the first dunk, new Relics spawn progressively deeper into the Left and Right wings.
- Barriers & Adds: Picking up Relics spawns Taken barriers (Blights) blocking doorways and Taken enemies. The Center team and Relic escorts must destroy these Blights (by shooting the core) and clear adds to allow carriers passage.
- Repeat: Continue collecting and dunking pairs of Relics (six pairs total, 12 Relics) until all statues are powered.
- Enter Portal: Defeat remaining enemies near the activated portal and proceed through. A chest waits on the other side.
D1 vs. D2 Differences:
Largely the same, but D2 requires shooting central Taken Blights to break barriers blocking relic carriers. The chest after the portal contains gear in D2.
Deepsight Rune Identification:
Before entering the portal, go underneath the platform it rests on. Three Hive symbols will be displayed – these are the runes that must be activated during this week's run for the bonus chest.
The Crux & Portico: Jumping Puzzles
Objective:
Traverse two distinct jumping puzzles to reach the first major encounter area.
Section 1: Swinging Pendulums
Navigate across large, swinging cylindrical pendulums.
Section 2: Tomb Ships
A more complex puzzle involving jumping between ephemeral Hive ships (Tomb Ships) over a chasm.
Mechanics:
Board the first docked ship. It will detach and move. Jump to subsequent ships as they appear and before your current ship disappears. Timing and jump control are crucial. High agility/mobility stats and appropriate jump types (e.g., Triple Jump for Hunters, Strafe Glide for Warlocks) are highly beneficial.
First Set: Right -> Right/Front -> Below/Left (to midpoint platform)
Second Set: Below/Left -> Duck -> Front/Right (high jump needed) -> Ahead/Above -> Above/Left -> Below/Left (to final platform)
Note that exact ship timing and positions can feel slightly variable; adapt quickly.
Hidden Chest #1:
- Location: In an alcove behind a door on the large wall opposite the midpoint platform, accessible via a diagonal ledge.
- Access: Requires precise timing. From a ship before the final docking platform, jump to the diagonal ledge on the left wall. Walk up to the door. Two players must simultaneously stand on the pressure plates at the very end of the entire jumping puzzle section (after the second set of ships, just before the Totems encounter entrance) to open this door. This coordination across the puzzle gap is a key element; players at the end must enable access for those still navigating the ships. Players swap roles to allow everyone access.
Loadout Tips:
Maximize Mobility. Advanced techniques like Warlock Well-skating or Eager Edge sword movement can bypass large sections but require significant practice and coordination; attempting these unprepared in a live raid can cause issues. The existence of such skips can sometimes create disparities in LFG groups between those who can perform them and those who cannot, requiring patience and communication.
D1 vs. D2 Differences:
Functionally identical. D1 had Calcified Fragments in this area, now replaced by Rune locations and the hidden chest mechanics.
Encounter 2: Annihilator Totems (Basilica)
Objective:
Charge a central plate by depositing approximately 200-250 stacks of "Deathsinger's Power" collected from side rooms, while preventing Annihilator Totems from wiping the team.
Setup & Roles:
- Split into two teams of three: Left side and Right side.
- Each side manages a continuous rotation through three core functions (role names vary by guide):
- Brand Holder / Totem Guardian: Takes the Brand (Brand of the Unraveler - Left, Brand of the Weaver - Right), stands on the Annihilator Totem plate in their side room (preventing a wipe), and kills enemies to generate stacks of Deathsinger's Power.
- Brand Claimer / Knight Killer: Kills a Hive Wizard and then a Blightguard Taken Knight that spawn on the upper balcony of their side. Picks up the "Brand Claimer" buff dropped by the Knight.
- Depositor / Runner: The player who just had their Brand taken runs to the large circular plate in the center of the main room and stands on it until all accumulated Deathsinger's Power stacks are deposited.
Mechanics Walkthrough:
- Player 1 grabs the Brand at the room entrance and heads to their side's Totem plate. They must stand under the Totem; leaving it unoccupied for ~5 seconds triggers a wipe. The side rooms are poisonous without the Brand's protective aura (indicated on HUD). Player 1 kills adds, gaining Deathsinger's Power stacks (progress tracked by symbols near the exit door). It's beneficial for other players to leave weaker enemies like Thrall alive for the Brand Holder to easily farm stacks.
- Player 2 goes to the side balcony, kills the Wizard, then kills the Blightguard Knight and picks up the Brand Claimer buff.
- Player 2 goes to the Totem plate where Player 1 is. While near Player 1, Player 2 holds the interact key to take the Brand. Player 2 now becomes the Brand Holder on the Totem.
- Player 1, now free and holding Deathsinger's Power stacks, runs to the center plate and deposits them.
- Player 1 then rotates to become the next Knight Killer (Player 3's role). Player 3 (who just deposited previously) is now killing the Knight to take the Brand from Player 2. The cycle repeats.
- Periodically, Unstoppable Ogres spawn in the center room once sufficient stacks are deposited; these must be dealt with using Unstoppable mods.
- Continue until the central door fully opens (approx. 200-250 stacks total).
Challenge: "The Grass is Always Greener"
- Requirement: Players cannot receive the same Brand (Unraveler or Weaver) twice consecutively.
- Strategy: After depositing stacks at the center plate, a player must go to the opposite side's balcony to kill the Wizard/Knight and claim the Brand. This forces two players to cross the room and swap sides each rotation. This significantly increases travel time compared to the standard strategy, making fast Knight kills and efficient movement even more crucial.
Loadout Tips:
- Unstoppable weapon (Pulse Rifle, Shotgun - check seasonal mods)
- Strong add clear: Machine Guns (Xenophage recommended for high-value targets), Witherhoard, Forbearance
- Pulse/Scout Rifles for Totem holders
- Aeons exotic gauntlets for heavy ammo generation via Knight finishers
- Well of Radiance for center plate survivability
| Loot Drops | Weapons | Armor |
|---|---|---|
| Totems Encounter | Doom of Chelchis (Void Scout Rifle) Qullim's Terminus (Stasis Machine Gun) |
Chest Armor Leg Armor Class Item |
D1 vs. D2 Differences:
D2 requires the Brand Claimer buff from Knights for transfers; it's not automatic on timer expiry. Deathsinger's Power comes from kills, not proximity to the totem. Stack requirement is higher. Unstoppable Ogres are added.
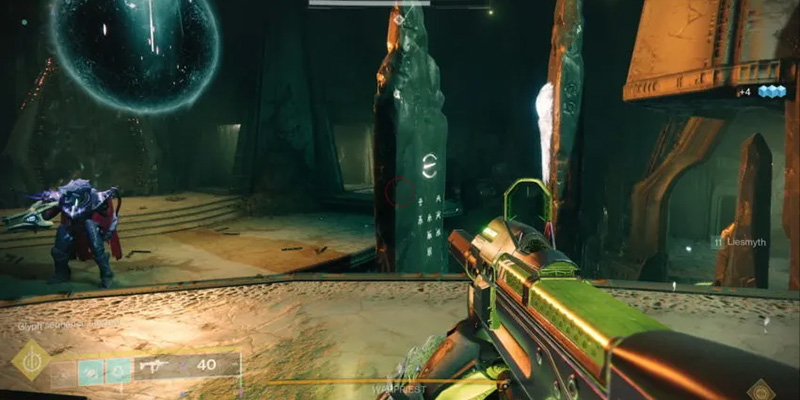
Encounter 3: The Warpriest
Objective:
Defeat the Warpriest boss by deciphering a Glyph sequence, managing the Brand of the Initiate buff for damage phases, and surviving the Oculus wipe mechanic using pillars for cover.
Setup & Roles:
- Split into three pairs: Left, Middle, Right.
- Each pair typically designates one person as the Plate Reader/Holder and the other for Add Clear/DPS.
Mechanics Walkthrough:
- Start: Step on all three plates (Left, Middle, Right) simultaneously. Clear initial waves of adds.
- Knight Phase: Three Hallowed/Revenant Knights appear (Left, Middle, Right). Blighted Wizards may also spawn. Killing all three Knights triggers the Glyph sequence.
- Glyph Reading Sequence: The message "Glyph sequence started" appears. This sequence determines the order plates must be activated to start DPS. - The Middle plate player always steps on their plate first to initiate the reading. While standing on the plate, they look at the back of the large stone pillars (monoliths) corresponding to the Left and Right plates. A white glow indicates the next plate in the sequence. - Reading Logic: If the Left pillar glows, Left is first. If the Right pillar glows, Right is first. If neither pillar glows from Middle's perspective, then Middle is the first plate in the sequence (as they cannot see the back of their own pillar). - The Middle player steps off their plate after making the first callout. - The player assigned to the first plate called steps on and remains on the plate. - This first player now looks at the backs of the other two pillars (they cannot see their own). If one glows, they call out that plate as second. If neither glows, the remaining (third) plate is second. - The player assigned to the second plate steps on and remains on. - The player assigned to the third (final) plate steps on. This player immediately receives the Brand of the Initiate buff. - Sequence Rules: Players must remain on their plates once the sequence begins correctly. Stepping off early breaks the sequence. Stepping on plates out of order causes damage and resets the sequence. Reading the next pillar's glow must be done while standing on the current correct plate. This mechanic demands precise communication and spatial awareness under pressure.
- Damage Phase (DPS): The player holding the Brand of the Initiate creates a red aura. All fireteam members must stand inside this aura to damage the Warpriest. The team usually gathers on the Right side platform or in the Middle for DPS. The initial Brand timer is around 20 seconds. In Destiny 2, killing regular adds does not extend this timer.
- Extending DPS (Brand Claimer Mechanic): - During the DPS phase, Taken Knights (Blightguards) will spawn, typically two sequentially on different sides (Left, Middle, or Right, but not the side corresponding to the final plate activated). - Designated players (often the two Plate Holders not currently holding the Brand) must quickly kill a Knight and pick up the "Brand Claimer" buff it drops. - The player with the Brand Claimer runs to the current Brand Holder and uses the interact key to "steal" the Brand, resetting its timer. - This process can be repeated with the second Knight, allowing for a total of three Brand cycles per full DPS phase.
- Oculus Wipe Mechanic: After the final Brand timer expires, the Warpriest initiates a wipe attack via the Oculus, the large black sphere above him. The Oculus glows intensely. The entire team must quickly take cover behind the shadow cast by one of the three large stone pillars. Any player caught in the light will die.
- Pillar Destruction & Repeat: The pillar used for cover is destroyed after the Oculus fires. The team must use a different, intact pillar for the next phase. With only three pillars, there is a maximum of four DPS phases before a wipe is unavoidable due to lack of cover. This limited cover acts as a hard enrage mechanic, pressuring teams to maximize DPS and successfully execute Brand extensions. Repeat the cycle: clear adds, kill Knights, read Glyphs, DPS with Brand swaps, hide behind a new pillar. A common hiding order is Right -> Middle -> Left.
Challenge: "Devious Thievery"
- Requirement: The Brand of the Initiate must be stolen within 5 seconds of the Brand Claimer buff being picked up from the defeated Knight.
- Strategy 1 (DPS Mid): Have the DPS team group in the center of the arena. This minimizes travel time for the Brand Claimer holder. May require ending DPS slightly early to reach cover pillars safely.
- Strategy 2 (Mobile DPS): The DPS team moves towards the Knight spawn location. The Claimer picks up the buff, and the Brand Holder moves towards them for a quick swap. Rockets might be preferable to LFRs for mobility.
- Strategy 3 (Speed Runner): Designate fast-moving players (Arc 3.0 Amplified builds, Titan Thundercrash, Eager Edge swords) as Knight killers. They rapidly cross the arena to the Brand Holder, who can remain in a more static DPS position (e.g., Right side). This forces a choice between mobile team DPS or reliance on individual speed for the challenge.
Loadout Tips:
- DPS: LFRs (Taipan, Cataclysmic, Sleeper), Izanagi's Burden, Whisper of the Worm, Divinity (one player). Witherhoard for passive damage.
- Add Clear: Pulse Rifles, SMGs, Witherhoard. Burst damage needed for Knights/Wizards (Shotguns, Fusions, Xenophage).
- Support: Well of Radiance, Titan Bubble (Weapons of Light can stack with Well), Nightstalker Tether. Aeons for heavy ammo. Siphon mods for orbs.
| Loot Drops | Weapons | Armor |
|---|---|---|
| Warpriest Encounter | Smite of Merain (Kinetic Pulse Rifle) Defiance of Yasmin (Kinetic Sniper Rifle) |
Gauntlets (Arms) Chest Armor |
D1 vs. D2 Differences:
D2 Brand extension requires Brand Claimer from Knights, not regular add kills. Warpriest uses all Taken abilities from the start (D1 Hard Mode mechanic integrated). Glyph reading sequence is initiated and read differently. Warpriest is more resistant to staggers.
Golgoroth's Cellar: The Maze
Objective:
Navigate a dark, multi-pathed maze filled with pitfalls to reach the Golgoroth encounter arena.
Navigation:
The maze features multiple branching paths and dead ends. Following a specific wall (e.g., always turning left or right at junctions) is a common strategy. One path requires climbing through a hole high in a wall to bypass a blockage. The exit is a large pit leading down to the boss arena.
Hidden Chest #2:
- Location: Spawns in the middle hallway of the maze upon correct activation.
- Access: Requires five players to find and stand on five hidden pressure plates in a specific, sequential order. This transforms the traversal section into a coordinated mini-encounter demanding full team participation.
- Plate Sequence & Locations:
- Plate 1: Start of maze, take the Right path to a dead end; plate is in an alcove on the right.
- Plate 2: Near the maze exit, take the Left hallway; plate is at the end, on the left.
- Plate 3: Near the maze entrance, take the Left hallway.
- Plate 4: Take the Middle-Left hallway; find a hole near the ceiling to climb through, bypassing a blocked door; plate is ahead after dropping down.
- Plate 5: Near the maze exit, take the Right hallway; plate is at the end.
- Activation: Players must position themselves at their assigned plates. Then, step on them in the numbered order (1 through 5). Success spawns the chest. Beware of large pits while navigating.
D1 vs. D2 Differences:
Maze structure is similar. D2 introduces the sequenced plate mechanic for the hidden chest. D1 had a Calcified Fragment in this area. Exploit-based skips using Stasis crystals exist but are not standard.
Encounter 4: Golgoroth
Objective:
Defeat the massive Hive Ogre, Golgoroth, by managing his Gaze, creating Pools of Reclaimed Light for damage phases, and handling the Unstable Light debuff.
Setup & Roles:
- Split the team: 2 Gaze Holders (Taunters) and 4 DPS players. This role specialization is critical, as failure in either role halts progress.
- Gaze Holders: Need reliable weapons to hit Golgoroth's back crit spot (LFRs like Arbalest, high-impact Snipers) and strong survivability (Solar subclasses, Loreley Splendor Titan recommended).
- DPS Team: Need high single-target damage (LFRs, Snipers), one Divinity user is highly recommended.
Mechanics Walkthrough:
- Start: Clear initial adds in the arena. Shoot the large orb hanging from the center ceiling; it drops, creating the first Pool of Reclaimed Light and spawning Golgoroth.
- Initiate DPS Phase: - DPS team shoots down one of the other six smaller orbs hanging from the ceiling to create subsequent Pools of Reclaimed Light. Only one orb can be active at a time in D2. Orbs regenerate health if not destroyed quickly. - Simultaneously, Gaze Holder 1 shoots the glowing weak spot on Golgoroth's upper back to acquire Golgoroth's Gaze.
- Holding Golgoroth's Gaze: - The Gaze buff lasts ~15-20 seconds. While active, Golgoroth turns to face the Gaze Holder and fires seeking Axiom Darts at them. Taken enemies will also prioritize attacking the Gaze Holder. - Crucially, the Gaze Holder must position themselves (often on the elevated sides or near the entrance, opposite the DPS pool) so that Golgoroth turns his chest towards the DPS team standing in the pool below. Taking the Gaze opens Golgoroth's stomach weak spot for damage.
- Damage Phase: - The 4 DPS players stand inside the active Pool of Reclaimed Light and shoot Golgoroth's glowing stomach crit spot. Damage can only be dealt to this spot while standing in a pool. - Unstable Light: A random player (or two in Pantheon mode) within the pool receives the Unstable Light debuff (indicated by a green screen effect). This player must quickly move away from the team before the debuff timer expires, causing a lethal explosion. Moving towards Golgoroth allows the explosion to deal bonus damage to him. This mechanic punishes players tunnel-visioning on damage and mandates situational awareness. - The DPS team shoots down the next ceiling orb as the current pool is about to expire, moving from pool to pool, often in a zig-zag pattern across the pit. Gaze Holders can assist in shooting down orbs.
- Swapping the Gaze: Before Gaze Holder 1's timer runs out (e.g., at 2-5 seconds remaining), Gaze Holder 2 must shoot Golgoroth's back weak spot to take the Gaze. Gaze Holder 2 then takes over positioning Golgoroth, while Gaze Holder 1 can potentially contribute DPS from the pool if safe.
- Cycle End & Repeat: Continue swapping Gaze and dropping pools. The DPS phase typically ends after all six damage orbs are used, or if the Gaze is dropped. After six successful Gaze swaps, Golgoroth "grows tired," the phase ends, and adds respawn. Repeat the entire cycle until Golgoroth is defeated.
- Tablet of Ruin: A tablet on the wall tracks player deaths. Each death adds a rune; reaching six runes triggers a team wipe. In D2, unused damage orbs might also contribute to the tablet.
Challenge: "Gaze Amaze"
- Requirement: When Gaze is transferred, the player currently holding the Gaze must be standing inside an active Pool of Reclaimed Light.
- Strategy: Requires precise timing and communication. The current Gaze Holder must move into the DPS pool shortly before their timer expires (e.g., at 5 seconds). The incoming Gaze Holder then shoots Golgoroth's back while the first is inside the pool (e.g., at 2 seconds).
- Increased Risk: This strategy directs Golgoroth's Axiom Darts straight into the DPS pool, endangering the team. Additionally, Golgoroth may perform a stomp attack if the Gaze Holder gets too close, potentially knocking them out of the pool and failing the challenge. Strong healing (Well of Radiance) and damage resistance are vital.
- Safety Tactic: Consider using only the first five damage orbs and intentionally letting the Gaze run out before the sixth pool. The sixth pool often drops very close to Golgoroth, increasing stomp risk. This avoids the riskiest part of the challenge phase while only minimally impacting overall DPS and not causing a Tablet wipe.
Well of Radiance Warlocks are incredibly valuable during this encounter, especially for the challenge. Position your Well directly in the Pool of Reclaimed Light to provide critical healing during Gaze transfers. Consider using Starfire Protocol for additional fusion grenades to damage Golgoroth between Wells.
Loreley Splendor Titans make excellent Gaze Holders due to their constant health regeneration. For DPS, Thundercrash with Cuirass of the Falling Star provides excellent burst damage. Ward of Dawn can be used to provide Weapons of Light before moving to the first pool.
Golden Gun with Celestial Nighthawk provides excellent burst damage for Golgoroth. Nightstalker Hunters can apply valuable debuffs using Deadfall or Moebius Quiver. For Gaze Holders, Graviton Forfeit invisibility builds allow for safer positioning.
Loadout Tips:
- Gaze Holders: Arbalest, Izanagi's Burden, high-impact LFRs/Snipers. Add clear weapon (SMG). Loreley Splendor Titan for survivability.
- DPS Team: Divinity. LFRs (Stormchaser, Cataclysmic, Taipan). Snipers (Izanagi's, Whisper). Witherhoard. Golden Gun Hunter (Celestial Nighthawk). Starfire Protocol Warlock.
| Loot Drops | Weapons | Armor |
|---|---|---|
| Golgoroth Encounter | Qullim's Terminus (Stasis Machine Gun) Midha's Reckoning (Arc Fusion Rifle) Zaouli's Bane (Solar Hand Cannon) |
Helmet Armor Leg Armor |
D1 vs. D2 Differences:
D2 only spawns one Pool of Light orb at a time. Unstable Light (D1 Hard Mode mechanic) is standard in D2. Enemy types differ slightly (no Cursed Thrall). Tablet of Ruin mechanics might be slightly adjusted.

The Transept: Wall Jumping Puzzle
Objective:
Traverse a final, complex jumping puzzle involving moving wall pistons ("dick wall puzzle" in community parlance) and hidden platforms activated by a Ghost.
Path & Hidden Chest #3:
- Navigate the initial sections with moving wall pistons pushing players off narrow ledges.
- Reach a point with a pressure plate that normally starts a bridge-building sequence across a chasm. You'll likely see Taken Vandals sniping from across the gap.
- To find the secret chest, ignore the plate. Look around (often to the right from the plate). Pull out your Ghost.
- The Ghost will reveal shimmering, invisible platforms floating in the air.
- Carefully jump across these hidden platforms, using the Ghost continuously to see the path. You may need to jump onto small visible ledges on nearby pillars or walls to reach the next set of invisible platforms.
- Follow the hidden platforms upwards and across the chasm until you reach a large doorway high up on a wall.
- Enter the doorway; the Hidden Chest #3 is inside this room. The reliance on the Ghost mechanic here is a direct callback to Destiny 1's secrets.
Loadout Tips:
High Mobility stat is helpful. Ghost is mandatory for the secret chest path. Skips using Well-skating or Eager Edge swords along the left side are possible but require practice.
D1 vs. D2 Differences:
The main puzzle layout and the hidden chest path using the Ghost are functionally the same as in D1. D1 had Calcified Fragments here. Movement skips are more common in D2.
Encounter 5: Daughters of Oryx
Objective:
Defeat the two Deathsinger sisters, Ir Anûk and Ir Halak, positioned on platforms at opposite ends of the arena. This involves activating plates, traversing invisible platforms while "Torn Between Dimensions," stealing a protective aura, and coordinating DPS phases.
Setup & Roles:
- Assign four players to the four main platforms (plates) in the room. Consistent callouts are crucial; common systems include L1/R1 (front plates closest to entrance) & L2/R2 (back plates closest to Oryx's spawn) or Front Left/Right & Back Left/Right. Agree on a system beforehand, as ambiguity (like L1/R1 vs Oryx's Left/Right) causes significant confusion.
- Designate two players as "Floaters," who initially help with add clear but are ready to step onto a plate if its assigned holder becomes Torn.
Mechanics Walkthrough:
- Start: Kill the Taken Knights that spawn on each of the four plates. One of the two Daughters will begin singing a song (Liturgy of Ruin) which acts as a wipe timer for the encounter, while the other Daughter remains passive but shielded.
- Plate Activation: One of the four plates will begin to glow green. The player assigned to that plate must step onto it.
- Torn Between Dimensions: Simultaneously, a random player (can be a plate holder or floater) becomes "Torn Between Dimensions," gaining a translucent appearance. If a plate holder is Torn, one of the Floaters must quickly take their place on the plate if it's needed for the sequence.
- Spark Location & Callout: The Torn player looks above the other three plates to locate a floating Taken orb (often called a spark, Blightguard fragment, or Brand piece). They must clearly call out which plate the spark is hovering above (e.g., "Spark is on R2!").
- Building the Bridge: The player assigned to the plate directly below the called-out spark steps onto their plate. This action (along with the first plate activation) summons a series of invisible platforms leading towards the spark, visible only to the Torn player. Note on sequence: Some guides suggest platforms activate sequentially counter-clockwise from the first plate, while others imply only the starting and ending plates matter. The standard approach involves activating the starting plate and the plate under the spark. Players should jump off their plates once the Torn player confirms they have collected the spark. Standing on plates incorrectly or for too long can cause players to be set on fire.
- Collecting the Spark: The Torn player navigates the invisible platforms and collects the spark. This entire process (steps 2-6) repeats three times in total, with different players becoming Torn and the spark appearing above different plates.
- Aura Steal: After the third spark is collected, the Torn player gains the ability to steal the protective aura (sometimes called Brand Claimer or Aura of Weaving). They must quickly jump to the platform of the Daughter who is not singing/shooting (the passive one) and use the interact key to steal her Aura of Immortality.
- Damage Phase (DPS): The player who stole the aura immediately runs to the agreed-upon DPS location (often the center of the room between the platforms, or sometimes on the plate opposite the target Daughter). The entire fireteam must gather inside the protective aura bubble. From within the bubble, the team can damage the other Daughter – the one who was singing/shooting. Only this Daughter is vulnerable during this phase.
- Repeat & Execute: After the DPS phase (or when the aura timer runs out), the cycle restarts. The Daughters swap roles – the one who was passive now sings, and the one who was attacked becomes passive and holds the aura to be stolen. Repeat the plate activation, Torn player, spark collection, and aura steal process. Crucial Rule: Once one Daughter is defeated, the fireteam must defeat the second Daughter in the very next DPS phase. Failure to do so results in an immediate wipe. This creates a significant DPS check, requiring either balanced damage across phases or enough burst to finish the second Daughter quickly.
Challenge: "Under Construction"
- Requirement: Players assigned to plates cannot stand on the same plate twice within a single cycle of building the platforms (i.e., between DPS phases).
- Strategy: The most common strategy is to have all four plate holders rotate to the next adjacent plate (either clockwise or counterclockwise, decided beforehand) after each spark is successfully collected by the Torn player. Floaters fill in for Torn players as needed, maintaining the rotation. This ensures no player occupies the same plate twice during the three spark collections leading up to a DPS phase. The rotation count resets after each DPS phase. This challenge adds a layer of procedural memory and execution tracking, requiring players to remember their current position in the rotation.
Loadout Tips:
- DPS: LFRs (Stormchaser), Sniper Rifles (Izanagi's Burden), Rocket Launchers (Gjallarhorn, Hothead). Divinity is helpful due to the Daughters' relatively small crit spots.
- Add Clear: Needed for the Knights on plates at the start and any adds spawning during platforming. Pulse Rifles, Hand Cannons, SMGs are suitable.
- Support: Well of Radiance is highly recommended for survivability and damage boost during DPS phases.
| Loot Drops | Weapons | Armor |
|---|---|---|
| Daughters of Oryx Encounter | Smite of Merain (Kinetic Pulse Rifle) Zaouli's Bane (Solar Hand Cannon) Defiance of Yasmin (Kinetic Sniper Rifle) |
Gauntlets (Arms) Chest Armor |
D1 vs. D2 Differences:
D2 may require fewer players on plates (unconfirmed, standard uses 4). D2 requires more Torn player sequences before DPS (3 for Daughters, 4 for Oryx) compared to D1's single sequence. Incorrect plate usage causes fire damage.
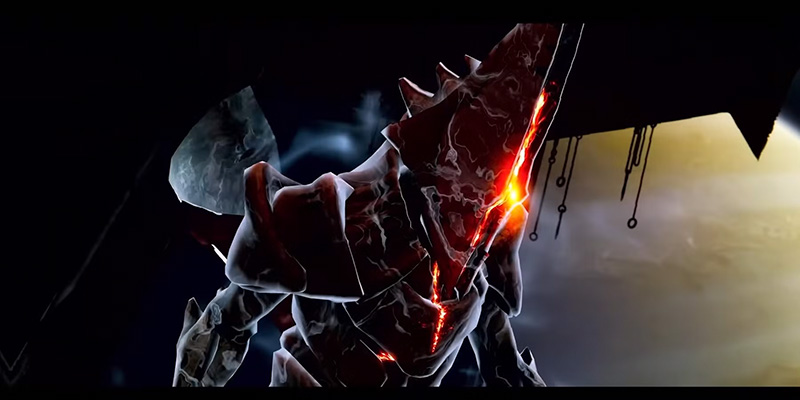
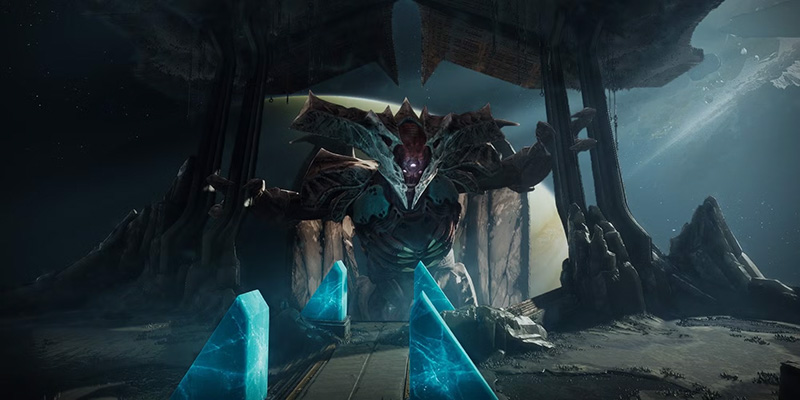
Encounter 6: Oryx, The Taken King
Objective:
Defeat Oryx, the final boss, by orchestrating a complex sequence involving plate activation, Torn Between Dimensions platforming, managing Light-Eater Ogres and Knights, detonating Corrupted Light bombs to stun Oryx, stealing an aura for protection, surviving Oryx's retaliatory attacks, and executing a final stand. This encounter combines and escalates nearly all mechanics seen previously.
Setup & Roles:
Identical to Daughters: 4 Plate Holders (L1/R1, L2/R2 or Front/Back), 2 Floaters. One player will randomly become the Relic Runner (Torn player) each cycle.
Mechanics Walkthrough:
- Start: Approach the large orb/relic at the far end of the arena opposite the entrance. Oryx appears. Clear initial adds and Taken Knights on the four plates.
- Oryx Slams & Plate Activation: Oryx will move towards one end of the arena and slam his fist onto one of the four plates. This plate glows green. The assigned player steps on it. A random player becomes Torn. Floaters cover if a plate holder is Torn.
- Spark Collection (Four Times): The Torn player locates the spark above another plate, calls it out. The corresponding plate holder steps on, creating platforms. The Torn player collects the spark. This process repeats four times in total for Oryx. Major Knights (Vessel replicas?) spawn after each spark and should be killed.
- Light-Eater Ogres: Starting after the first spark is collected, four Light-Eater Ogres will spawn sequentially near each plate, typically rotating counter-clockwise. The fireteam (primarily plate holders or designated floaters) must kill these Ogres very quickly. Upon death, each Ogre leaves behind a large black sphere – a Corrupted Light bomb. Note the location where each bomb drops. Do not touch or stand near the bombs yet. Warlocks with Cenotaph Mask can mark Ogres before they die to generate heavy ammo for the team.
- Light-Eater Knights: Shortly after the Ogres die, Light-Eater Knights will spawn (often in the corners, diagonally opposite their target bomb) and make a beeline for the Corrupted Light bombs. These Knights must be killed before they reach and consume a bomb. Losing bombs reduces the duration of the subsequent DPS phase.
- Vessel of Oryx & Aura Steal: After the fourth and final spark is collected, the Torn player gains the Brand Claimer buff. A powerful Knight called the Vessel of Oryx spawns (usually in the middle area). The player with Brand Claimer must approach the Vessel and steal its protective Aura of Immortality. Once the aura is stolen, the team should kill the Vessel immediately.
- Corrupted Light Detonation (Stun Phase): - Oryx moves to one end and slams his fist again. - The text prompt "Oryx calls upon the Darkness" appears in the bottom left feed. This is the signal for the standard strategy. - Optimal Timing: For potentially faster clears and longer DPS, players can enter the bombs as soon as Oryx lifts his hand after the slam, slightly before the text prompt appears. This grants about two extra seconds but requires precise timing and coordination. This reflects a design choice allowing for skill expression while providing a safer window for general play. - The four players assigned to plates (or whoever is covering) must run into the center of the black aura surrounding their respective Corrupted Light bomb. - They must remain inside the bomb's aura until the text feed confirms "[Player Name] has detonated a Corrupted Light" (or similar wording). Seeing your name is the confirmation. Do not leave early. - As soon as detonation is confirmed, these four players must sprint back to the center of the arena and get inside the protective Aura of Immortality being held by the Relic Runner (the player who stole it from the Vessel). The bombs explode, stunning Oryx.
- Damage Phase (DPS): While Oryx is stunned from the bomb detonations, his chest opens, revealing a large critical weak spot. The entire team, protected within the Aura of Immortality, unloads damage onto Oryx's chest. The number of bombs successfully detonated directly correlates to the length of the stun and therefore the DPS window.
- Oryx's Retaliation: After the DPS phase concludes (Oryx's chest closes), Oryx will unleash one of two possible retaliatory attacks, chosen randomly: - Bombardment / Meteor Storm: Oryx launches numerous seeking projectiles that track players and explode. All players must immediately start running (often in large circles around their assigned plate areas or the arena edges) and avoid grouping up to survive. Stopping means death. - Shadow Realm / Thunderdome: Oryx summons a large blight sphere, usually at the front of the arena, and begins teleporting players inside one by one. Inside, players must defeat a Shade of Oryx. Players outside can help by killing Thrall attempting to enter the sphere. The Shade fight is notably more difficult in D2 than D1, featuring a smaller arena and a more aggressive Shade. Killing the Shade returns players to the main arena. Failure to kill the Shade in time results in a wipe.
- Repeat Cycle: Once the retaliation phase ends, the entire encounter cycle restarts, beginning with Oryx moving to slam a plate.
- Final Stand: When Oryx's health drops to its final segment (around 25% or lower), he moves to the front/center of the arena and initiates his last stand sequence. - Two final Light-Eater Ogres spawn, one near the L2 plate location and one near R2. - Two designated players must quickly kill these Ogres, creating two final Corrupted Light bombs. - Wait for the "Oryx calls upon the Darkness" prompt. - The two designated players detonate these bombs. Detonating them simultaneously is often simplest, though some strategies involve staggering detonations to extend the stun slightly. - While Oryx is stunned by these final bombs, the entire team focuses all remaining firepower on his chest to finish him off. If Oryx completes his final incantation before being killed, the fireteam wipes.
Challenge: "Hands Off"
- Requirement: Throughout the entire encounter, no single player can kill the same Light-Eater Ogre (based on its spawn position) or the same Light-Eater Knight (based on its spawn position/target bomb) more than once. This includes the two Ogres that spawn during the final stand phase.
- Strategy (Plate Rotation): The most straightforward and LFG-friendly method is to have the four players assigned to plates rotate their positions after each full DPS cycle (i.e., after Oryx's retaliation phase). A common rotation is clockwise: L1 -> R1 -> R2 -> L2 -> L1. During each phase, plate holders are responsible only for the Ogre and Knight associated with their current plate assignment. Floaters should avoid killing Ogres or Knights unless absolutely necessary to cover for a Torn player, and if they do, they must remember which specific Ogre/Knight they killed to avoid conflicts later in the rotation. This systematic rotation ensures the challenge condition is met over multiple phases. Careful tracking is needed for the final stand Ogres to ensure the assigned killers haven't killed the L2/R2 Ogres previously in the encounter. This challenge heavily tests role discipline and adherence to the rotation plan over multiple cycles.
Well of Radiance Warlocks are essential for Oryx, providing crucial healing and damage buffs during bomb detonations and DPS phases. Position your Well in the center where the Brand Holder will be standing. Solar Warlocks with Cenotaph Mask can mark Ogres with Scorch to generate heavy ammo on their death.
Ward of Dawn Titans can provide Weapons of Light for a stacking damage buff with Well of Radiance. Position the bubble near but not on top of the center DPS position. Thundercrash Titans with Cuirass of the Falling Star can deal massive damage during the chest weak point phases.
Nightstalker Hunters can use Deadfall tethers to debuff Oryx during the chest DPS phase. Orpheus Rig allows for super regeneration across multiple phases. Gunslinger Hunters with Star-Eater Scales or Celestial Nighthawk provide excellent burst damage, especially during the final stand phase.
Loadout Tips:
- DPS: LFRs, Snipers (Whisper), Divinity. Touch of Malice synergizes well with Well of Radiance or Titan Bubbles (Blessing of Light for Ogres, Weapons of Light for DPS) allowing sustained fire without reloading or self-damage.
- Add Clear: Witherhoard, Osteo Striga, Pulse Rifles. Xenophage is effective against Ogres and Knights. Solar subclasses are strong for add clear (Titan especially).
- Support: Well of Radiance, Titan Bubble, Nightstalker Tether.
| Loot Drops | Weapons | Armor | Exotic |
|---|---|---|---|
| Oryx, The Taken King | Any Legendary weapon from previous encounters | Helmet Arms |
Touch of Malice (Random Chance) |
D1 vs. D2 Differences:
Light-Eater Knights are standard, not just Hard Mode. Corrupted Light bombs primarily stun Oryx to enable the DPS phase, rather than being the main source of damage themselves. Oryx's chest must be shot after the stun to initiate DPS. The post-DPS retaliation attack (Bombs vs. Shade) is randomized. The Shade of Oryx fight is more difficult. Final stand mechanics are slightly adjusted. The popular D1 "No Knight" strategy is not the intended D2 approach.
The King's Secrets: Deepsight Resonance Chest

Objective:
Activate three specific hidden Hive runes scattered throughout the raid during a single run to spawn a bonus chest after defeating Oryx. This chest guarantees one Deepsight Resonance (red border) King's Fall weapon per account per week, aiding in weapon pattern acquisition for crafting. This mechanic encourages full raid clears and rewards exploration.
Procedure:
- Identify Weekly Runes: At the very beginning of the raid, in the Hall of Souls starting area, go underneath the large platform where the portal eventually opens. Three distinct Hive symbols will be illuminated there. These are the three specific runes your fireteam must find and activate during that week's raid clear. It is essential to note or screenshot these symbols.
- Locate and Activate Runes: As the fireteam progresses through the raid, find the physical locations corresponding to the three noted symbols. Shoot the symbol with any weapon to activate it, causing it to glow brightly. Rune locations are spread across main paths and secret areas, rewarding thorough knowledge of the raid.
- Confirmation: Upon shooting the third correct rune, the message "The runes accept your offering" will appear in the bottom-left feed, accompanied by an audible chime.
- Claim Reward: After successfully defeating Oryx, the bonus Deepsight chest will spawn near the regular final encounter chest.
All Nine Potential Rune Locations & Symbols:
- Swinging Pendulums (Double Dash): On the first pendulum, turn around, look under the starting platform.
- Tomb Ship Hidden Chest 1 (Spider): Above the exit doorframe of the first hidden chest room.
- Totems Encounter (Spider V legs): Left side room. Climb onto cover near the totem plate, look left towards the second-floor wall near the entrance.
- Warpriest Encounter (Jellyfish): Climb up to the Left plate platform. Look across towards the Right side; the rune is on a wall perpendicular to an open doorway.
- Golgoroth's Maze (Triple Dots): At the very end of the maze, just before the drop into Golgoroth's arena, turn around.
- Golgoroth Encounter (X): Drop down from the rally banner spot. Turn left; the rune is on the wall near the typical location of the first DPS pool.
- Transept Hidden Chest 3 (Neutral Face): Inside the third hidden chest room, found to the left of the chest itself.
- Transept Puzzle Exit (Ice Cream): At the end of the main jumping puzzle path, just before the doorway leading into the Daughters/Oryx arena, look straight up at the ceiling.
- Daughters/Oryx Arena Entrance (U): Enter the final arena. Immediately turn around and look up above the entrance doorway.
Spoils of War: King's Fall Loot Table & Weapon Highlights
King's Fall offers a desirable suite of weapons and armor, including the coveted Touch of Malice Exotic Scout Rifle. Understanding how and where to acquire loot is key to efficient farming.
Loot Sources:
- Encounter Chests: Each major encounter (Totems, Warpriest, Golgoroth, Daughters, Oryx) drops a chest upon completion containing potential weapons and armor specific to that encounter.
- Hidden Chests: The three hidden chests primarily drop raid mods and gear pieces (weapons or armor) that the player has already acquired from the raid previously.
- Deepsight Resonance Chest: Guarantees one random Deepsight (red border) King's Fall weapon per account per week upon activating the correct runes and defeating Oryx.
- Final Chest (Cache of the King): After defeating Oryx, a final chest allows players to purchase specific weapons or armor pieces they have previously obtained using Spoils of Conquest (typically 20 Spoils per item). Spoils are earned from completing raid encounters across Destiny 2.
- Master Difficulty: Completing the weekly featured challenge on Master difficulty rewards an Adept (Harrowed) version of a King's Fall weapon. Adept weapons feature enhanced base stats when masterworked and can equip powerful Adept mods.
- Touch of Malice: This Exotic Scout Rifle has a random chance to drop only from defeating Oryx, the final boss, on either Normal or Master difficulty. Completing certain raid Triumphs may increase the drop chance.
King's Fall Encounter Loot Table
| Encounter | Weapon 1 | Weapon 2 | Weapon 3 | Armor Slot(s) |
|---|---|---|---|---|
| Totems | Doom of Chelchis (Void Scout) | Qullim's Terminus (Stasis MG) | - | Chest, Legs, Class |
| Warpriest | Smite of Merain (Kinetic Pulse) | Defiance of Yasmin (Kinetic Sniper) | - | Arms, Chest |
| Golgoroth | Qullim's Terminus (Stasis MG) | Midha's Reckoning (Arc Fusion) | Zaouli's Bane (Solar Hand Cannon) | Helmet, Legs |
| Daughters of Oryx | Smite of Merain (Kinetic Pulse) | Zaouli's Bane (Solar Hand Cannon) | Defiance of Yasmin (Kinetic Sniper) | Arms, Chest |
| Oryx, The Taken King | Any Legendary Weapon | Touch of Malice (Exotic) | - | Helmet, Arms |
Weapon Highlights & Crafting:
All Legendary weapons from King's Fall are craftable, allowing players to eventually create their perfect "god roll" once they acquire enough Deepsight Resonance versions to unlock the pattern. This system provides a deterministic path to desired rolls, complementing the RNG nature of drops like Touch of Malice. The introduction of craftable raid weapons is a significant difference from the purely RNG loot system of Destiny 1's King's Fall.
All King's Fall weapons also feature the Runneth Over Origin Trait, which reloads the weapon and overflows the magazine based on the number of nearby allies reloading.
Recommended PvE Perks (Examples):
| Weapon | Barrel/Mag Recommendation | Perk Column 1 | Perk Column 2 | Notes |
|---|---|---|---|---|
| Doom of Chelchis (Void Scout) | Arrowhead Brake, Tactical Mag | Explosive Payload / Firefly | Dragonfly / Frenzy / One for All | Firefly+Dragonfly for double explosions |
| Qullim's Terminus (Stasis MG) | Arrowhead Brake, Tactical Mag | Ensemble / Heating Up | Killing Tally / Headstone / Firefly | Killing Tally provides stacking damage |
| Smite of Merain (Kinetic Pulse) | Arrowhead Brake, Tactical Mag | Stats for All / Demolitionist | One for All / Adrenaline Junkie | Stats/One for All is a strong neutral combo |
| Defiance of Yasmin (Kinetic Sniper) | Arrowhead Brake, Extended Mag | Ensemble / No Distractions | Firing Line / Vorpal Weapon | Firing Line best for team DPS |
| Midha's Reckoning (Arc Fusion) | Chambered Comp, Accelerated Coils | Field Prep / Cornered | Reservoir Burst | Reservoir Burst for add clear burst |
| Zaouli's Bane (Solar Hand Cannon) | Arrowhead Brake, Accurized Rounds | Explosive Payload | Incandescent / One for All | Explosive+Incandescent is top-tier |
Touch of Malice (Exotic Scout Rifle):
- Intrinsic Trait (Touch of Malice): The final round in the magazine deals significantly increased damage but drains the wielder's health. This final round automatically regenerates, allowing continuous fire. Rapidly defeating three enemies restores a portion of the wielder's health.
- Exotic Perk (Charged with Blight): Precision hits charge a Blight projectile. Using the alternate fire mode launches this projectile, which damages and temporarily blinds enemies.
- Synergies: Works well in damage phases with constant healing sources like Well of Radiance or effects like Blessing of Light from Ward of Dawn, mitigating the health drain.
The unique perk combinations available on King's Fall weapons, like the double explosions on Doom of Chelchis or the potent synergy of Zaouli's Bane, make them highly sought after for their distinct gameplay impact, driving engagement with the raid's loot systems.
Echoes of the Past: Key Destiny 1 vs. Destiny 2 Differences
While the narrative and core structure remain, the Destiny 2 version of King's Fall features notable updates and changes compared to its original Destiny 1 iteration:
Mechanics:
- Brand Transfer: Requires the "Brand Claimer" buff obtained from specific Knights in Totems and Warpriest encounters, rather than automatic proximity/timer-based transfers.
- Deathsinger's Power (Totems): Gained via kills while holding a Brand, not passive generation.
- Glyph Sequence (Warpriest): More involved reading process based on pillar glows from specific perspectives.
- Oryx Stun: Corrupted Light bombs primarily stun Oryx to enable DPS, rather than dealing the bulk of the damage themselves.
- Integrated Hard Mode Mechanics: Several mechanics previously exclusive to D1's Hard Mode are now standard in D2's Normal mode, such as the Warpriest using all Taken abilities, Unstable Light on Golgoroth, and Light-Eater Knights always spawning at Oryx. This generally increases the baseline complexity compared to D1 Normal.
Encounters:
- Totems: Features Unstoppable Ogres.
- Golgoroth: Only one damage pool orb drops at a time.
- Oryx: Retaliation phase (Bombs or Shade) is randomized. Shade of Oryx fight is considered harder.
Loot System:
- Craftable Weapons: All Legendary weapons can be crafted, offering a deterministic path to god rolls.
- Deepsight Chest: A new puzzle guarantees a weekly red border weapon.
- Touch of Malice: Random drop from Oryx, not tied to a lengthy questline.
- Adept Weapons: Available from Master difficulty challenges.
Quality of Life:
Updated visuals, lighting, and environmental details. Access to Destiny 2's expanded sandbox of subclasses, abilities, and mods offers greater build diversity.
Conclusion: Long Live the Kingslayer
King's Fall remains a pinnacle Destiny experience, testing fireteam coordination, mechanical execution, and endurance. From the simultaneous dunks opening the portal to the intricate dance against Oryx himself, each encounter presents unique challenges and rewards. The updated Destiny 2 version integrates familiar mechanics with new twists, offering both nostalgia for veterans and a formidable challenge for newcomers.
Success hinges on clear communication – agreeing on callouts for plates, coordinating Brand swaps, timing Gaze transfers, and managing bomb detonations. Patience, especially when learning mechanics or playing with less experienced groups, is essential. Understanding individual roles within each encounter strategy and adapting loadouts accordingly will significantly improve consistency.
With its sought-after craftable weapons, powerful armor sets, hidden secrets, and the iconic Touch of Malice exotic, conquering King's Fall is a rewarding endeavor. By mastering the mechanics detailed in this guide, your fireteam can overcome the Taken King and truly earn the title of Kingslayer.