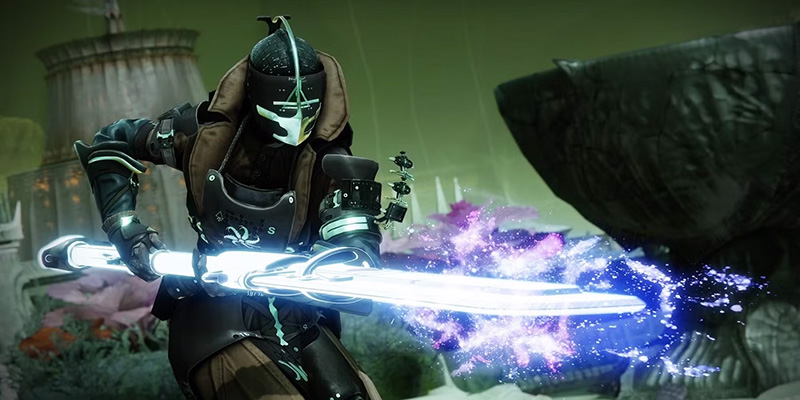
The Exotic Glaives: Your Class-Specific Powerhouses
Before embarking on the quest, understanding the rewards is essential. The Witch Queen Exotic Glaives are not merely cosmetic variations; they offer distinct tactical advantages tied to each Guardian class.Meet the Glaives
This Glaive embodies the Titan's protective nature. Its unique Exotic Trait, Remote Shield, allows the wielder to consume the Glaive's energy (charged by landing projectile hits) to fire a shot that deploys a protective shield, akin to a miniature Ward of Dawn, at the impact location. This can shield allies or the Titan themselves from incoming fire.
Focusing on support, the Warlock's Edge of Intent features the Restorative Turret Exotic Trait. Consuming stored energy allows the Warlock to fire a projectile that transforms into a turret, automatically firing healing bolts at nearby allies.
The Hunter's Glaive, Edge of Concurrence, leans into offense with its Lightning Seeker Exotic Trait. When fully charged, consuming the energy replaces the next shot with a burst of Arc energy that tracks along the ground towards targets, chaining lightning damage to nearby enemies upon impact.
The Evidence Board: Your Investigation Hub
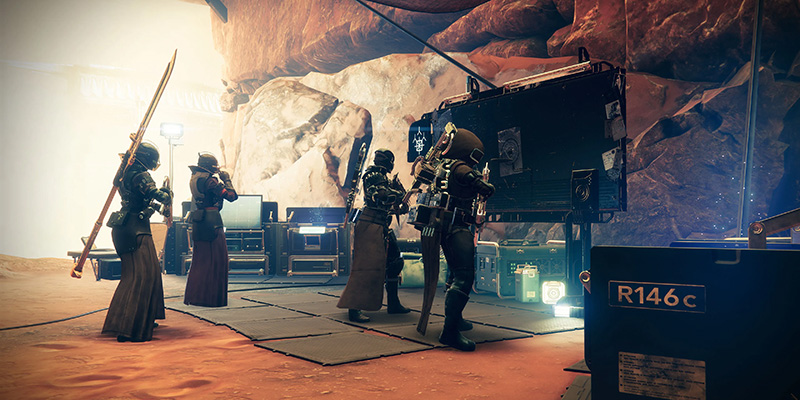
Laying the Groundwork: Completing the Evidence Board Reports
The final quest, "Report: Reverse-Lure," which directly rewards the first Exotic Glaive pattern, only becomes available after completing all other preceding "Report" quests offered by the Evidence Board. This multi-step process requires significant time investment and engagement with various Throne World activities and the weapon crafting system. Be prepared, as one particular step, "Report: Relic-Data," presented a substantial hurdle for players, especially before later quality-of-life updates.Prerequisite Quest Walkthroughs
Each "Report" quest involves investigating different aspects of the Throne World and the Lucent Brood's activities. Completing each step typically requires returning to the Evidence Board in the Enclave to log findings.Report: Resonance-Comp
This initial report introduces the Osmic Fragment, a key element in the Evidence Board's narrative. Guardians must travel to marked locations in the Quagmire, Fluorescent Canal, and Miasma patrol zones, scan the designated areas, defeat the spawning enemies, and collect the Resonant Runes they drop. Afterward, descend into the Witch's Echo region (accessible from Quagmire or Miasma) to retrieve the Osmic Fragment itself before returning to the Enclave to report the findings.Report: Altar-Reflect
This quest directs Guardians to an Altar of Reflection, locations holding fragments of Savathûn's memories. Follow the "Altar of Reflection: Catalyst" quest marker on the Throne World map. At the location, use the Deepsight ability to reveal hidden platforms or align resonant symbols to open a portal. Inside, solve a puzzle involving identifying a sequence of symbols and activating corresponding pools in the correct order. Note that Altar puzzles vary, sometimes involving shooting incorrect symbols among panels. After completing the puzzle and defeating any enemies, return to the Enclave. Finishing this quest also unlocks weekly repeatable Altar of Reflection missions.Report: Scorn-Order
Ikora's Hidden are investigating the Scorn's presence and intentions in the Throne World. This report tasks Guardians with hunting challenging Scorn enemies, often found in the Quagmire and Miasma regions or during Scorn-related Public Events. Defeated Scorn will drop "Marching Order" motes that must be collected. Additionally, completing one run of the Wellspring activity is required. Access to Wellspring might necessitate progressing further in the post-campaign "Of Queens and Worms" Exotic quest for the Parasite grenade launcher. It's advisable to retain any Deepsight Resonance (red-bordered) versions of the Wellspring weapons Tarnation (Grenade Launcher) or Come to Pass (Auto Rifle) that drop during this step, as they will be needed later.Report: Relic-Data (The Major Hurdle)
- Shape Campaign Weapons: The first major task is to Shape (craft) three specific Throne World weapons at the Relic in the Enclave: the Likely Suspect Fusion Rifle, the Red Herring Rocket Launcher, and the Empirical Evidence Sidearm. To Shape these weapons, their Patterns must first be unlocked. This requires obtaining at least one Deepsight Resonance (red-bordered) version of each weapon and completing its Attunement objective to extract the Pattern progress. These weapons can drop from various Throne World sources, including the campaign itself.
- Shape Wellspring Weapons: The next task involves Shaping two weapons exclusive to the Wellspring activity: the Come to Pass Auto Rifle and the Tarnation Grenade Launcher.
The Original Grind vs. Current RequirementsInitially, this step required unlocking multiple patterns for each Wellspring weapon (specifically, two pattern unlocks each for Tarnation and Come to Pass). Compounding this was the fact that Deepsight Resonance versions of these weapons had notoriously low drop rates from Wellspring. Thankfully, Hotfix 6.3.0.5 reduced the requirement to only one pattern unlock each and guaranteed that the first Wellspring weapon drop for a player each day would be a Deepsight Resonance version.
- Reshape with Enhanced Trait: The final crafting-related step requires the player to Reshape any craftable weapon at the Relic and apply an Enhanced Trait. Enhanced Traits provide superior versions of standard weapon perks but require rare Ascendant Alloys to apply. Furthermore, a weapon typically needs to reach a certain level (e.g., level 10 or higher, depending on the trait) before Enhanced Traits can be applied. Many players found it efficient to use the campaign's Enigma Glaive for this step, as it would likely be sufficiently leveled through regular play.
| Weapon | Type | Source | Patterns Needed | Notes |
|---|---|---|---|---|
| Empirical Evidence | Sidearm | Witch Queen Campaign / TW | 1 | Obtain Deepsight version |
| Likely Suspect | Fusion Rifle | Witch Queen Campaign / TW | 1 | Obtain Deepsight version |
| Red Herring | Rocket Launcher | Witch Queen Campaign / TW | 1 | Obtain Deepsight version |
| Come to Pass | Auto Rifle | Wellspring Activity | 1 | Obtain Deepsight (Rotates Daily) |
| Tarnation | Grenade Launcher | Wellspring Activity | 1 | Obtain Deepsight (Rotates Daily) |
Report: Steps-Retraced
This report requires interaction with the weekly replayable Witch Queen campaign missions. Prerequisite: Access to these missions is unlocked by reaching Rank 13 with Fynch. Steps: Launch any of the available weekly campaign missions. The objective is to defeat Champions within the mission to collect "Insight" items; using Finishers on Champions grants bonus progress. The mission must be completed fully at least once as part of the quest requirements. If insufficient Insight is gathered in one run, the mission can be replayed, or players can repeatedly defeat and farm the first Champion encountered. Report back to the Evidence Board upon completion.Report: Pyramid-Inspect
This penultimate report involves investigating the downed Pyramid ship in the Throne World swamps. Prerequisite: This quest requires the prior completion of the "Hard Evidence" quest. It became available only after the community achieved the World First completion of the Vow of the Disciple raid. Steps: Launch the "Preservation" mission from the Throne World map (originally recommended at 1540 Power Level, soloable). Inside, collect stacks of "Overflowing Knowledge" by interacting with glowing orange pyramid nodes (up to 3 stacks can be held at once). Deposit these stacks into the designated floating vehicle. Ride the vehicle, using its aura to cleanse a debuff periodically. Progress further into the Pyramid until reaching a room requiring symbol matching. Defeat Scorn enemies and Corrupted Chieftains; defeating a Chieftain reveals a symbol. Locate the room marked with the matching symbol (enemy spawns on the radar can help guide the way). Repeat this process until encountering three Fanatic's Chosen bosses. Defeat them, interact with the final objective to review the case, and then report back to the Evidence Board.The Final Gambit: Report: Reverse-Lure Walkthrough
With all prerequisite reports meticulously completed and logged, the final quest, "Report: Reverse-Lure," becomes available at the Evidence Board. This quest directly leads to the acquisition of the first Exotic Glaive pattern. It's crucial to note that this quest can only be fully completed once per account. Completing it on one character locks it out for others.Step-by-Step Guide
- Accept Quest (Steps 1-2): Interact with the now-available "Report: Reverse-Lure" on the Evidence Board in the Enclave.
- Collect Osmic Fragment (Step 3): Pick up the glowing Osmic Fragment located on the ground directly in front of the Evidence Board.
- Plant the Lure (Step 4): Travel to the Queen's Bailey patrol zone within Savathûn's Throne World. This area is adjacent to the Florescent Canal. A quest marker will guide the way to a specific pedestal. Interact with the pedestal to place the Osmic Fragment. The narrative purpose of this action is to use the fragment as bait to draw out Immaru (Savathûn's Ghost) and his Lucent Brood forces. Savathûn's own words suggest this entire scenario is a calculated trap, using a weapon memory stolen "through a game of riddles" as the lure.
- Observe from Vantage Point (Step 5): After placing the lure, turn towards the right (relative to facing the pedestal). Locate a Deepsight orb nearby, often situated along the grassy area near a statue with lanterns. Interact with this Deepsight orb. Doing so will reveal a series of hidden platforms above. Use these platforms to ascend to a vantage point overlooking the pedestal where the lure was placed.
Deepsight Bug & WorkaroundA potential issue reported by players involves the Deepsight orb needed for this step not visually appearing. Instead, the Deepsight buff might activate automatically when standing near its intended location. A community-discovered workaround is to proceed to the intended vantage point platform anyway. Once on the platform, wait for the Deepsight buff to auto-activate, then look towards the lure pedestal. The quest objective may register as complete approximately one second after the Deepsight buff procs automatically.
- Verify Fragment Taken (Step 6): Shortly after reaching the vantage point (or placing the lure), Lucent Brood Hive enemies will spawn near the pedestal. It is important not to attack them immediately; allow them to approach the lure first. Once they have interacted with it, proceed to defeat the enemies. One of the enemies will be a Lightbearer Wizard. When its health is critically low, it will become immune to damage and despawn, taking the fragment. After the enemies are cleared (or the Wizard has despawned), approach the pedestal again. Verify that the Osmic Fragment is gone to complete this step.
- Follow the Lucent Brood (Step 7): Turn around from the pedestal area and head towards the large doorway leading into Savathûn's palace structure – the same area encountered during "The Arrival," the first campaign mission. Follow the quest marker through the palace hallways.
- Defeat Lucent Brood Ambush (Step 8): The marker will lead to a large chamber where an ambush awaits. This room will contain numerous Hive enemies, including standard units and a powerful Hive Lightbearer Guardian. Engage and defeat all enemies within the room. Using a Super ability can help dispatch the Hive Guardian quickly. Crucially, remember to locate and destroy the Hive Guardian's Ghost after defeating the Guardian to prevent its resurrection. As enemies are defeated, some will drop Resonant Runes, which are required for the subsequent step.
- Retrieve Fragment & Runes (Step 9): Once the room is clear of enemies, locate the Osmic Fragment that was dropped (likely near where the Hive Guardian was defeated). Pick it up. Also, search the room thoroughly for any missed Resonant Runes dropped by enemies and collect them.
- Final Report (Step 10): With the Osmic Fragment recovered, return to the Enclave on Mars. Interact with the Evidence Board one last time to log the final report. A final audio log or recap of the investigation will play. As a reward for completing the entire Evidence Board questline, the Weapon Pattern for the Exotic Glaive specific to the character's class will be granted.
Forging Your First Glaive
With the pattern finally unlocked, the last step is to craft the Exotic Glaive itself.Crafting at the Relic
Proceed to the Relic, the weapon crafting station located in the lower levels of the Enclave.Free Crafting
Interact with the Relic and select the "Shape" option. Locate the newly acquired Exotic Glaive pattern. The initial crafting of this first Exotic Glaive is entirely free, requiring no Glimmer, Enhancement Cores, Alloys, or other crafting materials. Select the desired (though limited for the initial craft) perks and finalize the shaping process.Class Determines Glaive
The specific Exotic Glaive pattern awarded by "Report: Reverse-Lure" is determined by the class of the Guardian who completed the quest:- Titans receive the Edge of Action pattern.
- Warlocks receive the Edge of Intent pattern.
- Hunters receive the Edge of Concurrence pattern.
Leveling and Reshaping
Like all crafted weapons in Destiny 2, the Exotic Glaive can be leveled up through use (defeating enemies, completing activities). Leveling unlocks the ability to Reshape the weapon later at the Relic. Reshaping allows changing the standard Haft, Magazine, and Stock perks (the Exotic Trait remains fixed), but this process will require standard crafting materials.Expanding Your Collection: Getting the Other Exotic Glaives
Obtaining the first Exotic Glaive is a significant achievement, but the questline only provides the pattern for one class. Since the "Report: Reverse-Lure" quest is account-bound and cannot be repeated on alternate characters, Guardians seeking the Exotic Glaives for their other classes must use different methods. Two primary pathways exist: grinding the Wellspring activity or purchasing the patterns directly from the Evidence Board.Method 1: The Wellspring Grind
- RNG & Rarity: This method is entirely dependent on Random Number Generation (RNG). Historically, the drop rates for these Exotic Glaive patterns from Wellspring were reported by the community to be extremely low, leading to potentially long and frustrating farming sessions. Some player accounts detailed dozens of runs needed to acquire the patterns. While some sources suggest the drop rate issues were eventually addressed or improved, it fundamentally remains an RNG-based grind with no guarantee of acquisition within a specific timeframe.
- Any Character/Class: A key point is that the missing patterns can drop while playing on any character class. For example, a player who completed the quest on their Warlock (obtaining Edge of Intent) can still receive the Edge of Action (Titan) or Edge of Concurrence (Hunter) pattern while continuing to play on their Warlock in Wellspring. It is not necessary to switch to the specific class whose glaive pattern is desired. The pattern received is random among the ones the account is missing.
- Master vs. Normal Difficulty: Wellspring offers both Normal and Master difficulty modes. While Master difficulty generally provides better rewards for standard Wellspring weapons or armor, it is unclear from available information whether it offers a significantly higher drop rate specifically for the Exotic Glaive patterns. Some players farmed Master, but Normal difficulty might be more time-efficient for pattern farming due to faster completion times, unless a highly coordinated fireteam can clear Master rapidly.
Method 2: Evidence Board Purchase (The Modern Approach)
Requirements to purchase a specific Exotic Glaive pattern:
- The player must have already completed the "Report: Reverse-Lure" quest and obtained the first Exotic Glaive pattern on at least one character on their account.
- The player generally needs to be logged in on the character class corresponding to the Glaive pattern they wish to purchase (e.g., be on a Titan to buy the Edge of Action pattern).
- The character purchasing the pattern must have access to the Enclave and the Evidence Board. This likely requires minimal progress in the Witch Queen campaign on that specific character, such as completing the introductory missions up to meeting Fynch.
Cost per pattern:
| Currency | Amount | Notes |
|---|---|---|
| Exotic Cipher | 1 | Obtainable via Xenology quest (Xur) or Season/Episode Pass |
| Glimmer | 100,000 | Standard in-game currency |
| Legendary Shards | 200 | Potentially outdated/bugged cost due to shard removal. Verify. |
| Ascendant Shard | 1 | Rare endgame material (e.g., from high-level Nightfalls, vendor resets) |
Exotic Ciphers are a rare currency. The primary consistent source is the weekly "Xenology" quest offered by Xur, Agent of the Nine, which requires completing 21 playlist activities (Strikes, Crucible, Gambit) or a smaller number of more challenging activities like Nightfalls or Exotic missions. Additional Ciphers can sometimes be obtained from the Season Pass or Episode Pass reward tracks.
Since its implementation, the Evidence Board purchase option has experienced bugs. Players reported instances where the patterns were not available for purchase despite meeting all prerequisites. Additionally, the lingering Legendary Shard cost points to potential ongoing issues with this purchase method. Players should ensure all requirements are met before assuming the feature is bugged.
Guardian Field Notes: Tips, Fixes, and Known Issues
Navigating the path to the Exotic Glaives involves several steps, some of which have been adjusted or affected by bugs over time.Summary of Key Updates (Hotfix 6.3.0.5)
Several quality-of-life improvements were made, significantly easing the acquisition process compared to its state at The Witch Queen's launch:- Relic-Data Eased: Pattern requirements for Wellspring weapons (Come to Pass, Tarnation) were reduced from multiple unlocks to just one each.
- Guaranteed Deepsight: The first Wellspring weapon drop per day is now guaranteed to have Deepsight Resonance, aiding pattern progress.
- Enhanced Trait Step (Temporary Change): The requirement to use an Enhanced Trait in "Report: Relic-Data" was temporarily removed to bypass bugs (its current status should be verified in-game).
- Purchase Option Added: The ability to purchase missing Exotic Glaive patterns from the Evidence Board using endgame materials was introduced, offering an alternative to the Wellspring grind.
Recap of Common Bugs/Issues & Workarounds
Guardians attempting this questline should be aware of potential issues, some historical and some potentially ongoing:- Relic-Data Enhanced Trait Bug: Difficulty progressing Step 4 even after applying an Enhanced Trait. If the requirement is active, try the workaround of Reshaping an already-enhanced weapon with no changes.
- Preservation Mission Access: Inability to launch the required "Preservation" mission for "Report: Pyramid-Inspect". May require Bungie support if persistent.
- Reverse-Lure Deepsight Bug: The Deepsight orb for observing the lure may not appear visually. Use the workaround: stand on the vantage point platform and wait for the buff to auto-proc.
- Evidence Board Purchase Issues: Patterns missing from the board despite meeting requirements, or the cost including the removed Legendary Shards currency.
- General Evidence Board Bugs: Broader issues preventing interaction with the board have been reported and acknowledged by Bungie.
Player Context and Gumshoe Title