The Dreaming City, jewel of the Awoken, languishes under a perpetual twilight, ensnared in a temporal curse. Once the most sacred haven for the Reefborn Awoken, a place of meditation and study into paracausal powers, it became the stage for a tragedy orchestrated by the last Ahamkara, Riven, and the cunning Hive Witch Queen, Savathûn. Following the Guardians' victory in the Last Wish raid, Riven's final, spiteful wish, granted upon her death, ensnared the city in an inescapable three-week time loop, modeled upon Vex simulations overseen by the Taken Vex Mind, Quria.
This curse is not merely temporal; it manifests physically, a creeping blight of Taken energy that waxes and wanes with the cycle. Each week, the city shifts: enemy placements change, Petra Venj relocates, new Ascendant Challenges emerge, and the Blind Well hosts different champions. The cycle culminates in the third week, the "Strong Curse" week, when Taken influence saturates the city, the air thick with malevolent energy. It was during this peak that the gateway to the Shattered Throne originally pulsed open.
Whispers from the Ascendant Plane: An Introduction to the Shattered Throne
Eleusinia: Entering Mara Sov's Throne World
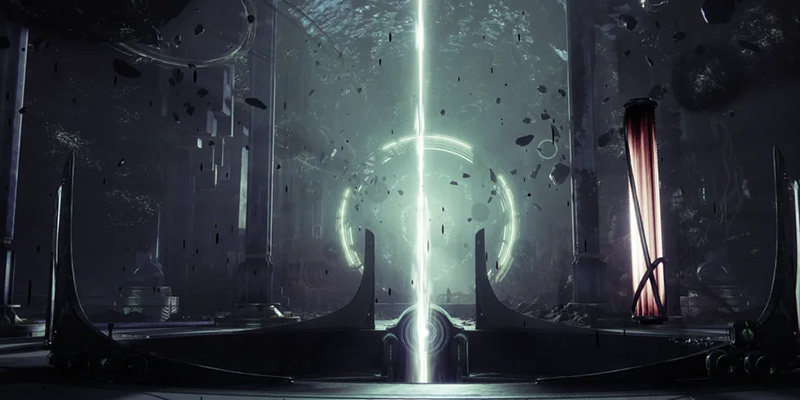
The Shattered Throne is not merely a dungeon; it is an incursion into Eleusinia, the personal Throne World of the Awoken Queen, Mara Sov. Throne Worlds are pocket universes carved from the fabric of the Ascendant Realm, shaped by the will and power of their creators. While most commonly associated with the Hive, who forge their realms through the brutal tenets of Sword Logic, Eleusinia represents something different. Created with the aid of Mara's loyal Techeuns, the wish-dragon Riven, and the shadowed knowledge of Eris Morn, it reflects Awoken cosmology – a realm of impossible architecture, crystalline structures, and ethereal pathways, now tragically corrupted by Taken influence.
Unlike Hive realms where Ascendant beings resurrect unless slain within their own throne, the specific rules governing Eleusinia remain partially veiled. Yet, the fundamental nature of Throne Worlds holds: they are dimensions shaped by mind and paracausal might, where the creator's power can manifest in profound ways, perhaps even altering their perceived size or form, as observed with Hive gods like Oryx. Venturing into the Shattered Throne thus offers Guardians a rare glimpse into a non-Hive Ascendant space, a domain born of Awoken power and secrets, now besieged and fractured – a shattered reflection of its queen's own trials.
Accessing the Dungeon: Location and Availability
Guardians seeking entry into Eleusinia once faced a journey tied intrinsically to the Dreaming City's sorrowful rhythm. During the Forsaken era, access was granted only when the curse reached its zenith, on the third week of the cycle. One had to navigate the hidden pathways beneath the Dreaming City to reach The Confluence, a central nexus accessible via portals scattered across the patrol zones, such as near the Spine of Keres or within the Gardens of Esila. There, during the Strong Curse week, a colossal Taken gateway would shimmer into existence, attended by a lone Techeun. Approaching this portal was the only way to breach Mara Sov's Throne World.
However, with the release of the Shadowkeep expansion, the gates to the Shattered Throne were thrown open permanently. Guardians may now launch the activity directly from the Dreaming City map in the Director at any time, regardless of the curse week. While the original Taken portal in The Confluence remains, a silent monument to a past necessity, it is now purely cosmetic.
Navigating the Labyrinth: Erebus
The Symbol Cipher: Mechanics and Navigation
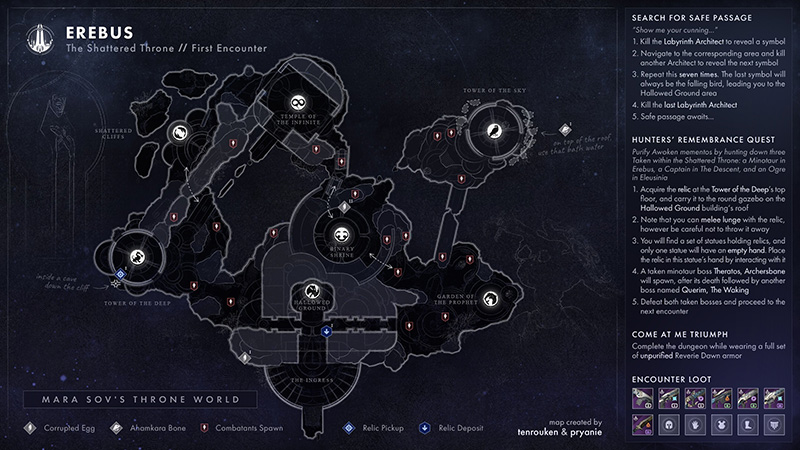
Upon breaching Eleusinia's outer sanctum, Guardians confront Erebus, a disorienting labyrinth woven from floating islands and Ascendant architecture. The first encounter is a trial of navigation and elimination, governed by cryptic symbols. At the threshold, across a broken chasm, stands the first Labyrinth Architect – a formidable Taken Knight flanked by Acolytes. Vanquishing this Architect reveals a glowing sigil hovering where it fell.
This symbol is the key. Each sigil corresponds to a specific, named location within Erebus, marked by an identical, non-glowing symbol etched onto its structures. Guardians must decipher the revealed symbol and journey to its corresponding island or temple. There, another Labyrinth Architect awaits, this time a different type of Taken Major (Captains, Minotaurs, etc.), surrounded by its own retinue. Defeating this second Architect unveils the next symbol in the sequence, pointing the way forward.
This cycle of symbol identification, navigation, and elimination repeats seven times in total, guiding the fireteam through each distinct area of the labyrinth. The order in which the symbols appear is randomized with each run, demanding spatial awareness and adaptability rather than rote path memorization. This design forces engagement with the environment, truly embodying the "labyrinth" concept. The only constant is the final symbol shown: the Diving Falcon (or a similar moniker), which invariably directs Guardians back to the central starting platform for a concluding battle against a Taken Captain Architect.
Mapping Erebus: Key Locations and Symbol Guide
Mastering Erebus requires familiarity with its layout and the symbols that govern passage. The area consists of a central hub (the start/end point) with pathways branching out to several distinct locations, often marked by unique architecture like towers or gardens. Each location bears a permanent symbol, though the order they must be visited changes. Referencing a map is highly recommended.
| Symbol Visual Description | Common Callout(s) | General Location Example | Key Features / Enemy Types |
|---|---|---|---|
| Bird standing, facing left | Standing Bird / Crow | Forward-right tower structure | Often features Hobgoblins, narrow platforms |
| Bird diving downwards, wings spread | Diving Bird / Falcon | Central starting/ending area | First/Last Architect location, open platform |
| Dragon/Serpent breathing fire to the right | Dragon | Left path, prominent tower | Architect often a Knight, exposed platforms |
| Two fish arranged head-to-tail in a circle | Double Fish / Yin-Yang Fish | Far left/northwest area | More enclosed space, can have Phalanxes |
| Single fish, curled head-to-tail | Curled Fish / Single Fish | Right path, garden-like area | Often Acolytes/Captains, some cover available |
| Snake coiled into an infinity symbol | Infinity Snake / Snake | Far right/northeast, sometimes tricky path | Can involve narrow bridges, potential for Phalanx spawns |
| Two snakes intertwined or facing each other | Two-Headed Snake / Snakes | Lower right/southeast area | Accessed via stairs/drops, can have varied enemy types |
Strategies and Troubleshooting (Team and Solo)
Success in Erebus hinges on balancing navigation speed with threat management. Long-range precision weapons are invaluable for dispatching the numerous Taken Hobgoblins perched on high ledges before they pick off Guardians traversing narrow paths. Scout Rifles, Bows (especially Wish-Ender once acquired), and Sniper Rifles excel here. For the Labyrinth Architects and other Majors, reliable Special or Heavy weapons are needed; Telesto was noted as a strong solo option in the past.
Hunters excel in Erebus with their mobility options. Use Invisibility (Void subclass) to safely navigate dangerous sections without drawing enemy fire. Nightstalker's Shadowshot is particularly effective for controlling groups of enemies at symbol locations. Consider Graviton Forfeit or Omnioculus for extended invisibility uptime.
Warlocks can leverage Devour (Void subclass) for consistent healing through add-dense areas. Well of Radiance provides excellent support for the team at difficult Architect locations. Consider using Chaos Reach to quickly eliminate Architects from a safe distance.
Titans provide excellent defensive capabilities in Erebus. Void Barricades can create safe zones while engaging Architects. Thundercrash offers powerful burst damage for quickly eliminating Architects. Consider using pulse grenades for area control against groups of adds.
In a fireteam, clear communication is vital. Designating one player as the "Navigator" to quickly identify the next symbol and guide the team can save precious time. The other members can focus on clearing immediate threats ("Ad-Clear") and moving swiftly to the next location ("Runners").
The Perilous Ascent: Platforming and Passage
The Descent and The Long Walk: Hazards and Enemies
Emerging from the depths beneath Erebus, Guardians begin their ascent. The path initially involves navigating downward through areas populated by Taken Acolytes, Minotaurs, and Vandals, many positioned for sniping engagements. Following this descent, the route climbs towards and into a large Awoken structure, requiring passage up staircases guarded by Taken Phalanxes. At the structure's upper landing, a Taken Captain Major named Asterion, Set Apart, blocks further progress and must be defeated to open the way forward.
Beyond Asterion lies a treacherous expanse often called the "Long Walk". This area features a vast chamber with a broken, narrow pathway stretching across it. The primary threats here are Taken Hobgoblins sniping from ledges along the walls and Taken Knights positioned further along the path, capable of unleashing devastating Solar fire attacks. Taken Phalanxes also occupy the central walkway, threatening to push unwary Guardians into the abyss below.
Morgan's Ascent: The Beam Gauntlet (Ogre Tactics)
Turning left from the Long Walk reveals a vast, open chamber defined by a network of impossibly thin beams and catwalks crisscrossing the void between scattered platforms and pillars. The objective is clear but daunting: traverse this precarious network to reach an exit on the far left side of the room.
The primary danger in this section, often called Morgan's Ascent or simply the "Beam Room," comes from Taken Ogres. As Guardians step onto certain beams or platforms, these massive foes materialize on adjacent platforms, unleashing powerful eye blasts that can easily send players plummeting to their deaths. Moving too quickly can trigger multiple Ogre spawns simultaneously, drastically increasing the risk. Taken Blights may also appear, blocking certain routes, sometimes heralded by a visible distortion effect before fully forming.
Sniper Rifles, Bows (Wish-Ender is particularly effective, capable of killing Ogres in just a few shots), Scout Rifles, or even weapons like Jötunn are highly recommended. Repeat this process – trigger, retreat, eliminate, advance – for each Ogre spawn.
Hunters can leverage St0mp-EE5 for enhanced jump capabilities, making beam traversal safer. Invisibility from Void subclass provides temporary safety if caught in a dangerous position. Celestial Nighthawk Golden Gun can one-shot Ogres from a safe distance.
Warlocks can utilize Heat Rises for extended glide duration, potentially skipping portions of the beam section entirely. Well of Radiance can provide a safe platform in emergencies. Nova Bomb can eliminate Ogres from maximum safe distance.
Titans equipped with Lion Rampant gain significantly improved aerial control, making beam navigation safer. Thundercrash can be used as an emergency traversal method in dire situations, though be careful with your landing spot.
The Thrallway: History and Strategy
Beyond the beam gauntlet lies the infamous Thrallway, a claustrophobic passage bathed in an oppressive gloom. Upon entering, Guardians are afflicted with a debilitating debuff: movement is slowed, double jumps and glides are disabled (only a single jump is possible), and natural health regeneration ceases, though healing abilities remain functional. Compounding this vulnerability, the corridor endlessly spawns hordes of Shadow Thrall that swarm the player from all directions. This section is also a Darkness Zone.
Instead, focus on weaving and dodging through the oncoming tide, using the single jump to leap over clusters of Thrall. Utilizing a sword can be advantageous, as the third-person perspective provides a wider field of view for navigating the linear but twisting path. Add-clearing weapons (like Trinity Ghoul), grenades, or specific subclass abilities (like Devour) should be used sparingly, primarily to escape imminent death or for specific farming purposes.
Crossing the Chasm
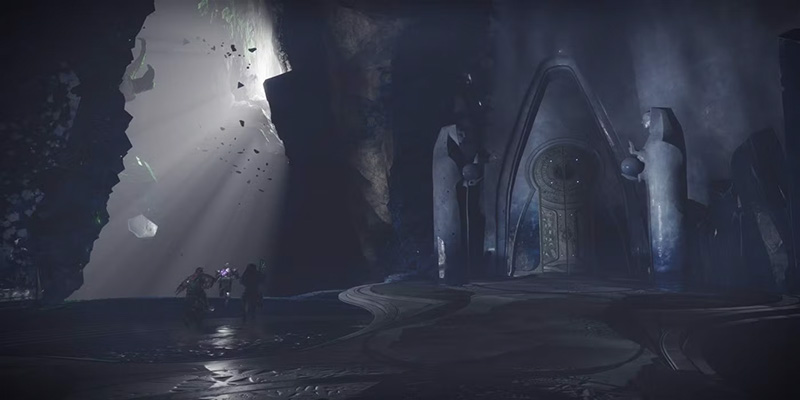
Upon successfully navigating the Thrallway and dropping into the subsequent area, Guardians regain their full movement capabilities and health regeneration, though the Darkness Zone persists until the Vorgeth encounter is overcome. Ahead lies another chasm, spanned by a broken bridge. After crossing the bridge remnants, the path leads towards a large, imposing temple structure situated across the void.
Two primary routes allow passage across this final gap before the first major boss:
- The Sludge Path (Left): Turning left leads into a hallway filled with viscous, damaging black sludge. This route demands careful navigation to avoid taking constant damage, essentially a deadly game of "The Floor is Lava".
- The Ledge Path (Right): Veering right (when facing the temple) leads to a series of rocky ledges ascending towards the temple entrance. This path is mechanically simpler but perilous due to Taken Phalanx-like energy blasts erupting from the walls at timed intervals. These "boopers" can easily knock unsuspecting Guardians off the ledges.
Vorgeth, the Boundless Hunger: The First Warden
Encounter Mechanics: Keepers, Petitioner's Mark/Burden Explained
Within the heart of Eleusinia waits Vorgeth, the Boundless Hunger – a monstrous Taken Ogre serving as the dungeon's first true boss. Vorgeth resides in a large, roughly square arena, perpetually shielded and immune to all damage upon encounter start. Defeating this warden requires mastering a cyclical mechanic involving special Wizards and a volatile buff.
Four unique Taken Wizards, known as Keepers of Petitions, spawn in the corners or along the sides of the arena, each protected by a contingent of Taken Vandals and Goblins. The core loop demands the destruction of all four Keepers. When a Keeper falls, it drops a glowing purple orb. Collecting this orb grants the Petitioner′s Mark buff to all living fireteam members.
This buff is governed by a strict timer: Petitioner′s Mark lasts for 45 seconds. Crucially, picking up any subsequent orb dropped by another Keeper resets this 45-second timer for everyone currently holding the buff. Failure is costly: if the timer reaches zero, any Guardian holding the buff instantly dies. Furthermore, dying while holding Petitioner′s Mark causes that player to lose all accumulated stacks.
During the damage phase, Vorgeth unleashes volleys of aggressive, seeking Axion Darts (shadow orbs) that can quickly overwhelm Guardians if not dealt with. If Vorgeth survives the damage phase, his shield regenerates, the Keepers and their guards respawn, and the entire cycle must be repeated.
Strategy: Managing Wizards, Orbs, and Damage Phase
Successfully navigating the Vorgeth encounter requires a blend of careful positioning, efficient add clear, coordinated orb collection, and focused damage. A common approach involves rotating around the room, typically counter-clockwise, using the pillars and structures near the entrance and along the sides for cover from Vorgeth's constant barrage.
Two primary strategies exist for handling the Keepers and their guards:
- Add Clear First: Methodically eliminate all Taken Vandals and Goblins protecting the Keepers before engaging the Wizards themselves. Prioritize the Goblins, as they can shield their allies. This approach is safer but consumes more time, putting pressure on the eventual orb timer.
- Sequential Elimination: Tackle each corner's group (adds and Wizard) one by one, killing the Keeper quickly and grabbing its orb before moving immediately to the next corner. This method is faster but demands efficient killing and constant movement to stay ahead of the 45-second timer.
Hunters can use Moebius Quiver Shadowshot for both Wizard debuffing and add control. Celestial Nighthawk Golden Gun delivers massive burst damage during the DPS phase. Blade Barrage with Shards of Galanor can also be effective. Use Vanishing Step to safely collect orbs or reposition during dangerous moments.
Well of Radiance is invaluable during the damage phase, providing both healing and damage boost. Nova Bomb can quickly eliminate a Keeper or deal substantial burst damage to Vorgeth. Devour builds provide consistent healing throughout the encounter, particularly valuable for solo attempts.
Ward of Dawn provides both protection and a damage buff during DPS phase. Thundercrash with Cuirass of the Falling Star deals massive burst damage to Vorgeth. Banner Shield can protect the team while collecting orbs. Sunspots from Solar subclass provide healing and damage increase zones.
When ready to deposit Petitioner′s Burden, ensure the area around the chosen brazier is clear of immediate threats. Wait for Vorgeth to be facing away or obstructed by a pillar to minimize risk during the dunk animation.
The damage phase demands maximum output in a short window. Deploying a Well of Radiance or Ward of Dawn provides crucial survivability and damage amplification. Designate at least one player to prioritize shooting down the incoming Axion Darts, or ensure the entire team is vigilant. Three darts typically need to be destroyed per volley to avoid lethal damage. Utilize high-impact Supers (Celestial Nighthawk Golden Gun, Thundercrash, Chaos Reach) and powerful Heavy weapons (Linear Fusion Rifles, Rocket Launchers, Swords like Lament which also provides healing). Whisper of the Worm remains a potent option, capable of using the Axion Darts to maintain its White Nail perk.
Troubleshooting and Alternative Approaches
Common failure points in the Vorgeth encounter often stem from timing and coordination issues.
- Timer Expiration: This usually indicates slow Wizard kills or inefficient movement between orb pickups. Emphasize faster clearing, better communication, and potentially weakening Wizards beforehand.
- Dying with Stacks: Players getting caught out of position or failing to respect enemy damage output. Encourage safer play, utilizing cover more effectively, and prioritizing survival over speed.
- Wiping During DPS: Typically caused by ignoring the Axion Darts or insufficient damage output. Assign a dedicated dart-shooter if needed, maximize buffs like Well/Ward, and ensure players are using optimal DPS weapons.
Eleusinia's Spire: The Path to the Apex
Ascending the Tower and the Second Thrallway
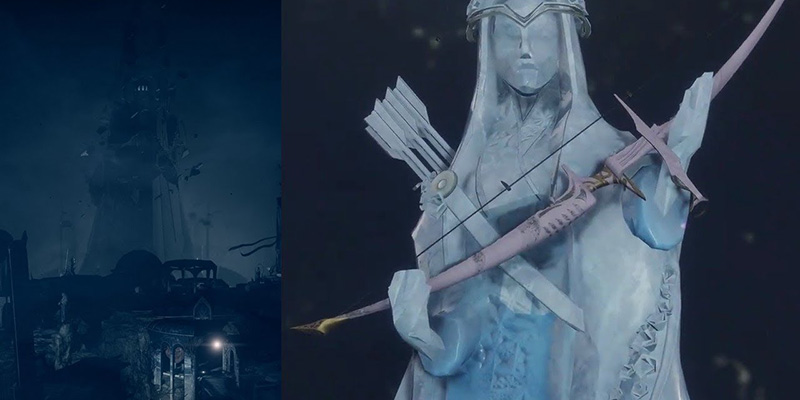
With Vorgeth vanquished, the path deeper into Eleusinia opens. Guardians proceed past a prominent statue of the Awoken legend Sjur Eido – interacting with this statue is a key step in the Wish-Ender Exotic quest. Beyond the statue lies a series of gravity lifts initiating the final ascent towards the spire's apex.
The climb involves navigating interconnected platforms and utilizing successive gravity lifts, all while fending off Taken resistance. Wizards, Captains, Thrall, Phalanxes, and Hobgoblins guard the passageways, requiring constant vigilance. The route is largely linear; follow the beckoning light of the lifts upward. Partway through the ascent, Guardians encounter a section sometimes referred to as the "second Thrallway," another corridor potentially featuring respawning Shadow Thrall, though less infamous for farming than its predecessor.
Dûl Incaru, the Eternal Return: Breaking the Cycle
Encounter Mechanics: Knights, Finite Thought, Crystal, Cleanse
At the pinnacle of Eleusinia's spire awaits Dûl Incaru, the Eternal Return – daughter of Savathûn and the linchpin holding the Dreaming City captive in its cursed loop. The final confrontation takes place in a relatively small, circular arena offering minimal cover.
The encounter revolves around defeating three towering Abyssal Champion Knights (powerful Hive Darkblades) that spawn alongside Dûl Incaru in the center of the room. When a Knight falls, it drops a glowing orb of energy.
However, Finite Thought carries a lethal countdown: a 45-second timer begins the moment the first orb is collected. Unlike the Petitioner′s Mark from the Vorgeth fight, this timer does not reset upon collecting subsequent orbs. If the Finite Thought timer reaches zero, any Guardian holding the buff will die, likely causing a wipe. Dying by any means also removes the buff.
To prevent this timed death, Guardians must "cleanse" the buff before the timer expires. This is done by stepping onto the glowing purple pedestal located in the exact center of the arena. Doing so immediately removes Finite Thought and concludes the current damage phase. Shortly after cleansing, the three Abyssal Champion Knights will respawn, restarting the cycle.
Two additional mechanics complicate the fight. Firstly, if the fireteam takes too long to eliminate the three Knights, Dûl Incaru will conjure a large, shimmering crystal behind her position. This crystal renders the Knights completely immune to all damage. It must be destroyed as quickly as possible – shotguns are effective – to break the Knights' immunity shield. Destroying the crystal may also trigger additional Taken Psion spawns. Importantly, this crystal can also manifest during the damage phase, and if it does, it will prevent players from cleansing the Finite Thought buff at the central well until the crystal itself is destroyed.
Secondly, throughout the encounter, waves of Taken Psions continuously spawn on the ledges flanking the arena. If left unchecked, these Psions will rapidly multiply through their splitting ability, quickly overwhelming the fireteam.
Strategy: Coordinated Kills, Psion Control, Damage & Cleansing
Victory against Dûl Incaru demands relentless add control, swift Knight elimination, maximized burst damage, and precise timer management.
Knight Elimination: The three Abyssal Champions must be killed quickly and, ideally, simultaneously. This maximizes the Finite Thought buff at x3 and minimizes the time Knights are active, reducing the chance of the immunity crystal spawning. Coordinate fireteam focus fire. Use high-impact Special weapons (Shotguns, Fusion Rifles), Heavy weapons (Linear Fusions, Rockets, Swords), or Supers to burst them down. Baiting the Knights close together can facilitate faster multi-kills. Remember that Knights can turn invisible after taking significant damage.
Crystal Management: If the immunity crystal appears behind Dûl Incaru, all fire must immediately shift to destroy it. Delaying allows Knights to persist and Psions to multiply, likely leading to failure.
Hunters should leverage Tether (particularly Deadfall) for both Psion control and boss debuffing. Celestial Nighthawk Golden Gun provides massive single-target damage against Dûl Incaru. Vanishing Step and Assassin's Cowl offer crucial survival options during Knight phases or emergencies.
Well of Radiance is essential for the damage phase, providing both survivability and damage enhancement. Nova Bomb can quickly eliminate the immunity crystal if it appears. Trinity Ghoul with catalyst or Ruinous Effigy excel at Psion control, particularly with Attunement of Chaos.
Thundercrash with Cuirass of the Falling Star delivers tremendous burst damage to Dûl Incaru. Ward of Dawn provides a safe haven and Weapons of Light for the team. Sunbreaker with Path of Burning Steps offers excellent add clear capability against the Psions while maintaining strong single-target damage.
Damage Phase: Once all three Knights are down and their orbs collected (confirm Finite Thought x3), unleash maximum damage on Dûl Incaru. Utilize damage-boosting Supers (Well of Radiance, Ward of Dawn) and debuffs (Tether). Heavy weapons like Whisper of the Worm, Sleeper Simulant, Lament, Rocket Launchers, or Linear Fusion Rifles are standard choices. Consistent precision hits or staggering Dûl Incaru can prevent her from retaliating effectively.
Cleansing: Keep a close eye on the 45-second Finite Thought timer. Before it expires, all players holding the buff must converge on the central glowing well to cleanse. Do not cleanse prematurely if significant damage time remains, but do not wait until the last second. If the immunity crystal is active during the DPS phase, it must be destroyed before cleansing is possible.
Troubleshooting and Alternative Approaches
Failures in the Dûl Incaru fight typically arise from predictable sources:
- Overrun by Psions: Insufficient or slow add clear is the most common culprit. Dedicate more resources (Supers, abilities, specific weapons) to controlling the ledges.
- Knights Immune (Crystal): The team isn't killing the Knights fast enough. Increase burst damage output on Knights or improve coordination. Destroy the crystal instantly when it appears.
- Death by Timer: Cleansing too late or taking too long to initiate DPS after killing Knights. Improve efficiency in the Knight-killing phase and watch the timer vigilantly.
- Knights Too Difficult: Use cover (pillars), stay mobile, employ high-burst weapons or Supers specifically for them.
Secrets Within the Throne: Hidden Rewards
Unveiling Hidden Chests: Locations and Navigation
Beyond the main encounters, the Shattered Throne conceals several hidden chests containing additional Dreaming City loot. Finding some of these chests requires Guardians to be Ascendant, achieved by consuming a Tincture of Queensfoil.
| Location Description | Ascendance Required? | Navigation Notes | Potential Loot |
|---|---|---|---|
| Exit of First Thrallway | No | Before jumping down, hop over the railing directly ahead. Chest is below. Portal returns you to the path. | Dreaming City Gear |
| After Vorgeth, Before First Gravity Lift | Yes | From Vorgeth's exit, look right towards the chasm before taking the lift. Platforms appear, follow them. | Dreaming City Gear |
| Before Final Ascent to Dul Incaru | No | Before the last two gravity lifts, go behind the structure. Find a doorway, turn right. | Dreaming City Gear |
Corrupted Eggs & Ahamkara Bones: Locations for Cursebreaker
The Shattered Throne is a critical location for Guardians pursuing the prestigious Cursebreaker title seal. This is because the dungeon houses numerous Corrupted Eggs and Ahamkara Bones, collectibles essential for completing specific Triumphs associated with the seal.
Known locations for Ahamkara Bones include near the "Standing Bird" temple in Erebus, across the ravine from one of the hidden chests, on the rafters in the beam room, near the temple after the Thrallway (Brephos I), and near the statue between the Taken wall pushers before Vorgeth. Consulting guides that list locations by their Marasenna entry names (e.g., Fideicide I, Cosmogyre II, Archiloquy, Brephos I) is helpful.
The Hunter's Remembrance: Forging the Wish-Ender

Quest Steps: Relic Runs and Hidden Bosses Detailed
The Wish-Ender Exotic Bow, a powerful Kinetic weapon capable of seeing through walls and piercing Barrier Champion shields, is intrinsically linked to the Shattered Throne. Acquiring it involves completing a unique quest integrated directly into the dungeon's encounters. The current iteration of this quest is titled "Hunter's Remembrance," obtainable from Petra Venj in the Dreaming City or the Quest Archive kiosk in the Tower.
The core of the quest requires locating and defeating three hidden bosses within the Shattered Throne, summoned by performing specific "relic run" tasks during the normal course of the dungeon. Completing these steps purifies Awoken Mementos associated with the quest.
The Three Relic Runs / Hidden Bosses:
- Querim (Erebus/Labyrinth):
- Relic Location: Atop the "Tower of the Deep" structure (associated with the Dragon symbol). Access requires platforming up the rocks behind or beside the tower.
- Dunk Location: On the roof of the central structure (where the first/last Labyrinth Architect spawns). Deposit the relic into the hands of a specific statue that lacks an orb.
- Boss Spawn: Dunking spawns preliminary bosses (Therators, Archersbane mentioned), culminating in Querim (a Minotaur). Defeat Querim to purify the first memento/charge the first token.
- Eriviks (Descent/Transition Areas): This requires depositing two separate relics.
- Relic 1 (Beam Room): Found in the back-right corner of the Ogre/beam room (Morgan's Ascent). It's advisable to clear the Ogres first.
- Dunk 1: Escort the relic to a cluster of Awoken statues located on the right-hand wall about halfway through the beam room.
- Relic 2 (Thrallway): Immediately upon entering the first Thrallway (slowed section), take a sharp right turn. The relic is in this small side area.
- Dunk 2: Carry the relic through the Thrallway. After dropping down into the next area (Crossing the Chasm), the dunk statues are immediately on the right.
- Boss Spawn: Successfully dunking both relics opens a large, previously sealed door after the Thrallway. Inside awaits Eriviks (a Captain). Defeat Eriviks to purify the second memento/charge the second token.
- Xavoth (Vorgeth's Arena):
- Trigger: Proceed through the Vorgeth encounter as normal until you have killed all four Keepers and collected Petitioner′s Burden x4. Deposit the Burden into one of the braziers to drop Vorgeth's shield.
- Hidden Enemy: Immediately after the shield drops (or potentially slightly before/during the dunk), an invisible Taken Minotaur named Fleeting Shade will spawn in the arena, often towards the back or right side relative to the entrance. Hunt down and kill this Minotaur quickly; it's only a red-bar enemy but can be elusive.
- Relic Location: Fleeting Shade drops the third relic upon death.
- Dunk Location: Carry the relic to a set of statues on the left side of the arena (relative to the entrance).
- Boss Spawn: Dunking summons Xavoth (a Taken Ogre). Defeat Xavoth to purify the final memento/charge the final token.
Spoils of the Ascendant Realm: Loot and Rewards
Complete Loot Table
Unlike most Destiny 2 dungeons that feature encounter-specific loot pools, the Shattered Throne operates differently. Every major encounter completion (Erebus, Vorgeth, Dul Incaru) and every hidden chest has a chance to drop any legendary weapon or armor piece associated with the Dreaming City destination. While this provides variety, it makes targeting a specific weapon or armor roll significantly more challenging compared to dungeons with focused loot drops.
| Item Name | Item Type | Element / Slot | Notable Perks / God Rolls (Examples) |
|---|---|---|---|
| Reverie Dawn | Armor Set | All Slots | Can drop with high stats (60+ total, spikey distributions) |
| Abide the Return | Sword | Heavy / Solar | PvE: Relentless Strikes / Whirlwind Blade or En Garde. PvP: Energy Transfer / Flash Counter. Origin Trait: Advanced Reflexes. |
| Retold Tale | Shotgun | Special / Void | PvE: Auto-Loading Holster / Vorpal Weapon or One-Two Punch. PvP: Quickdraw / Snapshot Sights. Origin Trait: Advanced Reflexes. |
| Sleepless | Rocket Launcher | Heavy / Arc | PvE: Auto-Loading Holster or Field Prep / Chain Reaction or Bipod. PvP: Tracking Module / Chain Reaction. Origin Trait: Advanced Reflexes. |
| Tigerspite | Auto Rifle | Kinetic | PvE: Subsistence or Outlaw / Kinetic Tremors or Frenzy. PvP: Moving Target or Fragile Focus / Kill Clip or Eye of the Storm. Origin Trait: Advanced Reflexes. |
| Twilight Oath | Sniper Rifle | Special / Solar | PvE: Fourth Time's The Charm / Vorpal Weapon or Box Breathing. PvP: Snapshot Sights / Opening Shot. Origin Trait: Advanced Reflexes. |
| Vouchsafe | Scout Rifle | Primary / Void | PvE: Rapid Hit or Fourth Time's / Explosive Payload or Destabilizing Rounds. PvP: Rapid Hit / Explosive Payload or Eye of the Storm. Origin Trait: Advanced Reflexes. |
| Waking Vigil | Hand Cannon | Primary / Arc | PvE: Outlaw or Rapid Hit / Dragonfly or Kill Clip. PvP: Opening Shot / Rangefinder (if available) or Kill Clip. Origin Trait: Advanced Reflexes. |
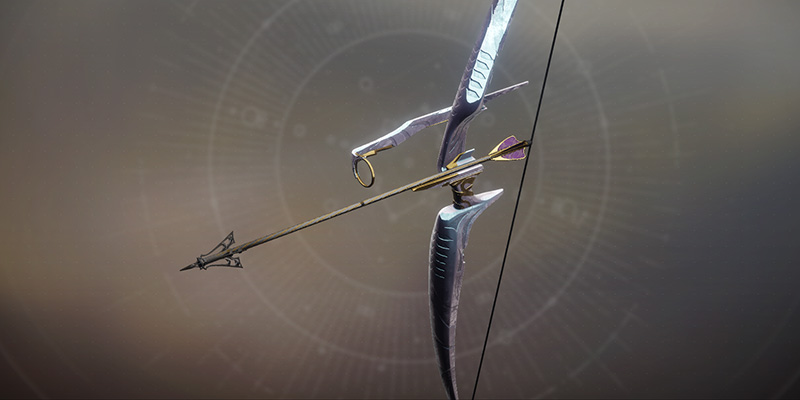
| Wish-Ender | Exotic Bow | Kinetic | Quest Reward. Perks: Queen's Wrath (Wallhacks, Anti-Barrier), Broadhead (Entry/Exit Damage). |
| Pallas Galliot | Ship | Cosmetic | Random drop from encounters (cited 20% chance, but feels lower). Required for Cursebreaker title. |
Notable Drops and The Pallas Galliot
While the legendary loot pool is shared across the Dreaming City, the Shattered Throne holds exclusive claim to the Wish-Ender Exotic Bow, obtained solely through its integrated quest. Its unique perks – Queen's Wrath providing wallhacks while aiming and intrinsic Anti-Barrier rounds, and Broadhead dealing damage on arrow entry and exit – make it a highly valuable tool, particularly in high-level PvE content requiring Champion counters and strong single-target damage.
Lastly, the elusive Pallas Galliot ship is a cosmetic reward that can randomly drop upon completing encounters within the Shattered Throne. While some sources cite a 20% drop chance, anecdotal evidence suggests it can be a frustratingly rare acquisition for many Guardians. Obtaining this ship is mandatory for completing the Dreaming City Collections Badge and earning the Cursebreaker title.
Mastering the Throne: Advanced Strategies
Solo & Solo Flawless Guide (Loadouts, Class Recs, Encounter Adjustments)
Conquering the Shattered Throne alone is a significant undertaking; achieving a solo flawless completion – without dying – is a true testament to a Guardian's skill, patience, and preparation. While not required for the Cursebreaker title, the accomplishment is often rewarded with a unique emblem or shader, marking the achievement.
Class Recommendations (Solo Flawless Focus):
Solar (Well of Radiance): Excellent survivability and burst damage potential during DPS phases. Heat Rises offers powerful movement options for platforming skips, potentially bypassing entire hazardous sections like the beam room. Touch of Flame fusion grenades with Starfire Protocol (pre-nerf) or Sunbracers provide strong add clear and damage.
Void (Devour): Near-constant healing from Devour makes surviving add-dense sections like the Thrallway significantly easier. Child of the Old Gods provides additional weakening and ability regeneration.
Arc (Crown of Tempests): Constant ability uptime with Crown of Tempests, paired with Arc Soul, offers strong add control and decent boss damage, especially with Stormtrance.
Void (Invisibility): Access to on-demand invisibility via Gambler's Dodge (especially with Omnioculus or Graviton Forfeit) is invaluable for repositioning, reviving (not applicable solo), grabbing objectives safely, or escaping danger. Assassin's Cowl provides invisibility and healing on powered melee kills, excellent for add clear sections. Tether (Moebius Quiver or Deadfall) offers crucial debuffing and add control.
Solar (Golden Gun): Celestial Nighthawk provides massive burst damage for quickly eliminating bosses or dangerous majors. Blade Barrage offers good burst as well. Healing Grenade and Ember of Empyrean can provide survivability.
Arc (Combination Blow): Builds focused on Combination Blow with Liar's Handshake can offer incredible melee damage and survivability, though potentially riskier in boss encounters. Gathering Storm offers strong ranged damage.
Solar (Hammer of Sol/Bonk): Strong survivability through Restoration loops (pre-nerf Loreley Splendor or current Sunspots/healing grenades) combined with high melee or Super damage.
Void (Ward of Dawn/Offensive Bulwark): Ward of Dawn provides essential safety during DPS phases. Offensive Bulwark with Bastion aspect grants overshields and increased grenade regeneration/melee damage, enhancing survivability and offense.
Arc (Thundercrash): Cuirass of the Falling Star Thundercrash delivers top-tier burst damage for deleting bosses quickly. Pulse grenades offer good add control.
Prismatic: Allows combining key survivability or damage aspects/fragments from different subclasses.
Three-Person Fireteam Efficiency (Roles and Synergies)
While conquerable solo, Shattered Throne was designed as a three-person activity, and tackling it with a coordinated fireteam offers a significantly smoother and faster experience. Efficiency comes from clear communication, synergistic builds, and defined (though potentially flexible) roles.
Role Assignments (Examples):
Erebus:
- Navigator (1): Quickly identifies the next symbol and communicates the destination. Needs good map knowledge.
- Runner/Lead Clear (1-2): Pushes ahead to the next location, engaging the Architect and initial adds.
- Ad-Clear/Support (1-2): Cleans up remaining adds, deals with snipers, covers the Runner.
Vorgeth:
- Wizard Killers (2): Focus on bursting down the Keepers of Petitions quickly and safely. Coordinate fire.
- Orb Runner/Dunker (1): Collects orbs dropped by Wizards (remembers buff is shared), manages the timer callouts, and safely dunks the Petitioner′s Burden. Can assist with nearby adds.
- (Flexibility): All players should assist with general add clear, especially Goblins, and be ready to shoot Axion Darts during DPS.
Dul Incaru:
- Knight Killers (All 3): Coordinated burst damage to take down all three Knights simultaneously.
- Crystal Breakers (All 3): Immediate focus on the immunity crystal if it spawns.
- Psion Control (1-2 Dedicated): Players with strong AoE Supers (Tether, Well + Fusions, Arc Staff) or add-clear weapons focus on keeping Psion populations suppressed. This is crucial.
- DPS (All 3): Maximize damage during the short window using buffs (Well, Ward, Tether) and coordinated Heavy weapon fire.
Echoes in Eternity: Replayability and Legacy
Weekly Lockouts, Pinnacle Rewards, and Farmability
The Shattered Throne, like other legacy dungeons in Destiny 2, finds continued relevance through the weekly rotator system. Each week, one specific older raid and one older dungeon are designated as the "featured" activities.
When Shattered Throne is not the featured weekly dungeon, there is no Pinnacle reward, and legendary drops are typically limited to the first completion per character per week for each encounter/chest. Subsequent runs within the same week on the same character will not yield additional legendary gear.
Connection to Dreaming City Activities and Cursebreaker
The Shattered Throne is inextricably woven into the fabric of the Dreaming City's activities and long-term pursuits, most notably the Cursebreaker title seal. As detailed earlier, achieving this title requires:
- Completing the Shattered Throne dungeon itself ("Never Again" Triumph).
- Acquiring the Wish-Ender Exotic Bow via its quest within the dungeon ("Gimme That Bow" Triumph).
- Destroying all nine Corrupted Eggs hidden within the dungeon using Wish-Ender ("Corrupted Omelette" Triumph).
- Collecting all four Ahamkara Bones secreted within the dungeon ("O Grave Robber Mine" Triumph).
- Obtaining the Pallas Galliot ship, a random drop from dungeon encounters (part of the Dreaming City Collections Badge).
- Acquiring the full Reverie Dawn armor set and other Dreaming City weapons, which can drop from the dungeon (part of the Collections Badge).
Beyond Cursebreaker, completing the dungeon was historically tied to the strongest curse week, which also influenced Ascendant Challenges and Blind Well Tier IV bosses. While access is now permanent, the dungeon remains thematically linked to the overarching narrative of the curse and the fight against Savathûn's and Xivu Arath's forces within the city.
From its intricate symbol-based navigation in Erebus to the tense platforming under Ogre fire, the frantic survival of the Thrallway, and the mechanically demanding boss fights against Vorgeth and Dûl Incaru, the Shattered Throne offers a varied and memorable journey. It is a descent into a corrupted paradise, a confrontation with the consequences of wishes and curses, and a testament to the enduring allure of the Dreaming City's mysteries. Whether braved for loot, titles, challenge, or simply the experience, the Echoes of the Shattered Throne continue to resonate within the world of Destiny 2.