
The Pinnacle Pursuit: Understanding Solo Flawless in Destiny 2
The term "Solo Flawless" in Destiny 2 represents one of the most demanding and prestigious achievements a Guardian can pursue in Player versus Environment (PvE) content. It is a true test of skill, patience, buildcrafting, and mental fortitude. This guide aims to equip players with the knowledge and strategies necessary to conquer any dungeon alone, without a single death, and focusing on the prevalent meta!
Defining the Challenge: What "Solo Flawless" Entails
At its core, achieving a Solo Flawless completion of a Destiny 2 dungeon requires a Guardian to enter and complete the entire activity, from the very first encounter to the final boss's defeat, as a single player, without succumbing to death even once. This monumental feat must be accomplished within a single, continuous gameplay session; leaving the activity and returning, even with a checkpoint, will invalidate a flawless attempt.

Beyond these explicit rules lie the inherent challenges. A solo player must manage every mechanic, every wave of enemies, and all boss damage entirely on their own. This effectively means performing the roles and output typically distributed among a three-person fireteam. While individual skill is paramount, the Power Level of the Guardian relative to the dungeon's recommended level is a critical baseline. Attempting a dungeon significantly under-level drastically increases the already substantial difficulty.
The Allure: Why Guardians Chase Perfection
The motivations for pursuing Solo Flawless dungeon completions are multifaceted, blending tangible rewards with profound intrinsic satisfaction.
Each Solo Flawless completion awards a unique emblem that serves as a prestigious visual indicator of a player's skill and dedication, instantly recognizable within the community.
Forging an Unbreakable Will: The Mental Game
Beyond the perfect build or flawless execution of mechanics, the journey to a Solo Flawless triumph is profoundly a mental one. The psychological demands of this challenge are immense, requiring a specific mindset and emotional resilience.
Patience, Perseverance, and Practice: The Triumvirate of Success
Patience is Paramount: Solo Flawless runs are inherently marathons, not sprints. It is far better to take an extra fifteen damage phases to defeat a boss safely than to die attempting it in three. The mantra is simple: survive. Time is a secondary concern to staying alive.
Embracing Failure as a Stepping Stone
A critical component of the Solo Flawless mindset is the ability to reframe failure. Instead of viewing a death as a waste of time, it should be seen as an invaluable learning opportunity.
- Analyzing Deaths: Upon dying, pause and analyze precisely why the death occurred. Was it positioning? A missed cue? Greed during damage? Overwhelming enemy pressure?
- Iterative Refinement: Make targeted adjustments based on what went wrong. This might involve tweaking loadouts, altering movement patterns, or adopting a more defensive posture.
Universal Armaments: Core Principles for Solo Success
While specific builds will vary by class and dungeon, certain universal principles of armament and stat allocation underpin most successful Solo Flawless endeavors, especially within the current meta.
Building for Survival: Essential Stats and Universal Mods
Strategic Loadouts: Ammo Economy and Champion Management
A well-thought-out loadout balances add clear, major/champion elimination, and boss damage, all while maintaining healthy ammo reserves.
| Weapon Slot | Purpose | Recommended Types |
|---|---|---|
| Primary | Add Clear & Ammo Conservation | Trinity Ghoul, Riskrunner, Witherhoard |
| Special | Majors & Champions | Sniper Rifles, Fusion Rifles, Wave Frame GLs |
| Heavy | Boss DPS | Rocket Launchers, Linear Fusion Rifles, Machine Guns |
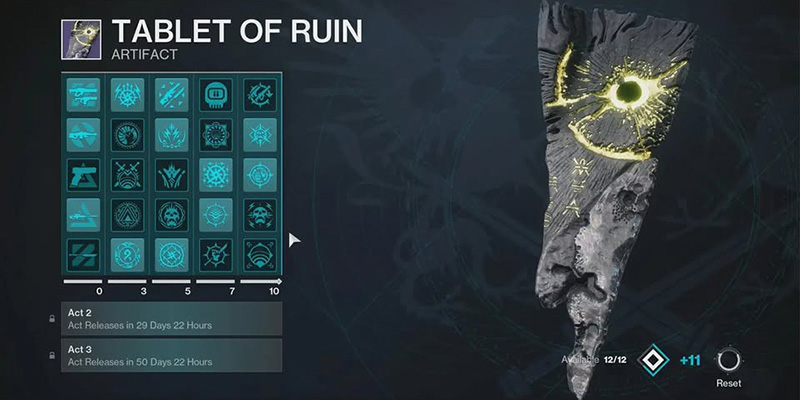
The "Tablet of Ruin" Artifact: Mastering Seasonal Power
The "Tablet of Ruin," the seasonal artifact active during "Episode: Heresy," is a cornerstone of buildcrafting for Solo Flawless attempts during this period. This artifact features a range of perks, with notable focuses on enhancing Arc (via the "Bolt Charge" mechanic), Void, and Strand subclasses.
When selecting perks from the "Tablet of Ruin" for a Solo Flawless run, prioritize:
- Enhanced Survivability (healing, damage reduction)
- Reliable Champion Counters
- Significant Damage Increases
- Improved Ability Uptime or Ammo Economy
Class Mastery: Architecting Your Solo Flawless Build
Mastering a Solo Flawless dungeon requires not only universal skills but also a deep understanding of class-specific strengths and how to leverage them through optimal buildcrafting.
Hunter: The Art of Evasion and Precision
Hunters traditionally excel in Solo Flawless attempts due to their inherent high mobility, access to potent burst damage Supers, and unparalleled survivability through invisibility and crowd control abilities.
Key Exotics: Assassin's Cowl (healing/invisibility on powered melee kills), Celestial Nighthawk (massive Super damage), Young Ahamkara's Spine (Tripmine enhancement)
Subclass Setup: Blade Barrage or Golden Gun, Knife Trick melee, Healing Grenade
Playstyle: Chain Knife Trick kills with Assassin's Cowl for constant healing and invisibility
Key Exotics: Gyrfalcon's Hauberk (Volatile Rounds after invisibility), Omnioculus (damage resistance while invisible)
Subclass Setup: Shadowshot, Snare Bomb, Vortex Grenade
Playstyle: Maintain near-constant invisibility, utilize Volatile-infused add clear
Titan: The Indomitable Bulwark
Titans excel in Solo Flawless scenarios through their unmatched raw survivability, primarily via Barricades, Overshields, and potent healing options.
Key Exotics: Synthoceps (melee/Super damage when surrounded), Loreley Splendor Helm (on-demand Restoration x2)
Subclass Setup: Hammer of Sol, Throwing Hammer ("Bonk"), Fusion/Healing Grenades
Playstyle: The "Bonk Titan" - Sunspots provide constant healing and ability regeneration
Key Exotics: Heart of Inmost Light, Cuirass of the Falling Star, An Insurmountable Skullfort
Subclass Setup: Thundercrash, Seismic Strike/Thunderclap, Storm's Keep aspect
Playstyle: Leverages Bolt Charge mechanics with current artifact for healing and damage
Warlock: The Resilient Savant
Warlocks bring unparalleled survivability to Solo Flawless attempts through healing Rifts, Well of Radiance defensive capabilities, and potent add-clear abilities.
Key Exotics: Sunbracers (infinite Solar Grenades), Phoenix Protocol (rapid Well regeneration), Starfire Protocol (Fusion Grenade builds)
Subclass Setup: Well of Radiance, Celestial Fire/Incinerator Snap, Solar/Healing Grenades
Playstyle: Well of Radiance provides ultimate safety during DPS phases
Key Exotics: Contraverse Hold (grenade energy), Nezarec's Sin (Void ability energy), Felwinter's Helm (weakening)
Subclass Setup: Nova Bomb, Child of the Old Gods, Vortex Grenades
Playstyle: Maintain Devour uptime for constant healing on kills
Conquering the Dungeons: A Solo Flawless Gauntlet
Embarking on the Solo Flawless journey requires a strategic approach to dungeon selection. Starting with older, more forgiving dungeons allows players to build confidence before tackling newer, more mechanically intensive challenges.
Recommended Dungeon Progression Order
| Rank | Dungeon | Difficulty Factors | Solo Flawless Emblem |
|---|---|---|---|
| 1 | Shattered Throne | Power-crept; main challenge is platforming | The Eternal Return |
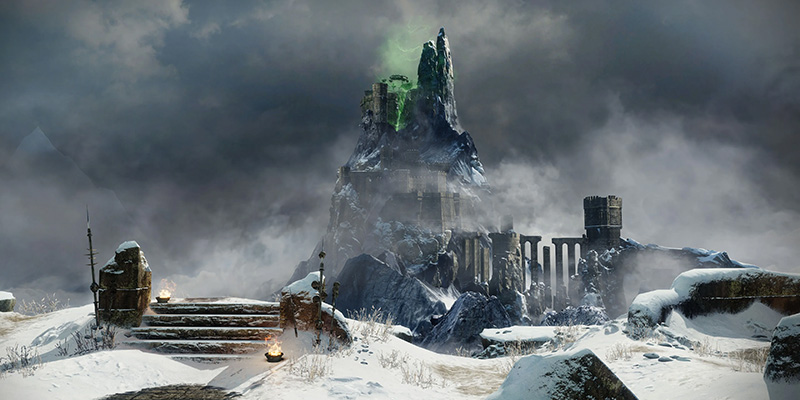
| 2 | Pit of Heresy | Significantly power-crept; straightforward encounters | Crimson Echoes |
| 3 | Prophecy | Complex mechanics but manageable with practice | Prophetic Visionary |
| 4 | Grasp of Avarice | Sparrow section is notorious run-killer | Piratical Ambitions |
| 5 | Spire of the Watcher | Large boss health pools; endurance test | Flight of Soteria |
| 6 | Duality | High enemy density; dangerous mechanics | Untouched by Opulence |
| 7 | Warlord's Ruin | Highly lethal; mistakes heavily punished | Tattered Regalia |
| 8 | Sundered Doctrine | Mechanically heavy; constant tick damage | Pyramid's Pilot |
| 9 | Ghosts of the Deep | Extremely tedious; high boss health | A Grave Matter |
| 10 | Vesper's Host | Numerous instant death mechanics; considered hardest | Station's Savior |
Warlord's Ruin: Detailed Strategy
Warlord's Ruin: Encounter Breakdown
Clear adds until you're teleported into rising cages. Shoot the 3 Blighted Eyes around your cage to escape. Once freed, cleanse as many Taken (Scorn) totems - stand in their white circles until they turn blue before the “Imminent Wish” timer ends. Each totem cleansed increases your “Naeem’s Wish” DPS window. When the timer ends and “hex backfires,” go all out with rockets, linears, snipers, Well of Radiance, supers, etc. Repeat cleanse → DPS until Rathil dies.
After Rathil, you're locked in separate cells. Players see skeleton hand clues pointing at tally marks: that’s how many cogs need to spin clockwise vs. counter‑clockwise (total = 6). Shoot each cog once to toggle, twice to stop, three times to reverse. When correctly aligned, shoot the central lever to escape.
Clear adds until Taken Eyes spawn, then shoot them to spawn Scorn Broken Knights with totems. Cleanse those to get up to 4 Solar Orbs, and deposit each orb in the braziers around the arena. Lighting all braziers triggers the DPS phase, granted by “Naeem’s Wish.” Use the glowing pillars to refresh “Shelter from the Storm” if you get cold stacks, then deal boss damage. Rotate as braziers expire.
Similar cleanse → DPS cycle across three ascending platforms:
- Shoot Taken Eyes → spawn Scorn Knights with lanterns.
- Cleanse lantern(s) to gain Imminent Wish; more cleansed = longer DPS.
- During cleanse, you’ll get “Hex of Vengeful Corruption”, melee a Corrupted Hex Drinker (immune Scorn unit) to transfer the hex, then back off so it doesn’t get passed back.
- After each full damage phase, the boss moves up a platform. Repeat three times.
On top platform, continue DPS: watch for “My hide is thick, O vengeance mine” - the platform will blight and boss goes immune. Rotate among the three main platforms, clearing Added Eyes to prolong DPS. Offload the final ~10 % health during the “Final Stand” on the center platform.
Vesper's Host: The Ultimate Challenge
Vesper's Host is considered the most challenging Solo Flawless dungeon, featuring numerous instant death mechanics including radiation hazards, incorrect panel interactions, boss attacks, and exploder shanks. Approach with maximum preparation.

Mechanics: Defeat waves of Fallen, including Brigs. Prioritize Snipers, Heavy Shanks, and explosive enemies.
Strategy: Utilize cover extensively and keep moving to avoid AoE damage. Arc builds with Jolt excel here.
Recommended Weapons: Queenbreaker with Particle Reconstruction, Arc weapons for Bolt Charge synergy
Mechanics: Uses Scanner, Operator, and Suppressor augments; shatter boss into servitors; follow glow pattern to shoot wall panels
Strategy: Perform augment roles, suppress Raneiks to split him, observe servitor glow positions, shoot wall panels in correct order, then DPS during brief damage windows
Recommended Build: Well of Radiance, Divinity, burst DPS (Linears, Rockets, Slug Shotguns)
Mechanics: Boss teleportation, "Dark Entropy" stacks, sniper priority, nuke attacks requiring shelter
Strategy: Stay in back left safe spot, prioritize sniper removal, play very defensively
Recommended Setup: Solar Titan with Loreley, Grand Overture, maximum survivability focus
Sundered Doctrine: The Newest Challenge
Sundered Doctrine is the newest dungeon, set within Rhulk's pyramid ship, featuring the Dread enemy faction and complex mechanics involving light beams, symbol matching, and wheel rotations.
- Mechanically interesting puzzles
- Strong artifact synergies available
- Rewards include new Exotic
- Less random lethality than Vesper's Host
- Constant tick damage during DPS
- Complex symbol mechanics
- High enemy damage output
- Requires specific positioning knowledge
Elite Techniques: Advanced Strategies & Recovery
Beyond solid builds and encounter knowledge, ascending to elite Solo Flawless play involves mastering advanced recovery techniques and optimization strategies.
The Art of Recovery: Surviving Near-Death Experiences
- "It's Not Over Till It's Over": Even at critical health, there are often ways to survive through quick ability usage
- Utilize Mobility for Evasion: Master class-specific movement tools for defensive positioning
- Defensive Supers as Panic Buttons: Don't save Supers only for DPS - use them to survive overwhelming situations
- Healing Abilities on Demand: Proactive use of Rifts, Healing Grenades, and Devour effects
Mastering Practice: Effective Checkpoint Strategies
Efficient practice is key to minimizing the number of full runs needed for Solo Flawless success. Destiny 2's checkpoint system can be leveraged for targeted training.
Optimal Practice Loop
Avoiding Common Catastrophes
Common Mistakes
Beginner Mistakes
Veteran Mistakes
The Evolving Meta: Current Trends in Solo Flawless Play
The landscape of Solo Flawless play in Destiny 2 is ever-evolving, shaped by sandbox updates, new Exotic releases, seasonal artifact mods, and community innovation.
Insights from the Frontlines: Popular Strategies
Observing skilled content creators who specialize in high-level PvE content provides valuable insights into effective strategies. Common themes in current successful builds include:
- Heavy "Tablet of Ruin" Integration: Builds extensively leverage Arc (Bolt Charge), Void (Volatile/Weaken), and Strand (Unraveling) synergies
- Emphasis on Survivability Exotics: Assassin's Cowl, Loreley Splendor Helm, and Devour-enabling Exotics remain popular
- Meta Weapon Choices: Graviton Lance, Lord of Wolves, Queenbreaker, and Particle Reconstruction LFRs are common
Impact of "Episode: Heresy" and "Rite of the Nine"
The current episode has significantly shaped the Solo Flawless meta through new subclass aspects like Storm's Keep for Titans and enhanced artifact synergies. The "Rite of the Nine" event has reinvigorated older dungeons with challenging new difficulty modes.
- New weapons with unique perks and origin traits
- Ultimatum difficulty with -25 Power level disadvantage
- Enhanced rewards for skilled completion
Anticipating "Edge of Fate": Future-Proofing Your Approach
While this guide focuses on the current meta, the "Edge of Fate" expansion releases July 15, 2025. Future-proofing principles include:
Future-Proof Strategies
The Mark of a True Master
The path to achieving a Solo Flawless dungeon completion in Destiny 2 is undeniably arduous, demanding a rare blend of skill, patience, meticulous preparation, and unwavering perseverance. It is a journey that pushes Guardians to their limits, forcing them to master not only the intricacies of their chosen class and the mechanics of each encounter but also the subtle art of survival against overwhelming odds.
The rewards - unique emblems, coveted cosmetics, and the profound satisfaction of personal achievement- are a testament to the dedication required. From the power-crept halls of the Shattered Throne to the punishing lethality of Vesper's Host or the intricate puzzles of Sundered Doctrine, each dungeon presents its own unique trial.
Success in this ultimate PvE endeavor hinges on several core tenets:
Success Principles
While this guide provides a comprehensive roadmap, the final steps on the path to Solo Flawless mastery must be walked by the individual Guardian. Embrace the challenge, learn from each setback, and celebrate every hard-won victory. The emblems earned are more than mere cosmetic flair; they are symbols of dedication, skill, and the indomitable spirit of a Guardian who has truly conquered the darkness, alone and without fault.
May your Light shine bright, and your resolve never falter. Eyes up, Guardian – your Solo Flawless triumph awaits.