
Hey Guardian! Let's Get Your Friend That Awesome Shotgun!
Setting the Stage: The Hype is Real!
Alright, Guardian, you've heard the whispers, seen the vids, and now you need Conditional Finality, pronto? Smart! This shotgun isn't just a weapon; it's a statement, a problem-solver, and honestly, just a ton of fun to use. The excitement is totally justified, and this guide is here to channel that energy straight into nabbing this exotic beast from the Root of Nightmares raid.
Conditional Finality: Freeze 'Em and Burn 'Em!
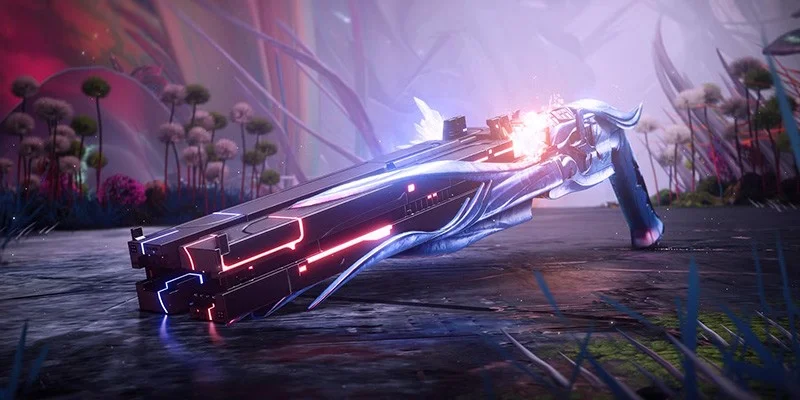
So, what's all the fuss about? Imagine this: one barrel of this shotgun blasts pure Stasis energy, freezing baddies solid right in their tracks. Then, with the very next shot from the other barrel, it unleashes a wave of Solar energy, making them go KABOOM with a powerful Ignite effect! That's Conditional Finality – a devastating one-two punch of crowd control and serious damage. The core perk, often called Paracausal Pellets, is what makes this magic happen: land most of your Stasis pellets, and you freeze the target; land most of your Solar pellets, and you ignite them.
This opens up some fantastic buildcrafting opportunities, letting you tailor your Guardian to make the most of both Stasis and Solar effects.
And if that wasn't enough, it's also a Champion's worst nightmare. Those pesky Unstoppable Champions? Frozen solid. Barrier Champions trying to put up their shields? A blast of Stasis will often freeze them before they even get a chance, or catch them as the shield is just coming up. This makes it an absolute top-tier pick for high-level content where Champions are a constant threat. It's a genuine game-changer in a special weapon slot.
Your Mission: The Root of Nightmares Raid
The Entry Ticket: What You Need
First things first, to even step into the Root of Nightmares raid – that's where Nezarec and your future shotgun live – you'll need to own the Lightfall expansion. No Lightfall, no entry, unfortunately!
Power-wise, it's recommended to be at least 1780 Power Level. While you can technically enter at a lower level, being 1780 or higher will make the experience much smoother and less like constantly getting squished. Every bit of Power helps you stay alive and contribute effectively.
The Target: Nezarec, Final Boss
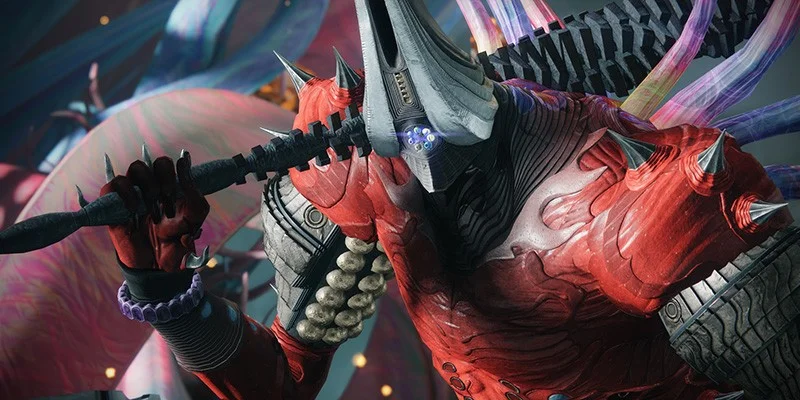
The prize, Conditional Finality, drops only from Nezarec, the big, intimidating dude at the very end of the Root of Nightmares raid. He's the final challenge, and defeating him is the only way to get a shot at this exotic shotgun. So, naturally, he's our main focus!
The Big Boss: Nezarec – How to Beat Him Without Breaking a Sweat (Much!)
The final encounter against Nezarec, the Final God of Pain, might seem daunting, but once you understand the rhythm, it's one of the more straightforward final raid bosses in Destiny 2.
The Main Gig: Playing with Light and Dark "Seeds" (Nodes)
The Nezarec fight is all about connecting these glowing orbs, or "nodes," spread across the arena. Think of it like playing connect-the-dots, but with cosmic energy that powers up the field for a damage phase! There are Light (white/blueish) nodes and Dark (orangey/reddish) nodes, and your fireteam will need to activate chains of both to make Nezarec vulnerable to your attacks.
Here's the super simple version of how it works:
- 2 players - runners - will need to stand at the beginning of the chain, in the pools of Light or Dark energy, and shoot the "seeds" within it. Careful, this starts the encounter!
- After they shoot their respective seeds and receive their buffs (Flux of Darkness or Field of Light), they need to run to the next active seed on their side and shoot the circle in the middle while standing close to it. Shooting it from afar won't work!
- Come back to receive the next buff - important! The active node with the buff will move the more you progress into connecting the nodes. Look for a glowing aura around the node.
- If you can't find which node you need to bring the buff to, look for a distinct small ball inside the node - it will look different from the seeds around it. Other seeds will also help you by drawing glowing lines in the direction of the node that needs the buff.
- After you connect the nodes to the last one, you will receive a visual and a sound cues. When both sides are connected, Nezarec is attacked by a Light beam, and this finally starts the DPS phase.
Remember, survival is crucial! Speed is important, but a runner's death is even more likely to impede the encounter's progress.
To make this dance work, everyone needs a job. Clear roles prevent chaos:
- Two Runners: One player will be responsible for the Light side of the arena, and another for the Dark side. Their primary job is to create a chain on their side with the corresponding buff. As connecting both sides will initiate the DPS phase, communication such as "Light's on the last one, how is the Dark side doing?" is key to prepare your teammates!
- One or Two Nezarec Taunters: These brave souls have the critical task of keeping Nezarec distracted. They do this by shooting his glowing chest, which gives them a debuff called "Nezarec's Hatred" and keeps his attention. If his chest isn't glowing, shooting one of his shoulders will make it vulnerable, which also serves another purpose we'll get to shortly. Having two players on this duty allows them to trade aggro if one gets into trouble, but most groups can manage with one.
- Add Clear: Everyone else on the fireteam should focus on eliminating the other enemies (adds) that spawn throughout the encounter. Prioritize the beefy Colossus enemies and any Psions that might be harassing your runners. Protecting the runners is paramount; if they're constantly under fire or if Nezarec is chasing them, connecting the nodes becomes nearly impossible, and the encounter will stall. This teamwork is what allows the runners to do their job effectively.
Don't Get Wiped! Surviving Nezarec's "Party Foul" Attack
Nezarec isn't just going to stand there and let you connect nodes. Periodically, he gets pretty upset and will attempt to unleash a devastating attack that can wipe out your entire team. But don't panic! There's a clear way to survive this.
The Signal:
One of the Taunters needs to shoot one of Nezarec's glowing shoulders. When a shoulder is destroyed, he'll emit a burst of energy from his back – this blast will be either BLUE (indicating Light) or ORANGE (indicating Dark). This is the signal for what kind of safe zone your team needs to create. Shooting his shoulder also makes his chest vulnerable, allowing the Taunter to grab his attention. Pro tip - Sniper Rifles are amazing for this purpose!
Creating Safety (The Refuge Mechanic):
Based on the color Nezarec flashes, your runners need to act fast:
- If Nezarec flashes BLUE light, the Dark Runner should get his side's buff, find a Light node that hasn't been completed yet, and shoot it. Doing this will create a protective pool around this particular node. When Nezarec starts glowing, everyone on the team needs to quickly get into this pool to survive Nezarec's wipe attack.
- If Nezarec flashes ORANGE light, the Light Runner with his side's buff needs to find a Dark node that hasn't been completed and shoot it. Same as before, everyone needs to receive the buff to survive the wipe mechanic - huddle up, team!
This life-saving refuge buff lasts for about 15 seconds, so don't leave the protective bubble too early. Doing so might cause you to lose the buff just as Nezarec is about to blow the arena up!
Now, when it comes to creating that safe spot, your runners can be quite strategic. Instead of just picking any random completed node, experienced teams often pre-designate or quickly identify nodes that are in safer, more central locations, or away from where Nezarec is currently rampaging. This foresight can turn a frantic scramble for safety into a much more controlled and successful maneuver. Completing the first few nodes on each side quickly provides fewer options for these refuge spots, which might increase the risk.
Time to Shine: The Damage Phase!
Once both the Light and Dark node chains are fully completed on both sides of the arena, a massive beam of light will strike Nezarec, stunning him temporarily. That's your cue – it's damage time!
Everyone should quickly group up on a pre-designated plate. Many teams use one of the central plates for ease of access, but some prefer specific side plates, or even gather in convenient corners based on their strategy. Warlocks should immediately drop a Well of Radiance in the center for healing and a damage boost. Titans can pop a Ward of Dawn slightly off the center for better team maneuverability (using Helm of Saint-14 for an overshield can be great for safety, or just for the Weapons of Light buff if a Well is already down).
Nezarec, while imposing, doesn't have an absolutely colossal health pool compared to some other raid bosses. Good, coordinated damage from the fireteam can melt his health bar surprisingly quickly. However, remember that Nezarec is an aggressive and mobile boss, even during the damage phase. He might try to charge your damage spot. Choosing a location that offers a bit of cover or allows for quick repositioning can be beneficial, especially if your team doesn't defeat him in a single damage phase. Be mindful when using Rocket Launchers, as he can get close and cause accidental self-damage.
After about 30 seconds of pouring damage into him, Nezarec will become immune, and the cycle of connecting nodes and managing his wipe attack begins anew. Repeat the process until he's defeated for good.
Pro-Tip Loadouts (Easy Mode!)
Don't let yourself stress too much about having the absolute "god-roll meta" weapons for this fight. Nezarec isn't super picky, and many things work well.
For Add Clear:
- Wave or Area Denial Frame Grenade Launchers: These are arguably the kings of add clear in Destiny 2. A single shot can wipe out a whole line of enemies safely from a distance. VS Velocity Baton, Psychopomp, and Forbearance (from Vow of the Disciple) are all valid and strong choices.
- Add Clear Primary: Many primary weapons nowadays have a variety of area damage perks for your specific build needs. Recluse with Destabilizing Rounds for a Void Titan, or Brigand's Law with Voltshot on an Arc Hunter. You can even equip Exotics like Sunshot if your Exotic slot isn't taken!
For Survivability:
- Rocket-Assisted Frame Sidearms: Don't sleep on Special Sidearms! Their damage and versatility can help you and your team out of a dangerous situation, so the more on the battlefield, the better. Aberrant Action with a Heal Clip, or Tinasha's Mastery with a Chill Clip - a duo worthy of the Conditional Finality itself!
Farming Smarter: Getting Conditional Finality Efficiently
The Weekly Limit: Three Rolls of the Dice
PRO FARMING STRAT: The Nezarec Checkpoint Trick!
Want to save a MOUNTAIN of time and just focus on fighting Nezarec multiple times a week (once per character for loot, of course) without re-running the entire raid each time? There's a super slick checkpoint trick that seasoned Guardians use!
Here's how your fireteam can do it (keep it simple and communicate clearly!):
- Get the Checkpoint: One player (the "Checkpoint Holder") needs to play through the Root of Nightmares raid until they reach the Nezarec encounter. Alternatively, your whole fireteam can play through the raid together to reach Nezarec and designate the Checkpoint Holder between yourselves.
- Invite the Team: The Checkpoint Holder then invites you and the rest of the fireteam to their game.
- Pass the Leadership: The Checkpoint Holder passes the "Fireteam Leader" role to you (or anyone else in the fireteam who doesn't have the checkpoint on their current character).
- Checkpoint Holder Swaps Characters - Crucial: The original Checkpoint Holder then switches to a different character they want to use to fight Nezarec and get a chance at the loot.
- Rejoin the Fireteam: That character rejoins the fireteam (which is now being led by you or the designated new leader).
- Defeat the Boss: The fireteam can start the Nezarec encounter and defeat him.
- Changing Characters: Now, everyone should switch to their other characters who haven't completed the raid yet (or they can stay on the same ones if they don't need any, and I mean ANY, loot from the raid). Checkpoint Holder does the same thing - invites all of you, then leaves and logs in on their third character, leaving their first one and their checkpoint intact.
- Watch the Team Composition - Important: While switching to other characters, communicate on your team composition, keeping in mind that whoever is playing a class this run will certainly not be able to use the same class next run. And no one wants to be left without a Warlock in a raid...
- Beat & Repeat: Defeat Nezarec 2 more times this way. If Conditional Finality doesn't drop this week, you can always do the same thing next week, until you receive this amazing weapon!
This method means your fireteam only has to complete the full raid once to secure the checkpoint. After that, it's just boss kills! This dramatically reduces the time investment per loot chance. While mechanically straightforward, this does require good communication and coordination within the team!
Boosting Your Luck: Raid Triumphs for a Better Drop Chance!
What are Triumphs and Why Do They Matter?
Think of Triumphs as special in-game achievements or challenges tied specifically to the Root of Nightmares raid. Completing certain of these Triumphs gives you a permanent boost to your chances of Conditional Finality dropping from Nezarec! This is HUGE! It's the primary way you can actively increase their odds beyond just hoping for good luck each week.
Once a Triumph that boosts the drop rate is completed, you needs to go into your Journey tab in the game menu, find the Root of Nightmares raid seal (it's called "Dream Warrior"), and "claim" the completed Triumph. This officially activates the drop rate boost. Don't forget this step!
Key Triumphs to Supercharge Your Conditional Finality Luck!
Here's a handy table listing the Triumphs within the Root of Nightmares raid that are confirmed to boost your drop chance for Conditional Finality. The "What You Gotta Do" column gives a very simple gist – you can always look up more detailed guides if a particular Triumph catches your eye!
| Triumph Name | What You Gotta Do (The Gist!) | Boosts Drop Chance? |
|---|---|---|
| Classic Horror | Beat all encounters with everyone on the same Guardian class (e.g., all Titans, all Warlocks) | Yes! |
| Dream Weavers | Beat all encounters with everyone using the Strand subclass | Yes! |
| Illuminated Torment | Complete the "Illuminated Torment" challenge (Cataclysm - 1st encounter) | Yes! |
| Psionic Purge | Cataclysm: Defeat both spawned Psions within 1 second of each other | Yes! |
| Crossfire | Complete the "Crossfire" challenge (Scission - 2nd encounter) | Yes! |
| Shields Up | Scission: Don't kill attuned shielded enemies on a floor until both node chains are complete | Yes! |
| Cosmic Equilibrium | Complete the "Cosmic Equilibrium" challenge (Macrocosm - 3rd encounter) | Yes! |
| Singular Orbit | Macrocosm: A player cannot gain the "Planetary Insight" buff twice in the same planetary shift | Yes! |
| All Hands | Complete the "All Hands" challenge (Nezarec - final encounter) | Yes! |
| Synchronicity | Nezarec: Activate both Light and Dark nodes within 5 seconds of each other, for every activation | Yes! |
| Final Nightmare | Complete all encounter challenges (Illuminated Torment, Crossfire, Cosmic Equilibrium, All Hands) on Master difficulty | Yes! |
This table serves as a fantastic checklist. The Triumphs vary in complexity, from relatively simple coordination tasks to challenges requiring specific team compositions or flawless execution of mechanics under pressure. The good news is that each one contributes to better odds, creating a path for dedicated players to improve their chances over time, rather than it being an all-or-nothing system.
Easy Starter Triumphs?
If you are new to Triumph hunting and want a less intimidating place to start, a couple of these are often considered more straightforward with good team communication:
- Psionic Purge: In the first encounter (Cataclysm), when the two Psions in bubbles spawn, the two players assigned to kill them just need to coordinate their final blows so both Psions die within 1 second of each other. A simple countdown ("3, 2, 1, shoot!") usually does the trick. Using guns is more reliable than melee for this.
- Shields Up: In the second encounter (Scission), the main rule is that your team cannot defeat any of the elemental-shielded Cabal Centurions on a specific floor until both the Light and Dark node chains on that same floor are fully completed. This mainly requires add-clear players to be careful and runners to communicate when the chains are done. Crowd control abilities like Stasis freeze or Strand suspend can be very helpful to manage these shielded enemies without killing them prematurely.
Tackling these can give you a nice confidence boost and your first drop rate increase!
A Little Patience Goes a Long Way, Guardian!
The Reality of Raid Exotics
Friend, it's important to have a chat about expectations. Even with all the Triumphs boosting the odds, getting a raid exotic weapon like Conditional Finality can take time. The base drop chance, before any boosts, is estimated to be quite low, around 5% – similar to other coveted raid exotics from the past.
Some lucky Guardians get it on their very first clear (we often say "RNGesus blessed them!"). For others, it might take many, many clears over several weeks or even months. It truly comes down to the luck of the draw with Destiny's random loot system.
Keep at It!
The most important thing is not to give up! Each weekly reset brings a fresh set of chances. Encourage yourself to run with a fun, patient team, focus on getting smoother and more confident with the Nezarec encounter, and perhaps pick one or two Triumphs from the list to aim for each week.
The more Triumphs you manage to knock out, the better your odds will become over time. Plus, many of these Triumphs also contribute towards earning the "Dream Warrior" title for the Root of Nightmares raid. So, even if Conditional Finality is being shy, the effort spent is still progressing them towards other cool in-game achievements and bragging rights! This provides an alternative sense of accomplishment and can make the grind feel more rewarding.
Go Get 'Em, Guardian!
Final Pep Talk
You now have all the essential intel you need to chase down Conditional Finality. It's time to rally the fireteam, dive into the eerie beauty of the Root of Nightmares, and show Nezarec who's truly the boss!
Remind yourself to be patient, communicate with your team, and most importantly, have fun. Raiding is one of Destiny 2's peak experiences. May your drops be plentiful, your aim true, and may Conditional Finality soon be a prized part of your arsenal! Good luck out there!