
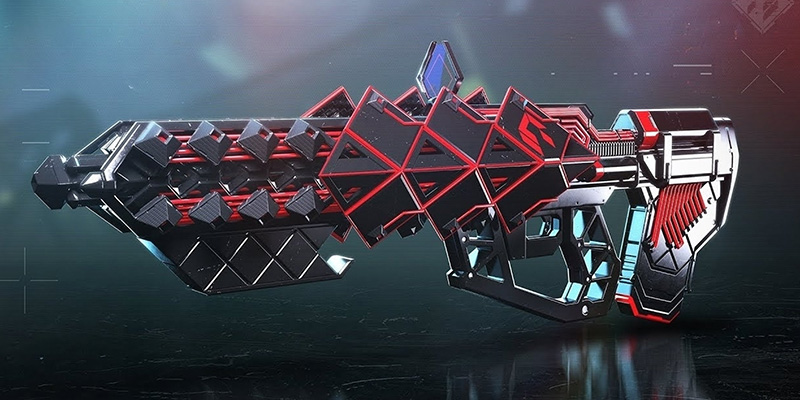
Alright, Guardian! Heard you're itching to get your hands on Outbreak Perfected, and let me tell you, your excitement is SPOT ON! This SIVA-powered beauty isn't just a Pulse Rifle; it's a statement. It chews through enemies and looks absolutely menacing while doing it. Think swarms of SIVA nanites tearing your foes apart from the inside out. Yeah, it's that cool. The weapon is renowned for creating these SIVA nanite swarms that deal extra damage, making it a unique and powerful tool in your arsenal.
This guide is your personal Ghost, whispering all the crucial secrets to snagging Outbreak Perfected and its awesome upgrades. We're skipping the boring lectures and diving straight into the action – exactly what you need to know, when you need to know it. Just pure, unadulterated Zero Hour conquest!
Zero Hour Availability Check
Guardians have reported bugs that sometimes made it uncompletable or even led to it being temporarily taken offline. Issues like the mission not ending properly after beating the boss, the timer continuing to count down sending players back to orbit, or quests not granting credit have been a pain for many. Some reports from early 2025 indicated it was "disabled because a bug is making it impossible to complete", while others from around February 2025 mentioned it was "broken with the launch of Heresy" with no estimated time for a fix. Though there have been periods where players reported it was fixed, its stability can fluctuate, especially with new game updates.
So, your first actual step? Head to your Director, look under the 'Legends' tab (it has also appeared under an 'Into the Light' sub-menu previously). See if Zero Hour is listed and active. If it is, great! If not, or if you hear rumblings in the community, you might need a little patience.
Getting the Asset Protection Quest
Assuming Zero Hour is a go, your first official stop is the Tower Annex to see Ada-1. She's the cool Exo who deals with Black Armory tech and, for our purposes, SIVA stuff. She'll offer you a quest called "Asset Protection". This is your golden ticket. Grab it! If Ada-1 only shows her vendor screen and the quest isn't available, it might be another sign the mission is currently disabled or bugged.
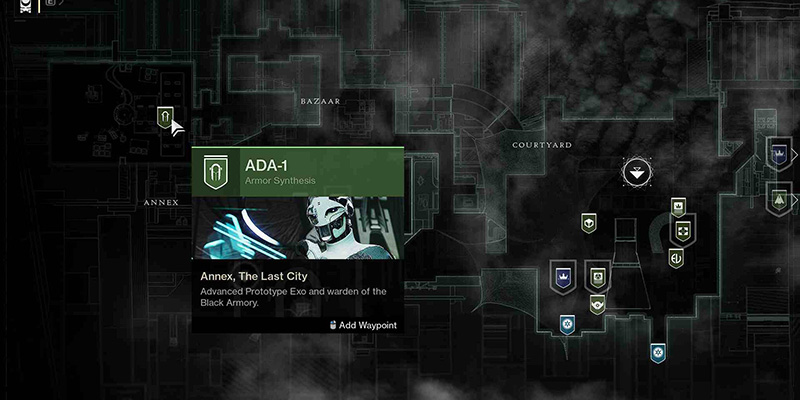
The "Asset Protection" quest basically says: "House Salvation has nicked some SIVA technology. Go get it back from the old Tower before they do something nasty with it". Simple, right? Well, the "getting it back" part is where the fun begins. Completing this quest by finishing Zero Hour (on any difficulty initially) is what gets you the pattern to craft your very own Outbreak Perfected. No quest, no SIVA-spewing rifle!
Recommended Loadouts
Zero Hour throws a LOT of Fallen at you, and they love their Arc weapons. The mission itself has an "Arc Threat" modifier, meaning incoming Arc damage is increased by 25%. So, think about bringing gear that counters Arc damage or dishes it out effectively.
- Arc is Your Friend: Consider an Arc subclass. For weapons, anything with Arc is great for shields. If there's a "Void Surge," "Strand Surge," or "Solar Surge" active (check the weekly modifiers!), lean into those too, but the Arc subclass survivability is always handy.
- The Crowd Control Crew: Add-clearing Grenade Launchers are chef's kiss for clearing groups of Shanks and Vandals.
- Boss Busters: For the big bosses at the end, you'll want some heavy hitters. Rocket Launchers (especially if "Overcharged Rocket Launcher" is an active modifier), Linear Fusion Rifles, or even a trusty Sniper Rifle can do the trick. The old reliable Whisper of the Worm is a classic for this mission.
- Exotic Spotlight - Riskrunner: If you have the Arc SMG Riskrunner, it can be a lifesaver in Arc-heavy sections. Taking Arc damage activates its Arc Conductor perk, granting Arc resistance and causing your shots to chain lightning and return ammo.
- Exotic Spotlight - Polaris Lance: This Solar Scout Rifle can be surprisingly good, especially for the final boss if you're running low on Heavy. Infinite ammo on critical hits and an explosive fifth shot (Perfect Fifth) can help you plink away at bosses from a safe distance.
- Cover Your Bases (Elemental Shields): While Arc is prominent, you will encounter other shield types. For instance, the Shanks in the first courtyard often have Void shields. Having options to break different shields quickly is always a smart move. Always check the active mission modifiers before you launch!
- Don't Be a Hero (Early On): Especially on your first few runs, survivability is key. Don't be afraid to play it a bit safer until you learn the encounters.
Zero Hour Normal Mode Walkthrough
Ready? Head to your Director, find Zero Hour under the 'Legends' node (or 'Into the Light' if it's featured there), and select Normal difficulty. You've got 45 minutes – plenty of time once you know the way!
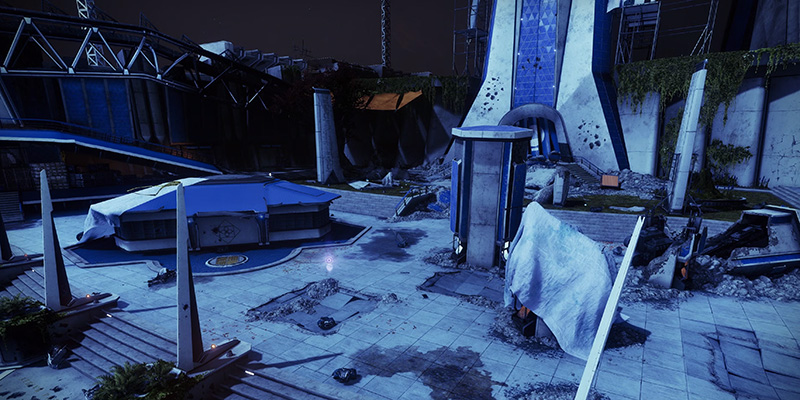
The Welcome Party (Bazaar & Tower Plaza)
You'll start in the ruins of the old Tower. Fight your way through the initial Fallen in the Bazaar. Look for an open air duct to proceed – it's usually to the right, near a blue light on the ground after Mithrax makes an appearance. In the Tower Plaza, you'll emerge from under a crumbled staircase to meet more Fallen, including snipers and your first miniboss: a chunky Fallen Brig. Use cover near the stairs, take out snipers first, then focus the Brig. Explosive weapons work well here.
Hangar Havoc (Fallen Walker Showdown)
Tower Ascent & Platforming
After the Walker, head up the stairs. The path is pretty linear for a bit, through Tower Watch, until you reach an exterior platform leading to an elevator shaft. Drop down to a landing pad.
Covert Passage (Normal Mode Path)
This is where the Normal and Legend paths really diverge. For Normal:
- Find the docked ship on the lower part of the landing pad (usually on the left). Enter the grate/passage just under its nose.
- Slide into an air duct, leading to a storage room. Take the left air duct.
- You'll reach a chasm with breakable grates. Land on the one below you and quickly move to the next, as they collapse.
- Outskirts of the Tower: Jump across yellow platforms, then onto smaller platforms jutting from the wall (these fall!). Reach a large static platform.
- Look for another small support platform on the Tower wall to jump to, leading to more jumps and a massive air duct.
- Climb yellow platforms to find the correct air duct (usually two floors up to your right if facing the middle platform). This drops you into the spinning fan shaft.
Spinning Fans of Doom
Easy does it here. Land on the center of each fan, then jump into the red-lit nooks on the shaft's edge to drop to the next. Watch out for Exploding Shanks!
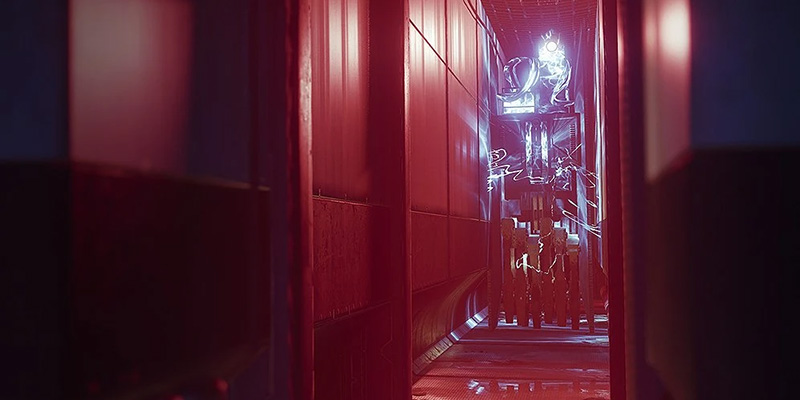
The Massive Chasm & TR3-VR's Lair
Cross a huge chasm using dimly-lit platforms. There's a switch at the end to make a bridge for your teammates. Then, into another vent to meet everyone's favorite murderous cleaning bot...
Meet TR3-VR (Don't Get Squished!)
The Cryptarch's Secret Stash (Vault & Floor Puzzle)
After escaping TR3-VR, climb up metal supports along the wall (elevators are busted!), slide down a long ramp. In the room you land in, turn around and go through the doorway on your right, but don't go down the stairs. Instead, slide through the open air duct on the right at the top of the staircase. This leads to a vault area.
- Find the wall with L-shaped pipes and a diamond Cryptarch symbol. Interact – it's a secret door!
- The Floor is Lava (Literally!): You'll face a 6x5 grid floor. Step on the wrong tile, and you're toast. The correct path changes based on the mission's weekly elemental singe (Arc, Solar, or Void).
- We won't list every path here as they change, but the key is to look up the current week's Normal mode solution. A quick search like "Zero Hour floor puzzle normal [current singe]" will save you a lot of crispy deaths!
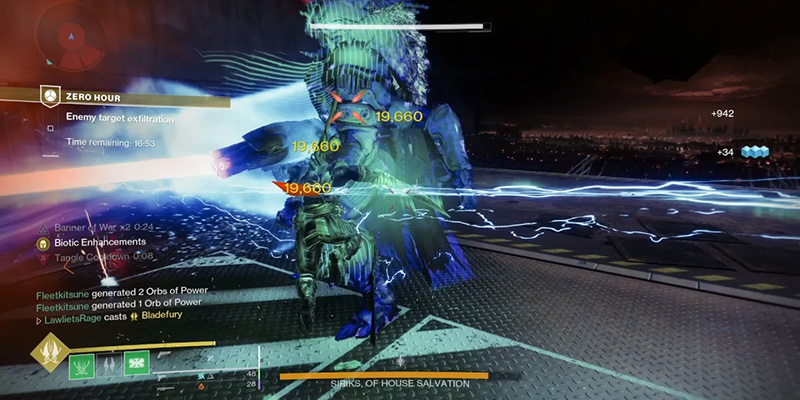
Boss Fight - Siriks, Loyal to Eramis
There's a rally flag spot in the shallow water just before the final air duct leading to the boss. Stock up!
Siriks Boss Fight Strategy
Siriks is a massive Fallen Vandal that teleports around the hangar bay. Focus on the adds first, as they do not despawn until both phases are complete. Destroy the two Turrets on elevated ground immediately – they HURT. Each time you remove a chunk of Siriks' HP, it will teleport (usually counter-clockwise) and trigger a new wave of adds, often including Servitors and Shanks.
Upon reaching about 20% HP, Siriks retreats and spawns two Fallen Walkers on elevated platforms (one on each side). Destroy their legs to expose their cores, then destroy the cores. Once they're down and adds are clear, Siriks returns inside a massive Brig, accompanied by nearly two dozen more adds.
This gets hectic. Use Supers on adds. Use cover on the lower floor. Brigs are immune to critical hits until their faceplate pops (around 30% HP), exposing a weak point. Use abilities and explosive weapons like Grenade Launchers and Rocket Launchers for damage.
Crafting Outbreak Perfected
You beat Siriks! Mithrax will appear and leave a chest. Open it! If this is your first clear and "Asset Protection" is done, head back to Ada-1 in the Tower. She'll give you the Deepsight (red border) Outbreak Perfected. The old method of getting Outbreak Perfected from the Monument to Lost Lights (Exotic Kiosk) is no longer available for this reprised version; crafting is the way.
Take that Deepsight weapon to the Relic at the Enclave on Mars. You'll need to extract its essence to unlock the pattern. Once the pattern is unlocked, you can craft your very own Outbreak Perfected! Initially, it'll have basic perks, but that's what the next steps are for – making it even MORE perfect.
This weapon creates SIVA nanite swarms on rapid kills and precision kills.
Outbreak Refined Catalyst Quests
Outbreak is cool, but a masterworked Outbreak with extra perks? Even cooler! The "Outbreak Refined" quests from Ada-1 are how you unlock these powerful alternate traits like Rapid Hit, Rewind Rounds, and Headseeker. These quests essentially guide you through unlocking the catalyst components for your craftable rifle.
After crafting Outbreak, Ada-1 will offer you a series of three weekly quests: "Outbreak Refined I," "Outbreak Refined II," and "Outbreak Refined III". Each quest has a similar structure:
Quest Structure
| Feature | Normal Mode | Legend Mode |
|---|---|---|
| Timer | 45 minutes | 20 minutes 40 seconds |
| Enemy Power | 1810 (0 delta) | Max Effective Power 1815 (-15 delta) |
| Key Modifiers | Arc Threat | Arc Threat, Overcharge: Pulse Rifles, Arach-NO! (Web mines) |
| Parkour Path | Unique, generally less complex | Different, more challenging parkour sections |
| Primary Reward Focus | Outbreak Perfected Weapon Pattern | "Outbreak Refined" Catalyst Perk Progress (Switches & Completion) |
Collect Inert SIVA Clusters
Ada needs more SIVA bits. You'll be sent to defeat Fallen in specific locations to get these to drop. It's usually pretty quick.
- Outbreak Refined I: Defeat Fallen in the Cosmodrome. Lost Sectors like Exodus Garden 2A are efficient, or just general patrol kills work too. You'll need 20 Inert SIVA Clusters.
- Outbreak Refined II: Defeat Fallen in the Exodus Garden 2A Lost Sector in the Cosmodrome.
- Outbreak Refined III: Defeat Fallen in "The Devils' Lair" strike in the Cosmodrome.
Legend Mode Switch Locations
Switch Set 1 (Outbreak Refined I - Unlocks Rapid Hit)
Location: After the Hangar tank fight, drop into the elevator shaft, then crawl through a vent into the Covert Passage area. You'll see some vents below you. Drop down, run to the far wall, and turn around to find an open vent cover (this is usually blocked in Normal Zero Hour). Drop down again into a small darkened room, find another vent with a destructible cover, go through it, and drop a final time onto a walkway above a couple of resilient Fallen Captains. Defeat them.
The Switches: One switch is on a platform next to the lowest walkway. Don't touch it yet. Turn left and jump to some red pipes in a corner to find another switch; activate this one first as it opens a hatch you'll need. Now, jump/glide diagonally across the room to an opening in the far corner. Follow the corridor, up a watery slope, then turn left to spot the hatch you opened. Jump on top of it (don't drop through) and climb the shaft above using ledges. A vent at the top leads to the second main switch. Activating this second switch gives you the "Catalyst Switch Primed" timer (30 seconds). You must then race back to that first switch (by the lowest walkway) and activate it before time runs out. Some Guardians find it easier to activate the "first" switch (lowest walkway) and then race to the "second" (high up) switch. Experiment to see what route feels best for your mobility.
Switch Set 2 (Outbreak Refined II - Unlocks Rewind Rounds)
Location: These are found after the area for the first set of switches, in a long room with alternating platforms and sniper Vandals (often called the "Vandal hallway").
The Switches: It's recommended to clear this room of enemies first. There's a switch at the far end of this room that activates additional platforms, making navigation between the catalyst switches easier. One switch is in the first cubby on the right as you enter this hallway. For the second, you'll need to slide into vents from this area and drop down.
Switch Set 3 (Outbreak Refined III - Unlocks Headseeker)
Location: These are at the very start of the outside jumping puzzle section (after TR3-VR and the vault floor puzzle, when you first step outside onto the Tower's exterior).
The Switches: As you exit the tunnel to the outside, instead of going left along the normal jumping path, turn RIGHT. The first switch is on this far right wall. Then, proceed along the normal jumping puzzle path. After the first couple of horizontal jumps and as you start to ascend, the second switch will be on a wall a few platforms up. Again, activating the higher switch first and then dropping to the lower one might be easier for some.
Complete Zero Hour on Legend
After successfully toggling the switches for that quest step, you then need to complete a full run of Zero Hour on Legend difficulty.
Return to Ada-1
Report back to Ada, and she'll grant you the perk for that "Refined" quest step, which you can then craft onto your Outbreak at the Enclave!
Unlocking Intrinsic Perks
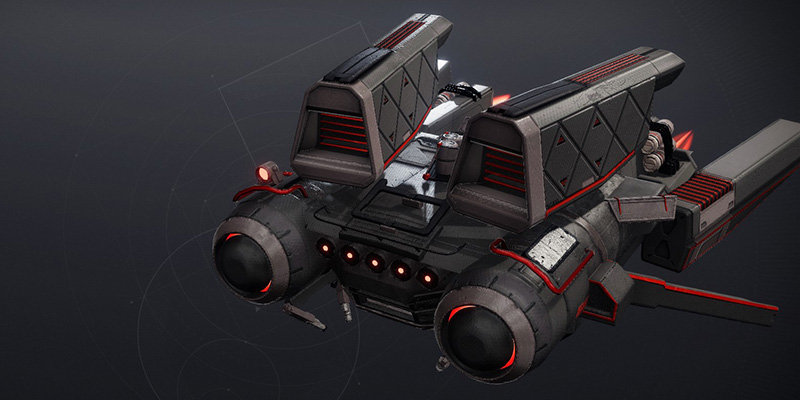
But wait, there's MORE! Outbreak Perfected also has unique intrinsic traits (think different addons to its core SIVA nanite behavior, "Corruption Spreads") that you can unlock. These come from a different set of puzzles inside Zero Hour. The great news is you can do these on Normal mode, which gives you a generous 45-minute timer and less punishing enemies. Completing these also unlocks the cool "Vimana Junker" exotic ship.
The Master Keypad
Three Puzzles, Three Intrinsic Tiers
There are three sets of these intrinsic puzzles, each unlocking a tier of perks and a piece of the ship schematic. Each involves two main steps: activating a console and shooting SIVA symbols in a specific area, then solving a console sequence in the final vault room (the one just before the boss, after the deadly floor puzzle).
SIVA Symbol Target Practice & Vault Consoles
Part 1: Activate Console & Shoot Symbols
In a specific area of the mission for each puzzle set, you'll find an interactable console. Activate it. A small hologram projector nearby will show a SIVA symbol. You need to find that symbol on a nearby panel/object and shoot it with Outbreak Perfected equipped. The hologram will then show the next symbol, and so on for three symbols. If you shoot the correct sequence, you'll see "Sequence Accepted" in your feed. The order of symbols displayed by the projector is randomized, but the locations of the target plates are fixed for each puzzle.
Puzzle Set 1 Access (Brig Room - Tower Plaza)
- Access Console: In the Tower Plaza (second main combat area with the Fallen Brig), after clearing all enemies, find the console on top of the broken ramp where you first entered this plaza.
- Symbol Locations: 1) On the side of the large, central building in this area. 2) On the broadside of a nearby obelisk/pillar that faces the central building. 3) Near the projector console itself, one level below the ledge you're on.
Puzzle Set 2 Access (Covert Passage/Dropship Area)
- Access Console: In the Covert Passage area (where the Normal and Legend parkour paths split, with the dropships below), find the console located behind the specific dropship you typically slide under for the Normal mode parkour (the one on the left). It's within an opening on that far wall.
- Symbol Locations: 1) Under the stairs near the projector nook as you walk out of it and turn left. 2) On the platform above the dropships, under a short staircase (just left of where you drop into this area). 3) On the topmost platform close to the railing, near the same wall as the projector nook.
Puzzle Set 3 Access (TR3-VR Maze Area)
- Access Console: After dropping down into the TR3-VR maze, head to the left about 10 paces from where you land. There will be a nook on the right containing the console.
- Symbol Locations: 1) Just beyond the console nook (away from the dropdown point), on the other side of an arc force field (this is in the bottom-left corner of the maze map). 2) In the bottom-left corner of the bottom-left "box" on the left side of the maze map, facing east. 3) On the leftmost side of the channel that runs horizontally across the center of the maze map, facing south.
Part 2: Cracking the Vault Consoles
After successfully shooting the symbols for a set, proceed through the mission until you reach the final vault room (the one after the deadly floor puzzle, just before Siriks). Inside this large room with multiple consoles, you'll need to activate a sequence of 5-6 consoles in a specific order to unlock the intrinsic perk for that set. There's usually a schematic on a wall that hints at the order, but they can be tricky. Video guides are very helpful here.
Vault Puzzle 1 Solution
- Enter vault room, interact with the first console on the right.
- Go directly across the room to interact with the second console just inside the door on the left.
- Exit the vault room and interact with the exterior console to your right.
- Go back inside the vault room and hit the console to the back-left.
- Use the console across from it on the back-right side.
- Exit the vault room, turn left, and interact with the exterior console that's furthest away.
Vault Puzzle 2 Solution
- Enter the vault and use the console directly in front of you.
- Circle around the central structure to the left and interact with the next console.
- Move to the back of that central structure, then jump up to interact with the elevated console in the back of the room.
- Exit the vault and go across the hall. Interact with the console to the far right.
- Turn to your left and interact with the adjacent console on the other side of the nearby vault.
- Head back into the second vault and use the final console on the right side of the room.
Vault Puzzle 3 Solution
- Start with the terminal closest to the schematic on the wall.
- Turn around and head to the terminal furthest to your left.
- Head into the open vault area and go to the back of the room to the terminal on the right.
- Hit the one to the left of it.
- Turn around and hit the terminal to your right, on the top of the room (requires a small jump).
Pro Tips for Success
- Team Up! (Or Don't, If You're a Legend): Zero Hour is designed with teamwork in mind, especially on Legend. Having friends to call out TR3-VR, solve puzzles, and revive you is invaluable. That said, soloing Zero Hour (even on Legend) is possible and a true mark of skill! But for your first Outbreak, grab a buddy or two. You don't need to solo it, especially when what you're actually chasing after is a juicy Exotic reward.
- Patience, Young SIVA-Wielder: This mission is tough. Bungie themselves said it's "not meant to be easy". The platforming can be tricky, the puzzles confusing at first, and the timer adds pressure. Don't get discouraged by wipes or failed attempts. Every run teaches you something.
- Practice Makes Perfect(ed): Especially for the jumping sections and TR3-VR maze, practice specific segments. You can just relaunch the mission from the Director to try again.
- Use Your Resources (Like This Guide!): If a specific part is stumping you, don't be afraid to pause and quickly search for a video of that section. Sometimes seeing it done makes all the difference.
- Communicate with Your Fireteam: Call out enemy locations, when you're flipping a switch, TR3-VR's position, or if you need help. Good comms can turn a chaotic run into a smooth clear.
- Unique SIVA nanite exotic trait
- Excellent for both PvE and PvP
- Multiple customization options via crafting
- Iconic weapon with great sound design
- Strong in group activities
- Challenging mission to complete
- Requires multiple runs for full catalyst
- Complex puzzle mechanics
- Time-gated weekly quest steps
- Mission can be buggy at times
Conclusion
You did it, Guardian! You braved the ruins of the old Tower, outsmarted a killer robot, solved ancient puzzles, and took down a massive Fallen threat. Outbreak Perfected is yours, and it's ready to unleash some serious SIVA pain.
With its unique nanite swarms that grow in damage based on the number of SIVA nanites attached to them, and all the extra perks you've unlocked, this rifle is a beast in all sorts of content. Go try it out and watch your enemies melt!
"The nanites spread through targets like a plague. They consume. They replicate. They perfect."
Now get out there and show the enemies of humanity what a Guardian armed with perfected SIVA can do!