
Welcome, Agents, to the definitive guide on mastering Breach, Valorant's bionic Swede whose kinetic blasts tear through defenses and pave the way for victory. Breach isn't just an Initiator; he's a force of nature, a walking earthquake designed to aggressively clear ground, disrupt enemy formations, and ensure no fight is ever truly fair. This guide will dissect every facet of his kit, transforming you from a hopeful Breach player into a tactical maestro capable of orchestrating chaos and securing rounds for your team.
Breach's Role: Team-Focused Space Creator
Breach is classified as an Initiator, a role fundamentally centered around setting up the team for success. Initiators challenge contested angles, provide crucial intelligence (directly or indirectly), and support their team's entry into dangerous territory. However, Breach carves a unique niche within this role. Unlike information-centric Initiators like Sova or Fade who rely on reveals, Breach specializes in direct, forceful disruption and debuffs. He doesn't ask enemies where they are; he tells them where they can't be. His entire toolkit – flashes, stuns, damage bursts, and a ground-shattering ultimate – is designed to be fired through walls and terrain, creating advantageous fights and clearing space for teammates, particularly aggressive Duelists, to capitalize.
Any "information" gained comes indirectly – forcing an enemy to move from cover with Aftershock, seeing a flash dodged, or hearing reactions to a stun. This makes Breach a "pure debuffer" initiator. His effectiveness is almost entirely dependent on his team's immediate reaction and ability to follow up on the chaos he creates. A perfectly placed Fault Line or Flashpoint is wasted if the team isn't poised to push. This inherent reliance necessitates either pairing Breach with agents who can gather information (like Sova, Fade, or Skye) or placing significant trust in the entry fragging capabilities of the team's Duelists.
The Power of Through-Wall Utility

Breach's defining characteristic is his unparalleled ability to project force through solid objects. Flashpoint, Aftershock, Fault Line, and Rolling Thunder all ignore conventional barriers, allowing Breach to initiate fights, clear corners, and disrupt defenders from positions of relative safety. This unique mechanic grants immense tactical flexibility but demands a deep understanding of map geometry and common enemy positions. Effective Breach play requires knowing precisely where to aim on one side of a wall to impact the desired location on the other.
Mastering Timing and Coordination: The Core of Breach Play
This synergy is a double-edged sword, as nearly his entire kit carries the significant risk of impairing allies. Flashpoint blinds, Fault Line stuns, Aftershock damages and dazes, and Rolling Thunder stuns and knocks up anyone caught in the blast radius, friend or foe.
The high potential for friendly fire elevates communication from a helpful tactic to an absolute necessity. Clear, concise callouts ("Flashing Haven A Heaven!", "Stunning Split B Main!", "Ulting site!") are non-negotiable. Utilizing the minimap indicators, which show the area of effect and differentiate between safe (yellow) and dangerous (red) zones for Breach himself, is crucial for avoiding self-inflicted harm and minimizing collateral damage. Unlike agents whose misplaced utility might simply be ineffective, a poorly timed Breach ability can single-handedly lose a round by blinding or stunning the entire pushing team. Therefore, mastering Breach isn't just about maximizing impact, but actively mitigating the inherent risks through meticulous coordination and communication.
Breach's Toolkit: Kinetic Disruption
Understanding the precise mechanics and strategic applications of each ability is paramount to unlocking Breach's potential.
| Ability Name | Key | Cost | Max Charges | Cooldown | Key Stats |
|---|---|---|---|---|---|
| Flashpoint | Q | 250 Creds | 2 | N/A | Max Blind: 2s; Windup: 0.5s; Projectile Speed: 2000 |
| Aftershock | C | 200 Creds | 1 | N/A | Damage: 80 HP/tick; Ticks: 2 (Total 160 HP); Delay: ~2.5s; Radius: 300; Dazes players; Damages Utility (100%) |
| Fault Line | E | Free | 1 | 40s | Concussion: 3.5s; Width: 7.5m; Max Length: 55m; Charge Time: 1s; Cast Time: ~1.5s |
| Rolling Thunder | X | 9 Ultimate Orbs | 1 | N/A | Concussion: 6s; Length: 30m; Width: 25m (cone); Knocks Up; Starts 8m ahead; Cost updated in Patch 7.04 |
Flashpoint (Q): Blinding Through Barriers
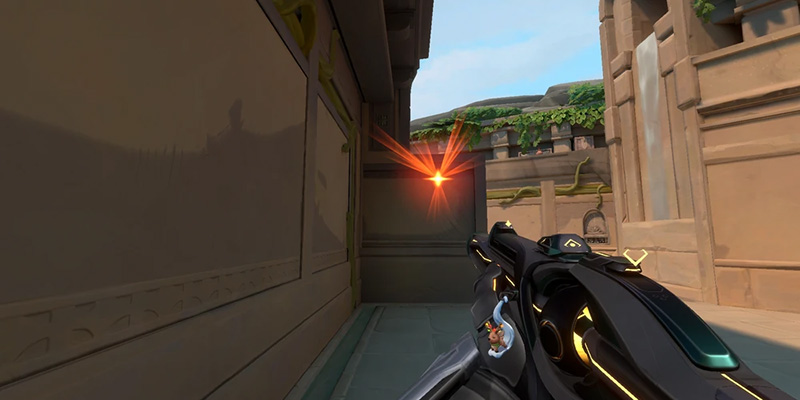
Mechanics: Flashpoint is Breach's primary tool for instant disruption. Activating it equips a charge that must be fired at a wall or surface. It passes through and detonates almost immediately on the other side after a brief 0.5-second windup. Anyone looking at the detonation point, regardless of distance, will be fully blinded for up to 2 seconds. Facing away from the flash significantly reduces the blind duration. With only two charges available per round at 250 credits each, every Flashpoint must be used judiciously. The reduction from three charges in earlier patches underscores the need for careful planning.
Coordination: Effective Flashpoint usage hinges on communication. Announce the target location clearly before firing ("Flashing Generator!") to prevent blinding advancing teammates. The goal is to time the flash perfectly with a teammate's peek or a Duelist's entry. Fast agents like Jett, Neon, and Raze benefit immensely, diving in while defenders are incapacitated. Pairing Flashpoint with information utility, like flashing an enemy revealed by a Sova dart or Skye Trailblazer, is highly effective.
Optimal Angles: Mastery involves understanding common defensive positions and the geometry needed to flash them safely. Instead of peeking, Breach fires through nearby cover. Examples include flashing Haven's A Heaven from A Short, Split's A Ramps from A Main, Bind's Hookah window from B Long, or Ascent's Generator from A Main. Consider flashing high or low depending on the expected enemy position and terrain. Flashing across a sightline (e.g., hitting the A Main wall on Ascent to blind Catwalk) or using unexpected surfaces can catch enemies off guard. A key Bind B Long flash involves hitting the tip of the far corner to blind back site, the site box, and the close cubby simultaneously. Always utilize the minimap indicator to confirm the flash location.
Common Mistakes: Other errors include flashing too early (enemies recover before the push) or too late (teammates push into the flash), wasting limited charges on low-probability plays, becoming predictable by using the same flash spots repeatedly, and flashing immediately after an Aftershock (enemies will likely already be turned away).
The speed of Flashpoint (0.5s windup) compared to Aftershock's lengthy delay (approx. 2.5s) clearly defines their roles. Flashpoint provides immediate, short-duration blindness ideal for initiating entries, while Aftershock serves a different purpose: methodical clearing and area denial. The limited charges demand tactical precision.
Aftershock (C): Clearing Corners with Force
Mechanics: Aftershock equips a fusion charge fired through a wall, initiating a slow-acting burst on the opposite side. After a significant delay (around 2.2-2.5 seconds), it detonates in two powerful ticks, each dealing 80 damage (total 160 HP). This damage is usually enough to kill or severely injure anyone caught directly. It also applies a daze effect. Costing 200 credits with only one charge, Aftershock can also damage enemy deployables like Killjoy's Turret or Cypher's Trapwires, though its damage multiplier against non-players was reduced to 100%. It boasts a surprisingly long projectile range, meaning Breach doesn't need to hug the wall he's firing through, and affects a wide cylindrical area. Enemies targeted will see a distinct warning indicator.
Strategic Uses: Defensively, it's excellent for delaying pushes through narrow chokepoints or preventing attackers from planting the Spike in default locations. It can also destroy or damage key enemy utility. Combining Aftershock with Fault Line or Flashpoint can make escape significantly harder for the target. Its slow detonation acts as a powerful deterrent, zoning enemies away from an area for several crucial seconds.
Wall-Bang Spots (Conceptual): While Aftershock ignores standard wall penetration rules, it's often used on locations frequently targeted by wall-bangs due to their defensive strength. Common targets include: Ascent's A Generator and Hell (fired from A Main), Ascent's B Shed or Switch area (fired from B Main), Haven's C Cubby (fired from C Site), Haven's Garage window area, Split's A Screens or Rafters (fired from A Lobby), Bind's Hookah corner (fired from B Long), and Bind's A Lamps or U-Haul cubby (fired from A Short). Remember to use the minimap indicator for precise aiming. Aftershock can also hit locations directly above or below Breach, like clearing Haven Heaven from below or Hell from above.
Common Mistakes: Hitting teammates is less common than with flashes/stuns but still possible. Crucially, using Aftershock without immediate team follow-up allows the displaced enemy to simply reposition safely. Using the single charge too early or aggressively can leave Breach without a vital tool for post-plant or retake situations. Over-predicting enemy locations instead of reacting to intel is another pitfall.
The strategic value of Aftershock lies in its ability to create predictable movement. While the damage potential was increased, making it more punishing to ignore, its slowness remains its defining feature. It's a tool for calculated displacement, forcing enemies out over several seconds, providing information through their reaction, and potentially funneling them into teammates' crosshairs. Its role has shifted away from being a primary utility destroyer due to damage multiplier changes, reinforcing its focus on manipulating enemy positioning.
Fault Line (E): Ground-Shaking Stuns
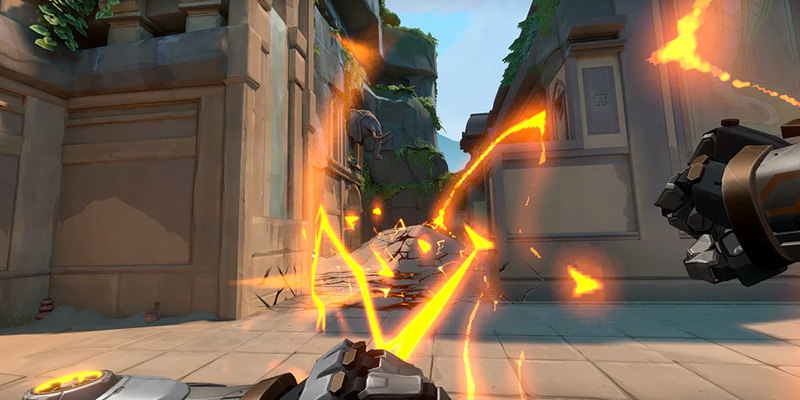
Mechanics: Fault Line is Breach's signature ability, available for free every 40 seconds. Equipping it allows Breach to HOLD FIRE, charging the ability to increase its linear range up to 55 meters. Releasing the fire button initiates the quake. The quake travels through all terrain, including down elevations (but not up), in a 7.5-meter wide path. Anyone caught within the zone (friend or foe, but not Breach himself) is heavily concussed/dazed for 3.5 seconds. This concussion significantly slows movement, reduces fire rate, impairs vision (shaking, covering), and hinders aim recovery. The full charge takes only 1 second, and the detonation occurs roughly 1.5 seconds after release, regardless of charge time.
Coordination: Clear communication ("Stunning B Main!") is vital to avoid concussing teammates. Fault Line is a primary tool for initiating pushes; use it to stun common defensive angles or chokepoints just as the team moves in. The stun creates perfect opportunities for teammates with damaging abilities, like Raze's Paint Shells or Sova's Shock Bolts, to secure kills on impaired targets. Defensively, it's highly effective for stopping or significantly delaying attacker rushes down predictable paths. Always use the minimap indicator for accurate long-range aiming.
Optimal Usage: Use it to force enemies off high ground (like Haven A Heaven) or out from behind cover. It can be used reactively based on sound cues, stunning enemies you hear approaching, or pre-emptively on likely push routes during defense. Combining Fault Line with a follow-up Aftershock into the stunned area increases the chance of dealing significant damage or securing a kill.
Common Mistakes: Concussing teammates remains a critical error. Using it in wide-open spaces allows enemies to easily sidestep the effect. Charging longer than necessary wastes time and makes Breach vulnerable due to slowed movement speed during the charge. Using it without coordinating teammate follow-up negates its purpose. Predictable timing or targeting allows experienced players to anticipate and dodge.
Fault Line stands as Breach's most reliable and frequently available tool for creating immediate combat advantages. Its potent 3.5-second concussion directly impairs enemies, making them vulnerable to coordinated follow-up. While Aftershock focuses on displacement, Fault Line aims for direct debilitation. The 40-second cooldown necessitates tactical usage, reserving it for high-impact moments like site executes, crucial retakes, or stopping committed pushes, rather than speculative angle checks. Its reliability and direct CC make it the cornerstone of Breach's initiating power.
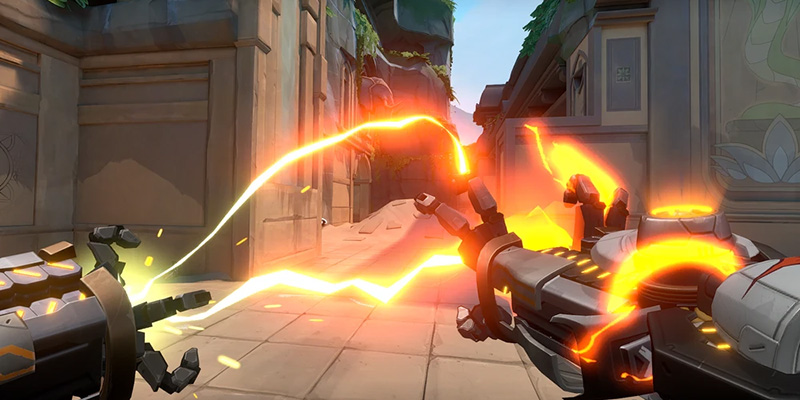
Rolling Thunder (X): The Ultimate Site Take
Mechanics: Rolling Thunder is Breach's ultimate ability, requiring 9 ultimate points (updated cost as per Patch 7.04, superseding older sources citing 7 or 8). Activating it equips a Seismic Charge. Firing unleashes a cascading series of quakes that travel through all terrain in a massive cone shape, extending 30 meters long and 25 meters wide at its end. Anyone caught within the blasts – including allies – is knocked vertically into the air and concussed for a lengthy 6 seconds. The intensity of the knock-up depends on the target's elevation relative to Breach. The ultimate originates 8 meters in front of Breach, meaning it doesn't affect the area immediately around him. The concussion effect also de-scopes players caught in the blast. Updated visuals provide clearer indication of the AoE, and the minimap displays the full cone before firing.
Coordination: The standard tactic involves the team pushing directly behind the advancing shockwaves, capitalizing on enemies who are stunned, displaced, and airborne. It's the ultimate tool for executing onto a heavily defended site or initiating a coordinated retake.
Impact: Rolling Thunder clears vast swathes of terrain, forcing defenders off critical angles and out of cover. Its combination of a long-duration stun and disruptive knock-up makes affected enemies incredibly vulnerable. It's exceptionally effective at breaking entrenched site holds or interrupting Spike defuses. A well-placed ult can easily cover the majority of a standard bomb site.
Common Mistakes: Hitting teammates is a frequent and disastrous error. Using the ultimate without the team being ready or able to push immediately renders it almost useless. Aiming the ult at empty space instead of targeting areas where enemies are likely holding or playing retake from wastes its potential. A critical mistake is forgetting the 8-meter dead zone in front of Breach; teams pushing with the ult must still carefully clear close angles unaffected by the initial blasts. Using it too early, before enemies are committed or close enough to be reliably hit, allows them to simply reposition. Conversely, holding onto the ult for too long searching for the "perfect" multi-kill scenario can waste valuable ult charge cycles.
Rolling Thunder is a game-changer, a round-winning ultimate when used correctly. Its high cost and potential for friendly fire necessitate careful planning and flawless execution. It's not a tool for speculative plays but for decisive moments demanding a coordinated team push. The emphasis should be on ulting players to enable kills, rather than just ulting generic space. Advanced players even listen for the distinct sound of enemies landing after being knocked up to pinpoint their exact locations within the chaos. Its power is directly tied to the team's ability to capitalize on the window it creates.
Mastering the Breach: Attack Execution
Executing onto a defended site is where Breach truly shines, acting as the battering ram that cracks open enemy lines for his team.
Initiating the Push: Coordinated Utility for Entry
Breach's fundamental role on attack is to enable his Duelists to enter contested ground safely and effectively. He is the setup man, ideally positioned second or third in the push, allowing him to focus on utility timing while the entry fragger makes first contact. A typical execute involves a rapid sequence of utility:
- Fault Line (E): Initiate by stunning the primary chokepoint or common first-contact angles to disrupt immediate resistance.
- Flashpoint (Q): Immediately follow the stun by flashing key defensive positions through walls (e.g., site boxes, heaven platforms) as teammates begin to move in.
- Aftershock (C): Use pre-emptively or concurrently to clear notoriously dangerous close corners (like Bind's U-Haul or Split's Screens cubby) that the initial stun/flash might miss, or where defenders might retreat to.
Throughout this process, constant, clear communication regarding ability usage, targets, and push timing is paramount. The success of a Breach-led attack hinges on maintaining tempo. The effects of his flashes and stuns are potent but brief. Therefore, the utility must be deployed sequentially and rapidly, and the team, especially the entry fraggers, must push immediately off the back of it to capitalize before defenders recover. This requires a level of coordination and trust often found lacking in less organized play, highlighting why Breach excels in structured environments.
Synergizing with Duelists for Space Creation
Breach is arguably the best friend an aggressive Duelist could ask for. His kit is tailor-made to facilitate the high-speed entries of agents like Jett, Raze, and Neon. Flashpoint allows them to dash, satchel, or slide onto site while enemies are completely blind. Fault Line and Rolling Thunder turn defenders into stationary or slow-moving targets, easily picked off by fast-moving Duelists securing space. Even Aftershock plays a role, forcing defenders out of safe corners and potentially into the direct path of an incoming Duelist. This synergy requires the Duelist to have faith in Breach's utility and timing, pushing confidently the moment the flash pops or the stun lands.
Breaking Common Defensive Setups
Breach possesses the tools to dismantle typical defensive fortifications. Aftershock is invaluable for destroying or damaging Sentinel utility from safety, clearing Killjoy Turrets, Nanoswarms, or Lockdown devices, as well as Cypher Tripwires and Cages. Although Aftershock no longer instantly destroys a Killjoy ultimate due to health and damage adjustments, it can still contribute significantly to its destruction. Fault Line and Rolling Thunder can stun enemies playing behind Sage's Barrier Orb or Viper's Toxic Screen/Poison Cloud, disrupting their hold. Flashpoint is particularly effective against Operator players holding predictable long angles, blinding them even if they are partially obscured by smokes or positioned in off-angles. Overwhelming complex setups often requires coordinating Breach's disruption with utility from other teammates, such as combining a Breach stun with a Sova Recon Bolt reveal and a Raze Paint Shells for maximum effect.
Illustrative Map-Specific Execute Patterns
- Ascent A Site: From A Main, Fault Line the main entrance choke. Immediately Flashpoint through the left wall towards Generator and the right wall towards Heaven. Use Aftershock preemptively on the close 'Hell' cubby under Heaven or the Generator corner. If facing heavy resistance, Rolling Thunder can be used from A Main towards the site, clearing Generator, Heaven base, and default plant spots.
- Split B Site: From B Garage/Main, Fault Line the main entrance. Flashpoint through the main wall targeting B Heaven and the back site area. Use Aftershock to clear the close 'Hell' corner to the left upon entry. Rolling Thunder is effective from Garage or deep B Main, covering Heaven, site, and potentially CT entrance. A coordinated flash push involving teammates can be very effective here.
- Haven C Site: Pushing from C Long, Fault Line the main site entrance. Flashpoint through the large wall targeting the Platform (Plat) and back site areas. Use Aftershock on the common default plant corner behind the central box structure. Rolling Thunder from C Long covers the entire site effectively.
- Bind B Site: From B Long or Garden, Fault Line the Hookah entrance or the site choke from Long. Flashpoint through the Hookah wall (from Garden) or the B Long wall (targeting site/Elbow). Use Aftershock to clear the close Cubby near Hookah entrance or the default plant spot behind the site structure. Rolling Thunder can be deployed from B Long or Garden to cover site, Elbow, and potentially CT.
Holding the Line: Defensive Setups & Retakes
On defense, Breach transitions from a proactive initiator to a reactive disruptor, using his kit to stall pushes, punish aggression, and enable powerful retakes.
Disrupting Attacker Pushes: Utility for Stalling
Breach excels at throwing a wrench into attacker plans. His primary defensive goal is often to delay pushes long enough for teammates to rotate. This is achieved through reactive utility usage based on sound cues and map information:
- Fault Line (E): Upon hearing footsteps indicating a push down a specific lane (like Ascent A Main, Bind Hookah, Haven C Long), firing Fault Line down that chokepoint can halt the push entirely or force attackers to wait, disrupting their timing.
- Flashpoint (Q): When attackers are close to entering a site or peeking an angle, a well-timed Flashpoint fired through a nearby wall can blind the entry fraggers, creating opportunities for safe defensive peeks or forcing the attackers to pause and regroup.
- Aftershock (C): This ability can deny crucial space during a push. Firing it into tight entryways (like Haven Garage window) or common initial plant spots forces attackers to either wait or push through into potentially disadvantageous positions. It can also be used early to destroy scouting utility like Sova Drones or Skye dogs attempting to gather information.
Breach players should generally play safer positions on defense initially, preserving their valuable utility for the moment the attackers commit to a push or for a potential retake scenario.
Coordinated Retake Strategies
Breach is arguably one of the strongest agents in retake situations. His ability to disrupt entrenched attackers from safety is invaluable.
- Rolling Thunder (X): This is the ultimate retake tool. Firing it onto the captured site can stun and displace multiple defenders, clearing common post-plant positions and making it significantly safer for the defending team to push back in. The retaking team should push in coordination with the ultimate's waves.
- Fault Line (E): Use Fault Line to stun defenders playing common post-plant angles, such as behind site boxes, in corners, or known lineup spots.
- Flashpoint (Q): Flash through site walls to blind defenders holding angles against the retaking team. This can cover angles that teammates pushing from different directions might be exposed to.
- Aftershock (C): Ideal for clearing deep corners where defenders might be hiding during the retake, or crucially, for forcing a defender off the Spike during a defuse attempt. Listening carefully for the defuse sound cue is key.
Post-Plant Denial Tactics
Even if not retaking the site entirely, Breach can make defusing the Spike a nightmare for attackers.
- Aftershock (C): The most common tactic is to fire Aftershock onto the default plant spot (or wherever the Spike is planted) immediately upon hearing the defuse sound. The delay often aligns well with the defuse timer, forcing the defuser off or killing them if they stick it. Specific lineups exist for common plant spots.
- Fault Line (E): Firing Fault Line across the bomb can stun the defuser, interrupting the defuse and buying valuable time.
- Rolling Thunder (X): If available, Rolling Thunder can deny a huge area around the Spike for its duration, making a defuse nearly impossible while the quakes are active. This pairs exceptionally well with damaging area-denial ultimates or abilities from teammates, like Brimstone's Orbital Strike or Viper's Pit/Snakebite.
Illustrative Map-Specific Defensive Holds
- Ascent B Site: Anchor near Market or back site. Use Fault Line/Flashpoint reactively down B Main on a push. Aftershock can clear the switch cubby in B Shed if attackers take control. For retake, Rolling Thunder from CT spawn or Market can clear the entire site.
- Split A Site: Play back site near Screens or in Heaven. React to A Main pushes with Fault Line/Flashpoint through the wall. Aftershock can clear the corner near Ramps or Screens. Retake using Rolling Thunder from Heaven or Spawn aiming towards site.
- Haven A Site: Defend from A Heaven or back site. Use Fault Line down A Long or A Short based on sound/info. Flash through walls when attackers push close. Aftershock can clear Hell or default plant spots. Retake initiated with Rolling Thunder from CT covers most common post-plant positions.
- Bind B Site: Hold from CT, Elbow, or back site. Use Fault Line/Flashpoint reactively into Hookah pushes. Aftershock can clear the Hookah window corner or default plant behind the site structure. Retake effectively with Rolling Thunder from CT or Garden.
Synergies and Teamplay: Amplifying Impact
Breach thrives on teamwork. Understanding how his abilities interact with other agents is crucial for maximizing his impact and building effective team compositions.
| Agent Role | Specific Agents | Key Synergy Interaction | Snippet Examples |
|---|---|---|---|
| Duelist | Jett, Raze, Neon | Flash/Stun enables safe/effective dash/satchel/slide entries; Stun sets up easy kills for fast movers. | Raze |
| Fault Line/Rolling Thunder stun + Paint Shells/Showstopper combo is extremely lethal. | |||
| Controller | Omen, Brimstone, Viper | Smokes enable safer Breach utility usage; Breach can flash through friendly smokes; Post-plant denial combos (Ult + Ult/Molly). | Omen |
| Paranoia/Shrouded Step can follow up Breach's CC. | |||
| Info Initiator | Sova, Skye, Fade | Info (Recon, Drone, Haunt, Dog) enables precise Breach utility targeting; Compensates for Breach's lack of info. | Skye |
| Additional flashes overwhelm defenders; Dog clears space; Heal provides sustain. | |||
| KAY/O | Suppression disables counter-utility during executes; Additional flashes add pressure. |
Pairing with Duelists (Jett, Raze, Neon, Phoenix etc.)
This is Breach's most natural synergy. His entire kit is designed to create windows for aggressive entries. Flashpoint allows Duelists like Jett to Dash, Raze to Satchel, or Neon to Slide onto site while key angles are blinded, drastically reducing entry risk. Fault Line / Rolling Thunder make enemies easy targets for fast-moving Duelists who are taking space. The combination of a Breach stun followed by Raze's Paint Shells or Showstopper is particularly devastating and can often guarantee kills on stationary targets.
Positioning: Breach typically follows the Duelist onto site (playing second or third man in), ready to trade kills or use follow-up utility based on the Duelist's entry and calls.
Working with Controllers (Omen, Brimstone, Viper, Astra etc.)
Controllers provide the necessary cover and area denial that complements Breach's disruptive abilities.
Smokes: Controller smokes block off long sightlines or isolate sections of a site, allowing Breach to use his abilities from safer positions without being exposed. Furthermore, Breach can effectively flash through friendly smokes, catching enemies who might be pushing through them or holding angles within the smoke.
Specific Synergies: Omen's Paranoia blind can layer with Breach's flashes for maximum disorientation, and Omen can use Shrouded Step to quickly capitalize on stunned enemies. Brimstone's Stim Beacon can further accelerate a Breach-initiated push. Viper's walls can slice sites, allowing Breach to focus his utility on clearing the remaining sections.
Complementing Info Initiators (Sova, Skye, Fade, KAY/O)
Since Breach lacks any inherent information-gathering tools, pairing him with an Initiator who does provide intel is often crucial for maximizing his effectiveness, especially in coordinated play.
- Targeted Utility: Information from Sova's Recon Bolt or Owl Drone, Fade's Haunt, or Skye's Trailblazer allows Breach to use his Fault Line, Flashpoint, or Aftershock with much greater precision, targeting known enemy locations instead of relying solely on prediction.
- Utility Overload: Pairing Breach with Skye or KAY/O creates flash-heavy compositions that can overwhelm defenders' ability to react. Skye's Trailblazer (dog) can clear close angles before Breach commits his utility, and her Regrowth provides healing sustain that Breach lacks.
- Enabling Executes: KAY/O's ZERO/POINT suppression can disable defensive utility (like Sentinel traps or Sage slows) that might otherwise hinder a Breach-led execute, clearing the path for his stuns and flashes to have maximum impact.
Facing Resistance: Counters and Counterplay
Even the most seismic force meets resistance. Understanding how enemies will try to counter Breach is key to adapting and maintaining effectiveness.
Identifying Common Breach Counters (Agents & Tactics)
Breach's power comes with inherent vulnerabilities that smart opponents will seek to exploit.
Countering Agents:
- High Mobility (Jett, Raze, Neon, Chamber TP): Agents with rapid movement abilities can potentially dash, satchel, slide, or teleport out of Fault Line or Rolling Thunder's area of effect before the stun fully registers, or quickly reposition after being flashed.
- KAY/O: This is arguably Breach's hardest counter. KAY/O's ZERO/POINT knife and NULL/CMD ultimate apply Suppression, completely disabling Breach's ability to use any of his utility. A suppressed Breach loses his entire initiating capability.
- Defensive Sentinels (Killjoy, Cypher): Well-placed turrets, traps, and cages can slow down Breach-led pushes, forcing him or his team to expend utility just to clear the path. Sentinel utility also provides information that can help defenders anticipate Breach's location and intentions.
- Repositioning/Invulnerability (Yoru TP/Ult, Reyna Dismiss): Agents who can quickly become intangible or teleport away might avoid follow-up damage even if initially caught by Breach's utility.
Countering Tactics:
- Playing Long Ranges / Open Spaces: Breach excels in confined spaces and corridors where his linear stuns and through-wall abilities are most effective. Playing further back in more open areas makes dodging his Fault Line easier and reduces the immediate impact of his flashes. He is generally considered less effective on larger maps with wide-open sightlines.
- Aggressive Peeking / Timing Exploitation: Breach is vulnerable during his ability animations, particularly the Fault Line charge-up which slows his movement. Aggressive defenders might peek to catch him mid-animation.
- Utility Denial: Using Controller smokes or walls (like Sage's Barrier Orb) to block Breach's line of sight to the walls he needs for Flashpoint and Aftershock can neutralize those abilities. Destroying info utility from Sova or Fade prevents Breach from having precise targets.
- Splitting Pressure: Attacking from multiple points simultaneously can force Breach to choose where to deploy his limited utility, potentially leaving another angle vulnerable.
Strategies to Overcome Counter-Plays
A skilled Breach player anticipates these counters and adapts accordingly.
| Counter Type | Adaptation Strategy |
|---|---|
| Against Mobility | Vary the timing and location of utility to be less predictable. Layer CC by combining stuns with flashes, making dodging significantly harder. Use Aftershock to funnel escaping enemies into predictable pathways for teammates to cover. Communicate potential escape routes for coordinated lockdown. |
| Against KAY/O | Try to bait out the ZERO/POINT knife before committing important utility like Rolling Thunder. Play more spread out with the team to minimize the number of players caught in NULL/CMD suppression. If suppressed, rely on gunplay and positioning until abilities return. |
| Against Sentinels | Coordinate utility usage with teammates to efficiently destroy setups (e.g., Breach Aftershocks a Killjoy swarm while a teammate shoots the turret). Utilize info-gathering teammates to pinpoint utility locations before pushing. Employ fake pushes to force defenders to reveal or expend their utility prematurely. |
| Against Repositioning Agents | Capitalize immediately on utility hits. The moment an enemy is flashed or stunned, the team needs to push aggressively to deny Yoru or Reyna the time needed to teleport or dismiss safely. Clear communication ensures multiple players can target the vulnerable enemy. |
| Against Long Angles/Open Spaces | Coordinate closely with Controllers to secure smokes that block off long sightlines, allowing the team to push into closer ranges where Breach excels. Use Fault Line and Rolling Thunder from unexpected angles or through deeper terrain to cover open ground. Advance methodically, clearing angles carefully rather than rushing into open space. |
| Against Anticipation | Unpredictability is key. Mix up the timing of pushes and utility usage. Learn and utilize less common, more creative flash and stun angles. Condition opponents by repeating a play, then drastically switching tactics. Use fakes – make noise and use an Aftershock on one site to draw attention, then quickly rotate and execute on the other. |
| Against Aggression | Leverage Breach's ability to use utility from safety behind cover. Ensure teammates are positioned to trade effectively if Breach is pushed during an ability animation. Use Flashpoint defensively to punish overly aggressive peeks. |
| Against Utility Denial | Communicate clearly with Controllers about desired smoke placements that still allow Breach access to key walls. Push faster and more decisively to prevent defenders from establishing complex denial setups. |
Countering Breach often involves exploiting his reliance on specific map geometry, his noticeable ability animations, or his lack of innate information. Overcoming these counters demands more than just mechanical skill; it requires deep map knowledge, strategic unpredictability, robust team communication, and the ability to adapt utility usage based on the specific threats presented by the enemy team composition and tactics. Mastery lies not just in executing set plays, but in the dynamic interplay of prediction, reaction, and coordination.
Breach Bootcamp: Skill Progression
Mastering Breach is a journey. Players should focus on different aspects of his kit and playstyle depending on their experience level.
Beginner Focus: Foundational Utility Use, Basic Coordination, Avoiding Team Damage
New Breach players should prioritize understanding the fundamentals and, critically, avoiding detrimental mistakes.
- Utility Basics: First, learn the core function of each ability: Flashpoint blinds, Aftershock damages and clears corners, Fault Line stuns, and Rolling Thunder delivers a massive stun and knock-up. Understand the credit costs (Q: 250, C: 200) and ultimate points (X: 9), as well as charge limitations (Q: 2, C: 1, E: 1/40s). Practice firing Q and C through walls in the practice range to get a feel for the mechanic. Pay close attention to the minimap indicators when aiming E and X.
- Basic Coordination: Try to time these abilities just before teammates are expected to peek or push into the affected area.
- Avoiding Team Damage: Initially, the highest priority should be not hitting your teammates. Before using Q, E, or especially X, quickly check the minimap for friendly icons within the ability's potential area of effect. Learn the approximate range and spread of each ability to make safer choices. A missed opportunity is far better than a team wipe caused by friendly fire.
- Simple Tactics: Start with straightforward applications. Use Aftershock on obvious, common hiding spots (like the corner behind the box, or a tight cubby) before exposing yourself to peek. Use Fault Line down straight hallways or chokepoints where enemies are likely to push or hold. Use Flashpoint through a wall before entering a room or clearing a significant angle. On defense, focus on using utility reactively – hear footsteps approaching a choke? Use Fault Line or Flashpoint to disrupt them.
The key takeaway for beginners is to build a solid foundation: learn the tools, communicate intentions clearly, and prioritize team safety. Simple, reliable utility usage is far more valuable than attempting complex, risky plays early on.
Advanced Tactics: Precision Timing, Complex Combos, Map-Specific Nuances, Adaptive Play

Experienced players should focus on refining their execution, expanding their tactical repertoire, and developing strategic adaptability.
- Precision Timing: This involves mastering the exact moment to deploy utility for maximum effect. Time flashes and stuns to pop precisely as a teammate peeks or a Duelist initiates their entry ability (Jett Dash, Raze Satchel). Understand the duration of blinds/stuns and factor in enemy reaction times to create optimal windows. Defensively, time stuns or Aftershocks to hit pushes at their most committed and vulnerable point, not too early or too late.
- Complex Combos: Layer Breach's abilities for synergistic effects. A common combo is Fault Line immediately followed by Aftershock into the same area, making the damage much harder to escape. Using Aftershock can sometimes mask the audio or visual cue of a subsequent Flashpoint. After a Rolling Thunder, use Fault Line or Aftershock to clear specific corners known to be outside the ult's initial impact zone. Coordinate multi-agent utility stacks, like a Breach stun setting up a Raze nade while a Sova dart provides vision.
- Map-Specific Nuances: This requires deep map knowledge. Learn precise, often pixel-perfect, lineups for Flashpoint, Fault Line, and Aftershock to hit critical angles consistently across all maps in the pool. Understand how elevation changes affect Fault Line and Rolling Thunder trajectories. Know exactly which walls and structures can be utilized for through-wall abilities and the common angles associated with them. Leverage verticality where possible, such as using Aftershock on enemies above or below.
- Adaptive Play: Move beyond set plays. Read the enemy team's tendencies, positioning, and utility usage throughout the match and adapt your own utility deployment accordingly. Use utility for misdirection and fakes, such as Aftershocking one site to draw rotations before executing elsewhere. Adjust your level of aggression based on the round's context, economy, and team requirements. Understand when it's crucial to save utility (like Rolling Thunder for a retake) versus using it proactively. Take initiative with strategic calls that leverage Breach's strengths. An advanced technique involves listening intently for the sound of enemies landing after being knocked up by Rolling Thunder to pinpoint their exact location amidst the chaos.
Conclusion: Becoming the Unstoppable Force
Breach stands as a testament to the power of coordinated aggression in Valorant. He is the ultimate team-centric initiator, shattering defensive lines and creating opportunities through sheer kinetic force. His unique ability to project stuns, flashes, and concussive blasts through any terrain redefines how space can be taken and controlled.
Mastering Breach is a demanding but rewarding endeavor. It requires more than just aiming skill; it demands practice to learn the lineups and timings, constant, crystal-clear communication to synchronize with teammates and avoid disaster, and intimate map mastery to exploit every angle and surface. Players must embrace experimentation, prioritize teamwork above individual plays, and understand that Breach's impact is often measured in the success of his team rather than his personal kill count. Managing expectations, especially when playing without a coordinated team, is also crucial for maintaining focus.
Now go forth, Agent, and let the ground tremble.