
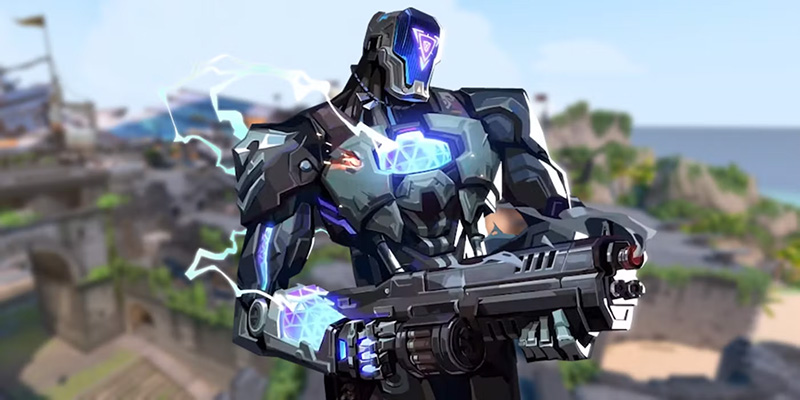
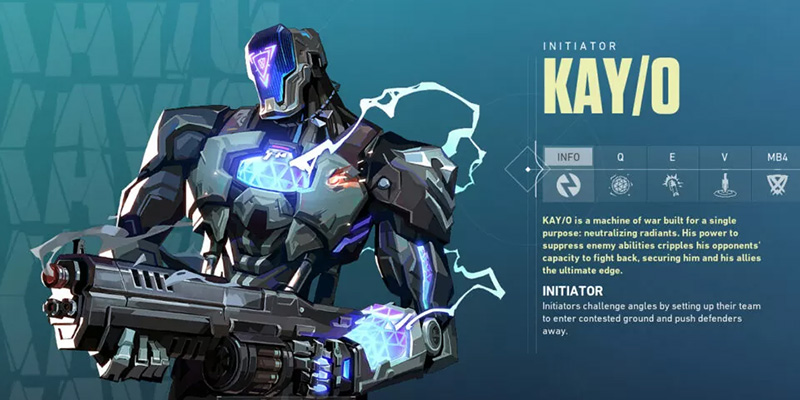
In the tactical landscape of Valorant, agents wield abilities that define engagements, control space, and secure objectives. Among them stands KAY/O, a unique Initiator designed not just to start fights, but to fundamentally alter their nature. Described as a "machine of war built for a single purpose: neutralizing radiants", KAY/O possesses the unparalleled power to suppress enemy abilities, dismantling his opponents' capacity to fight back and forcing confrontations onto the primal grounds of pure gunplay. This capability makes mastering KAY/O essential for teams looking to gain the ultimate edge by disrupting established strategies and countering ability-reliant agents.
This report delves into the intricacies of KAY/O mastery, providing a comprehensive analysis for dedicated players seeking to elevate their strategic understanding and execution. It begins by deconstructing KAY/O's complete arsenal, offering detailed insights into each ability's mechanics and tactical applications. The core focus then shifts to his defining feature: suppression. We will explore the nuances of the ZERO/point knife and the NULL/cmd ultimate, examining their strategic deployment, precise interaction mechanics with other agent abilities, and methods for maximizing their impact. Following this, the report investigates KAY/O's crucial role within team compositions, analyzing optimal agent pairings, map-specific strategies, and essential communication protocols for seamless synergy. Finally, advanced techniques for elevating individual play and common pitfalls to avoid will be addressed, equipping players with the knowledge required for true KAY/O mastery.
KAY/O's introduction was a deliberate move to counterbalance a meta potentially becoming overly reliant on ability usage, aiming to shift gameplay back towards gun skill and mechanics in specific scenarios. His presence demands adaptation, particularly from agents heavily dependent on their abilities for impact or escape, and Sentinels whose setups form the backbone of site defense. Understanding how to wield his suppressive power effectively is key to unlocking his potential as a game-changing Initiator.
Section 1: Deconstructing the War Machine: KAY/O's Abilities
A thorough understanding of KAY/O's complete toolkit is foundational to mastering his role. While suppression is his defining characteristic, his flashes and damaging fragment are integral components that contribute to his versatility as an Initiator capable of information gathering, entry support, and area denial.
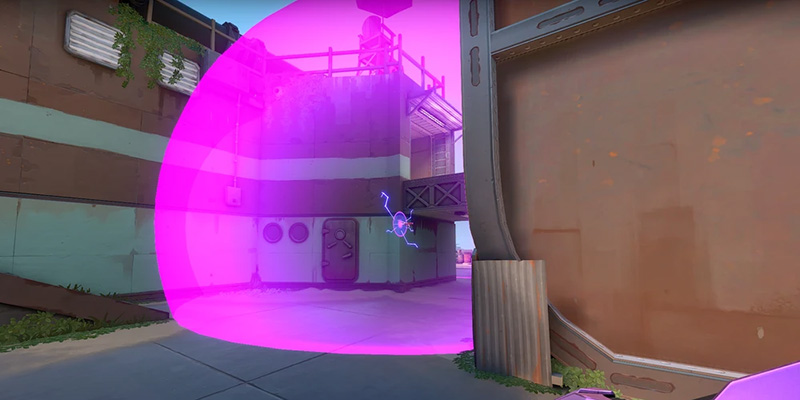
1.1 FRAG/ment (C Ability)
Mechanics: KAY/O equips an explosive fragment grenade. Upon throwing, this fragment sticks uniquely to the floor, not walls or ceilings. Once adhered, it detonates multiple times – specifically four ticks – over its 4-second duration. Each explosion deals significant, near-lethal damage within its 8-meter diameter, with damage concentrated at the center. A critical change implemented in Patch 5.01 allows the damage to apply even without direct line of sight to the fragment itself, making it more effective at clearing hidden positions. The ability costs 200 Credits and KAY/O can hold a maximum of one charge. Patch 5.12 adjusted its interaction with non-player entities, reducing its damage multiplier against deployable utility from 250% to 100%, though it remains capable of damaging many abilities. A visual critical danger indicator was added in Patch 6.07 for clarity.
Usage Context: FRAG/ment serves primarily as a potent zoning and area denial tool, comparable in function to Brimstone's Incendiary or Killjoy's Nanoswarm. It excels in post-plant situations, forcing defusers off the Spike or delaying them significantly. It's also highly effective for clearing tight corners, flushing enemies out from behind cover, or stopping aggressive pushes through chokepoints. While its damage against utility was reduced, it can still be used to destroy or damage enemy deployables like Killjoy's Nanoswarm or Cypher's Trapwire. Players should be mindful of the brief wind-up period between pulses, as aggressive opponents might attempt to push through during these intervals.
1.2 FLASH/drive (Q Ability)
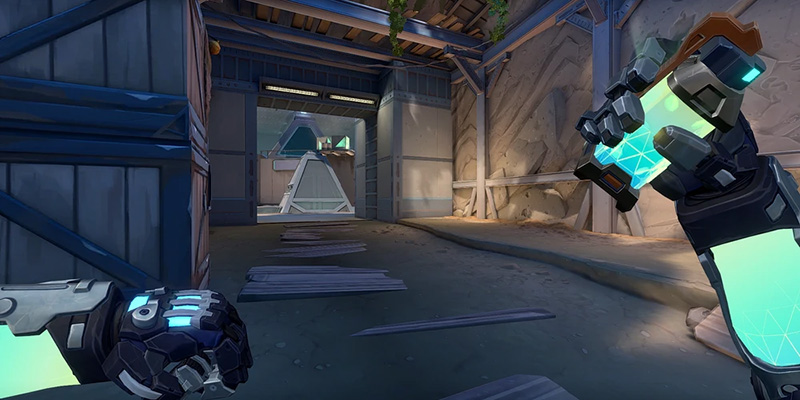
Mechanics: KAY/O equips a standard flash grenade. When thrown, it explodes after a fuse timer, blinding any player within line of sight. FLASH/drive features two distinct throwing modes:
- Overhand (Left Mouse Button - LMB): This throw travels a significant distance and originally had a 1.6-second fuse. Patch 5.07 adjusted the maximum blind duration for this throw to 2.25 seconds. It's well-suited for long-range engagements, bouncing off walls to flash deep angles or supporting teammate pushes from afar.
- Underhand (Right Mouse Button - RMB): This is a lobbed throw with a shorter travel distance. It initially had a 1-second fuse, exploding quickly after being thrown. Patch 5.07 decreased its maximum blind duration to 1.25 seconds. The quick detonation makes it ideal for self-executed pop-flashes around corners, enabling aggressive peeks, or supporting rapid site rushes.
Usage Context: FLASH/drive is a cornerstone of KAY/O's kit, frequently cited as one of the best flash abilities in the game, particularly for self-setup plays. It is essential for initiating engagements, blinding defenders during site executes, enabling safer peeks around corners, disrupting enemy pushes, and facilitating site retakes.
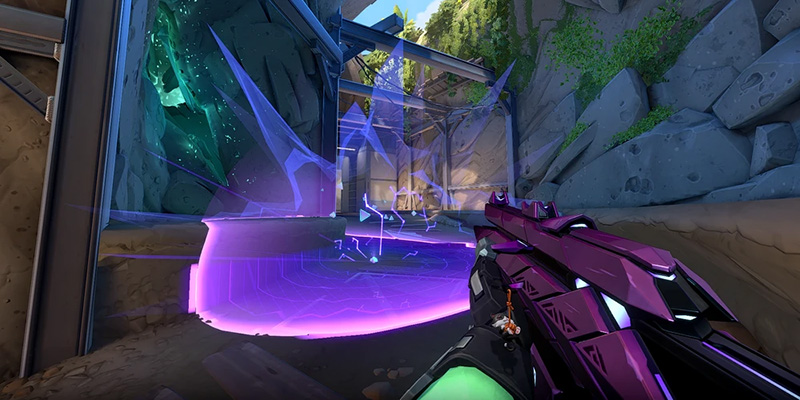
1.3 ZERO/point (E Ability - Signature)
Mechanics: KAY/O's signature ability is a throwable suppression blade, often referred to as his "knife". It functions like a projectile, sticking to the very first surface it impacts, whether it be a wall, floor, ceiling, or even an enemy player. After sticking, the blade winds up briefly before detonating, releasing an energy pulse that suppresses any enemy agent caught within its large 30-meter diameter (15m radius). The suppression effect lasts for 8 seconds. Being a signature ability, ZERO/point is free and recharges automatically over 40 seconds. A crucial aspect is its ability to function through walls and terrain; enemies do not need line of sight to the knife to be suppressed if they are within the radius. Furthermore, upon detonation, the ability provides vital intelligence: KAY/O and his allies are informed of which specific agents were suppressed, and a voiceover indicates how many enemies were hit. Initially fragile with only 1 HP, its health was significantly increased to 20 HP in Patch 5.12, making it more resilient to stray bullets or quick reactions. Its hitbox was also improved for easier destruction if targeted directly. It can damage Fade's Prowler and is immune to damage from allied sources.
Usage Context: ZERO/point is KAY/O's primary information-gathering tool. It's invaluable for scouting enemy presence at the start of rounds, setting up site executes or retakes by disabling defender utility, and specifically countering Sentinel setups (like those of Killjoy or Cypher). It can also prevent enemies from using movement abilities like Jett's dash or Chamber's teleport for escapes and counter aggressive pushes that rely on abilities like flashes.
1.4 NULL/cmd (X Ability - Ultimate)
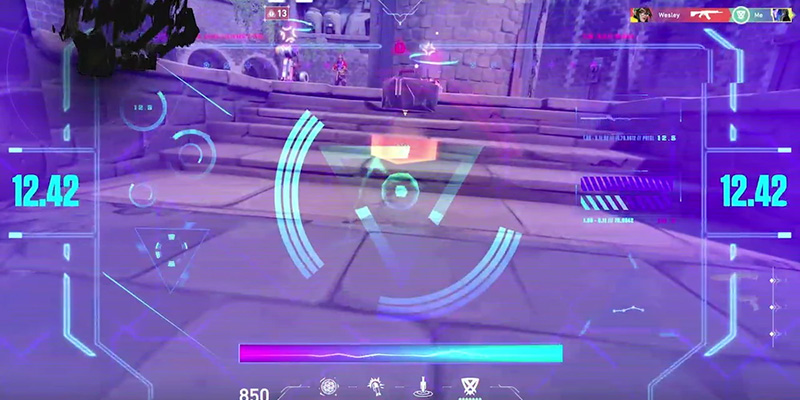
Mechanics: KAY/O's ultimate ability, NULL/cmd, is activated instantly, overloading him with polarized radianite energy. This overload manifests in several ways: large energy pulses emanate periodically from KAY/O's location, suppressing any enemies hit for 4 seconds per pulse. The ultimate lasts for 15 seconds, during which five pulses are emitted (one every 3 seconds). These pulses have a massive reach of 42 meters, comparable to Killjoy's Lockdown ultimate, and penetrate through walls. While overloaded, KAY/O gains a Combat Stim effect, significantly increasing his rate of fire, reload speed, and weapon recovery speed. Perhaps the most unique aspect is the downed state: if KAY/O receives lethal damage while NULL/cmd is active, he isn't killed immediately. Instead, he enters a destabilized state, kneeling on the ground for 15 seconds. In this state, he possesses a substantial 850 HP and retains vision, allowing him to provide intel. Teammates can approach the downed KAY/O and interact with him for 3 seconds to stabilize his core and revive him. The 15-second bleed-out timer pauses as soon as an ally begins the revive interaction. Upon revival, KAY/O returns with most of his health but no shields. Initially, the suppression pulses stopped when KAY/O was downed, but Patch 3.06 changed this so pulses continue even in the destabilized state. The ultimate originally cost 7 points, but this was increased to 8 points in Patch 5.12, reflecting its significant impact. Other quality-of-life changes include ensuring the rate of fire buff is consistent and making the downed portrait visible to all players. Notably, KAY/O cannot be healed by abilities like Sage's Healing Orb while downed.
Usage Context: NULL/cmd is a premier tool for initiating site executes, allowing KAY/O and his team to push onto a site while defenders' abilities are suppressed. It's equally powerful for initiating site retakes, disabling post-plant setups and suppressing defenders. It can also be used defensively during post-plant situations to prevent defuses and disrupt retake attempts. Its suppression is effective for countering enemy ultimates if timed correctly. The combination of combat stim and the potential for revival encourages aggressive plays, allowing KAY/O to lead the charge and create opportunities for trades.
Overall Kit Cost
KAY/O's full purchasable utility loadout (two FLASH/drive at 250 credits each, one FRAG/ment at 200 credits) totals 700 credits. This places him in the mid-to-high tier regarding economic investment compared to other agents, reflecting the significant impact his abilities can have when used effectively.
Section 2: The Art of Suppression: ZERO/point Mastery
KAY/O's signature ability, ZERO/point, is more than just an information tool; it's the cornerstone of his suppression identity. Mastering its deployment, timing, and understanding its precise interactions is crucial for unlocking KAY/O's potential to disrupt enemy strategies and control engagements.
2.1 Core Mechanics Revisited
The effectiveness of ZERO/point stems from several key mechanical attributes:
- Radius & Line of Sight Penetration: The knife's substantial 15-meter suppression radius combined with its ability to affect enemies through walls is its defining feature. This allows KAY/O to suppress common defensive positions, clear angles, and gather intel without requiring direct visual confirmation or exposing himself to immediate danger. Players can target likely enemy locations behind cover or within structures, forcing reactions or disabling key utility before a push.
- Duration & Cooldown: The 8-second suppression duration provides a significant window where enemies cannot use their abilities. This timeframe is often long enough to execute a site push, secure a kill on a vulnerable target, or force a repositioning. The 40-second cooldown means the ability is available multiple times per half, encouraging frequent but calculated usage rather than hoarding it for perfect moments.
- Survivability: Upgraded to 20 HP, the knife is no longer trivially destroyed by stray shots. It requires a conscious effort from the enemy to target and eliminate it, especially before it activates. The improved hitbox makes it slightly easier to shoot if directly targeted, balancing its increased health. Clever placement remains key to ensuring activation.
- Intelligence Gathering: Beyond suppression, the intel provided is invaluable. Knowing how many agents are suppressed gives an immediate sense of enemy presence in the scanned area. Crucially, knowing which specific agents are suppressed allows the team to tailor their strategy, knowing if a key Sentinel, Controller, or Duelist has been temporarily neutralized.
2.2 Strategic Applications
ZERO/point's versatility allows for numerous strategic applications across different phases of a round:
- Early Round Intelligence: Deploying the knife at the beginning of a round is a standard tactic to scout for aggressive pushes, determine enemy presence in key areas like mid or main chokepoints, or check common Operator angles. To maintain effectiveness, players should vary the timing (e.g., immediate throw vs. waiting 5-10 seconds) and the specific location targeted each round to avoid predictability.
- Execute & Retake Setup: Throwing ZERO/point onto a bombsite immediately before the team commits to an execute or retake is essential. This action serves multiple purposes: it provides a headcount of defenders on site, reveals their identities (allowing prioritization of targets), and, most importantly, disables their defensive abilities (especially crucial against Sentinels like Killjoy or Cypher) during the critical entry window.
- Countering Setups & Abilities: ZERO/point is a direct counter to agents relying heavily on deployable utility or specific abilities. It should be actively used to disable Sentinel traps, turrets, and cameras before entering their effective range. It's also highly effective at preventing agents like Jett or Chamber from using their movement abilities to escape engagements. Furthermore, it can shut down aggressive enemy pushes that depend on coordinated ability usage, such as multi-flash entries. Keeping track of the enemy's ultimate economy allows KAY/O to use ZERO/point preemptively or reactively to nullify timed ultimates like Raze's Showstopper or Neon's Overdrive by forcing their timers to expire during the suppression window.
- Aggressive Information Plays: The knife isn't solely for passive information. It can be used proactively to enable aggressive maneuvers. Suppressing an enemy holding a specific angle allows KAY/O or a teammate to push that angle with a reduced threat of counter-utility, turning the intel directly into an offensive advantage.
2.3 Placement Tactics & Lineups
Maximizing ZERO/point's impact requires careful consideration of its placement:
- Survivability Focus: The primary goal when placing the knife is to ensure it activates before being destroyed. This often involves throwing it onto high surfaces, behind cover relative to the enemy's likely position, onto rooftops, or utilizing specific map geometry that makes it difficult to target quickly. Throwing it onto the back side of a box an enemy is hiding behind, or onto a wall just outside a main choke point rather than directly into it, can make it effectively unbreakable before detonation. Sticking the knife directly onto an enemy player achieves the same result, though it deals no impact damage.
- Unpredictability: Consistently throwing the knife to the same spot each round allows attentive opponents to pre-aim and destroy it instantly. Varying the target location, angle, and timing of the throw is essential to keep the enemy guessing and increase the likelihood of successful suppression and intel gathering.
- Lineups: While less emphasized in the provided materials compared to flashes or mollies, the concept of learning lineups applies equally to ZERO/point for consistent and often safer deployment. Knowing specific throws allows KAY/O to place the knife in optimal, hard-to-reach locations from a safe distance, maximizing its chance of survival and impact. Players seeking such lineups often turn to community resources and content creators specializing in agent utility. The principle demonstrated by FRAG/ment lineups – using HUD elements or map geometry to aim – is directly applicable to developing or learning ZERO/point throws.
2.4 Detailed Suppression Interactions (ZERO/point)
Understanding precisely what ZERO/point does and doesn't affect is critical for effective use. The general rule is that suppression prevents the casting or equipping of abilities for its 8-second duration. However, interactions vary based on ability type:
| Agent Ability | Effect of ZERO/point Suppression (8s) | Notes / Mechanism |
|---|---|---|
| Killjoy Turret/Alarmbot | Disabled & Revealed (if Killjoy agent is suppressed) | Suppression targets agent, disabling linked tech. Requires hitting Killjoy. |
| Killjoy Nanoswarm | Cannot be activated (if Killjoy agent is suppressed) | Prevents casting. Deployed but inactive Nanoswarms are unaffected unless Killjoy is suppressed. |
| Killjoy Lockdown (Ult) | Cannot be cast. Already deployed Lockdown is unaffected. | Prevents casting. Once deployed, the device operates independently. |
| Cypher Trapwire/Spycam | Disabled & Revealed (if Cypher agent is suppressed) | Suppression targets agent, disabling linked tech. Requires hitting Cypher. |
| Cypher Cyber Cage | Cannot be activated (if Cypher agent is suppressed) | Prevents casting/activation. Deployed cages remain but cannot be triggered by suppressed Cypher. |
| Chamber Trademark | Disabled (if Chamber agent is suppressed). Cannot be recalled. | Suppression targets agent, disabling linked tech. Prevents recall activation. |
| Chamber Rendezvous (TP) | Cannot teleport to anchor. Cannot recall anchor. | Prevents activation of the teleport ability. |
| Chamber Headhunter/TdF(Ult) | Temporarily disabled (cannot equip/fire). | Equipped weapon ability is disabled. Chamber may regain ult after suppression if duration permits. |
| Jett Tailwind (Dash) | Cannot be activated. | Prevents casting movement ability. |
| Jett Updraft | Cannot be activated. | Prevents casting movement ability. |
| Jett Drift (Passive) | Disabled. | Passive ability is actively disabled. |
| Jett Blade Storm (Ult) | Temporarily disabled (cannot throw knives). | Equipped weapon ability is disabled. Jett regains knives after suppression if duration permits. |
| Raze Blast Pack | Cannot be activated/detonated. Deployed packs detonate automatically on timer. | Prevents casting/manual detonation. Does not destroy deployed packs. |
| Raze Showstopper (Ult) | Temporarily disabled (cannot fire). Timer continues. | Equipped weapon ability is disabled. Suppression can cause the ult timer to expire. |
| Skye Trailblazer/Guiding Light | Instantly destroyed if active. Cannot be cast. | Minions are killed by suppression pulse. |
| Sova Owl Drone | Instantly destroyed if active. Cannot be cast. | Minion is killed by suppression pulse. |
| Sova Recon Bolt/Shock Dart | Cannot be cast/charged. | Prevents casting/charging. Already fired arrows are unaffected. |
| Sova Hunter's Fury (Ult) | Disabled (cannot fire). Timer continues. | Equipped weapon ability is disabled. Short duration often means ult is fully canceled. |
| Fade Prowler | Damaged. Control interrupted if active. Cannot be cast. | Suppression damages Prowler, interrupts control. |
| Fade Haunt/Seize | Cannot be cast. Deployed Haunt/Seize unaffected. | Prevents casting. |
| Viper Toxic Screen/Poison Cloud | Deactivated after 2s delay (if Viper agent is suppressed). Cannot be activated/redeployed. | Suppression targets agent, severing control link to deployables. |
| Viper's Pit (Ult) | Cannot be cast. Already deployed Pit is unaffected. | Prevents casting. Once active, the Pit is an independent environmental effect. |
| Reyna Dismiss/Devour | Cannot be activated (even during Empress). | Prevents casting. Overheal from Devour is not removed. |
| Reyna Empress (Ult) | Cannot be cast. Active Empress combat stim remains, but Dismiss/Devour cannot be used. | Prevents casting. Underlying stim/timer unaffected, but associated abilities blocked. |
| Iso Double Tap (Shield) | Cannot gain shield orb/activate shield. Existing shield is not removed. | Prevents casting/orb collection. Applied shield is a status effect and remains. |
| Iso Contingency/Undercut | Cannot be cast. | Prevents casting. |
| Iso Kill Contract (Ult) | Cannot be cast. Suppression inside arena is possible but doesn't remove Iso shield if already active. | Prevents casting. Interaction inside ult based on Iso retaining shield while suppressed. |
| Omen Shrouded Step | Cannot be cast. Teleport not cancelled if suppressed before TP completes (Patch 6.11). | Prevents casting. Specific patch interaction for ongoing teleports. |
| Omen From the Shadows (Ult) | Cannot be cast. Teleport is cancelled if suppressed while in Shade form (Patch 7.0). | Prevents casting. Vulnerable Shade form can be interrupted. |
| Phoenix Curveball/Hot Hands/Blaze | Cannot be cast. | Prevents casting. Healing from Hot Hands/Blaze is prevented if suppressed. |
| Phoenix Run It Back (Ult) | Cannot be cast. Active ult timer continues; combat stim remains, fire healing prevented. | Prevents casting. Similar to Reyna's ult interaction. |
| Yoru Fakeout/Blindside/Gatecrash | Cannot be cast/activated. | Prevents casting/activation of teleport or clone. |
Section 3: Overload Engaged: NULL/cmd Dominance
KAY/O's ultimate ability, NULL/cmd, represents the apex of his suppressive power, transforming him into a walking engine of ability denial and enhanced combat capability. While sharing the core suppression mechanic with ZERO/point, its application via sustained pulses over a vast area, combined with the Combat Stim and revive potential, necessitates distinct strategic considerations regarding timing, team coordination, and objective focus.
3.1 Core Mechanics Revisited
NULL/cmd is a multifaceted ultimate ability defined by three key components:
- Suppression Pulses: Upon activation, NULL/cmd immediately begins emitting powerful energy pulses every 3 seconds for the ultimate's 15-second duration. Each pulse suppresses enemies within a massive 42-meter radius for 4 seconds. The pulses travel through all terrain, making evasion within the radius virtually impossible. This sustained, wide-area suppression is the ultimate's primary tool for disrupting enemy defenses or coordinating pushes.
- Combat Stim: Throughout the ultimate's duration, KAY/O benefits from a potent Combat Stim. This buff significantly increases his weapon rate of fire (adjusted for consistency in Patch 9.05), reload speed, and recoil recovery speed. This transforms KAY/O from a utility-focused Initiator into a formidable frontline combatant capable of winning crucial duels during site takes or retakes.
- Downed State & Revive: The ultimate's most unique feature is its interaction with death. If KAY/O takes lethal damage while NULL/cmd is active, he enters a downed, destabilized state for 15 seconds instead of dying outright. In this state, he has 850 HP, making him difficult to finish off quickly, and retains his vision to provide callouts. Crucially, the suppression pulses continue to emit while he is downed. Allies can revive him with a 3-second interaction, and the 15-second timer pauses once the interaction begins. This revive mechanic offers significant tactical potential but requires team coordination. The ultimate costs 8 points, making it a costly but potentially game-swinging investment.
3.2 Strategic Timing and Usage
The high cost and significant impact of NULL/cmd demand careful consideration of its timing:
NULL/cmd is most effective when timed with coordinated team movements, either for site executes or retakes. When activated as the team begins its push, it disables defender abilities, creates safer entry paths, and gives KAY/O combat advantages through the stim effect. The key is timing - activate too early and you waste valuable duration; too late and defenders may have already used their crucial abilities.
- Site Executes: This is arguably the most common and powerful use case. Activate NULL/cmd just as the team begins its coordinated push onto a bombsite. Activating too early wastes valuable duration. The goal is to have the suppression pulses blanket the site as entry fraggers move in, disabling Sentinel traps, controller smokes, and defender abilities, thereby creating a much safer entry path. Prioritize hitting agents reliant on abilities for defense.
- Site Retakes: NULL/cmd is equally effective for initiating retakes. Activating it as the retaking team moves onto the site suppresses attackers holding post-plant positions, prevents them from using delaying utility (like mollies or smokes), and gives KAY/O the combat advantage with his stim to clear angles and challenge defenders.
- Post-Plant Defense: While primarily an offensive tool, NULL/cmd can be used defensively in post-plant scenarios. If the enemy team is attempting a coordinated retake, activating the ultimate can severely disrupt their plans by disabling their utility usage, forcing them into less favorable gunfights against the buffed KAY/O and his team.
- Counter-Ulting: NULL/cmd can be used reactively to shut down high-impact enemy ultimates, particularly channeled or equipped ones like Raze's Showstopper, Jett's Blade Storm, Sova's Hunter's Fury, Neon's Overdrive, or Chamber's Tour De Force. Hearing the enemy ultimate voice line is the cue to activate NULL/cmd, potentially nullifying the threat before it can be fully utilized.
- Aggressive Entry Fragging: The combination of Combat Stim and the revive mechanic enables KAY/O to adopt a more aggressive, entry-fragging role while his ultimate is active. He can lead the charge onto a site, leveraging his increased firepower and the safety net of the downed state to take initial fights and create space, relying on teammates to trade kills and potentially revive him.
3.3 Maximizing the Revive Mechanic
The downed state and revive potential of NULL/cmd add a unique tactical layer, but its value is entirely dependent on teamwork:
- Coordination is Key: The revive mechanic is useless without team support. Teammates must be aware when KAY/O ults aggressively and be positioned to trade the kill if he goes down, secure the immediate area, and then execute the 3-second revive. This requires clear communication and pre-planned coordination.
- Strategic Positioning: When using NULL/cmd to lead a push, KAY/O players should consider where they might go down. Aiming to fall behind recently gained cover or in a location accessible to teammates increases the chances of a successful revive. Dying in a completely open, exposed position often negates the revive potential.
- Communication While Downed: A downed KAY/O is not out of the fight entirely. He retains vision and can provide crucial real-time information about enemy positions and movements to his team. Clear callouts during these 15 seconds can be game-winning. Teammates must also communicate their intent and ability to attempt the revive.
- Leveraging as Bait: The downed state can be used tactically as bait. Enemies face a dilemma: commit resources (time, ammo, positioning) to finishing the high-HP downed KAY/O, push the teammate attempting the revive, or ignore KAY/O and risk him being brought back into the fight. All these scenarios can draw enemy attention and create openings for other teammates to capitalize on, turning a potential death into a tactical advantage. The high health pool (850 HP) makes finishing KAY/O a significant commitment, often exposing the enemy in the process.
3.4 Detailed Suppression Interactions (NULL/cmd)
The suppression effect from NULL/cmd follows the same fundamental rules as ZERO/point: it prevents the casting and equipping of abilities. Key interactions remain consistent: it disables active Sentinel utility if the agent is pulsed, temporarily shuts down equipped weapon ultimates, kills controllable minions, prevents associated actions during status-based ults (like Reyna's Dismiss), deactivates Viper's wall/orb, but does not affect already deployed environmental ultimates like Viper's Pit or Killjoy's Lockdown, nor does it remove existing status effects like Iso's shield.
The primary difference lies in the delivery method. Instead of a single, targeted pulse like ZERO/point, NULL/cmd provides sustained area denial through its five wide-reaching pulses over 15 seconds. This makes it less about surgically countering a specific ability and more about overwhelming an entire area – typically a bombsite – during coordinated pushes or retakes. The large radius ensures multiple enemies and their utility are likely suppressed simultaneously, while the pulsing nature means the suppression is refreshed, preventing enemies from simply waiting out a single pulse before using abilities again. Therefore, NULL/cmd should be viewed as a tool for broad, temporary neutralization during critical team maneuvers.
Section 4: Forging Synergy: KAY/O in Team Play
While KAY/O possesses tools for individual impact, his true strength is unlocked through effective integration within a team structure. His role as an Initiator is amplified by his unique suppression mechanic, allowing him to enable teammates, dismantle enemy defenses, and dictate the terms of engagement in ways other agents cannot.
4.1 KAY/O's Role in Enabling the Team
KAY/O contributes to team success in several key ways:
- Initiation Through Disruption: Like other Initiators, KAY/O creates opportunities for his team to attack or retake sites. However, his primary method is disruption via ability denial. By suppressing key defenders or their utility with ZERO/point or NULL/cmd, he removes obstacles and neutralizes threats before his team commits. His flashes also serve as a more traditional initiation tool, blinding opponents for teammates to capitalize on.
- Space Creation: Both suppression and flashes facilitate space creation. Suppressing Sentinel traps allows safe passage through chokepoints. Flashing common angles forces defenders to reposition or be vulnerable, allowing duelists and entry players to push forward and secure map control. FRAG/ment contributes by zoning enemies out of powerful positions.
- Utility Denial & Gunfight Focus: KAY/O's core function is forcing engagements into the realm of pure gunplay. This is particularly advantageous against compositions heavily reliant on ability combos or agents who depend on utility for survival or impact (e.g., disabling a Killjoy setup, preventing a Jett dash escape, stopping a Sage heal/rez). By temporarily leveling the playing field to raw aim duels, KAY/O can give his team an edge if they are confident in their mechanics.
- Role Versatility: While classified as an Initiator, KAY/O's kit allows for significant flexibility. He can function as a primary information gatherer with ZERO/point, a supportive flasher for his duelists, an area controller with FRAG/ment, and even transition into an aggressive entry fragger during NULL/cmd thanks to the combat stim and revive potential. This adaptability makes him a valuable asset in various team compositions and strategic approaches.
4.2 Optimal Agent Pairings & Synergies
KAY/O's effectiveness is significantly enhanced when paired with agents whose abilities complement his own:
The KAY/O-Duelist synergy is among the most powerful in the game. KAY/O's FLASH/drive creates perfect entry opportunities for mobile duelists like Jett (dashing off the flash) or Raze (satcheling in). His suppression clears the path by disabling traps and defensive utility, allowing duelists a safer entry. Effective timing and communication between KAY/O and the duelist are paramount to capitalize on these windows.
- Duelists (Jett, Raze, Neon, Reyna): This is a natural and powerful synergy. KAY/O's FLASH/drive creates perfect entry opportunities for mobile duelists like Jett (dashing off the flash) or Raze (satcheling in). Suppression clears the path by disabling traps and defensive utility, allowing duelists a safer entry. While Reyna's Dismiss is countered by suppression, suppressing enemies before she engages allows her to take fights without fearing ability-based counterplay from the target. Neon benefits from the chaos and cleared paths KAY/O creates. Effective timing and communication between KAY/O and the duelist are paramount to capitalize on these windows.
- Controllers (Viper, Omen, Brimstone, Astra): Controllers shape the battlefield, and KAY/O helps secure it. Viper's Toxic Screen or Poison Cloud provides cover from which KAY/O can safely deploy flashes or ZERO/point knives. Conversely, KAY/O's suppression can prevent enemies from easily pushing through or destroying Viper's utility. Area denial abilities like Viper's Snake Bite, Brimstone's Incendiary, or Astra's Gravity Well combo effectively with KAY/O's FRAG/ment or suppression, trapping enemies in damaging zones or preventing escape. Omen or Astra smokes can also be used to obscure the trajectory or landing spot of a ZERO/point knife, making it harder to shoot down.
- Other Initiators (Sova, Fade, Skye, Breach, Gekko): Double Initiator compositions featuring KAY/O are increasingly common and effective. Combining KAY/O's suppression and flashes with the reconnaissance of Sova (Recon Bolt, Owl Drone) or Fade (Haunt, Prowlers) creates layered threats, forcing enemies to contend with multiple forms of utility simultaneously. Skye's flashes and healing offer additional support and info gathering. Breach's stuns (Fault Line, Rolling Thunder) paired with KAY/O's flashes or suppression can completely overwhelm defenders during site hits. Gekko's Wingman can plant or defuse the Spike while KAY/O uses suppression and FRAG/ment to protect it. Success in double Initiator setups hinges on clear communication to avoid redundant utility usage and maximize combined impact.
- Sentinels (Killjoy, Cypher, Sage): KAY/O serves as a potent counter to enemy Sentinels. Pairing him with a friendly Sentinel like Killjoy or Cypher provides flank security and site anchoring, freeing KAY/O to play more proactively. Sage offers direct support through healing, bolstering KAY/O's survivability during aggressive pushes, and her Slow Orbs create lethal combos with FRAG/ment. Having KAY/O ensures the team isn't solely reliant on destructible traps for information and control.
4.3 Map-Specific Team Compositions & Strategies
KAY/O's viability fluctuates across the map pool, excelling where his suppression can counter common strategies or where his flashes control crucial sightlines. Based on analysis and observed pro play trends:
| Map | Recommended Comp (featuring KAY/O) | Key Synergies / Strategy Focus |
|---|---|---|
| Ascent | Jett, Sova, Omen, Killjoy, KAY/O | Strong default. KAY/O suppresses KJ setups & provides info. Sova recon + KAY/O knife for intel. Omen smokes + KAY/O flashes enable Jett entry. |
| Icebox | Jett, Sova, Viper, Sage/Killjoy, KAY/O | KAY/O counters Sage walls/KJ setups. Viper walls + KAY/O flashes for site takes. NULL/cmd forces defenders off small sites. |
| Breeze | Jett/Yoru, Sova, Viper, Cypher/Chamber, KAY/O | KAY/O flashes effective in open spaces. ZERO/point for long-range intel. Viper walls provide cover. NULL/cmd secures large sites. |
| Fracture | Raze/Neon, Fade, Brimstone, Killjoy/Chamber, KAY/O | KAY/O counters prevalent KJ setups. Fade recon + KAY/O suppression for executes. NULL/cmd strong for site control. |
| Haven | Jett, Sova/Fade, Omen, Killjoy, KAY/O | KAY/O provides suppression as an alternative to Breach stuns. Flashes strong for Garage/Longs. Standard execute structure. |
| Abyss | Jett, Omen/Astra, Cypher, Sova, KAY/O | Balanced comp for new map. KAY/O provides intel/suppression for complex angles. Sova recon aids clearing. Cypher covers flanks. |
| Split | Raze, Omen/Viper, Cypher, Sage, KAY/O | KAY/O flashes for Mid control. FRAG/ment useful for Rafters/post-plant. Suppression counters potential Sentinel holds. |
| Bind | Raze, Viper, Skye/Gekko, Brimstone/Omen, KAY/O | KAY/O flashes for Hookah/Lamps. Suppression aids pushes through TPs/chokes. FRAG/ment for post-plant. |
4.4 Essential Communication Protocols
Effective communication is non-negotiable for maximizing KAY/O's potential, given the team-dependent nature of his utility:
// Essential Communication Calls for KAY/O Players

- Flashes: "Flashing [location]!" (before throwing)
- ZERO/point: "Knifing [location]!" → "Suppressed [#] [Agent names]!"
- FRAG/ment: "Mollying [location]!" (especially in post-plant)
- NULL/cmd: "Ulting for [execute/retake] now!"
- If Downed: Provide precise enemy positions - "One heaven, one generator!"
- Team Response: "Coming for rez" or "Can't rez, pushed off"- Utility Calls:
- Flashes: Announce intent to flash and the location clearly and before throwing ("Flashing Haven C Long!", "Pop-flashing U-Hall!"). This prevents blinding teammates and allows them to coordinate peeks.
- ZERO/point: Call out the target location ("Knifing Ascent A Site!") and relay the results immediately and concisely ("Knife clear!", "Suppressed two on site! Suppressed Killjoy and Jett!").
- FRAG/ment: Announce placement, especially in post-plant ("Mollying default!") or when zoning ("Mollying Hookah entrance!").
- NULL/cmd Coordination:
- Clearly state the intention and timing ("Ulting for A execute now!", "Popping ult for retake!").
- If downed, provide continuous, precise callouts on enemy positions based on retained vision ("One heaven, one generator!").
- Teammates must communicate if they are in a position to safely attempt the revive ("Coming for rez," "Can't rez, pushed off").
- Intel Relay: All information gathered via ZERO/point needs to be shared promptly with the team to inform decision-making.
Mastering KAY/O involves not only mechanical skill but also becoming a clear and proactive communicator, ensuring his powerful abilities enable the team rather than hinder it.
Section 5: Elevating Your Play: Advanced Techniques & Pitfall Avoidance
Moving beyond basic ability usage requires incorporating advanced techniques and recognizing common mistakes. Refining mechanics, understanding nuanced interactions, and developing strategic awareness are key to truly mastering KAY/O.
5.1 Advanced Tips & Techniques
- Mastering Pop-Flashes: The underhand (RMB) FLASH/drive is KAY/O's signature self-setup tool. Effective pop-flashing involves minimizing the time the flash projectile is visible to the enemy before detonation. This requires practice to understand the fixed travel distance and optimal positioning relative to the corner being flashed. Standing too close to the wall when throwing the underhand flash gives enemies more time to react. Advanced techniques include throwing flashes slightly behind or above one's own position to allow peeking without being self-blinded. Utilizing the different fuse times (RMB: 1s/1.25s vs LMB: 1.6s/2.25s) can create mind games; faking a faster pop-flash with a longer-fused throw might catch enemies turning prematurely. Flashing through smokes or Viper walls is also a powerful tactic to catch enemies holding within or behind vision blockers.
- Strategic FRAG/ment Usage: Go beyond simple post-plant denial. Use FRAG/ment proactively to force enemies out of advantageous positions during gunfights, manipulating their movement. Deploy it to cover flanks or prevent lurkers from interfering during a site execute. Learn specific lineups to counter common enemy utility placements, such as Killjoy's Lockdown ultimate. While risky, understanding the brief delay between damage pulses might allow for quick pushes through the affected area, though this requires precise timing and awareness. Learning lineups for common defensive angles or default plant spots from safe positions significantly increases its reliability and utility.
- ZERO/point Mind Games: Effective knife usage involves unpredictability. Vary the timing (immediate vs. delayed throw) and location each round to prevent easy counter-play. The threat of suppression can be as powerful as the effect itself, forcing enemies to play cautiously or reposition preemptively. Monitor the enemy team's ultimate economy via the scoreboard; use ZERO/point strategically to suppress agents like Raze or Neon just as they might look to use their timed ultimates. Prioritize throwing the knife onto surfaces that are difficult or impossible for enemies to shoot quickly, such as high walls, roofs, or behind geometry.
- NULL/cmd Optimization: Timing is paramount. Activate the ultimate immediately before or during the team's commitment to a site execute or retake to maximize the suppression window. Fully leverage the downed state by communicating intel clearly and positioning for potential (but safe) revives. Use the ultimate's pulses to actively target and suppress high-priority enemies like Sentinels holding a site or agents with impactful ultimates ready.
- Synergistic Plays: Look for opportunities to chain KAY/O's abilities or combine them with teammates'. Examples include flashing an angle then immediately using FRAG/ment to punish enemies blinded or forced into cover, using ZERO/point to gather info then activating NULL/cmd for a coordinated push based on that intel, or layering FRAG/ment with controller area denial (Viper mollies, Astra pulls) or slows (Sage).
5.2 Common Mistakes and How to Avoid Them
Recognizing and correcting common errors is essential for consistent performance:
- Wasting Flashes: Avoid throwing FLASH/drive without a specific objective, such as enabling a peek, supporting a teammate's entry, or stopping a push. Always communicate flash usage clearly to prevent blinding teammates. Predictable flash trajectories (e.g., simple bounces off obvious walls) are easily dodged; focus on mastering pop-flashes and less obvious angles. Underutilizing the potent RMB pop-flash is a frequent oversight.
- Ineffective ZERO/point Usage: Throwing the knife into open areas where it's instantly destroyed yields no value. Repetitive, predictable knife placements allow enemies to counter it easily. Failing to act upon the information gained (or the lack of information, which is itself informative) negates its purpose. Mistiming the knife during executes (too early, suppression fades; too late, defenses are already active) reduces its impact.
- Poor NULL/cmd Timing/Usage: Activating the ultimate significantly before a push wastes its limited duration and suppression pulses. A common error is ulting without ensuring team support is available to follow up or provide a potential revive. Playing passively during NULL/cmd fails to leverage the combat stim and the pressure created by suppression. Dying in positions where teammates cannot safely reach for a revive wastes the ultimate's unique mechanic.
- Lack of Communication: This underlies many other mistakes. Failing to call flashes, knife intel, ultimate intentions, or enemy positions while downed severely limits KAY/O's team-enabling potential.
- Over-reliance on/Misunderstanding Suppression: Forgetting that suppression is temporary and enemies will regain their abilities necessitates readiness for the ensuing fight. Assuming suppression counters all abilities leads to misplays; knowing the specific interactions (e.g., it doesn't stop Viper's Pit or remove Iso's shield) is crucial. Suppression should enable plays, not replace fundamental gun skill and positioning.
Avoiding these pitfalls requires conscious practice, focusing on timing, map awareness, understanding ability interactions, and prioritizing clear, concise communication within the team.
The best KAY/O players understand that suppression is a tool to create advantages, not a replacement for fundamental skills. They maintain unpredictability, communicate clearly, coordinate perfectly with teammates, and develop an intuitive sense of when and where to use each ability for maximum impact. Mastery comes from combining mechanical skill with strategic depth and team synergy.
Conclusion: Achieving KAY/O Mastery
KAY/O stands apart in the Valorant roster as the premier ability-denial Initiator, a war machine designed to neutralize Radiant powers and force engagements onto the fundamental level of gunplay. His unique capacity to suppress enemy abilities offers a powerful strategic advantage, capable of dismantling entrenched defenses, enabling aggressive pushes, and countering ability-reliant compositions.
Mastery of KAY/O hinges on two interconnected pillars: Suppression Execution and Team Synergy.
Suppression Execution involves nuanced understanding and application of both ZERO/point and NULL/cmd. For ZERO/point, this means mastering placement for survivability and unpredictability, utilizing its intel effectively, timing its deployment for maximum disruption during executes and retakes, and knowing precisely which enemy abilities it can and cannot affect. For NULL/cmd, mastery lies in optimal activation timing for coordinated plays, leveraging the combat stim for aggressive impact, coordinating with teammates to maximize the revive potential, and understanding its role in wide-area denial during critical moments.
Team Synergy is equally vital. KAY/O's flashes, while potent for self-use, are devastating when coordinated with duelist entries. His suppression creates windows that the entire team must be ready to exploit. This requires constant, clear communication – calling flashes, relaying knife intel, announcing ultimate intentions, and providing information while downed. Integrating KAY/O effectively means understanding how his abilities complement different agent roles and map strategies, as detailed in the recommended compositions.
Players seeking to elevate their KAY/O gameplay should prioritize dedicated practice on flash mechanics, particularly pop-flashes, to minimize enemy reaction time. Experiment with diverse ZERO/point locations and timings to remain unpredictable. Analyze match VODs (personal or professional) specifically focusing on NULL/cmd activation timing relative to team movements and objectives. Most importantly, cultivate disciplined communication habits.
KAY/O is not merely an agent with a suppression gimmick; he is a versatile Initiator whose toolkit, when wielded with strategic depth and seamless team coordination, can fundamentally shift the balance of power in any match, turning the tide by forcing the fight onto his terms.