
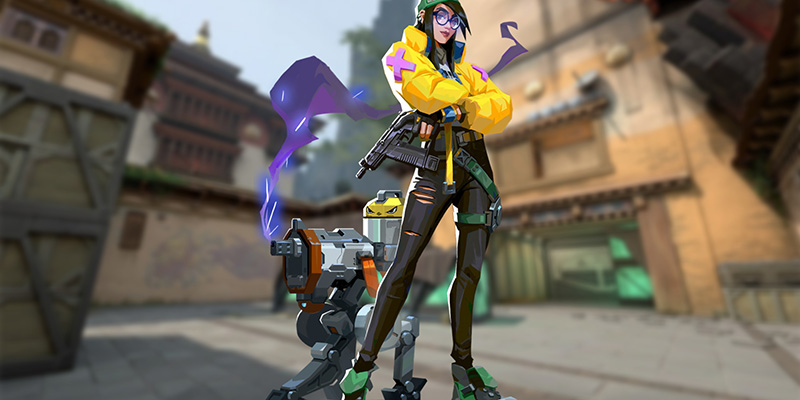
Valorant's roster features a diverse cast of agents, each bringing unique tactical advantages to the battlefield. Among them stands Killjoy, the German engineering genius, a Sentinel agent who excels at locking down territory and controlling engagements through her arsenal of deployable inventions. Mastering Killjoy means mastering the art of defense, information gathering, and post-plant security, making her an invaluable asset for any team aiming for strategic depth and round control.
Killjoy's Role: The Technical Sentinel Anchor
Sentinels form the defensive backbone of a Valorant team. Their primary function is to secure sites, control map areas, gather intelligence on enemy movements, and support their team, often by delaying enemy advances or watching flanks. Unlike Duelists who seek aggressive engagements or Initiators who break open sites, Sentinels typically prioritize survival, understanding that their utility remains crucial throughout the entire round. They are the anchors, holding positions and providing stability.
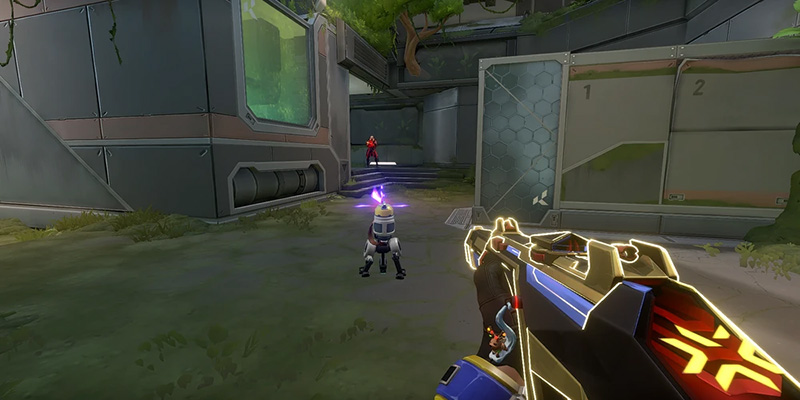
Killjoy embodies the quintessential anchor and post-plant Sentinel. Her specific approach relies heavily on her deployable gadgets: a Turret for information and chip damage, an Alarmbot to detect enemies and apply a debilitating debuff, Nanoswarm grenades for area denial and damage, and the formidable Lockdown ultimate for large-scale crowd control. This gadget-centric playstyle distinguishes her from other Sentinels. Cypher excels at passive surveillance and tripwire traps, Sage provides healing and physical barriers, Chamber offers aggressive teleportation and potent weaponry, and Viper (often played as a Sentinel) controls space with toxic screens and pools.
Killjoy's Turret offers passive information gathering without requiring her direct attention, unlike Cypher's Spycam which necessitates him being off the immediate battlefield while viewing. Her Nanoswarms deal damage independently, unlike Cypher's Tripwires which often require his direct follow-up to secure a kill.
Overview of Her Strategic Value (Defense, Post-Plant)
Killjoy's strategic value lies primarily in her unparalleled ability to fortify and defend bombsites. Her layered utility setups can make entering a site an extremely costly endeavor for the attacking team. She excels at stalling pushes, buying invaluable time for her teammates to rotate and support.
Furthermore, Killjoy is arguably the strongest post-plant agent in the game. Her Nanoswarm grenades, often deployed via pre-learned lineups, can deny spike defusals from incredibly safe distances, securing rounds that might otherwise be lost. Her Turret and Alarmbot also contribute significantly to post-plant defense by providing information and deterring retaking defenders.
Killjoy's Arsenal: A Deep Dive into the Toolkit
Understanding the precise mechanics, statistics, and nuances of Killjoy's inventions is fundamental to mastering her playstyle. This knowledge informs every decision, from initial placement during the buy phase to mid-round adjustments and clutch scenarios. Knowing the exact health of a Turret, the damage output of a Nanoswarm, or the windup time of Lockdown elevates strategic planning beyond mere intuition, allowing for calculated risks and optimized plays.
Turret (E): The Versatile Guardian
Killjoy's signature ability, the Turret, is a deployable sentinel that automatically targets and fires upon enemies within its range.
Mechanics:
The Turret scans and fires within a 100° frontal cone. Players can deploy it facing outwards or use Alt Fire during placement to have it face them. A key feature is its recallability; holding the Equip key (E by default) allows Killjoy to retrieve the Turret. Recalling it incurs a short 10-second cooldown (reduced from a previous 20 seconds). However, if the Turret is destroyed by enemy fire, it goes on a significantly longer 45-second cooldown. Like her Alarmbot, the Turret will deactivate if Killjoy moves more than 40 meters away, reactivating once she re-enters the radius.
Stats:
The Turret's effectiveness is defined by its stats. Its health was reduced from 125 HP to 100 HP, making it more vulnerable to focused fire. It fires in three-shot bursts, with damage scaling based on distance: 8 HP per bullet within 20 meters, 6 HP per bullet between 20 and 35 meters, and 4 HP per bullet beyond 35 meters. Enemies hit by the Turret are also tagged, applying a 29.5% slow effect (significantly reduced from a previous 72.5%).
| Statistic | Value | Notes |
|---|---|---|
| Health (HP) | 100 | Nerfed from 125 HP |
| Damage per Bullet | 8 HP (0-20m), 6 HP (20-35m), 4 HP (35m+) | Fires 3-shot bursts |
| Cone Angle | 100° | Previously 180° |
| Tagging Slow | 29.5% | Nerfed from 72.5% |
| Recall Cooldown | 10 seconds | Reduced from 20s |
| Destroyed Cooldown | 45 seconds | |
| Activation Range | 40 meters | Deactivates if Killjoy is further away |
| Cost | Free | Signature Ability |
| Max Charges | 1 |
Optimal Placements:
- Information Gathering: The Turret excels at providing passive intel. Placing it in elevated positions or spots overlooking common entry points or large areas grants early warning of enemy presence and movement. Even if the enemy destroys it, the act of destruction itself provides valuable information about their location and intent.
- Crossfire Creation: A core tactical use is establishing crossfires. Position the Turret to cover an angle opposite to where Killjoy or a teammate intends to hold. When the Turret engages, enemies are forced to divide their attention, creating opportunities for players to swing and secure kills on distracted opponents.
- Distraction/Deterrent: The Turret can draw enemy fire, acting as a temporary distraction during site pushes or retakes. Its mere presence can make enemies hesitant to push certain angles or force them to expend utility to deal with it, acting as a psychological deterrent. Placing it to cover default plant spots can delay or disrupt planting attempts.
- Flank Watching (Attack): On attack, the Turret is indispensable for guarding the team's flank against lurking defenders or aggressive rotations.
Recall Strategy:
The difference in cooldown between recalling (10s) and destruction (45s) is substantial. Therefore, proactively recalling the Turret before it gets destroyed is crucial for maximizing its uptime throughout a round. Players should recall the Turret when rotating sites, anticipating its imminent destruction, or simply to reset its health pool for a subsequent engagement.
Strategic Implications:
Following nerfs to its health and slowing effect, the Turret's primary function has shifted from being a significant damage source to being an exceptional information tool and tactical distraction. While it can contribute chip damage and secure occasional kills, its real strength lies in its ability to passively watch angles, force enemy reactions, enable crossfires, and provide crucial intel. Maximizing its value involves smart placement focused on these aspects and diligent recall management, rather than expecting it to function as an independent weapon.
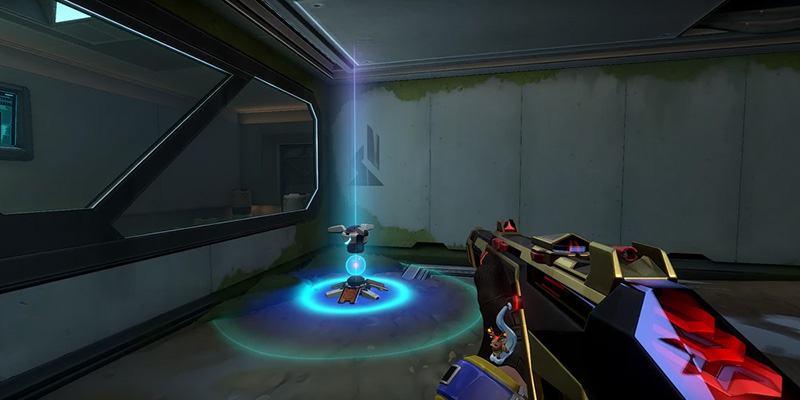
Alarmbot (Q): The Silent Scout
The Alarmbot is a stealthy device that provides localized detection and applies a potent debuff to unsuspecting enemies.
Mechanics:
Once deployed, the Alarmbot becomes covert, remaining invisible until an enemy comes within 7 meters. If an enemy enters its 5-meter detection radius, the bot activates, hunts them down, and explodes upon reaching them. The explosion itself deals no damage but applies the 'Vulnerable' status effect for 4 seconds, causing affected enemies to take double damage from all sources. Killjoy receives audio and visual cues on the minimap when the Alarmbot is triggered or destroyed. Like the Turret, it can be recalled by holding the Equip key (Q by default) and has a short 7-second cooldown after pickup (drastically reduced from 20 seconds). It also deactivates beyond a 40-meter range from Killjoy.
Stats:
The Alarmbot costs 200 Creds and Killjoy can only hold one charge per round. It has 50 HP and is now immune to damage from allies. Key stats include its 5m detection radius, 7m reveal distance, 4s Vulnerability duration, 7s pickup cooldown, and 40m activation range.
| Statistic | Value | Notes |
|---|---|---|
| Health (HP) | 50 | Immune to allied damage |
| Cost | 200 Creds | |
| Max Charges | 1 | |
| Detection Radius | 5 meters | |
| Vulnerability Duration | 4 seconds | Target takes double damage |
| Reveal Distance | 7 meters | Invisible until enemy is within this range |
| Pickup Cooldown | 7 seconds | Reduced from 20s |
| Activation Range | 40 meters | Deactivates if Killjoy is further away |
Effective Placements:
- Information/Tripwire: Its most basic use is as an early warning system. Place it in narrow choke points, doorways, or common pathways to detect enemy pushes or flanking maneuvers. Placing it at the edges or corners of entry points makes it harder to spot immediately. Even if destroyed, it signals enemy presence.
- Traps/Vulnerability Setup: The Alarmbot shines when combined with damaging utility. Place it near pre-positioned Nanoswarms; triggering the Alarmbot signals when to detonate the Nanoswarms for a high-damage combo amplified by the Vulnerability. It can also be placed within the Turret's line of sight to increase the Turret's effective damage. Placing it opposite an angle Killjoy is holding can force an enemy to turn towards the bot, exposing them to Killjoy's fire. It can also be placed to delay spike plants or force attackers to choose between planting and taking the debuff.
- Corner Clearing (Attack): While risky, the Alarmbot's seeking behavior allows it to be cautiously used to check tight corners during an attack push.
- Concealment: Maximize surprise by placing the Alarmbot behind crates, debris, or terrain features, or even on top of objects like huts, making it harder to spot and destroy before activation. Avoid predictable, open placements.
Vulnerability Exploitation:
The 4-second window of double damage is brief but incredibly potent. Players should be ready to capitalize immediately upon hearing the Alarmbot trigger, either by peeking for a direct engagement or activating synergistic utility like Nanoswarms. Communication is key to ensure teammates can also benefit from the debuff.
Strategic Implications:
The Alarmbot is a highly versatile tool, functioning as an information gatherer, a powerful debuffer, and a crucial component of Killjoy's deadliest utility combos. Its significantly reduced pickup cooldown (20s to 7s) greatly enhances its flexibility, allowing Killjoy to reposition it much more dynamically mid-round for adapting defenses, covering rotating flanks, or setting up for post-plant scenarios without the lengthy delay previously imposed. This brings its adaptability closer to agents like Cypher, though still constrained by the 40m activation range. The Vulnerable effect remains one of the strongest single-target debuffs in the game, capable of turning minor damage into lethal threats.
Nanoswarm (C): A Hidden Hazard
Nanoswarm grenades are Killjoy's primary tool for dealing direct damage and denying space through remotely activated, damaging fields.
Mechanics:
Killjoy throws the Nanoswarm grenade, which becomes covert (invisible) upon landing. It can be activated remotely by Killjoy at any time (provided she is within range and alive). Upon activation, it deploys a swarm of nanobots that deals significant damage over time to any agent within its radius. The grenade itself is invisible until an enemy gets within 3.5 meters (a reduction from the previous 5m). Recent updates increased its reveal radius to 5.25 meters and cause it to become revealed if disabled (e.g., by Killjoy's death or suppression). Crucially, unlike the Turret and Alarmbot, Nanoswarms cannot be recalled once thrown.
Stats:
Each Nanoswarm costs 200 Creds, and Killjoy can purchase up to two charges. The swarm deals 45 Damage Per Second (DPS), an increase from the previous 40 DPS. The damage ticks rapidly over its 4-second duration. The damaging radius is 4.5 meters. A significant buff increased the Nanoswarm's health from 1 HP to 20 HP, making it much more resilient to accidental destruction. It deals 50% damage to non-player objects.
| Statistic | Value | Notes |
|---|---|---|
| Health (HP) | 20 | Increased from 1 HP |
| Cost | 200 Creds | |
| Max Charges | 2 | |
| Damage (DPS) | 45 | Increased from 40 DPS |
| Duration | 4 seconds | |
| Radius | 4.5 meters | |
| Reveal Radius | 5.25 meters | Increased from 3.5m detection range |
| Activation | Remote, Manual Trigger | Cannot be recalled |
Usage:
- Area Denial: Nanoswarms are excellent for temporarily blocking choke points, preventing enemy pushes through narrow corridors, or delaying site entries.
- Post-Plant: This is where Nanoswarms truly shine. By placing them on or near common spike plant locations (often using pre-practiced lineups), Killjoy can activate them when she hears the defuse sound, dealing heavy damage and often preventing the defuse entirely. If using both charges, staggering their activation maximizes the denial time. Some players even hide them within the spike's model itself, making them harder to spot and destroy before defusing.
- Defensive Setups: Pre-placing Nanoswarms in common hiding spots (like corners or behind boxes) or along entry paths allows Killjoy to activate them to damage or flush out enemies attempting to take site control. Combining them with an Alarmbot trigger provides confirmation of enemy presence before activation. Placing them in spots that are difficult for enemies to break adds to their effectiveness.
- Flank Watching (Attack): While less common than using Turret/Alarmbot, Nanoswarms can be placed passively in flank routes. Activating them upon hearing flankers can deter the push or inflict damage.
- Clearing Angles/Flushing: Throwing Nanoswarms into suspected enemy positions, such as inside smoke screens or behind cover, can force enemies to reposition or take damage.
Lineup Principles:
Nanoswarm lineups involve learning specific throws from safe locations that consistently land the grenade on critical spots like default plant locations. Mastering these requires practice in custom games to ensure accuracy and consistency. Numerous online resources, including video guides and websites, catalogue lineups for various maps. Understanding common plant spots on each site is essential for knowing where to aim these lineups.
Strategic Implications:
The increase in Nanoswarm health from 1 HP to 20 HP was a significant buff. Previously, stray bullets or minimal utility could easily destroy them before activation. Now, enemies must consciously target and expend resources (multiple bullets or specific utility) to break them. This increased resilience makes pre-placed defensive traps and crucial post-plant lineups far more reliable, solidifying Killjoy's control capabilities. Additionally, while potentially a niche interaction or bug, reports suggest that activating two Nanoswarms simultaneously in the same location might lead to reduced overall damage output due to overlapping damage tick cancellations. This further reinforces the tactical recommendation to stagger the activation of multiple Nanoswarms, ensuring maximum duration of denial and avoiding any potential negative damage interactions.
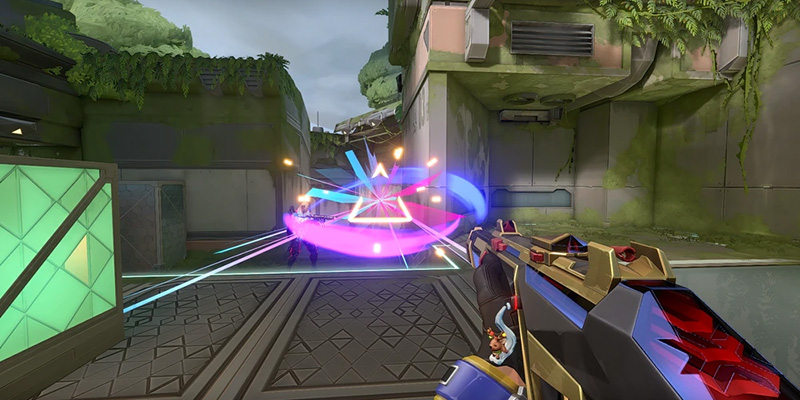
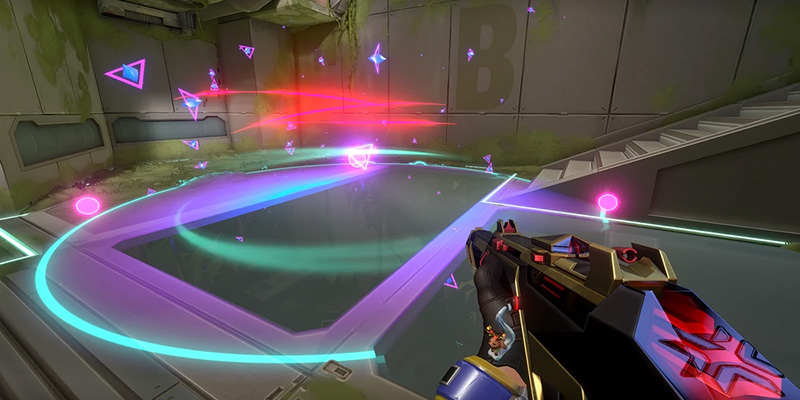
Lockdown (X - Ultimate): The Game Changer
Killjoy's ultimate ability, Lockdown, is a powerful device capable of securing large areas and altering the course of a round.
Mechanics:
Killjoy deploys a device that, after a lengthy 13-second windup period, emits a massive pulse. Any enemies caught within the device's large radius when the pulse triggers are 'Detained' for 8 seconds. Detained enemies are severely impaired: they cannot equip or use their weapons or abilities, and their movement speed is significantly reduced. The Lockdown device itself can be destroyed by enemy fire or abilities before it completes its windup. It is immune to damage from allies.
Stats:
Lockdown requires 9 Ultimate points to charge, an increase from previous costs of a7 and 8, reflecting its high impact. The device itself has 200 HP, buffed from 150 HP, making it more durable against attempts to destroy it. Key timings are the 13-second windup and the 8-second Detain duration. Its radius is substantial, typically capable of covering an entire bombsite.
| Statistic | Value | Notes |
|---|---|---|
| Ultimate Cost | 9 Points | Increased from 7, then 8 |
| Health (HP) | 200 | Increased from 150 HP; Immune to allied damage |
| Cast Time (Windup) | 13 seconds | Vulnerable during this time |
| Detain Duration | 8 seconds | Enemies cannot use weapons/abilities, are slowed |
| Radius | Large | Typically covers an entire bombsite |
Strategic Usage:
- Site Takes (Attack): Lockdown is exceptionally effective for executing onto a bombsite. Deploying it forces defenders to either abandon their positions or risk being Detained, creating a window for the attacking team to push in, clear remaining enemies, and secure the plant. Attackers should typically push onto the site during the final 5 seconds of the windup, as defenders will likely have retreated by then.
- Site Retakes (Defense/Post-Plant): On defense, Lockdown is a premier tool for retaking a site after the spike has been planted. Placing it strategically forces attackers holding post-plant positions out into the open or detains them, making the retake significantly easier for the defending team. Coordinating the retake push with the Lockdown's detonation is crucial.
- Forcing Rotations/Stalling (Defense): If Killjoy hears a heavy enemy presence committing to her site early in the round, deploying Lockdown can force the attackers into a difficult choice: push through and risk detainment, try to destroy the device under pressure, or abandon the push and rotate to another site. This can buy significant time for defensive rotations or completely disrupt the enemy's attack plan. However, experienced teams might anticipate this and simply wait out the Lockdown before re-executing on the same site.
- Post-Plant (Attack): Lockdown can also be used defensively after planting the spike. Deploying it can prevent or significantly delay the defending team's retake attempt, securing precious time for the spike to detonate.
Placement & Protection:
Effective Lockdown usage hinges on placement. The device should be positioned in a location that covers the desired strategic area (e.g., the entire bombsite, key choke points) while being difficult for enemies to easily access and destroy during its 13-second windup. Placing it behind solid cover, in deep corners, or locations requiring enemy utility expenditure to reach is ideal. Protecting the Lockdown device during its vulnerable windup phase often requires team coordination and cover fire.
Counters & Considerations:
Lockdown is powerful but not invincible. Certain high-damage abilities, such as Sova's Hunter's Fury, Brimstone's Orbital Strike, or Raze's Showstopper and Paint Shells, can destroy the device quickly if aimed correctly. Sustained gunfire from multiple enemies can also break it. Therefore, players should be mindful of the enemy team's available ultimates and potent utility before deploying Lockdown, ideally using it when key counters are unavailable. Its high ultimate cost (9 points) means it's a significant investment and should be used in rounds where its impact can be decisive.
Strategic Implications:
The increases to Lockdown's health (150 HP to 200 HP) and ultimate cost (eventually reaching 9 points) underscore its recognized potency and impact. It's more resilient than ever but available less frequently. This positions Lockdown as a high-stakes, potentially round-winning ability that demands careful strategic thought regarding its timing, placement, and the surrounding game state (like enemy economy and available counters). It's not an ultimate to be used lightly, but when deployed correctly in a critical moment, it can decisively swing the round in Killjoy's team's favor.
Mastering Defensive Site Control
Killjoy's essence lies in her ability to exert unparalleled control over defensive territory. Excelling with her requires embracing the Sentinel mindset, understanding how to layer her abilities effectively, and avoiding common defensive errors.
Principles of Anchoring: Patience, Information, Delay
The core tenets of playing Killjoy effectively on defense revolve around three key principles:
- Patience: As a site anchor, Killjoy's primary goal is often to hold ground rather than seek aggressive engagements. Overextending or peeking unnecessarily risks an early death, which can cripple the team's defense as her valuable utility goes offline. Successful Killjoy players often play slow, allowing their gadgets to make initial contact and provide information before committing to a fight. Trust the setup and let the enemies come to you.
- Information: Killjoy's Turret and Alarmbot are potent information-gathering tools. The audio cues and minimap indicators provided when these gadgets detect or are destroyed by enemies offer crucial insights into enemy presence, direction, and timing. Relaying this information clearly and concisely to teammates is paramount for coordinated defensive responses. Killjoy often has the best overview of the immediate threats to her site.
- Delay: A primary function of Killjoy's kit is to stall enemy pushes. The Turret's suppressing fire, the need to destroy utility, the activation of Nanoswarms to block paths, and the threat of Lockdown all serve to slow down enemy executes. This delay buys critical time for teammates to rotate from other areas of the map and reinforce the contested site, turning an initial disadvantage into a defensible position.
Building Layered Defenses: Ability Synergy in Practice
Effective Killjoy defense is not merely about placing individual gadgets; it's about creating a synergistic system where abilities work together, cover each other's weaknesses, and present multiple, compounding threats to attackers. This concept of layered defense is key to maximizing her potential.
Here are the most effective ability combinations for Killjoy's defensive setups:
- Alarmbot + Nanoswarm: The quintessential Killjoy trap. When the Alarmbot triggers, activate the Nanoswarm for doubled damage due to the Vulnerable debuff.
- Turret + Player: Create a crossfire situation where enemies must deal with threats from multiple angles simultaneously.
- Turret + Alarmbot: Enhance both abilities by placing the Alarmbot within the Turret's line of sight.
- Layered Nanoswarms: Place them at sequential points along a push path for extended area denial.
Alarmbot + Nanoswarm: This is the quintessential Killjoy trap. Place the Alarmbot in a choke point or common entry path where enemies are likely to trigger it. Conceal one or two Nanoswarms nearby, ideally in spots that are difficult for enemies to spot and destroy preemptively. When the Alarmbot triggers (signaled by audio and minimap cues), activate the Nanoswarm(s). The Vulnerable debuff from the Alarmbot doubles the already significant damage from the Nanoswarm, creating a lethal zone that can quickly eliminate or severely weaken pushing enemies.
Turret + Player: This involves creating a crossfire situation. Place the Turret to cover one angle of approach, while Killjoy herself holds a different, often opposite, angle. When enemies push, they are forced to deal with threats from two directions simultaneously. The Turret acts as both an early warning system and a distraction; players can wait for the Turret to engage and then swing on the enemy while their attention is divided.
Turret + Alarmbot: Placing the Alarmbot within the Turret's line of sight enhances both abilities. If the Alarmbot triggers, the Vulnerable debuff makes subsequent Turret shots significantly more impactful. Conversely, the Turret can provide covering fire for the Alarmbot or engage enemies who are focused on destroying the bot.
Layered Nanoswarms: Instead of placing both Nanoswarms in the exact same spot, consider placing them at sequential points along a common push path or at different critical locations within a site (e.g., one on default plant, one at the main entrance). This forces enemies to navigate multiple damaging zones or allows for extended area denial by activating them sequentially.
Integrating with Teammates: Killjoy's utility becomes even more potent when combined with the abilities of her teammates. Pairing Nanoswarms with slowing abilities like Sage's Slow Orb or Clove's Meddle creates inescapable damage zones where enemies are trapped and take heavy damage. Combining Lockdown with initiator abilities like Breach's Rolling Thunder, KAY/O's NULL/cmd, or various flashes can lead to devastatingly effective site retakes or holds. Controller smokes can help obscure Killjoy's setup or funnel enemies into her traps.
The power of these combinations lies in creating a defensive structure that is far more formidable than the sum of its individual parts. A single Alarmbot might be a minor nuisance, but an Alarmbot combined with hidden Nanoswarms and a crossfiring Turret presents a complex and lethal challenge that can completely shut down an enemy attack.
Avoiding Common Defensive Pitfalls
While Killjoy's defensive potential is immense, several common mistakes can undermine her effectiveness:
- Predictable Setups: Using the exact same Turret, Alarmbot, and Nanoswarm placements every single round makes Killjoy easy to counter. Experienced opponents will quickly learn the common spots and pre-fire or use utility to destroy the setup before it has any impact. Varying placements from round to round is essential to maintain the element of surprise.
- Obvious Placements: Placing utility in wide-open, easily visible locations invites quick destruction. Utilize corners, boxes, map geometry, and shadows to conceal gadgets, forcing enemies to actively search for them or stumble into their range unexpectedly.
- Over-Rotation: The urge to quickly help teammates on the other side of the map can be strong, but rotating too early or unnecessarily can leave the anchored site completely vulnerable. Trust the initial setup to provide information and delay. Assess the threat level accurately and rotate only when a full commitment is confirmed, ensuring the primary defensive position isn't compromised prematurely. Killjoy often serves as the final line of defense for her site.
- Wasting Utility: Nanoswarms are powerful but limited resources. Activating them prematurely without confirmation of enemy presence or simply based on guesswork can waste valuable utility. While sometimes activating early to stall a suspected push can be a valid tactic, generally, it's better to wait for confirmation from an Alarmbot trigger, Turret fire, or sound cues.
- Range Limitation Neglect: Forgetting the 40-meter activation range for the Turret and Alarmbot is a critical error. Straying too far to lurk or support distant teammates will deactivate the core defensive setup, rendering it useless. Maintaining awareness of this range is crucial (discussed further in Section 7).
Dominating Post-Plant Scenarios
While Killjoy is a defensive powerhouse, her influence extends dramatically into the post-plant phase, arguably her strongest area of impact. Once the spike is planted, the attacking team transitions to defense, and Killjoy's toolkit is perfectly designed to prevent the enemy team from retaking the site and defusing the spike.
Securing the Spike Plant
Although Killjoy lacks the entry fragging capabilities of Duelists, she plays a vital role in enabling a successful spike plant. On attack, her primary contribution during the site execute is often providing flank security with her Turret and Alarmbot, ensuring the team isn't caught off-guard by rotating defenders. Additionally, her Lockdown ultimate can be used offensively to clear defenders from the target site entirely, creating a safe window for the team to push in and plant the spike.
Essential Post-Plant Utility Placement (Turret, Alarmbot)
Immediately after the spike is planted, Killjoy should transition back into her defensive mindset, deploying her utility to secure the site against the inevitable retake attempt.
- Turret: Place the Turret in a position where it has a line of sight on the planted spike or covers the most common angles defenders will use to approach for the defuse. It can serve as an early warning system, firing as soon as a defender attempts the defuse, giving Killjoy and her team time to react. It can also cover flanks or cross angles while the team holds the site.
- Alarmbot: Deploy the Alarmbot directly on or very near the spike to detect any player attempting a defuse. Alternatively, place it on the primary pathways defenders will use to retake the site, providing an early warning of their approach. The Vulnerable debuff applied by the Alarmbot makes any defender caught attempting a defuse significantly easier to eliminate.
Mastering Nanoswarm Lineups (Key Principles & Examples)
The Nanoswarm is Killjoy's ultimate post-plant weapon. Using lineups allows her to deny the spike defuse from safe, often distant, positions, making it incredibly difficult for the defending team to win the round.
Goal: The primary objective of post-plant Nanoswarms is to prevent the enemy from completing the spike defuse, which typically takes 7 seconds (or 3.5 seconds for a half defuse). The Nanoswarm's 4-second duration and high damage output are perfectly suited for this.
Principles: Effective lineup usage requires learning specific, repeatable throws for common (default) plant locations on each map. These lineups often involve aligning Killjoy's HUD elements with specific points in the map environment (e.g., leaves, wires, corners, shadows). Consistency is key, and practicing these throws in custom games is essential for reliability under pressure.
Execution: After planting the spike (ideally in a location for which Killjoy knows a lineup), she should retreat to the designated safe spot for the lineup. Upon hearing the distinct audio cue of an enemy starting the defuse, she activates the Nanoswarm. If both Nanoswarms are available and placed for the same spot, activating them sequentially (waiting for the first to nearly expire before triggering the second) maximizes the denial time, covering nearly 8 seconds – longer than a full defuse. A clever tactic involves hiding the Nanoswarm grenade inside the visual model of the planted spike, making it very difficult for defenders to spot and destroy before attempting the defuse. Defenders should be wary of this and potentially shoot the spike model before committing to a defuse.
Examples: Numerous resources exist online showcasing specific Nanoswarm lineups for every map, often through video tutorials or dedicated strategy websites. Section 6 of this guide will detail lineups for specific maps currently in the competitive pool.
The ability to reliably deny spike defusals with well-executed Nanoswarm lineups is arguably Killjoy's most powerful and unique contribution to the attacking side. A Killjoy who has mastered post-plant lineups can single-handedly secure rounds that would otherwise be lost, transforming her from a purely defensive anchor into a constant threat throughout the entire game. This capability alone often justifies her selection in team compositions.
Killjoy on the Attack: Securing Flanks and Post-Plants
While Killjoy's kit is inherently geared towards defense, she plays a crucial, albeit different, role during attacking rounds. Her offensive strength lies not in direct aggression but in enabling her team's execute and dominating the critical post-plant phase.
Effective Flank Watching Setups
The most consistent and vital role for Killjoy on attack is watching the team's flank. As the attacking team commits to pushing a specific site, defenders will often attempt to rotate through other parts of the map or push aggressively from behind to catch the attackers off-guard. Killjoy's utility is perfectly suited to prevent this.
- Turret: Place the Turret in a position covering common flank routes, such as mid-map connectors or pathways leading from the opposite site or defender spawn. Hidden or unexpected placements can provide earlier warnings. The Turret's gunfire provides an immediate alert and can potentially slow or damage flankers.
- Alarmbot: Deploy the Alarmbot in key choke points along potential flank routes. Its detection provides a clear warning, and the Vulnerable debuff can make dealing with the flanker easier for Killjoy or a rotating teammate.
- Nanoswarm: While less common for pure flank watching, Nanoswarms can be placed passively in tight corridors or doorways along flank routes. Activating them upon hearing enemy footsteps can deter the flank or inflict significant damage.
Securing the flank allows the rest of the attacking team to focus their attention forward onto the site execute without fear of being attacked from behind, significantly increasing the chances of a successful site take.
Transitioning to Defense: Post-Plant Lockdown
Once the spike is successfully planted, Killjoy immediately shifts back to her defensive expertise. Her objective is now to prevent the defenders from retaking the site and defusing the spike.
- Rapid Setup: Killjoy should quickly deploy her remaining utility around the planted spike. This includes placing her Turret to watch key retake angles or the spike itself, positioning her Alarmbot near the spike or on entry paths, and, most importantly, setting up her Nanoswarms for defuse denial (ideally using pre-learned lineups).
- Survival Priority: As on defense, Killjoy's survival in the post-plant is critical. She needs to stay alive to activate her Nanoswarms at the correct moment. Playing from a safe position, relying on information from her utility and teammates, is generally advisable.
The Calculated Risk: Lurking with Killjoy
The viability of lurking (moving away from the main team push to control other map areas or catch rotating enemies) with Killjoy is debated.
| Arguments For | Arguments Against |
|---|---|
| Lurking allows Killjoy to potentially gain map control elsewhere, catch rotating defenders off-guard, gather information, and even open up an alternative site if the main push stalls. Her utility can cover her immediate flank while lurking. | Killjoy's 40m utility range limit is a major constraint. Deep lurking will deactivate any utility left to watch the main team's flank or utility placed for post-plant on the target site. Cypher, with his global utility, is generally considered a much better lurker. |
Verdict: Lurking with Killjoy is a high-risk, high-reward strategy best employed situationally by experienced players with strong game sense. It requires careful management of the 40m range – either keeping utility close to the lurking position or accepting that far-off utility will be disabled. It's generally not advisable to lurk deeply or when the enemy team is on an eco/save round where unexpected aggression is less likely. Holding mid-map control while the team pushes a site can be a safer form of lurking.
Offensive Lockdown Strategies
Killjoy's ultimate, Lockdown, can also be a potent tool on attack:
- Site Execution: As previously mentioned, deploying Lockdown onto the target site before the main push forces defenders out, significantly simplifying the site take. Timing the push to coincide with the final seconds of the Lockdown windup maximizes its effectiveness.
- Faking Sites: A more advanced tactic involves using Lockdown on one bombsite purely as a diversion. The loud audio cue and large visual indicator will draw defender rotations towards the Lockdown site, potentially leaving the other bombsite vulnerable for a quick take by the rest of Killjoy's team. This requires good coordination and timing.
Ultimately, Killjoy's attacking strength is less about individual fragging power and more about strategic control. By diligently watching flanks, she enables safer site executes. By mastering post-plant setups, she secures round wins after the spike is down. Her offensive impact comes from disrupting the defenders' plans and controlling space, rather than directly overpowering them in combat.
Map Mastery: Killjoy Setups Across the Competitive Pool
Killjoy's effectiveness is heavily influenced by map layout. Her static utility thrives in environments with well-defined choke points, specific angles to hold, and predictable plant spots. Mastering Killjoy involves learning not just general principles but specific, optimized setups for each map in the competitive rotation. Map knowledge is paramount; understanding common push routes, default plant locations, and map geometry allows for concealed and synergistic utility placement.
The current Valorant competitive map pool (as of May 2025, following Patch 10.08) includes: Ascent, Haven, Icebox, Lotus, Pearl, Split, and Sunset. Fracture was recently removed, replaced by Sunset.
Ascent
A classic map with controllable Mid, distinct choke points (A Main, B Main, Mid Link), and defined sites. Killjoy is a very strong pick here, excellent for anchoring either site (especially B due to fewer entry points) or controlling Mid.
Site A Defense:
- Turret: Common spots include on top of Generator, behind the site boxes, in A Heaven overlooking Main/Short, or deeper towards Tree/Wine.
- Alarmbot: Place to cover A Main entrance (behind the wall corner), Wine/Tree entrance, or A Short cubby/entrance. An Alarmbot in A Heaven can cover Ropes/Ramps pushes.
- Nanoswarms: Place on the default plant spot (near Generator), inside Generator entrance, at the A Short choke point, or in Lane for "microwave" setups combined with Alarmbot.
- Example Setup (Lane Microwave): Turret watching Mid Cubby cross. Alarmbot deep in Lane. Nanoswarms placed behind the "candy cane" barrier and near the wall for Lane entrance, thrown from near Generator.
Site B Defense:
- Turret: Place on Back Plat overlooking Main, Logs covering Main, or deeper site watching Market/Stairs.
- Alarmbot: Position at B Main entrance (behind corner), Market doorway, or bottom of Stairs.
- Nanoswarms: Cover default plant (near Switch/Boathouse), B Main entrance choke, or under B Window/Logs. A hidden Nanoswarm can be placed under the Boathouse floor texture.
Post-Plant Lineups:
- A Site: Lineups exist from Mid (near boxes), A Lobby (near rock/buoy or on rocks), and potentially Catwalk.
- B Site: Lineups commonly thrown from B Main (near boxes), Logs/Plank area, Attacker Spawn side near Garden/Cannon, or Catwalk.
Attacking:
Turret is excellent for watching Mid Link flank or the flank from Defender Spawn towards A/B. Post-plant setups are crucial.
Haven
Unique for its three bombsites, Haven demands strategic utility placement or focusing defensive efforts. Killjoy can anchor one site strongly or play more centrally to support Garage/Mid control. Her Lockdown is particularly potent for retaking any of the three sites.
Site A Defense:
- Turret: Place in Heaven overlooking Short/Site, Hell (under Heaven), back site boxes, or watching Long push.
- Alarmbot: Cover A Short entrance, A Long push (near corner), or Sewer entrance.
- Nanoswarms: Target default plant (near site box), A Short entrance, or A Long entrance.
Site B Defense:
- Turret: Position back site watching Mid Window and Garage entrance, or on site boxes.
- Alarmbot: Place at Mid Window exit, Garage entrance, or B door entrance from Mid.
- Nanoswarms: Cover default plant spot, entryways from Mid/Garage.
Site C Defense:
- Turret: Common spots include back site Plat, Logs corner, or deeper towards Garage connector.
- Alarmbot: Place at C Long entrance (behind corner) or Garage entrance.
- Nanoswarms: Cover default plant (near Plat), C Long entrance choke, or Garage entrance. Hidden Nanoswarm in the dragon pot is possible.
Post-Plant Lineups:
Requires lineups for three distinct sites. Common throwing spots include A Long (for A), C Long (for C), Attacker Spawn areas, and potentially Garage/Mid for B site plants.
Attacking:
Flank watch is critical due to the map's layout. Turret often placed watching Mid Doors, Garage flank, or the flank from the opposite side spawn connector. Lurking Mid/Garage can be effective if utility covers flanks. Post-plant setups are vital.
Icebox
Known for verticality, long sightlines, and multiple angles. Killjoy is considered a strong pick, often featured in double Sentinel compositions alongside Viper or Sage. Elevated Turret placements are highly effective for information. Lockdown is powerful for controlling the open sites.
Site A Defense:
- Turret: Excellent spots include top of Rafters (Belt side or Nest side), top of Pipes, or back site Nest overlooking Belt/Site.
- Alarmbot: Place near Belt entrance, under Pipes, near Screens, or watching the push from Ramps/Nest.
- Nanoswarms: Cover default plant (near Nest or safe plant behind box), Belt entrance choke, or under Pipes.
Site B Defense:
- Turret: Place on top of Yellow container, behind Snowman, back site near default, or even in Kitchen window overlooking site/Tube.
- Alarmbot: Cover Green lane entrance (behind cover), under Tube exit, Kitchen entrance, or Snowpile path.
- Nanoswarms: Target default plant spots (open near Yellow or safe behind Green box), Green lane entrance, or Snowpile choke.
Post-Plant Lineups:
Lineups often thrown from safer positions like Mid Boiler, Attacker Spawn tunnel, Kitchen, or behind site cover (e.g., B back site, A Nest).
Attacking:
Turret essential for watching flanks through Mid or from Defender Spawn. Post-plant control is key due to the open nature of the sites.
Lotus
Another three-site map featuring rotating doors, a destructible wall (A Link), and multiple flanking routes. Killjoy excels here, particularly at locking down C site or controlling access through the rotating doors. Often paired with double controllers (like Viper/Omen) due to the large sites.
Site A Defense:
- Turret: Place on top of Hut, Stairs overlooking Main/Tree, back site near Drop, or watching the rotating door.
- Alarmbot: Cover Tree entrance, Stairs entrance, Drop path, or near the destructible wall/rotating door.
- Nanoswarms: Target default plant, Tree entrance choke, Stairs choke, or near rotating door.
Site B Defense:
- Turret: Place top site near Pillar, back site wall, or watching Main entrance.
- Alarmbot: Cover B Main entrance or A Link connector entrance.
- Nanoswarms: Target default plant, B Main entrance choke.
Site C Defense:
- Turret: Place on Mound overlooking Long/Site, back site corner near Waterfall, or watching rotating door.
- Alarmbot: Cover Waterfall entrance, C Hall entrance (behind corner), or near rotating door.
- Nanoswarms: Target default plant (near Mound), Waterfall entrance, Hall entrance choke.
Post-Plant Lineups:
Requires lineups for three sites. Common throwing spots include A Link (for A/B), C Link (for B/C), Attacker Spawn areas, or safe corners within the sites.
Attacking:
Turret crucial for watching flanks through the various links or Defender Spawn paths. Post-plant setups are vital for holding the large, multi-entrance sites.
Pearl
A more traditional two-site map set underwater, featuring a complex Mid area, a long B site, and distinct A site. Killjoy is effective for locking down the tighter A site or playing for retake information on B.
Site A Defense:
- Turret: On top of the central Hut, in the corner by Dugout, in A Link watching Mid, or hidden back site near Secret.
- Alarmbot: Place around the Hut (behind corners or on top), at A Main entrance (behind corner or on stairs), on A Link stairs, near Dugout, or further back watching flanks.
- Nanoswarms: Target default plant (inside circle near Hut), hidden inside Dugout corners, on A Link stairs, or covering site entrances.
Site B Defense:
- Turret: Place back site near Screen, in B Hall overlooking Long, or on Tower platform.
- Alarmbot: Cover B Long entrance (behind pillar/corner), B Hall entrance, or Tower stairs.
- Nanoswarms: Target default plant (open or behind pillar), B Long entrance choke, B Hall entrance choke.
Post-Plant Lineups:
- A Site: Lineups often thrown from A Main, A Link, or Art area.
- B Site: Lineups typically thrown from B Link, B Hall, Mid Connector, or Attacker Spawn side Ramp.
Attacking:
Turret watches flank through Mid connectors or Defender Spawn paths. Strong post-plant setups are essential, especially for holding the long B site.
Split
Characterized by verticality (Rafters, Heaven areas), tight choke points, and a highly contested Mid. Killjoy is a strong defensive pick, particularly effective at locking down the B site via Heaven/Rafters control or anchoring A site.
Site A Defense:
- Turret: Place on A Rafters overlooking site/Main, behind Screens, back site near spawn entrance, or watching Ramps push.
- Alarmbot: Cover A Main entrance (behind box/corner), Ramps entrance from Mid.
- Nanoswarms: Target default plant (near Screens/box), A Main choke point, or Ramps choke point.
Site B Defense:
- Turret: Place in B Heaven overlooking site/Main, on B Rafters, back site near Alley, or watching Garage/Vent push.
- Alarmbot: Cover B Main entrance (behind corner), Garage/Vent entrance from Mid.
- Nanoswarms: Target default plant (near pillar/corner), B Main entrance choke, Heaven drop area, or Mail room entrance.
Post-Plant Lineups:
- A Site: Lineups thrown from A Main, Attacker Spawn connector, or potentially Mid Vent area.
- B Site: Lineups commonly thrown from B Main, Attacker Spawn connector, or Mid Mail area.
Attacking:
Turret essential for watching Mid Mail flank or the flank route through Defender Spawn. Post-plant setups are crucial for holding the vertically complex sites.
Sunset
A relatively new map featuring a classic three-lane, two-site layout with a crucial Mid area. Killjoy can effectively anchor either site, leveraging the map's corners and choke points. Mid control is vital. Cypher is also noted as strong here.
Site A Defense:
- Turret: Place top site near Elbow overlooking Main, back site near generator, or watching Alley push.
- Alarmbot: Cover A Main entrance (behind boxes/corner) or Alley entrance from Mid.
- Nanoswarms: Target default plant (near box), A Main choke point, or Elbow/Alley entrance.
Site B Defense:
- Turret: Place top site boxes, back site wall near Market, or watching Main push.
- Alarmbot: Cover B Main entrance (behind pillar/corner) or Market entrance from Mid.
- Nanoswarms: Target default plant (open or behind pillar), B Main choke point, or Market entrance.
Post-Plant Lineups:
As a newer map, established lineups might be less widespread but likely thrown from Mid Top, Attacker Spawn side connectors, or safe corners within the sites (e.g., B Boba, A Elbow). Principles remain the same: target default plant spots from safety.
Attacking:
Turret watches flank through Mid Top/Bottom or Defender Spawn paths. Post-plant setups are essential for holding sites against retakes through Mid or main entrances.
Continuously learning and adapting setups based on enemy habits and evolving meta strategies is key to sustained success with Killjoy on any map.
Synergies and Constraints
While Killjoy is a powerful agent, her effectiveness is influenced by her team composition and her inherent limitations, most notably the range restriction on her deployable gadgets. Understanding these factors is crucial for maximizing her impact and mitigating her weaknesses.
Ideal Team Compositions with Killjoy
Killjoy thrives when paired with agents whose abilities complement her defensive and control-oriented style.
General Synergies:
- Information Gatherers (Sova, Fade, Cypher): Agents who can provide reconnaissance help Killjoy place her utility more effectively, anticipating enemy movements or confirming safe spots for aggressive setups. Sova's Recon Bolt or Fade's Haunt can reveal enemy positions, allowing Killjoy to pre-place Nanoswarms or position her Turret optimally. A second Sentinel like Cypher can provide global flank watch or information gathering that Killjoy's range-limited kit cannot.
- Initiators (Breach, KAY/O, Skye, Gekko): Initiators who can stun, flash, or suppress enemies create powerful combo opportunities. Lockdown becomes even more devastating when paired with follow-up stuns or flashes, preventing enemies from escaping or destroying the device. Breach's Fault Line or Aftershock can force enemies out of cover and potentially into Killjoy's traps. Gekko's Wingman can plant or defuse while Killjoy provides cover.
- Controllers (Viper, Omen, Brimstone, Astra, Harbor): Controllers provide smokes that can obscure Killjoy's setups, protect her Lockdown device, or funnel enemies into specific choke points covered by her utility. Some controllers offer damaging utility that pairs well with Nanoswarms (Brimstone Incendiary, Viper Snake Bite) or crowd control that combos with her kit (Astra Gravity Well).
- Healers/Support (Sage): Sage's Slow Orbs can trap enemies within Nanoswarm radius for extended periods. Her healing and Resurrection provide sustain, making defensive holds more resilient.
Specific Strong Pairings:
- Killjoy + Viper: A classic defensive duo, particularly strong on maps like Icebox, Lotus, and Bind. Their combined utility creates formidable post-plant scenarios and site holds, layering damage-over-time and area denial.
- Killjoy + Cypher: Offers comprehensive information and lockdown potential, though potentially lacking offensive pressure depending on the rest of the team.
- Killjoy + Breach/KAY/O: Excellent synergy for coordinated site takes and retakes using Lockdown combined with powerful initiator ultimates and crowd control.
- Killjoy + Astra/Brimstone: Allows for devastating damage combos by layering Nanoswarms with Gravity Well or Incendiary/Orbital Strike.
Playing Around the 40m Range Limitation: Strategies and Mindset
The most significant constraint on Killjoy's gameplay is the 40-meter activation range on her Turret and Alarmbot. If Killjoy moves further than 40 meters away from these deployed gadgets, they deactivate, rendering them temporarily useless until she moves back into range. This limitation has profound implications for her playstyle and requires specific strategies to manage effectively.
The Constraint Defined:
This range limit fundamentally differentiates Killjoy from Sentinels with global utility, like Cypher, whose traps and camera remain active regardless of his position. Chamber's Trademark also previously had global range before being nerfed to have a range restriction similar to Killjoy's.
Defensive Implications:
The range limit forces Killjoy to play relatively close to the site she intends to anchor. If the enemy team attacks the opposite site, Killjoy faces a difficult decision. If she rotates immediately, her utility on the original site deactivates. If she stays, she might be too late to help defend. This makes her particularly vulnerable during retake scenarios on the site she wasn't initially holding, as she arrives with potentially no active utility and long cooldowns if she had to recall gadgets late.
Attacking Implications:
The range limit restricts Killjoy's ability to perform deep lurks effectively. Any flank-watching utility placed early in the round will deactivate as the team pushes forward onto a site unless Killjoy stays significantly behind the main group.
Strategies and Mindset:
- Embrace the Anchor Role: The simplest approach is to accept the limitation and commit to anchoring a specific site or area, playing within the 40m radius of the core setup.
- Proactive Recalling: Develop the habit of recalling the Turret and Alarmbot before initiating a rotation or pushing significantly forward on attack. While recalling still incurs a cooldown (10s for Turret, 7s for Alarmbot), this is far shorter than the 45s cooldown if the Turret is destroyed, and it ensures the utility is available for redeployment sooner upon reaching the new location. The reduction of these pickup cooldowns was a significant quality-of-life buff for managing the range limit.
- Clear Communication: Constantly communicate position and utility status to the team. Let teammates know if rotating will disable flank watch or site defenses. Coordinate recalls and redeployments.
- Calculated Lurking (Advanced): If attempting to lurk, players must be acutely aware of the 40m boundary. This might involve keeping utility closer to the lurking position to cover immediate flanks, focusing on mid-map control rather than deep site holds with utility, or simply accepting that far-off utility will be temporarily disabled.
- Team-Based Solutions: On larger maps or against complex strategies, relying on teammates is essential. A second Sentinel can cover areas outside Killjoy's range. Teammates need to be aware of Killjoy's limitations during rotations and retakes.
- Mid-Round Adaptation: Use the recall function dynamically. If a push is stalled or the team decides to rotate, recall utility promptly to reposition effectively.
The 40m range limit is not necessarily a sign of Killjoy being underpowered, but rather a defining characteristic that shapes her strategic role. It enforces a more deliberate, anchored playstyle compared to globally present Sentinels. Mastering Killjoy involves not just clever setups, but also intelligent management of this spatial constraint through proactive recalls, clear communication, and a strong understanding of positioning relative to her active gadgets.
Advanced Techniques: Elevating Your Killjoy Play
Moving beyond basic setups and ability usage unlocks Killjoy's true potential as a strategic mastermind. Advanced Killjoy play involves creativity, unpredictability, precise timing, psychological pressure, and proactively countering enemy strategies.
Unconventional Setups & Angles
Static, predictable defenses are easily dismantled by experienced players. Elevating defensive play requires thinking outside the box:
- Creative Placements: Experiment constantly with gadget locations. Place Turrets and Alarmbots on top of crates, tucked into high corners, behind unusual map geometry, or in off-angles that enemies don't typically pre-aim. Utilize verticality where possible. The goal is to surprise opponents and delay detection.
- Hidden Nanoswarms: Go beyond placing Nanoswarms directly on default plant spots. Hide them underneath ramps, inside destructible objects (like pots or boxes where applicable), or just outside the immediate visual range of common angles, relying on the Alarmbot trigger or sound cues for activation.
- Unpredictability: The most crucial element is variation. Even the most ingenious setup becomes ineffective if used repeatedly. Change placements round-to-round based on enemy tendencies and previous outcomes. Keep opponents guessing.
Timing-Based Plays and Utility Sequencing
Precision timing dramatically increases the impact of Killjoy's abilities:
- Nanoswarm Activation: Rely on audio cues (spike defuse sound, enemy footsteps, Alarmbot trigger) rather than waiting for visual confirmation, especially for post-plant lineups or traps. Sometimes, delaying activation slightly after an Alarmbot trigger can bait enemies deeper into a Nanoswarm radius before they realize the danger. Mastering the sequential activation of two Nanoswarms for maximum denial time is critical.
- Lockdown Deployment: Use Lockdown proactively, not just reactively. Deploy it before an anticipated heavy push to deter it entirely or force a costly rotation. Use it to initiate a retake or site execute rather than waiting until the situation is desperate. Consider the enemy's ultimate economy – using Lockdown when key counters (Sova/Brimstone ults) are down increases its chances of success.
- Recall Management: Develop the instinct to recall Turret and Alarmbot just before rotating or anticipating their destruction. This minimizes the cooldown penalty and maximizes utility uptime.
Advanced Crossfire and Bait Setups
Leverage enemy expectations and aggression with clever setups:
- Turret as Bait: Place the Turret in a somewhat obvious but threatening position to intentionally draw enemy attention and fire. While the enemy is distracted shooting the Turret, Killjoy can hold an unexpected off-angle nearby for an easy kill.
- "Microwave" Setups: These intricate traps often involve layering multiple pieces of utility in a confined space. For example, placing an Alarmbot at the entrance of a narrow corridor (like Ascent A Lane or Split B Mail) with two Nanoswarms hidden sequentially inside. When the Alarmbot triggers, activating both Nanoswarms (staggered) creates an inescapable kill zone.
- Playing Off Utility: Use the information from triggered utility not just to react, but to aggress. Swing immediately when an Alarmbot triggers nearby or when a Turret makes contact, capitalizing on the enemy's distraction or Vulnerable status.
Pro-Level Lurking Tactics (Situational)
While inherently risky due to the range limit, calculated lurking can yield high rewards for advanced Killjoy players.
- Focus: Instead of deep lurks, focus on controlling crucial mid-map areas (e.g., Haven Garage, Ascent Mid, Split Mid).
- Utility Management: Keep utility relatively close to cover immediate flanks while lurking, accepting that utility left far behind will deactivate. Use Alarmbots to listen for rotations through key pathways.
- Timing and Game Sense: Successful lurking relies heavily on reading the game flow, understanding enemy rotation timings, and capitalizing on moments of distraction or vulnerability. It requires significant map awareness and experience.
Outsmarting Killjoy Counters
Anticipating and mitigating enemy attempts to counter Killjoy's setup is a hallmark of advanced play:
- Countering Utility Destruction: Place gadgets in less predictable locations, behind cover, or in spots that force enemies into vulnerable positions to destroy them. If an enemy consistently uses specific utility (e.g., Sova darts, Raze grenades) to clear common spots, adapt placements accordingly.
- Playing Around Recon: If facing agents like Sova, Fade, or KAY/O who can reveal utility locations, have backup plans. Either reposition after being revealed or prepare to engage enemies who push based on the revealed information, potentially using the revealed gadget as bait.
- Mitigating Lockdown Counters: Track enemy ultimates known to destroy Lockdown (Sova's Hunter's Fury, Brimstone's Orbital Strike, Raze's Showstopper). Try to bait these abilities out beforehand or deploy Lockdown during windows when these counters are unavailable. Place the Lockdown device in locations less susceptible to direct hits from these abilities (e.g., under overhead cover, deep in corners).
Mastering Killjoy transcends simply knowing setups; it involves a dynamic interplay of strategic placement, precise timing, psychological manipulation through unpredictability, and the ability to adapt and counter the enemy's actions in real-time. It's about transforming static defenses into proactive control systems.
Conclusion: Becoming the Ultimate Killjoy
Killjoy stands as one of Valorant's premier defensive agents, offering unparalleled site anchoring capabilities, game-changing post-plant control, and valuable passive information gathering. Her unique arsenal of deployable gadgets allows her to create complex, layered defenses and secure objectives in ways few other agents can replicate. From the early warning and crossfire potential of her Turret, the potent debuff of her Alarmbot, the area denial and kill potential of her Nanoswarms, to the site-clearing power of her Lockdown ultimate, Killjoy possesses a toolkit that rewards strategic thinking, meticulous planning, and precise execution.
Mastering this German genius, however, requires more than just learning default setups. It demands a deep understanding of each ability's mechanics and statistics, a commitment to learning map-specific placements and lineups, and the tactical acumen to adapt strategies on the fly. Embracing the principles of patience, information gathering, and delay is crucial for effective anchoring. Layering abilities synergistically, both independently and with teammates, transforms simple defenses into formidable fortresses. Recognizing and mitigating common pitfalls, like predictable placements or neglecting the range limitation, is vital for consistent performance.
Furthermore, true mastery involves elevating play beyond static defense. It encompasses dominating post-plant scenarios with well-practiced Nanoswarm lineups, effectively utilizing utility for flank security on attack, understanding the risks and rewards of situational lurking, and employing advanced techniques like unconventional angles, timing-based plays, and bait setups to outsmart opponents.
The path to becoming an ultimate Killjoy involves continuous learning and adaptation. Practice setups and lineups diligently in custom games. Study professional players to observe high-level decision-making and innovative strategies. Analyze personal gameplay to identify weaknesses and areas for improvement. Most importantly, remain adaptable, varying setups and approaches based on the map, the opponents, and the ever-evolving Valorant meta. By combining deep knowledge of her kit with practical experience and a creative mindset, players can unlock Killjoy's full potential, becoming the engineering mastermind who dictates the flow of battle and consistently secures victory for their team.