
From the light, Agent. Enter the realm of Omen, a phantom woven from fragmented memories, a specter haunting the battlefields of Valorant. He is more than a mere Controller; he is an enigma, a master manipulator of sight and sanity, wielding darkness as both shield and weapon. Omen hunts from the periphery, rendering foes blind, teleporting across the map unseen, and letting paranoia fester as enemies scramble to predict his next strike. His power lies not just in blocking vision, but in twisting perception, dictating the rhythm of conflict through calculated misdirection and the ever-present threat of the unknown. He embodies the dual nature of control – the tangible command of space through shadow orbs, and the intangible dominance of the enemy's mind through fear and uncertainty. Primarily classified as a Controller, Omen specializes in governing sightlines and manipulating the battlefield, yet his unique toolkit unlocks potent lurking capabilities, allowing him to become a phantom menace operating far from his team.
Omen's Place in the Shifting Meta
Across Valorant's evolving tactical landscape, Omen remains a constant shadow, a testament to his inherent flexibility and power. Often ranked A-Tier among Controllers, his presence is felt across a wide array of maps and team compositions. In past metas, he was considered the premier pick on the majority of maps in rotation, showcasing remarkable adaptability even on maps where specialists might traditionally be favored. While agents like Viper excel at locking down large areas post-plant, or Brimstone offers rapid, team-focused executes with his Sky Smokes, Omen provides a different kind of strength. His kit – combining rechargeable, globally deployable smokes, a potent nearsight/deafening flash, and two distinct teleportation abilities – offers unparalleled versatility.
Even with the rise of aggressive controllers like Clove, Omen retains his unique niche. While Clove thrives in chaotic ranked play through post-death utility, Omen shines in coordinated environments and offers avenues for intricate, creative strategies that can dismantle opponents. Skilled players can elevate Omen's impact to S-Tier levels, leveraging his kit for unpredictable flanks, crucial information plays, and sustained map pressure. His enduring strength isn't merely derived from the power of individual abilities, but from the synergistic potential and strategic breadth of his entire toolkit. He can adapt his function mid-round – shifting from primary smoke deployer to lurker, to flanker, to supportive initiator – offering a tactical flexibility that few agents can match. This adaptability makes him a consistently valuable asset, capable of fitting into and enhancing diverse team strategies.
Navigating This Guide: A Path to Mastery
This manuscript serves as your passage into the shadows, a comprehensive codex detailing the intricacies of Omen. We shall dissect his spectral arsenal, laying bare the mechanics and strategic applications of each ability. The journey begins with foundational tactics, ensuring even novices grasp the core principles of his control. From there, we delve into advanced stratagems – the art of the one-way, the mastery of teleportation mind games, precision Paranoia, and the nuances of lurking. We will traverse the current competitive map pool, revealing map-specific smoke placements, teleport routes, and execute blueprints. Finally, we explore the ecosystem around Omen: his most potent synergies, the strategies used to counter him, common pitfalls to avoid, and the crucial management of economy. Prepare to shed your predictable patterns and embrace the phantom's path.
Omen's Arsenal: Tools of Deception and Control
Before dissecting the strategic layers, one must understand the tools. Omen's abilities are instruments of manipulation, each serving distinct yet interconnected purposes.
| Ability Name | Keybind (Default) | Cost | Charges | Cooldown/Recharge | Duration | Key Mechanic |
|---|---|---|---|---|---|---|
| Shrouded Step | C | 100 Credits | 2 Max (Purchased) | N/A | 1.2s Total | Short-range, LoS teleport with audio cue at start location |
| Paranoia | Q | 200 Credits | 1 Max (Purchased) | N/A | 2s Effect | Wall-piercing projectile; Nearsights & Deafens all hit |
| Dark Cover | E | Free | 2 Start, Regenerates 1 every 30 secs | 30s Recharge | 15s Max | Global range, placeable hollow smoke sphere |
| From the Shadows | X | 7 Ult Points | 1 Max (Earned) | N/A | ~4s Reform | Global map teleport, vulnerable Shade form, cancellable |
Shrouded Step (C): Beyond Movement
Omen's Shrouded Step is far more than a simple repositioning tool; it is an instrument of surprise and misdirection.
Sound Cue: Critically, Shrouded Step emits a distinct audio cue only from Omen's starting position, not the destination. This sound is audible to enemies within a 12.5-meter radius. This auditory signature is the core of its strategic depth. It can be masked by significant ambient noise, sufficient distance, or crucially, by the deafening effect of Omen's own Paranoia.
Strategic Uses: Its applications are numerous: offensively teleporting to unexpected high ground or flank positions; defensively repositioning to safety when under fire or escaping traps; crossing dangerous sightlines without exposure; and entering or exiting Dark Cover smokes for aggressive peeks or escapes. It's invaluable for reaching elevated positions inaccessible to most agents.
Mind Games: The sound cue enables potent psychological manipulation. Casting Shrouded Step onto your current location or nearby cover (a "fake TP") can mislead enemies into thinking you've repositioned elsewhere, baiting their attention or utility. The "Jump TP" technique involves jumping and casting mid-air; momentum can carry Omen slightly forward, creating the sound cue at the peak of the jump before snapping back, useful for faking entry or peeking corners.
The essence of mastering Shrouded Step lies in understanding its sound cue as a tool. It's not just about moving from A to B; it's about controlling the information (or misinformation) the enemy receives. Effective usage requires considering how the sound will influence enemy behavior – will it draw attention, cause hesitation, or be masked entirely? This transforms a movement ability into a potent psychological weapon.
Paranoia (Q): Blinding the Senses
Paranoia is Omen's primary tool for initiating conflict and disrupting enemy formations.
Effective Usage: Paranoia excels at setting up engagements. Use it to initiate pushes onto sites by blinding defenders holding common angles. Clear tight corners or suspected hiding spots without exposing yourself. Halt aggressive enemy rushes by blinding and deafening the entry players. Flush defenders out of strong positions during executes or retakes. Crucially, its effect cannot be dodged by turning away, unlike traditional flashes, making it exceptionally potent against Operators or players holding static angles.
Paranoia stands out due to its unique combination of wall penetration, unavoidable nearsight, and the often-underestimated deafen effect. This makes it a cornerstone of coordinated Omen play. The ability to launch it from safety through terrain allows for creative setups and disruption unseen by the enemy until it hits. The deafen is particularly potent, masking crucial sound cues like footsteps, ability usage, or the distinct sound of Omen's own Shrouded Step, enabling aggressive follow-up plays. However, its potential to hinder allies necessitates clear communication and careful aim, reinforcing Omen's role as a strategic, thinking player's agent.
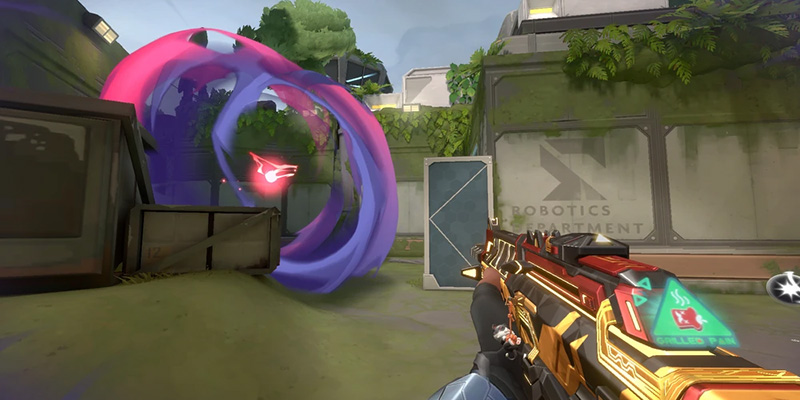
Dark Cover (E): Weaving Darkness
Dark Cover is Omen's signature ability, the foundation of his control and lurking presence.
Placement: Omen possesses unique control over smoke placement. The default method utilizes a "phased world" map view, allowing precise targeting across vast distances using the minimap and a 3D world representation. Holding FIRE (LMB) moves the target marker farther away, while ALT FIRE (RMB) brings it closer. Pressing RELOAD toggles to a normal first-person view, allowing Omen to place smokes more quickly in his immediate vicinity while retaining awareness and movement, though sacrificing long-range precision. The phased world offers accuracy but leaves Omen vulnerable as his immediate surroundings are obscured; the normal view prioritizes awareness over pinpoint placement. Utilizing the minimap indicator is crucial for accuracy in either mode. A key feature is the ability to place smokes vertically, allowing them to form high up and settle onto surfaces, enabling one-way smokes.
Strategic Uses: Dark Cover is incredibly versatile. Its primary function is blocking critical sightlines during attacks or defenses. It creates safe passage for teammates across open areas. It denies information and forces enemies into predictable paths. It's essential for setting up Omen's signature one-way smokes. It provides cover for Shrouded Step or From the Shadows teleports. Layering smokes at different depths can confuse enemy perception of team positioning. It can be used aggressively to block off angles during post-plant scenarios.
The combination of global range and a recharging mechanic fundamentally defines Omen's strategic identity. It enables him to maintain map-wide influence throughout a round, supporting pushes or defenses from unexpected locations, which is crucial for his lurking potential. This contrasts sharply with agents like Brimstone, whose smokes are powerful but limited in range and number. Furthermore, the hollow nature and vertical placement capabilities offer a higher skill ceiling, allowing for advanced tactics like one-way smokes and teleport plays within the smoke itself, demanding specific counter-strategies from opponents. These unique mechanics are the pillars upon which Omen's reputation as a versatile and deceptive controller is built.
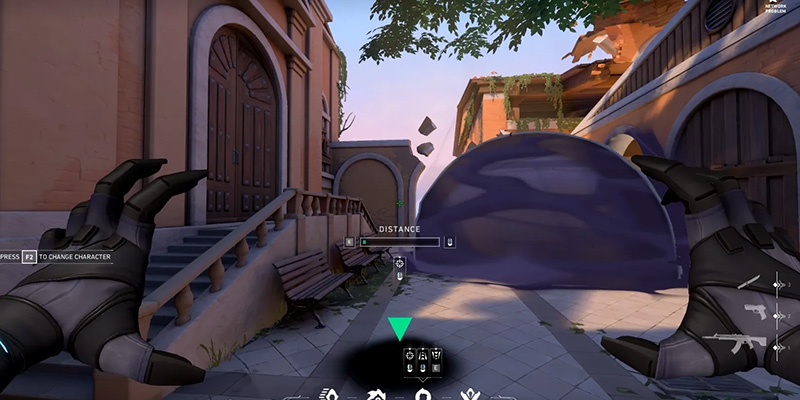
From the Shadows (X): Global Presence
Omen's ultimate ability, From the Shadows, offers unparalleled map mobility, but it comes with significant risks.
Strategic Applications: Its uses are primarily strategic rather than purely combative. It enables rapid global rotations or flanks, catching enemies completely off guard if successful. It's invaluable for gathering information: teleport to a location, scout the area briefly, and cancel the ultimate to return safely. It can be used as an escape tool in dire situations, though the long cast time makes this risky. A key application is retrieving the Spike from a dangerous or distant location: Ult directly onto the Spike, press the interact key (F) to grab it, and immediately cancel the Ult to return to safety. It's effective in post-plant scenarios for repositioning to unexpected angles to ambush defusers. Combining it with a pre-placed Dark Cover at the destination provides crucial visual cover upon arrival. Faking the ultimate – starting the TP to one site to bait enemy rotations while the team moves to another – is a powerful mind game.
The true power of From the Shadows often lies not in the completed teleport, but in the strategic possibilities unlocked by its threat and its cancel mechanic. It functions more as a tool for map-wide manipulation, information warfare, and objective play than as a reliable method for securing kills. Using it purely for information gathering or faking rotations by canceling is often safer and more impactful than committing to a risky flank. Mastering the ultimate involves understanding when to commit, when to gather info, when to retrieve the objective, and crucially, when and how to utilize the cancel function to maximum effect. This transforms it from a simple teleport into a complex instrument of global strategy and psychological pressure.
Foundational Tactics: First Steps into Darkness (Beginner Guide)
Welcome, fledgling shadow. Mastering Omen begins with understanding the fundamentals. His power lies in control – control of vision, space, and ultimately, the enemy's perception.
Core Controller Duties: Smoking for the Team
Your primary responsibility as Omen is to manipulate sightlines using your Dark Cover smokes. On Attack, your goal is to block common defensive angles, allowing your teammates to push onto a site with fewer angles to worry about. Think about where defenders like to hold – high ground like Haven on Ascent, or chokepoints like Garage entrance on Haven. Place your smokes to obscure these positions as your team advances.
On Defense, your smokes deny the attackers easy entry and force them through predictable paths. Smoke off the main entrances to the site your team is defending, like A Main on Ascent or C Long on Haven, as attackers begin their push. This slows them down, potentially separates them, and makes them vulnerable as they exit the smoke.
Remember, Omen's smokes have global range. This means you can be positioned safely or even on a different part of the map and still place smokes to support your team's push or defense elsewhere. Crucially, place smokes for the team, not just for your own benefit. Communicate your intentions: "Smoking Heaven," "Smoking Garage."
Essential Smoke Placements: Blocking Key Angles
Let's start with some basic, high-value smoke locations. Use the default map targeting mode (press E) for these longer-range placements, utilizing the minimap indicator for accuracy.
Door/Generator: Place a smoke blocking the doorway near Generator that connects to Defender Spawn/Mid Link. This cuts off a primary rotation path for defenders.
Garage Entrance: If attackers are pushing through Garage towards C site, place a smoke blocking the doorway connecting Garage to the site. This isolates attackers in Garage or forces them through the smoke.
The why behind these placements is key: block powerful angles, cut off rotations, and force enemies into disadvantageous positions.
Basic Shrouded Step: Safe Repositioning & High Ground Access
Shrouded Step (C) is your short-range teleport. As a beginner, focus on its safer uses.
Safe Movement: Use it to move between two points of cover without crossing an open, dangerous sightline. If caught in a bad spot, TP to nearby safety.
High Ground: Use it to reach simple elevated positions, like the default boxes found on many sites (e.g., the large box on Haven C site, or the Generator box on Ascent A site). These offer unexpected angles but be aware enemies might check them.
Fundamental Paranoia: Clearing Common Spots
Paranoia (Q) is your tool for safely checking dangerous areas and initiating fights.
Clearing Angles: Before peeking a corner or entering an area where an enemy might be hiding (like Haven C Long cubby or Ascent A Main wine room), send Paranoia through the wall first. If it hits someone, they'll be nearsighted and deafened, making them an easier target.
Stopping Pushes: If you hear enemies rushing a chokepoint (like Haven Garage or Ascent B Main), fire Paranoia down the lane to disrupt their push.
Omen's Economy 101: Basic Buys
Managing credits is vital. Omen has an advantage with his free, regenerating smokes.
Leveraging Omen's free Dark Cover charges is key to efficient economy management, especially in early rounds. When credits are limited, the 200c investment in Paranoia generally offers more immediate team impact than Shrouded Step, making it the higher priority purchase after basic weaponry and shields.
Advanced Stratagems: Orchestrating Chaos (Advanced Guide)
Beyond the fundamentals lies the true depth of Omen's potential – manipulating the battlefield through intricate utility usage and psychological warfare.
The Art of the One-Way Smoke
The hollow nature and precise vertical placement of Dark Cover allow for the creation of one-way smokes: smokes that allow Omen (and potentially allies) to see enemies before they can see Omen. This transforms a defensive tool into an aggressive angle-holding weapon.
Technique: This requires precise aim using the phased world view. Target ledges, the top corners of entrances, or specific map geometry. Pay close attention to the green arrow indicator in the targeting UI – placing it just above the desired ledge or surface is often key. Practice is essential to find consistent lineups.
Examples: Common locations include the top of the wall in Ascent A Main (hold from Generator), the boxes at Haven A Short (hold from site), the roof corner above Ascent B Stairs (hold from Boathouse), or the window frame at Haven C Long (hold from CT).
Mastering one-way smokes significantly elevates Omen's defensive capabilities and overall skill ceiling. It demands map knowledge, precision, and an understanding of sightlines. While potentially affected by balance changes, they remain a powerful tool in Omen's arsenal, turning standard chokepoints into deadly traps.
Mastering Shrouded Step: Aggression, Evasion, and Mind Games
Advanced Shrouded Step usage is about calculated risks, exploiting sound cues, and manipulating enemy expectations.
Smoke Plays: TP into your own Dark Cover for a surprise peek or to push through aggressively. Coordinate with info utility (Sova dart) to ensure safety.
Angle Cross: After taking shots from one angle, quickly TP across the lane to reappear where the enemy isn't aiming.
Paranoia Combo: Use Paranoia to blind and deafen enemies, then immediately TP behind or beside them for a silent flank. The deafen masks the TP sound.
Trap Escape: Teleport out of corners when pinned down or to escape area-denial ultimates like Killjoy's Lockdown (timing is crucial).
Smoke Cover: Use Dark Cover to obscure your TP animation for a safer escape.
Jump TP: Jump and cast TP mid-air to peek corners briefly or fake entry, using momentum and the sound cue strategically.
Smoke Juggling: Place two Dark Covers and TP into one, forcing enemies to guess your location. You can also fake the TP into the smoke.
Sound Play: Understand the 12.5m audio radius. TP from just outside this range for stealthier repositioning, or use loud TPs intentionally to draw attention. Use "silent" TPs (onto surfaces at the same height) to minimize noise when needed.
Advanced TP usage is less about the destination and more about the journey – the information (or misinformation) conveyed by the sound and visual cues. Combining TP with Paranoia (masking sound) or Dark Cover (visual block) unlocks its most potent applications. It requires reading the enemy, understanding timings, and embracing calculated risks to turn movement into a weapon of confusion.
Precision Paranoia: Lineups for Impact
Elevate Paranoia from a reactive tool to a precise instrument of initiation through learned lineups.
Technique: Utilize minimap pings as ground-level references when aiming through terrain. Learn specific visual cues on walls or the environment to align your crosshair for consistent trajectories. Remember Paranoia travels straight forward from Omen's position.
Retakes: Use lineups to blind common post-plant positions held by attackers. Example: Ascent A retake flash hitting Generator/Hell area from Garden.
Defensive Holds: Use lineups to disrupt pushes through chokepoints from safer angles. Example: Haven C Long flash from CT spawn area.
Treating Paranoia with the precision of other lineup-based abilities allows for highly coordinated and impactful plays. Instead of hoping to hit enemies reactively, lineups guarantee coverage of critical areas during executes or retakes, maximizing the ability's potential to create openings and secure objectives. This requires practice and memorization of specific map interactions.
Lurking Masterclass: Timing, Pathing, and Psychological Warfare
Omen's kit makes him one of the most effective lurkers in Valorant.
Timing & Frequency: Lurking is most effective mid-round to catch rotating defenders off guard. Avoid lurking every round; predictability negates its effectiveness. Mix it up with grouped pushes.
Pathing: Utilize less-traveled routes. Shrouded Step is key for silently crossing dangerous sightlines (e.g., Mid on Ascent) or reaching unexpected off-angles to intercept rotations. Controlling Mid often provides the best lurking opportunities.
Psychological Warfare: The mere possibility of an Omen lurking forces defenders to play more cautiously, dedicate resources to flank watch, and potentially hesitate on rotations. Amplify this by using fake teleports or placing smokes in unusual locations to suggest presence.
Communication: Relay information gathered during the lurk to your team promptly. Coordinate your timing – wait for your team to make noise before revealing your lurk position to catch rotating players.
Omen's lurking isn't just about sneaking; it's a strategic function deeply intertwined with his abilities. He leverages his global smokes to fulfill controller duties remotely while using his mobility and the inherent threat of his presence to manipulate enemy movements and gain map control. Effective Omen lurking requires strong game sense, map knowledge, and clear communication.
Ultimate Mind Games: Fakes, Combos, and Post-Plant Dominance
The cancel mechanic elevates From the Shadows (X) from a risky teleport to a versatile strategic weapon.
Creating Confusion: Ult and cancel right before your team executes a site hit. The global sound cue and map distortion can cause momentary panic and distraction.
Self-Fake: Ult onto your current location and cancel. Enemies hearing the sound cue might assume you've teleported away, allowing for a surprise re-peek.
Chaos Coordination: Time your Ult with loud, disruptive teammate abilities (like Breach's Rolling Thunder or Fade's Nightfall) to mask the sound cue or capitalize on the ensuing chaos.
Spike Retrieval: The ultimate tool for recovering the Spike dropped in enemy territory. Ult directly onto the Spike icon, press 'F' (interact) the moment you materialize, and immediately cancel the Ult to return to safety with the objective.
Counter-Intel: Using the Ult during an enemy Cypher's Neural Theft can obscure the minimap reveal for your team.
The ability to cancel From the Shadows is paramount to its advanced usage. It mitigates the inherent risk and unlocks its potential for information warfare, objective control, and psychological manipulation far beyond a simple repositioning tool. Mastering the timing of the cancel, understanding when to gather info versus committing, and combining it with other utility are hallmarks of a high-level Omen player.
Advanced Economic Warfare: Calculated Risks
While standard buy rules apply, Omen's kit sometimes justifies calculated economic risks.
Prioritizing Utility: On force-buys or half-buys, consider if purchasing full Omen utility (Paranoia + TPs = 300c) offers more round-winning potential than a slightly better weapon. If a specific TP play can guarantee an early pick or Paranoia can halt a crucial rush, the utility investment might outweigh a Sheriff or Stinger upgrade.
Synergy Buys: If your team composition heavily relies on Omen's setup (e.g., Jett dashing through smokes, Breach stunning blinded enemies), ensuring Omen has Paranoia, even at the cost of his own weapon strength, might be the optimal team play.
Countering Enemy Economy: If you anticipate the enemy team is on a save round (likely using close-range weapons like Classics or Shorties), investing in a Spectre/Stinger and full utility for an aggressive Paranoia + TP play becomes a higher percentage risk. The potential reward (multiple kills, weapon upgrades, round win) can justify the investment.
Map Domination: Omen's Playground
Omen's versatility allows him to adapt to any battlefield, but certain maps play particularly well to his strengths. Here, we dissect strategies for the current competitive map pool. (Note: Specific lineups require visual aids; descriptions focus on placement location and intent.)
Ascent
Essential Dark Cover Placements
- Attack A: Smoke deep Heaven and Door/Generator. Prevents Operator peeks and cuts off rotations.
- Defense A: Smoke A Main choke (near archway) to slow pushes and force utility. Can also smoke Catwalk entrance.
- Attack B: Smoke deep Market window/door and Defender Spawn entrance stairs. Blocks common hold spots and rotations.
- Defense B: Smoke B Main choke (near orb) to halt pushes. Can also smoke Stairs from Boathouse.
- Mid Control (Attack/Defense): Smoke Catwalk entrance and Tiles/Top Mid connector depending on desired control.
One-Ways
- A Main Defense: Place smoke on the top edge of the left wall in A Main (hold from Generator/Site).
- B Stairs Defense: Place smoke on the corner of the Boathouse roof above Stairs (hold from Boathouse).
- B Main Defense: Place smoke on the corner edge of the B Main entrance wall (hold from Lane/back site).
Key Shrouded Step Locations
- A Site High Ground: TP onto Generator, Pyramids (left safer), A Link Box, A Dish Box, A Corner Bricks.
- B Site High Ground: TP onto Boathouse ledge, CT Barrels (retake).
- Crossing/Lurking: TP from A Main into Site Lower/Upper without crossing choke. TP across Mid Courtyard under cover of smoke. TP onto Mid Cubby box. Risky TP from A Ropes into A Main smoke.
Impactful Paranoia Lineups
- A Execute: Flash through wall towards Generator/Hell or Heaven.
- B Execute: Flash through wall from B Main towards Stairs/Switch or Market/CT.
- Mid Control: Flash Top Mid/Catwalk from Cubby/Pizza.
- A Retake: Flash A Main from Site/Garden, or flash Generator/Hell from Garden.
Site Execute Blueprints & Defensive Anchors
- Attack B: Smoke Market/Spawn, Flash Stairs/Switch, team pushes B Main, Omen can Ult Boathouse for info/pincer or push with team.
- Defense A: Anchor near Generator. Use A Main one-way or standard choke smoke. Use TP to reposition onto Generator or Pyramids. Use Paranoia down A Main on contact or for retake.
Lurk Routes and Timings
Lurk Mid, smoking Catwalk/Tiles for team pushing A or B. Use TP to cross Mid safely. Catch rotations in Mid Link or Defender Spawn connector.
Haven
Essential Dark Cover Placements
- Attack A: Smoke Heaven and Connector (CT) entrance.
- Defense A: Smoke A Long choke and/or A Short (Sewers) entrance.
- Attack B: Smoke B Back (Connector) and Defender Spawn/Window entrance.
- Defense B: Smoke Mid Window and/or Garage Doors.
- Attack C: Smoke Connector (CT) entrance and Garage entrance.
- Defense C: Smoke C Long choke and/or Garage Doors.
One-Ways
- A Long Defense: Place smoke on top-left of A Long boxes (hold from site corner).
- A Short Defense: Place smoke on top-left of A Short boxes (hold from site/behind boxes).
- C Long Defense: Place smoke on window behind double boxes at C Long entrance (hold from Connector/site).
- Garage Defense: Place smoke on upper ledge above Garage door (hold from C Plat/Connector).
Key Shrouded Step Locations
- A Site: TP onto A Site boxes (Short or Long side), Graffiti box. TP into Heaven for retake/post-plant.
- B Site: TP onto B Site central structure.
- C Site: TP onto C Site default box, Plat boxes.
- Crossing/Lurking: TP from Garage to Mid Grass (aggressive play with Paranoia). TP across A Long or C Long entrances. TP between sites via Connectors.
Impactful Paranoia Lineups
- A Execute: Flash Heaven or Site from A Long/Short. Flash Ramps from Sewers.
- C Execute: Flash Site (logs/backsite) from C Long or Garage.
- B Defense: Flash Mid Window push or Garage push.
- A Retake: Flash Hell/Default from Heaven/CT. Flash Long or Short from CT.
- C Retake: Flash C Long or Garage entrance from CT.
Site Execute Blueprints & Defensive Anchors
- Attack C: Smoke CT/Garage, flash site from Long, team pushes Long, Omen can lurk Mid or push with team.
- Defense C: Anchor site. Use C Long one-way. Smoke Garage on push. TP onto site box for off-angle. Use Paranoia through walls from CT/site for retake.
Lurk Routes and Timings
Lurk Mid from C or A start. Use global smokes to support opposite site push. Catch rotations in Garage, Mid Window, or Connectors. TP across Mid Doors or into Grass for aggressive lurks.
Split
Essential Dark Cover Placements
- Attack A: Smoke Heaven and Screens.
- Defense A: Smoke A Main choke. Can place one-way on Ramps.
- Attack B: Smoke Heaven/Rafters and Back Site/CT entrance.
- Defense B: Smoke B Main choke (Garage).
- Mid Control: Smoke Top Mid connector (towards B) and/or Vent entrance.
One-Ways
- A Ramps Defense: Place smoke on top edge of Ramps doorway (hold from Heaven/Screens).
- Mid Vent Defense: Place smoke on top edge of Vent entrance (hold from Mail/Top Mid).
- B Main Defense: Place smoke on top edge of B Main doorway (hold from site/behind pillar).
Key Shrouded Step Locations
- A Site High Ground: TP onto Rafters, Screens boxes, site boxes.
- B Site High Ground: TP onto Rafters, Default Pillar, back site boxes.
- Mid: TP onto Frog box (Mid bottom), Vent entrance box, Mail rafters.
- Crossing/Lurking: TP from A Main up Ramps. TP from Screens onto A Site steps. TP from B Main behind Site Pillar. TP from Market into Sewers (or vice versa). Aggressive TP into B Main smoke.
Impactful Paranoia Lineups
- A Execute: Flash Heaven/Site from A Ramps. Flash Screens from A Main.
- B Execute: Flash Heaven/Backsite from B Main. Flash Site Pillar/Hell from B Main.
- Mid Control: Flash Top Mid from Mail/Bottom Mid. Flash Vent from Mail/Top Mid.
- Defense: Flash A Main push from Screens/Ramps. Flash B Main push from Site/Heaven. Flash Sewers push from Market.
Site Execute Blueprints & Defensive Anchors
- Attack B: Smoke Heaven/Backsite, Flash Pillar/Hell, team pushes Main, Omen can TP onto Rafters or push with team.
- Defense A: Anchor Heaven/Ramps. Smoke A Main choke. Use TP to reposition between Heaven, Rafters, Screens. Use Paranoia down Main on contact.
Lurk Routes and Timings
Lurk Mid, using TPs to navigate vents/ropes silently. Catch rotations in Sewers or CT connectors. Use global smokes to support A/B while lurking Mid.
Bind
Essential Dark Cover Placements
- Attack A: Smoke Heaven (Tower) and Truck/Lamps.
- Defense A: Smoke A Short entrance and/or Showers (Bath) entrance.
- Attack B: Smoke Elbow/Garden and CT Spawn/Window.
- Defense B: Smoke Hookah (Window) entrance and/or B Long entrance.
One-Ways
- A Short Defense: Place smoke on top edge of A Short entrance (hold from Site/Truck).
- Hookah Defense: Place smoke on top edge of Hookah window (hold from Site/Elbow).
- B Long Defense: Place smoke on corner ledge near B Long entrance (hold from Garden/Backsite).
Key Shrouded Step Locations
- A Site High Ground: TP onto Truck, Triple Boxes, Default Boxes.
- B Site High Ground: TP onto Site Container, Hookah Boxes.
- Crossing/Lurking: TP across A Short or B Long. TP from B Garden into Elbow. TP into Hookah aggressively. TP from Showers to site/cubby.
- Teleporter Fakes: Enter map TP and immediately use Shrouded Step back to original location to fake rotation. Can be done twice.
Impactful Paranoia Lineups
- A Execute: Flash U-Hall/Lamps from A Short. Flash Heaven from Showers.
- B Execute: Flash Hookah interior from B Long/outside. Flash Elbow/Site from B Long.
- Defense: Flash A Short push from Site/U-Hall. Flash Showers push from Site/U-Hall. Flash Hookah push from Site/Elbow. Flash B Long push from Garden/Site.
Site Execute Blueprints & Defensive Anchors
- Attack B: Smoke Elbow/CT, Flash Hookah, team pushes Long/Hookah, Omen can lurk A or push with team.
- Defense A: Anchor near Truck/U-Hall. Use A Short one-way or standard smoke. TP onto Truck/Boxes for off-angles. Use Paranoia down Short/Showers on contact.
Lurk Routes and Timings
Utilize map teleporters for quick lurk rotations. Lurk A Short while team pressures B, or vice versa. Use global smokes to support main push while lurking. TP fakes using map teleporters are highly effective.
Icebox
Essential Dark Cover Placements
- Attack A: Smoke Rafters/Nest and Screens/Top Site. Placement varies based on desired control (blocking vs. one-ways).
- Defense A: Smoke A Main choke (near Pipes/Belt). Can place one-way under Nest.
- Attack B: Smoke Snowman/Backsite and Nest/Top Site. Can smoke deep Orange for close plants.
- Defense B: Smoke B Main choke (Green) and/or Tube entrance.
- Mid Control: Smoke Boiler entrance and/or Tube connector.
One-Ways
- A Site Attack: Smoke on right edge of Top Site can create one-ways vs Backsite/Rafters. Smoke on Rafters can create slit one-way.
- B Site Attack: Smoke on Nest can create one-way vs Backsite.
- B Main Defense: Place smoke on edge of Green crates (hold from Yellow/Site).
- Tube Defense: Place smoke on top of Tube leaving a slit (hold from Tube/Kitchen).
- A Belt Defense: Place smoke across Belt entrance (hold from Top Site).
Key Shrouded Step Locations
- A Site High Ground: TP onto Nest, Rafters, Top Site boxes, Pipes.
- B Site High Ground: TP onto Yellow container, Top Tube, Snowman structure, Site boxes.
- Crossing/Lurking: TP across Mid. TP onto Tube from Kitchen/Mid. TP onto various crates around the map.
Impactful Paranoia Lineups
- A Execute: Flash Nest/Rafters or Backsite from A Main/Belt.
- B Execute: Flash Top Site/Snowman or Deep Site/Orange from B Main/Green.
- Mid Control: Flash Boiler or Kitchen/Tube area from Mid entrance/Pallet.
- Defense: Flash A Main push from Site/Nest. Flash B Green push from Site/Yellow. Flash Mid push from Kitchen/Boiler.
Site Execute Blueprints & Defensive Anchors
- Attack A: Smoke Rafters/Screens, Flash Nest/Site, team pushes Belt/Pipes, Omen can TP onto Nest/Rafters or push with team.
- Defense B: Anchor near Yellow/Site. Use B Main Green one-way or Tube smoke. TP onto Yellow or Top Tube for off-angles. Use Paranoia down Green on contact.
Lurk Routes and Timings
Lurk Mid, using TPs to navigate verticality. Catch rotations in Kitchen, Boiler, or Spawn connectors. Global smokes essential for supporting A/B while lurking Mid.
Breeze
Essential Dark Cover Placements
- Attack A: Smoke Cave entrance and Switch/Pyramid backsite.
- Defense A: Smoke A Main choke (near Cave) and/or Mid Doors entrance.
- Attack B: Smoke Back Site/Wall and Tunnel entrance.
- Defense B: Smoke B Main choke and/or Mid Nest/Window.
- Mid Control: Smoke Top Mid/Nest and/or Mid Doors/Pillar.
One-Ways
- A Main Defense: Place smoke on top edge of Cave entrance (hold from Site/Pyramid).
- B Main Defense: Place smoke on top edge of B Main entrance (hold from Site/Pillar).
- Mid Top Defense: Place smoke on top edge of Mid Doors (hold from Pillar/Nest).
Key Shrouded Step Locations
- A Site High Ground: TP onto Pyramids, Switch box, Bridge structure.
- B Site High Ground: TP onto Pillar, Back Site boxes, Tunnel entrance top.
- Mid: TP onto Nest structure, Pillar.
- Crossing/Lurking: TP across long sightlines (risky). TP onto crates for off-angles.
Impactful Paranoia Lineups
- A Execute: Flash Cave or Back Site/Switch from A Main.
- B Execute: Flash Site Pillar/Back or Tunnel from B Main.
- Defense: Flash A Main push from Site/Cave. Flash B Main push from Site/Pillar. Flash Mid push from Nest/Pillar.
Site Execute Blueprints & Defensive Anchors
- Attack A: Smoke Cave/Switch, Flash Site, team pushes Main/Mid Doors, Omen uses TPs for off-angles or pushes with team. (Difficult execute vs Viper).
- Defense B: Anchor near Pillar/Back Site. Smoke B Main choke. Use TP onto Pillar/Boxes. Use Paranoia down Main on contact.
Lurk Routes and Timings
Lurking is difficult due to long rotation times and open spaces. Mid control is key. Catching rotations is harder. Global smokes are less impactful due to map size.
Lotus
Essential Dark Cover Placements
- Attack A: Smoke Stairs and A Top/Connector.
- Defense A: Smoke A Main choke (Rubble) and/or Tree entrance.
- Attack B: Smoke B Main choke and Defender Spawn/Link entrance.
- Defense B: Smoke B Main choke (aggressive or passive placement).
- Attack C: Smoke Waterfall/CT entrance and Site Bend.
- Defense C: Smoke C Main choke (aggressive or passive placement).
One-Ways
- A Door Defense: Place smoke on top edge of rotating door frame (hold from Site/Stairs).
- C Main Defense: Place smoke on top edge of C Main entrance (hold from Site/Waterfall).
- A Site Defense (vs Tree): Place smoke on top edge of Tree doorway (hold from Site).
Key Shrouded Step Locations
- A Site High Ground: TP onto Hut roof, A Top platform, site boxes.
- B Site High Ground: TP onto central structure boxes.
- C Site High Ground: TP onto Waterfall ledge, site boxes.
- Crossing/Lurking: TP across A Rubble sightline. TP through rotating doors (requires timing). TP between sites via links. Aggressive TP onto A Tree box during door opening. TP onto C Mound box.
Impactful Paranoia Lineups
- A Execute: Flash Stairs/Site from Tree/Main.
- B Execute: Flash Site/Back from B Main.
- C Execute: Flash Site Bend/Waterfall from C Main.
- Defense: Flash A Main push from Site/Link. Flash B Main push from Site/Link. Flash C Main push from Site/Waterfall.
Site Execute Blueprints & Defensive Anchors
- Attack A: Smoke Stairs/Top, Flash Site, team pushes Tree/Main, Omen can TP onto Hut or push with team.
- Defense C: Anchor Site/Waterfall. Use C Main one-way or standard smoke. TP onto Waterfall ledge or site boxes. Use Paranoia down Main on contact or for retake.
Lurk Routes and Timings
Lurk Mid (B area), supporting A/C with smokes. Use rotating doors carefully (noise). Catch rotations in Links or Defender Spawn paths. TP allows fast rotation back to team if lurk fails.
Sunset
Essential Dark Cover Placements
- Attack A: Smoke A Link/Elbow and Top Site/Alley.
- Defense A: Smoke A Main choke. Can place one-way on A Main crates.
- Attack B: Smoke Top Mid/Market entrance and Defender Spawn/Boba entrance.
- Defense B: Smoke B Main choke.
- Mid Control: Smoke Top Mid (from Tiles/Market) and/or Bottom Mid (from Courtyard/Tiles).
One-Ways
- Mid Tiles Defense: Place smoke on white ledge above Tiles entrance (hold from Top Mid).
- Mid Bottom Defense: Place smoke on top edge of Bottom Mid entrance (hold from Top Mid/Market - tricky placement).
- A Main Defense: Place smoke on top of A Main crates (hold from Elbow/Link).
- B Boba Attack: Place smoke on top edge of Boba entrance (hold from Main/Site).
- A Alley Post-Plant: Place smoke on top of wooden box in Alley (hold from Site/Elbow).
- A Default Post-Plant: Place smoke on top of default box (hold from distance).
Key Shrouded Step Locations
- A Site High Ground: TP onto green crate, surveillance camera (potential bug), lamps (potential bug).
- B Site High Ground: TP onto cross structure, site boxes, lamps (potential bug).
- Mid: TP onto Top Mid boxes, Courtyard lamps (potential bug).
- Crossing/Lurking: TP across Mid Courtyard. TP onto crates for off-angles in A Main or B Main.
Impactful Paranoia Lineups
- Mid Control: Flash Tiles from Courtyard/Bottom Mid. Flash Top Mid from Tiles/Market.
- A Execute: Flash Elbow/Site from A Main.
- B Execute: Flash Boba/Site from B Main.
- Defense: Flash A Main push from Elbow/Site. Flash B Main push from Site/Boba. Flash Mid Tiles push from Top Mid.
Site Execute Blueprints & Defensive Anchors
- Attack Mid Control: Smoke Bottom Mid/Top Mid, Flash Tiles with teammate push (Jett/Raze), secure Mid control.
- Defense A: Anchor near Elbow/Link. Use A Main smoke/one-way. TP onto green crate or lamps for off-angle. Use Paranoia down Main on contact.
Lurk Routes and Timings
Lurk Mid, supporting A/B pushes with smokes. Use TP to cross Mid Courtyard or take Top Mid angles. Catch rotations in Market, Elbow, or Spawn connectors.
Synergies & Counters: Allies and Adversaries
Omen's effectiveness is amplified by coordination and hindered by predictable play. Understanding his interactions with other agents and common counter-strategies is crucial.
Potent Pairings: Maximizing Team Synergy
Omen's versatile kit allows him to synergize well with a variety of agents, particularly those who can leverage the vision denial and disruption he provides.
These agents are Omen's natural allies. Sova and Fade can send reconnaissance utility (Recon Bolt, Haunt) through or near Dark Cover, revealing hidden enemies. Breach and KAY/O can layer their flashes and stuns (Flashpoint, Fault Line, FRAG/MENT, ZERO/point) with Omen's Paranoia or through his smokes, creating overwhelming initiation sequences. Gekko's Dizzy can also pair well, and Wingman can plant or defuse under smoke cover. The information and crowd control provided by Initiators allow Omen and his team to capitalize on the space his abilities create.
Aggressive Duelists thrive in the chaos Omen creates. Jett can dash through smokes or onto sites blinded by Paranoia. Raze can use Paint Shells and Blast Packs to clear angles obscured by Dark Cover or flush out enemies hit by Paranoia. Neon can sprint through smoked chokepoints. Phoenix can safely use Curveball flashes from within Omen's smokes for aggressive pushes. Omen essentially provides the setup and cover for these agents to execute aggressive entries.
On defense, Omen's smokes can funnel attackers into Cypher's Trapwires or Killjoy's Nanoswarms/Turret. Omen's ability to TP can help reinforce a Sentinel's site quickly or allow the Sentinel to play more passively while Omen holds an aggressive angle nearby. This pairing creates layered defenses that are difficult to penetrate.
Double controller compositions featuring Omen are viable, especially on larger maps or maps requiring complex executes. Omen's rechargeable smokes complement Viper's persistent toxins or Harbor's large walls, allowing for layered vision denial. Pairing with Astra allows for global coverage, while Clove adds post-death smoke potential. Omen's Paranoia adds a unique initiation tool often lacking in other controller pairings.
Omen flourishes alongside proactive teammates who can either provide information about enemies hidden by his smokes or immediately exploit the openings created by his Paranoia and teleports. His flexibility allows him to adapt to many team compositions, but his impact is maximized when his utility directly enables his teammates' strengths.
Exploiting Omen: How Enemies Counter Him
Despite his power, Omen is not without weaknesses. Astute opponents can exploit his mechanics and tendencies.
- Hollow Smokes: Never assume a Dark Cover is empty. Omen or an enemy could be lurking inside. Use utility like flashes (Skye, KAY/O), scans (Sova, Fade), or damaging abilities (Raze grenade, KAY/O molly) to clear smokes before pushing through. Be prepared for players to push out of the smoke unexpectedly.
- Predictable Teleports: Common high-ground TPs or obvious flank teleports become predictable over rounds. Holding angles on these common spots, especially after hearing the TP sound cue, can lead to easy kills.
- One-Way Counters: One-ways are strong but not invincible. Flashes (Skye, Breach, KAY/O) can blind the Omen holding the angle. Stuns (Breach) can disrupt his aim. Recon abilities (Sova Dart, Fade Eye) can reveal his position. Agent abilities like Killjoy's Turret can provide a distraction to push past, or Skye's Trailblazer can clear the angle. Simply waiting out the 15-second smoke duration is also a valid, albeit slow, counter.
Ultimate Counterplay
- Shooting the Shade: The most direct counter is to destroy the Shade form during the From the Shadows channel, canceling the TP.
- Anticipation: If the TP completes, anticipate the flank or push. The loud sound gives ample warning.
- Spike Denial: To prevent Omen from grabbing the Spike with his Ult-cancel trick, players must physically stand or crouch directly on top of the Spike, blocking his interaction radius. Simply being near the Spike is not enough.
- Baiting the Cancel: If you spot the Shade forming, don't immediately shoot. Look away briefly to make Omen think he's unseen, baiting him into completing the TP, then turn and eliminate him.
General Tactics: Maintain discipline against fake TPs; don't blindly react to every sound cue. Use information utility (Sova, Fade, Cypher Cam) to track Omen's location, especially if he is known to lurk.
Countering the Counters: Adapting Your Play
A skilled Omen anticipates these counters and adapts accordingly.
- Vary TP Spots: Mix up aggressive TPs with safe, repositioning ones. Don't reuse the same high-impact TP spot multiple times in a match. Incorporate fake TPs to keep enemies guessing.
- Mask Sound Cues: Utilize Paranoia's deafen to cover Shrouded Step sounds for aggressive plays. Use ambient noise (gunfire, explosions, other abilities) or distance to mask TP sounds whenever possible. Use silent TPs (same height) for stealthy rotates.
- Unpredictable Smoke Play: Vary how you use your hollow smokes. Sometimes play inside, sometimes peek edges, sometimes use them purely for cover to move elsewhere. Don't be predictable.
- Strategic Ult Cancels: Leverage the cancel mechanic. If enemies consistently shoot your Shade, prioritize using the Ult for info, fakes, or spike grabs rather than committed flanks. Assess the situation before committing to the full teleport.
- Adaptive Lurking: If your lurks are consistently being shut down, change your timing, pathing, or frequency. Sometimes grouping with the team is the less predictable play. Communicate effectively to ensure your lurks provide value even if they don't result in kills.
Avoiding Predictability: Common Mistakes and Refinements
Even seasoned shadows can falter. Recognizing and correcting common mistakes is key to consistent performance.
Smoke Mismanagement: Timing and Placement Errors
- Timing: Deploying smokes too early, long before the team is ready to execute, wastes their duration and leaves crucial angles open when the push actually happens. Conversely, smoking too late exposes teammates during entry. Coordination is key.
- Placement: Shallow smokes that don't fully cover an angle or chokepoint allow enemies to use the edges for cover or peek safely. Not placing smokes deep enough into defensive positions (like Heaven) allows defenders to hold advantageous positions within or behind the smoke. Leaving small gaps, especially on maps with complex geometry like Haven, can provide unexpected sightlines for the enemy. Forgetting the hollow nature means not anticipating enemies potentially pushing through or playing inside them.
Wasted Paranoia: When Not to Blind
- Firing Paranoia aimlessly into large, open sites without knowing enemy positions often reveals your intent without blinding anyone significant.
- Accidentally blinding teammates due to poor aim, lack of communication, or bad timing can lose fights.
- Casting Paranoia while Omen himself is exposed leaves him vulnerable during the brief immobility.
- Holding onto Paranoia for too long, waiting for the "perfect" moment, often means missing opportunities to use it proactively for pushes or to stop aggression.
Ultimate Overextensions and Misplays
- Using From the Shadows to teleport aggressively into un-scouted enemy territory, especially deep flanks or spawns, is extremely high risk and often results in immediate death.
- Holding the ultimate for the entire half waiting for an ideal clutch scenario often means wasting potential uses for info gathering, rotation fakes, or spike retrieval.
- Failing to cancel the ultimate when the Shade is clearly being targeted or when the tactical situation changes is a common error.
- A simple but critical mistake is forgetting to equip your primary weapon before activating the ultimate; arriving in a potential gunfight with your knife out is disastrous.
Conclusion: Become the Nightmare
Omen is more than smoke and mirrors; he is a force of calculated chaos, a master of strategic deception. His strength lies not in raw firepower, but in his unparalleled versatility – the ability to control sightlines globally, reposition unpredictably, initiate with potent disruption, and wage psychological warfare through deception and lurking. He offers sustained map control throughout the round, adapting his role as needed.
Mastering Omen is a journey into the shadows of tactical depth. It demands more than just mechanical skill; it requires creativity to envision unconventional plays, keen game sense to anticipate enemy movements and time abilities perfectly, deep map knowledge for precise utility placement, and constant adaptability to counter enemy strategies and avoid predictability. Learn the lineups, practice the teleports, understand the timings, but never stop experimenting. Explore the map's hidden ledges, devise new ways to manipulate sound and vision, coordinate intricate plays with your allies.
Embrace the phantom's toolkit. Weave darkness across the map, appear where least expected, and let paranoia be your vanguard. Control the space, control their minds, and become the nightmare they never see coming. Scatter.