
Get ready to blow the competition away! Raze, VALORANT's explosive Duelist straight outta Brazil, is all about bringing the chaos, the firepower, and a whole lot of personality to the fight. If high-octane action, flushing enemies out of hiding, and making big, impactful plays sounds like your kind of party, then Raze is the Agent for you. This guide will break down everything needed to master her explosive toolkit, from the basics of tossing grenades to the high-flying acrobatics that define top-tier Raze play. Let's light the fuse!
Ready to Make Some Noise? Meet Raze!
Introduction: Who is Raze?
Raze isn't subtle. She arrives on the scene with "big personality and big guns," ready to dismantle enemy defenses with a "blunt-force-trauma playstyle". As a Duelist, her primary job is to seek out engagements, apply pressure, and create space for her team, often by leading the charge onto sites. She thrives in chaos, using her arsenal of grenades, mines, and a rocket launcher to clear tight corners, break entrenched positions, and generally cause mayhem. Her kit is almost entirely focused on dealing Area of Effect (AoE) damage and disrupting enemy plans with a generous dose of "boom". She's impulsive, spontaneous, and embodies pure chaotic energy on the battlefield.
Why Unleash the Boom? Playing Raze
Choosing Raze means choosing aggression and impact. Her strengths are undeniable:
- Massive Area Damage: Paint Shells and Showstopper can devastate grouped enemies or deny crucial areas.
- Unrivaled Mobility: Blast Packs offer unique vertical and horizontal movement, allowing Raze to reach unexpected positions and traverse the map with incredible speed.
- Effective Clearing & Scouting: Boom Bot acts as a mobile scout, gathering info and forcing enemies out of hiding. Paint Shells excel at clearing common angles.
- Chaos Creation: Raze's abilities force enemies to react, move, and often make mistakes, dictating the flow of engagements.
Riot's balancing philosophy often aimed to reduce her lethality while preserving her utility functions, like clearing enemy abilities or providing mobility. This shift demands a more strategic approach. While the core identity of explosive chaos remains, true mastery now lies in using her kit with purpose – leveraging Blast Packs primarily for movement and utility destruction, Paint Shells for calculated flushing and area denial, Boom Bot for intelligent scouting, and Showstopper for strategic pressure as much as for kills. The ongoing community discussions about her balance reflect this significant evolution.
Raze's Explosive Arsenal: Deconstructed
Raze's toolkit is a symphony of destruction, designed for maximum impact. Each ability – Boom Bot, Blast Pack, Paint Shells, and Showstopper – plays a distinct role, but they truly shine when used in combination to overwhelm opponents through damage, mobility, and sheer disruption.
| Ability Name | Key | Cost / Ult Points | Max Charges | Brief Description |
|---|---|---|---|---|
| Boom Bot | C | 300 Creds | 1 | Deploys a bot that travels straight, bounces, locks onto enemies, chases, and explodes. |
| Blast Pack | Q | 200 Creds | 2 | Throws a sticky charge detonated on command; damages/moves targets, propels Raze. |
| Paint Shells | E | Free (Recharges) | 1 | Throws a cluster grenade; initial blast followed by sub-munitions. |
| Showstopper | X | 8 Ult Points | 1 | Equips a rocket launcher firing a high-damage AoE rocket. |
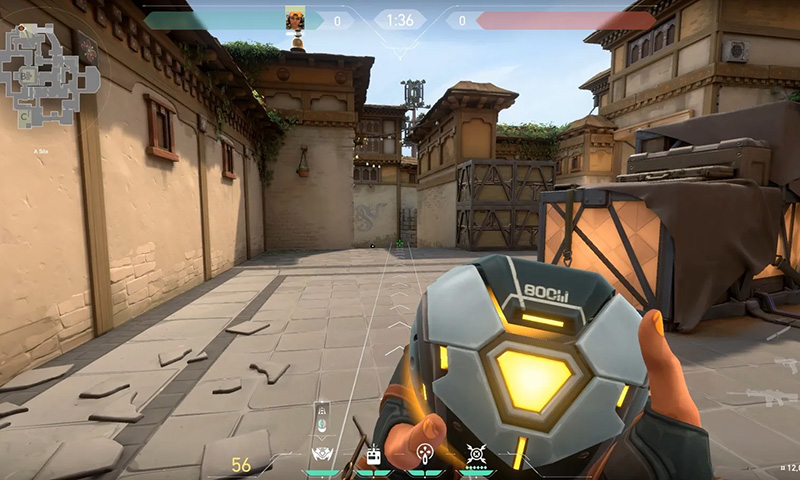
Boom Bot (C): Your Rolling Menace
Mechanics & Stats: Activating this ability equips the Boom Bot. Firing deploys it, sending it rolling in a straight line across the ground. It's not deterred by walls, simply bouncing off them to continue its path. The bot possesses a frontal detection cone; if an enemy enters this zone (up to 15 meters away), the Boom Bot locks on, changes direction to pursue them, and explodes with significant force if it gets close enough.
| Stat | Value | Notes |
|---|---|---|
| Cost | 300 Creds | |
| Health | 60 HP | Nerfed from 100 HP |
| Damage | 30-80 HP | Nerfed from 50-125 HP |
| Duration | 5 seconds | |
| Detection Range | 15 meters (frontal cone) | |
| Explosion Radius | 2m (Inner) / 6m (Outer) | |
| Utility Damage | x2.5 multiplier | |
| Allied Damage | Immune |
Beginner Guide: Basic Botting
The simplest use for Boom Bot is reconnaissance. Before pushing into an unknown area or rounding a corner, deploy the bot to check for immediate threats. It excels at clearing tight spaces like U-Halls or small rooms, forcing any hiding enemies to either reveal themselves by shooting the bot or retreat. A key tip for beginners is to listen carefully after deploying the bot. If opponents try to destroy it, the sound of their gunfire confirms their presence even if the bot doesn't explode.
Advanced Tactics: Pathfinding & Pressure
Experienced Raze players use the Boom Bot with more finesse.
- Map-Specific Paths: Understanding map geometry allows for clever bot deployment. For instance, on Ascent attacking A, bouncing the bot off the left wall of A-Main can send it towards the Generator corner, clearing a common defensive spot without direct line of sight. On Split attacking B, angling the bot correctly allows it to bounce deep into the Garage area to scout or pressure defenders.
- Bounce Tech: Predicting the bot's trajectory after bouncing off walls is crucial for clearing deeper angles or specific, hard-to-reach spots. This requires practice and map knowledge.
- Info Plays: Beyond just getting kills, the Boom Bot is invaluable for information. Deploying it can force defenders to reposition, revealing their general location, or confirm that an area is clear, enabling a safer push for the team.
- Boosting the Bot: A more niche but potentially surprising tactic involves using a Blast Pack to launch the Boom Bot. Throwing a Blast Pack near the deployed bot and detonating it can send the bot flying over cover or into unexpected locations, potentially catching enemies off guard.
- Sound Cues: Learn to recognize the distinct audio cue the Boom Bot makes when it locks onto and starts chasing an enemy. This provides real-time information about enemy presence.
- Counterplay Awareness: Remember that enemies can and will shoot the Boom Bot. Its reduced health (60 HP) makes it relatively fragile. Therefore, timing the deployment to coincide with a push or distraction increases its chances of survival and impact.
Blast Pack (Q): Defy Gravity, Deliver Destruction
Mechanics & Stats: Raze instantly throws a satchel charge that sticks to any surface it hits. Re-activating the ability (pressing Q again) detonates the pack, dealing damage and knocking back anything caught in the blast – enemies, allies (though no longer damaging them), objects, and Raze herself. Crucially, Raze does not take damage from her own Blast Packs, making them a powerful mobility tool. However, launching high into the air can still result in lethal fall damage upon landing. Blast Packs are also highly effective at destroying enemy deployable utility, such as Sage walls, Cypher Trapwires, and Killjoy's gadgets.
| Stat | Value | Notes |
|---|---|---|
| Cost | 200 Creds (each) | |
| Max Charges | 2 | |
| Damage | 15 (Initial <0.5s) / 50 (Armed) | Heavily nerfed from 75 HP |
| Arm Time | 1.5 seconds | Increased from 0.5s; damage only applies after arming |
| Max Duration | 5 seconds | |
| Utility Damage | 600 | Consistently high damage to objects |
| Self Damage | No | |
| Ally Damage | No | Changed from Yes |
| Horizontal Velocity | Slowed | Nerf affecting momentum from satchels |
| Explosion Audio | Updated | Specifically to make double satchels more audible |
Beginner Guide: Simple Boosts & Utility Busting
For newcomers, the Blast Pack's most accessible uses are basic mobility and utility destruction. Placing a satchel directly beneath Raze's feet and detonating it while jumping allows for easy access to standard-height boxes and platforms, granting advantageous sightlines. When facing enemy traps like Cypher's wires or Killjoy's Turret/Nanoswarms, throwing a Blast Pack near them and detonating it provides a safe way to clear these obstacles from a distance. Using Blast Packs offensively for damage is generally discouraged for beginners due to the significant damage reduction and the 1.5-second arm time; it's only viable if an enemy's position in a tight corner is confirmed and the detonation can be timed correctly after the satchel arms.
Advanced Tactics: Mastering Satchel Movement!
The true potential of Raze unlocks when players master her Blast Pack movement. This aspect of her kit has a remarkably high skill ceiling and is what distinguishes exceptional Raze players. The severe nerfs to Blast Pack's direct damage potential over time have firmly cemented its primary value in the realms of mobility and utility destruction. Discussions within the player community often center on whether the 200 Cred cost is justified purely for its movement capabilities, highlighting its perceived role. Riot Games even specifically updated the audio cues for Blast Pack detonations to ensure enemies could better react to the threat of a Raze using two satchels in quick succession for aggressive plays. This convergence of developer changes and player perception underscores that while damage is a secondary function, mastering satchel jumps is paramount.
Executing the signature double satchel requires precise timing and mouse movement:
- Setup: Aim slightly downwards towards the ground directly in front of Raze. Throw the first Blast Pack (Q).
- Launch: Immediately jump. As Raze reaches the apex of the jump, detonate the first satchel (Q again). This provides the initial vertical momentum.
- Mid-Air Transition: While ascending from the first blast, quickly flick the mouse downwards and slightly forward in the intended direction of travel. Throw the second Blast Pack (Q) towards the ground or a nearby surface.
- Boost & Direction: Detonate the second satchel (Q again) just as Raze is about to land on or pass over it. This converts the vertical momentum into horizontal speed or provides an additional vertical boost.
- Critical Timing: The timing of the second detonation is key, especially considering the slowed horizontal velocity implemented in patches. Detonating too early or too late will significantly impact the distance and height gained.
- Landing & Readiness: Control Raze's movement in the air using strafe keys (A/D) and immediately ready the equipped weapon upon landing.
Additional advanced satchel techniques include:
- Horizontal Boosts: For a quick forward dash, throw a single satchel on the ground behind Raze while sprinting and detonate it. This provides a burst of speed useful for crossing open areas or initiating pushes.
- Aggressive Peeks: Satchels can facilitate highly aggressive peeks. Throwing a satchel to propel Raze quickly around a corner or over cover can catch defenders completely off guard. This must be combined with good crosshair placement and readiness to fire immediately.
- Entry Paths: Each map offers unique opportunities for satchel-based entries. Examples include launching over the wall into A Showers on Bind, or double satcheling from A Main onto the Screens structure on Split. Learning and practicing these routes is essential for effective site takes.
- Defensive Repositioning: Blast Packs aren't just for attacking. They provide an excellent escape tool, allowing Raze to quickly disengage from a disadvantageous fight or rapidly rotate to support another part of the map.
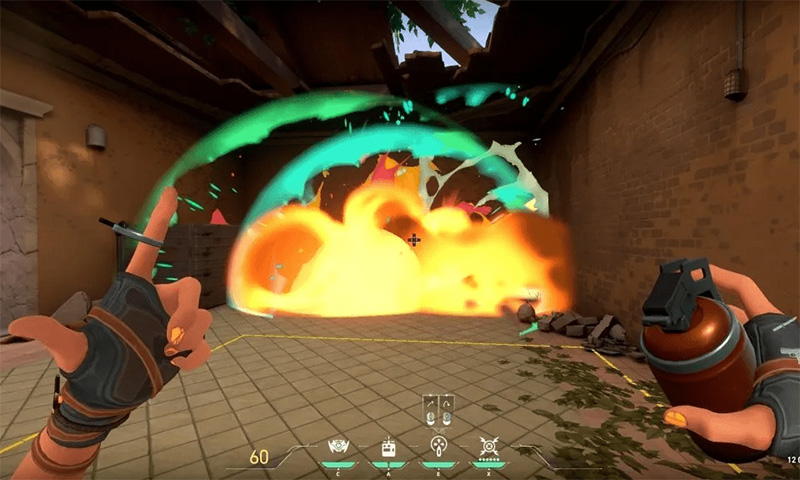
Paint Shells (E): Clearing Rooms, One Cluster at a Time
Mechanics & Stats: This is Raze's Signature Ability, meaning she gets one charge for free each round. Activating it equips a cluster grenade. Firing throws the grenade, which detonates after a short fuse, causing an initial blast. Immediately following this, it releases four smaller sub-munitions that also explode, dealing damage to anyone within their range. Like many explosive abilities, Paint Shells can inflict damage on Raze herself and her teammates if they are caught in the blast radius. An alternate fire (right-click) allows for a shorter, underhand toss, useful for closer ranges.
| Stat | Value | Notes |
|---|---|---|
| Cost | Free | |
| Recharge | 2 Kills or Assists | |
| Primary Explosion Radius | 5.5 meters | Nerfed from 6m |
| Secondary Explosion Radius | 5.25 meters | Nerfed from 6m |
| Minimum Damage (Primary/Secondary) | 1 HP | Nerfed from 15 HP |
| Max Potential Damage | High (e.g., up to 275 HP reported) | Inconsistent; depends on hits from primary/sub-munitions |
| Utility Damage Multiplier | 1.0x | Nerfed from 2.5x |
Beginner Guide: Flushing and Zoning
For players new to Raze, Paint Shells serve two primary functions: forcing enemies out of cover and temporarily denying space. Tossing a grenade into a common hiding spot like a corner or behind a box will compel any opponent there to move, potentially into the open. Similarly, throwing a grenade into a narrow choke point can halt or delay an enemy push, buying valuable time for the team. The most critical lesson for beginners is caution: always be mindful of teammate positions and Raze's own location to avoid friendly fire or self-damage.
Advanced Tactics: Precision Bombardment
Advanced Raze play involves using Paint Shells with greater precision and strategic intent. A key aspect that elevates Raze's potential is the unique economy of her Paint Shells. Being free at the start of the round and recharging after contributing to two kills or assists creates a powerful feedback loop. Successful aggression directly translates into more utility, potentially allowing a Raze player to use multiple grenades in a single round – a significant advantage compared to agents whose similar abilities require purchasing credits each time, like KAY/O's FRAG/ment. However, the significant nerfs to the grenade's minimum damage and radius mean that simply spamming them is ineffective. Achieving value requires deliberate placement and timing, making the recharge mechanic a reward for skillful play rather than a source of free, random damage.
- Key Lineups: Learning specific grenade lineups for each map allows Raze to clear angles or hit default plant spots without exposing herself. For example, from the B Lobby on Ascent, aiming at a specific point on the Boathouse roof can cause the grenade and its clusters to land perfectly on the common default plant location near the green boxes. On Haven's C site, bouncing the grenade off the back wall of C Long can effectively clear the defensive cubby near the site entrance. Many such lineups exist and are worth practicing.
- Airburst Techniques: Throwing the grenade high into the air allows the initial explosion to happen overhead, causing the sub-munitions to rain down over a wider area or bypass low cover. This is effective for hitting enemies playing behind objects they think provide safety.
- Combo Plays: Paint Shells become significantly more lethal when combined with setup utility from teammates. An enemy caught by Breach's Fault Line stun, pulled by Fade's Seize, or trapped in an Astra Gravity Well becomes an easy target for a well-placed grenade. Following up a Boom Bot that has scouted an area with a Paint Shell can pressure enemies effectively.
- Post-Plant/Denial: Paint Shells are excellent tools for preventing spike plants or forcing enemies off a defuse. Their duration and area coverage make them difficult to push through safely.
- Clearing Utility: While the damage multiplier against enemy utility was heavily nerfed, a precisely placed Paint Shell can still assist in clearing out clusters of traps or other deployables, though it's less efficient than Blast Packs for this purpose now.
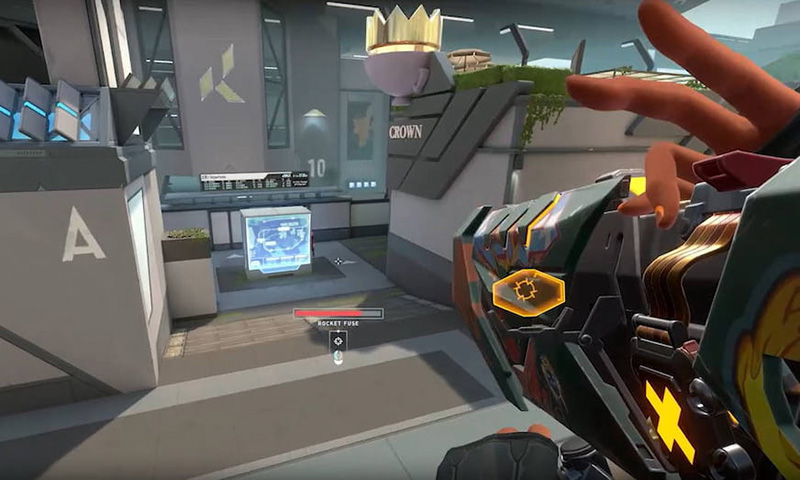
Showstopper (X): The Ultimate Party Crasher
Mechanics & Stats: Raze's Ultimate ability, Showstopper, equips a powerful rocket launcher. Firing launches a single rocket that explodes on contact with any surface or player, dealing massive damage in a significant area. Once activated by pressing X, Raze has a limited time (10 seconds) to fire the rocket before the ultimate expires and is wasted. Like Paint Shells, the explosion can damage Raze if she's too close. A loud audio cue – typically "Fire in the hole!" or "Here comes the party!" – plays upon activation, alerting all nearby players (including enemies) that the Showstopper is ready.
| Stat | Value | Notes |
|---|---|---|
| Ultimate Cost | 8 Points | Increased from 6, then 7 |
| Damage | 30-150 HP | Depends on proximity to blast center |
| Explosion Radius | 8 meters | |
| Duration (Active) | 10 seconds | |
| Equip Time | 1.4 seconds | Increased from 1.1s |
| Quick Equip Time | 0.7 seconds | Increased from 0.5s |
Beginner Guide: Big Booms for Big Problems
For players learning Raze, Showstopper is best reserved for high-impact situations. Its most straightforward use is against multiple enemies clustered together, particularly in confined spaces like small rooms, narrow corridors, or tight choke points where the large blast radius guarantees maximum effect. It's also a powerful tool for breaking through a stubborn enemy defense during a site execute or stopping a coordinated enemy push dead in its tracks. Because of the strict 10-second timer after activation, beginners should focus on firing the rocket relatively quickly once a suitable target or situation presents itself, avoiding the risk of wasting the ultimate.
Advanced Tactics: Strategic Devastation
While the image of a rocket launcher suggests guaranteed kills, experienced players understand that Showstopper's value extends beyond simple fragging. Its high ultimate cost (8 points, tied for the most expensive tier) and increased equip time make it a significant investment that demands careful consideration. Furthermore, players frequently report instances of inconsistency, where rockets seemingly hit close to targets but fail to secure a kill. This suggests that relying solely on Showstopper for kills might be misguided. Often, its greatest strength lies in the immense pressure and space control it generates the moment enemies hear its activation sound cue. Forcing defenders off critical angles, delaying a push, or clearing a path can be just as round-winning as landing a multi-kill.
- Optimal Timing & Key Spots: Deploy Showstopper during crucial moments like site executions to clear common defensive positions (e.g., Heaven platforms on Haven A, Rafters on Split B) or during post-plant scenarios to deny the spike defuse decisively. Using it preemptively when anticipating a heavy push through a specific choke can halt the enemy's momentum entirely.
- Satchel-Ult Combos: Combining Showstopper with Blast Packs elevates its threat potential significantly. Using one or two satchels to launch Raze into the air or rapidly reposition before firing allows for unexpected angles of attack, bypassing enemy cover and catching opponents off guard. This "flying rocket" technique is a hallmark of skilled Raze players.
- Leveraging the Sound Cue: The activation sound is a weapon in itself. Experienced Razes might activate the ultimate purely to force enemies back or create hesitation, without immediately firing. This psychological pressure can stall pushes, buy precious seconds for teammates to rotate, or create openings by forcing defenders to abandon strong positions.
- Target Prioritization & Aiming: For more consistent damage, aiming the rocket at the ground directly beneath or slightly behind enemies is often more reliable than attempting direct body shots, maximizing the splash damage potential. Prioritize hitting high-value targets, clusters of enemies, or breaking key defensive setups (like Sage walls or Killjoy lockdowns).
- Self-Propulsion (Risky): Firing the rocket at the ground behind or below Raze can provide a significant speed boost, similar to a Blast Pack. However, this is highly situational and carries the risk of self-damage or awkward positioning.
Level Up Your Raze: From Beginner Boom to Advanced Blitz
Mastering Raze is a journey from basic explosive handling to high-flying, coordinated destruction.
Raze 101: Foundational Fury (Beginner Focus)
New Raze players should focus on understanding the fundamentals and using her kit safely and effectively.
- The absolute priority is avoiding unnecessary self-damage or friendly fire with Paint Shells and Showstopper.
- Learn to use Boom Bot for basic scouting around immediate corners before peeking.
- Practice using Paint Shells to flush enemies from common hiding spots or to temporarily block off choke points.
- Get comfortable with single Blast Pack jumps onto standard crates and platforms to understand the basic mobility boost.
- Understand the Duelist role: be prepared to enter sites and take fights, but avoid reckless pushes that lead to easy deaths.
- Play with the team.
Simple Combos: A straightforward combo is deploying Boom Bot into an area, followed immediately by a Paint Shell to pressure any enemies revealed or forced out by the bot. Using Blast Packs to safely destroy enemy traps like Cypher wires or Killjoy Nanoswarms from a distance is another essential basic skill.
Positioning: Initially, stick close to teammates during pushes. Use utility like Boom Bot and Paint Shells to help clear the path ahead for the team, rather than just for personal gain. Communicate intended utility usage.
Raze Proving Grounds: Advanced Mayhem (Advanced Focus)
Elevating Raze play involves mastering her movement, combining abilities intricately, and making high-level strategic decisions.
This is where Raze truly shines. Dedicate significant time to practicing:
- Double satchel jumps, focusing on timing the detonations for maximum height and distance, especially considering the slowed horizontal velocity.
- Master horizontal boosts for quick repositioning and aggressive pushes.
- Learn air strafing techniques to maintain control while airborne.
- Practice satchel peeks – using a satchel to quickly peek around or over cover for a surprise shot.
- Research and practice map-specific satchel routes that allow for rapid site entries, unexpected flanks, or fast rotations.
Intricate Ability Combos: Explore advanced combinations. The Satchel-Ult play (launching into the air before firing Showstopper) is iconic and highly effective. Boosting the Boom Bot over obstacles with a Blast Pack can lead to surprise detections or damage. Master advanced Paint Shell lineups for hitting specific spots from safety and practice airburst techniques for wider coverage. Layer utility effectively: use the Boom Bot to draw attention, throw a Paint Shell to zone off escape routes, and then use a Blast Pack to close the distance for a kill.
High-Level Decision Making: Advanced play requires smart choices. Know when to use Blast Packs aggressively for entry versus defensively for escape or repositioning. Develop game sense to predict enemy locations for optimal grenade and ultimate usage. Understand that Showstopper's value isn't solely measured in kills; recognize its power in creating space, forcing rotations, and delaying pushes. Actively manage the Paint Shells recharge mechanic, knowing that securing kills directly fuels more utility for later in the round or subsequent rounds.
Exploiting Timings: Use the speed gained from satchels to beat enemy rotations to a site or catch players off-guard during transitions. Strategically use the Showstopper's sound cue to manipulate enemy movement and buy time, even without firing immediately.
Strategic Satchel Sense
Playing Raze effectively isn't just about mechanical skill; it requires smart resource management and coordination.
Economy: Fuelling the Firepower
Managing Costs: Raze's full purchasable kit costs 700 Creds: 300 for the Boom Bot and 200 each for two Blast Packs. This is a significant investment. Players must decide on buy priorities. Is full utility more valuable than upgrading from a Spectre to a Phantom? When is purchasing both Blast Packs truly necessary? The value proposition of the second satchel, especially after damage nerfs, is often debated, weighing its mobility and utility-breaking potential against the 400 Cred cost for both.
Pistol Rounds: Buying the 300 Cred Boom Bot on the pistol round is a major economic decision. It can provide valuable scouting or pressure, but leaves less money for armor or a better sidearm like the Ghost. Players must weigh the potential impact of the bot against personal survivability or firepower.
Leveraging Free Nade: The fact that Paint Shells are free and recharge on kills/assists should factor into economic planning. A successful round where Raze gets kills might mean she doesn't need to spend as much on utility in the following round, potentially allowing for a faster weapon upgrade or helping the team's overall economy.
Lock and Load: Weapon Synergies
Shotgun Style: Raze's exceptional mobility, particularly with Blast Packs, pairs incredibly well with shotguns like the Judge or Bucky. Satcheling aggressively onto a site or into close quarters while wielding a shotgun allows for devastating mid-air or close-range blasts where rifle inaccuracy would be a major hindrance. This high-risk, high-reward playstyle can overwhelm defenders caught off guard.
Rifle Reliability: For standard engagements after creating space or taking position, the Vandal or Phantom remain the go-to choices. The key is ensuring weapon readiness immediately after using Blast Packs for movement, as the transition needs to be seamless to capitalize on the repositioning.
Team Dynamics: Playing with Others
Synergies: Raze thrives when paired with Initiators. Agents like Breach, Skye, KAY/O, Fade, and Sova can stun, flash, reveal, or pull enemies, setting them up perfectly for Raze's AoE damage from Paint Shells or Showstopper. Controllers like Brimstone or Omen can use smokes to block sightlines, creating safer paths for Raze's aggressive satchel entries. Even Sage's Slow Orbs can make enemies easier targets for Raze's explosives.
Coordinating Entries: Communication is vital. Raze players should announce their intentions, especially when planning aggressive satchel entries. Use Boom Bot and Paint Shells proactively to clear space for the team's push, not just personal benefit. A Raze satcheling deep into a site alone without any follow-up is often just feeding the enemy team. Call out potential targets or areas being cleared with Showstopper.
Map Matters: Raze's effectiveness is heavily influenced by the map layout. She excels on maps characterized by tight corridors, enclosed spaces, numerous choke points, and vertical elements where her AoE damage and Blast Pack mobility can be fully exploited. Maps like Bind and Split are classic Raze playgrounds for this reason. Sunset has also emerged as a strong map for her in professional play. Conversely, maps with wide-open spaces might diminish the impact of her Paint Shells and Boom Bot. Players must adapt their ability usage and strategic approach based on the specific map being played – prioritizing grenade usage in narrow areas and leveraging satchel mobility where verticality offers advantages.
Avoiding the Fizzle: Common Raze Mistakes
Even the most explosive Agent can fizzle out if played poorly. Avoiding common pitfalls is crucial for consistent impact.
Wasting Utility: One of the most frequent errors is using abilities without clear purpose. Randomly chucking Paint Shells into open areas hoping for a lucky kill is inefficient, especially given the nerfs emphasizing precision. Deploying Boom Bot across long, open sightlines where it's easily destroyed before providing value is another waste. Firing Showstopper at a single, isolated enemy who poses little threat, or activating it when enemies are clearly scattered and unlikely to be hit, squanders its high cost. Similarly, using Blast Packs primarily for their minimal damage when their mobility could have saved Raze or secured a better position is a misplay.
Predictable Movement: Relying on the same satchel entry path onto a site every round makes Raze easy to counter. Repeatedly peeking the same angle without variation allows enemies to pre-aim. Making Boom Bot paths obvious by always deploying it from the same spot gives enemies ample time to react. Mix up approaches to keep opponents guessing.
Poor Movement Execution: Consistently failing double satchel jumps due to poor timing or mechanics negates one of Raze's biggest strengths. Taking significant or lethal fall damage after using Blast Packs indicates a lack of control. A critical error is not having the weapon ready immediately after landing from a satchel jump, leaving Raze vulnerable. Practice is essential.
Bad Ultimate Usage: Holding onto Showstopper for the entire 10-second duration only to have it expire unused is a common mistake. Firing the rocket from highly exposed positions often results in Raze being eliminated before the rocket even lands. Poor target selection or aiming, leading to whiffs or minimal splash damage, undermines the ultimate's potential. Forgetting to account for the increased equip time can also lead to being caught out during activation.
Friendly Fire / Self-Damage: Carelessness with Paint Shells or Showstopper can lead to damaging or even killing teammates or Raze herself. Always check surroundings before deploying area-damage abilities. (Note: Blast Packs no longer damage allies, removing one previous source of friendly fire).
Poor Team Play: The "lone wolf" Raze often fails. Satcheling deep into enemy territory far ahead of the team usually results in being traded out with no gain. Failing to communicate utility usage (e.g., "Botting C main," "Nading U-Hall") leaves the team unprepared to follow up. Using abilities purely for personal frag potential instead of facilitating the team's overall strategy (like clearing traps or creating space for a push) limits Raze's true impact.
Go Get 'Em! Bring the BOOM!
Raze is pure, unadulterated explosive energy packed into a VALORANT Agent. She's a high-impact Duelist capable of shattering defenses, creating chaos, and reaching places no other Agent can dream of. Her strength lies not just in the raw power of her explosives, but in the creative and strategic application of her entire kit – the scouting potential of Boom Bot, the unparalleled mobility of Blast Packs, the zoning power of Paint Shells, and the game-altering pressure of Showstopper.
Now get out there, make some noise, and show them how the party really starts! BOOM!