
In the tactical landscape of Valorant, Viper stands as a unique Controller, wielding an arsenal of poisonous chemical devices to manipulate the battlefield, choke enemy vision, and suffocate hope. Classified as a Controller, her primary function is area denial and map manipulation, using toxins to shape engagements to her advantage. However, her kit possesses qualities that blur the line, allowing her to function as a hybrid Controller/Sentinel, capable of locking down sites with persistent threats and delaying enemy advances with unparalleled efficiency. Mastering Viper demands a strategic mind, favoring calculated, slower-paced gameplay built on foresight and meticulous planning rather than reactive engagements. She is the embodiment of control, turning key areas into deadly traps for the unwary.
Overview of Her Strategic Value
Viper's strategic value hinges on two core pillars: Site Control and Post-Plant Security. Her abilities excel at blocking critical lines of sight, creating hazardous zones that deter or punish enemy movement, and establishing near-impenetrable fortresses around a planted Spike. While her Toxic Screen can bisect entire sections of the map and her Poison Cloud can choke specific angles, her true terror often manifests after the Spike is planted. Her Snake Bite ability, particularly when combined with precise lineups learned through practice, allows her to deny defuses from safe distances, buying invaluable time or securing kills on desperate opponents. This post-plant prowess makes her arguably the best agent for securing planted Spikes.
Viper's effectiveness extends beyond the tangible effects of her utility; it lies in the psychological pressure she exerts. Her abilities, particularly the toggleable Poison Cloud and Toxic Screen, create persistent threats that force opponents into a constant state of vigilance. Unlike the fleeting smokes of agents like Omen or Brimstone, Viper's presence lingers. Enemies must perpetually track her fuel status, anticipate potential lineups, and weigh the risk of traversing toxic zones, which inevitably slows their tempo, forces utility usage, and introduces hesitation into their decision-making. This mental burden, the constant threat of decay and unseen angles, is a subtle yet potent weapon in Viper's arsenal.
Viper's Arsenal: The Tools of Dominion
Understanding the precise mechanics and statistics of Viper's abilities is paramount to wielding her toxic power effectively. Each tool serves a distinct purpose, contributing to her overall control and lethality.
Poison Cloud (Q): The Versatile Orb
Viper equips and throws a gas emitter that remains perpetually throughout the round until activated. Activation creates a spherical cloud of toxic gas, consuming fuel. A significant change in recent patches prevents the orb from being picked up mid-round; it can now only be retrieved during the buy phase. This fundamentally alters its flexibility, demanding commitment to its initial placement. If the Poison Cloud is active when Viper dies, it will remain active for an additional 2 seconds, provided she has sufficient fuel remaining.
| Property | Value |
|---|---|
| Cost | 200 Creds |
| Charges | 1 |
| Max Uptime (per full fuel tank) | 12 seconds |
| Minimum Fuel to Activate | 30% |
| Reactivation Cooldown | 5 seconds |
| Decay (Toxin) | 30 HP instant decay upon contact, followed by 10 HP decay per second while inside |
| Decay Linger | Effect persists for 1.5 seconds after leaving the cloud |
| Radius | Approximately 6 meters |
Toxic Screen (E): The Dividing Wall
Viper equips a launcher firing a line of gas emitters that penetrate terrain. Activating the ability erects a tall wall of toxic gas along the emitter line, consuming fuel. Crucially, once the emitters are deployed, the wall's location is fixed for the round and cannot be picked up or redeployed. Similar to the orb, if the Toxic Screen is active upon Viper's death, it remains up for an additional 2 seconds.
| Property | Value |
|---|---|
| Cost | Free (Signature Ability) |
| Charges | 1 |
| Max Uptime (per full fuel tank) | 12 seconds |
| Minimum Fuel to Activate | 30% |
| Reactivation Cooldown | 5 seconds |
| Decay (Toxin) | 30 HP instant decay upon contact, followed by 10 HP decay per second while inside |
| Range | Approximately 50 meters |
Snake Bite (C): The Venomous Pool
Viper launches a canister that shatters upon hitting the floor (or any surface that can be stood upon), creating a circular pool of acid. This pool deals damage over time and, critically, applies the Vulnerable debuff to enemies within it. The projectile ricochets off walls and ceilings until it impacts a floor surface. Snake Bite also damages destructible enemy utility.
| Property | Value |
|---|---|
| Cost | 300 Creds |
| Charges | 1 |
| Duration | 6.5 seconds |
| Damage Per Second | Approximately 12.5 base DPS, but effectively 25 DPS due to the Vulnerable debuff doubling damage taken. Total potential damage is around 162.5 HP over the full duration. |
| Vulnerable Debuff | Enemies take 200% damage from all sources while affected. Lingers for 2 seconds after exiting the pool. |
| Radius | Approximately 4.5 meters |
| Equip Time | 0.8 seconds |
Viper's Pit (X): The Ultimate Suffocation Zone
Viper unleashes a massive, expanding cloud of toxic gas centered on her location. Enemies inside suffer from Nearsight (severely reduced vision) and continuous health Decay. Viper, however, gains enhanced vision within the pit, highlighting enemies in a distinct red (or chosen enemy highlight color) glow. The Pit persists indefinitely as long as Viper remains inside it. If she exits, a timer begins, and the Pit collapses if she doesn't return before it expires. The ultimate can be manually dispersed early by holding the ability key. A key feature is that it completely obscures the minimap for enemies inside and prevents them from providing minimap detection to their allies.
| Property | Value |
|---|---|
| Ultimate Cost | 9 Ultimate Points |
| Max Time Outside Pit | 8 seconds |
| Decay (Toxin) | 30 HP instant decay upon contact, followed by 10 HP decay per second while inside. Decay cannot kill, stopping at 1 HP. |
| Smoke Integrity Regen Time | 25 seconds |
| Vision | Enemies Nearsighted; Viper sees highlighted enemies |

Fuel & Toxin: The Core Mechanics
| Ability | Type | Cost | Charges | Max Uptime/Duration | Cooldowns | Key Effects |
|---|---|---|---|---|---|---|
| Fuel | Passive | - | - | - | Regen: 3.3%/sec (30s full) | Max 100. Powers Q & E. Increased drain with Q+E active. Min 30% to activate Q/E. |
| Toxin | Passive | - | - | - | HP Regen Delay: 1.5s | Applies Decay via Q/E/X. 30 instant Decay + 10/sec. Lingers 1.5s. Reduces max HP to 1 (non-lethal). Allies unaffected. |
| Poison Cloud (Q) | Basic | 200 Creds | 1 | 12s (per full fuel) | Reactivation: 5s. Pickup: Buy Phase Only. | Spherical smoke. Applies Toxin. Remains 2s after death if active. |
| Toxic Screen (E) | Signature | Free | 1 | 12s (per full fuel) | Reactivation: 5s. Cannot be picked up. | Long wall smoke, penetrates terrain. Applies Toxin. Remains 2s after death if active. |
| Snake Bite (C) | Basic | 300 Creds | 1 | 6.5s | - | Acid pool. ~25 DPS (incl. Vulnerable). Applies Vulnerable (200% dmg taken, lingers 2s). Damages utility. |
| Viper's Pit (X) | Ultimate | 9 Ult Points | 1 | Infinite (inside) | Max Time Outside: 8s. Integrity Regen: 25s. | Large toxic cloud. Applies Toxin. Nearsights enemies. Highlights enemies for Viper. Obscures enemy minimap. |
Mastering the Fuel: Sustaining the Suffocation
Conservation Techniques (Toggling, Timing)
The core technique for preserving fuel is "toggling" or "cycling" smokes – activating Poison Cloud or Toxic Screen only when necessary and deactivating them promptly to allow fuel regeneration. This requires active engagement and awareness, rather than passively leaving smokes up.
Activate smokes based on specific triggers like enemy footsteps, initiator reconnaissance revealing presence (e.g., Sova dart, KAY/O knife), or enemy utility usage. Once the immediate threat passes or the enemy utility expires, deactivate the smoke to begin regeneration. This baits enemy utility and forces them to push into unfavorable conditions or wait, allowing Viper's fuel and cooldowns to recover.
Use smokes intermittently during an execute or lurk. Activate the wall/orb to cross an angle or pressure defenders, then deactivate it once the space is taken or if defenders retreat. This conserves fuel for later in the round, such as post-plant scenarios. Dropping smokes early if an attack stalls or enemies rotate away is crucial for maximizing fuel regeneration.
Managing Cooldowns and Fuel Depletion Windows
Beyond conservation, effective fuel management involves navigating Viper's cooldowns and inherent vulnerabilities. The 5-second reactivation cooldown after deactivating Q or E is a critical window. Enemies aware of this delay (potentially indicated by the yellow cooldown light on the emitters) can coordinate pushes during this brief downtime.
Furthermore, the 30% minimum fuel requirement for activation means that even after some regeneration, Viper might be unable to raise her smokes immediately after full depletion. Understanding the 30-second full recharge time helps in planning longer-term utility availability.
Constant communication is non-negotiable. Viper players must inform their teammates about low fuel levels, impending smoke deactivation, or when smokes are on cooldown. This allows the team to adjust positioning and expectations, preventing fatal surprises when vision control unexpectedly disappears. Playing Viper effectively is a constant resource battle, demanding anticipation of enemy actions based on smoke uptime and downtime.
Corrupting the Battlefield: Map-Specific Strategies
Viper's influence waxes and wanes depending on the terrain. Her rigid Toxic Screen and now-permanent Poison Cloud demand map-specific knowledge and precise execution. The current competitive map pool (as of Season 2025, Act 3) includes Ascent, Haven, Icebox, Lotus, Pearl, Split, and Sunset.
Viper's map dependency is pronounced due to the nature of her kit. The Toxic Screen, once deployed, is immutable for the round, and the Poison Cloud can no longer be repositioned after the buy phase. This necessitates pre-planned strategies, unlike the reactive smoking capabilities of agents like Omen. Furthermore, the single, high-impact Snake Bite charge makes learning precise post-plant lineups essential to maximize its value. Her skill ceiling is thus intrinsically linked to map knowledge and lineup execution proficiency.
Ascent
A traditional two-site map with a crucial, open Mid area. Features controllable doors on both sites. Viper can be effective, especially defensively and post-plant, but struggles with flexible Mid control compared to other Controllers.
Attacking Protocols
Toxic Screen (E) Executes:
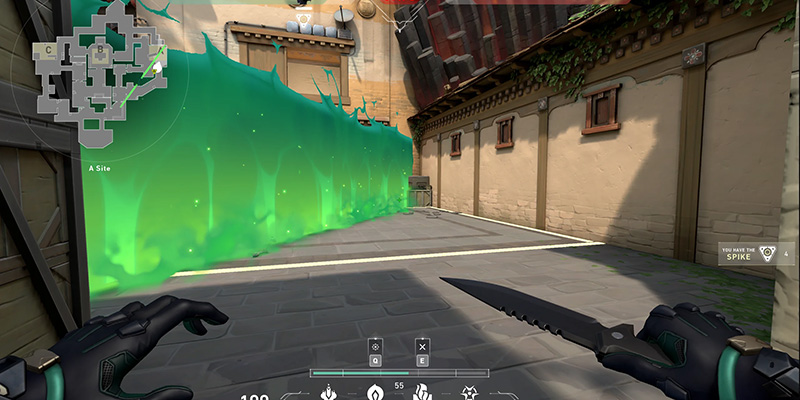
- Beginner (A Site): Stand in the corner of A Lobby near the entrance barrier. Aim high towards A Site, ensuring the minimap indicator line cuts across A Main entrance, Generator, and covers Heaven entrance. Left-click to deploy.
- Beginner (B Site): Stand in the back corner of B Lobby. Aim high towards B Site, ensuring the minimap indicator line cuts across the main B entrance choke point and extends towards Defender Spawn/Market exit. Left-click to deploy.
- Advanced (Mid Control): Stand in A Lobby near Mid entrance. Aim high towards Mid Market, ensuring the wall cuts across Mid Cubby exit and extends to block vision from Catwalk towards Pizza/Market. Left-click to deploy.
Poison Cloud (Q) Placements:
- Beginner (A Heaven): From A Main, aim towards the A Heaven window structure. Throw the orb to land inside or just in front of Heaven to block Operator angles.
- Beginner (B Default): From B Main, throw the orb onto the default plant box on B Site to provide cover for planting.
- Advanced (A Generator One-Way): Requires precise lineup onto the Generator structure to create a one-way view towards A Main or Heaven.
Defensive Strongholds
Toxic Screen (E) Setups:
- Beginner (A Site Hold): Stand near A Tree/Generator. Deploy the wall diagonally across A Main entrance, extending towards Mid Link.
- Beginner (B Site Hold): Stand in Market or back of B Site. Deploy the wall across the B Main choke point, extending towards Mid.
- Advanced (Mid/A Split): Stand in A Garden. Deploy the wall through Mid Link towards A Main, effectively cutting off both push points.
Poison Cloud (Q) One-Ways/Choke Control:
- Beginner (Mid Catwalk): Throw orb towards Mid Catwalk entrance from Pizza or Market to deter pushes.
- Advanced (A Main One-Way): Stand top A Stairs (Garden side). Aim at the top edge of the archway (or where barrier meets wall pre-round). Left-click throw to land orb on the arch, creating a one-way looking down A Main.
- Advanced (B Main One-Way): Stand against the left side of the B Main doorway (site side). Aim at the lamp structure opposite. Jump and right-click throw to land orb on the lamp, creating a one-way looking down B Main.
Post-Plant Nightmares
Snake Bite (C) Lineups:
- Beginner (A Default from A Main): Stand near the box in A Main. Aim high above the default plant spot (near Generator). Jump-throw.
- Beginner (B Default from B Main): Stand behind crates in B Main. Aim at the lamp above the default plant spot. Throw.
- Advanced (A Generator from A Lobby/Tree): Requires precise lineups using HUD elements or specific map geometry (e.g., aiming at specific roof corners or clouds from A Lobby/Tree area).
- Advanced (B Default/Boxes from Mid Courtyard/Spawn): Requires precise lineups using HUD elements or skybox references from Mid Green Boxes or further back.
Poison Cloud (Q) Usage: Throw orb directly onto the planted Spike to combine decay with Snake Bite damage and obscure vision.
Viper's Pit (X) Deployment: Ideal for locking down either site post-plant. On A, deploy centered near Generator to cover Main, Heaven, and Tree entrances. On B, deploy centered on site to cover Main, Market, and Defender Spawn entrances. Position yourself away from the most likely entry point.
Haven
Unique three-site map requiring broad map control and fast rotations. Viper can be strong, especially with double controller setups, but solo controlling three sites is challenging. Excels at locking down C Long or Garage defensively and post-plant on all sites.
Attacking Protocols
Toxic Screen (E) Executes:
- Beginner (A Site): From A Lobby/Long, deploy wall cutting across A Short entrance and extending towards A Heaven.
- Beginner (B Site): From outside B Window (Mid), deploy wall across the B Site entrance, blocking vision from Defender Connector.
- Beginner (C Site): From C Lobby/Long, deploy wall diagonally across the C Site entrance, blocking sight from CT spawn connector and back site platform.
- Advanced (A Site Split): Deploy wall from Sewers (A Short) extending across A Site to block Heaven and CT connector, enabling a split push from Long and Short.
- Advanced (C/Garage Control): Deploy wall from Attacker Spawn aiming towards C Garage, cutting off Garage entrance and extending towards C Site.
Poison Cloud (Q) Placements:
- Beginner (A Heaven): Throw orb onto A Heaven platform from A Long.
- Beginner (B Site Default): Throw orb onto the default plant box on B Site from Mid Window area.
- Beginner (C Site Default): Throw orb onto the default plant boxes on C Site from C Long.
- Advanced (A Tower Window): From A Main entrance, hug right corner, aim at second light bulb, throw orb onto Tower Window.
Defensive Strongholds
Toxic Screen (E) Setups:
- Beginner (A Site Hold): Deploy wall across A Long entrance.
- Beginner (B Site Hold): Deploy wall across B Main entrance from Mid Window or site.
- Beginner (C Site Hold): Deploy wall across C Long entrance.
- Advanced (Mid/Garage Control): Stand near B Site entrance (Mid side). Deploy wall extending through Garage entrance and across Mid Window entrance.
- Advanced (C/Mid Control): Stand near C Link. Deploy wall across C Long entrance and extending to block Mid Window push.
Poison Cloud (Q) One-Ways/Choke Control:
- Beginner (A Long): Place orb at the A Long choke point.
- Beginner (Garage): Place orb inside Garage entrance.
- Beginner (C Long): Place orb at the C Long choke point.
- Advanced (A Short One-Way): Stand in A Link corner. Aim at the top corner of the Short doorway arch. Throw orb onto the arch.
- Advanced (Garage One-Way): Stand in back corner of Garage. Aim where the two metal roof bars meet overhead. Left-click throw onto doorframe.
- Advanced (C Long One-Way): Stand in C Cubby corner. Aim at the "trumpet" shaped structure above C Long entrance. Throw orb into the structure.
Post-Plant Nightmares
Snake Bite (C) Lineups:
- Beginner (A Default from A Long): Stand back A Long. Aim high over A Site default boxes. Throw.
- Beginner (B Default from Mid): Stand near Mid Window/Boxes. Aim towards the sky above B Site default box. Throw.
- Beginner (C Default from C Long): Stand back C Long. Aim high over C Site default boxes. Throw.
- Advanced (A Default from Sewers/Spawn): Requires precise lineups using skybox elements (e.g., specific clouds, building edges) from A Short/Sewer area or further back.
- Advanced (B Default from Attacker Spawn): Stand in Attacker Spawn near Mid entrance. Aim high using specific roof/tower elements towards B Site.
- Advanced (C Default from Attacker Spawn/Garage): Stand in Attacker Spawn near C entrance or inside Garage. Aim high using specific roof/flag elements towards C Site.
Poison Cloud (Q) Usage: Place orb on Spike for decay and vision block alongside Snake Bite.
Viper's Pit (X) Deployment: Extremely strong on B Site, covering the entire area. On A, deploy to cover Long, Short, and Heaven entrances. On C, deploy to cover Long and Garage entrances. Ulting a specific choke like C Long or Garage entrance can also be effective.
Icebox
Characterized by verticality, ziplines, and distinct A and B sites connected through Mid. Viper is considered very strong here, often a meta pick due to her ability to cut long sightlines and control tight spaces.
Attacking Protocols
Toxic Screen (E) Executes:
- Beginner (A Site): Stand near Attacker Spawn barrier towards A. Aim high, deploying wall across A Belt entrance and towards A Rafters/Nest area.
- Beginner (B Site): Stand in Attacker Spawn tunnel towards B (Garage). Aim high, deploying wall across B Main entrance (near Yellow box) and extending towards Snowman/Top Site.
- Advanced (A Site Deep Control): Deploy wall from Attacker Spawn aiming deeper onto A Site, cutting off vision from Back Site and Defender Spawn entrance.
- Advanced (Mid to B Split): From Mid Boiler control, deploy wall cutting across B Tube exit and extending onto B Site, blocking vision from Snowpile and Back Site.
Poison Cloud (Q) Placements:
- Beginner (A Rafters): From A Belt, throw orb onto A Rafters platform.
- Beginner (B Top Site): From B Green/Main, throw orb onto the top B Site platform (near Orange box).
- Advanced (A Nest): Precise throw from Belt or Attacker Spawn to land orb inside A Nest structure.
- Advanced (B Yellow): Throw orb onto the top of the Yellow container from B Green/Garage.
Defensive Strongholds
Toxic Screen (E) Setups:
- Beginner (A Site Hold): Deploy wall across A Belt entrance from Nest or Site.
- Beginner (B Site Hold): Deploy wall across B Green/Main entrance from Yellow or Site.
- Advanced (A Site Vertical): Deploy wall vertically up the side of A Site near Belt, creating unusual angles.
- Advanced (Mid/Kitchen Control): Deploy wall from Kitchen extending across Mid Boiler entrance towards Tube.
Poison Cloud (Q) One-Ways/Choke Control:
- Beginner (A Belt): Place orb at the A Belt entrance choke.
- Beginner (B Green): Place orb at the B Green entrance choke.
- Advanced (Mid Boiler One-Way): Place orb inside Mid Boiler structure near Tube entrance for a one-way looking towards Attacker Mid.
- Advanced (B Yellow One-Way): Place orb on top of B Yellow container for a one-way looking down B Main.
- Advanced (A Belt Screen One-Way): Place orb on top of the screen structure at A Belt entrance for a one-way.
Post-Plant Nightmares
Snake Bite (C) Lineups:
- Beginner (A Default from Belt): Stand back A Belt. Aim high over A Site default plant area (near ramps). Throw.
- Beginner (B Default from B Main/Green): Stand back B Green. Aim high over B Site default plant area (near Yellow). Throw.
- Advanced (A Default from Attacker Spawn/Nest): Requires precise lineups using skybox elements (e.g., crane, building edges) from Attacker Spawn side or A Nest.
- Advanced (B Default from Attacker Spawn/Kitchen): Requires precise lineups using skybox elements (e.g., specific points on mountains/buildings) from Attacker Spawn Garage or Kitchen area.
Poison Cloud (Q) Usage: Place orb on Spike, crucial for dealing enough damage with the single Snake Bite.
Viper's Pit (X) Deployment: Extremely effective on both sites. On A, ulting from Rafters or top site covers most approaches. On B, ulting from top site near Orange or from Snowpile covers the entire plant area and entrances. Ulting Mid Boiler can also deny crucial rotations. Positioning on elevated areas within the pit (e.g., A Rafters, B Top) provides strong advantages.
Within the Serpent's Nest: Viper's Pit Mastery
Viper's ultimate ability, Viper's Pit, is one of the most impactful and feared abilities in Valorant. It transforms a large area into a suffocating deathtrap, drastically altering sightlines and decaying enemy health. Mastering its deployment and subsequent play is crucial for maximizing Viper's potential.
Optimal Deployment Scenarios (Attack, Defense, Retake)
Positioning and Playing Inside the Pit
Survival and lethality inside the Pit rely on exploiting its unique properties. Viper's key advantage is the enhanced vision, highlighting enemies in red (or the player's chosen color) while they struggle to see. To maximize this:
Use weapons without bullet tracers, like the Phantom or shotguns (Judge, Bucky), to avoid revealing your position through the mist. Shotguns become particularly deadly due to the forced close-range engagements.
Avoid standing in the open. Play corners, use map geometry for cover, and rely heavily on audio cues to pinpoint enemy locations before they see your highlight. Position yourself far from the most likely enemy entry points to maximize the time they spend decaying before reaching you. Constantly reposition within the Pit to remain unpredictable. Utilize natural pockets or layer your Poison Cloud inside the Pit for extra concealment.
Some players find enabling the "Bloom" graphics setting makes enemy highlights appear brighter and more noticeable within the Pit. Experiment with different enemy highlight colors (e.g., Yellow, Purple) to find what stands out most.
Psychological Warfare: Baiting and Outplaying Opponents
The Pit isn't just a physical barrier; it's a mental one. Use the limited time outside (8 seconds) strategically. Step out briefly to make enemies think you've abandoned a position, then quickly re-enter as they push in, catching them off-guard from an unexpected angle. In post-plant, tapping the Spike can bait enemy spam through the smoke, revealing their positions for counter-fire. The mere existence of the Pit forces enemies into difficult, often panicked, decisions.
Addressing Counters (Utility Destruction, Enemy Ults)
Viper's Pit is powerful but not invincible. Be aware of enemy utility that can compromise your advantage:
- Recon: Sova's Recon Bolt, Fade's Haunt, or KAY/O's ZERO/point can reveal your position inside the Pit, negating the vision advantage. Position away from common scan landing spots.
- Area Denial Ults: Brimstone's Orbital Strike or Breach's Rolling Thunder can flush Viper out or kill her if she's caught within their radius. Track enemy ultimate points and anticipate their usage.
- Flashes: Abilities like Skye's Guiding Light or Phoenix's Curveball can still blind players inside the Pit, enabling coordinated pushes. Play angles that minimize direct exposure to entry points.
- Enemy Viper: An opposing Viper's Pit deployed within or overlapping yours creates a chaotic neutral zone where both Vipers lose their exclusive vision advantage.
The Pit's strength is maximized when enemies are forced to push into it blindly. Proactive clearing utility from the enemy team significantly diminishes its effectiveness. Therefore, successful Pit usage often depends on the enemy lacking specific counters, Viper positioning intelligently to mitigate incoming utility, and awareness of the enemy's available resources.
Economic Warfare: Funding the Venom
Managing credits effectively is crucial for any agent, but Viper's reliance on her purchasable abilities (Poison Cloud and Snake Bite) adds specific considerations to her economic strategy.
Pistol Round Buys (Prioritizing Abilities vs. Weapon)
The first round sets the economic tone. Viper has several viable options:
| Option | Loadout | Total Cost | Notes |
|---|---|---|---|
| Full Utility + Light Shields | Poison Cloud (200) + Snake Bite (300) + Light Shields (300) | 800 Creds | Recommended. Prioritizes having Viper's full kit available with some protection. |
| Ghost + Orb | Ghost (500) + Poison Cloud (200) | 700 Creds | Better firepower but sacrifices the crucial Snake Bite and shields. |
| Base Pistol + Full Utility | Poison Cloud (200) + Snake Bite (300) | 500 Creds | Leaves 300 Creds, typically best spent on Light Shields. |
Full Buy Considerations (Viper's Utility Value)
On full buy rounds, Viper should aim for a primary rifle (Phantom or Vandal, 2900 Creds), Heavy Shields (1000 Creds), and her full utility suite (Poison Cloud 200 + Snake Bite 300 = 500 Creds). This brings the minimum target for a comfortable full buy to around 4400 Creds. Viper's utility cost (500 Creds) is substantial compared to some agents but is fundamental to her effectiveness. Skimping on Poison Cloud or Snake Bite significantly hampers her ability to control space or secure rounds post-plant. If credits are tight, consider opting for a slightly cheaper rifle like the Bulldog or Guardian rather than sacrificing essential abilities.
Eco/Force Buy Strategies Tailored for Viper
Viper's economic planning should always factor in the cost of enabling her core utility. Her ability to influence rounds often hinges more on having her Q, E, and C available than on having the absolute best weapon, making ability purchases a high priority.
Toxic Alliances: Synergistic Destruction
While Viper can exert significant pressure alone, her true potential is often unlocked through coordination with teammates whose abilities complement her own. Information and supplementary control are key force multipliers for her kit.
Information is Power: Pairing with Initiators (Sova, Fade, Skye, KAY/O, Gekko)
Viper's smokes obscure vision for everyone, but Initiators provide the crucial intelligence needed to capitalize on this blindness.
Sova's Recon Bolt, Fade's Haunt, Skye's Trailblazer, or KAY/O's ZERO/point can reveal enemy positions through or behind Viper's Toxic Screen or Poison Cloud. This information allows Viper or her teammates to secure kills via wallbangs, pre-fires, or precisely aimed Snake Bites. Fade's Prowlers can also physically clear areas obscured by Viper's smokes.
Flashes from Skye or KAY/O, or stuns from Breach, can disorient enemies forced to push through Viper's toxic barriers, making them easy targets for players waiting on the other side. Combining decay with a stun or flash is often lethal.
Gekko's Wingman can plant or defuse the Spike while Viper uses her utility to provide cover and deny enemy interference, freeing Viper up to hold angles or prepare post-plant lineups.
Layered Control: Double Controller Compositions (Harbor, Omen, Brimstone, Astra, Clove)
Pairing Viper with another Controller creates layers of vision denial, offering more comprehensive map control and mitigating Viper's weaknesses like fuel limitations and static utility placement.
| Pairing | Synergy |
|---|---|
| Viper + Harbor | A potent combination, especially on larger maps (historically Breeze, currently Pearl). Harbor's curving High Tide walls can complement Viper's straight Toxic Screen, while his Cove provides safe planting/defusing bubbles. Layering Viper's decay with Harbor's slows creates extremely hazardous zones. |
| Viper + Omen/Clove | This pairing blends Viper's persistent, pre-placed control (Wall/Orb) with the flexibility of rechargeable, repositionable smokes (Omen's Dark Cover, Clove's Ruse). Omen or Clove can smoke reactively while Viper maintains her static setup, or they can layer smokes for complex executes. Omen's Paranoia also synergizes well with Viper's vision denial. |
| Viper + Brimstone | Offers immense execute power. Brimstone's rapid Sky Smokes can supplement Viper's wall during site takes. Post-plant becomes a nightmare for defenders facing both Viper's Snake Bite and Brimstone's Incendiary. Brimstone's Stim Beacon can also aid pushes through Viper's utility. |
| Viper + Astra | Combines Viper's linear control with Astra's map-wide, precise utility. Astra can use Gravity Wells or Nova Pulses to punish enemies caught in Viper's toxin or use Nebula smokes to supplement Viper's fuel-limited vision blocking. |
Enabling Aggression: Supporting Duelists (Jett, Raze, Neon etc.)
While primarily a Controller, Viper can enable aggressive plays for Duelists:
- Pathways: Toxic Screen creates corridors of cover, allowing Duelists like Jett or Neon to dash or slide onto sites with reduced exposure.
- Temporary Cover: Poison Cloud can be used offensively to block a specific angle momentarily, allowing a Duelist to take space or reposition.
- Coordination is Key: Misplaced Viper utility can severely hinder Duelist entry paths. Clear communication about wall/orb placement and timing is essential to avoid obstructing aggressive pushes.
Viper excels when her large-scale vision denial is augmented by information gathering (Initiators) or additional, flexible layers of control (Controllers). She sets the stage, enabling her teammates to capitalize on the chaos and restricted sightlines she creates. This often makes her more potent in coordinated team environments or when paired synergistically, rather than acting as a completely independent solo Controller, especially considering the inflexibility introduced by recent nerfs.
Avoiding Fatal Missteps: Common Viper Errors
Viper's high skill ceiling means there are numerous pitfalls awaiting inexperienced or careless players. Many common errors revolve around her unique resource management and the commitment required by her abilities.
Fuel Mismanagement and Its Consequences
- Unnecessary Uptime: Leaving Poison Cloud or Toxic Screen active when no threat is present or when vision denial isn't needed drains fuel needlessly. This often results in having no fuel available during critical pushes, retakes, or post-plant holds.
- Ignoring Levels/Cooldowns: Failing to monitor the fuel gauge and communicate low levels or cooldown status to teammates leads to unexpected vulnerability when smokes drop.
- Exploitable Windows: Not playing around the 5-second reactivation cooldown or the 30-second full recharge time allows attentive enemies to push during these moments of weakness.
Suboptimal Utility Placement (Walls that Hurt, Orbs that Don't Cover)
Poor placement renders Viper's powerful tools ineffective or even detrimental.
- Blocking Teammate Vision: Placing walls that cut off angles teammates need to hold or push.
- Creating Enemy Cover: Walls that don't fully connect with geometry can create unintended safe pockets for enemies to hide within or peek from.
- Incomplete Coverage: Not aiming high enough, causing the wall to terminate early due to terrain, leaving angles exposed. Failing to cover key sightlines entirely.
- Premature Deployment: Placing the wall too early on attack can telegraph intent, allowing defenders ample time to stack the site or rotate.
- Ineffective Chokes/One-Ways: Throwing orbs that leave gaps enemies can peek through, or placing one-ways that are easily countered or don't provide a clear advantage.
- Wasted Placement (Post-Nerf): Placing the orb defensively early in a round with the intention of using it later for post-plant is no longer possible due to the removal of mid-round pickup. Players must commit the orb's function for the round.
- Passive Placement: Placing defensive orbs too far back, conceding significant space to attackers before they even encounter resistance.
- Wasted Charge: Using the single, precious Snake Bite charge to clear a minor corner or for low-impact damage instead of reserving it for the high-value post-plant scenario.
- Inaccurate Lineups: Failing to execute post-plant lineups correctly, resulting in the molly missing the Spike and providing no defuse denial.
Predictability and Poor Ultimate Usage
- Predictable Placement: Consistently ulting the exact same spot on a site makes it easy for enemies to pre-aim common Viper positions or use counter-utility effectively.
- Suboptimal Location: Always ulting directly on the Spike isn't always optimal. Ulting a key choke point leading to the site can sometimes provide better control and safety.
- Ignoring Counters: Deploying the Pit without considering if the enemy team has ultimates (Brimstone, KAY/O) or recon abilities (Sova, Fade) ready to counter it.
- Mismanaging Presence: Staying outside the Pit for longer than the 8-second limit, or failing to re-enter promptly, causing premature collapse due to the slow integrity regeneration.
- Low Value Ults: Using the ultimate when the round is already effectively won or lost, or in a way that primarily hinders teammates' vision or movement.
Lack of Communication
Given the impact and limitations of her utility (especially fuel and cooldowns), failing to communicate intentions and status updates is a critical error. Teammates need to know when smokes are going up or down, where walls are being placed, and Viper's fuel situation to play effectively around her.
Conclusion: The Lingering Venom
Viper embodies strategic depth in Valorant. Her power lies not just in the immediate effects of her toxins, but in the lingering control and psychological pressure she exerts across the map. She is an architect of hazardous zones, a master of area denial, and arguably the premier agent for securing objectives in post-plant scenarios.
Mastering Viper is a demanding endeavor. It requires meticulous map knowledge, dedicated practice of precise lineups, and constant, vigilant fuel management. Recent nerfs have curtailed her flexibility, removing mid-round orb retrieval and increasing the commitment required for her utility. She is less of a jack-of-all-trades Controller/Sentinel and more of a specialized instrument of control, demanding greater foresight and discipline from her wielder.
Yet, despite these adjustments, her core identity remains potent. The ability to bisect sightlines with Toxic Screen, create deadly one-ways with Poison Cloud, deny defuses with Snake Bite, and completely lock down areas with Viper's Pit ensures her continued relevance. When played with calculation and a touch of malice, Viper transforms the battlefield into her personal toxic playground, where enemies tread with caution, and victory is suffocatingly secured. Embrace the venom, learn its intricacies, and watch your opponents choke on their ambition.