Valorant's roster of Duelists is diverse, each agent bringing a unique flavor of aggression to the battlefield. Among them stands Yoru, the Japanese native who operates not just with bullets, but with reality itself. He rips holes through dimensions, crafts illusions, and teleports across engagements, embodying the archetype of the trickster duelist. While other duelists might rely on raw speed like Jett or Neon, explosive power like Raze, or self-sustaining aggression like Reyna or Phoenix, Yoru's path to victory is paved with misdirection, infiltration, and calculated chaos. His toolkit is designed less for straightforward confrontation and more for outwitting and outmaneuvering opponents, getting the drop on targets before they even know where to look.
Yoru's Identity: The Trickster Duelist
Hailing from Japan, Ryo Kiritani, known as Yoru, carries an air of mystery, his past shrouded in the shadowy underworlds where he honed his skills in deception and subterfuge. This background informs his entire design; he is an agent built to create confusion among enemy ranks. His abilities allow him to infiltrate enemy lines unseen, manipulate enemy perception with phantom footsteps and clones, blind opponents from unexpected angles, and reposition instantaneously. He embodies a blend of aggression and deception, using both in equal measure to secure advantages.
Role Deep Dive: Creating Chaos and Exploiting Angles
As a Duelist, Yoru is fundamentally tasked with seeking engagements, securing opening kills, and creating space for his team to operate. However, his approach differs significantly from his peers. While expected to contribute frags, Yoru's primary strength lies in his disruptive potential. He excels at creating chaos, enabling surprise flanks, gathering crucial intelligence through unconventional means, and generally making the enemy team second-guess every piece of information they receive.
His kit leans heavily towards utility functions – misdirection, repositioning, and information gathering – rather than pure damage output or self-sufficiency. This makes him less of a traditional entry fragger who bursts onto a site first and more of a strategic weapon. He can certainly lead a push, but often finds greater value in lurking, drawing attention, or setting up multi-angled attacks enabled by his teleportation. He is, in essence, a thinking player's duelist, rewarding tactical acumen as much as mechanical skill.
Why Master Yoru? Unlocking Unpredictable Impact
Unlike agents with more straightforward tools, Yoru's effectiveness hinges on the player's ingenuity and ability to execute complex plays under pressure. Some analyses suggest dedicating significant time, potentially hundreds of hours, is necessary to truly harness his potential.
However, the reward for this investment is immense. A proficient Yoru player becomes a force of pure unpredictability. By manipulating information and movement, Yoru can dismantle carefully planned enemy strategies, create openings where none seem to exist, and exert significant psychological pressure on opponents. He can turn the tide of rounds through cleverness and surprise, making him a uniquely impactful, albeit demanding, agent. The very difficulty of mastering him means skilled Yoru players are less common, making their tactics potentially even more surprising and effective.
Deconstructing the Toolkit: Yoru's Abilities Explained
Yoru's power stems from his unique set of abilities, each designed to manipulate space, perception, or both. Understanding the nuances of each tool is the foundation of mastering the agent.
Mechanics:
Fakeout allows Yoru to deploy an echo that transforms into a mirror image of himself. Using FIRE sends the clone forward instantly, while ALT FIRE places an inactive echo that can be triggered later with USE. This ability underwent a significant rework, changing from simple footstep sounds to a full visual clone. The clone moves in a straight line for up to 10 seconds and possesses 150 HP. If destroyed by an enemy, it turns towards the shooter and detonates after a 0.6-second windup, unleashing a blinding flash with a maximum duration of 3.1 seconds in a 30-degree conical area. Fakeout costs 100 Credits and Yoru currently holds only one charge (down from a previous maximum of two).
Core Uses:
The primary function of Fakeout is misdirection. It creates audio-visual distractions to mislead enemies about Yoru's actual position or intended path. It can be used to bait enemy shots, forcing them to reveal their location. Sending a clone towards one site while the team pushes another is a classic feint. The threat of the flash forces opponents into a difficult decision: shoot the clone and risk being blinded (potentially flashing nearby teammates as well), or ignore it and risk it being the real Yoru.
Advanced Tactics:
- The "Be the Clone" Gambit: One of the most potent psychological plays involves mimicking the clone's behavior. By moving in a perfectly straight line (holding only the forward key), Yoru can convince enemies he is the decoy, especially after conditioning them by repeatedly sending clones their way. This requires immense trigger discipline and reading the opponent's hesitation. Moving slightly sideways or at an angle while faking can also bait misses, reinforcing the enemy's assumption that they are shooting at a clone. Successfully pulling this off can lead to easy kills as enemies lower their guard.
- Combining with Other Abilities: Fakeout becomes even more deceptive when layered with other abilities. Sending a clone from the apparent destination of a Gatecrash teleport (real or fake) creates complex misdirection scenarios. A clone can be sent out immediately after exiting Dimensional Drift to cause confusion. It's even possible, though tricky, to bounce Blindside flashes off the clone itself.
- Information Denial/Utility Tanking: The clone can be used tactically to absorb enemy utility, such as Raze's Boombot, or momentarily block sightlines during a push.
Counterplay/Tells:
Despite its deceptive potential, the clone has giveaways. It moves slightly slower than a real player and strictly in a straight line, which can look unnatural. Crucially, status effects like Viper's vulnerability (green shards), concussion effects (dizzy visuals), or Sage's slow orbs do not appear on the clone, while they do affect the real Yoru. The clone is also unaffected by the slowing effect of Cypher's Cyber Cage. While KAY/O's ZERO/point knife suppression effect won't visually appear on the clone, his NULL/cmd ultimate suppression will. Gecko's Wingman does not detect the clone, and Mosh Pit or Thrash cannot detain it. Interestingly, Sova's Recon Bolt can scan and reveal the clone. Experienced players, especially those using agents with status-applying abilities, can leverage these tells to differentiate the real Yoru from his echo. The shift from simple audio footsteps to a complex visual clone with unique interactions demands a deeper understanding from both Yoru players aiming to deceive and opponents trying to see through the ruse.
Mechanics:
Blindside involves Yoru ripping an unstable dimensional fragment from reality and throwing it. The defining characteristic of this flash is that it only activates after colliding with a hard surface in the game world – walls, boxes, floors, etc. It will not activate in mid-air. Upon impact, there is a distinct audio cue during a brief wind-up before the flash detonates, blinding enemies within its line of sight. The flash duration can vary, potentially lasting up to 1 second if looked at directly, but significantly less if turned away from, with some sources noting a minimum duration around 0.6 seconds.
Fundamental Uses:
Blindside is Yoru's primary tool for direct engagement and creating openings. It's ideal for flashing around corners before peeking to challenge an enemy. It serves as a powerful initiator for site entries, blinding defenders holding common angles. Defensively, it can effectively halt or disrupt enemy pushes by blinding the attackers. It also creates windows of opportunity for safer repositioning or activating Gatecrash.
Advanced Techniques & Lineups:
- Pop Flashes: The bounce mechanic allows for "pop flashes" – bouncing the fragment off a surface very close to the intended target area (like the ground just around a corner or a nearby wall). This minimizes the travel time and the warning provided by the audio cue, making the flash harder to dodge. Mastering these close-range bounces requires significant practice.
- Deep Flashes: Conversely, Yoru can use high or distant bounces off walls or ceilings to send the flash deeper into an area, catching enemies holding further back or in less common positions.
- Self-Sufficient Flashes: Skilled Yoru players learn bounce angles that maximize the flash effect on enemies while minimizing the duration of the flash on themselves, often by timing their turn away from the detonation point.
- Map-Specific Lineups: Because the bounce is critical, utilizing specific map geometry is key to consistent and effective Blindsides. Learning reliable lineups for common scenarios dramatically increases the ability's impact. The potential for innovation is high, rewarding quick thinking and experimentation.
| Map | Location | Bounce Surface | Target Area | Purpose |
|---|---|---|---|---|
| Bind | Hookah Entrance | Inside wall/ceiling | Hookah Interior | Entry Flash |
| Bind | B Window | Crane opposite site | B Short approach | Defensive Anti-Push Flash |
| Ascent | A Main | Wall near site entrance | Generator/Site Box | Entry Flash |
| Ascent | B Main (Corner) | Ground near entrance | B Site Entrance | Pop Flash for Entry/Peek |
| Split | B Heaven | Wall/Ceiling below | B Site | Flash for dropping/peeking site |
| Haven | A Sewers | Wall leading to A Site | A Site | Entry Flash |
| Lotus | C Main | Wall inside C Main | C Site approach | Entry Flash |
| Fracture | A Main (near Drop) | Wall opposite Drop entrance | Drop area | Defensive Anti-Push Flash |
| Icebox | B Garage | Yellow container | B Site (Yellow) | Flash for site control/push |
| Pearl | A Main | Wall near site entrance | A Site | Entry Flash |
Mechanics:
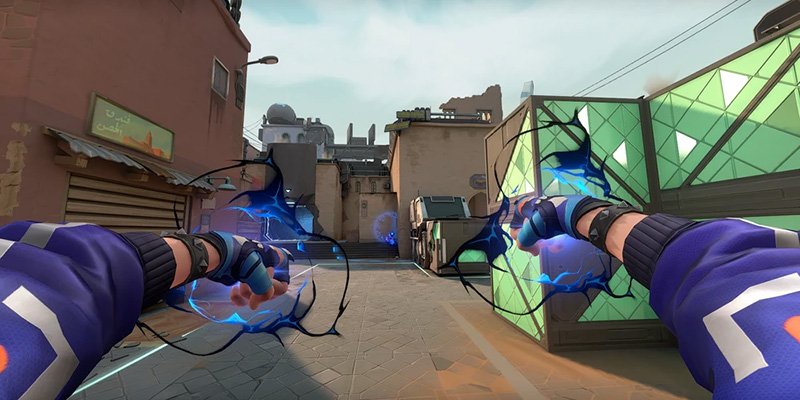
Gatecrash is Yoru's signature ability, allowing him to deploy a rift tether. FIRE sends the tether traveling forward in a straight line until its duration expires or it hits an impassable object. ALT FIRE places the tether stationary at Yoru's feet. Yoru can then ACTIVATE the ability to instantly teleport to the tether's location. The tether remains active for 30 seconds. Crucially, Yoru can also press the USE key (default 'F') while looking at the tether icon to trigger a fake teleport. This plays the same initial audio and visual cues as a real teleport but Yoru remains in place. Enemies within a certain range can see and hear the active tether orb and can destroy it. Gatecrash starts with one charge, costs 200 credits for a second charge, and refreshes a charge after securing two kills. There is a brief animation upon arrival after teleporting; jumping during this animation can help maintain momentum and make Yoru slightly harder to hit.
Strategic Uses:
- Repositioning/Escape: This is perhaps the most fundamental use. Placing a tether in a safe, previously cleared location allows Yoru to take aggressive angles, gather information, or attempt a pick, and then instantly teleport back to safety if threatened. It functions as a "get out of jail free card," albeit one that requires setup and has a delay compared to abilities like Jett's dash.
- Flanking/Aggression: Sending the tether to unexpected locations, behind enemy lines, or onto elevated positions enables surprise attacks and flanks. This is often most effective when combined with a Blindside flash to cover the teleport's distinct audio cue.
- Rotations: Gatecrash provides unparalleled rotation speed. Yoru can quickly move between bombsites on defense or rejoin his team after a lurk on attack. This is especially valuable on larger maps or against fast-executing teams.
- Site Execution Assist: During a coordinated site take, Yoru can send his tether to land on site from an unusual angle (e.g., back site, high ground) and teleport in as his team pushes main, creating a multi-pronged threat.
- Information Baiting: The fake teleport (F key) is a powerful psychological tool. It can make enemies look towards the tether's location, believing Yoru has teleported, while he pushes from another angle or holds his current position. This is particularly effective in clutch situations or after conditioning opponents to expect real teleports.
Advanced Placement & Timing:
The success of Gatecrash heavily depends on where and when the tether is placed and activated. Optimal placements are often in spots that are difficult for enemies to see or quickly destroy, or that offer immediate cover upon arrival. Precise timing is needed to sync teleports with flashes, teammate actions, or lulls in combat. Numerous specific lineups exist for sending the tether across maps or to specific strategic locations, requiring practice to master. An advanced trick involves using the Fakeout clone: by placing the clone strategically, Yoru can jump on it as it falls to reach and place his Gatecrash tether on normally inaccessible high ground like double-stacked boxes.
Combos:
Gatecrash is rarely used in isolation in high-level play. Common combinations include: TP + Blindside (masking sound, blinding on arrival), TP + Fakeout (using clone or fake TP for misdirection), and TP + Dimensional Drift (safe scouting/repositioning followed by TP escape).
| Map | Start Point | End Point | Aim Cue/Method | Purpose |
|---|---|---|---|---|
| Ascent | A Main (Triangle Pot) | A Ramps | Aim at falling sign head | Bypass A Main choke for entry |
| Ascent | Top Mid | Mid Market | Align box edges, aim center of green box | Flank/Behind enemy lines |
| Bind | A Short (Back) | U-Hall (Lamps) | Align walls, aim at second pipe notch | Cross dangerous sightline safely |
| Bind | B Main (Left Corner) | Defender Arches | Aim at brick corner | Pinch B Site / Flank |
| Haven | C Long | Attacker Spawn | (Specific lineup needed) | Fast flank / Deep lurk |
| Split | Mid Vent | B Heaven | (Specific lineup needed) | Vertical reposition / Flank |
| Icebox | B Cubby (Corner) | Snowman | Aim at snowman on cliffs | Catch rotating enemies |
| Pearl | B Long (Line) | Defender Spawn | Aim at wall discoloration | Extremely fast flank |
| Lotus | C Main | B Site | (Specific lineup needed) | Fast rotation / Site split |
| Sunset | B Site | A Site | (Specific lineup needed) | Fast rotation |
Mechanics:
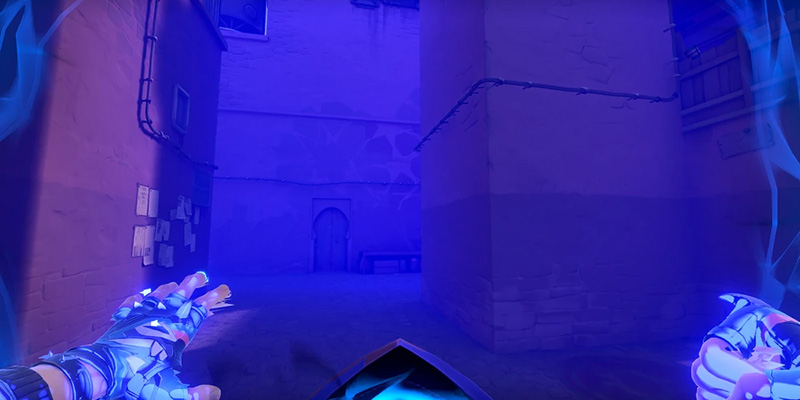
Yoru's ultimate ability, Dimensional Drift, allows him to don his iconic mask and enter his own dimension. While active, he becomes invisible and invulnerable to enemies outside his dimension. The ability typically lasts around 12 seconds. A key feature is that Yoru can still use his other abilities (Fakeout, Blindside, Gatecrash) while inside the drift. However, he cannot fire his weapons. Enemies who are very close to an ulted Yoru will hear distinct audio cues and see a blue visual indicator on their screen, warning them of his proximity. Yoru can exit the ultimate early by reactivating the ability (X key). While drifting, he can interact with world objects like dropped weapons and the Spike, and can pass through certain enemy utility like Cypher's Trapwires undetected.
Core Applications:
- Information Gathering/Scouting: This is one of the most powerful uses. Dimensional Drift allows Yoru to safely push into enemy territory, scout defensive setups, identify enemy locations, and relay this information to his team via pings or voice comms. He essentially becomes a mobile, invulnerable drone for its duration.
- Repositioning/Safe Rotation: The ultimate provides a safe way to traverse dangerous areas of the map, rotate between sites without being seen, or position aggressively behind enemy lines.
- Spike Carrier/Retrieval: If the Spike carrier is eliminated in an exposed location, Yoru can use Dimensional Drift to safely retrieve the Spike and either escape or move to a safer plant location. This can salvage rounds or enable unexpected plants.
- Setting Up Plays: Yoru can use the invisibility to reach an advantageous position (e.g., flanking angle, unexpected corner) before exiting the ultimate to surprise enemies. This is often combined with his other abilities for maximum impact.
Advanced Strategies & Combos:
- Ult-TP Combo: This is a cornerstone technique for advanced Yoru play. Before or during the ultimate, Yoru places his Gatecrash tether in a safe or strategic location. After gathering information or repositioning with Dimensional Drift, he activates the Gatecrash (E key) immediately followed by exiting the ultimate (X key). This sequence minimizes the vulnerable period between ulting and teleporting and can cancel the ultimate's exit animation, making the transition almost seamless.
- Ult + Shorty Eco Play: On save or eco rounds, Yoru can use his ultimate to close the distance on an unsuspecting enemy, exit the drift directly beside them with a Shorty equipped, secure the kill, and potentially upgrade his weapon before teleporting away with Gatecrash.
- Empty Gun Bait: A highly situational but potentially hilarious gimmick involves emptying a primary weapon, ulting, finding an enemy (ideally one with a weaker weapon), dropping the empty gun near them, waiting for them to pick it up, then un-ulting with a secondary weapon for an easy kill while they fumble with the unloaded gun. This relies heavily on enemy panic and lack of awareness.
- Combo Ults: Dimensional Drift synergizes well with area-denial or info-revealing ultimates. Yoru can identify clustered enemies for allies like Sova or Brimstone to target with their ultimates. Conversely, ultimates from agents like Fade, KAY/O, or Breach can stun, suppress, or deafen enemies, providing cover for Yoru to safely exit his Dimensional Drift and engage.
- Macro Plays: The combination of invisibility, ability usage within ult, and Gatecrash allows for complex, map-wide strategic plays. For example, Yoru could ult on one side of the map, place a TP back, send another TP across the map while still ulted, scout the second site, and then decide whether to plant there, return via TP, or continue flanking.
Strategic Application: Wielding Deception Across the Map
Understanding Yoru's abilities is only the first step; applying them effectively within the strategic context of Attack and Defense phases is where mastery truly begins. Yoru's flexible toolkit allows for diverse approaches depending on the situation, team composition, and enemy tendencies.
Attacking Principles
Yoru's role on attack can shift between creating openings, executing site takes, or applying pressure from unexpected angles through lurking.
- Entry Pathing: Gatecrash is invaluable for navigating dangerous sightlines during an entry. Yoru can send his tether across areas like A Short on Bind to reach U-Hall/Lamps without exposure, or onto site from an off-angle like Back Site B on Ascent. Blindside is used concurrently to clear critical corners and blind defenders as Yoru or his team advances. This allows Yoru to establish presence in key areas that would otherwise be heavily contested.
- Site Execution: During a coordinated push, Yoru can contribute significantly by layering his utility. A well-placed Blindside flashes defenders, a Fakeout clone pressures one angle or baits utility, while Yoru himself might use Gatecrash to arrive from a different direction simultaneously with his team. Dimensional Drift can be used for pre-execution reconnaissance, identifying defender positions just before the team commits.
- Lurking Masterclass: Yoru is arguably one of the most effective lurkers in Valorant. He can use Fakeout sounds or fake Gatecrash teleports near the main team push to draw defender attention and rotations away from his lurking path. Setting a Gatecrash tether near his team provides a crucial escape route or allows for a rapid rejoin after securing a lurk pick or if the main push needs assistance. Dimensional Drift enables him to slip past mid-map sentinels or watchers undetected, setting up deep flanks.
- Post-Plant: After the Spike is planted, Yoru remains a potent threat. Pre-placed Gatecrash tethers allow for quick repositioning to play advantageous post-plant angles or escape if overwhelmed. Blindside flashes can be used to delay defuses or win duels against retakers. Fakeout can create distractions or bait shots from defenders attempting the defuse. Dimensional Drift allows Yoru to safely gather information on the retaking enemies' positions and numbers.
Defending Principles
On defense, Yoru transitions towards information gathering, rapid rotations, and disrupting attacker plans through flanks and aggressive holds.
- Information Plays: Early-round Fakeouts can provide valuable information about attacker presence or direction by baiting shots or forcing reactions. Dimensional Drift allows for aggressive, yet relatively safe, information gathering deep into attacker territory or to confirm the direction and strength of an enemy push.
- Aggressive Holds: Yoru can leverage Gatecrash and Blindside to take early, aggressive map control. He can flash and peek common entry points, secure a pick, and then use a pre-placed Gatecrash tether to fall back safely. This can stall pushes and create uncertainty for the attackers.
- Rotations & Flanks: Gatecrash is Yoru's primary tool for rapid rotations. He can hold one site and quickly teleport to reinforce another if the attackers commit elsewhere. Furthermore, Dimensional Drift or long-range Gatecrash lineups (like B Long to Defender Spawn on Pearl or across Ascent Mid) enable potent flanks, catching attacking teams off-guard as they execute onto a site.
- Retake Strategies: During retakes, Yoru provides valuable utility. Blindside can flash enemies holding strong post-plant positions. Gatecrash allows him to teleport into unexpected angles on the site, avoiding common crossfires. Dimensional Drift enables safe scouting of the site to identify defender locations before the team commits to the retake, or can be used to isolate a defender for an easier kill. Fakeout can create distractions, drawing fire away from teammates pushing onto the site.
Furthermore, maximizing Yoru's effectiveness often requires thinking ahead. Unlike purely reactive abilities, key components of his kit like Gatecrash tethers and placed Fakeout clones need to be deployed proactively, anticipating future needs. A Yoru player must constantly assess the round's likely progression, considering where a safe escape TP might be needed later, or where a delayed clone activation could create the most impact. This necessity for foresight and planning contributes significantly to his perceived difficulty and high skill floor, demanding more than just in-the-moment reactions.
Advanced Arts: Mastering Mind Games and Combos
True Yoru mastery transcends mechanical execution; it delves into the psychological manipulation of opponents and the seamless synergy of his abilities.
The Psychology of Deception: Conditioning and Unpredictability
At its core, Yoru's power lies in his ability to manipulate enemy expectations and sow seeds of doubt. He forces opponents to question the information their senses provide. A key technique in this psychological warfare is conditioning. By repeatedly using an ability in a predictable way – for instance, always sending a Fakeout clone down A main at the start of a round – Yoru can train his opponents to expect that specific pattern. Once this expectation is set, breaking the pattern yields immense surprise value. The Yoru player might then mimic the clone's movement themselves, walking straight into enemy lines while being ignored, or use a real Gatecrash teleport after several rounds of only using the fake teleport sound.
The goal is to keep opponents perpetually uncertain, forcing them to hesitate, second-guess, and potentially make fatal mistakes. A successful Yoru player aims to drain the enemy's mental resources and sanity through relentless, unpredictable pressure. This constant mental battle requires not just executing techniques, but actively reading opponent reactions and dynamically shifting strategies round-to-round to maintain the element of surprise. Predictable Yorus are easily countered; adaptive Yorus are nightmares.
Synergistic Ability Combos (Detailed Examples)
While each of Yoru's abilities has its uses, their true potential is unlocked when combined synergistically, creating layers of deception that are far harder for opponents to decipher than abilities used in isolation.
- Gatecrash (TP) + Blindside (Flash): This is the fundamental offensive combo. Yoru throws his Blindside to bounce and detonate near his Gatecrash destination just as he activates the teleport. The flash serves two crucial purposes: it masks the loud audio cue of the teleport arrival, and it blinds any enemies looking towards the arrival point, allowing Yoru a safer entry or engagement. Precise timing is key – activating the TP just before or as the flash pops is ideal.
- Dimensional Drift (Ult) + Gatecrash (TP): The ultimate escape and repositioning tool. Yoru places a Gatecrash tether in a safe location (often near his team or in a previously cleared area), activates Dimensional Drift to scout, gather information, or push deep, and then activates the Gatecrash teleport just before manually exiting the ultimate (pressing E then X in quick succession). This minimizes the vulnerability window during the ultimate's exit animation and can even cancel it, providing a near-instantaneous transition from invulnerability to safety.
- Dimensional Drift (Ult) + Fakeout (Clone): To maximize confusion upon exiting his ultimate, Yoru can send out a Fakeout clone either while still inside the drift or immediately upon reappearing. This presents enemies with two immediate Yoru visuals, forcing a split-second decision and potentially baiting fire onto the flashing clone.
- Gatecrash (Fake TP) + Fakeout (Clone): A powerful misdirection play. Yoru activates the fake teleport sound (F key) towards his placed tether, making enemies anticipate his arrival there. He then immediately sends his Fakeout clone from that same tether location. This combination of audio and visual cues strongly sells the fake, drawing enemy attention while the real Yoru operates elsewhere. Adding a real Blindside flash thrown towards the fake TP location can further enhance the confusion.
These combinations work because they layer stimuli and mask the individual weaknesses or tells of each ability (like the TP sound or the clone's predictable movement). They force opponents to process conflicting information under pressure, significantly increasing the likelihood of misjudgment compared to using abilities one at a time. Mastering these synergistic plays is essential for unlocking Yoru's higher-level potential.
Insights from High-Level Play: Creative Setups and Tactics
Observing professional and high-ranked Yoru players reveals a layer of creativity and refinement beyond basic combos. Plays like Durka's famous fake clone out of smoke on Pearl during a VCT match, which relied heavily on conditioning and opponent expectations, showcase the psychological depth possible. Gimmicks like the "empty gun bait" seen in online content, while highly situational, demonstrate the inventive thinking required to push Yoru's limits. Utilizing ally abilities in unique ways, such as having a Sova dart the Fakeout clone to provide scans from an unexpected source, highlights the importance of team coordination. Ultimately, high-level Yoru play often comes down to subtle micro-adjustments in timing, precise positioning learned through experience, and the crucial ability to adapt plays based on the flow of the match and specific enemy habits observed in real-time.
Navigating the Battlefield: Map-Specific Advantages
Yoru's effectiveness can vary significantly depending on the map's layout and geometry. Understanding which maps favor his kit and learning specific setups for them is crucial for consistent impact.
Identifying Yoru's Strongest Maps
Yoru thrives on maps that offer ample opportunities for his core mechanics. Maps with complex geometry, numerous corners and surfaces for Blindside bounces, distinct choke points, multiple pathways between sites, and long sightlines or separated areas that facilitate Gatecrash teleports and lurks tend to amplify his strengths.
- Bind: Often considered a strong Yoru map due to its teleporters, which synergize naturally with Gatecrash and Dimensional Drift for rapid rotations and unpredictable flanks. The tight corridors and defined areas like Hookah and Lamps offer excellent Blindside opportunities.
- Split: The map's verticality, vents, and distinct mid control area provide numerous angles for Gatecrash TPs (including vertical plays) and Blindside flashes. Lurking through mid or vents is particularly effective.
- Haven: With three bombsites, the need for rotations is high, playing directly into Gatecrash's strength. The distinct site layouts and multiple entry points offer diverse angles for flashes and teleports.
- Pearl & Lotus: These maps feature complex layouts with multiple interconnected pathways, potentially offering strong flanking routes and TP opportunities. The varied geometry likely provides good Blindside angles.
- Ascent: Offers long sightlines for TP travel (e.g., Mid to Market) and defined chokes (A Main, B Main) that are good targets for Blindsides and Fakeouts.
- Sunset: Specific fast rotates using Gatecrash have been identified, suggesting potential for leveraging map layout.
Conversely, maps that are extremely open with fewer hard surfaces for bounces, or maps with very linear pathways that make TP travel predictable, might slightly diminish Yoru's overall effectiveness compared to maps offering more intricate possibilities. The key factor is the availability of resources – bounce surfaces for Blindside and safe, unexpected travel paths for Gatecrash – which are directly provided by the map's architecture. Players should prioritize learning Yoru on maps where the environment naturally complements and enables his unique toolkit.
Example Setups/Routes on Key Maps
While countless specific plays exist, here are illustrative examples based on the principles discussed:
- Gatecrash: Send TP from A Short to U-Hall/Lamps to bypass the main choke. Place TP near one map teleporter, use Dimensional Drift through it, scout, then TP back. Send TP from B Long towards A Short via the Attacker spawn teleporter for a deep flank.
- Blindside: Bounce flash off the back wall of Hookah to clear site entry. Use low bounces in Lamps or Showers for pop flashes.
- Fakeout: Send clone through a map teleporter to fake presence.
- Gatecrash: TP from Top Mid into Market behind Pizza. TP from A Main onto Generator or back site boxes. TP from B Main into backsite B near Workshop.
- Blindside: Bounce off A Main entrance walls to flash Generator/site. Use ground bounces in B Main for entry pop flashes. Flash Catwalk from Mid Cubby.
- Gatecrash: TP from Mid Vent up to B Heaven. TP from A Lobby onto Screens or Rafters. Place TP defensively in Heaven to escape after an aggressive peek.
- Blindside: Bounce off walls in Vents to clear angles. Use ceiling bounces in B Garage or A Main for deep flashes. Flash Screens from A Lobby.
- Gatecrash: Utilize known fast rotates like B site to A site, or A site towards Defender Spawn.
- Gatecrash: Execute extremely fast flanks by sending TP from B Long all the way to Defender Spawn. TP from A Main into Flowers or Dugout.
- Blindside: Bounce flashes off the central pillar on A site or walls in B Hall.
These examples illustrate the types of plays Yoru enables on different maps. Players should use custom games to experiment with bounce angles and TP trajectories to discover setups that fit their playstyle.
Team Dynamics and Counterplay
Yoru's effectiveness is not solely determined by individual skill; it is significantly influenced by team composition, communication, and the enemy's ability to counter his strategies.
Ideal Agent Synergies
Yoru flourishes when paired with agents who can either capitalize on the chaos he creates or enable his deceptive plays.
- Follow-up Damage: Agents like Phoenix or Raze can quickly follow up on enemies blinded or distracted by Yoru's abilities, securing kills after he creates an opening.
- Cover and Disruption: Controllers like Viper or Omen can use smokes or walls to obscure sightlines, masking Yoru's Gatecrash teleports or providing cover for his lurks and flanks. Viper's pit, in particular, can create large areas where Yoru can operate more freely.
- Information and Setup: Initiators are crucial partners. Sova's Recon Bolt can provide info that helps Yoru plan his TPs or ults, and their ultimates can be devastatingly combined. Sova can even dart Yoru's clone for unconventional scans. Fade's Haunt or Prowlers can clear space, while her Nightfall ultimate combos well with Dimensional Drift. Breach's Fault Line or Rolling Thunder can stun enemies, setting up easy kills for Yoru or covering his ultimate exit. KAY/O's suppression can disable key defensive utility, while his ultimate also provides cover for Yoru's engagements.
- Intelligence Coordination: Cypher's surveillance tools can complement Yoru's infiltration, creating a duo adept at gathering information and executing surprise plays.
- Sustain: Since Yoru lacks any self-healing abilities, having an agent like Skye on the team who can provide heals is beneficial, allowing him to play more aggressively or recover after risky engagements.
The Crucial Role of Communication
Yoru players must inform their team about:
- Gatecrash Intentions: Where TPs are placed, whether a TP is intended for flanking or escape.
- Dimensional Drift Intel: Pinging enemy locations spotted during ult, calling out numbers, and identifying key utility.
- Coordination: Calling for specific flashes, smokes, or follow-ups from teammates to enable plays. Announcing intended flanks or lurks so the team can play accordingly.
Without communication, Yoru's distractions may go uncapitalized, his flanks may be unsupported, and the valuable information gathered during his ultimate may be wasted. His lack of self-sustain further emphasizes this dependency; he often relies on teammates to trade him out or support his pushes. Success with Yoru is intrinsically linked to strong team play and constant information sharing.
Recognizing and Overcoming Counters
Aware opponents will actively try to counter Yoru's tricks. Understanding these counters is key to adapting and maintaining effectiveness.
Detection Agents:
Agents specializing in information gathering pose a significant threat as they negate Yoru's element of surprise.
- Cypher: Spycam can spot Yoru or his tether; Trapwires placed across common TP paths or flank routes can catch him.
- Killjoy: Turrets provide wide coverage and can detect Yoru or his tether entering an area. Nanoswarms can deny common TP locations.
- Sova: Recon Bolt reveals positions, potentially exposing a lurking Yoru or a hidden tether.
- Fade: Haunt provides reveals similar to Sova's Recon Bolt. Prowlers can track Yoru if he's nearby.
Area Denial & Crowd Control (CC):
Abilities that restrict movement or punish static positions can make teleporting risky.
- Mollies (Brimstone, Killjoy, Viper): Can be placed on likely TP spots to damage Yoru upon arrival. Viper's Snake Bite also applies vulnerability, which can help identify fake clones.
- Slows (Sage): Slow Orbs can hinder escape after a TP or make Yoru an easier target.
- Stuns/Flashes (Breach, Skye, KAY/O): Can disrupt Yoru's execution or leave him vulnerable after teleporting.
- Suppression (KAY/O): ZERO/point knife or NULL/cmd ultimate disables all of Yoru's abilities, rendering him temporarily powerless.
Adaptation Strategies:
When facing counters, Yoru must adjust:
- Vary TP Locations: Avoid using the same predictable Gatecrash spots. Place tethers in less obvious, harder-to-clear locations.
- Utilize Fake TP: Increase the use of the fake teleport sound to create uncertainty and bait utility.
- Coordinate Utility Clearing: Communicate with teammates (e.g., Sova, KAY/O) to destroy enemy detection or denial utility before committing to a play.
- Leverage Dimensional Drift: Use the ultimate specifically to bypass static defenses like Cypher traps or Killjoy setups.
- Be Aware of Interactions: Remember how Fakeout interacts with specific agent abilities (e.g., Viper molly revealing fakes, Sova drone scanning fakes).
Adapting When Your Tricks Are Expected
If enemies consistently predict teleports, shoot clones on sight, or ignore fake sounds, Yoru must evolve his strategy mid-game. Options include:
- Shift to Team Play: Play closer to the team, using abilities for more straightforward purposes like basic entry flashes or safe repositioning TPs rather than complex deception plays.
- Rely on Fundamentals: Focus more on gunplay, crosshair placement, and movement.
- Use Expectations as Misdirection: If enemies expect a flank TP, fake that play and push with the team instead. If they always shoot the clone, use that expectation to set up flash plays or bait them into revealing positions.
- Increase Unpredictability: Change the timing of plays, not just the location. Use abilities at unexpected moments in the round.
The key is to remain fluid and avoid falling into readable patterns.
Conclusion: Embracing the Path of the Riftwalker
Yoru stands apart in the Valorant roster as a Duelist who wages war not just with firepower, but with perception itself. His unique power lies in deception, unpredictability, and the ability to manipulate the battlefield through dimensional rifts and phantom echoes. Mastering him is a journey that demands dedication, creativity, and a deep understanding of both his intricate mechanics and the psychology of his opponents.
His strengths are undeniable: the capacity to create unparalleled chaos, execute devastating flanks, gather crucial information from impossible angles, and exert immense mental pressure on the enemy team. From the mind games of the Fakeout clone and the precision required for Blindside bounces, to the strategic depth of Gatecrash teleports (both real and fake) and the reconnaissance power of Dimensional Drift, Yoru offers a toolkit brimming with potential for outplay and strategic dominance.
Learning from errors, constantly seeking creative applications for abilities, and solidifying fundamental mechanics like movement and crosshair placement are essential steps on the path to mastery.
Ultimately, playing Yoru effectively is about embracing his unique identity as the unpredictable Duelist. It requires a shift in mindset from pure aggression to calculated deception. Focus on outsmarting opponents, coordinating closely with the team through clear communication, and reveling in the creative freedom his abilities afford. Walk the path of the Riftwalker, embrace the chaos, and become the unseen threat that dismantles enemy strategies one dimension-bending play at a time.