
Welcome to Breeze, Valorant's sprawling tropical paradise located somewhere in the Bermuda Triangle. Introduced in April 2021, Breeze offers a stark contrast to many of Valorant's tighter, more claustrophobic maps. It's a map defined by its sheer scale, featuring wide-open spaces, exceptionally long sightlines, and engagements that often occur at considerable distances. This unique design philosophy necessitates a fundamental shift in strategy, agent selection, and weapon choices compared to other maps in the pool.
It is important to note that as of mid-2025, Breeze is currently not part of the active Competitive, Premier, or Deathmatch map rotation. Map pools in Valorant change periodically, often with each new Act or major update, to keep the competitive environment fresh, allow developers to rework maps, and manage the total number of maps players need to master. While currently sidelined from ranked play, Breeze remains available in modes like Unrated, Swift Play, Spike Rush, and Custom Games.
Furthermore, understanding Breeze's principles remains valuable. Mastering this map hones crucial skills directly transferable to other scenarios: proficiency in long-range duels, strategic use of large-scale utility (especially vision blockers), the critical importance of map control, and the ability to adapt to unique environmental challenges. The lessons learned on Breeze's shores can elevate gameplay across the entire Valorant map pool.
This immediately establishes a core strategic tension: controlling these sightlines is fundamental to controlling the map. Consequently, agents capable of disrupting or blocking these long lines of sight gain immense value. Viper, in particular, stands out; her Toxic Screen and Poison Cloud abilities are uniquely suited to bisecting Breeze's large open areas, effectively neutralizing the inherent advantage held by defenders or attackers wielding Operators.
This interaction is so pronounced that Viper is often considered a near-mandatory pick for effective team compositions on Breeze. Teams lacking robust methods to control or deny vision across these critical sightlines will find themselves at a significant disadvantage against opponents who leverage the map's design with agents like Jett or Chamber proficiently wielding Operators. Therefore, mastering Breeze involves not just mechanical skill, but a deep understanding of how to manipulate, or counter the manipulation of, these vital sightlines, making large-scale vision control a cornerstone of strategic success. This reliance can shape the meta, potentially reducing compositional flexibility compared to maps with less extreme characteristics.
Map Layout and Key Callouts: Navigating Paradise
Breeze adheres to a standard Valorant layout with two Spike sites, A and B, connected by a central Mid area. However, the scale distinguishes it immediately. Both Spike sites are expansive, and the Mid area is arguably the largest and most complex in Valorant, featuring multiple levels, distinct sections, and crucial pathways. The map generally follows a three-lane structure: attackers can approach A Site via A Main/Cave or A Hall, B Site via B Main, and both sites are accessible through the contested Mid area.
Several unique features define Breeze's gameplay flow:
Effective communication is paramount on a map as large and complex as Breeze. Precise callouts are essential for coordinating pushes, defenses, and rotations. While specific terms can sometimes vary between teams or regions, understanding the common nomenclature is critical. The sheer number of distinct locations means ambiguity can lead to fatal misunderstandings, especially given the long sightlines where misinformation about an enemy's position can be instantly punished. Teams should strive for consistency and clarity in their communication, agreeing on specific terms for key areas.
Common Breeze Callouts:
| A Site Area | Mid Area | B Site Area |
|---|---|---|
|
|
|
Given the map's size and the potential for confusion arising from map changes or regional differences, establishing a clear, shared map language within a team is not just helpful, but essential for executing effective strategies on Breeze.
Dominating the Attack: Strategies for Taking Sites
Attacking on Breeze requires a departure from the fast-paced, close-quarters tactics often employed on smaller maps. The vast open spaces and long sightlines demand patience, meticulous planning, and coordinated execution.
Core Attacking Principles:
A Site Executes:
- A Main/Cave Push: A common approach involves using smokes or Viper walls to block vision from A Bridge/Stairs and Mid Wood Doors. Initiator utility like Sova's Recon Bolt or Skye's Trailblazer/Guiding Light is used to clear A Cave and check common defensive spots on site (like behind Pyramids or near Switch). Jett can use her Tailwind dash to quickly create space upon entry.
- A Hall Pressure: With A Hall reopened, attackers gain a vital alternative route. This path can be used for a full team push, a split push coordinated with A Main/Cave, or for a lurker to apply pressure or catch rotating defenders off guard. Successfully using Hall requires clearing it safely (potentially with utility) and coordinating the opening of the Mechanical Door via the switch. There have been suggestions that Omen might be able to teleport past the door mechanism, offering a unique entry, though this needs confirmation.
- Cave Control Focus: Taking firm control of A Cave early can provide a staging ground for an A execute. Utility like Viper's Poison Cloud or Snake Bite can help clear defenders holding inside Cave.
- Mid-to-A Split: This strategy involves first securing Mid control, then pushing towards A Site through Mid Wood Doors. Key defensive angles like A Stairs/Bridge need to be smoked off from the Mid approach. This split forces defenders to watch both Mid Wood Doors and A Main/Hall/Cave entrances.
Example - 5-Man A Cave Rush:
- Early Mid clear with KAY/O knife and Sova Recon, followed by a patient wait
- Coordinated execute through Cave:
  * Viper wall across site
  * Recon Mid again
  * KAY/O knife and Viper Snakebites on common spots (corner, behind pyramid)
  * Sova Drone leads the entry
  * Jett dashes in
  * Sova Shock Darts post-plant angles

This highlights the potential for fast, decisive takes but also the high utility cost and vulnerability to delays.
B Site Executes:
- B Main Push: The most direct route. Requires smoking off Defender Arches and potentially Mid Nest or the B Tunnel entrance to prevent flanks. Clearing close corners near B Planks and checking B Back/Platform for Operators is crucial. Viper walls are effective for cutting the site in half during the push.
- Mid-to-B Split: After gaining Mid control, attackers push through B Elbow and B Tunnel. This requires smoking off Mid Nest and Arches and carefully clearing the tight spaces within Elbow and Tunnel. This split forces defenders to defend both B Main and the Tunnel entrance.
- Challenges: B Site often feels more challenging to attack than A Site. It has fewer primary entry points (B Main and B Tunnel, compared to A Main, A Cave, A Hall, and Mid Wood Doors for A). Defenders can establish strong crossfires from B Back, Arches, and potentially Mid Nest if uncontrolled.
The Battle for Mid: Securing Mid for Attack
Taking Mid control is often pivotal but presents its own challenges. Attackers typically push from Mid Cannon/Bottom Mid. Success requires significant utility investment: Viper or Harbor walls can partition the area, blocking sightlines from Nest and Doors; smokes are needed for Cubby and Doors; flashes or info tools help clear Nest and check corners. Coordinating the Mid take is essential; isolated players pushing Mid are vulnerable to collapses from defenders rotating from either site or holding Nest/Doors.
This creates a strategic dilemma: is the high cost and risk of securing Mid always worth it compared to a simpler, faster, well-executed push directly onto a site? While Mid control enables sophisticated split strategies, the optimal approach might depend on team coordination levels, agent composition, and the specific defensive setup encountered. A failed attempt to take Mid can leave the attacking team severely depleted of resources and time.
Locking Down the Defense: Holding and Retaking
Defending Breeze successfully requires leveraging its unique layout while mitigating its challenges. The long sightlines can be advantageous, but the multiple entry points and large sites demand robust strategies and adaptability.
Core Defensive Principles:
A Site Defense Setups & Holds:
- Bridge/Stairs Control: Classic defensive positions offering long angles over A Main and Cave entrances. Vulnerable to coordinated pushes with smokes.
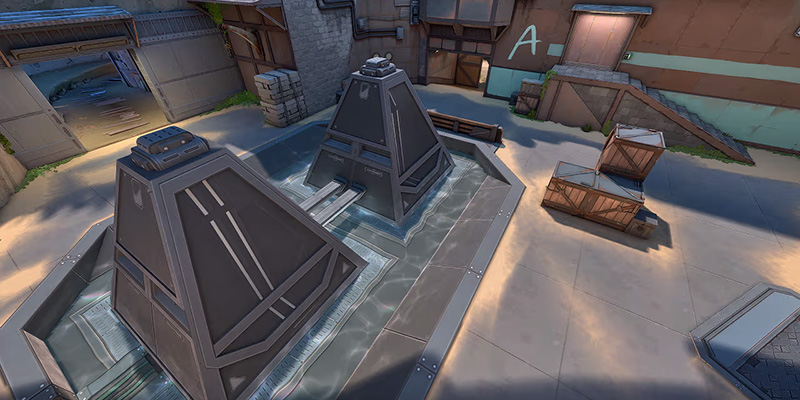
- Pyramid Play: Utilizing the central pyramids for cover allows for dynamic positioning and crossfires. Killjoy setups often focus around this area.
- Hall Containment: Holding angles towards the A Hall Mechanical Door is crucial, especially now that it's a viable attack route. Requires awareness of the switch and potential pushes from the Attacker Rope.
- Viper Utility: Defensive Viper walls can block A Main and Cave simultaneously, or create one-way smokes at the Cave entrance or Hall door. Poison Orbs can deny plants on default spots.
- Killjoy Setups: A common setup involves placing the Turret on the boxes near the right pyramid for wide coverage, with Nanoswarms placed on default plant spots near the pyramids. An Alarmbot can cover the Cave entrance.
B Site Defense Setups & Holds:
- B Back/Platform/Window: These positions offer powerful, long-range angles overlooking B Main and the site itself. Ideal for Operator players but require awareness of pushes from Tunnel/Elbow.
- Pillar Play: Using the large central pillar for cover can allow defenders to hold closer angles, but be mindful of wallbang potential through the pillar and surrounding walls. The addition of bricks/boxes around the pillar offers slightly more cover.
- Elbow/Tunnel Control: Preventing attackers from pushing through Mid requires holding B Elbow and Tunnel. Utility like mollies, slows, or Cypher traps can be effective here. Shotguns can work in the tight corners.
- Viper Utility: Walls can cut off B Main entirely or split the site. One-way orbs can be placed on boxes near Tunnel entrance. Snake Bites deny default plants.
- Killjoy Setups: Turret placed to watch B Main entrance, with Nanoswarms covering the default plant area. Alarmbot can watch the Tunnel entrance.
Mid Defense Strategies:
- Holding Mid Nest: A powerful position granting extensive vision over Mid Bottom, Cannon, and the approach to B Tunnel. Usually held with an Operator or Vandal. However, it's exposed and vulnerable to coordinated attacker utility and pushes.
- Playing Cubby/Wood Doors: Holding closer angles towards Mid Bottom and Pillar, often requiring utility support for safety.
- Aggressive Information Peeks: Taking quick, early peeks towards Mid Cannon or Bottom Mid can provide valuable information or secure an early kill, but is inherently risky.
- Utility Denial: Viper walls or orbs can completely block passage through Mid. Sage walls can temporarily delay pushes. Cypher Trapwires can alert to Mid presence.
Effective Retake Tactics:
Retaking sites on Breeze is notoriously difficult. The open nature of the sites, multiple angles attackers can hold in post-plant, and potentially long rotation times conspire against defenders. Success hinges on flawless coordination and utility usage.
The inherent difficulty of retaking sites on Breeze shapes the defensive meta. Because regaining control of a site is so challenging, strategies often shift towards preventing the Spike plant altogether. This emphasizes the importance of strong initial site holds, utilizing Sentinels like Cypher or Killjoy to anchor positions and provide early warnings, and employing delay tactics with controller or initiator utility. Committing defenders to fight and die on site to prevent the plant can often be more effective than conceding the site and hoping for a successful retake against established attackers. Teams that consistently play passively and rely on retakes are likely to struggle on Breeze's unforgiving terrain.
Optimal Agent Compositions: Your Breeze Dream Team
Selecting the right agents is crucial for success on any Valorant map, but Breeze's unique characteristics make agent synergy and suitability particularly impactful. The map's vastness, long sightlines, and emphasis on map control heavily favor agents whose abilities can operate effectively over large distances, provide mobility across open spaces, or deliver large-scale vision denial.
Must-Picks & Top Tiers:
Widely regarded as indispensable on Breeze. Her Toxic Screen is the longest wall in the game, capable of cutting across entire sections of Mid or splitting sites during executes/holds. Poison Cloud creates effective one-way smokes or denies plants/defuses. Viper's Pit (Ultimate) can single-handedly lock down a bombsite for post-plant or defense. Her high win rate reflects this dominance.
The premier duelist choice for Breeze. Tailwind (Dash) allows her to safely cross deadly open sightlines or aggressively take space, especially when combined with an Operator. Updraft provides access to unexpected vertical angles, although Breeze is relatively flat overall.
An exceptional initiator for gathering information across Breeze's large areas. Recon Bolt can scan multiple angles simultaneously, and Owl Drone can clear corners safely. Shock Darts provide post-plant denial potential. His consistent high performance is reflected in win rate data.
A strong alternative or complement to Sova. ZERO/POINT (Suppression Knife) is invaluable for disabling defender utility setups before executes. FLASH/DRIVE provides potent flashes for entry or retakes. NULL/CMD (Ultimate) is incredibly powerful for overwhelming defenders on Breeze's open sites during pushes or retakes. While potentially having a slightly lower win rate than Sova in some analyses, his kit is well-suited to the map's challenges.
Strong & Viable Picks:
A viable Sentinel choice, particularly favored by players who excel with the Operator. His Rendezvous (Teleport) enables highly aggressive peeks with a safe escape route, perfect for Breeze's long angles. Headhunter provides pistol-round strength and eco-round firepower. Trademark offers flank protection, though its single charge and range limitations are notable weaknesses compared to other Sentinels. Recent buffs enhancing TP radius and Headhunter/Tour De Force usability have improved his standing. He functions almost as a secondary duelist.
Offers a versatile kit with team healing, info gathering via Trailblazer (Dog), and potent flashes with Guiding Light. Seekers (Ultimate) can help clear sites or locate enemies during retakes. The removal of her flash recharge in Patch 8.01 requires more intentional usage but doesn't negate her overall value.
Frequently paired with Viper in double controller compositions. His High Tide (Water Wall) offers flexible, rechargeable vision blocking for pushes or retakes. Cascade can push defenders off angles, and Cove provides temporary safe haven for planting or defusing.
| Agent | Role | Tier (Breeze) | Key Strengths on Breeze | Potential Weaknesses on Breeze |
|---|---|---|---|---|
| Viper | Controller | S | Longest wall blocks sightlines; Orbs for one-ways/denial; Ult locks down sites | Requires lineup knowledge; Can be slow to rotate utility |
| Jett | Duelist | S | Dash enables safe crossing/entry; Operator synergy; Updraft for off-angles | Less site lockdown utility than other roles |
| Sova | Initiator | S | Map-wide recon; Drone clears corners; Shock Darts for post-plant | Requires lineup knowledge; Darts can be destroyed |
| KAY/O | Initiator | A | Suppression disables utility; Strong flashes; Ult powerful for pushes/retakes | Flashes require coordination; Ult provides audio cue |
| Chamber | Sentinel | A | TP allows aggressive Operator plays; Headhunter eco value; Flank watch | Limited site lockdown; Single trip vulnerable |
| Harbor | Controller | A | Flexible walls; Cove for safe plants/defuses; Strong in double controller comps | Walls are temporary; Less persistent denial than Viper |
| Cypher | Sentinel | A | Excellent flank watch; Global info with Cam; Cages act as smokes | Trips can be destroyed; Requires setup time |
| Skye | Initiator | B | Flashes, healing, info gathering; Versatile kit | Flash recharge removed; Dog vulnerable |
| Yoru | Duelist | B | TP for lurks/rotations; Flashes can disrupt; Ult for info/repositioning | Requires high skill/coordination; TP can be camped |
| Killjoy | Sentinel | C | Strong site anchor; Ult delays retakes; Nanoswarm post-plant | Utility range limited for large sites; Ult destructible |
| Omen | Controller | C | Rechargeable smokes; Blind useful; TP allows repositioning | Smokes less impactful than Viper/Harbor walls; Shorter duration |
| Raze | Duelist | C | Explosives clear tight spaces (Tunnel/Cave); Mobility with satchels | Less effective in open spaces; Ult less reliable at range |
| Brimstone | Controller | C | Fast smokes; Strong post-plant Molly/Ult | Limited smoke range/charges; Less flexible than other controllers |
| Sage | Sentinel | C | Wall can delay Mid; Healing/Rez utility | Wall easily broken; Slow orbs less impactful in open areas |
| Others | Various | C/D | Generally struggle due to short-range utility or kits less suited to open combat | Map design inherently disadvantages certain ability types |
Example Team Compositions:
The prominence of double controller compositions, particularly Viper paired with Harbor, is a direct consequence of Breeze's scale. On smaller maps, a single controller often suffices. However, Breeze's expansive areas and numerous long sightlines create a situation where layering vision-blocking utility becomes highly advantageous. Combining Viper's persistent Toxic Screen and Poison Cloud with Harbor's rechargeable High Tide and protective Cove allows teams to exert far greater control over the map, enabling safer rotations, more robust site executions, and stronger post-plant defenses. This strategic adaptation highlights how Breeze's unique design elevates certain compositional approaches from niche to potentially optimal.
Weapon Loadouts: Gearing Up for Long-Range Fights
Weapon selection on Breeze is heavily influenced by its long engagement distances. Unlike maps that favor close-quarters combat and SMGs or Shotguns, Breeze demands proficiency with rifles and sniper rifles capable of performing effectively at range.
The Kings of Breeze: Operator and Vandal:
These two weapons reign supreme on this map.
Situational Choices:
- Phantom: While generally less favored than the Vandal due to damage falloff at range, the Phantom can still find niche uses. It excels inside smokes, in slightly closer engagements around site boxes (like A Pyramids or B Pillar), or for players who prefer its easier spray control. However, be aware of its limitations in long-range duels.
- Guardian / Outlaw: These semi-automatic rifles are excellent choices for eco or force-buy rounds. Their high damage per shot and effectiveness at range make them potent tools when Vandals or Operators are unaffordable. The Outlaw, with its two-shot burst potential, fits particularly well into the Breeze meta.
- Sheriff: A high-skill, high-reward pistol for eco rounds. Its ability to one-shot headshot at significant distances makes it dangerous in the right hands, even against fully bought opponents.
- Shotguns (Judge / Bucky): Their viability is severely limited on Breeze due to the prevalence of long-range fights. However, they can be situationally effective for holding extremely tight corners, such as inside B Tunnel, B Elbow, or potentially within Viper's Pit.
Economy Management:
The emphasis on expensive weapons like the Operator ($4700) and Vandal ($2900) makes economy management particularly important on Breeze. Teams need to coordinate buys effectively to ensure key players can afford optimal loadouts. Winning pistol rounds provides a significant economic advantage. Decisions on when to force buy (perhaps with Guardians/Outlaws) versus taking a full eco round require careful consideration, as a single Operator on the enemy team can heavily influence the outcome of a round against weaker buys.
Post-Plant and Lineup Mastery
Securing the Spike plant is only half the battle on Breeze. The large, open sites require well-thought-out post-plant strategies and often rely heavily on utility lineups to prevent defuses, especially given the difficulty of retaking.
Attacker Post-Plant Positions:
Holding the site after planting requires utilizing the available cover and angles effectively, forcing defenders to clear multiple positions during a retake.
A Site:
B Site:
Key Utility Lineups (Viper Focus):
Viper lineups are particularly potent on Breeze, allowing control over vast areas from relative safety.
Defensive Viper Walls:
- A Site: Common walls run from A Main across the site entrance, blocking vision from Cave and Main. Others might cut across towards Mid Doors.
- B Site: Walls typically block the B Main entrance, often extending towards Elbow or across the site.
- Mid Control: Walls thrown from defender spawn can cut across Mid Bottom, denying easy passage for attackers.
Attacking Viper Walls:
- A Execute: Walls thrown from A Cave or A Main can slice the site diagonally, blocking vision from Bridge/Stairs and Mid Doors, allowing a safer plant near Pyramids.
- B Execute: Walls thrown from B Main can cut off Arches and B Back, or split the site vertically through the pillar, facilitating a plant.
- Mid Take: Walls can block Nest and Doors, allowing attackers to push up Mid Bottom.
Viper Orbs (One-Ways & Denial):
- Chokepoints: Orbs can create one-way smokes at entrances like A Cave, A Hall door, Mid Wood Doors, or B Tunnel.
- Plant Denial: Orbs thrown onto default plant spots can obscure vision or be combined with Snake Bites.
Viper Post-Plant Lineups (Snake Bite):
Other Useful Lineups:
- Sova Recons: While challenging due to map size and lack of ceilings, Recon Bolts are vital for info. Lineups exist for clearing common angles on A and B sites during executes or retakes. Retake darts, like those clearing B site corners from defender spawn, are particularly useful.
- KAY/O Knives: ZERO/POINT lineups can suppress key defensive positions (e.g., Mid Nest, back of sites) before a push or during a retake attempt.
- Brimstone/Astra Smokes: If these agents are picked, standard smoke placements cover chokepoints. Astra's Cosmic Divide (Ultimate) can be used effectively for large-scale site executes, blocking major sightlines.
The difficulty of holding Breeze's open sites through gunfights alone, combined with the inherent challenge of retakes, elevates the importance of utility lineups significantly. Post-plant mollies, particularly Viper's Snake Bites, become critical tools for denying defuses from safety, effectively multiplying the impact of a single player. Similarly, well-placed defensive walls and one-way smokes help manage the map's vast spaces more effectively than relying solely on positioning and aim. On Breeze, lineup knowledge, especially for controllers like Viper, transitions from a helpful skill to a fundamental component of high-level play. The ability to control space and deny objectives remotely directly counteracts the map's inherent challenges, making lineup mastery a key differentiator.
Adapting Your Playstyle: Tips for Success
Success on Breeze requires more than just knowing strategies; it demands adapting individual playstyles to the map's unique demands and coordinating effectively within specific agent roles.
Role-Specific Advice:
Your primary function is creating space and taking opening duels, but Breeze requires caution. Use mobility (Jett Dash, Yoru TP, Raze Satchels, Neon Sprint) to navigate open areas safely, often relying on team utility like smokes or flashes for cover. Taking aggressive off-angles can be rewarding, but avoid dry peeking long sightlines. Operator proficiency, especially on Jett, is highly valuable. Remember, entering sites alone without initiator recon or controller smokes is extremely risky on this map; coordinate your pushes.
You are the architects of map control. Your walls and smokes are essential for blocking sightlines during executes, defending chokepoints, and setting up post-plant scenarios. Precise placement and timing are key. Communicate clearly with your team about where and when utility is being deployed, as it dictates safe movement paths. Viper players, in particular, should invest time learning crucial lineups.
Information is your weapon against Breeze's vastness. Use recon abilities (Recon Bolt, ZERO/POINT, Trailblazer, Haunt) relentlessly to clear angles, identify enemy positions, and enable safer pushes. Flashes and stuns are vital for supporting entries and disrupting defenders holding long angles. Your utility helps mitigate the inherent risks of navigating open spaces.
Your role is crucial for map stability and information. Use traps (Trapwire, Trademark, Alarmbot) to cover the numerous flank routes and provide early warnings – essential on a map this large. Anchor sites passively, using utility to delay pushes and buy time for rotations. Chamber can adopt a more aggressive posture, leveraging the Operator and his teleport. Sage walls can offer temporary blockage, particularly in Mid.
Aggressive vs. Passive Play:
Breeze demands a careful balance between aggression and passivity.
Communication and Common Mistakes:
Clear, concise communication is non-negotiable. Use agreed-upon callouts, announce utility usage, and state intentions clearly. Several common mistakes plague players on Breeze:
- Neglecting Mid Control: Giving opponents free passage through Mid is often fatal.
- Over-Rotating: Abandoning a site completely leaves it vulnerable to quick hits.
- Dry Peeking: Challenging established long-range angles without flashes, smokes, or info.
- Poor Utility Management: Wasting crucial smokes or walls needed later for executes or retakes.
- Ignoring Flanks: Failing to use Sentinels or awareness to cover backstabs on the large map.
Conclusion: Conquering Breeze
Breeze presents a unique and demanding challenge within the Valorant map pool. Its identity is forged in its expansive scale and the prevalence of long-range combat, demanding a strategic departure from the close-quarters brawls found elsewhere. Mastering this tropical battleground hinges on understanding and exploiting its core characteristics: leveraging long sightlines with weapons like the Operator and Vandal, employing large-scale vision control through agents like Viper and Harbor, recognizing the pivotal importance of Mid control for strategic flexibility, and executing coordinated, multi-pronged attacks and defenses.
The map's design inherently favors agents capable of influencing vast spaces, whether through information gathering (Sova, KAY/O), mobility (Jett), or extensive utility deployment (Viper, Harbor). Furthermore, the difficulty associated with retaking sites places a premium on strong initial holds and decisive post-plant strategies, often reliant on well-practiced utility lineups.
While currently outside the competitive rotation (as of mid-2025), the skills honed on Breeze – precise long-range aim, calculated utility usage, disciplined communication, and adaptable strategic thinking – are invaluable across all of Valorant. It serves as a crucible, amplifying the importance of core fundamentals and rewarding players who can adapt to its unique demands.