
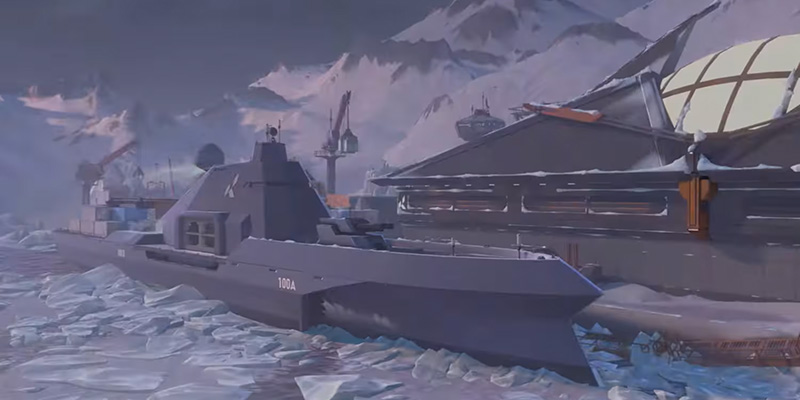
Valorant's Icebox map, introduced on October 13, 2020, transports players to a frigid, snow-covered Kingdom Corporation shipping port and archaeological site located on Bennet Island, Sakha, Russia. From its inception, Icebox represented a significant departure from the flatter terrains of earlier maps. It was deliberately designed to challenge players with complex layouts, multi-level engagements, and intricate sightlines, fostering skirmishes and fast-paced gameplay. The map quickly garnered a reputation for its complexity, proving demanding even for veteran players and professionals who needed to adapt significantly from habits formed on more conventional battlegrounds. Statistically and strategically, Icebox often leans towards the attackers, offering ample opportunities for creative site takes and executions.
Its defining characteristics are immediately apparent: significant, pervasive verticality across the entire map, unique horizontal and vertical ziplines facilitating rapid movement, and distinct two-tiered bomb sites on both A and B. These elements combine to create a tactical puzzle unlike any other in the Valorant map pool.
The Defining Role of Verticality and Complex Angles
Verticality is not merely a feature of Icebox; it is the map's core design principle, fundamentally shaping every encounter and strategic decision. While maps like Split also incorporate vertical elements, Icebox integrates height differences and multi-level structures far more extensively. This design philosophy results in what has been described as a "ridiculous amount of different angles," compelling players to constantly perform checks not just horizontally, but also vertically – looking above and below their current position.
This inherent complexity forces a fundamental shift in player mindset. Success on Icebox demands more than just precise horizontal crosshair placement; it requires constant vertical awareness and spatial reasoning. The sheer volume of potential threat angles across multiple elevations significantly increases the cognitive load compared to flatter maps. Players and teams who excel on Icebox demonstrate superior information processing, adaptability, and an ability to mentally map and predict threats in a three-dimensional space, going beyond pure mechanical skill.
Mastering Icebox's Verticality: Core Concepts & Features
Understanding and exploiting Icebox's vertical elements is paramount to achieving consistent success. Several core features define the map's multi-level combat.
Exploiting Two-Tiered Sites (A & B)
A defining feature unique to Icebox at the time of its release is the presence of two-tiered Spike planting sites on both A and B. Each site offers attackers the choice between planting the Spike on the ground level or on an elevated platform. This design introduces significant strategic depth. Planting on the higher tier, such as the A-site Rafters/window area or the B-site upper platform, generally provides attackers with superior lines of sight onto the Spike during post-plant scenarios. This forces defenders attempting a defuse to expose themselves to multiple angles held by the attackers from relative safety.
Successfully securing a top-site plant can drastically swing the post-plant advantage in favor of the attackers, making retakes significantly more difficult for defenders. Consequently, executing these high-plant strategies often necessitates dedicated utility usage. Agents like Sage are frequently employed to use their Barrier Orb to create safe pockets for planting on these exposed upper levels, a tactic commonly observed in professional play, particularly on A site. Similarly, Viper walls or orbs might be used to obscure vision during the plant. The B-site top plant is generally considered less common and often contingent on securing Mid control first. The decision of whether to plant high or low becomes a critical tactical choice based on site control, available utility, and the perceived risk.
Strategic Use of Ziplines (Horizontal & Vertical): Risk vs. Reward
Icebox features both vertical ropes (ascenders) allowing players to climb between levels on A and B sites, and a unique horizontal zipline spanning across the A site structure. Notably, Icebox introduced the first player-controllable horizontal ziplines to Valorant, allowing movement in either direction, unlike the later one-way ziplines on Fracture.
These ziplines offer significant tactical potential, enabling rapid vertical repositioning, quick access to powerful high-ground positions like A Nest, unexpected flanks, or swift escapes from disadvantageous fights. However, this speed comes at a high cost: players are extremely vulnerable and exposed while traversing ziplines, making them easy targets if used predictably or without cover. The horizontal A-site zipline, while offering the fastest way across the site, is particularly perilous due to its exposure.
Successful usage hinges on timing and context – using them during distractions, when enemy positions are known, or for calculated aggressive plays, rather than as a default movement option. Techniques like using shift for silent vertical rope travel or utilizing silent jumps and drops from elevated positions accessed via ropes add further layers to their tactical application.
Key High-Ground Positions and Power Angles
Icebox is replete with elevated positions that grant significant tactical advantages. Mastering these locations is crucial for controlling the map:
- A Site: A Nest (accessed via zipline, offers wide views), A Rafters/Top Site (the upper plant level), Top of Generator, Pipes.
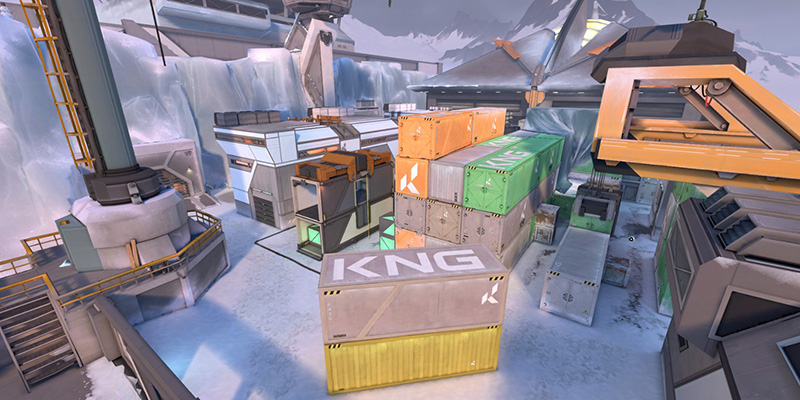
- B Site: B Top Site/Platform (upper plant level near rope), Top of Yellow Container, Snowman area (elevated ground near back B), B Nest (small elevated cubby near Orange).
- Mid: Top of Boiler (overlooking Attacker Mid), Top of Tube (accessible via abilities).
These positions provide superior sightlines, potential cover, and allow players to hold unexpected or "off-angles" that catch opponents off guard. The map's complex geometry and abundance of crates and structures also create numerous "ratty" angles and hiding spots at various elevations, demanding thorough clearing.
The Importance of Vertical Crosshair Placement and Awareness
The multi-level nature of Icebox necessitates a fundamental adjustment to aiming and awareness habits. Players cannot rely solely on horizontal crosshair placement. Constant vigilance is required, checking angles not just left and right, but also above and below, upon entering any new area. Standard crosshair discipline must evolve to account for threats potentially appearing from elevated platforms, nests, or drops. Holding angles effectively means anticipating peeks from multiple vertical levels simultaneously.
This complexity places a premium on information gathering. Initiator utility becomes exceptionally valuable. Abilities like Sova's Recon Bolt and Owl Drone, Fade's Haunt and Prowlers, or KAY/O's ZERO/point Knife are crucial for safely scouting these multi-level threats before committing players. Icebox disproportionately rewards players and teams who combine strong mechanical skill with excellent spatial reasoning and methodical utility usage for information control. Predicting threats across the Z-axis and using abilities to confirm or deny potential angles becomes just as important, if not more so, than winning straight aim duels on a flat plane.
A Site Domination: Strategies and Angles
The A Site on Icebox, located within a large indoor research facility, is arguably the epitome of the map's vertical design philosophy. Mastering this site requires adapting to its unique layout and leveraging its vertical elements.
Attacking A: Leveraging Long Ranges, Taking Nest Control, Executing Top-Site Plants
Approach: The pathways leading into A Site, primarily from A Main and Belt, feature long sightlines, making rifles like the Vandal and Phantom, or the Operator sniper rifle, highly effective choices. Attackers often need to take initial long-range duels to clear common defensive angles before pushing onto the site proper. Aggressive executes can be successful once key areas like Nest and Rafters are controlled or smoked off. Unlike B Site, complex splits involving Mid control are generally considered less essential for a standard A take, though Mid presence can help secure flanks.
Nest Control: The elevated "Nest" position, accessible via vertical ziplines near the site entrance, is a critical strategic point. For attackers, seizing control of Nest provides a powerful overview of the site, allowing them to spot and engage defenders from an advantageous high ground, often catching them off guard. However, Nest is a very common position for both attackers and defenders, so players holding it must be wary of being predictable and should reposition frequently.

Top-Site Plant: A primary objective for attackers on A is often to plant the Spike on the elevated "Top Site" area, typically near the window overlooking the site or on the Rafters. As previously discussed, this high plant provides excellent visibility for post-plant defense, making it difficult for defenders to defuse without exposure. Due to the lack of natural cover on Top Site, securing this plant usually requires coordinated utility. Sage's Barrier Orb is frequently used to block angles from Generator or Screens, creating a safe planting pocket. Omen or Viper smokes can also be employed to block key sightlines like Rafters, Backsite, or Screens during the plant. The A-site top plant is considered particularly potent, often forcing defenders to adopt specific counter-strategies or play for retake scenarios.
Vertical Angles to Clear/Use: Entering A Site demands meticulous clearing of numerous vertical angles. Attackers must check Nest, Rafters, the top of the Generator structure, Pipes overlooking the site entrance, and various angles created by stacked boxes and Radianite crates. Controller utility is essential for managing these threats. Omen smokes are ideal for blocking vision from Screens, Rafters, Top Site, and Backsite. Viper can achieve similar blocks with her wall or orb. Agents with vertical mobility like Jett can use Updrafts to aggressively contest defenders on high ground or clear elevated angles. Sage walls can block entry points like Screens or provide cover near 410/Generator for plants.
Defending A: Utilizing Rafters and Nest, Defensive Vertical Angles, Retake Strategies
Holding Site: Defenders typically have more space to set up initially compared to attackers on A. Key defensive positions leverage the site's verticality: Nest and Rafters offer powerful sightlines over the main entry points. Other common spots include playing behind the Generator, holding from Pipes, or anchoring the Backsite area. Agents with vertical movement capabilities, such as Jett using Updraft/Dash or Omen using Shrouded Step, can quickly reposition between these high-ground spots, taking unexpected angles to surprise attackers. Sage players can utilize Barrier Orb to create "boost" spots, elevating themselves or teammates onto structures like the Generator for unconventional sightlines. Despite these options, holding A site directly against a coordinated push is widely considered challenging.
Vertical Angles: Defenders primarily use the height advantage from Nest and Rafters for opening duels against attackers pushing from Main or Belt. Holding angles from Pipes or the top of the Generator can create crossfires on attackers entering the site. Defenders must remain unpredictable, as attackers will anticipate and clear these common elevated positions.
Retakes: Retaking A Site after the Spike is planted is notoriously difficult. The numerous angles, elevated positions (Nest, Rafters, Top Site plant spot), and potential crossfires attackers can establish make coordinated retakes essential but challenging. Gaining control of Rafters and Nest during the retake attempt is often crucial. Significant utility usage is typically required, such as Viper's Toxic Screen or Viper's Pit to section off parts of the site, Sova's Hunter's Fury to clear common post-plant spots, or flashes and initiator abilities to clear angles. Due to the difficulty of retaking, defensive strategies often involve playing for information, delaying the push, and setting up for a coordinated retake rather than dying on site.
The dynamics of A Site highlight a core tension on Icebox: control of vertical space is immensely powerful but fiercely contested. Both attackers and defenders vie for the same key high-ground positions like Nest and Rafters. A successful attack often hinges on displacing defenders from these spots, while a successful defense requires leveraging them effectively without becoming predictable. The difficulty in retaking A stems directly from the multitude of strong, elevated post-plant positions attackers can secure, reinforcing the importance of initial site control and the strategic value of vertical dominance.
B Site Domination: Strategies and Angles
The B Site on Icebox, situated outdoors amidst shipping containers and cranes, presents a different set of challenges and opportunities compared to A Site, though verticality remains a key factor.
Attacking B: Controlling Yellow, Executing Splits via Mid, Managing Close-Quarters Verticality
Approach: Engagements on B Site tend to occur at shorter to medium ranges compared to the long sightlines of A. The site layout, dominated by large containers, creates numerous corners and close angles that need careful clearing. Due to the site's structure and multiple entry points, executing split pushes through the Mid area (either via Kitchen/Tube or the Under Tube path) is often considered necessary for a successful B take. Attackers must navigate the parallel pathways (B Green, B Orange) and contend with defenders potentially holding angles from various container positions.
Yellow Control: The large Yellow container located centrally on the site is arguably the most critical piece of terrain on B. Gaining control of the space around and potentially on top of Yellow is paramount for attackers. It provides essential cover for planting the Spike and establishes strong post-plant positions from which to defend the site. Attackers must prioritize clearing defenders who often play behind Yellow or use it as cover during retakes. Agents with vertical mobility like Jett or Omen might be able to access the top of Yellow for an elevated advantage, though this requires specific ability usage.
Top-Site Plant: Similar to A, B Site features a two-tiered plant area with an upper platform accessible via a vertical rope near the back of the site or through a Mid push. Planting on this upper level is generally less common than the A-site top plant but remains a viable strategy, particularly if attackers have secured control of Mid and can approach the top site safely. This plant offers good visibility for post-plant defense but requires securing the upper platform and potentially using utility like a Sage wall for cover during the plant.
Vertical Angles to Clear/Use: Attacking B requires clearing multiple angles at different heights. Key areas include the top of the Yellow container, the upper platform near the rope, the elevated Snowman area towards defender spawn, the B Nest cubby near Orange lane, and various angles created by the stacked Orange and Green containers. Viper walls are highly effective here, often used to cut off sightlines from Snowman and the Top Site simultaneously. Sage walls are crucial for securing plants, especially the default plant near Yellow. Jett can utilize Updrafts to take unexpected off-angles around the containers or contest Top Site, while Omen can use Shrouded Step to teleport onto containers or even the top of Tube if pushing from Mid.
Defending B: Holding from Yellow/Snowman, Kitchen Control, Vertical Angles on Retake
Holding Site: Defending B Site effectively often hinges on controlling Mid. Without Mid control, defenders must watch three potential entry points: B Green (main entrance), B Orange (parallel path), and the exit from Tube via Kitchen. Key defensive positions include playing behind or aggressively on Yellow, holding from the elevated Snowman area, controlling Kitchen to watch Tube and Orange entrances, anchoring on the Top Site platform near the rope, or utilizing the B Nest cubby. Establishing control in Kitchen is particularly vital as it provides sightlines onto two key attacker approaches. Agents like Chamber excel on B defense due to their ability to hold aggressive angles in B Main or Mid and safely teleport away using Rendezvous when pressured. Given the multiple angles and attacker options, defenders are often advised not to overcommit to holding the site directly and should be prepared to fall back and play for a coordinated retake if necessary, as rotations can be long. Sage can use boost walls near B Green for early aggression, and Killjoy setups with turrets and Nanoswarms can significantly delay pushes.
Vertical Angles: Defenders leverage height advantages from the Top Site platform, the top of Yellow (if accessible/held), and the Snowman position. Kitchen provides crucial sightlines towards Tube and the Orange lane entrance.
Retakes: B Site is generally considered easier to retake than A Site, provided the defenders haven't lost control of Mid. If attackers only pushed through B Main (Green/Orange), they have fewer escape routes and post-plant positions compared to A. Clearing the Yellow container area and the Top Site platform are the primary objectives during a retake. Utility such as Viper's wall or ultimate, Sova recons, or Sage slows are highly effective in facilitating B retakes.
The verticality on B Site manifests differently than on A. It's less about expansive open high ground and more focused on layered ground cover provided by the containers, coupled with specific elevated power positions like Top Site and the crucial Yellow container. Control of B hinges significantly on navigating this container maze and dominating the area around Yellow. Furthermore, the strategic importance of Mid control becomes acutely apparent, as it drastically alters the defensive requirements and attacking options for B Site, underscoring the map's interconnected design.
Controlling Mid: The Vertical Nexus
The Mid area on Icebox serves as the strategic heart of the map, a crucial nexus point whose control significantly influences the flow of the round and access to both bomb sites. Its design incorporates key vertical elements that define engagements within this space.
Importance of Mid for Rotations and Site Splits
Mid control is paramount on Icebox. It provides vital pathways for attackers to flank defenders on either A or B site, or to execute split pushes, particularly towards B. For defenders, controlling Mid denies these attacker options, prevents lurks, and allows for faster rotations between the two bomb sites. Losing Mid control often forces defenders into passive, site-focused holds and makes coordinated defense much more difficult. The strategic value of Mid on Icebox is often compared to that of Mid on Ascent, highlighting its critical importance. As mentioned, Mid control is particularly crucial for enabling B site attacks and complicating B site defense.
Key Vertical Angles (Boiler, Tube top/bottom, Kitchen)
Engagements in Mid are heavily influenced by several key locations incorporating verticality:
- Boiler: Located on the defender's side of Mid, the Boiler area features an elevated platform overlooking the main corridor leading from the attacker's Mid entrance. This position provides defenders with a significant high-ground advantage for holding pushes or taking opening duels. Attackers typically need to use smokes (Omen, Viper) or other utility to block this sightline to advance safely through Mid. Patch 4.04 narrowed the Boiler ramp geometry, intended to make smoke utility cover the area more consistently.
- Tube: This enclosed structure connects Attacker Mid (via Kitchen) directly to the B bomb site. Its verticality is twofold: players can potentially be on top of the Tube structure (often accessed via Jett's Updraft or Omen's Shrouded Step) holding angles towards Mid Boiler, Kitchen, or B site. Simultaneously, players can traverse underneath the Tube, creating another pathway and angle connecting Mid to B site, near the Orange containers. Controlling Tube often involves using Sage walls to block passage or Viper orbs to create one-way smokes or deny access.
- Kitchen: This area serves as the junction between Attacker Mid, the Tube entrance, and a pathway towards B site. It offers angles towards Boiler/Defender Mid and the entrances to B site (Tube and Orange lane). Defenders often place Sentinel utility here, such as Chamber Trademarks or Killjoy setups, to gain information or delay pushes. Patch 4.04 included adjustments to the back wall of Kitchen.
Strategies for Attacking and Defending Mid Control
Attacking: A common approach involves using smokes or walls (Viper, Omen) to block the Boiler angle, allowing the team to push towards Kitchen and Tube. Initiator utility (Sova Drone/Recon, Fade Prowlers, KAY/O Knife) is crucial for clearing Kitchen and potential defenders positioned on top of or underneath Tube. Successfully taking Mid opens up options for B site splits via Tube/Under Tube or flanking maneuvers towards A site. Executing Mid pushes requires careful coordination and utility management.
Defending: Defenders typically prioritize holding the Boiler angle early in the round. Sentinel agents play a key role in controlling the Kitchen and Tube pathways. Chamber often places a Trademark in Kitchen, Killjoy can set up turrets/Nanoswarms, and Sage frequently uses walls or Slow Orbs to block or delay pushes through Tube. Viper can use her Poison Cloud or Toxic Screen to control Tube and the underpass area. Defensive strategy in Mid often focuses on gaining information, delaying attacker pushes, and preventing splits, allowing teammates time to rotate.
The Mid area truly functions as the map's vertical nexus. Control is not merely about holding horizontal ground but requires actively managing sightlines from the elevated Boiler position and denying enemy passage through the complex, multi-level Tube structure. The interplay between Boiler, Kitchen, and Tube (top and bottom) forms the core tactical battleground in Mid. The introduction of the Patch 8.0 window adds another layer of vertical complexity, likely aiming to disrupt previous defensive dominance and encourage more dynamic engagements through this strategically vital part of the map.
Agent-Specific Vertical Mastery on Icebox
Success on Icebox is significantly influenced by an agent's ability to navigate and control its vertical landscape. Certain agents possess kits uniquely suited to exploiting the map's multi-level design.
As a premier duelist, Jett's mobility is exceptionally potent on Icebox. Her Updraft ability allows her to quickly reach virtually any key high-ground position, including A Nest, A Rafters, B Top Site, Generator tops, Tube top, Yellow top, and various crates, creating unexpected angles. Combined with Tailwind (Dash), she can take aggressive Operator peeks from these elevated spots and escape safely, or dash onto sites during executes. Her ultimate, Blade Storm, synergizes well with Updraft for aerial attacks. Specific entry paths utilizing Updrafts and dashes for both A and B sites have been developed by high-level players. Jett's kit allows her to directly challenge and control vertical space like few others.
Omen is often considered a must-pick Controller on Icebox due to his unparalleled ability to manipulate vertical sightlines and reposition unpredictably. His Shrouded Step (Teleport) enables him to access the same high-ground positions as Jett (Nest, Rafters, crates, Tube top, etc.) often catching enemies completely off guard. He can teleport into his own smokes for aggressive plays or across gaps to bypass chokepoints. His Dark Cover (Smokes) are ideal for blocking elevated angles like Nest, Rafters, or Boiler, and can be placed precisely to create one-way advantages. His ultimate, From the Shadows, allows for map-wide repositioning, useful for deep flanks or safe rotations.
Another duelist whose mobility excels on Icebox, Raze uses her Blast Packs for explosive vertical movement. She can reach high ground similar to Jett and Omen, enabling aggressive site entries or holding unexpected angles. Her Paint Shells (Nade) and Boom Bot are effective for clearing the numerous tight corners and multi-level cubbies found across the map, particularly on A site.
Sage transitions into a crucial role on Icebox, often considered a core pick due to her site control capabilities. Her Barrier Orb is not just for blocking paths; it's frequently used defensively to boost players onto high ground (like behind A Generator or near B Green) creating powerful, unexpected off-angles. Offensively, her wall is essential for providing cover to safely plant the Spike on the exposed elevated sections of A and B sites. Her Slow Orbs are highly effective at controlling chokepoints and hindering pushes aimed at taking vertical control.
As the prime information-gathering Initiator, Sova is invaluable for navigating Icebox's visual complexity and verticality, often deemed a must-pick. His Recon Bolt can scan large areas, revealing enemies across multiple elevations simultaneously, crucial for safe site entries or retakes. The Owl Drone can be flown vertically to clear high and low angles that are difficult or dangerous to peek directly. Shock Darts are effective for clearing common hiding spots or denying plants/defuses on the tiered sites, while Hunter's Fury can flush enemies from cover or secure kills during post-plant.
Viper operates as a powerful Controller/Sentinel hybrid on Icebox, excelling at large-scale area denial that accounts for verticality. Her Toxic Screen (Wall) can be angled to cut across sites, simultaneously blocking ground level and elevated positions like A Rafters/Nest or B Top Site/Snowman. Her Poison Cloud (Orb) can create one-way smokes on high platforms or completely block chokepoints like Tube. Snake Bite (Mollys) are crucial for post-plant denial, especially effective against plants on the tiered sites. Her ultimate, Viper's Pit, is excellent for locking down entire multi-level bomb sites for executes or post-plants.
(Note: Nerfs have impacted his pick rate, but his historical role highlights vertical potential). Chamber was previously a dominant Sentinel on Icebox. His Rendezvous (Teleport) anchors allowed him to take highly aggressive Operator angles from elevated positions (Nest, Yellow top, Generator, Pipes, Tube top) and instantly teleport to safety, making him incredibly difficult to trade. His Trademark (Trip) was often placed in Kitchen or under Tube to watch for Mid flanks.
| Agent | Key Vertical Abilities | Common Vertical Positions | Vertical Strengths |
|---|---|---|---|
| Jett | Updraft, Tailwind, Blade Storm | Nest, Rafters, Top Sites, Crates, Tube Top | Unmatched vertical mobility for repositioning and taking off-angles |
| Omen | Shrouded Step, Dark Cover | Nest, Rafters, Crates, Tube Top | Unpredictable repositioning; Excellent vertical sightline denial |
| Raze | Blast Pack | Any high ground via satchels | Explosive vertical mobility; Strong clearing potential |
| Sage | Barrier Orb, Slow Orb | Generator, Snowman (boost spots) | Unique boost potential; Essential for secure high-ground plants |
| Sova | Recon Bolt, Owl Drone | N/A (information gathering) | Unrivaled vertical information gathering; Clears complex angles safely |
| Viper | Toxic Screen, Poison Cloud | N/A (area denial) | Large-scale vertical area denial; Strong post-plant control |
| Chamber | Rendezvous, Trademark | Nest, Yellow top, Generator, Pipes | Safe, aggressive angle holding; Instant repositioning |
Advanced Angles & Pro Insights
Beyond basic site execution, mastering Icebox involves understanding the nuanced angles and strategies employed in high-level play, many of which revolve around exploiting verticality.
Commonly Contested Vertical Angles in High-Level Play
Professional and high-ranked gameplay on Icebox often centers around contesting specific, powerful vertical angles. Examples include:
- A Site: Taking early duels from A Heaven/Rafters, holding tricky, tight angles from A Catwalk, using the A Default ropes immediately at round start for a surprise peek onto site, or playing unexpected spots near A Vents or backsite.
- B Site: Utilizing the B Snowman position for sightlines towards B Cherry/Main (though risky solo), playing aggressively behind or on top of Yellow, or holding angles to punish plants near B Default.
- Mid: Holding off-angles in Kitchen with high-ground advantage, using the Boiler platform for control, or playing deep angles to catch rotations.
A key concept is the use of "off-angles" – positions that leverage the map's verticality and complexity to place defenders or attackers where opponents might not immediately check. Agents like Jett and Omen, with their vertical mobility, excel at reaching and utilizing these unexpected positions.
Post-Plant Strategies Leveraging Verticality
Icebox's design heavily influences post-plant scenarios. The ability to plant the Spike on elevated positions, particularly on A site, grants attackers significant advantages by providing clear sightlines onto the defuser. Common attacker post-plant strategies involve falling back to secure elevated positions like A Rafters, A Nest, B Yellow, B Top Site, or Snowman, creating difficult crossfires for defenders attempting a retake.
Consequently, utility designed for area denial becomes extremely potent. Viper's Snake Bites and Poison Cloud, Sova's Shock Darts and Hunter's Fury, Killjoy's Nanoswarms, KAY/O's FRAG/ment, and Brimstone's Incendiary and Orbital Strike are frequently used to bombard the default or elevated plant spots, preventing defuses. The effectiveness of this post-plant utility meta makes agents who possess such abilities highly valuable on Icebox, and also elevates counter-utility agents like Kayo, whose NULL/cmd ultimate can suppress these abilities. Successful post-plant defense often involves attackers spacing out effectively, creating crossfires from different elevations, and potentially playing off-site entirely, relying on lineups to delay or prevent the defuse.
The post-plant phase on Icebox becomes a battle heavily defined by vertical control and targeted utility usage. Retaking requires not just clearing horizontal corners, but meticulously checking multiple levels while simultaneously navigating a potential barrage of denial utility aimed at predictable, often elevated, plant locations. This dynamic reinforces the strategic importance of agents equipped for both securing vertical positions and executing powerful post-plant denial.
| Angle/Position | Location | Use | Strategic Value | Counterplay |
|---|---|---|---|---|
| A Nest | A Site | Attack/Defense | High ground overview, Off-angle potential | Frequent checks, Utility (smokes, flashes, scans) |
| A Rafters/Top Site | A Site | Attack/Defense | High ground plant/defense, Strong post-plant | Smoke off, Use initiator utility to scan |
| B Top Platform | B Site | Attack/Defense | High ground plant/defense, Controls rope access | Smoke off, Clear with drone/recon |
| B Yellow Top | B Site | Attack/Defense | Dominant site overview, Strong post-plant | Check with utility, Vulnerable if position known |
| Mid Boiler Top | Mid | Defense | Holds Attacker Mid push, High ground advantage | Smoke consistently, Flash before peeking |
Impact of Map Changes on Vertical Play
Icebox has undergone several significant revisions since its release, reflecting Riot Games' ongoing efforts to refine its complex design and address player feedback, often focusing on aspects related to its core verticality.
Patch 4.04 Changes (Focus on B Site & QoL)
Patch 4.04 introduced substantial changes, primarily targeting the B bomb site and various quality-of-life adjustments across the map. Key modifications to B site included:
- Widening the Green lane entrance.
- Adjusting the placement and geometry of the Yellow container, adding adjacent crates.
- Removing the lower shipping container near site and adjusting the upper container's doorway.
- Narrowing the overall B site planting area.
- Closing off the building in the back of B site near defender spawn.
- Adjusting the default plant zone boundaries and making the bridge to the upper container plantable.
- Adding crates under Tube to block a line of sight towards B site.
Other changes included narrowing the Boiler ramp in Mid, adjusting the back wall in Kitchen, lowering the doorway into A Screens to remove a "foot shoot" angle, and replacing a half-cover on A site with a crate.
The stated goals behind these B site changes were to address attacker tendencies to stall behind the powerful Yellow container, encourage more dynamic site control, improve gameplay flow, and make Controller utility more consistently effective. The adjustments to Yellow, the containers, and site dimensions directly impacted vertical angles, cover options, and how players navigate the multi-level space on B. Narrowing Boiler ramp aimed to improve smoke coverage consistency, affecting holds from its elevated position. Adding crates under Tube altered sightlines, potentially impacting plays involving the top of Tube.
Reception to these changes was mixed. While Riot aimed to improve strategic diversity, some analyses suggested the core attacker and defender strategies remained largely unchanged. Some player feedback indicated that the new B site felt more difficult or less enjoyable to play, while others acknowledged the necessity of addressing the previous B site's issues.
Patch 8.0 Changes (Focus on Mid)
More recently, Patch 8.0 brought targeted changes to the Mid area. The most significant alteration was the addition of a window looking from the defender side of Mid (near Boiler) out towards A site Belt and Defender Spawn. Concurrently, a box located beneath this new window was raised.
Raising the box underneath might nerf specific Omen teleport spots or jump-up positions previously used in that location. The overall intent seems to be encouraging more attacker presence and viable pushes through Mid.
Overall Evolution
Icebox's history, including earlier undocumented changes (Patch 1.14 mentioned) and the major revisions in 4.04 and 8.0, demonstrates a continuous process of adjustment. Riot has iteratively tweaked sightlines, cover, chokepoints, and specific structures, often directly addressing problematic areas arising from the map's intense verticality and complexity. The goal appears to be balancing the map's unique vertical identity with smoother gameplay flow and broader strategic viability.
The evolution of Icebox underscores the challenge of balancing such a vertically complex environment. Changes frequently target specific pain points stemming from its multi-level design – such as overly dominant high-ground positions (like the old Yellow), chokepoints difficult to approach due to vertical threats (Mid Boiler), or awkward angles created by geometry (A Screens foot-shoot). The aim seems to be improving tactical diversity and playability without stripping the map of the core vertical challenges that define it. The varied opinions on the impact of these changes highlight the inherent difficulty in tuning such a complex space, as modifications inevitably affect different playstyles, agent choices, and skill levels in diverse ways.
Conclusion: Synthesizing Verticality and Site Control
Icebox stands as a unique and demanding battlefield within Valorant, defined by its pervasive verticality and complex, multi-layered design. Achieving mastery on this map requires a fundamental shift from strategies employed on flatter terrains. It necessitates constant three-dimensional awareness, meticulous angle clearing that includes vertical space, and the strategic utilization of height, cover, and movement options like ziplines.
The core principles for Icebox domination revolve around:
- Embracing Verticality: Players must actively look up and down, adjusting crosshair placement and anticipating threats from multiple elevations. Leveraging high ground for offense and defense is critical, but requires unpredictability.
- Mastering Key Features: Understanding the risk-reward of ziplines, the strategic implications of the two-tiered bomb sites, and the power positions like A Nest, B Yellow, and Mid Boiler is essential.
- Strategic Utility Usage: Information gathering (Sova, Fade, KAY/O) is paramount for safely navigating complex spaces. Controller utility (Viper, Omen) is vital for blocking vertical sightlines, while Sentinel abilities (Sage, Killjoy, historical Chamber) are key for securing plants, holding chokes, and creating off-angles.
- Mid Control: The Mid area acts as the map's strategic nexus. Controlling its vertical elements (Boiler, Tube) dictates rotational freedom and enables effective site splits, particularly towards B.
- Adaptability: Rigid strategies are less effective on Icebox. Players and teams must adapt based on enemy positioning, utility availability, and the specific challenges posed by the multi-level engagements on each site.
- Dedicated Practice: Consciously practice checking vertical angles during site entries and holds. Utilize the practice range or custom games to familiarize yourself with common high/low spots and zipline mechanics.
- Agent Specialization: Experiment with agents whose kits synergize well with verticality (Jett, Omen, Raze, Viper, Sova, Sage). Understand how their abilities can be used to gain height, control space, or gather information across levels.
- Utility Coordination: Emphasize communication regarding utility usage, especially for clearing vertical angles before pushes, smoking off key high ground, or executing safe plants on elevated tiers.
- Spatial Awareness: Develop strong spatial reasoning. Anticipate where enemies might leverage height and plan pushes and defenses accordingly. Icebox rewards players who can think and react in three dimensions.
Ultimately, Icebox challenges players to integrate tactical thinking, precise utility usage, and spatial awareness with mechanical skill. It is a map where map knowledge and strategic depth are rewarded just as much, if not more than, raw aiming prowess. By understanding and mastering its unique vertical dimensions, players can unlock the secrets to dominating this complex and rewarding Valorant battlefield.