
Season 7 hit Marvel Rivals on March 20, 2026, and it changed the game more than most patches do. Every hero in the roster took a global ult charge nerf, a brand new Strategist joined the pool, and two Team-Up synergies got deleted with two new ones taking their place. Playing Season 6.5 habits into this season won't get you far.
This guide covers every Healer and Support hero in the Strategist class for Season 7. Since players at different skill levels don't experience the meta the same way, rankings are split into two tracks: one for casual players from Bronze to Platinum, and one for competitive play at Diamond and above. Hero breakdowns, Team-Up rankings, and composition recommendations are all pulled from current Season 7 data.
The Ult Economy Shift
Start here before looking at any individual hero, because this change affects every Strategist ranking and every decision you'll make in the support role.
NetEase applied a global 20% nerf to ult charge rates across the entire roster, with no exceptions. The numbers break down like this:
- Vanguards and Duelists: Damage to energy conversion dropped from 90% to 70%. Passive energy regen fell from 12/s to 11/s.
- Strategists: Healing to energy conversion dropped from 90% to 75%. Passive regen fell from 12/s to 8/s.
New Strategist: White Fox
Season 7 brings White Fox to the Strategist roster, a hero rooted in Korean nine-tailed fox mythology. She heals, deals damage, charms enemies, and transforms into a full Kumiho form through her ultimate.
Charm CC from the support position is something Marvel Rivals hasn't had before, and that's the core of what makes her different. Her Team-Up with Luna Snow, called Blessing of the Kumiho, gives White Fox a 10% healing anchor bonus in Kumiho form. Luna Snow gets a Spirit Fox projectile that travels in a straight line, healing allies and simultaneously damaging and charming enemies it passes through. Free crowd control built into a poke healer pairing that was already strong before White Fox showed up.
Her ultimate also grants Lifesteal to teammates, stacking self sustain on top of whatever healing the team is already receiving.
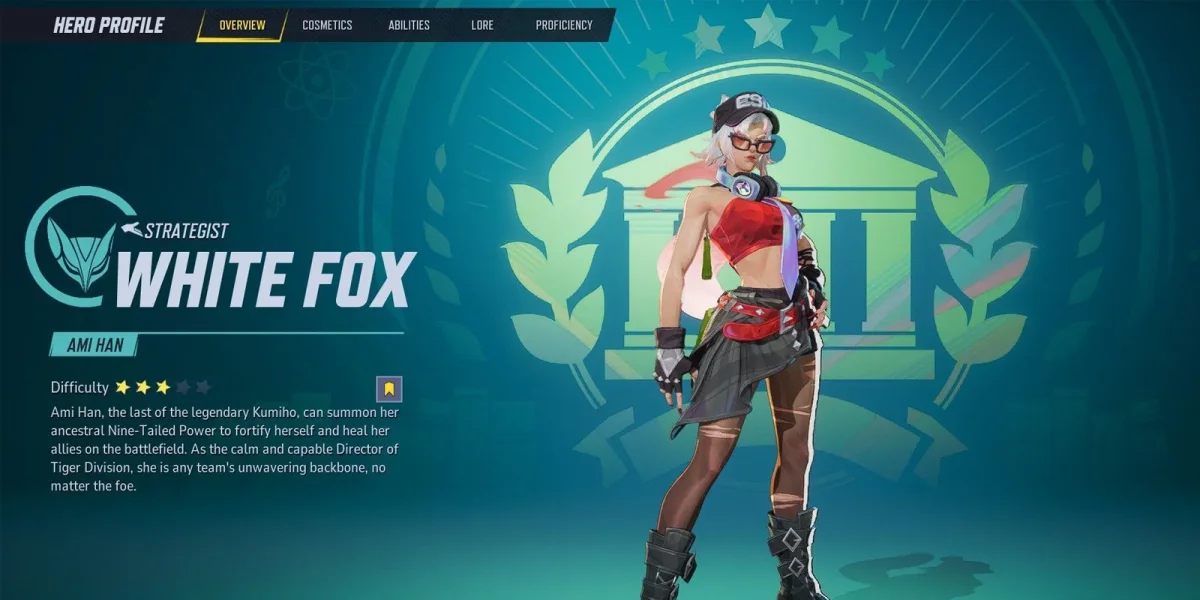
White Fox enters Season 7 as the most disruptive Strategist addition in recent memory, bringing charm CC to the support role for the first time.
How to Read This Tier List
A Strategist that excels for new players can look completely different when you assess them for experienced ones. Two separate ranking tracks are used throughout this guide:
Any hero on this list can be made to work with enough practice. Low tier ratings reflect how a hero performs for a typical player without much preparation, not a hard cap on what's possible when you actually invest time in them.
Tier List at a Glance
Casual Tier List (Bronze to Platinum)
| Tier | Strategists |
|---|---|
| S | Gambit, Rocket Raccoon, Cloak & Dagger, Invisible Woman |
| A | Adam Warlock, Ultron, Jeff the Land Shark |
| B | Luna Snow, Mantis |
| C | Loki |
| Unranked | White Fox (too early to assess) |
Competitive Tier List (Diamond and Above)
| Tier | Strategists |
|---|---|
| S+ | Gambit, Invisible Woman |
| S | White Fox, Loki, Luna Snow |
| A | Adam Warlock, Cloak & Dagger, Mantis, Ultron |
| B | Jeff the Land Shark, Rocket Raccoon |
| C | Healpool (Deadpool as Strategist) |
Hero Breakdowns
Gambit is the best Strategist in Season 7 at every level of play. His kit doesn't have any meaningful weak points in the current meta, his ultimate is exceptionally strong, and he can flip into a threatening DPS role when someone dives him. In casual, he's the clearest pick available with almost no debate. In competitive, he took nerfs this season that reduced his ult's charge acceleration bonus for allies from 30% to 20% and his movement boost from 50% to 40%. Neither of those changes came close to moving him out of the top spot. He's still the primary anchor of virtually every high elo triple support comp.
Expect Gambit to be a first or second ban in Diamond and above. Draft lanes will actively target his removal, so have a clear plan for operating without him before the match starts, both when you're on his team and when you're not.
Invisible Woman has been a top tier fixture since launch, and Season 7 hasn't changed that verdict. She brings high healing output, solid evasion through double jumping and vanishing under pressure, and attacks that hit allies and enemies at the same time so she's contributing to both damage and healing without having to pick one. Her ultimate is strong and reliable. Three separate heroes in the roster have Team-Ups that pair with her, so she picks up healing bonuses frequently depending on team composition - a flexibility advantage most Strategists simply don't have.
For casual players, her self preservation tools mean she survives encounters that would delete other supports. At the competitive level, she sits alongside Gambit at the very top of the support pool with no serious challengers.
White Fox is the most significant Strategist addition the game has seen in recent seasons. Charm CC from a support role is a completely new mechanic in Marvel Rivals, and her Blessing of the Kumiho pairing with Luna Snow is immediately one of the best synergies in the game at the high end.
Her Lifesteal ultimate adds team sustain that layers on top of existing healing, giving her value even in comps that already run strong raw output. At the competitive level, she's projecting as a dominant pick right out of the gate. The casual tier placement will be filled in once the meta has time to settle around her. For players wanting to learn her early, charm CC and the Kumiho Team-Up with Luna Snow are the two mechanics to understand before you start ranked.
- Ultimate capable of deciding matches on its own
- Skill investment translates directly into wins
- Extremely high ceiling for dedicated players
- Requires the deepest investment of any Strategist
- The learning time puts you in competitive brackets anyway
- Poor fit for occasional or low-prep players
Loki's casual and competitive rankings run in nearly opposite directions, which makes him stand out from every other hero on this list. At Diamond and above, his ultimate is capable of deciding matches on its own and the skill he requires to operate well translates directly into wins, which earns him a spot in the competitive S tier.
In casual settings, that same skill requirement makes him a poor fit for players who aren't deeply invested in learning him. The time it takes to make Loki work consistently at a casual level is roughly the same investment that would push a player into competitive brackets anyway. If you're building up your Strategist pool from scratch, save Loki for last.
Luna Snow follows a pattern similar to Loki, though less extreme. In competitive, she got a meaningful buff this season through the Idol Aura rework, which reduces her Ice Arts cooldown by two seconds on kills and gives her noticeably better tempo in sustained fights. Her Blessing of the Kumiho pairing with White Fox makes her one half of the strongest dual support combination available in Season 7, and that firmly puts her in the competitive S tier.
At casual ranks, she's slipped relative to where she used to sit. Multiple seasons of the roster expanding around her have introduced picks that are easier to use and produce comparable results at lower levels of play. Luna hasn't gotten worse - the alternatives have gotten better. Her precision requirements and the knowledge investment needed to get consistent value from her hybrid style push her to B tier for casual audiences. She's still very playable, just outpaced by simpler options at that level.
Gambit, Invisible Woman, and White Fox form the strongest Strategist core in Season 7, with Luna Snow close behind thanks to her buffed Idol Aura and the Blessing of the Kumiho pairing.
Adam Warlock is one of the most consistent Strategists across both tracks. His healing runs on cooldowns rather than targeting precision, which makes him considerably more forgiving than other healers who also deal damage. His abilities are straightforward to learn, and his ultimate creates high impact moments without needing specialized knowledge to land them.
He gained flight in Season 7, and his new Cosmic Cyclone Team-Up with Storm grants him Heavenly Harmony: a healing and movement speed trail that activates after his Soaring Surge and provides sustained value when allies pass through it during fights. His ult charges more slowly now with the global nerf, but it remains one of the most impactful abilities in the game when you use it at the right moment.
In the casual track, Adam Warlock is the recommended starting point for players who want to eventually learn Mantis, since both share the DPS and healer hybrid style.
Cloak & Dagger's standout feature for casual players is auto aim. Not having to track targets manually is the single biggest practical advantage a Strategist can have at lower ranks, and they deliver it as a core part of the kit. They've been consistently strong across multiple seasons and remain impactful in Season 7.
Dagger's side handles healing while Cloak's side provides lock on damage that covers you against divers, so you're rarely in a position where you have to completely stop healing to defend yourself. Their ultimate creates a healing path that teammates can move through toward an objective, adding a spatial control element that works even without heavy team coordination.
In competitive, they fall to A tier mostly because Gambit, Invisible Woman, and White Fox operate at a higher ceiling in organized play. As a flex pick who performs reliably at every level, they're always a safe choice.
Mantis is another hero where the gap between casual and competitive performance is wider than it first appears. Her healing uses lock on mechanics with preset amounts, which sounds simple enough. The catch is that she's a hybrid who needs to land critical hits to keep her healing output reliable, and that means understanding spacing, team comp awareness, and map knowledge at a level that goes beyond what most casual players are putting in.
She absolutely works at casual ranks and performs well in the right hands, but the crit requirement to maximize her healing makes her more demanding than alternatives like Jeff the Land Shark or Cloak & Dagger, who hit their full value without that execution bar. At Diamond and above, where players are already operating at a high mechanical level, that ceiling becomes a genuine strength and she earns her A tier slot without question.
Jeff the Land Shark is the most accessible Strategist in the game. His design centers entirely on constant healing output, and his spray hits allies and enemies at the same time, so you never have to stop healing to deal damage. You can sit in the backline, keep spraying, and contribute meaningfully without making reads or role pivots. He's the closest the Strategist pool gets to a pure heal bot, and that's exactly what makes him the right starting point for new support players.
At the competitive level, Jeff lost his Jeff-nado Team-Up with Storm this season when that synergy was removed. It's a noticeable loss at high ranks where Team-Up synergies get actively coordinated and maximized. He functions in Diamond lobbies but his ceiling sits well below the top tier Strategists, and losing his primary high value Team-Up makes it hard for him to justify a slot in optimized comps.
Rocket moved up to the casual S tier this season. He puts out solid sustained healing, takes minimal effort to play at a baseline level of effectiveness, and contributes a revive station that no other Strategist currently provides. His Rocket Network Team-Up, where he acts as the anchor for Star-Lord and Mister Fantastic, adds meaningful utility on top of his already solid baseline kit. The synergy gives Star-Lord an Astral Jump device for teleportation, lets Mister Fantastic exceed his normal elasticity cap, and boosts his Inflation state, making Rocket a real force multiplier for both partners.
The same simplicity that makes him great at casual levels is what holds him at B tier competitively. When Gambit, Invisible Woman, and White Fox are all in the same meta, Rocket's output can't compete for a slot in optimized Diamond comps. He's not unplayable at high ranks, just outclassed by everything sitting above him.
Ultron's playstyle is unlike any other Strategist in the pool. He passively heals while playing a DPS role, all from the air. That means he can cover a team's need for both damage output and healing at the same time without fully sacrificing either. His damage also operates at extremely long range, keeping the mechanical bar low for his DPS contribution.
He's not the strongest healer in the pool by raw throughput, but his dual role capability earns him A tier at both levels of play. In casual settings, improvised comps benefit from a hero who doesn't need a dedicated role slot for either damage or healing. In competitive, sustained long range pressure combined with passive healing gives him genuine value as a flexible third Strategist option.
Deadpool has a Strategist mode called Healpool, and the assessment is straightforward: it has no business appearing in Diamond ranked play. Players choosing Healpool intentionally in a competitive environment are working against themselves. This isn't a comment on Deadpool as a hero overall - his Duelist form actually received buffs this season - but Healpool specifically doesn't have the output, utility, or Team-Up options to justify a slot when real Strategists are available.
Team-Up Synergies
Team-Ups are specific hero pairings that unlock bonus abilities or passive bonuses when both heroes are on the same team. Season 7 shook up the Strategist Team-Up landscape significantly, removing two familiar pairings and adding two new ones.
New Team-Ups in Season 7
Removed Team-Ups in Season 7
Existing Team-Ups Worth Knowing
Best Compositions by Skill Level
For Casual Players
Two S tier Strategists as your anchors is a reliable foundation. Gambit and Invisible Woman together give the team constant healing and strong ultimates that don't need precise timing to be effective. Jeff the Land Shark or Rocket Raccoon as a third support adds another layer of healing without putting extra pressure on that player. Cloak & Dagger are a solid substitute in any of these slots if manual targeting is proving difficult.
Diamond Level Comps
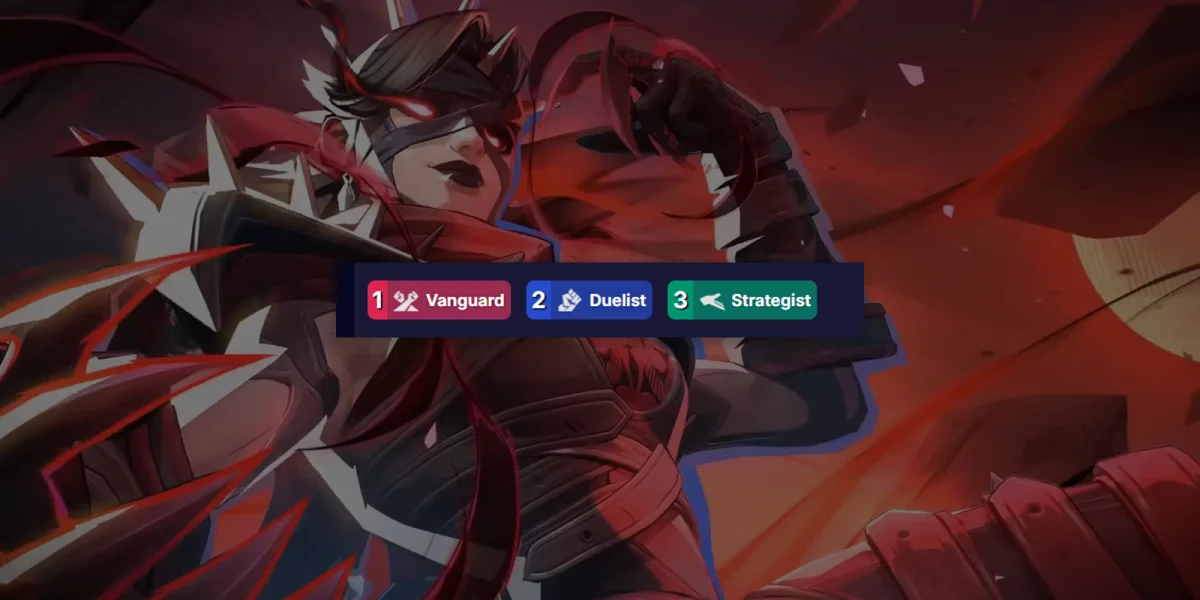
Triple support (1-2-3: one Vanguard, two Duelists, three Strategists) remains the dominant format at Diamond and above in Season 7. Three compositions stand out as the strongest options for the opening weeks.
Magneto (Vanguard), Hawkeye (poke DPS), Blade (sustain DPS), Gambit (primary Strategist), White Fox (secondary Strategist), Luna Snow (third Strategist)
Straightforward triple support adapted for Season 7. Blessing of the Kumiho between White Fox and Luna Snow adds free charm CC into poke lanes while Gambit anchors the healing. Hawkeye handles sustained long range damage and Blade self sustains against divers. This is also the comp your opponents are likely running, so it's both the strongest option and the most predictable one to face.
Groot (Vanguard), Daredevil (primary dive), Black Panther (secondary dive), Gambit (primary Strategist), Invisible Woman (secondary Strategist), Adam Warlock (third Strategist)
A direct counter to triple support when your team can actually execute dive discipline. Daredevil and Black Panther (both buffed in Season 7) chain dives to isolate supports before heals can respond. Groot's walls cut off escape routes, and Cosmic Cyclone gives Warlock trail utility during the chase. This comp requires real coordination - attempting it without that in ranked leads to predictable results.
Magneto (primary Vanguard), Doctor Strange (secondary Vanguard), Hawkeye (poke DPS), Iron Man (aerial DPS), Gambit (primary Strategist), Luna Snow (secondary Strategist)
A 2-2-2 option for maps where a second tank creates actual value. Strange's portal utility survives his shield nerf well enough to still justify his slot. Iron Man's Season 7 buffs make aerial pressure viable now that ult spam frequency has dropped. Less raw than triple support in open neutral play, but more adaptable to specific maps and a reasonable fallback for teams whose Strategist players can't coordinate three healer rotations reliably.
Beginner to Advanced
There's a natural progression through the Strategist pool based on complexity.
Key Notes by Rank
Bronze to Platinum
The most impactful pick decision you can make as a casual Strategist player is choosing heroes with auto aim or passive healing. Manual tracking at lower ranks is inconsistent, and every missed heal compounds pressure on your team over time. Cloak & Dagger and Rocket Raccoon are the clearest examples of heroes that stay effective without demanding precise aim.
The ult nerf hits you less hard than it hits Diamond players, but it does mean you shouldn't sit on your ultimate waiting for a perfect moment that might not come. With longer charge windows than Season 6.5, using your ult when a reasonable opportunity appears is better than holding for an ideal one that never materializes.
Gold and Platinum
Team-Up awareness starts generating real value at this level even without full draft coordination before the match. Knowing that three heroes can trigger Invisible Woman's healing bonuses, or that Star-Lord and Mister Fantastic activate Rocket's Rocket Network buffs, lets you get more out of whoever your team happens to pick. Check the Team-Up indicators in game and adjust your positioning when a bonus activates.
Diamond and Above
Ult economy is the most important macro skill in Season 7. In Season 6.5, teams ran ult cycles on roughly a 35 second loop and whoever pressed first usually won the exchange. In Season 7, those windows stretch to 50 seconds and beyond. Teams that create and win fight windows during the neutral phases will have a measurable edge in the opening weeks of the season before lobbies fully recalibrate.
White Fox will get banned in your lobbies. Treat her as unavailable from game one and build a composition that works without her. The same goes for Gambit in coordinated drafts. A team whose entire game plan collapses the moment either hero is banned hasn't actually prepared for the draft.
On the Vanguard side, Groot is approaching mandatory. Wall control is the most reliable soft CC available when ults aren't covering positional mistakes every 35 seconds, and Groot provides it at the base kit level without asking your team to coordinate anything beyond general spacing.
Triple support (1-2-3) remains the dominant format at Diamond and above in Season 7. Ult windows stretched to 50 seconds - teams that play the neutral phases well will dominate in the opening weeks.
Season 7 Wrap Up
Three things define the Season 7 Strategist meta: Gambit and Invisible Woman are still the best supports in the game despite taking nerfs, White Fox enters the game immediately as a disruptive force with CC mechanics the Strategist role has never had before, and the global ult nerf means support players need to actually play the neutral phases between power windows rather than coasting from one ult cycle to the next.
Triple support isn't dead. The raw healing throughput that makes it dominant in neutral play wasn't meaningfully touched by the ult charge change. The mid fight phases just require more active play now rather than waiting for the next ult to arrive.
For casual players, Gambit, Invisible Woman, Cloak & Dagger, and Rocket Raccoon are the strongest picks this season. For competitive, build around Gambit, Invisible Woman, White Fox, and Luna Snow, and sort out your contingency plans for when any of those four get banned before you queue.