
Master the Hardcore challenge in WoW Classic with this complete Enhancement Shaman guide. Level safely, gear smart, and conquer Azeroth with confidence.
Why Choose Shaman in Hardcore?
Shamans are a versatile hybrid class, blending melee prowess with caster utility – a perfect toolkit for the Hardcore mode's unforgiving nature. In Classic Hardcore (where death is permanent), an Enhancement Shaman can be a lifesaver thanks to unique abilities and adaptability. Here's why Shamans shine in Hardcore:
- Survivability Tools: You can equip a shield for a massive durability boost (high armor and block chance) when things get rough. With totems like Stoneclaw Totem (taunt totem) and Earthbind Totem (AoE slow), plus self-healing and Reincarnation (self-resurrection), Shamans have multiple "oh crap" buttons to avoid death.
- Hybrid Damage: About half of an Enhancement Shaman's damage comes from auto-attacks (white hits), and the rest from spells and abilities. This means you're not as gear-dependent as pure melee classes, and you're not as mana-dependent as pure casters – a great balance for the long 1-60 journey.
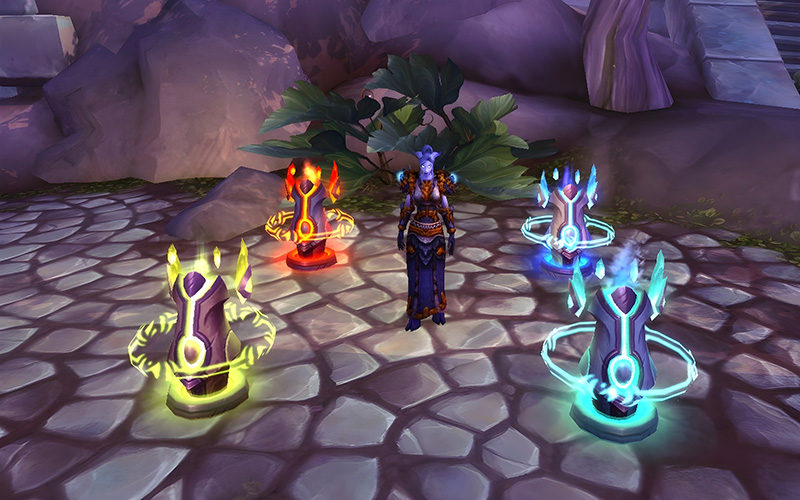
- Totemic Support: Totems provide immense buffs and utility for you and your group. From Strength of Earth Totem (melee attack power buff) to Windfury Totem (extra attacks for party members) to Tremor Totem (fear break), you make any duo or group much stronger. This support can enable safer and faster leveling, especially in duos.
- Respectable Leveling Damage: While end-game Enhancement Shaman DPS falls behind Warriors or Mages, during leveling you can deal burst damage that is surprisingly high. A lucky Windfury proc or a big crit can delete a mob before it reacts. You also get Flame Shock for damage-over-time and Fire Nova to blast groups in emergencies.
- Fun and Engaging: Shaman gameplay stays fresh with a variety of spells and situational abilities. Bored of just auto-attacking? Throw some Lightning Bolts. Too much casting? Switch back to melee. You won't get the "rotation fatigue" some classes have. And nothing beats the thrill of clutch heals or Ghost Wolf escapes in Hardcore!
In short, Enhancement Shaman offers a balanced, engaging playstyle that is very well-suited to Hardcore's solo-oriented gameplay. Now let's dive into how to build, gear, and play your Shaman to survive from 1 to 60.
Enhancement specialization focuses on improving your melee capabilities while retaining the core Shaman toolkit. Your weapon will be your most important gear piece, and you'll supplement melee attacks with shocks, totems, and self-buffs. Enhancement offers the best blend of survivability and damage for the dangerous Hardcore journey.
Leveling Build and Talents (Hardcore Enhancement)
Enhancement as the Optimal Hardcore Spec
For leveling in Hardcore, Enhancement is the recommended specialization. It provides steady damage without needing to drink constantly, and gives you defensive talents early on. Elemental can deal burst damage after level 40, but it's mana-hungry and offers fewer survival talents in the early game. Enhancement's early talents greatly outweigh the others for a Hardcore run.
Most players stick with Enhancement all the way to 60 for Hardcore. (Some non-HC guides suggest respeccing to Elemental at 40 for speed, but in Hardcore, safety > speed. You can certainly stay Enhancement through 60 and beyond for a more durable journey.)
Key Talent Benefits:
- Shield Specialization (Enhancement Tier 1): Increases chance to block with a shield and gives you mana when you block. Even if you prefer two-handed weapons, taking this talent early is worth it for when you swap to a shield in dangerous moments. A shield can literally save your life in Hardcore by cutting incoming damage in half or more!
- Two-Handed Axes/Maces (Enhancement Tier 2): Allows you to use 2H axes and maces from level 20 onward. This one-point wonder is great because two-handers significantly increase your damage output when you have a good weapon. Even if you usually use a 1H + shield for safety, having the option to swap to a big 2H for easier fights or higher DPS is valuable.
- Flurry (Enhancement Tier 3 capstone): Increases your attack speed by up to 30% for the next 3 swings after a critical hit. This talent dramatically improves your kill speed and scales well with better weapons. It's a must-have by your 30s.
- Parry (Enhancement Tier 4): Grants 5% chance to parry incoming melee attacks. Parry is essentially 5% avoidance for one talent point – huge for Hardcore survivability. You want this immediately at level 30 when it becomes available.
- Elemental Weapons (Enhancement Tier 5): Boosts the effect of your weapon imbues (like Rockbiter, Windfury) by 13% and improves totem damage. This ups both your melee and spell damage in one talent.
- Weapon Mastery (Enhancement Tier 6): Increases all your auto-attack damage by 10%. Since so much of your damage is melee swings, this is effectively a 5-10% overall DPS increase – very strong.
- Stormstrike (31-point Enhancement capstone): Gives you a new ability at level 40 that instantly hits with both weapons (or twice with a 2H) and buffs the next Nature damage on the target. Note: Stormstrike in Classic has a long 20s cooldown and high mana cost. It's nice burst (especially combined with an Earth Shock), but not game-changing. Many Hardcore Shamans take it at 40 for lack of other Enhance talents, but then start investing in another tree (Elemental or Restoration) for 40-60.
Talent Progression (Level 10-60)
To help you plan, here's a level-by-level talent path optimized for Hardcore. This build focuses on early defense and efficient damage, reaching Stormstrike by 40 and then bolstering your survivability with Restoration talents in the 40-60 range:
| Level Range | Talent Points and Allocation | Notes (Why?) |
|---|---|---|
| 10 – 14 | 5/5 Shield Specialization in Enhancement | +25% block and +5% chance to block = huge durability. Great for using a shield in tough fights. (5% max mana from Ancestral Knowledge isn't worth it for HC) |
| 15 – 17 | 3/3 Improved Lightning Shield | Lightning Shield is an efficient damage source; buff it for more free damage. (If you don't use Lightning Shield often, you could put these into Thundering Strikes early and Anticipation for dodge instead.) |
| 18 | 1/5 Thundering Strikes | +1% melee crit (up to 5% at 5/5). We start with one point here to unlock Flurry later. |
| 19 – 20 | 2/2 Improved Ghost Wolf | Ghost Wolf cast time -2 sec (down to 1 sec). This is mandatory for Hardcore. A near-instant Ghost Wolf lets you flee from danger reliably. (If you're Tauren, you can even War Stomp then Ghost Wolf to escape a sticky situation!) |
| 21 | 1/1 Two-Handed Axes and Maces | Enables 2H weapons. Grab this at 21 if you have or expect a good 2H weapon. If not, you can delay it a bit, but it's only 1 point and worth having ready. (Note: Staves do NOT require this talent – you can train staves separately – but this talent is needed for 2H axes/maces.) |
| 22 – 25 | 4/5 Thundering Strikes (complete 5/5) | Finish maxing the +5% crit from Thundering Strikes. More crit = more Flurry uptime and faster kills. |
| 26 – 29 | 4/5 Flurry | Start putting points into Flurry for attack speed on crit |
| 30 | 1/1 Parry | Take Parry immediately at level 30 |
| 31 | 5/5 Flurry (put the last point) | Now finish Flurry (5/5). You'll notice a big jump in DPS when Flurry is up, making your auto-attacks much faster after a crit. |
| 32 – 34 | 3/3 Elemental Weapons | Improves your Rockbiter/Windfury/Flametongue Weapon damage by 13% (and Fire totem damage). A straight boost to both melee and spell damage – take these three points next. |
| 35 – 39 | 5/5 Weapon Mastery | Increases all your auto-attack (white) damage by 10%. Since a huge portion of Enhance DPS is white damage, this is a solid DPS increase. By level 39 you'll have this maxed. |
| 40 | 1/1 Stormstrike | Congratulations, you can now pick Stormstrike! This gives you a new attack ability. It's a nice burst tool (especially to double-dip Earth Shock damage), though remember it costs a lot of mana. Use it on tough mobs or to burst down casters quickly, but you might skip it on easy fights to save mana. |
By level 40, you have 31 points in Enhancement, giving you all the core tools of the spec. From this point, you have flexibility on where to spend your 20 remaining talent points (levels 41-60). Here are two good paths:
- Totemic Focus – reduces mana cost of totems (great for dropping Stoneclaw/Earthbind without draining your mana)
- Healing Focus – 70% pushback resistance on healing spells, so you can heal yourself while getting hit without huge delays. Crucial in clutch moments.
- Nature's Guidance – +3% hit chance with all spells and attacks. This talent at the bottom of Tier 5 Restoration is amazing for Hardcore because it boosts your melee and spell hit, effectively increasing damage consistency and reducing the chance your heals or Earthbind Totem resist at the worst time. We want 3/3 Nature's Guidance by level 60.
- Tidal Mastery – up to +5% spell/heal crit (nice to have if you go deep enough in Resto).
- (Optional) Nature's Swiftness – the 31-point Resto talent, lets you make one spell instant cast (e.g. an instant big Healing Wave). You can't reach this with a 31/20 build, but some players choose to skip Stormstrike and go 30 Enhancement / 21 Resto to get Nature's Swiftness at level 60. This is a viable choice for maximum safety: giving up Stormstrike (which is mediocre) in exchange for an on-demand instant heal or escape spell at end-game. It's up to you – for leveling it won't matter until you're 60.
A sample Resto-heavy path for 41-60: 5/5 Totemic Focus, 5/5 Healing Focus, 5/5 Tidal Mastery (or Ancestral Healing + Restorative Totems, depending on preference), and 3/3 Nature's Guidance by 60. This makes you a much more reliable healer in groups and tougher to kill overall. The hit chance and reduced spell pushback alone are worth going Resto subspec in Hardcore.
- Concussion – +5% damage to Lightning Bolt, Shock spells, etc.
- Call of Flame – +15% Fire totem damage (or Elemental Warding – damage reduction vs Fire/Frost/Nature by 10%, for a bit more defense; you might prefer Warding in Hardcore).
- Elemental Focus – clearcasting chance on spell crit (free spell occasionally).
- Reverberation – reduces Shock cooldown by 1 sec (more shocks = more DPS).
- Elemental Devastation – spell crits increase your melee crit chance. Not very reliable without high spell crit, but it's a fun bonus when it procs.
Elemental subspec will buff your Shock and Lightning Bolt damage significantly, speeding up kills. Just remember you'll be spending more mana (so carry plenty of drink). This path is higher damage but slightly less "oh-no" protection compared to Restoration. In Hardcore, only take Elemental subspec if you're confident in avoiding danger and want the extra damage.
No matter which path you choose after 40, you'll remain primarily Enhancement in playstyle. Enhancement's foundation gives you a safe and steady leveling experience – high melee damage, shields, and escapes – and the extra talents in Elemental or Restoration let you tailor your late-game to your liking.
Skill Training Tips:
- Weapon Skills: Train all weapon types available – 1H axes (Orgrimmar), 2H axes/maces (after talent at lvl 20, then train the skill), staves (Thunder Bluff) and 1H maces (starting weapon type). Keeping your weapon skills maxed is important; a missed hit at a critical time can spell doom. If you pick up a new weapon type, find low-level mobs to quickly skill up.
- Shield Training: You start able to use shields. Always carry a shield in your bags, even if you love 2H weapons. Equipping a shield in emergencies (like accidental multi-pulls) can literally double your effective survival time. Get in the habit of swapping to a shield whenever you feel threatened or are going to heal in combat.
- Mail Armor at 40: Shamans can wear Mail armor starting at level 40 (visit your trainer to learn Mail proficiency). This is a big durability boost – upgrade your Leather pieces to Mail as soon as you can around that level. More armor = less damage taken from melee mobs (which are the vast majority of enemies).

Best-in-Slot (BiS) Gear for Leveling
Unlike end-game, "BiS" leveling gear isn't something you farm for weeks – it's mostly about grabbing big upgrades when you can and prioritizing stats that keep you alive. For Enhancement Shamans in Hardcore, Stamina and Strength/Agility are king for solo play, while a secondary set with Intellect is useful if you plan to heal in groups. Here's how to gear up smartly as you level:
- Prioritize Weapon Upgrades: Your weapon contributes most of your damage output, so always aim for the highest DPS weapon available. A slow, high-damage weapon works best with Windfury Weapon (once you get it at 30), whereas faster weapons pair fine with Rockbiter or Flametongue. But overall DPS is more important than speed or stats on the weapon. Don't use a low damage green with +Strength over a higher DPS blue/white weapon.
- Stamina on Gear: In Hardcore, HP is life. Surviving with 5% health is surviving – so never underestimate +Stam on gear. A lot of "of the Bear" mail/leather gear (Str/Sta) is ideal for Enhance. Even "of the Tiger" (Agi/Str) or "of the Monkey" (Agi/Stam) are great. Agility gives you crit and a bit of armor/dodge, Strength gives attack power; both are good, but Stam gives you a buffer against unexpected damage.
- Armor Value: When choosing between gear pieces, consider armor, especially pre-40 when you're in leather. A high-armor piece (even if it has weaker stats) can sometimes be worth it for mitigation. Post-40, upgrade to mail gear for a big armor boost.
- Secondary "Caster" Gear: Keep an eye out for cloth or leather with Intellect and Spirit for a healing set. As a Shaman, you might be asked to heal a dungeon or tough group quest. Having +Int gear to swap in will give you a larger mana pool and stronger heals. For example, the Crescent Staff from Wailing Caverns (if Horde can get it) has +10 Int/+10 Spi – great for a caster set, even if it's a staff weapon.
Notable Quest Rewards:
Some quests offer exceptional gear upgrades. A few to remember for Horde Shaman:
- "Hidden Enemies" – Orgrimmar (Level ~14): Rewards the Hammer of Orgrimmar, a 9.1 DPS one-hander. Excellent weapon for its level if you do Ragefire Chasm early.
- "Serena Bloodfeather" – Barrens (lvl 18): Rewards Harpy Skinner, a 9.6 DPS one-hand axe (fast weapon, good stats). Solid choice if you haven't found a better weapon by high teens.
- "Callous Axe" – Hillsbrad (lvl 24): Can be bought from a vendor (Ott in Tarren Mill) – 15 DPS two-handed axe! This white weapon is actually better than many same-level greens. If you visit Hillsbrad at 24, check the weapons vendor for the Callous Axe.
- "Weapons of Spirit" – Feralas (lvl 48): Rewards Force of the Hippogryph, a 30.4 DPS one-hander (fast dagger). Nice fast weapon for late game or off-hand if dual-wield existed (not in Classic, alas).
- "Betrayed" – Azshara (lvl 54): Rewards Belgrom's Hammer, a 32.8 DPS one-handed mace with decent stats. Very strong 1H for the mid-50s.
- Dungeon Quest Rewards: Many dungeon quests give excellent gear. For example, the Sunken Temple quest "The God Hakkar" (lvl ~53) can reward Lifeforce Dirk (35.9 DPS dagger), and Razorfen Kraul's quest "A Vengeful Fate" can reward Corpsemaker (a 29 DPS two-handed axe) – Corpsemaker is famously good in the late 20s. If you plan to do dungeons (carefully!), check the quest rewards first so you don't miss a great item.
To make things easier, we've compiled weapon progression tables below for both one-handed and two-handed weapons. These list some of the best weapons you can reasonably acquire at various level ranges:
One-Handed Weapon Progression
Below are notable one-handed weapons useful for an Enhancement Shaman while leveling. This includes fast daggers, axes, and maces, since you might pair a 1H with a shield for safety.
| Req. Level | Weapon (1H) & DPS | Source (Horde) |
|---|---|---|
| 2 | Cudgel – 2.8 DPS | Vendor (starter zones) – Basic club to get you started. |
| 10 | Jagged Dagger – 6.0 DPS | Quest – Skull Rock (Durotar) |
| 10 | Skorn's Hammer – 6.5 DPS | Quest – The Demon Scarred Cloak (Mulgore) |
| 14 | Hammer of Orgrimmar – 9.1 DPS | Quest – Hidden Enemies (Orgrimmar/RFC). Great early mace if you do RFC. |
| 18 | Harpy Skinner – 9.6 DPS | Quest – Serena Bloodfeather (Barrens). One of the best 1H weapons in the high teens. |
| 24 | Callous Axe – 15.0 DPS | Vendor – Ott in Hillsbrad Foothills. Excellent 1H axe (limited supply on vendor). Check for it around level 24-25. |
| 29 | Daring Dirk – 17.5 DPS | Vendor – Vharr in Booty Bay (Stranglethorn). High DPS dagger available in limited supply at Booty Bay. Worth a boat trip if you're in the mid-20s and need a weapon. |
| 33 | Bleeding Crescent – 18.1 DPS | Quest – Parts of the Swarm (Thousand Needles). Solid one-hander from a mid-30s quest line. |
| 38 | Black Water Hammer – 22.2 DPS | Quest – Deep Sea Salvage (Arathi Highlands). Nice 1H mace with good damage for late 30s. |
| 41 | Tok'kar's Murloc Shanker – 25.0 DPS | Quest – Threat From the Sea (Swamp of Sorrows). Good dagger from a Swamp quest chain. |
| 48 | Force of the Hippogryph – 30.4 DPS | Quest – Weapons of Spirit (Feralas). High-DPS dagger from a Feralas quest (great for off-hand in TBC, but still fine for 1H usage in Classic). |
| 50 | Axe of the Ebon Drake – 30.3 DPS | Quest – Set Them Ablaze! (Searing Gorge) |
| 53 | Lifeforce Dirk – 35.9 DPS | Quest – The God Hakkar (Sunken Temple). One of the best daggers you can get before end-game. |
| 54 | Belgrom's Hammer – 32.9 DPS | Quest – Betrayed (Azshara). Good 1H mace with stats, useful in mid-50s if you do this chain. |
| 55 | Hunt Tracker Blade – 33.7 DPS | Quest – The Remains of Trey Lightforge (Felwood). Decent dagger from Felwood. |
| 57 | Lorespinner – 37.7 DPS | Quest – Lethtendris's Web (Dire Maul). High DPS dagger from a Dire Maul quest (if you venture there in later levels). |
Two-Handed Weapon Progression
Two-handers deliver big burst damage, especially when you get Windfury Weapon at level 30. Here are some excellent two-handed weapons for various levels:
| Req. Level | Weapon (2H) & DPS | Source (Horde) |
|---|---|---|
| 18 | Crescent Staff – 11.4 DPS | Quest – Leaders of the Fang (Wailing Caverns). This staff has caster stats (Int/Spi) but solid DPS for the 18-20 range. Usable even before you get the 2H Axe/Mace talent, since Shamans can train Staves. |
| 20 | Bonecracker (2H Mace) – ?? DPS | Quest – Counterattack! (Barrens). This is an elite quest reward; not always safe to do. But if you complete the Counterattack event, the 2H mace is decent. |
| 28 | Corpsemaker – 29.5 DPS | Drop – Razorfen Kraul (Overlord Ramtusk). A fantastic 2H axe for late 20s/early 30s. It has +15 Str/+8 Sta to boot. If you dungeon, Corpsemaker is a top priority – just be very careful in RFK! |
| 32 | Whirlwind Axe – 30.9 DPS | Not available to Shaman (Warrior quest only), but mentioning so you don't envy Warriors too much. ???? However, do party with a Warrior friend if they get this, as Windfury Totem on a Whirlwind Axe is bonkers. |
| 35 | Bonebiter – 31.1 DPS | Quest – Dark Council (Arathi Highlands). This 2H mace is a great mid-30s weapon with +Strength. It's a bit of a quest chain but worth the effort if you need a weapon around that level. |
| 37 | Ravager – 31.6 DPS | Drop – Herod in Scarlet Monastery Armory. It's a 2H axe with a whirling AoE proc. Fun but risky to use in Hardcore (the uncontrolled spin can accidentally pull mobs). Also Shamans can't use axes until talent at 20 (which you'll have) but cannot use 2H swords – luckily Ravager is an axe, so you can use it. Just use with caution. |
| 45 | Thrash Blade – ?? DPS | Quest – Corruption of Earth and Seed (Maraudon). Actually a 1H sword, so Shaman cannot use swords in Classic – skip this. Instead, look for: Princess Theradras's Scepter (drop in Maraudon, 41.5 DPS 2H mace) around this level, or The Rockpounder (Uldaman quest reward, 29.7 DPS but with +14 Str, decent for mid-40s if you did Uldaman late). |
| 51 | Arcanite Reaper – 52.0 DPS | Crafted – Blacksmithing. Probably unrealistic in Hardcore leveling, but if you somehow get one crafted, you've basically "beaten" the weapon game until 60. It's the infamous 2H axe of doom. Orc Shamans with this and Windfury scare things to death. |
| 55 | Ice Baron's River (example) | (By the mid-50s, you may get something like Earthstrike (epic from Engi quest) or Diabolic Skiver (quest in EPL). The specifics matter less since 55-60 gets you into near end-game territory. Just know that by then, you want a weapon with ~35+ DPS minimum to comfortably finish leveling.) |
As you can see, weapon progression is critical. Don't hesitate to depart from your questing path to snag a weapon upgrade – it will pay off in faster, safer kills for many levels to come. Also consider carrying multiple weapons: one high-DPS 2H for maximum damage, and a 1H + Shield for tough situations. The ability to swap based on the situation is a big advantage for Shaman.
Best Professions for a Hardcore Shaman
Professions in Hardcore aren't just a gold-making sidebar – they can directly impact your survival. The right professions will supply you with consumables and gear that make the leveling process safer and smoother. Below we'll cover the top choices for a Shaman:
Herbalism + Alchemy ????????
Alchemy is often considered the #1 profession for Hardcore due to the sheer value of consumables. Being able to craft your own potions is like having an extra healing spell, extra mana, and bonus buffs on demand. Herbalism is the gathering skill to fuel Alchemy.
- Healing Potions: Instant emergency healing is absolutely vital. You will find herbs for Minor Rejuvenation and Healing Potions early on, and as you level Alchemy you'll always have the best healing potions you can use. Never worry about finding or buying potions – you'll make plenty.
- Mana Potions: Shaman fights can be mana-intensive if you use a lot of shocks and heals. A quick mana pot can let you drop that extra Earth Shock to finish a mob or cast one more Healing Wave to save yourself.
- Buff Elixirs: Alchemy provides elixirs that boost stats (Agility, Strength, Intellect, Defense, etc.) and resistance potions for situational use. You can keep an Elixir of Fortitude (HP boost) or Agility running to give you an edge while leveling.
- Utility Potions: Some potions can counter dangerous mechanics. For example, Free Action Potion makes you immune to stuns and slows for 30 seconds – extremely useful if you're facing mobs that net or stun (gnolls, spiders, etc.) or if you need to run away without being hampered. As a Shaman, being stunned is one of the worst things that can happen when you're trying to Ghost Wolf or heal – FAP prevents that. There are also Swiftness Potions (for a short sprint) and Limited Invulnerability Potions (brief immunity to physical damage) that can be lifesavers.
- Cheap Regen: Alchemy can make Jungle Remedy (anti-disease) and Mageblood Potions (+mana regen) etc., but those are higher level. Even early on, minor mana oil (later phases) or Spirit elixirs help reduce downtime.
The downside of Herbalism/Alchemy is you have to spend time gathering herbs in the wild, which can slow your leveling a bit. However, this gathering time often doubles as safe grinding/XP time and exploration. The safety net provided by endless potions is well worth it. Many Hardcore veterans rate Alchemy as a top-tier choice for almost every class.
Mining + Engineering ⛏️????
Engineering is the other top-tier profession for Hardcore players. Paired with Mining to gather materials, Engineering gives you access to powerful gadgets and explosives that can save your life or boost your combat:
- Explosives (Bombs/Grenades): Dynamite and grenades not only do burst AoE damage, they also stun or incapacitate targets briefly. For a Shaman who lacks hard stuns, this is incredibly useful. An Iron Grenade toss can stun a group of mobs for 3 seconds, allowing you to heal or run. It's essentially a ranged AoE interrupt – very handy if you pull a caster or need to stop a fleeing enemy.
- Target Dummy: The Mechanical Target Dummy is a crafted device that taunts all nearby enemies to attack it for 15 seconds (or until it dies). This is a literal lifesaver if you accidentally aggro more than you can handle. Drop a Target Dummy, and all the mobs switch to it, giving you time to either finish one off or just Ghost Wolf the heck out while they are busy. Think of it as a reusable super-Stoneclaw Totem (and it doesn't cost mana).
- Explosive Totem Combo: A fun trick – drop a Stoneclaw Totem and then immediately use a dynamite or grenade. The Stoneclaw will taunt enemies and clump them up, and the bomb will damage/stun them without you being hit. This combo can let you handle 2-3 mobs safely or at least soften them.
- Goblin Rocket Helmet / Net-o-Matic: Engineering offers quirky items like a charge-to-stun helmet or a net gun. These have failure chances but can be clutch if they work.
- Parachute Cloak, Ultra Boots, etc.: There are gadgets to slow fall (Parachute Cloak) or run faster. In later levels, Goblin Rocket Boots give a burst of speed – though they can malfunction, they might explode (not lethal, but something to be aware of).
- Compact Harvest Reaper (Mechanical pet): At Engineering 175, you can make a mechanical pet that fights for you for a short time. It's like having a temporary hunter pet – extra damage and another target for enemies to hit instead of you.
The downside to Engineering is it requires a lot of materials (ores, stones) and constant crafting to keep up with grenades and such. It's more upkeep than Alchemy, and you'll need to mine ore veins (which may take you into caves – be careful!). Also, Engineering items often have cooldowns or limited charges. But the utility and emergency value is arguably even greater than Alchemy – some Hardcore players swear by Engineering as the lifesaving profession.
Verdict: If you prioritize self-reliance and survivability, Alchemy/Herbalism is probably the best single set to pick. If you enjoy gadgets and have the presence of mind to use bombs and dummies, Engineering/Mining provides unparalleled panic buttons (and some offense too). You won't go wrong with either route, and if you're very keen, you could even do Herbalism + Mining while leveling and drop one at 60 to powerlevel the crafting skill of choice (this is a slower path though).
Skinning + Leatherworking ????????
A more low-maintenance choice, Skinning/Leatherworking can be useful early on but is generally a tier below Alch/Eng for Hardcore value.
- Skinning lets you collect leather from beasts you're killing anyway, with almost no extra time investment.
- Leatherworking then allows you to craft your own armor. Early on, you'll be wearing Leather armor (until 40), so being able to make yourself some green quality armor is nice. For example, you can craft Hillman's Shoulders in the 20s, which are decent shoulders at a time when you might otherwise only have grey or white ones. Shamans often struggle to find good mail or leather pieces while leveling, so crafting can fill in gaps.
- You can also craft armor kits to add a bit of armor to your gear – every little bit helps in Hardcore.
- In the late 30s, Leatherworking lets you make some Mail gear (once you hit 40 and can wear mail). There are a few good pieces, but many patterns require dungeon drops or rare materials.
- Post-40, you can specialize into Elemental/Tribal/Dragonscale Leatherworking, but frankly for an Enhancement Shaman the benefits are limited. The Dragonscale (mail) items like the Black Dragonscale set are hard to obtain in Hardcore (require farming dragon scales in higher-level zones). The Devilsaur Set (Tribal LW) is leather and more for rogues/hunters – plus hunting Devilsaurs in Un'Goro on Hardcore is asking for trouble (those dinos hit hard!).
Overall, Skinning/LW is easy to level and will gear you decently in the early and mid game, but it lacks the "oh crap" lifesaving items that Alchemy and Engineering provide. If you want a low-effort profession that passively improves your gear and provides some income (leathers sell decently to NPC or other players if trading were allowed), this is a fine choice. Just know that come end-game, you might envy those Engineers with their fancy tricks.
Other Professions:
- Tailoring: You might think "Shaman in cloth? No way!" But Tailoring isn't entirely crazy. It requires no gathering profession (uses cloth drops from humanoids) and can make you bags (which are extremely useful for more inventory space on a long Hardcore journey). Additionally, if you plan to heal in groups or maybe respec Elemental at 60, Tailoring can craft some Intellect gear (though most tailored gear is cloth armor, which you typically won't wear during combat). Some players take Tailoring just for the bags and then drop it – or keep it for fun. It's unconventional, but not without merit.
- Blacksmithing: Not recommended for Shaman. You can't wear plate (which BS focuses on after 40), and crafting weapons via Blacksmithing is usually not worth the investment – it's very material-intensive and you'll often find or quest a better weapon by the time you could craft one. Shamans simply don't rely on crafted weapons enough to justify the cost.
- Fishing & Cooking: These are secondary professions that everyone can (and in Hardcore, should) take. Cooking lets you turn creature meat into buff food – for example, at cooking 50 you can make Boiled Clams for +2 Stamina Spirit, later Roasted Quail for +6 Stam, etc. Buff food is free extra stats. Also, cooked food heals more health per tick when eating and saves money (since you caught it or farmed it). Fishing ties into cooking (catch fish to cook) and can also get you some interesting items in bottles, etc., but mostly it's a relaxing way to get food. It can be time-consuming, but setting aside some fishing time in safe areas can stock you with valuable food (and potions from fish like Blackmouth Oil).
- First Aid: Absolutely take First Aid! Even as a healer class. Bandages allow you to heal up faster and save your mana for when you really need it. In Hardcore, after a fight you might be low – it's often better to bandage to full than to spend mana on a Healing Wave (which might leave you oom if something else attacks). Also, you can use heavy bandages in combat if you get a window (for example, you Stoneclaw Totem or stun an enemy and quickly bandage up). First Aid can literally tick healing while you're still able to swing or move. Max it out as you level; the Anti-Venom it provides also cures poisons at higher levels, which is handy if you don't want to waste mana on Cure Poison.
In summary, Alchemy/Herbalism and Mining/Engineering are the top contenders for a Hardcore Shaman. They each provide incredible tools to minimize the risk of death – whether through constant potion healing or ingenious gadgets. Choose the combo that fits your playstyle. If you want maximum safety and self-healing, go Alchemy. If you love technical tricks and explosive solutions, go Engineering. Either way, don't neglect Cooking and First Aid on the side – every advantage matters in Hardcore.
Critical Survival Strategies (How Not to Die!)
Hardcore Classic is a marathon, not a sprint. As an Enhancement Shaman, you have many ways to survive dangerous situations, but you must use them proactively. Here we'll cover essential survival tips and strategies unique to Shamans (and some general Hardcore wisdom):
- Plan Your Pulls: Don't rush into fights without thinking. Use Line-of-Sight (LoS) and body pulling to your advantage:
- If there are multiple mobs close together, try to pull one at a time with a ranged ability. You have several options: Lightning Bolt is a good opener (it hits fairly hard and has a longer range than your shocks), or Earth Shock for an instant pull (and to interrupt if it's a caster). You can also pull with Lightning Shield – run near a mob with LS up and it will zap them – but that's less controlled.
- If mobs are clustered and linked, consider using Earthbind Totem to slow them and kite, or a Stoneclaw Totem to occupy one while you kill another. Stoneclaw works like a limited AoE taunt – nearby mobs will whack the totem instead of you for a few seconds.
- LoS pulling: If you need a caster enemy to come to you (so you don't fight it near other mobs), drop an Earthbind totem around a corner, then peek and Earth Shock the caster. This will force it to run at you (because it can't see you to cast if you hide behind a wall/tree). It will run into your totem's slow and be separated from its friends.
- Totem Management: Totems are incredibly useful for survival, but use them wisely:
- Stoneclaw Totem: As mentioned, it's basically a "poor man's Target Dummy" – it taunts mobs in an area to attack it. Use Stoneclaw when you accidentally pull an extra mob or two. It won't hold them forever (it has limited health), but it buys you time to either kill one mob or run away. Just remember: when Stoneclaw totem dies, those mobs will come back to you immediately. Have a plan for that (either you're far away by then, or you've healed up and only have one mob left to deal with).
- Earthbind Totem: An AoE slow in a 10-yard radius. Use this when fleeing or kiting tough enemies. Earthbind pulses its slow effect when first dropped and then every few seconds, so try to get some distance and let it pulse to snare the mob, then move further. Tip: If multiple mobs are chasing, drop Earthbind and then immediately Ghost Wolf – the slow plus your speed makes escape much easier. (Ghost Wolf + Earthbind is your go-to "run away!" combo.)
- Healing Stream Totem: Don't underestimate this little totem for long fights. It's not a massive heal, but over a fight it might heal you for a couple hundred health for essentially free (low mana). In Hardcore, every hit point matters.
- Magma / Fire Nova Totem: These totems do AoE damage and also generate threat on all nearby enemies when they activate. If you're being overwhelmed, dropping a Fire Nova Totem can immediately burst a group of mobs and possibly finish off ones that are low, and momentarily distract them (they often turn to smash the totem after the burst). This can give you a window to run or heal. Just be careful – Fire Nova has a 5 sec arming time, and Magma ticks over time; you might be better off using that time to run unless the damage will swing the fight.
- Tremor Totem: Always have this on your bars. Fear or sleep mechanics can be a death sentence in Hardcore (imagine getting Feared into more mobs… yikes). Tremor Totem pulses every few seconds to break fear, charm, or sleep. Use it whenever you fight mobs that can fear (Undead priests, some elites like Son of Arugal, etc.). It's not instant, but it will break you out of CC faster so you can regain control.
- Grounding Totem: At level 30, you get this Air totem spell. Grounding Totem will absorb one harmful spell cast at you (or party) every few seconds. This is extremely useful vs caster mobs or if you accidentally aggro something like a caster while dealing with another – drop Grounding to intercept any big nuke they throw. It has a short cooldown but can negate a fireball or shadow bolt that might have chunked 30% of your HP.
- Fire Resistance / Frost Resistance Totems: situational, but if you're going to tangle with dragon whelps (fire breath) or winter mobs (frostbolts), these totems can cut incoming magic damage by a lot.
- Totem Range & Awareness: Remember, totems only work within a certain radius (usually 20 yards). If you leash or run too far, they stop helping you. Also, if you leave a totem behind and it aggroes a new mob after you've run off, that mob will kill the totem then come sprinting for you!. A common Hardcore Shaman mistake is forgetting a totem in a camp – when its effect (like Earthbind slow) hits a patrolling mob, you suddenly have an unexpected angry mob chasing you. Solution: Destroy totems when you're done with them (you can replace an existing totem by dropping another of the same element, or right-click the totem's button if using an addon like TotemTimers). Or just be mindful of your totem's duration and range.
- Frost Shock Kiting: Your Frost Shock (rank 1) is an incredible kiting tool. It applies a 50% slow for 8 seconds (same slow % and duration for all ranks) on a 6 second cooldown. That means you can perma-slow a target by using Frost Shock on cooldown. A great tactic for a tough melee mob is to shock it, then run a bit, let your cooldown come up, shock again... you can "tag kite" it indefinitely if you have room and mana. This is useful for high-level elites or mobs you just can't face-tank. Pro tip: stick to Rank 1 Frost Shock for kiting – higher ranks do more damage but cost a lot more mana, and the slow effect is the same. Using rank 1 saves mana for a process that might take many shocks.
- Ghost Wolf = Panic Button: With Improved Ghost Wolf, you have a 1-second cast that gives +40% movement speed (outdoors only). This is your bread-and-butter escape ability. If a fight is going south (mana nearly gone, health low, more mobs inc), drop an Earthbind totem and hit Ghost Wolf. Because Ghost Wolf is so fast to cast with talents, you can often do it even in combat unless you're being smacked by multiple fast-hitting mobs (spell pushback could prevent it if 3 mobs are on you at once). In those cases, a War Stomp (Tauren racial) can secure your Ghost Wolf cast free of pushback. Once you're a wolf, run until you're safe. Do note: You cannot Ghost Wolf indoors or in caves. Because of that, caves are the most dangerous places in Hardcore. Always be extremely careful in caves/tunnels, since your best escape tool is off the table. In a cave, you have to rely on potions, totems, perhaps a target dummy or swiftness potion, because you can't mount or Ghost Wolf out. So think twice before going into an enclosed area with only one exit!
- Reincarnation (Ankh): Shaman's unique ability Reincarnation gives you a free self-resurrection every hour (with talents it can be 40 min cooldown, but we usually won't have Improved Reinc in our build). This is a blessing in Hardcore, but use it wisely:
- Always carry Ankh reagents. Reincarnation requires an Ankhs in your inventory. It's cheap and sold at reagent vendors – stock up a few and always have them on you. Don't be the Shaman who dies and can't reincarnate because you forgot to buy an Ankh.
- Be aware of the cooldown. If you reincarnated recently, play extra safe for the next hour. It's easy to feel invincible with an "extra life," but it's not always available.
- Plan the use: If you find yourself in a hopeless situation (e.g., you're definitely going to die), you might mentally prepare to reincarnate. Ideally, try to die somewhere safe if you can manage it (for example, if you have 2 mobs on you and can't escape, you might try to run far away from where you pulled them even if it means you die en route, so that when you reincarnate, those mobs have reset and you're in a clear area). If you just stand and die, the mobs will camp your corpse and kill you immediately when you rez. It's a grim thing to plan your death, but a well-planned "death and Reincarnate" can save your run.
- Reincarnating counts as a death in official Hardcore? – There is some debate, but on official Blizzard Hardcore servers, using Reincarnation does NOT end your run as long as you don't release spirit. You will get a "death" in your statistics, and you won't earn the "No Deaths" achievements, but you can continue playing. In the context of just reaching 60 alive, Reincarnation is allowed. So don't hesitate to use it if it's do-or-die. But treat it as a last resort – it's much better to never get to the point of dying in the first place.
- After Reincarnating, remember you come back at low health and mana. The first thing you should do is get to a safe spot (use a potion or Healthstone immediately if any danger still lurks) and heal up. A mistake would be Reincarnating and then getting punched by the same mob and dying again instantly – that will be the end. So only Reincarnate when it'll actually help: either the mob(s) that killed you have reset or are nearly dead or someone can peel them off you.
- Use Your Potions Early: A common newbie error is hoarding potions or waiting too long thinking "I can survive without using it." In Hardcore, drink that potion sooner rather than later. Health potions have a cooldown (2 minutes) and you might need a second one if the fight drags on or another mob adds. If you drop below 35-40% health, that's a good time to pot. Don't wait until you're at 5% – a random crit can finish you off. Same goes for Mana potions when you need mana for a heal or shock to finish a mob.
- Keep Healing Surge (Lesser Healing Wave) Ready: As Enhancement, you won't be casting healing spells a lot during combat (it costs DPS time and mana), but in an emergency you might need a fast heal. Lesser Healing Wave is quick but heals for less; Healing Wave is big but slower. If you took Healing Focus in Restoration tree, you have a 70% chance to avoid interruption while casting heals – this is a boon for clutch self-heals under attack. If you didn't, consider using a Major Healing Potion then a heal, rather than trying to cast a big heal at low health (the potion gives you a buffer of health so you don't die mid-cast).
- Elemental Resistance: As a Shaman, you can cure Poison and Disease on yourself (and others) with Cure Poison/Cure Disease spells. Use them! Poison DoTs from spiders or scorpions can really eat your health – don't let them tick if you have the cure available. You also have Water Breathing and Water Walking from your Water totem quests – use Water Walking to avoid unnecessary swims (you don't want to be caught by murlocs in the water, and you can also fish while standing on water which is neat). Use Water Breathing whenever diving; drowning is a stupid way to die in Hardcore. If you don't have a potion or spell, at least watch your breath bar.
- Know When to Run: Perhaps the most important Hardcore skill: the moment you suspect a fight might be lost, disengage. It's better to run and reset (even if it's a big time loss) than to risk it all on barely surviving. Shamans have tools to safely disengage – Earthbind, Stoneclaw, Frost Shock, Ghost Wolf, Grenades, etc., so use them as soon as you feel the tide turning against you. For example, you're at half health and another add joins the fight – don't try to be a hero. Drop Stoneclaw (to taunt one), Frost Shock the other to slow it, Ghost Wolf and get out. You can come back in 5 minutes and try again when things have reset, but you can't come back at all if you're dead.
By layering these strategies, a Shaman becomes extremely hard to kill. You have the tools to handle almost any situation – just remember to actually use them. In Hardcore, complacency is your worst enemy. Treat every encounter with respect, keep your buffs (Lightning Shield, weapon imbues, totems) up, and have an escape route in mind at all times. "Hope for the best, plan for the worst" is the Hardcore motto. As a Shaman, the elements are on your side – so play smart and you'll live to tell the tales of your journey.
Group Play and Solo Play Tips
Shamans excel in both solo and group scenarios, but your approach will differ slightly:
Solo Play Tips
When adventuring solo, your focus is on controlled pulling, efficient killing, and minimal downtime, all while erring on the side of caution. Many of the survival tips above apply double for solo play (since you have no backup if things go wrong). Here are some solo-specific pointers:
- Pull with Lightning Bolt (if at range) or Earth Shock (for an instant pull/interrupt). If the mob is ranged, you might LoS pull as mentioned.
- Start meleeing with your weapon buff active (Rockbiter up to lvl 29, then switch to Windfury Weapon at 30 for big procs). Windfury proc can one-shot lower enemies or heavily chunk higher ones, turning the tide fast.
- Drop a Searing Totem if you expect the fight to last more than ~10 seconds or you might chain into another fight. Searing Totem adds steady DPS and can help finish off a fleeing enemy. Caution: Searing Totem will shoot any enemy that's in range, even ones you haven't attacked. So in areas with tightly packed mobs, be careful – it might inadvertently tag a neutral or a second mob if your main target flees near them. In safer open areas, it's a nice DPS increase.
- Use Earth Shock as a finisher or interrupt. Earth Shock does high instant damage (especially if you haven't used a shock in the pull), and it's great to stop enemy casters or to prevent a runner from yelling for help. If the mob will live long enough to cast again, save Earth Shock for that interrupt; if not, blast them.
- Maintain Lightning Shield on yourself for extra damage. It's very efficient damage-per-mana (especially with the talent points in it). Each orb that hits the enemy is bonus damage while you continue to melee. Just be mindful: if you body-pull another mob with Lightning Shield up, LS will zap it and aggro it immediately. So don't run too close to others with LS on.
- Healing: Ideally, you kill the mob without needing to heal mid-fight. As Enhancement your damage output and shields should carry you. After combat, heal yourself with a bandage or small Healing Wave so you start the next fight topped off. Regenerate mana via drinking if needed.
- Mana Management: Solo, you can't rely on others for mana regen (like blessing of wisdom, etc.), so manage your mana carefully. Enhancement's advantage is you don't need to cast much to kill things. Limit your Shock usage to important moments. If a mob is <20% HP, it might be better to auto-attack a few more times than spend mana on a shock – save that mana for an emergency heal or the next pull. You can also weave in auto-attacks between casts to let the 5-second rule give you some mana regen mid-fight (cast spells in bursts then melee). With some Spirit on your gear, this technique helps (Shamans benefit nicely from Spirit regen while fighting in melee due to this downtime between casts).
Inventory Prep: Solo players should carry plenty of reagents (Ankh, Fish Oil for Water Breathing and Fish Scales for Water Walking – have a few if needed). Also carry extra healing/mana potions and bandages. No one will be trading you healthstones or anything, so your self-sufficiency is key.
Group Play Tips
When playing in a group (whether a duo partner in open world or a full group in dungeons), your Shaman's role can shift depending on the composition. Enhancement Shamans can deal damage and off-heal, and your totems provide huge support to your team. Here's how to be an asset in group play:
Be ready to heal if needed. In Hardcore, groups are often grateful just to have a healer at all. Even if you are Enhancement spec, you can heal most leveling dungeons or group quests with a decent mana pool and use of totems (Mana Spring, etc.). Let your group know what you're comfortable doing. If you have a pure healer (like a Priest) along, then you can swing your hammer and be DPS; if not, you might have to take the healer role by default. Shamans are excellent off-healers because you can DPS in easier pulls and spot-heal when things get rough.
| Totem Type | Recommendations | Group Benefit |
|---|---|---|
| Air Totems | Windfury Totem (lvl 32) | Godly for melee groups - gives party members 20% chance for extra attack. Warriors and Rogues love this. |
| Earth Totems | Strength of Earth Totem (lvl 8) | Boosts strength for everyone. Use it if you have any physical damage dealers. |
| Air Totems | Grace of Air Totem (lvl 42) | Gives +Agility - great for dodge and crit, especially for rogues and hunters. |
| Water Totems | Mana Spring Totem vs Healing Stream | Mana Spring is often more useful if your healer or casters need mana. Use Healing Stream if mana is fine and party could use passive healing. |
Crowd Control and Utility:
Shamans don't have traditional CC like polymorph or sap, but you do have tools:
- Purge: In group content, be the purge-bot. Many mobs (and bosses) will buff themselves or shield or enrage. Your Purge can remove those beneficial buffs. For example, purge a Shadowform off a troll priest or a Lightning Shield off an enemy Shaman. This makes the fight safer for everyone.
- Interrupts: Earth Shock is one of the best interrupts in Classic (instant, only 6 sec cooldown if talented in Reverberation). In dungeons, coordinate to interrupt dangerous casts. You can take turns with a rogue's Kick or a mage's Counterspell.
- Off-tanking: While you're not a tank, in a pinch you can temporarily tank an extra mob (especially if you have a shield equipped). If an extra mob peels to the healer, you can Earth Shock (rank 1) it – Earth Shock generates high threat, especially with Rockbiter Weapon on. You might pull it off the squishy and onto you. Then you can either kite it with frost shock or tank it a few seconds until the group can assist. Also, drop Stoneclaw Totem to help tank multiple adds – it's surprisingly helpful even in 5-man content to clump/control adds for a moment.
- Ankh in Group: If you die during a dungeon or group fight, remember you have reincarnation. In Hardcore, you really don't want to die at all, but if it happens and it's a wipe scenario, you popping back up could save the group. You could resurrect others if the mobs reset. Some coordinated hardcore groups even have the shaman purposely die at a safe spot to use Ankh and rez others if a wipe is unavoidable – but that's an advanced tactic (and losing your no-death achievement if you care). Regardless, communicate: if the fight's gone sour and people are going down, you might call out "I'll Ankh if we wipe" and try to run to a safe corner before you die so you can res after.
If you're leveling as a duo with someone, Shaman is amazing support. Some of the best duos in Hardcore are Shaman + Warrior or Shaman + Rogue, because you buff them with Windfury/Strength and can heal, while they provide consistent damage and some CC (warrior's stuns, rogue's stuns/sap). In a Shaman + Hunter duo, you bolster the hunter's pet and cover each other's weaknesses (you can melee alongside the pet and heal it; hunter provides ranged DPS). Shaman + Warlock or Mage is also strong – you act as a frontline and healer while they destroy things from range. Just adapt your play: if you duo with a caster, be ready to tank a bit and use Earth Shock to interrupt mobs chasing your partner; if you duo with melee, maximize their damage with totems and maybe let them tank while you support.
Share the load: In duo, alternate who pulls or takes initial aggro so one person isn't always getting beat on. Shamans can start a fight with Lightning Bolt and then let the other person take over threat by the time the mob reaches – or vice versa, a hunter pulls and you catch the mob as it arrives with an Earth Shock.
Safer Together: Having a duo partner in Hardcore makes many things safer – you can handle accidental adds more easily, and you can rez each other (if one's a Shaman or a Pally with soulstone – not applicable in Classic for Alliance). As a Shaman specifically, you bring so much utility that almost any class pairs well with you. So if you have a friend to duo with, go for it! Just remember to still not get overconfident – two dead heroes is still a delete.
Communication: If you're the only one who can cure poison (in group with no druid/paladin), or if you have Tremor Totem for a fear boss, let your team know what you're doing. E.g., "I'll drop Tremor Totem, so if feared run back to it" or "I can cure poison, call out if you need one cleansed." This kind of teamwork makes group play smoother and safer for all.
In summary, solo play for a Shaman is about measured, efficient combat and using your full toolkit to avoid sticky situations. Group play leverages your support abilities – totems, off-heals, utility – to help the whole party survive and succeed. Many Hardcore players consider a Shaman in the group a blessing for the buffs and flexibility they bring. Whether alone or with allies, a well-played Shaman is an asset and has a high chance of making it through challenges alive.
Consumables and Totem Management
We touched on consumables in the Professions section, but let's emphasize the key consumables and how to manage them, along with some totem-specific management tips (since totems are basically a Shaman's version of consumables on the go!):
Must-Have Consumables for Hardcore Shaman
- Healing Potions: Always, always have a stack of the best Healing Potions you can use. Minor (lvl 5), Lesser (lvl 14), Greater (lvl 22), Major (lvl 35) – keep upgrading. These are your emergency heal when things go wrong or when you need to save mana. If Alchemy is your profession, you'll be swimming in these. If not, farm the herbs or keep an eye out from mob drops. In Hardcore, a single potion can be the difference between life and death.
- Mana Potions: Particularly useful if you find yourself OOM mid-fight and need to heal or Shock. Even minor mana potions (50-100 mana) can enable one more Earth Shock or heal. As you level, get better ones. Don't waste major mana pots on trivial fights – save for "oh crap" moments or boss fights.
- Rejuvenation Potions: These restore both health and mana (albeit less of each). They are nice for efficiency and double duty, though they share cooldown with healing/mana pots (all are on the same two-minute timer). If you have them, consider using Rejuvenation pots in protracted fights where you know you'll need both resources (but if it's truly dire, a straight Healing pot is usually better for immediate life-saving).
- Protection Potions: These are often overlooked. Alchemy can produce various Protection Potions (Shadow Prot, Frost Prot, etc.) which absorb damage of that type. If you know you're going to fight say a fire elemental or a bunch of plague zombies, chugging the appropriate protection potion before the fight can significantly reduce damage taken. For example, Shadow Protection pot before fighting Mor'Ladim (hits with shadow) or Holy Protection if dealing with those crazy Paladins in Scarlet Monastery (Holy damage).
- Elixirs (Buffs):
- Elixir of Fortitude: +120 health. That's like 12 stamina. Very nice buff at lower levels especially.
- Elixir of Lesser Agility: +8 Agi (at low level) or later Elixir of Agility: +15 Agi. Agility = crit + armor + dodge, all good for you.
- Elixir of Greater Defense: +250 armor for 1 hour. 250 armor is roughly 4-5% physical damage reduction at level 30-ish. Very useful if you anticipate heavy combat.
- Elixir of Water Breathing: not needed since Shaman has Water Breathing spell.
- Gift of Arthas: a neat elixir that gives +10 Shadow resist and has a chance to disease any attacker (reducing their damage). Situational, but if you have it, can use vs heavy hitters.
- Note: You can have one "Battle" and one "Guardian" elixir up at once. For example, Agility (battle) and Defense (guardian) stack. Use that to maximize buffs.
- Scrolls: Pick up any scrolls you find (Scroll of Stamina, Protection, Strength, Spirit, etc.). They can be used alongside elixirs and totems (most stack with everything). Before a tough fight, pop a Scroll of Stamina for a bit more HP, or a Scroll of Spirit to regen faster. Scroll of Protection gives a tiny armor buff that might make a difference. They drop from mobs or chests often – don't just vendor them, use them!
- Food & First Aid:
- Bandages: We mentioned it but to reiterate: keep your bandages current (silk, mageweave, runecloth as you progress). Use them to save mana between fights. Also use them in emergencies with clever tactics (e.g., Stoneclaw and then bandage while the mobs hit the totem).
- Food: Carry food to eat and regen health. If you have cooking, use that tasty cooked food (because cooked food often gives the "Well Fed" buff increasing a stat). For example, Roasted Quail at cooking 175 gives +7 Stamina if well-fed. That buff lasts 15 minutes. That's a mini Fortitude buff you can have up all the time essentially for free. Always aim to be "Well Fed" – it's free stats. High-level foods give even +12 or + stamina, which is huge in Hardcore.
- Mana regen drinks: Obviously, always have water. Buy or make (if you have a Mage friend make you some). Never be afraid to sit and drink – a 30-second drink break is nothing compared to a corpse run from dying by pushing with low mana.
- Limited Invulnerability Potion (LIP): At higher levels, this potion makes you immune to physical damage for a short duration (~6 seconds). It's extremely OP if used right. For example, if you accidentally pull 3 melee mobs at level 50, you pop LIP and they can't hurt you for 6 sec – giving you time to drop all your totems, heal, or even just run. It doesn't stop magic damage, but most mobs are physical. These are usually crafted by Alchemists or found rarely. If you get some, put them on an easy hotkey for panic moments.
- Swiftness Potion: +50% run speed for 15 seconds. It doesn't cancel Ghost Wolf, but you can't use Ghost Wolf at same time (potions are instant though, Ghost Wolf is a cast). Swiftness pot is usable indoors, whereas Wolf is not – that's a big deal. Save a couple swiftness potions for "indoor escapes" or if Ghost Wolf is on cooldown (just kidding, Ghost Wolf no CD, but sometimes you need immediate speed right now and can't even spare 1 second to cast Wolf). They're low level (Alchemy around 60) so you can have these fairly early.
- Free Action Potion (FAP): We mentioned it in Professions but it deserves a spot here. Free Action Potion lasts 30 seconds making you immune to stuns and movement impairing effects. That means while it's up, you cannot be stunned, rooted, or slowed. In Hardcore, that is godly when fighting things like Basilisks (who can stun), Netherwing (nets), or even PvP situations. Also, if you ever decide to do a dungeon like Maraudon, FAP is commonly used on the Princess Theradras fight to avoid her slow/stomp effects. For Shaman, if you need to guarantee a Ghost Wolf escape, pop a FAP then Ghost Wolf – now nothing can stop you from running for 30 sec except death. Keep a couple on you once you can make or acquire them.
- Restorative Potion: Another high-end alchemy potion that removes one magic, curse, poison, or disease every few seconds. Not commonly needed, but could be useful if fighting things that stack nasty DoTs (like multiple debuffs).
- Whipper Root Tuber, Night Dragon's Breath, etc.: If you venture into Felwood, there are consumables from the plants there (Whipper Root Tuber is a reusable instant heal, Night Dragon's Breath gives mana+small heal). These are excellent free consumables – consider doing the cleansing quests in Felwood to get some if you reach high 40s.
Advanced Totem Management
We already covered many totem tactics, but let's summarize and add any additional nuance:
| Totem Strategy | Description |
|---|---|
| Rotation of Totems | You have four totem element slots (Earth, Fire, Water, Air). You can have one of each down at any time. It costs quite a bit of mana to drop all four, and you rarely need to. Typically, you'll drop 1–2 totems for most fights (whatever is most relevant: e.g., Strength of Earth and Searing Totem while solo). In a dungeon, you might drop all four for maximum party buffs. |
| Recasting Totems | In Classic, there is no totemic recall. If you want to move and bring your totems along, you have to destroy them (by re-dropping a totem of that element or right-clicking their icon) and then spend mana to place them again at the new spot. This can be mana-intensive. Be judicious: if you're only moving a short way and might come back, maybe leave them. |
| Totem Threat Quirks | Stoneclaw, Magma, Fire Nova generate threat. One detail: Fire Nova Totem, when it explodes, generates a lot of threat on all affected mobs – enough that they often turn and kill you right after they smash the totem (because the threat from the totem transfers to you when it dies). |
| Positioning Totems | You can control somewhat where a totem spawns relative to you. If you're trying to avoid pulling an unwanted group, drop your combat totems (like Magma or Searing) away from that group. If extra mobs are to your left, position yourself so your fire totem is on your right side when you drop it. |
Totem Stomping in PvP: Not relevant to Hardcore PvE, but in case you do duel or something, know that players often kill totems quickly (since they have 5 health). However, mobs won't specifically target your healing or buff totems unless provoked, they usually only smack totems that actively taunt or damage them. So don't worry, a gnoll isn't going to wander over to kill your Grace of Air totem just for fun – only if you drop it in its face as you run.
Totem Macros/Addons: Consider using an addon like TotemTimers or similar. This will show you timers for each totem's duration and when they will expire, as well as allow one-click destruction or recast. It's very handy to keep track, especially for things like Tremor Totem pulses (so you know if one tick just happened, you have ~3 seconds till next – useful for timing fears) and Mana Spring ticks.
Fire Totem Sacrifice: Similarly, if you have multiple mobs low on HP, a Fire Nova totem can finish them off simultaneously, even if you have to trade some of your health to do it. In non-Hardcore, Shaman sometimes suicide-nova packs of mobs for efficiency; in Hardcore you'd better be sure it will kill them and not you. But say two mobs are both one hit away and you're also one hit away – dropping a Fire Nova will kill them in 5 sec, you just need to live that long or survive their one more hit. If they kill you exactly as Nova goes off and wipes them, you could then Ankh. Pretty extreme scenario, but keep that bag of tricks open!
Overall, mastering totem management sets apart a great Shaman from a good one. They are an extension of your character – extra "members" of your party, so to speak. Treat them with the same tactical consideration you'd treat another player or pet. With good totem use and plenty of consumables at your disposal, you'll be prepared for most hardships Hardcore can throw at you.
Key Zones and Quests for Safe Leveling
Leveling in Hardcore isn't just about how you fight, but where you fight. Some zones are far more dangerous than others due to mob abilities, terrain, or elite presence. Below is guidance on choosing safer leveling zones and spotlighting some key questlines (especially those with good rewards) that are worth doing for a Shaman. This will be mostly from a Horde perspective (since Shaman is Horde in Classic).
Safer Leveling Zones:
1-10: Your starting zone
Durotar for Orc/Troll, Mulgore for Tauren) is straightforward. Do all the starter quests; they teach you class skills and are pretty low risk. Just avoid venturing too far into higher level subzones (e.g., don't go running into Razormane camps in Durotar at level 5). Both starting areas are quite safe if you follow the quest progression. At level 4 you get your Call of Earth totem quest – do it, it's easy and gives you Earth Totem (Stoneclaw and Earthbind come from that).
10-20: The Barrens
The Barrens is a Horde favorite. It's wide open, relatively flat (good visibility), and quests are abundant and not too deadly if you're careful. Biggest dangers in Barrens:
- The Oasis quests (Kolkar bosses) – watch out for Verog and Barak, they're surrounded by many adds.
- Wailing Caverns area has elites outside, steer clear unless doing dungeon.
- Southsea Freebooters (pirates) around 14-16: they sometimes swarm, pull carefully.
- Barrens has a few roaming neutral beasts (like the Kodo and Savannah Prowlers) but nothing crazy.
- The quest Counterattack! spawns a wave event including a level 16 elite. Many hardcore players skip Counterattack! or come back at 20+ to do it safely, as it can overwhelm an unsuspecting player.
- Otherwise, Barrens is great. Camp Taurajo quests at 15-20 also safe if careful (Thunder lizards have a stun, but you can FAP or avoid).
- You can also dip into Stonetalon Mountains around 15-16 – it's quite safe if you stick to the path and do the quests at Malaka'jin and Sun Rock Retreat. Stonetalon has many non-elite quests that Horde often skip (so it's quieter) and not many surprise hazards. Just be cautious around Boulderslide Ravine (earth elemental cave, can overwhelm if you dive too deep).
20-25: Hillsbrad Foothills
Hillsbrad Foothills is a good zone in this range for Horde. You have Tarren Mill quest hub. Hillsbrad field farmers are easy humanoids to fight (just watch for the call for help mechanic – they sometimes spawn 2 adds when low). Azurelode Mine murlocs can be net-happy, but you're a Shaman with Earthbind/Ghost Wolf – nets are annoying but with Healing and totems you can manage. There is an infamous roaming monster Yetimus (a level 30 yeti) in Hillsbrad – if you go to the yeti cave area for quests, be very alert for him as he can one-shot low 20s.
- Also avoid the Dalaran area (many caster mobs, they can be done carefully but are higher level and social aggro).
- Hillsbrad also leads to Alterac Mountains (stay away until you're much higher; lots of high 30s ogres).
- Keep in mind Hillsbrad PvP quest chain flags you for PvP (not an issue if on PvE server, but on hardcore it might not matter unless griefers, but on official HC PvP flags can be scary due to grief potential).
- Stonetalon (mid section around 20-25) continues to be decent – the Venture Co. mine quests are okay if careful.
- Thousand Needles at 25: a good zone because it's wide open and you can often outrun things (just don't fall off the cliffs!). The main concern is the Galak centaur camps can swarm if you charge in. Use Earthbind and ranged pulling to separate them. There's also a notorious quest Homeward Bound escort with a speedy NPC – can be dangerous if you're not prepared, consider skipping escorts unless you outlevel them.
25-30: Arathi Highlands and Desolace
Arathi Highlands maybe around 30 for some quests (but Stromgarde Keep is full of elites and dangerous). Desolace at 30 is a decent spot – it's mostly open and mobs are spaced out. Quests are a bit spread out too. The centaur factions can be done diplomatically (pick one side and only fight the other to avoid too many enemies).
30-40: Dustwallow Marsh and Beyond
Good zones here include Dustwallow Marsh (many quests around Brackenwall are on relatively spaced mobs; just be careful of Theramore deserter camps, they have multi pulls). Dustwallow has that huge dragon (level 55) in the northwest – but he stays in his ruins mostly; don't go near those ruins obviously.
- Badlands (~40): wide open, but mobs hit hard (lot of basilisks, cougars). The quests with coyotes and rock elementals are fine, just avoid the elite areas (Angor Fortress is dangerous).
- Tanaris (40-50): a pretty safe zone. Tanaris has spread out mobs. The pirates can come in packs but you can pull carefully. No random elites (except Caliph Scorpidsting – but he's quest target and static). Just watch out for giant Gahz'rilla if you do ZF (dungeon).
- Feralas (40-50): nice and green, mobs reasonably spaced except gnoll camps. The woodpoker ogres quest in Feralas can be tough (they net and have spellcasters). But generally okay.
- Hinterlands (45-50): one of my personal favorites. The troll mobs are spread out among ruins, and you can take them one by one. Some are casters (purge their self-renew buff). Just avoid Jintha'Alor (the big troll city) unless you have a group – that's an elite area.
- Felwood (48-55): considered relatively safe for a high-level zone. The wildlife and satyrs are straightforward; just don't stray into the "dead areas" with elites or the Furbolg tunnels if not prepared. Felwood has good grinding spots if you need XP without quest risk.
- Western Plaguelands (50-58): parts of WPL are doable (like Sorrow Hill skeletons, fungal vale slimes) but other parts (Andorhal, etc.) have mobs that can swarm. Eastern Plaguelands and Burning Steppes have more elites and dangerous stuff, be cautious or skip until you're strong or in a group.
Dungeons:
Each dungeon has its own hazards. In Hardcore, doing dungeons is often more dangerous than questing, because one mistake can kill the whole group. That said, dungeon loot and quests can be very rewarding (Corpsemaker from RFK, for example). If you do dungeons, go with a trusted group (friends or guildies ideally) and slightly over-level it to be safe. Shamans are great in dungeons as healers or support, just be extra mindful of patrols, boss mechanics, and line of sight pulls. Some dungeon-specific tips:
| Dungeon | Level Range | Key Dangers |
|---|---|---|
| RFC | 15-16+ | Pretty safe for Horde if everyone is level 15-16+. Just watch the lava (falling in can be lethal). |
| WC | 17-20 | Long dungeon, lots of patrols, don't swim in the eeries if you can avoid it (drowning or pulling too many murlocs). |
| SFK | 22-25 | Watch out for the cursed zones (Wolf Master Nandos area has many adds). |
| SM | 30-40 | Cathedral is extremely deadly if you overpull the final room. Many Hardcore deaths happen there due to one person body pulling too many Scarlet mobs. Only attempt with a coordinated plan (LoS pulling to the foyer, clearing slowly). |
| ZF | 44-46 | Avoid if possible the stair event (mass waves can overwhelm). Many skip it, or do it only with a very solid plan. |
| Mara | 46-52 | Princess Theradras' knockback and AoE can kill if healer is not ready; also packs of lashers can surprise. |
| BRD+ | 50+ | Honestly, at 50+ your heart rate will be up in any dungeon. Many Hardcore players skip final dungeons entirely and just grind or do quests to 60, because the risk is high. |
Key Shaman-Specific Quests:
Totem Quests:
Do all your totem quests as you level:
- Call of Earth (level 4) – easy starter, grants Earth Totem.
- Call of Fire (level 10) – more involved (Barrens -> Durotar hidden path, etc.). Some running, a bit of fighting an elemental. Reward: Fire Totem.
- Call of Water (level 20) – infamous long quest chain. It sends you across the world: Barrens -> Ashenvale -> Thousand Needles -> Silverpine, etc. It's tedious but not particularly dangerous if you over-level it slightly. Just lots of running. The reward is Water Totem which lets you use Healing Stream and Mana Spring – very important for reducing downtime and aiding in healing. Tip: You can delay Call of Water until your mid-20s to make the fights trivial and the travel safer (less aggro running through zones). But definitely do it before 30.
- Call of Air (level 30) – much simpler than water. You'll go to Thousand Needles and get your Air Totem. At the end, you receive a nifty 1-hour buff that gives +40% move speed and +30% attack speed (kind of like a mini Bloodlust) – enjoy that while it lasts! More importantly, Air Totem unlocks Windfury Totem, Grace of Air, Grounding, etc., which are awesome. There's virtually no combat in Call of Air, just some travel.
Class Quest (Level 50): At level 50, every class in Classic gets a special quest (usually starting from your trainer) that yields a nice item. The Shaman one is "Killimdor's Revenge" - check with your Shaman trainer for details. If it requires a dungeon (LBRS has one part for Shaman for the gem), you might or might not do it depending on Hardcore stance on dungeons at that level. Not vital to survive 1-60, but nice if you get it.
Weapon quests:
There aren't specific weapon quests for Shaman like Paladin/Warlock have, but some general ones to note:
- Some Horde quest chains give great weapons (we listed them in the weapon section). For example, "Betrayed" in Azshara (level 51+ chain) culminating in Belgrom's Hammer.
- Maraudon Scepter questline: The Corruption of Earth and Seed chain gives multiple reward choices, one is a decent 2H mace for Shaman.
Safe XP Quests:
- Delivery Quests: Any quest that just needs you to deliver a package or speak to an NPC is free XP and usually safe. Do them! For instance, "Deliver to Splintertree Post" etc. They often chain into other quests too.
- "Kill X of Y" quests in open zones are generally safer than "collect 20 ears" in a cave. Use your judgment – if a quest sends you into an enclosed space full of mobs (like gnoll tunnels or caves), evaluate if you can handle it. Caves are lethal because mobs respawn behind you and pathing can surprise you. If you go in, have an exit strategy, and don't linger after completing the objective.
- Elite Quests: Some early elite quests become soloable if you outlevel them enough. For example, Test of Strength in Barrens (killing Mushlump, a lvl 21 elite fungus monster) – at 28 you might solo it. Use caution even then. Generally, if a quest suggests a group and you're Hardcore solo, skip it or come back 5+ levels later.
Avoid Risky Quests:
A few notorious quests to possibly avoid:
| Quest | Reason to Avoid |
|---|---|
| The Venture Co. Shredder in Northern Stranglethorn | Requires going into the Venture Co. base, mobs net and come in packs. |
| Blood Elf Reclaimers quest in Arathi | Those elves have nasty spell damage and there are stealthed ones. |
| Any escort quest where the NPC runs ahead | Escorts are unpredictable; if you do them, be prepared for multiple mobs and protect the NPC. |
| The Crown of Will chain (Hillsbrad into Alterac) | Ends in a tough area with many mobs. |
| Hartus Thunderaxe quest | 85 Elite dragon in Swamp of Sorrows – obviously no. |
| The Spider God (Stonetalon) | Fighting a high level elite spider in a cave is no fun alone. |
| Uldaman Staff quest | Requires digging up something surrounded by elites, skip unless doing with a group. |
Prioritize quests that give good gear upgrades (we listed many in gear section), as those make you stronger and indirectly safer. And try to maintain a questing path that keeps you in yellow or green difficulty quests, rather than orange/red quests. If everything in a zone is starting to be 3-4 levels above you, consider grinding a level or moving to another zone to do slightly lower level quests. Leveling a tad slower is fine – dying means no leveling at all.
Rotations and Ability Usage Tips
Playing a Shaman effectively involves knowing which ability to use when. Unlike some classes, you don't have a rigid rotation at all times – you'll adjust based on the situation. However, let's break down common scenarios and the ideal ability usage for each:
Standard Solo Fight Rotation (Single Mob)
- Buff Up: Before engaging, ensure you have Lightning Shield active and your weapon is imbued (Rockbiter until 30, then usually Windfury). Also drop Strength of Earth Totem if you have time/mana – its buff persists for a bit even if you move out of range.
- Pull: Use Lightning Bolt from max range to pull the mob. If done properly, you can often get a second Lightning Bolt off before the mob reaches you. Two Lightning Bolts will chunk a big portion of its health. If you prefer conserving mana or the mob is low HP, you can body-pull and save mana for shocks.
- Melee and Shock: Engage in melee. Immediately after your first swing, you might drop a Searing Totem (if the fight is going to last a while). During melee, use Earth Shock as needed: If the mob is a caster, save Earth Shock to interrupt its cast (Earth Shock causes a 2 second school lockout on the target – very useful). If the mob is melee and hits hard, you might instead use Frost Shock to kite a bit or slow its attack rate. If the mob is fleeing, Earth Shock it to finish it or Frost Shock to snare it. If none of the above, Earth Shock on cooldown is your highest DPS shock.
- Totems in Combat: If fighting a tougher foe, consider dropping Stoneclaw Totem when it's off cooldown to give yourself breathing room (the mob will whack the totem for a couple seconds). Or drop Stoneskin Totem at the start of fight for passive damage reduction (less used since Strength of Earth is usually better to kill faster).
- Finishing Moves: If the mob is below 20% and not running, you could just auto-attack it dead to conserve mana. If you want to finish quickly to reduce damage taken, an Earth Shock or Lightning Bolt (if enough distance) works. Shamans don't have an execute ability per se, but a max-rank Earth Shock crit can be pretty "execute"-like.
- After Fight: Heal up if needed (Bandage or minor Healing Wave). Refresh Lightning Shield if it expired or orbs were consumed. If low on mana, just sit and drink some water to full before next fight if below ~40% mana. It's better to fight each mob with full resources than to chainpull and risk running OOM in a bad spot.
- Totem Play: Immediately drop Stoneclaw Totem to taunt at least one of them off you. Stoneclaw pulses taunt periodically, so it might juggle them a bit. This buys you time to focus one down.
- Focus Fire: Identify the squishiest or most dangerous mob and burn it first. If one is a healer or caster, Earth Shock that one and try to kill it quickly. If one is ranged, you might Earthbind + move away to pull the melee away from the ranged so you can deal with them separately.
- Magma Totem / Fire Nova Totem: If you think you can survive a bit, dropping a Magma Totem (which does AoE damage around it) or Fire Nova Totem (delayed blast) can soften all enemies. Just remember after they do damage, those mobs will likely smack the totem then come for you. Use that moment to heal or reposition.
- Chain Lightning: If you've gone elemental subspec and have Chain Lightning at 32+, it can be nice burst to 3 targets at once, but it's expensive mana-wise. In Hardcore you likely remain Enhancement and might not even buy Chain Lightning immediately. But if you have it and 3 mobs are fairly low, a Chain Lightning could finish them – just careful not to accidentally pull a 4th if one is nearby (CL jumps up to 3 targets).
- Frost Shock Kiting: If things look bad (more than 2 on you and your totem died), consider kiting. Frost Shock one mob to slow it, run a bit, then shock the next, etc. You can sort of round-robin slow them while moving toward a safer spot. If near a path or boundary where they might leash, that's even better.
- Grounding Totem: If one of the mobs is a caster, drop Grounding Totem to absorb their next spell – that's one less fireball hitting you.
- Use a Cooldown/Consumable: Multi-mob fights are exactly when to use things like Grenades (stun them all for a moment), Health Potion, or other consumables.
- One at a Time: Try to isolate and kill one mob as fast as you can (pop trinkets, use Strength of Earth and Grace of Air if you have both via totem twisting for max DPS, etc.). Once it's 1v1, you're in better shape.
- If Overwhelmed: Drop Earthbind, Ghost Wolf and get out of there. No shame in resetting a bad pull. Come back and try again more carefully.
- Open with heavy burst (Lightning Bolt, Earth Shock) to get mob to half HP quick.
- Then sustain with auto-attacks and maybe another shock if needed.
- If your health gets low mid-fight, either finish it quickly (potion + shock) or slow it down (Stoneclaw + heal yourself).
- Always keep an eye on your health and mana mid-fight. If both are getting low, that's a sign you should consider fleeing or potting unless the mob is nearly dead.
- Keep weapon enchants and Lightning Shield up.
- Drop totems that make sense for the fight (Strength of Earth almost always when stationary, plus maybe Searing Totem for damage).
- Pull cleverly (ranged if possible).
- Use Earth Shock to interrupt or burst, Frost Shock to slow as needed.
- Melee with auto-attacks empowered by Flurry/Windfury – enjoy the big numbers and try not to cheer so loud you pull another pack ????.
- End fight with enough mana/health to handle an add, or if not, regen before next fight.
- A solid talent build focusing on survivability and steady damage.
- Knowledge of the best gear and weapons to grab at each stage of leveling (so you can maximize your strength without unnecessary risk).
- Chosen professions that will provide lifesaving potions or gadgets.
- An array of strategies for survival, from using Stoneclaw Totem as your personal tank, to mastering Ghost Wolf hit-and-run tactics.
- Tips for both solo adventuring and group synergy, ensuring you can adapt to any situation and help your fellow heroes.
- Efficient use of consumables and totems, basically turning you into a raid-boss-level prepper with buffs on buffs.
- A roadmap of safe zones and quests to guide you to 60 with minimal "WTF!" moments.
- A firm grasp of your Shaman's rotation and abilities, so you can handle anything from a single murloc to a pack of angry harpies.
- And a suite of addons to streamline all of the above, acting like your supportive elemental spirits watching over your shoulder.
Multi-Target (2+ Mobs) Strategy
Totem Twisting and Managing Buffs
"Totem twisting" is an advanced concept (usually for maximizing Windfury and Grace of Air uptimes in raids). In leveling/Hardcore, you don't need to twist per se, but you can manage multiple short-term totems:
More practically, you might swap Fire totems: e.g. start with Magma Totem for AoE if 3 mobs, then once 2 are dead, replace it with Searing Totem to single-target the last one longer without expiring. This conserves mana vs just letting Magma tick (it has a short duration).
Ability Usage Highlights:
| Ability | Best Usage |
|---|---|
| Lightning Bolt vs. Lightning Shield | Both are ways to deal Lightning damage. Lightning Bolt as an opener is great for pulling or when a mob flees and you can't reach it. Lightning Shield is more efficient since it does damage when you get hit (and you will get hit anyway). Always keep LS up in combat unless you're fighting caster mobs that rarely hit you. |
| Earth Shock | Your workhorse. High damage, low cooldown, interrupts spells. Generous use of Earth Shock will speed up your kills, but watch your mana. It also generates a lot of threat (great if you need to taunt, not great if you're trying not to pull aggro in groups). |
| Frost Shock | Use for kiting or stopping runners. Also if you crit something and it's almost dead, a Frost Shock can finish it with style and the slow doesn't matter then. |
| Flame Shock | A DoT + upfront damage. Flame Shock is nice to apply if you plan to kite (the DoT will keep hurting them as they chase). But note, you can't use another Shock until the cooldown – so you trade your ability to Earth Shock for that period. |
| Ability | Best Usage |
|---|---|
| Healing Wave vs. Lesser Healing Wave | Healing Wave (big heal, longer cast) is more mana efficient per health healed. Good for between fights or if you have a safe window to cast a big heal. Lesser (LHW) is fast and good in clutch moments. If you took the talent Healing Grace (resto) you reduce threat of heals, but that's more for raids. |
| Searing Totem | Fire-and-forget turret. Use it almost every fight starting level 10. Rank it up as you go. It's very cost-effective damage over a long fight. Just careful about its target selection. In groups, it tends to attack whatever you attack or whatever's closest. |
| Magma Totem | Short-range AoE pulsing flame. Great if swarmed by weak foes, but it chews through mana and can pull extra mobs if any are just outside its radius. Mostly use in emergencies or planned AoE. |
| Fire Nova Totem | Delayed blast – 5 sec after dropping, boom. High damage though. One trick is drop Nova Totem and immediately stun or root enemies around it so they stay in range (War Stomp + Nova synergy for Tauren). |
| Ability | Best Usage |
|---|---|
| Stoneskin Totem | - damage from each melee hit. Useful early on when mobs hit for small amounts (it can reduce a big portion of it). At higher levels, mobs hit for 50+ and stoneskin reduces like 10 – not as noticeable. |
| Mana Spring Totem | As soon as you get this (level 26), use it in any fight that lasts a while or between fights while drinking/eating. It returns mana over time. It stacks with your drinking regen. In groups, it's one of your best supportive totems. |
| Healing Stream Totem | Not huge output, but over a 5 minute fight it's very mana efficient healing. In solo short fights, its impact is minor. But if you drop it and then kite, it will tick heal you while you reposition. |
| Tremor Totem | Use it whenever fear/charm is possible. Mobs like: Rotting Horrors in Duskwood (fear), some Forsaken in Hillsbrad (fear), certain named mobs with fear. |
Sentry Totem: (Level 34) This totem lets you sort of see through its eyes remotely. Honestly, not very useful in PvE except maybe scouting around a corner or using it as a camera. You could drop it at an intersection to watch for patrols coming. But you have to stand still to use its view. Fun fact: you can use it to do a trick jump because when you cancel Sentry view, your character returns facing the same direction as the Sentry totem was facing. Not really useful in HC context. So Sentry Totem is more of a novelty – don't worry if you forget it exists.
Combat Strategy & Survival
DPS vs. Defense Considerations
As Enhancement, you always weigh doing more damage (to end the fight faster) vs. playing safe (taking less damage). Generally, faster killing is safer as long as you're not sacrificing too much defense. The sooner a mob dies, the fewer hits and surprises it can throw at you. So using offensive spells/totems to kill it before it kills you is often the right call. However, don't go so overzealous that you end up OOM and at low health because you dumped everything into DPS.
Against Different Enemy Types
Casters: They hurt, but are squishy. Try to interrupt their first cast (they often open with their strongest nuke; Earth Shock it). Then close the gap and melee them – they usually have low armor so you'll tear them down fast. Use Grounding Totem for backup. If a caster is healing itself, save a shock for when it tries to heal (or better, burn it down so it doesn't get chance).
Melee fighters: These are straightforward. Keep Stoneskin up if they attack fast, or Strength of Earth to kill faster. If they enrage or something, you can either kite a moment or just heal through it. Some melee mobs have cleaves or knockdowns (e.g., Basilisks can stun gaze – try to LoS or interrupt with Grounding if it's a magic stun; Dragonkin cleave – don't stand in front of two at once).
Stealthers: Know which mobs can stealth (certain panthers, stealth rogue mobs). Carry a Flame Shock DoT on them if they try to vanish. Also, dropping Earthbind pre-emptively can sometimes pop stealth mobs out if they wander into it.
Ranged (bow/gun) mobs: These will keep shooting if you just stand. Best tactic is line of sight – e.g., pull a camp and duck behind a tree so the melee come and the ranged is forced to move closer, then greet it with a shock. Or if LoS isn't available, just run straight at the ranged totem until they swap to melee (most ranged switch to a dagger or so when you close distance). Grounding Totem does nothing for physical projectiles, unfortunately (only spells).
Fliers (harpies, flying bugs): Can be a bit buggy in Classic with hitbox. Use auto-target and shocks. Totems still hit them if in range. Just ensure you have healing ready if their pathing causes you to take extra hits (like flying harpies sometimes back out of melee and you have to re-engage).
Cooldown Usage
Shamans in Classic don't have many long cooldowns (except Nature's Swiftness if Resto 31, Elemental Mastery if Ele 31). If you have Nature's Swiftness (unlikely until maybe level 60 if you specced that way), you can use it as an "oh crap" instant heal or even instant Ghost Wolf to escape (or instant Chain Lightning to finish a group of wounded mobs – but in Hardcore, probably save for heal). If you have Elemental Mastery (Ele 21 talent), that guarantees a crit – could be used to one-shot something with a big Chain Lightning crit if needed.
But mostly, your "cooldowns" are Reincarnation (1 hour), Mana Tide Totem (if 31 Resto – also unlikely in leveling build).
If you follow these tactics, you'll find Shaman combat to be smooth and efficient, rarely needing you to sit and drink excessively, and giving you control over most encounters.
Recommended Addons for Hardcore Shaman Play
While addons are not strictly required, they can greatly enhance your gameplay and safety in Hardcore. Here are some addons that many Hardcore players (Shamans included) find useful:
| Addon | Benefit |
|---|---|
| Questie (Quest Helper) | Marks quest objectives and available quests on your map, so you don't wander into high-level areas by accident. It helps plan efficient routes and prevents missing that one quest item in a cave (where staying too long could be dangerous). |
| Hardcore Addon / Death Alert | The community-developed Hardcore addon can announce nearby player deaths, issue you the "Hardcore" verification, and track achievements. It can enhance the social aspect and warns you if someone died in your zone. |
| TotemTimers | A shaman-specific addon that shows timers for all your active totems, as well as cooldowns for Reincarnation, Lightning Shield orbs, and weapon imbue duration. It also lets you bind keys to drop totem sets or recall totems. |
| WeakAuras 2 | Create custom notifications to flash an alert when your health drops below a threshold, when Ankh cooldown is ready, or when you're affected by a nasty debuff. Import existing Hardcore sets for audio/visual cues. |
| Nameplate Addons | Consider Threat Plates or Plater, which show threat levels on nameplates and cast bars on enemies. Being able to easily see enemy cast bars is crucial for a Shaman to land Earth Shock interrupts. |
| GTFO | Makes a loud alarm sound if you are standing in harmful ground effects. In Hardcore, you can't afford to sit in a fire or poison cloud without noticing. |
Configure your UI so that critical information is visible: your health/mana, target's cast bar, totem timers, and party frames (if in group) should be easy to monitor. Use keybinds for your potions and consider a macro to equip your shield quickly.
// Shield Equip Macro Example
#showtooltip
/equip [mod:shift] Two-Handed Weapon; Shield
/equip [mod:shift] Two-Handed Weapon; One-Handed Weapon
While you can play without addons, using them smartly in Hardcore is like having an extra set of eyes and ears. They help you plan your leveling, keep track of buffs/timers, and warn you of danger. Just remember: no addon can save you from every situation – stay vigilant, but let them assist where they can.
Conclusion
By following this comprehensive guide, you should be well-equipped to take on the Hardcore challenge as an Enhancement Shaman. You have:
Hardcore WoW Classic is not easy – but that's exactly why it's exciting. As an Enhancement Shaman, you have one of the richest toolkits to handle the unexpected. There's a special satisfaction in dropping a clutch totem or making a daring escape with 2% health and an angry mob behind you, then healing up and laughing in relief (nervous laughter, of course).
Take it slow, play smart, and embrace the journey. Every level you ding in Hardcore feels truly earned. Whether you're calling down lightning on an unsuspecting quilboar, saving a party with a timely heal, or outmaneuvering a prowling predator in the wilds, you'll build epic stories to tell.
Good luck, Shaman of the Horde – may the Earthmother guide your path, may the winds always be at your back, and may your ancestors welcome you only when you choose. ???? For the Horde, and for Hardcore glory!