

Molten Core is World of Warcraft's first 40-player raid, located deep within Blackrock Mountain. Released in Classic WoW Phase 1, it represents Tier 1 raid content and serves as a major progression milestone. Players face 10 unique bosses culminating in Ragnaros the Firelord. Its fire-themed mechanics and old-school challenges (such as group attunement, heavy coordination, and high attrition) make MC a memorable and difficult raid. Success in Molten Core unlocks legendary quests (for Sulfuras and Thunderfury) and key rewards.
Molten Core's importance in Phase 1 is twofold: (1) it introduces 40-man raid mechanics and Tier 1 gear, pushing players to optimize pre-raid equipment and consumables; and (2) it gates progression to later content, since slaying each boss (and eventually Ragnaros) is required for attuning Majordomo and summoning Ragnaros. Being a high-stakes, high-difficulty encounter, MC demands extensive preparation. In this guide we cover everything needed to master Molten Core: attunement, gearing, consumables, trash and boss strategies, loot priorities, reputation, class roles, and raid leadership tips.
Preparation and Requirements
Attunement Quest Chain
Before entering Molten Core, level 60 raids must complete the "Attunement to the Core" quest chain. At level 55+, speak to Lothos Riftwaker outside Blackrock Depths. He sends you into BRD to retrieve a Core Fragment from the lava cave just before the Molten Core portal. Clear through Blackrock Depths ("the lava burn" route), grab the Fragment, and return to Lothos to get the Molten Core attunement. (Note: this quest simply unlocks the teleport portal to MC in BRD; no additional item is needed inside MC.)
Level and Gear Requirements
- Minimum Level: 60. Molten Core bosses hit extremely hard and one-shot lower levels easily.
- Recommended Gear: Best available Phase 1 gear – high stamina and survival stats – from dungeons and pre-raid BoE/BiS lists. Players should aim for high stamina, defense, and fire resistance in their gear. Melee DPS want high strength/agility and crit, casters want spell damage, haste, and mana regen. Healers prioritize mp5 and crit. Many classes rely on crafted epics and hard-to-get blues (e.g. crafted Fire Resist cloak, Scholomance/BWL drops).
For example, DPS warlocks often use Dark Advisor's Pendant (Scholomance neck) and Robe of the Void (tailoring). Tanks might wear Lionheart Helm (blacksmithing helm) and Black Dragonscale Mail for armor. Rogues may craft Glowing Lizardscale Cloaks and use PvP shoulders, while mages seek Robe of the Archmage (tailoring) and PvP gloves. Many best pre-raid items come from UBRS, BRD, Scholomance, and PvP sets.
Consumables and Buffs
Prepare a stock of potions, elixirs, and food buffs. Key consumables include:
- Fire Protection Potions: Greater Fire Protection Potion (especially for Geddon and Ragnaros). Every raider should pop one before those fights.
- Arcane Protection Potions: Greater Arcane Protection Potion for Shazzrah phase (taunts Arcane Explosion). Useful especially for melee.
- Mana/Health Potions and Restoration Potions: Ensure healers and caster DPS have plenty of Elixir of Greater Intellect, Major Mana Potion/Major Healing Potion, and Free Action Potion (for Fear spells).
- Flask of the Supreme Power: If available (requires Black Lotus and Alchemy), greatly boosts spellpower for casters.
- Elixirs: Elixir of the Mongoose (melee crit/attack speed), Arcane Elixir (spell damage), Elixir of Fortitude (stats for tanks/healers).
- Food buffs: +Intellect foods (e.g. Nightfin Soup) for casters, +Fire resistance foods (e.g. Dragonbreath Chili) for tanks, etc.
- Runes and Oils: Rune of Warding, Rune of Strength, Runic Mana Potion if possible. Weapon oils like Sharpening/Mana Oils.
Fire Resistance Gear and Farming
Fire-based bosses (Baron Geddon, Ragnaros, Golemagg, Sulfuron adds, etc.) require high Fire Resist (FR). Strategies to obtain FR gear include:
- Hydraxis Ring quest: Complete the Duke Hydraxis chain ("Hands of the Enemy" → "A Hero's Reward") to earn the Tidal Loop ring (+15 Fire Resist).
- PvP Fire Resist Armor: Blacksmith Thorium-crafted pieces (e.g. Sulfuron Ingot recipes like Helm of Fire) and tailor's Chromatic Cloak (Brightcloth cloak + Spitfire Bracers mats) which give 26 FR.
- Dungeon Drops: Bindings from Lord Victor Nefarius (Blackwing Lair) or other non-Classic sources are not available in Phase 1, so rely on class enchants + FR potions.
- Enchantments: Enchant Cloak – Greater Fire Resistance (requires Cenarion Circle reputation) to add +40 FR.
- Consumables: As above, Greater Fire Protection Potions. Fire auras and seals: Paladins can use Seal of the Martyr (+3 FR), Shamans' totems (Wrath for DPS), etc.
Raid Composition
A balanced 40-man raid composition is key. Typical recommendations:
| Role | Number | Classes |
|---|---|---|
| Tanks | ~3–4 | 2 Prot Warriors + 1 Druid bear, possibly another Prot or off-tank |
| Healers | ~7–10 | Priests, Paladins, Shamans, Druids |
| Melee DPS | ~12–15 | Warriors, Rogues, Enhancement Shamans, Elemental Shamans, Feral Druids |
| Ranged DPS | ~15–20 | Mages, Warlocks, Hunters, Shadow Priests |
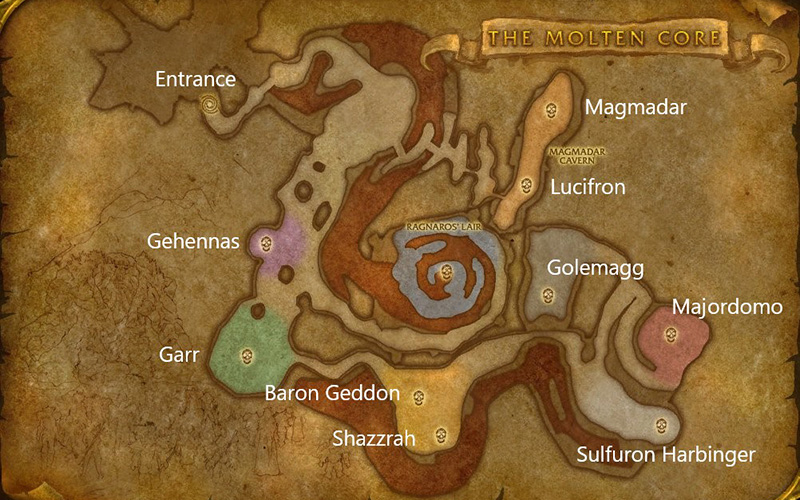
Instance Overview
Molten Core is a single large cavern divided into wings. From the entrance (BRD portal) you reach an open central chamber with multiple corridors. A concise map:
- Wing 1 (South): Lucifron → Magmadar → Gehennas.
- Wing 2 (East): Garr → Baron Geddon. Garr patrols in front of his chamber, with a fire pit that spawns adds. Geddon is deeper, standing in lava with a rotating knockout ability.
- Wing 3 (North): Shazzrah → Sulfuron Harbinger → Golemagg → Majordomo. Shazzrah prowls right of the entrance chamber. Sulfuron sits mid-hall with four Flamewaker priest adds. Golemagg awaits on a higher platform beyond Sulfuron. Majordomo (up the ramp beyond Golemagg) must be pulled up by activating Majordomo runes or with runic item.
- Ragnaros (End): After Majordomo's defeat (or by players with runes), Ragnaros appears in the lava pit in the center of the dungeon.
Trash Mobs
Key trash mobs include Flamewaker Elites/Shadowcasters, Firelords, Lava Surger/Lava Elemental, Molten Giants/Destroyers, Fiery Core hounds, and Molten Behemoths. Important tactics:
- Lava Surger (elemental): These are large fire elementals that knock back in a small AoE. Tanks should face them away from the raid; ranged can group on the opposite side. Warlocks can Banish one to reduce damage.
- Lava Elemental (Warrior/Nefarius adds): These cast Fire Nova around them. Spread out and tank them facing away.
- Molten Giants/Destroyers: These hit very hard and stun on melee crits. Tanks must pick them up and face them away; casters can crowd-control or ignore these if behind.
- Fire Lords (Flamewalker, Lava Annihilator, etc): They spawn extra adds. Pull carefully, and be ready to AoE down summoned adds.
- Ancient Core Hounds: Found in Garr's chamber and beyond; they breath a 60° cone of fire. Tanks must face them away and pull them one at a time. Hunters should kite or ranged DPS kill quickly. When facing an Ancient Core Hound, MELEE MUST NOT stand in front of it (drop FR potions if needed).
- Core Hound Packs: Often 2–4 in a group. Do not pull entire packs at once. Instead, pull and burn them one by one; kill summons quickly. Spread ranged to avoid multi-breath hits.
Patrols and Safe Pulls
Most trash is stationary. Garr patrols a circular path near his room's entrance, so kill him quickly to drop patrols. Generally: pull small batches (2–4 mobs), AoE them down or pick off casters first. Avoid pulling mixed types (e.g. one caster with two melee) to simplify control. Pull from corners, hugging walls to avoid overlapping AoEs.
Trash Skips
Experienced raids often skip optional trash by clever movement. For example: skip some wolf and mage packs in the Majordomo hallway to save time, or hug walls past inactive groups. However, carry enough FR potions because skipping FR mobs means fewer drops (like Fireguard Destroyers). Always be mindful of what you skip – e.g., don't miss grabbing Sulfuron Ingot trash (Riftius Sparknozzle) or other useful drops. Skipping is advanced and only recommended for well-geared runs.
Core Hound Pack Technique
When approaching a core hound pack, send ranged ahead or use Hunter pets as bait. Pull one hound and have melee kill it while others hold or banish siblings. Always burn summon adds (like Lava Parasites) quickly. If a pack is too large, consider Ghost Wolf (Shaman) or Bladestorm (Warrior) tactics to safely pull and burn individually.
Skinning – Ancient Core Hounds
If you have Leatherworkers, they should skin every Ancient Core Hound (including Magmadar's two hounds). Each gives Core Leather, a rare crafting material used in Dragonstalker, Stormrage, and core set crafts. Bring Skinning Kits and tag these mobs (Magmadar's hounds often get killed early, so tank off one so a skinner can hit it after the boss dies).
Boss-by-Boss Strategies
Molten Core has 10 bosses. Below is a breakdown of each fight, covering mechanics, positions, and class tasks. Each boss is accompanied by a role-by-role summary (tanks, healers, DPS).
Notation: MT = Main Tank, OT = Off-Tank, BT = Backup Tank.
Lucifron
Abilities: Dominate Mind (mind-control on random raid members), Impending Doom (doom debuff, ~4 sec CD on all targets, 2000 Shadow damage AoE), Lucifron's Curse (doubles AP and mana costs). Two Flamewalker Protectors flank him.
- Tanks: Use 3 tanks: one main tank on Lucifron, and one tank each for the Flamewalker Protectors. All should face their target away from the raid. Druids/Warriors use Shocks/Fear Ward against Dominate Mind as needed.
- Healers: Priests remove Dominate Mind; Druids remove Curse (or dispel with Remove Curse if possible). Heal the tanks through Impending Doom (mass-damage).
- DPS: Ranged DPS kill Protectors first (burn 1 Protector fully before switching). Melee burn adds as the tanks hold them. Then burn Lucifron. Everyone should stand max range from Lucifron until adds are down, to reduce doom damage.
Advanced: If very confident, tanks can pick up Lucifron with all adds, then DPS cleave Protector and Lucifron together for a fast kill. However, having two tanks on adds to handle Mind Control safer.
Magmadar
Abilities: Frenzy (self-buff; +100% attack speed, casts uninterruptibly – must be dispelled by Hunter's Tranquilizing Shot), Panic (AoE fear, ~30s CD), Lava Bomb (fire impact on main tank). Two Flamewalker Protectors stand nearby. Killing Magmadar resets any Ancient Core Hounds spawned during fight (they die automatically).
- Tanks: Use 1 main tank (Warrior preferred) on Magmadar. Have backup tanks ready for the Protectors. Pre-heal and have Fear Ward/Shocks up to mitigate his fear. Face him away from ranged/healers so Fear (Panic) doesn't hit them.
- Healers: Mana is critical – assign a dedicated Mana Tide Totem (Shaman) or Innervate for main tank. Heal through Magmadar's heavy AoE (Earthquake). Run from Lava Bombs (blast on MT) and heal quickly afterward.
- DPS: Kill Protectors first (one at a time) as Lucifron strategy. After adds, focus Magmadar. Hunters: ALWAYS Tranq Magmadar on Frenzy (roughly every 25–30s). Use at least two hunters in raid. Everyone must spread out vs Panic AoE (e.g., DPS line on east/west with space).
Misc: Magmadar fears (Panic) lasts ~5s – healers must be ready after he unchains. Tanks should have Intervene/Riposte or defensive cooldowns to survive big hits.
Advanced: To speed-kill, tanks swap quickly after one get heavy stacks of Magmadar's parry buff (Magma Splash). But ensure a free taunt is ready (Trap Cyclone can help).
Gehennas
Abilities: Rain of Fire (random 8-yard AoE under a player; high Fire damage), Gehennas' Curse (reduces healing by 75%), flanked by 2 Firewalker Shielders with heals.
- Tanks: Use 3 tanks: one on Gehennas, one on each Flamewalker. Position bosses side-by-side but spread ~10y apart. Face all away from raid so Flamewalker aura (Conflagration) doesn't affect others.
- Healers: Druids/Mages must dispel Gehennas' Curse immediately. Healer healing uptime is severely limited by the curse. Healers should stack near each other to quickly top off after Rain of Fire. Ranged healers should move out of Fire patches quickly.
- DPS: Focus on adds first: kill one Flamewalker at a time, then Gehennas. Interrupt the Shielder's heal casts. Melee standby to dodge Gehennas' periodic fires. During Rain of Fire, everyone runs out of targeted red circles as fast as possible.
Misc: Gehennas has no direct cast except rain-of-fire and the passive aura. Don't dispel the heroism buff he occasionally grants (nerfed in Classic).
Garr
Abilities: Continuously casts Flame Buffet (stuns if hit in melee), and has eight Lava Surge adds that periodically combust if not banished. Every 30s, Eruption: killed adds explode near raid on death. Garr grants no buffs.
- Tanks: One tank on Garr, others hold his Flamewaker adds as they spawn. Have Warlocks Banish up to 2 adds to prevent extra Eruptions. Position banshed adds away. Keep the boss centered to avoid knockback interactions.
- Healers: Keep tanks topped up (tanks take heavy hits every 6s from Buffet). Give dispels or divine shields on stun if needed. Raid healers should be at range, as Eruption can hit anyone near an add (avoid clustering).
- DPS: Burn Garr first. Focus all DPS on Garr — he is priority. As adds spawn, assign one Warlock/MDPS to banish each to prevent their Eruptions. If adds are not banished in time, they must be kited or killed away from the raid to avoid Eruption damage. Melee stay on boss after all initial adds are controlled.
Misc: Warlocks or Priests (Shadows) can handle Mind Control if any. The Flamewaker adds have no heal. Use cooldowns on boss to survive Combustion (a stacked AoE on tank when kill runes).
Baron Geddon
Abilities: Living Bomb (Bombs players for 10s, exploding for ~2000+ Fire damage), Inferno (cleave knockback to all nearby), and Ignite Mana (burns mana per sec on main tank). At low health he casts Armageddon (massive raid-wide Fire AoE, ~6s cast).
- Tanks: 1 main tank. Backs up if needed during Armageddon. Use Fire Resistance potions on pull. Face him away from raid. Tank should refresh Ignite Mana with dispel or potion; HoTs and mana pots for support.
- Healers: Remove Ignite Mana often (Paladin/Ferals dispel, Shaman Riptide helps regen, Priests Power Word: Shield). During Living Bomb, bubble or shield targeted player to absorb explosion. Maintain raid health to survive Bomb and Heal after Inferno. Distribute Fire Resistance buffs (Shamans/Barkskin).
- DPS: When someone gets Living Bomb, they should run out of melee range immediately. Explosion must hit only that player. After Bomb drop, they rejoin. During Inferno knockback (~10s CD), melee back away to avoid being stunned by the initial blast. Ranged stay spread out.
Positioning: Place 1–2 high-HP volunteers (typically Warriors/Paladins) to take Bomb. Use Freedom from Priest on them. Others avoid lingering on Bombed players.
Misc: Ignite Mana heavily drained tanks; consider pre-casting Empowered Mana Potion. Use cooldowns during Armageddon (BLESSING OF PROTECTION or Guardian Spirit) to save raid if needed.
Shazzrah
Abilities: Arcane Explosion (every ~6s, heavy Arcane AoE), Deaden Magic (self-buff reducing magic damage by 50% — must Purge), Shazzrah's Curse (magic vulnerability debuff, +100% magic damage). He teleports frequently, displacing melee.
- Tanks: 1 main tank (with 1–2 backups in case). Keep Shazzrah between tanks at room center. Drop a Flame or Sunwell to reduce hate from ranged. When he teleports, another tank taunts to hold him for main tank to top up.
- Healers: Priests must Purge Deaden Magic immediately when cast. Druids/Mages Remove Shazzrah's Curse off players quickly. Position healers out of melee ring (to avoid knockbacks). After Arcane Explosions, heal the raid (priority to tanks).
- DPS: Spread ranged around the room at max range to minimize Arcane Explosion hits. Melee stay behind boss and move when he teleports. Assign 1+ Priest to Purge Deaden Magic and Druids/Mages to purge Shazzrah's Curse on raid. Use Arcane Resistance potions if concerned.
Misc: Mark Shazzrah for kill (separate from Baron room). Teleport mechanic: he periodically vanishes and reappears; raid should freeze DPS during teleports and resume after. Use Greater Arcane Protection Potion on melee to reduce explosion damage.
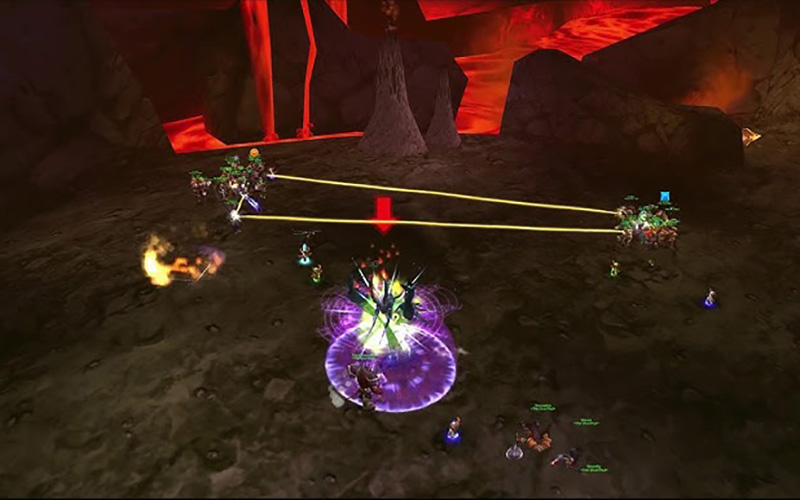
Sulfuron Harbinger
Abilities: No direct attacks; he spawns four Flamewaker Priests/adds with him. As adds die, Sulfuron casts Dark Mending (big heal). Sulfuron has an aura Inspire that buffs nearby adds if they are close.
- Tanks: Ideal is 5 tanks – one for Sulfuron, one for each add (5 total). If fewer, combine roles carefully. Spread tanks: one at Sulfuron's position, an "add group" tank holding all non-focused adds, and one tank for current kill-target. Always keep the active target at least 45 yards from the rest. When an add dies, rotate tanks so newly focused add is isolated.
- Healers: Assign one healer per tank (since spread out). Healing will be heavy; use cooldowns and potions liberally.
- DPS: Kill adds one by one. Mark an add, drag it 45+ yards from the others, and DPS it down interrupting any heals. After it dies, move next add to kill point. Only after all four Flamewalkers are down, switch to Sulfuron. Interrupt Dark Mending cast on adds to prevent big heals.
Positioning: Sulfuron himself should be kept far from add group (center vs edges). Assign 1 tank to hold Sulfuron alone.
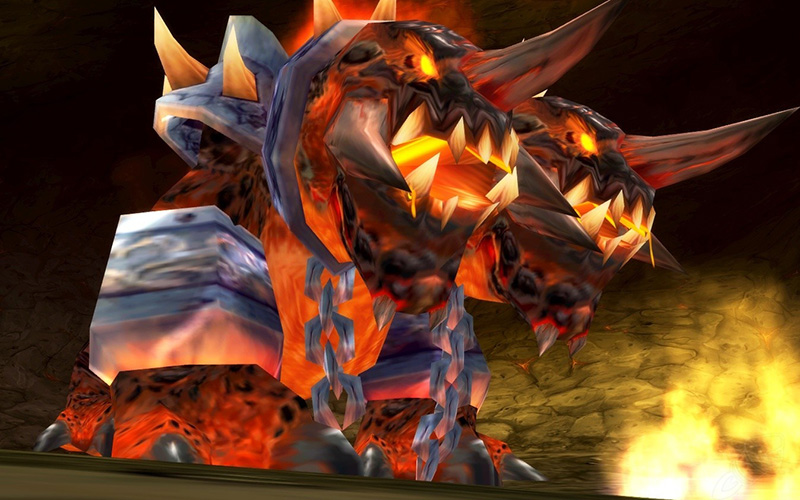
Golemagg the Incinerator
Abilities: Magma Splash (debuff on melee attackers, stacking – requires tank swap every ~5 stacks); on death, he always enrages and Earthquakes. He is accompanied by 2 Ancient Core Hounds immune to damage until he dies.
- Tanks: Use 4 tanks: two on Golemagg, two on the Core Hounds. Initially, have Hunters pull the hounds to waiting tanks at sides of room. Tanks taunt the Core Hounds and face them into walls away from raid. Meanwhile, two warriors tank Golemagg center. Swap those tanks every 5 stacks of Magma Splash (the off-tank must NOT hit Golemagg until taunting).
- Healers: Tanks will soak most damage. Keep shields and HoTs on all four tanks. Position healers so as to reach tanks when spread out.
- DPS: Only kill Golemagg. Ignore the Core Hounds completely. Melee stay behind Golemagg; ranged can fire anywhere safe. Don't break crowd control on hounds. Once the boss is down, the hounds auto-die.
Misc: After main tank has ~5 Magma Splash debuffs, off-tank taunts and main tank backs off (no hitting). Having Rage/Shield Wall rotation helps survive. Use Battle Shouts for raid DPS before the kill.
Majordomo Executus
Abilities: Majordomo's fight is unusual: you kill all his Flamewalker adds, and he then vanishes to summon Ragnaros. Key abilities: Magic Reflection on adds (reflects caster spells), random Teleport effect (drops a player in coals), and the Burning Runes mechanic for summoning Ragnaros.
- Tanks: You need 5 tanks (Warriors): one on Majordomo, four on the adds. At pull, assign each tank a Flamewaker: two Flamewaker Elite and two Flamewaker Healer spawns in room. Tanks should pull adds away from each other. If a tank dies or an add breaks polymorph, a taunt swap is needed immediately.
- Healers: This fight deals heavy shadow damage. Every raider should have Priest's Shadow Protection buff. Healers use all cooldowns; Runes on floor do AoE damage if stood on (don't run into center). Watch tanks carefully (adds hit hard and heal each other).
- DPS: Assign 4 Mages to Polymorph the four smaller healer adds at pull. Casters then burn the four large adds first, one at a time. Interrupt Adds' Magic Reflection: if a healer add is reflecting, stop DPS to avoid killing yourself. After all adds are dead, do not attack Majordomo; instead, he will vanish and spawn Ragnaros. Majordomo has no HP to kill — killing adds completes the boss fight.
Misc: Hunter pets can be used to initially taunt (tank) all adds. When Majordomo casts Teleport (early pulls random person into coals), that person must quickly run out to survive. This is usually harmless if you know where safe spots are. Note: completing Majordomo also gives a Sulfuron Hammer token (needed for Sulfuras).
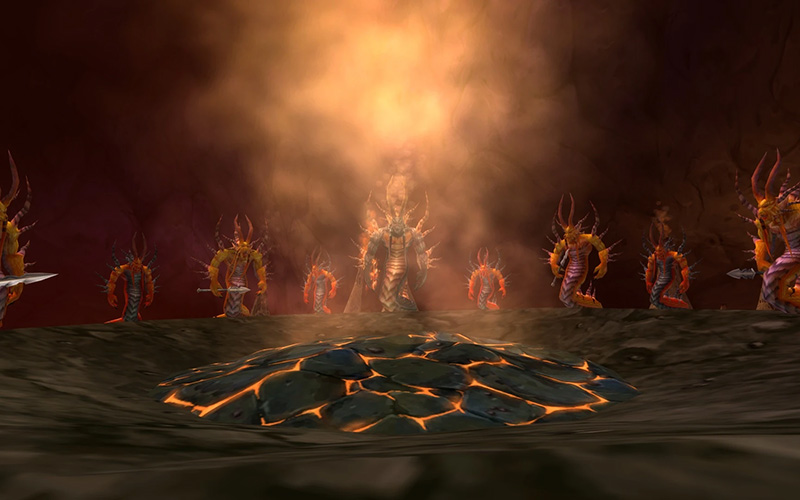
Ragnaros (Firelord)
Abilities: Wrath of Ragnaros (3000+ Fire damage melee swing, knocks back melee), periodic Ranged Knockback (~14s, flings close non-MT back into lava), Elemental Fire (large single-target Fire DoT on main tank), and most importantly Summon Sons of Flame (every 3 min: Ragnaros submerges for 90s, during which 8 "Sons of Flame" (ranged fire elementals) spawn). After Sons die or time elapses, Ragnaros re-emerges. The fight has a 60-minute kill timer.
- Preparation: Fire Resistance is paramount – the MT should have ~300 FR (315 buffed), others at least 100–200 unbuffed. Everyone should consume 1+ Greater Fire Protection Potion pre-pull. Ranged DPS and healers should note that Ragnaros only attacks melee-range players – they can DPS freely on him.
- Positioning: Spread the raid around Ragnaros. Ideally, melee/tanks form an inner ring close to Ragnaros (south/west/north sides) to soak melee strikes, while healers/ranged stand on an outer ring (south/west) well outside melee range. Utilize pillars and wall bits for occasional knockback cover.
- Phase 1 (Up): Focus 100% DPS on Ragnaros. Avoid unnecessary group heals, maximize DPS. Watch Ragnaros's melee swing (apply defensive CDs as needed). Ranged DPS can stand on southern outer ledge and Firevigor (only risk is periodic knockback to non-MT, so be ready to avoid ledge gaps). Maintain mana – Healers should chain mana to tanks continuously.
- Submerge (every ~3:00): 20s before submerge, pre-move the raid to the south outer ring. When Ragnaros says "COME FORTH, MY SERVANTS!," he submerges and 8 Sons of Flame spawn in the lava around the room.
Handling Sons: The Sons are stationary until Ragnaros submerges, then rush south. They do pure fire damage and have an AoE mana burn. Move to safe spots (on the southern lip) to limit melee knockbacks. The Sons must be killed quickly, typically with area DPS: Hunters AoE trap+volley, Mages AoE blasts, or Consecration. Avoid letting them soak the entire raid's mana.
Positioning: Upon submerge, keep range classes behind and use defensive CDs. The MT (and only him) should stay on Ragnaros (until submerge), and after submerge all melee back up onto safe rock edges.
Re-emerge: Once the Sons are dead or 90s passes, Ragnaros reappears. Raid immediately resumes DPS on him. The Sons also respawn periodically from the lava but these are the final stage. If Ragnaros lives beyond 1h, he resets (wipe).
Tips: Maintain Fire Resistance buffs (Shaman totems, Seal of the Wise/Shield), and time FR pots on every pull. Tanks use 2x Shield Block rotations. Use portal heroes and any raid cooldowns. Kill Ragnaros ideally before he resurfaces too many times (focus on strong burst after first submerge).
Pitfalls: Being knocked into lava is lethal. Always keep track of ledges. If Ragnaros is not below 40% by ~4:30, you'll likely get another submerge. Extreme coordination and DPS uptime is needed for a kill under the 60-minute lockout.
Loot Analysis
Loot Tables
Each boss drops class-specific loot, including Tier 1 tokens and pieces, and legendary quest tokens. Key highlights:
- Lucifron: Drops Paladin T1 head (Judgement Hood), Rogue T2 pieces, etc. (Notably, Lucifron drops Judgement Bindings – a Paladin T1 belt – and other cloth/mail for DPS classes.)
- Magmadar: Drops all Tier 1 leg pieces (e.g. Warlock Necropile Pants, Warrior Lightforge Leggings, etc.). Also Molten Core imprint gloves. Provides Warlock Dungeon Set Legs (leg plate) and Priest T1 leg.
- Gehennas: Drops assorted T1 set parts (e.g. Paladin T1 gloves, Shaman T1 gloves, Rogue T1 boots). (Exact loot table: Earthfury Gauntlets, Giantstalker Boots, etc.)
- Garr: Drops all Tier 1 head pieces (Stormrage Crown, Lightforge Helm, etc.) and one half of Bindings of the Windseeker (for the Thunderfury quest).
- Baron Geddon: Drops Lawbringer Pauldrons (Paladin gloves) and Stonerender Gauntlets (Shaman gloves), among others. Also one half of Bindings of the Windseeker.
- Shazzrah: Drops mage and warlock robe (Arcanist Regalia and Necropile Vestments pieces), plus Sunfury leggings, T1 shoulders.
- Sulfuron Harbinger: Drops mostly consumables (Sulfuron flasks, etc.) and Sulfuron Essence (crafting mat). No significant gear, but kills grants quest reward (Empyrean Demolisher mount token for DM).
- Golemagg: Drops all Tier 1 chest pieces (e.g. Robe of the Void, Judgement Breastplate) and Sulfuron Ingot (key mat for Sulfuras). Also Magmus Stone and Amulet of Binding (FL healing helm).
- Majordomo Executus: Drops the Ragnaros quest items: Orb of Domination (for T1 chest), Eye of Sulfuras, Crest of Retribution, [and 2 Tokens of Invincibility if lucky]. Each defeat also splashes loot from drops of the Flamewalkers.
- Ragnaros: Drops all Tier 2 leg pieces (Azuresong Leggings, etc.), the Sulfuras Hammer (quest token for Sulfuras), the Hand of Ragnaros world quest item, and Flamewaker's tokens. He also drops Bindings of the Windseeker (turn in the two halves to finish Thunderfury) and a chance at Eskhandar's Right Claw (Hunter bow). In essence, Ragnaros yields the primary materials for the legendary Sulfuras and Thunderfury quest chains.
Class Priorities
Each drop should be rolled on by the class who benefits most (raid leaders must mediate "need vs greed"). Tier 1 set items are usually roll-on for their class token. For example, Stormrage Crown (Druid T1) goes to a Druid; Judgement Belt (Paladin T1) to a Pally; Necropile Pants to a Warlock; Lightforge Helm to a Warrior; etc. Bindings of the Windseeker halves from Garr/Geddon go to Thunderfury aspirants (Paladin/Warrior), not necessarily who killed boss.
Tier 1 Sets
Tier 1 (Classset 1.5) pieces come from various bosses above. Although 8-piece bonuses are minor (e.g. Priest 4pc +10% healing, Warlock 4pc +15 Shadow damage on DoTs, Paladin 4pc +25 Holy damage on Seal of Righteousness, etc.), the individual stats are high. Prioritize completing your class' T1 set over other epics if possible. For example, Priests aim for Regalia of Faith (set) pieces, Paladins for Lawbringer (T1) legs, Warriors for Lightforge helm/chest, Rogues for Bloodfang gloves/boots, etc.
Legendary Questlines
- Sulfuras: To craft Sulfuron Hammer, you need 8 Sulfuron Ingots (dropped by Golemagg) and 10 Fiery/Lava Cores (from Magmadar, Garr, Geddon, Shazzrah). Then trade at Lokhtos Darkbargainer for Sulfuron Hammer. Finally, combine Sulfuron Hammer with Ragnaros's Eye of Sulfuras (dropped from Ragnaros) to forge Sulfuras, Hand of Ragnaros.
- Thunderfury: Collect the two Bindings of the Windseeker from Garr and Baron Geddon. Complete the "Binding the Winds" quests (involving Onyxia and a Drakefire Amulet). Eventually the final drop from Azuregos (post-quest) gives Thunderfury. This chain is complex and spans end of Classic but begins with MC binds.
Reputation and Extras
Hydraxian Waterlords Reputation
The Hydraxian Waterlords (led by Duke Hydraxis) are allied with the raid. Gaining rep allows obtaining permanent versions of MC quest items. Major methods in Classic:
- Complete Hydraxis Quests: Inside Azshara, finish Agent of Hydraxis, Hands of the Enemy, and finally A Hero's Reward. The last quest ("A Hero's Reward") grants 200 reputation and the Fire Resist ring Tidal Loop (or Ocean's Breeze).
- Kill Monsters in MC: All bosses and trash in MC grant rep with Waterlords. Once you reach Revered, only boss kills count. (Attuned raids commonly smash MC weekly to inch from Honored to Revered.)
- Enemy Factions: In SoD there are new methods (dousing runes etc), but in Phase 1 the above are key. (Silithus farming for Dust Stormers is pre-Phase1 and not yet relevant in official Phase 1.)
Rewards at each rep: The main notable rewards are:
- Aqual Quintessence: Needed to defeat Majordomo and summon Ragnaros. Rewards from Hands of the Enemy chain.
- Eternal Quintessence: A 1-hour cooldown version of Aqual (usable repeatedly once Revered).
- Hydraxis Rings: Ocean's Breeze and Tidal Loop (+15 FR each) are given after "A Hero's Reward" quest. These are essentially extra Fire Resist items for tanks/heavy hitters.
No other gear is sold by Waterlords (no quartermaster). At Exalted, the quartermaster entries unlock, but in Classic "Eternal Quintessence" is the main longtime benefit.
Enchanting Recipes
Important enchanting recipes for MC include:
- Enchant Cloak – Greater Fire Resistance: (Requires Honored Cenarion Circle) grants +40 FR on cloaks. Tanks/Priests should enchant cloaks with this to maximize FR.
- Enchant Weapon – Spell Power: Molten Core blacksmiths drop the Formula: Enchant Weapon – Spell Power. This adds +2–5 spell damage per enchant and is a huge DPS boost for casters.
- Enchant Weapon – Healing Power: Also drops in MC. Useful for healers.
- Other nice enchants: Enchant Chest – Major Mana, Enchant Weapon – Fiery Weapon (from Pyromancer Loregrain's quest in Duskwood), and Stat Elixirs (Wizard Oil, Mana Oil). Use +38 Intellect enchant, resist gear enchants (BRILLIANT VISION rune on chest for mana regen).
Performance Tracking (Speed-running)
Top guilds aim to speed-clear MC. Best times rely on skipping non-essential trash, optimizing boss pulls (e.g. sequential boss trains), and maximizing DPS uptime. Tools like raid timers and Warcraft Logs help measure parses. For example, world-record runs (often 24-man SoD speeds) take <30 min, but expect ~1–2 hours for guild clears in Classic. To improve efficiency: designate raid roles in advance, stack consumables properly, and minimize dead time between pulls. Keep a log of each pull's duration and wipe causes to refine your strategy.
Class-Specific Guides
Below is a brief overview of each class's role in MC, plus recommended builds, rotations, and priorities. For full details, consult class guides, but here are the Phase 1 essentials:
Roles: Main tanks (Protection), some DPS (Fury). Prot Warriors hold Magmadar, Majordomo adds, etc.
Talents: Prot: 2/2 Tactical Mastery, 5/5 Shield Spec, 5/5 Anticipation, 2/3 Improved Demoralizing Shout, 3/3 Defiance, and 3/5 Vitality for survivability.
Fury DPS: 5/5 Cruelty, 5/5 Unbridled Wrath, 2/2 Improved Battle Shout, 5/5 Flurry, and 3/3 Enrage.
Rotation: Tanks use Overpower and Revenge to maximize threat. Use Shield Block on CD, then Devastate/Sunder. DPS Fury warriors focus Bloodthirst/Overpower spam, keeping Enrage up.
Consumables: Sharpening Stones, Rage potions, Fire Protection Potions on Ragnaros.
Gear: Tanks prioritize Defense/Mitigation: Arcanum Shield (BRD offhand), Lionheart Helm, Sulfuras Enchant (defense), FR resist. DPS fury: strength, crit, hit (e.g. Ironfoe if available).
Role: Primary melee DPS with strong single-target. Also off-tank if needed (Magmadar, Lucifron adds).
Talents: 5/5 Opportunity, 5/5 Flurry, 5/5 Vitality, 1/2 Aggression, 3/3 Lethality, and enough in Combat (Spinning Slash) or Assassination (Mutilate) based on style. (Early Classic often 2H Swords).
Rotation: Maintain Slice-and-Dice up, then Sinister Strike or Mutilate on CD. Use Rupture on adds. Vanish after a Living Bomb then re-garrote. Poison Blizzard on adds (e.g. Serpent on Magmadar).
Consumables: Elixir of the Mongoose, Savory Deviate Delight, Heavy Runecloth Bandage (emergency), melee oil.
Gear: Agility/STR pieces, Hit cap ~8%. Mace specialization if wielding a mace, otherwise Sword. Tier tokens (Bloodfang) take priority.
Role: Main healer (Holy/Disc), MDPS (Shadow) or buff provider. Essential for MC: many warlocks/priest DPS combos handle purge/debuffs.
Talents: Holy build: 5/5 Healing Focus, 5/5 Improved Renew, 5/5 Holy Specialization, 5/5 Divine Fury, 1/1 Circle of Healing, 3/3 Spiritual Guidance, 3/3 Spiritual Healing. Shadow build: 5/5 Spirit Tap (for raid regen) only if raiding with many priests.
Rotation (Healer): Keep Renew on MT, PWS on bottlenecks, PoM spam, Spirit Tap where possible. Make sure to cast Dispel Magic (to purge Shazzrah's Deaden Magic) and Remove Curse (often done by Druids but Priest has it too).
Consumables: Greater Shadow Protection Potion, Mageblood Potion, Mana/Healing pots, Eternium Runed Blade (Disc).
Gear: Intellect/SP gear (Robes of Prophecy, truefaith set later). Mana regen (Spirit) and +Healing (Holiness). Pre-raid best: Truefaith Vestments (tailor), Felcloth Robe, etc.
Role: Main ranged DPS (Frost/Arcane). Also Purge of Curses (for Shazzrah) if no Druid available. Can sit out on cores when needed.
Talents: Typically Arcane Explosion spam build in Phase 1 (8/8 Improved Fireball, 5/5 Ignite, 5/5 Improved Scorch, 3/3 Frostbite). Later would shift to Fire or Frost tree.
Rotation: Use Mage Armor for main fight (Conjured Mana Gem for free cast). Alternating Frostbolt/Ice Lance and Fireblast to keep DoTs up. Use Fire Blast on proc or to make movement. Evocation on 3min CD.
Consumables: Arcane Brilliance (if no Buffee), food buffs (+Int), Mageblood Pills, Mana Gems, Fire Protection Pots (Ragnaros), Arcane Resistance Pots (Shazzrah for melee).
Gear: Spell damage/int pieces: Robe of Archmage (tailor), Darkmoon Firewater (trinket), Azuresong Mageblade (offhand). +Spell Crit (e.g. Frostfire gloves). Tier tokens: Arcanist Regalia pieces.
Role: Ranged DPS (Affliction/Destruction). Also CC (banish), minor raid heal (Fel Dominate Mind on bots).
Talents: 5/5 Improved Shadow Bolt, 5/5 Suppression, 5/5 Cataclysm (fire chain), 5/5 Shadow Mastery. Or hybrid Affliction/Destruction (Siphon Life, Curse specs) for MC.
Rotation: Maintain Curse of Elements on boss (or Shadow), Immolate on target, then Shadow Bolt/Incinerate spam. Keep Corruption up. Banish 1–2 Garr adds. Souls taken: Molten/Core hounds.
Consumables: Demonic Runes (Soul Shard generator), Fire protection potions, Spellstone (herb), Demon Armor.
Gear: +Spell Damage, +Hit (to hit 13%, if possible). Dark Advisor's Pendant (Scholo), Robe of the Void (tailor). Tier tokens: Felheart (T1) gloves, pants.
Role: Healer (Resto) and off-tank (Bear). Can also DPS with Moonkin (later phases).
Talents: Resto build: 5/5 Furor, 3/3 Tranquil Spirit, 5/5 Nature's Swiftness, 5/5 Blessing of Nature (chance to double leaf/soothe), 3/3 Improved Rejuvenation, 5/5 Gift of Nature. Some Protection (Bear) for off-tank: 5/5 Thick Hide, 3/3 Mark of the Wild.
Rotation: Heal with Nourish and Rejuvenation. Use Lifebloom if available. Feral 5 for off-tank: swipe, maul, lacerate or mangle spam with White/Yellow gear (rare). Remove Curse on targets (pivotal for Gehennas/Shazzrah).
Consumables: Mana potions (for Innervate), Wildvine Potion (if accessible), Elixir of Fortitude for tanks. Barkskin on threat.
Gear: Heal: +HP/SPirit. Off-tank: +Armor/Stamina. Pre-raid: Robes of Prophecy, Earthfury or Stormrage pieces (drop in phase 2).
Role: Ranged DPS and primary boss attunement items. Critical for crowd control and special tasks (Lucifron Tranq, Magmadar Tranq, Magma Hound tanking via pet).
Talents: Beast Mastery spec for single-target (5/5 Ferocity, 5/5 Intimidation, 5/5 Unleashed Fury, 3/5 Ferocious Inspiration). Extra points in Survival for Trap Mastery.
Rotation: Keep Serpent Sting up (poison big targets), Arcane Shot on CD (or Multi-shot on trash). Use Explosive and Freezing Traps for adds. Concussive on fast enemies. Use Tranquilizing Shot on Magmadar and Lucifron. Spread shots on Ragnaros for stable DPS (even if not on aggro list).
Consumables: Black Lotus-based Mana potions (if skilled) or nature resist gear for Ragnaros stage. Ammo buff (Flamewaker 20% dmg arrow). Aspect of the Beast, Dragonhawk pet for extra DPS or Cat for threat.
Gear: Ranged weapon with high dps (Shadowstrike crossbow or earthborer rifle), leather crit gear (Windtalker, silithid scale).
Role: Tank (Prot) and healer (Holy) support. Several Paladins a must for seals/auras.
Talents: Protection: 3/3 Divine Strength, 5/5 Anticipation, 5/5 Improved Righteous Fury, 2/2 Toughness, 5/5 Improved Hammer of Justice, 3/5 Holy Shield. Holy: 5/5 Spiritual Focus, 5/5 Healing Light, 3/3 Divine Intellect, 5/5 Spiritual Attunement.
Rotation: Prot Pally uses Seal of Command to boost damage, Holy Shield up, Judgments of Wisdom on boss to provide mana back. Use Devotion Aura for +8% Armor (plus Fire for Rag). As healer: keep Beacon of Light (WoW Classic buff), LF/AoE heals (Holy Light, Holy Shock). Blessings (Kings/AoM) pre-pull.
Consumables: Righteous Orbs (aggro), Elite Mana potions, Reinforced Core (SC or RBCL), Holy resist potions.
Gear: Prot: Strength/Stam (Sunwell, Judgement set). Holy: +Healing +Mana (Vestments of Prophecy, Judgement shoulders for crit). Many Paladins want Lightforge legs/gloves.
Role: Healer (Resto) and elemental DPS. Key support via Totems.
Talents: Restoration: 5/5 Ancestral Healing, 5/5 Totemic Focus, 3/3 Tidal Focus, 5/5 Purification, 2/2 Healing Grace, 3/3 Improved Reincarnation. Enhancement (for DPS): 5/5 Convection, 5/5 Call of Flame, 3/5 Elemental Devastation.
Rotation: Resto Shamans keep chain heal/bolt on tanks, Riptide on heavy-hit targets, Earth Shield on MT. Use Mana Tide Totem on cd for healers. Purge Shazzrah's Deaden Magic with Cleanse Spirit if needed. DPS spec: Lava Burst (heroic strike PvE style rotation).
Consumables: Weak Troll's Blood Potion, Major Mana Potion, buffs (Flametongue Totem, Grace), drum of fortitude for party.
Gear: Resto: +Heal +MP5 gear (Earthfury epic back, etc.). Elemental: +Spell damage +Hit.
Each class should focus gear on MC needs: e.g. prioritize stamina/Resist for tanks, spellpower for casters, strength/crit for melee. All should bring appropriate consumables (e.g. a druid brings Natures Grace elixirs for tanks, etc.).
FAQs and Troubleshooting
Common Wipes
Most wipes in MC happen due to missed mechanics. Typical causes: mass stack damage (e.g. everyone hit by Rain of Fire or multiple Living Bombs), uncontrolled adds (e.g. Garr/Magmadar adds exploding), dispels failing (Shazzrah/Curse), or party running into the wrong area. To recover from a wipe, quickly resurrect and re-buff, then either continue the pull or reset to a safe point. Wipe strategy: keep CC up to prevent plague of adds, or break if tank down, then re-pull with stronger CD usage.
Improving Efficiency
Always debuff enemies (Curse of Shadow on boss, Sunder Armor on Horde tanks, Expose Armor, etc.). Use battle resurrections early in fights (e.g. preraise/lockouts). Assign arena targets and crowd-control for trash so DPS can focus bosses. Cut downtime by keeping a healer or mage buff rotation (Replenishment, Arcane Int, Fras Siabi's). After each boss, do quick fixes: Bandage, prepare next zone consumables. Track boss kill times and adjust strategy: e.g. if Magmadar took too long, assign extra hunters or DPS. Use voice commands to coordinate.
Leadership Tips
The raid leader should call fights and assignments clearly. Before pulls, ensure everyone knows their role (who banshes, who purges, who MTs). Bring moral & discipline: encourage raid to listen and not chat during pulls. Keep raid logs or notes (boss HP after X mins). Schedule MC runs weekly or twice-weekly; raid nights. For speed-killing, assign subgroups specialized on tasks (e.g. Subgroup 1 always handles Lucifron adds, Subgroup 2 only handles Garr adds, etc.). Frequently rotate the raid if someone is underperforming (e.g. behind on DPS).
Recovery Advice
After a wipe, quickly identify what went wrong (e.g. "we had two living bombs hit the raid at once" or "no one dispelled the curse"). Adjust strategy before re-engaging. It may help to reset part of the trash if add positions changed. Use Bloodlust/Heroism at optimal times. Teach and spread knowledge: a faster person explaining a mechanic can prevent repeat.