
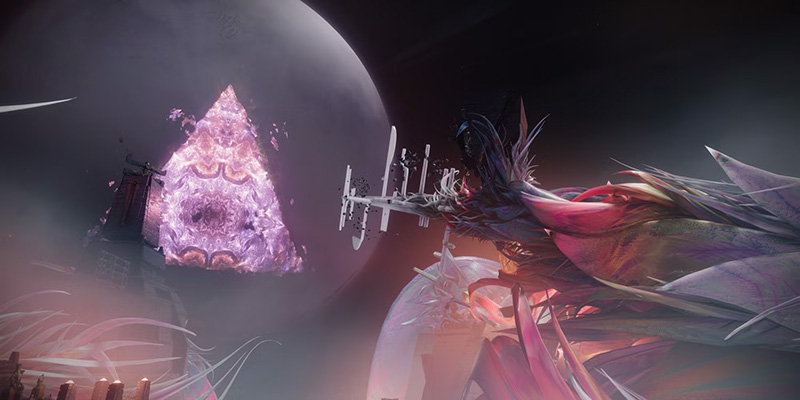
Destiny 2's Root of Nightmares raid, introduced with the Lightfall expansion, invites Guardians aboard the Witness's terraformed Pyramid ship, now besieged by Shadow Legion Cabal and haunted by an ancient, powerful entity. This guide provides a comprehensive walkthrough of every encounter, secret, and challenge within. While considered one of the more accessible raids in Destiny 2's history due to its mechanics often requiring fewer active participants, mastering its intricacies, especially on higher difficulties or for challenges, demands coordination, communication, and a solid understanding of its core systems. This accessibility, however, has been a point of discussion within the community, with some veterans finding it less challenging than expected compared to other endgame content like the Lightfall Legendary campaign or even Neomuna patrols. Despite this debate, the raid offers unique Strand-infused weapons and a visually distinct experience.
Preparing for the Nightmare: Loadouts and Lingo
Before venturing into the Pyramid ship, proper preparation is key. This involves reaching the appropriate Power Level, assembling a suitable loadout, and understanding the raid's unique terminology.
Raid at a Glance
This table summarizes key information for Guardians preparing to face the Root of Nightmares:
| Feature | Normal Difficulty | Master Difficulty |
|---|---|---|
| Recommended Power | 1770 (Base) 1780+ Recommended Scales up to 1800 |
1820 (Requirement) 1840 (Enemies) Player Power Capped at 1820 (-20 Delta) |
| Difficulty Level | Considered one of the easiest raids; mechanics allow for fewer active players. High Day 1 completion rate. Solo flawless completion achieved. | Significantly harder due to Power Cap, increased enemy health/damage, additional Champions, and modifiers. |
| Champions | Barrier Colossi (Enc 1, 3, 4) | Barrier Colossi (Enc 1, 3, 4), Unstoppable Incendiors (Enc 2) |
| Average Time | ~40-60 mins (Experienced KWTD) ~1.5-2 hours (Teaching run) Global Avg: ~1h 37m |
Global Avg: ~2h 25m |
| Team Size | 6 Guardians Recommended | 6 Guardians Required |
| Expansion Req. | Lightfall | Lightfall |
Recommended Loadouts & Subclasses
While Root of Nightmares allows for flexibility, certain loadouts excel. The core mechanic involves activating nodes ("Field of Light"/"Flux of Darkness"), demanding add clear and boss damage phases.
Single Target/Majors: Fusion Rifles (Merciless can work), Sniper Rifles (Izanagi's Burden, Succession), Shotguns (Conditional Finality, Nessa's Oblation). Divinity is invaluable for debuffing bosses/Tormentors. Witherhoard offers great passive damage.
Boss DPS (Zo'Aurc & Nezarec): Rocket Launchers are meta (Gjallarhorn + Legendary Rockets like Hothead, Bump in the Night with Auto-Loading Holster/Demolitionist + Explosive Light/Vorpal/Lasting Impression/Frenzy/Clown Cartridge). Linear Fusion Rifles (Cataclysmic, Briar's Contempt, Stormchaser, Taipan) are reliable alternatives. Izanagi's Burden + ALH Rocket swap is a high-skill strategy. Thunderlord + Divinity is a consistent option.
Subclass Recommendations
Nightstalker (Void): Excellent for add control, invisibility (Gyrfalcon's Hauberk synergy), and boss debuff via Shadowshot (Moebius Quiver recommended). Orpheus Rig enhances tether. Crucial now that Divinity's debuff is lower.
Threadrunner (Strand): High mobility useful for running mechanics in Encounters 1 & 2. Can bypass Scission launcher bugs. Suspend provides strong crowd control. Silkstrike Super less ideal for stationary DPS.
Arcstrider (Arc): Gathering Storm Super offers good boss damage, especially with Star-Eater Scales. Good add clear.
Gunslinger (Solar): Blade Barrage Super with Star-Eater Scales is top-tier boss damage. Radiant provides team damage buff.
Dawnblade (Solar): Well of Radiance is arguably essential for boss DPS phases, providing healing and damage buff. Starfire Protocol (pre-nerf, check current meta) paired well with Witherhoard/Fusion Grenades for DPS. At least one, preferably two, recommended.
Shadebinder (Stasis): Excellent add control with Osmiomancy Gloves, Coldsnap Grenades, and Bleak Watcher turrets. Can trivialize combat difficulty.
Voidwalker (Void): Strong add clear potential. Nova Bomb for burst DPS.
Stormcaller (Arc): Good add clear. Chaos Reach or Stormtrance for damage.
Broodweaver (Strand): Swarmers exotic enhances Threadlings for add clear and Super damage. Good crowd control.
Sunbreaker (Solar): Very high survivability, especially with Loreley Splendor Helm (grants Restoration) - great for Master difficulty, running, or taunting. Hammer of Sol for add clear/damage.
Berserker (Strand): Excellent crowd control via Suspend (Barricade, Shackle Grenades). Good alternative if lacking a Shadebinder. Bladefury Super for add clear/damage.
Sentinel (Void): Ward of Dawn (Bubble) provides Weapons of Light damage buff (doesn't stack with Well) and overshields. Good survivability.
Striker (Arc): Thundercrash Super is a strong burst DPS option, especially with Cuirass of the Falling Star. Good add clear with Pulse Grenades/Jolt.
Understanding the Lingo: A Raid Glossary
Raids have their own language. Understanding these terms is crucial for clear communication, especially in LFG (Looking For Group) teams.
| Term | Definition | Example Usage / Notes |
|---|---|---|
| Add(s) / Ad Clear | Additional enemies (non-boss). Add Clear is the role of killing these enemies. | "Focus on add clear while the runners handle plates." |
| Aggro / Hatred | Getting the main boss's attention/focus. | "Taunters need to swap aggro before Hatred runs out." (Nezarec specific) |
| Buff / Debuff | A temporary positive effect (Buff) or negative effect (Debuff) applied to players or enemies. | "Grab the Field of Light buff." / "Apply Weaken debuff to the boss." |
| Callout | Verbal communication of important information during an encounter. | "Call out which planet is wrong." / "Call out the Tormentor spawn!" |
| Champ / Champion | Powerful enemies (Barrier, Overload, Unstoppable) requiring specific stun methods. | "Need an Unstoppable stun for the Incendior." |
| CP / Checkpoint | A saved progress point within the raid, allowing teams to restart at that encounter. | "Does anyone have the Nezarec CP?" |
| Field of Light | Core RoN buff (white/Traveler energy) used to activate Light nodes/plates. | "Runner 1, grab Field of Light." |
| Flux of Darkness | Core RoN buff (orange/Pyramid energy) used to activate Dark nodes/plates. | "Need Flux of Darkness for this plate." |
| KWTD | Know What To Do. Common LFG requirement indicating experience is expected. | "LFG RoN KWTD fast run." |
| DPS | Damage Per Second. Often refers to the phase where the boss is vulnerable. | "Get ready for DPS phase." / "What's your DPS loadout?" |
| Wipe / Wipe Mechanic | Team death, resetting the encounter. Can be intentional ("Let's wipe") or caused by failing a mechanic. | "Sweeping Terror is a wipe mechanic." / "Timer's low, just wipe it." |
How to Start the Root of Nightmares Raid
Accessing the raid is straightforward:
- Own Lightfall: The expansion is required.
- Launch from Director: Select Neptune, then choose the Root of Nightmares raid icon.
- Initial Area: Upon loading in, Guardians follow a linear path marked by colourful roots and Cabal enemies, leading into the terraformed Pyramid ship. There's no complex opening encounter like in some previous raids.
- Deepsight Puzzle Start: Before dropping down the first major descent, veer left behind a building/structure to find three glowing seeds (Light or Dark). Note their left-to-right order; this is crucial for the guaranteed Red Border chest puzzle later.
- Reach First Encounter: Continue following the path until arriving at the first encounter arena, marked by a rally banner spot.
Encounter 1: Cataclysm - Survive the Onslaught
The first encounter serves as an introduction to the raid's core mechanics under pressure.
Objective
Activate sequences of plates using the "Field of Light" buff before the "Sweeping Terror" timer expires, repeating across four sections.
Core Mechanics Explained
- Field of Light: Obtained by standing in the aura of an active plate (glowing white Traveler orb) and shooting the orb. Lasts 15-20 seconds. Allows activation of the next plate.
- Plate Activation: Follow the light beam from the last activated plate to the next inactive plate (marked by a floating black sphere). Stand on the inactive plate and shoot the black sphere to activate it, consuming the Field of Light buff. This creates a new Traveler orb on the activated plate.
- Sweeping Terror: A 30-35 second wipe timer affecting the whole team. Reaching zero = wipe.
- Extending Sweeping Terror: Find two shielded Psions in bubbles. Melee/punch both Psions to spawn a Tormentor (Cavum of Nezarec) on the left or right side. Kill the Tormentor to add ~30 seconds to the Sweeping Terror timer.
- Progression: Completing a sequence of 4-5 nodes halts the timer ("His Hatred Halts"). The starting plate shifts, and the process repeats for a total of four sections.
- Champions: Barrier Colossi are present.
Roles & Responsibilities
| Role | Player Count | Key Tasks |
|---|---|---|
| Plate Runner(s) | 1-2 | Obtain Field of Light, follow beams, activate plates, coordinate buff refreshes if using two runners. |
| Add Clear / Tormentor Team | 4-5 | Kill adds, quickly locate and melee Psions, call out Tormentor location, kill Tormentor ASAP to extend timer, kill Barrier Champions. |
Walkthrough
- Start: Designate roles. Runner(s) stand in the initial aura and shoot the Traveler orb to gain Field of Light and start the encounter/Sweeping Terror timer.
- Add Clear Duty: Immediately search for the two bubble Psions. Punch them both quickly. Locate the spawned Tormentor (left/right callout needed). Focus fire (aim for shoulder weak spots first) and kill it to extend the timer. Kill Barrier Champions and other adds. Repeat Psion/Tormentor cycle as needed.
- Runner Duty: Follow the light beam from the activated plate. Find the inactive plate with the black sphere. Stand on it, shoot the sphere to activate. Return to a plate with an aura, stand inside, shoot its Traveler orb to regain Field of Light. Repeat until "His Hatred Halts". Move to the next section's starting plate when Sweeping Terror restarts.
Strategies
Troubleshooting
Challenges
Interlude 1: First Parkour & Secret Chest
Navigation
After collecting loot from the Cataclysm chest, follow the path down behind the chest. This section introduces gravity cannons/launch pads. Stand on the pad and shoot the darkness node/crux in front to launch forward. Traverse platforms, dealing with a few Cabal.
Secret Chest #1 Location
As Guardians traverse the iridescent path that bends left towards the next encounter area, sniping Psions will be visible in an open square doorway/alcove high up on the right wall. Jump across and enter this alcove. Follow the short passage inside to find the first hidden chest. Some early reports mentioned needing to kill a Tormentor inside, but most guides indicate the chest is simply found after entering the side path.
Encounter 2: Scission - Enter the Root
This encounter significantly ramps up the complexity, demanding mastery of dual buffs and introducing tricky traversal.
Objective
Activate sequences of Light and Dark plates across three vertical floors using "Field of Light" and "Flux of Darkness" buffs, navigating via gravity cannons, before the "Imminent Expulsion" timer runs out for each floor.
Core Mechanics Explained
- Field of Light & Flux of Darkness: Two distinct buffs. Field of Light (White) originates from the right side, Flux of Darkness (Orange) from the left. Obtained by standing in the respective aura and shooting the floating orb.
- Plate Activation: Activate nodes matching your current buff color. Crucially, some plates on each side require the opposite side's buff to be activated, forcing players to cross the central chasm.
- Gravity Cannons (Launchers/Boopers): The primary means of crossing the large chasm separating the left and right sides. Stand positioned against the launcher and shoot the floating crux/diamond/node in front to activate it.
- Redolence Enemies: Special shielded Cabal (Incendiors, Centurions) that spawn throughout the encounter. Right-side (White aura) enemies require Field of Light to damage; Left-side (Orange aura) enemies require Flux of Darkness. Add clear players must have the correct buff. Master difficulty features Unstoppable Incendiors.
- Imminent Expulsion Timer: A wipe timer (~1 minute) active for each floor. It is not extended by killing enemies. Completing all nodes on the current floor stops the timer.
- Orb Lockout Timer / Disrupt: A critical mechanic to understand. Grabbing a buff (shooting an orb) while another player still holds that same type of buff can trigger a "Disrupt" or lockout, preventing anyone from grabbing that buff again for 15-20 seconds. This often happens if Runner B grabs a buff refresh before Runner A has activated their plate, or if multiple players try to grab the buff sequentially instead of simultaneously. Precise coordination between runners, and ensuring add clear gets buffed with the runner, is vital.
- Floor Progression: Activating all nodes on a floor stops the timer and spawns a final wave/minibosses that require the corresponding side's buff to defeat. Killing these enemies activates the gravity cannon leading to the next floor. This process repeats for three floors total.
Roles & Responsibilities
| Role | Player Count | Key Tasks |
|---|---|---|
| Plate Runners | 2 (1 Light, 1 Dark) | Grab initial buffs, activate sequences of nodes, use launchers to cross chasm for opposite-buff plates, coordinate buff refreshes meticulously to avoid lockouts, help kill floor-end minibosses. |
| Add Clear | 4 (2 per side) | Stand in aura with runner for buff refreshes, kill regular adds, prioritize killing Redolence enemies with matching buff, handle Barrier/Unstoppable Champions, protect runners from adds. |
Walkthrough
- Split: Divide into Left (Dark) and Right (Light) teams of three. Assign one Runner per side.
- Start: All three players on each side stand in their initial aura. The Runner shoots the orb, granting the buff to all three and starting the Imminent Expulsion timer.
- Node Running: Runners follow their node path. When a plate requires the opposite buff, they use a gravity cannon to cross the chasm. Activate the node. To return or proceed, they may need to grab the buff on the current side and activate another node there, or use another launcher to go back. Crucially: Runners must communicate constantly about needing buff refreshes. Both runners (and their respective add clear teammates) need to be in the aura when the orb is shot. Coordinate timing to avoid the lockout.
- Add Clear: Stay near the active aura spawn point to receive buffs alongside the runner. Kill regular Cabal. Immediately target Redolence enemies once buffed. Prioritize Champions. Keep adds off the runners.
- Floor End: Once all nodes on the floor are activated, the timer stops. A final wave of enemies/minibosses spawns. Players must use their side's buff (Light on Right, Dark on Left) to defeat them. If the aura doesn't appear, it might indicate the lockout bug occurred earlier, potentially requiring a wipe.
- Ascend: Defeating the final wave activates a launcher at the far end. Use it to ascend to the next floor. Repeat steps 2-5 for floors two and three.
Strategies
Troubleshooting
Challenges
Strategy: This challenge demands precise cross-map aiming and timing. Option 1 (Runners Shoot Each Other's Crux): The Light runner aims and shoots the crux for the Dark runner's launcher, and vice-versa. Requires excellent coordination and simultaneous shots. Option 2 (Dedicated Shooters): Assign one add clear player on each side the responsibility of shooting the crux for the runner on the opposite side when called for. This simplifies the runner's task but adds complexity for add clear. Long-range, accurate weapons (Scout Rifles, Pulse Rifles, Sniper Rifles) are recommended for the shooters. Remember this applies to the launchers used to ascend between floors as well.
Strategy: Add clear must actively avoid killing the shielded enemies until both runners have finished all nodes for the current floor. Focus damage on regular adds and Champions. Use crowd control abilities (Suspend, Blind, Stasis freeze) to manage the Redolence enemies without killing them. Once both node chains are done, the team can eliminate the Redolence enemies, likely during the final miniboss wave. This increases the danger from shielded enemies remaining active longer.
Interlude 2: Darkness Refuge & Second Secret Chest
Navigation
The path after Scission leads into another jumping puzzle section, this time featuring a lethal environmental hazard. Periodically, a large wave of orange energy sweeps the area. Any Guardian caught outside a protective "Refuge" aura when the wave hits will be instantly killed. This section is not a Darkness Zone, meaning players can respawn if they die. Progress involves platforming between safe zones created by linking nodes.
Darkness Refuge Mechanic
Similar to the mechanic in the final encounter, players must activate short node chains (Light-to-Light or Dark-to-Dark) to create temporary safe zones (Refuges). Standing in the Refuge grants a buff protecting against the energy wave. Consistent progress requires moving between Refuges before the next wave hits.
Secret Chest #2 Location
This chest is found midway through this jumping puzzle area. Players will reach a point with a structure often described as a temple or having stairs leading up. From a platform near these stairs, look down over the edge to spot a floating Darkness crux/switch/node. Shoot this switch. Doing so will open a previously locked door in the temple structure nearby (often behind the player after shooting the switch). Enter the newly opened room; the second hidden chest will be inside, typically situated between a Light and a Dark node plate.
Checkpoint Doors
Like some other jumping sections, this area features doors that will only open once all six fireteam members are present in front of them, ensuring no one gets left too far behind.
Encounter 3: Macrocosm - Zo'aurc, Explicator of Planets
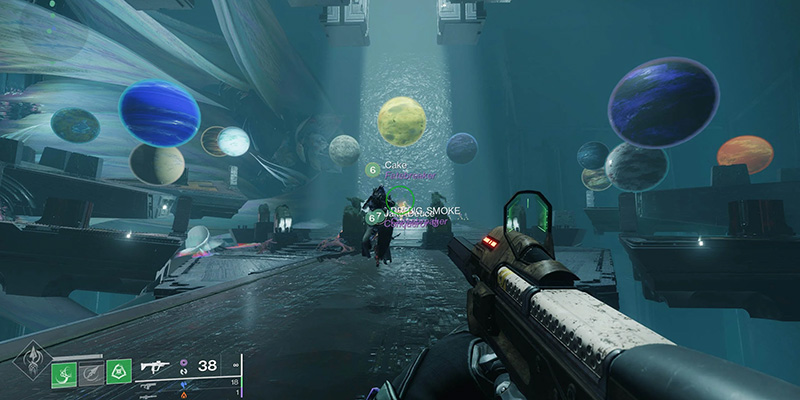
Guardians enter the Witness's orrery, a grand chamber where they must manipulate celestial bodies to confront the Cabal boss, Zo'aurc.
Objective
Correctly align planets based on their Light and Dark affinity across four corner platforms and the central area to initiate damage phases and defeat Zo'aurc, Explicator of Planets.
Core Mechanics Explained
- Arena Layout: The room features a central platform area surrounded by four triangular "island" platforms at the corners (Top Left, Bottom Left, Top Right, Bottom Right). The Left side is generally considered the Light side, and the Right side is the Dark side. Each corner island has three planets floating above it. The center has three planets above the main DPS plates. Initially, the 6 planets on the Left side are a mix of 4 Light and 2 Dark, while the Right side has 4 Dark and 2 Light.
- Planetary Insight: Colossus enemies called Terrestrial Lieutenants spawn on the corner islands. Killing a Lieutenant grants the killer the "Planetary Insight" buff for a short time. This buff allows the player to see the elemental alignment (Light or Dark) of the three planets directly above their island.
- Planet Swapping (Indexing): The first major task is "indexing" – getting all Light planets to the Left side and all Dark planets to the Right side. After gaining Planetary Insight, the player identifies the single planet above their island that is the "wrong" alignment (a Dark planet on the Left side, or a Light planet on the Right side). They interact with the plate underneath this mismatched planet to pick up its "Planetary Affinity". Simultaneously, the player on the corresponding opposite island (Top Left swaps with Top Right, Bottom Left swaps with Bottom Right) does the same with their mismatched planet. The players then run across to the opposite island and interact under the plate their partner just vacated, depositing their carried planet's affinity. This effectively swaps the two mismatched planets. This needs to be done for both the top pair and the bottom pair of islands. Success is indicated by a message like "The indexed planets reveal themselves".
- Central Alignment: After successful indexing, another wave of adds and Lieutenants spawns. Kill the Lieutenants again to gain Planetary Insight. This time, focus on the three planets floating above the central DPS area. Players on the Left (Light) side need to grab Planetary Affinity from any Light planet on their islands and deposit it under a matching Light planet in the center. Players on the Right (Dark) side do the same, grabbing Dark affinity and depositing it under a Dark planet in the center. Three planets need to be aligned in the center total.
- DPS Phase: Once the three central planets are correctly aligned, the damage phase against Zo'aurc begins. This might be triggered by shooting a central crux or happen automatically. Zo'aurc gains an overshield of either Light (White/Blue) or Dark (Orange/Red). The four corner island platforms will also glow with either Light or Dark energy. To damage Zo'aurc, the fireteam must stand on one of the corner platforms whose energy color matches the boss's current shield color. The boss will cycle through shield colors during the DPS phase, forcing the team to reposition to the correctly colored platform. The DPS window is relatively short, ending after a set time or damage threshold. Teams typically have three DPS phases before Zo'aurc enrages and wipes the team.
- Hidden Timer Influence: It's important to note that excessive time spent during the planet swapping and alignment phases can negatively impact the duration of the subsequent DPS phase. Efficiency in executing the mechanics directly translates to more time available to damage the boss. Slow or sloppy execution of the setup can lead to frustratingly short damage windows.
Roles & Responsibilities
| Role | Player Count | Key Tasks |
|---|---|---|
| Planet Movers/Shifters | 4 (1 per corner) | Kill assigned Lieutenant Colossus, gain Planetary Insight, identify & call out correct planets for swapping/alignment, grab Planetary Affinity, execute swaps, align central planets, DPS. |
| Add Clear | 2 | Manage spawning adds (especially Psions), protect Planet Movers, avoid killing Lieutenants, assist with boss DPS. |
Walkthrough
- Start & Initial Clear: Enter the arena, clear initial Cabal waves until Centurions appear. Kill the Centurions.
- Indexing Phase: Four Lieutenants spawn, one on each corner island. The four designated Planet Movers kill their respective Lieutenant to gain Planetary Insight. Each Mover identifies the single planet above their island that doesn't match their side's alignment (Dark on Left, Light on Right). Clear callouts are essential (e.g., "Bottom Left has Dark, needs swap," "Top Right has Light, needs swap"). Movers interact under their identified mismatched planet, run to the corresponding opposite island (BL <-> BR, TL <-> TR), and interact under the plate their counterpart is moving. Repeat for the other pair if needed until all 4 swaps are done. Look for the "indexed planets" message.
- Central Alignment Phase: New wave of adds and Lieutenants spawn. Movers kill Lieutenants again for Insight. Look at the three central planets. Three Movers (usually 2 from one side, 1 from the other, depending on central planet alignment) grab Affinity from a planet matching their side's alignment (Light from Left, Dark from Right) and deposit it under a central planet of the same alignment.
- DPS Phase: Once central planets are aligned, DPS begins (shoot crux? / automatic?). Zo'aurc gains a Light or Dark shield. Entire team moves to a corner platform matching the shield color. Deal damage. When the shield color changes, quickly move to a platform matching the new color. Continue until the phase ends.
- Repeat: After DPS ends, return to starting positions. Repeat the Indexing -> Central Alignment -> DPS cycle.
- Final Stand: When Zo'aurc's health is critically low (last segment), he enters Final Stand. He becomes briefly immune, then vulnerable for a final, short DPS check. Defeat him before the timer expires to avoid a wipe.
Strategies
Best DPS Strategies for Zo'Aurc
Weapon Choices: The meta favors burst damage due to the plate-switching mechanic.
| Weapon Type | Recommended Exotics/Legendaries | Key Perks | Notes |
|---|---|---|---|
| Rocket Launchers | Gjallarhorn, Hothead, Bump in the Night, Blowout, Ascendancy | Auto-Loading Holster, Demo, Explosive Light, Frenzy, Clown Cartridge | Excellent burst damage, Gally buffs team rockets. Ideal for plate swaps. |
| Linear Fusion Rifles | Cataclysmic, Taipan-4FR, Stormchaser, Briar's Contempt | Bait and Switch, Firing Line, Focused Fury | Consistent damage, easier aiming than rockets for some. |
| Special Exotics | Izanagi's Burden, Witherhoard | Honed Edge (Izi), Damage over Time (Wither) | Izi pairs with ALH Rockets for high burst. Wither adds passive DPS. |
| Debuff Tool | Divinity, Tractor Cannon, Hunter Tether (Shadowshot) | Weaken/Debuff | Divinity aids crit-based weapons (LFRs). Tractor buffs non-Div damage (Rockets). Tether is a Super-based debuff. |
Troubleshooting
Challenges
Strategy: This fundamentally requires two full rounds of planet swapping (moving 8 planets total) before the Central Alignment phase can occur. Method 1 (Side by Side): All four Movers focus on swapping planets on the bottom two islands first (moving Dark Left, Light Right), then repeat for the top two islands. Method 2 (Standard x2): Execute the normal swap process, but identify planets based on the challenge goal (e.g., on Left side, identify Light planets to move Right; on Right side, identify Dark planets to move Left). This naturally takes two cycles. After the two swap cycles, the Central Alignment phase proceeds as normal (Light affinity to central Light planets, Dark affinity to central Dark planets). This challenge significantly increases the time pressure for the setup phase, making efficient execution and aiming for a two-phase DPS highly recommended. Master difficulty adds Anti-Barrier Champions, demanding strong Champion counters (Arbalest recommended) and survivability.
Strategy: This challenge primarily enforces role discipline. If the four designated Planet Movers are the only players killing the Lieutenants, this challenge is completed naturally. Add Clear players must absolutely avoid killing the Lieutenants.
Interlude 3: The Final Ascent
Navigation
After defeating Zo'aurc, Guardians proceed through the final platforming section leading towards the apex of the Pyramid and the final confrontation. This involves ascending a series of white/shiny root-like platforms extending upwards.
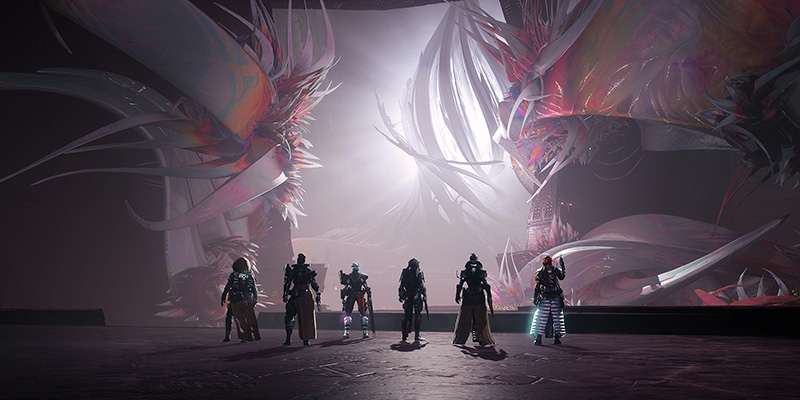
Encounter 4: Nezarec - Final God of Pain
The final battle pits Guardians against Nezarec, an ancient disciple of the Witness freed from his prison. This encounter combines node-linking mechanics with boss aggro management and a crucial survival mechanic.
Objective
Activate simultaneous sequences of Light and Dark nodes to create damage phases, manage Nezarec's "Hatred" aggro mechanic, utilize "Refuge" buffs to survive his potent wipe attack, and ultimately defeat the Final God of Pain.
Core Mechanics Explained
Node Linking (Final Time!)
The arena is divided into a Light side (left) and a Dark side (right), each featuring a starting orb and six subsequent nodes arranged in a circuit. Designated "Runners" grab their respective buff (Field of Light or Flux of Darkness) from the starting orb and activate nodes 1 through 6 in sequence. To initiate the DPS phase, the final node (Node 6) on both the Light and Dark sides must be activated almost simultaneously, typically within a 5-second window. Failure to synchronize the final activations results in a wipe.
Nezarec's Hatred
Throughout the fight, Nezarec will randomly target a player with the "Nezarec's Hatred" debuff. This player takes increased damage and is periodically launched into the air, making it extremely dangerous, especially for Runners attempting to activate nodes.
Taunting / Gaze Mechanic
To control who Nezarec targets with his Hatred, players can intentionally draw his aggro. This is done by shooting specific weak points on Nezarec: both of his shoulders (which will glow) and his chest crit spot. Successfully damaging these points inflicts the "Nezarec's Hatred" debuff onto the shooter for approximately 10 seconds. Two designated "Taunters" must coordinate and alternate taking the Hatred debuff to keep Nezarec focused on them and away from the Runners.
Wipe Mechanic & Refuge
Shortly after a player takes Nezarec's Hatred (or possibly just after breaking his shoulders), Nezarec unleashes a large area-of-effect explosion, either Light (appearing white or blue) or Dark (appearing orange or yellow). This signals his imminent, lethal wipe attack. To survive, the team must quickly create and stand in the opposite colored Refuge aura:
- If Nezarec emits a Light (White/Blue) explosion: The Dark Runner must take their Flux of Darkness buff to any activated Light node (that isn't the current buff-refreshing aura node) and shoot it.
- If Nezarec emits a Dark (Orange/Yellow) explosion: The Light Runner must take their Field of Light buff to any activated Dark node (again, not the current aura node) and shoot it.
This creates a temporary protective Refuge aura. All six Guardians must step inside this aura to gain the corresponding Refuge buff, which grants immunity to Nezarec's wipe attack. Once the buff is acquired, players can move out of the aura. This mechanic is often necessary after the first DPS phase, as subsequent node activation cycles might be too slow to complete before Nezarec triggers the wipe. However, exceptionally fast and coordinated teams can potentially complete the node sequences quickly enough to trigger the next DPS phase before the wipe occurs, effectively skipping the Refuge mechanic.
DPS Phase
Triggered by the successful simultaneous activation of the final Light and Dark nodes. Nezarec is stunned, often indicated by being hit by a large beam of energy, and becomes vulnerable to damage for roughly 30 seconds. The standard strategy is for the team to gather on a specific plate (often one of the back plates, like the furthest Light plate, is preferred for positioning) and deploy damage buffs like Well of Radiance. Nezarec remains mobile during DPS, jumping, teleporting, and performing ground slams that can suppress Guardians (canceling Supers and abilities).
Final Stand
When Nezarec's health drops to about 10%, he enters a final stand phase. He becomes briefly immune, then vulnerable for one last, short DPS window (around 20 seconds). The team must pour all remaining damage into him during this window to secure the kill before he performs a final wipe.
Roles & Responsibilities
| Role | Player Count | Key Tasks |
|---|---|---|
| Plate Runners | 2 (1 Light, 1 Dark) | Rapidly activate the 6 nodes on their assigned side, coordinate the simultaneous final node activation with their counterpart, create the correct Refuge buff when called for by Taunters. |
| Taunters / Gaze Holders | 2 | Alternate shooting Nezarec's shoulders/chest weak spots to maintain the "Nezarec's Hatred" debuff on themselves, call out the color of Nezarec's wipe explosion (Light/Dark) for Refuge creation, potentially position Nezarec before DPS phase. |
| Add Clear | 2 | Eliminate spawning Cabal enemies and Colossi, kill Barrier Champions (on Master difficulty), provide backup support to Runners or Taunters if needed, contribute to DPS. |
Walkthrough
- Start: Encounter begins as Runners grab their initial Light/Dark buffs.
- Node Running & Taunting Phase: Runners proceed to activate nodes 1 through 6 on their respective sides. Simultaneously, the two Taunters coordinate to keep Nezarec's Hatred active on one of them, swapping aggro every ~10 seconds by shooting his weak points. Add Clear players manage spawning enemies, prioritizing any Champions on Master difficulty.
- Simultaneous Final Activation: As Runners approach Node 6, they must communicate clearly and coordinate a countdown to shoot/activate their final nodes within the required 5-second window.
- DPS Phase 1: Successful activation stuns Nezarec. The team immediately converges on the pre-determined DPS plate (e.g., back Light plate). Deploy Well of Radiance/other buffs. Apply debuffs (Divinity/Tractor/Tether). Deal maximum damage to Nezarec's chest crit spot for ~30 seconds. Be mindful of his slam attacks causing suppression.
- Refuge Phase (Typically after DPS 1): As the DPS phase ends or shortly after, Nezarec prepares his wipe attack. A Taunter (having recently taken Hatred) calls out the color (Light or Dark) of Nezarec's explosive burst. The Runner of the opposite element grabs their buff, runs to an activated node of the called-out color, and shoots it to create the Refuge aura. All players must quickly step into the aura to gain the protective buff.
- Repeat Cycle: After surviving the wipe (or if it was skipped by speed), players reset to their positions. Repeat the Node Running, Taunting, (potentially Refuge), and DPS cycle until Nezarec reaches critical health.
- Final Stand: Nezarec enters his final stand phase at low health. Unleash all remaining Supers and heavy ammo to finish him within the short (~20s) window before the final wipe.
Strategies
Beginner Strategy
Focus on consistency and survival. Runners should prioritize completing their node sequence correctly, even if slightly slower. Always anticipate needing to perform the Refuge mechanic after the first DPS phase. Taunters need reliable communication for aggro swaps and should use survivable subclasses (like Loreley Sunbreaker). Use dependable DPS options like Linear Fusion Rifles or Thunderlord paired with Divinity. Don't be afraid of needing three or more DPS phases.
Sunbreaker with Loreley Splendor Helm provides excellent survivability through constant healing from Sunspots. Combine with high Resilience and Recovery stats, along with Solar damage resistance mods for maximum durability while holding Nezarec's Hatred.
Advanced Strategy
Aim for speed and efficiency to potentially skip the Refuge mechanic entirely. Runners need optimized paths and potentially assistance from add clear players grabbing buffs simultaneously. Implement high-damage DPS strategies involving coordinated Rocket Launcher volleys (with Gjallarhorn/Tractor Cannon support) and Izanagi's Burden swaps, or optimized Super rotations (Thundercrash, Blade Barrage, Nova Bomb). The Taunter positioning Nezarec near the DPS plate before the phase starts is a key optimization. Aim for a one or two-phase kill.
Best DPS Strategies for Nezarec
Weapon Meta: Similar to Zo'Aurc, but Nezarec's mobility favors reliable burst or tracking.
| Weapon Type | Recommended Exotics/Legendaries | Key Perks | Notes |
|---|---|---|---|
| Rocket Launchers | Gjallarhorn, Hothead, Bump in the Night, Blowout | Auto-Loading Holster, Demo, Explosive Light, Vorpal, Lasting Impression | Top tier burst damage. Pair with Tractor Cannon. Gjallarhorn buffs others. |
| Sniper + Rocket Swap | Izanagi's Burden + ALH Rocket | Honed Edge (Izi), ALH + Damage Perk (Rocket) | High skill ceiling, massive burst potential. Requires precise execution. |
| Machine Gun + Debuff | Thunderlord + Divinity | Overload (Thunderlord intrinsic), Weaken (Div) | Very consistent and easy to use, especially against mobile boss. Good ammo economy. |
| Linear Fusion Rifles | Cataclysmic, Briar's Contempt, Taipan-4FR | Bait and Switch, Firing Line, Focused Fury | Reliable sustained damage, but potentially harder to optimize on Nezarec vs rockets. Needs Divinity. |
| Debuff Tool | Divinity, Tractor Cannon, Hunter Tether (Shadowshot) | Weaken/Debuff | Divinity for crit weapons, Tractor for global buff (rockets), Tether for Super-based debuff. |
Troubleshooting
Wiping to Nodes Not Syncing
The most common failure point. Runners must finish within ~5 seconds of each other. Requires practice, clear communication ("Light side finishing in 3, 2, 1..."), and potentially having add clear help if one side falls behind.
Runners Dying to Nezarec's Hatred
Taunters are failing to maintain aggro control. Ensure Taunters understand the shoulder/chest weak points, the 10-second Hatred duration, and communicate swaps clearly ("Taking Hatred!", "Hatred fading, need swap!"). Taunters should prioritize survival using resilient builds (e.g., Loreley Titan).
Wiping to Nezarec's Wipe Attack
Failure to create the correct Refuge in time, or players not getting the buff. Taunters must make the Light/Dark explosion callout clearly and immediately. Runners need to know instantly who is responsible for creating the Refuge (opposite runner) and which color node to hit. Ensure all 6 players get inside the created aura.
Warlocks running Well of Radiance should consider using Starfire Protocol with Fusion Grenades for additional DPS during damage phases. Pair with Empowering Rift and Touch of Flame for maximum grenade damage output alongside Well's team buff.
Inconsistent DPS / Boss Teleporting
Nezarec's mobility makes DPS frustrating. Utilize positioning strategies: DPS from a back plate, have the Taunter try to lure Nezarec close to the DPS spot before the phase starts. Accept some randomness and focus on maximizing damage when possible.
Suppression During DPS
Nezarec's ground slam cancels Supers/abilities. Standing further back on the DPS plate or within a Well of Radiance can mitigate this. Be ready to jump or reposition if he targets the group directly.
Challenges
All Hands (Weekly Rotator)
This is a significant coordination challenge. Every single player in the fireteam must activate one Light node AND one Dark node before each DPS phase begins. The final Light and Dark nodes (Node 6) must still be activated within 5 seconds of each other.
Synchronicity (Triumph)
Requires the simultaneous activation (within 5 seconds) of the final Light and Dark nodes for every single DPS phase throughout the entire encounter completion.
Strategy: This is essentially the standard mechanic for initiating DPS, but the Triumph demands flawless execution every time. It tests the consistency and communication of the Runners for the entire fight. No room for error on the final node coordination.
Hunters can provide excellent damage with Blade Barrage + Star-Eater Scales or Celestial Nighthawk Golden Gun. For utility, consider running Orpheus Rigs with Deadfall Tether to both debuff Nezarec and provide Super energy back for multiple damage phases.
Bonus Loot: Secrets of the Pyramid
Beyond the encounter chests, Root of Nightmares hides additional rewards for observant Guardians.
Hidden Chests Recap
- Hidden Chest #1: Found during the parkour section after Cataclysm. Enter the square alcove on the right wall where Psions are sniping from.
- Hidden Chest #2: Located in the Darkness Refuge jumping puzzle area after Scission. Find and shoot the Darkness crux below a platform near the stairs/temple structure. This opens a door in the structure behind/nearby containing the chest.
These chests award Spoils of Conquest and random pieces of raid gear (weapons or armor) that the player has already obtained from encounter completions in the current raid run or previous runs. They are a good source for extra rolls but won't unlock new items. Finding both chests contributes to the "Dream Warrior" title and unlocks the "Oxidized Lead" shader via a Triumph.
Deepsight Resonance (Red Border) Chest Puzzle
This multi-step puzzle guarantees one random Deepsight (red border) weapon drop upon completing the raid, aiding in weapon pattern acquisition for crafting.
- Step 1: Identify the Sequence: At the very beginning of the raid, before the first major drop-down, locate a structure on the left side. Behind it, near some flowers/vines, is a display showing three glowing seeds or orbs. Note the sequence of Light (White) and Dark (Orange/Black) orbs from left to right. This three-symbol sequence is the key for the puzzle.
- Step 2: Activate Nodes in Three Hidden Rooms: Throughout the raid, locate three specific hidden rooms. Each room contains both a Light starting node and a Dark starting node. Based on the sequence identified in Step 1, players must activate the correct node type in each room. To activate, shoot the correct starting node, then shoot the corresponding end node it points towards.
- Step 3: Claim the Reward: If all three nodes were activated correctly according to the sequence, the feed will display the message "A great harvest awaits..." after activating the third node. After defeating Nezarec, an additional chest will spawn near the regular final chest, typically to the left of where Nezarec's scythe lands. This chest contains one guaranteed random Deepsight weapon from the Root of Nightmares loot pool.
Raid Rewards: The Spoils of Nightmares
Completing encounters and discovering secrets in Root of Nightmares yields unique weapons, armor, and mods.
Weapons Overview
| Weapon Name | Type | Element | Encounter Drops | Notable Perks |
|---|---|---|---|---|
| Koraxis's Distress | Grenade Launcher (Heavy) | Strand | Cataclysm, Scission, Nezarec | Reconstruction, Chain Reaction, Demolitionist, Envious Assassin, Full Court, Hatchling |
| Nessa's Oblation | Shotgun (Special) | Void | Cataclysm, Scission, Nezarec | Reconstruction, Demolitionist, Repulsor Brace, Destabilizing Rounds, Vorpal Weapon, Focused Fury |
| Mykel's Reverence | Sidearm (Special) | Strand | Scission, Macrocosm, Nezarec | Rewind Rounds, Perpetual Motion, Pugilist, Swashbuckler, Paracausal Affinity, Hatchling |
| Acasia's Dejection | Trace Rifle (Special) | Solar | Scission, Macrocosm, Nezarec | Reconstruction, Rewind Rounds, Target Lock, Incandescent, Paracausal Affinity, Vorpal Weapon |
| Rufus's Fury | Auto Rifle (Primary) | Strand | Macrocosm, Nezarec | Reconstruction, Rewind Rounds, Demolitionist, Target Lock, Paracausal Affinity, Hatchling |
| Briar's Contempt | Linear Fusion Rifle (Heavy) | Solar | Cataclysm, Nezarec | Reconstruction, Rewind Rounds, Demolitionist, Surrounded, Focused Fury, Paracausal Affinity |
| Conditional Finality | Shotgun (Exotic Kinetic) | Stasis/Solar | Nezarec Only | Split Decision, Paracausal Pellets (Intrinsic Exotic Perks) |
Conditional Finality Deep Dive
This unique dual-element Exotic shotgun drops exclusively from defeating the final boss, Nezarec. Ownership of the Lightfall expansion is required to enter the raid.
The base drop chance is estimated to be low, around 5%, similar to other raid exotics like Vex Mythoclast. Completing the raid on Master difficulty does not inherently increase this base drop rate. However, players can increase their odds by completing specific raid Triumphs listed in the Root of Nightmares section of the Journey tab (under Seals/Titles). Claiming these Triumphs provides a cumulative boost to the drop chance.
| Triumph Category (Examples) | Potential Drop Rate Increase? | Notes |
|---|---|---|
| Encounter Challenge Completions | Yes | Completing Illuminated Torment, Crossfire, Cosmic Equilibrium, All Hands. |
| Master Difficulty Completion | Yes | Completing the entire raid on Master difficulty (Final Nightmare Triumph). |
| Specific Encounter Triumphs | Yes | E.g., Shields Up, Synchronicity, Psionic Purge, Singular Orbit. |
| Other Raid Seal Triumphs | Yes | Check the "Dream Warrior" seal for all applicable Triumphs. |
Exotic Perks: Conditional Finality
- Split Decision: The shotgun has two barrels, one firing Stasis pellets, the other firing Solar pellets.
- Paracausal Pellets: Landing most or all pellets from the Stasis barrel freezes the target. Landing most or all pellets from the Solar barrel ignites the target.
It occupies the Kinetic weapon slot despite dealing elemental damage. It holds two rounds in the magazine, firing Stasis then Solar. There is currently no Catalyst for Conditional Finality.
Extremely potent for crowd control and stunning Champions (freezes Unstoppables, ignites Barriers via Solar interactions). Synergizes exceptionally well with both Stasis and Solar subclass builds, enabling powerful elemental verb loops.
Armor Sets Overview
| Class | Set Name | Encounter Drops (Helm / Arms / Chest / Legs / Class Item) |
|---|---|---|
| Titan | Agony | Helm (Enc 1, 4), Arms (Enc 1, 2), Chest (Enc 1, 2, 3), Legs (Enc 2, 3, 4), Mark (Enc 3) |
| Hunter | Trepidation | Helm (Enc 1, 4), Arms (Enc 1, 2), Chest (Enc 1, 2, 3), Legs (Enc 2, 3, 4), Cloak (Enc 3) |
| Warlock | Detestation | Helm (Enc 1, 4), Arms (Enc 1, 2), Chest (Enc 1, 2, 3), Legs (Enc 2, 3, 4), Bond (Enc 3) |
Raid Mods Overview
Root of Nightmares armor pieces can equip unique raid mods that offer powerful effects synergistic with subclasses or raid mechanics.
| Mod Name | Effect | Required Subclass | Slot (Armor Piece) |
|---|---|---|---|
| Chill Out | Defeating a combatant with a Stasis weapon spawns a Stasis crystal. | Stasis | Any |
| Precise Jolts | Rapid precision hits with Arc weapons jolt the target. | Arc | Any |
| Volatile Volleys | Defeating powerful combatants with a Void weapon grants your Void weapons Volatile Rounds. | Void | Any |
| Radiant Heat | Powerful combatant final blows with Solar weapons grant Radiant to you. | Solar | Any |
| Tangled Up | Defeating a combatant with a Strand weapon spawns a Tangle. | Strand | Any |
| Cabal Extinguisher | When an ally gains Field of Light or Flux of Darkness, deal increased weapon damage to Cabal for a short time. | Any | Any |
| Release Recover | When you lose Field of Light or Flux of Darkness, begin recovering health. | Any | Any |
| Focused Light | While you have Field of Light, gain increased weapon damage and resilience. | Any | Any |
| Focused Darkness | While you have Flux of Darkness, gain increased ability damage and mobility. | Any | Any |
First-Timer's Field Guide & Accessibility
Jumping into raids for the first time can be intimidating. Root of Nightmares, being relatively accessible, is a great place to start. Here's advice for newcomers:
Raid Etiquette & Communication
- Patience is Key: Raids involve learning and wiping. Be patient with yourself and your teammates, especially in teaching runs or LFG groups. Experienced groups might clear RoN in under an hour, but learning runs can take 1.5-2 hours or more.
- Use Clear Callouts: Communication is vital. Use simple, agreed-upon terms for mechanics, locations, and enemy types. Announce when you need help or are performing a critical action. Using third-person ("Runner 1 needs help") can sometimes be clearer than first-person ("I need help") in a chaotic fight.
- Listen and Ask: If joining a teaching run or playing with experienced players (Sherpas), listen carefully to explanations. Don't hesitate to ask questions if something is unclear – it's better than causing a wipe due to misunderstanding.
- Microphone: While some LFG posts might say "No Mic," having a microphone is highly recommended, bordering on essential, for effective coordination in raids.
Tips for Learning and Improving
- Preparation: Watching video guides or reading walkthroughs (like this one!) beforehand provides a solid foundation for understanding the mechanics.
- Start Simple: Offer to take on the Add Clear role first. This allows observation of the mechanics in action while contributing in a crucial, but often less complex, role. As comfort grows, volunteer for mechanic roles like running plates or taunting.
- Embrace Wipes: Wiping is part of the learning process. Don't get discouraged. Each attempt helps build muscle memory and understanding. The structure of Root of Nightmares, introducing the core node mechanic early and iterating on it, helps reinforce learning throughout the raid.
- Speak Up: If confused about a mechanic or role, ask the team for clarification. A quick explanation is always better than repeated wipes caused by uncertainty.
Common Mistakes & Troubleshooting Recap
- Cataclysm: Timer expiring due to slow Tormentor kills; runner errors causing delays. Fix: Focus fire on Tormentors, clear communication, practice running.
- Scission: Frequent deaths to inconsistent launchers; buff lockouts from uncoordinated grabs; dying to shielded Redolence enemies. Fix: Apply launcher safety tips (FPS cap!), communicate buff timings meticulously, ensure add clear gets buffs.
- Macrocosm: Errors in planet identification or swapping; taking too long in setup phases shortening DPS; dying to boss stomp. Fix: Use clear callouts, practice efficient movement, prioritize speed in mechanics, maintain distance from boss.
- Nezarec: Failure to sync final node activations; runners dying due to poor aggro management; incorrect Refuge creation leading to wipes; inconsistent DPS due to boss movement. Fix: Practice final dunk countdowns, ensure Taunters communicate swaps, double-check Refuge calls/creation, use positioning strats for DPS.
- General: Lack of communication, not prioritizing high-threat targets (Champions, specific mechanics), dying to avoidable damage (standing in enemy AoE, poor positioning). Fix: Encourage active communication, assign priorities, emphasize situational awareness.
Conclusion: Nightmare Conquered
Venturing into the heart of the Witness's corrupted Pyramid ship, Guardians face down the Shadow Legion and the terrifying Nezarec. From mastering the Field of Light and Flux of Darkness in Cataclysm and Scission, to aligning the cosmos against Zo'Aurc, and finally confronting the Final God of Pain himself, the Root of Nightmares offers a unique and visually stunning raid experience. While perhaps more mechanically forgiving than some of its predecessors, it still demands teamwork, communication, and skillful execution, especially when tackling its challenges or the demanding Master difficulty. By understanding the mechanics, preparing adequately, and communicating effectively, any fireteam can overcome the terrors within and claim the spoils of this nightmare.
Good luck out there, Guardian. May your loot be plentiful and your wipes few!