
Welcome, Guardians, to the definitive guide for Vow of the Disciple, a pinnacle six-player raid experience introduced in Destiny 2's The Witch Queen expansion. Nestled within the imposing, resonant architecture of a Pyramid ship submerged in Savathûn's Throne World, this raid presents a formidable challenge, demanding intricate puzzle-solving, precise combat execution, and flawless team coordination. Renowned for its complex mechanics and powerful adversaries, Vow of the Disciple tests the mettle of even the most seasoned fireteams.
Before venturing into the depths of the Sunken Pyramid, preparation is paramount. The recommended Power Level for the Normal difficulty is 1530, while the Master difficulty demands 1580. However, Power Level alone is insufficient; success hinges on a well-coordinated fireteam of six Guardians working in concert. Optimizing loadouts for both add clearing and boss damage, understanding artifact mods, and possessing a fundamental grasp of the raid's core mechanics are crucial prerequisites.
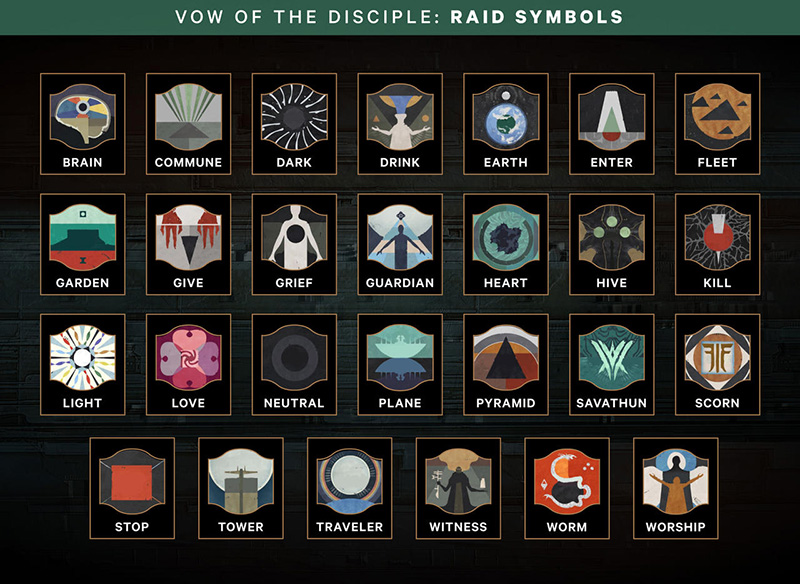
At the heart of Vow of the Disciple lies its unique language: a set of 27 distinct symbols, or glyphs, that form the basis of nearly every puzzle and encounter. Familiarity with these symbols and establishing clear, consistent callouts within your fireteam are non-negotiable for navigating the challenges ahead. Miscommunication during critical moments can easily lead to a wipe.
This guide will provide a comprehensive walkthrough of the entire Vow of the Disciple raid, structured to equip your fireteam for success. We will delve into:
- The Symbol Reference Guide: A complete breakdown of all 27 glyphs, including official names and common community callouts.
- Disciple's Bog: Navigating the opening sequence and escorting the payload.
- Encounter 1: Acquisition: Strategies, roles, and challenge guide.
- Encounter 2: The Caretaker: Boss mechanics, roles, DPS strategies, and challenge guide.
- Encounter 3: Exhibition: Relic management, roles, navigating the gauntlet, and challenge guide.
- Encounter 4: Rhulk, Disciple of the Witness: Final boss mechanics, phases, DPS strategies, and challenge guide.
- Spoils of the Disciple: Loot tables, the Collective Obligation Exotic, and hidden secrets.
- Optimal Loadouts: Recommended subclasses, weapons, and mods.
- Accessibility & Simplified Guide: Tips for approachability and a printable reference concept.
Prepare yourselves, Guardians. The secrets of the Sunken Pyramid await.
The Language of the Disciple - Symbol Reference Guide
Mastering the visual language of the Vow of the Disciple raid – its 27 unique symbols – is the bedrock upon which success is built. These glyphs permeate every major encounter, acting as both instructions and crucial pieces of information that must be relayed accurately and swiftly between teammates. Clear, consistent communication is paramount, especially when joining groups via Looking For Group (LFG) systems, where shared understanding prevents fatal errors.
Fortunately, Bungie provided official names for each symbol, discoverable within the raid itself. In the large "museum" or "glyph gallery" room preceding the Acquisition encounter, or during the weekly Preservation mission (a less intense, solo-able version of parts of the raid), players can aim down sights (ADS) at any symbol, and its official name will appear just beneath the radar. This room also serves as a location to unlock entries for the Vow of the Disciple lore book.
However, the Destiny 2 community, known for its efficiency and sometimes irreverent naming conventions, quickly developed alternative callouts. While the official names offer a valuable standard, particularly for LFG where consistency is key, many fireteams find community-derived names simpler, faster to say under pressure, or simply more memorable and humorous. Common examples include calling "Knowledge" simply "Brain", "Stop" as "Red Square", "Worship" as "Man on Man" or "Chaos Elmo", and "Give" (the official name for the symbol often initially called "Gift") being referred to as "Crying Guy", "Hands", or jokingly "Raidsecrets".
This divergence between official terminology and community shorthand presents a potential communication hurdle. Using official names ensures anyone familiar with the standard can understand, which is vital for LFG success. Conversely, community callouts can feel more natural or efficient for established teams but may cause confusion when playing with unfamiliar Guardians.
To aid in learning and standardizing callouts, various community resources have emerged, including flashcard-style quizzes and interactive helper tools or apps. The following table provides a comprehensive reference, listing each symbol, its official name, and some of the most common community alternatives encountered.
| Symbol Description | Official Name | Common Community Callouts |
|---|---|---|
| Abstract shape resembling Ascendant Realm geometry | Ascendant Plane | Ascendant, Taken Realm, Shattered |
| Stylized representation of the Black Garden | Black Garden | Garden, Vex Garden, Flowers, Radiator Springs, Italian Flag |
| Dark, heart-like shape with tendrils | Black Heart | Dark Heart, Smudge, Australia in a Fishbowl |
| Abstract representation of thought or mind | Commune | Communicate, Pink Floyd, Prism, Volcano, Lightshow |
| Dark, circular void | Darkness | Dark, Black Hole, Black Circle, Dark Butthole, Anus |
| Stylized chalice or cup | Drink | Cup, Goblet, Chalice, Fountain, Cuphead |
| Representation of Earth | Earth | Globe, World, Blue Marble |
| Downward-pointing cone or teardrop | Enter | Entrance, Door, Teardrop, Upside-down Ice Cream Cone, Drip |
| Abstract shape resembling Pyramid ships | Fleet | Ships, Doritos, Armada |
| Open hands offering something | Give | Gift, Hands, Crying Guy, Raidsecrets |
| Abstract shape suggesting sorrow or claws | Grieve | Grief, Sad, Claws, Hollow, Heartless, Manhole, RDJ |
| Stylized Ghost shell | Guardian | Ghost |
| Three-eyed Hive symbol | Hive | Hive Eyes, Savathun, Savathun's Face |
| Crosshairs or target symbol | Kill | Shoot, Target, Attack |
| Brain-like symbol | Knowledge | Brain, Big Brain |
| Bright, circular light source | Light | White Hole, White Circle, Light Butthole |
| Heart shape | Love | Heart |
| Blank or empty frame | Neutral | Blank, Empty, Nothing |
| Triangular Pyramid ship shape | Pyramid | Triangle, Dorito, Dark Ship |
| Stylized representation of Savathûn | Savathun | Witch Queen, WQ |
| Forked symbol resembling the Scorn sigil | Scorn | Forsaken, Stabby |
| Red square | Stop | Red Square, Square, Halt |
| Representation of the Tower | Tower | Spire, City Tower |
| Representation of the Traveler | Traveler | Ball, Orb, Sphere, Light Ball |
| Figure resembling the Witness | Witness | Entity, Dark Figure, Veil |
| Stylized figure in a pose of reverence | Worship | Pray, Bow, Kneel, Man on Man, Chaos Elmo, Kylo Ren |
| Segmented worm-like creature | Worm | Wyrm, Snake, Snek |
Breaching the Pyramid - Disciple's Bog
The journey into the Vow of the Disciple raid begins not within the Pyramid itself, but in the murky swamps of Savathûn's Throne World, specifically the Miasma region. Guardians will spawn facing a large, ominous, sealed door guarded by a projection of Savathûn and her Lucent Hive forces. This initial area imposes no respawn restrictions, making it an ideal spot to finalize loadouts and test builds before the true challenges begin. Defeating Savathûn's projection is the sole requirement to unseal the entrance.
Once inside, Guardians will mount their Sparrows and navigate a boggy path until they reach a stationary, dark ferry or barge. This vessel becomes the focal point of the first major activity: escorting it through the swamp to the Pyramid's entrance. As the fireteam approaches, Scorn enemies will begin to spawn, initiating the escort sequence.
The core mechanic here involves powering the ferry with "Knowledge." To do this, the fireteam must defeat specific yellow-bar Ogre or Abomination enemies designated as Knowledge Bearers. Each defeated Knowledge Bearer spawns several (typically three) glowing orange shards or splinters of Knowledge around the area, easily identifiable by the pillars of light they emit. Guardians must collect these shards. Picking up shards grants stacking statuses: Heightened Knowledge, Brimming Knowledge, and finally Overflowing Knowledge upon collecting the third shard. A Guardian can hold a maximum of three Knowledge shards at once. Once holding three, they must return to the ferry and stand within its aura to automatically deposit the Knowledge. Depositing enough Knowledge (nine total Fonts) allows the ferry to move forward to the next stop. This cycle of defeating Knowledge Bearers, collecting shards, depositing them, and defending the ferry repeats several times as the vessel progresses through the bog.
This opening sequence serves as more than just an entry point; it functions as an interactive tutorial for several key raid concepts. It introduces the Pervading Darkness debuff and the importance of specific safe zones (the ferry's aura) for managing it. It also familiarizes players with interacting with Darkness-related objects (the Knowledge shards) as a core progression mechanic. The subsequent journey into the Pyramid reinforces this.
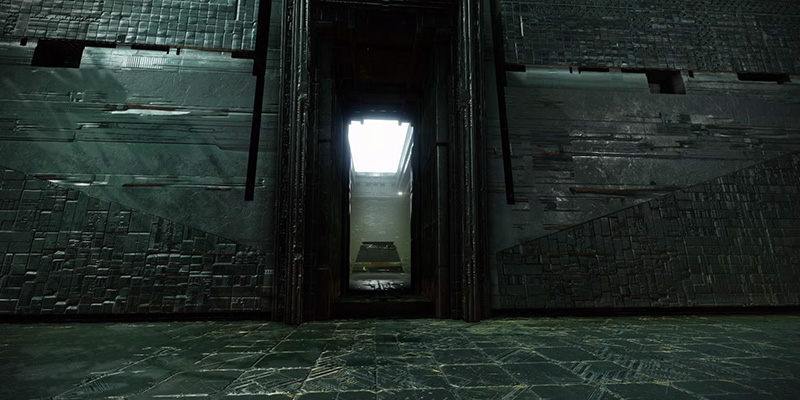
Eventually, the ferry reaches its final destination: the entrance to the massive Pyramid structure. Guardians proceed inside, following hallways filled with intriguing environmental details, such as a giant Hive Worm cross-section on display, offering narrative context without immediate combat pressure. This path leads to the large "museum" or "glyph gallery" room containing pillars displaying all 27 raid symbols. This space is explicitly designed for fireteams to familiarize themselves with the symbols and their official names before the encounters begin. From this room, a hole on the right side leads down into the depths of the Pyramid, towards the first official encounter. Remember to break the fall with a jump, as the drop is significant.
Encounter 1 - Acquisition
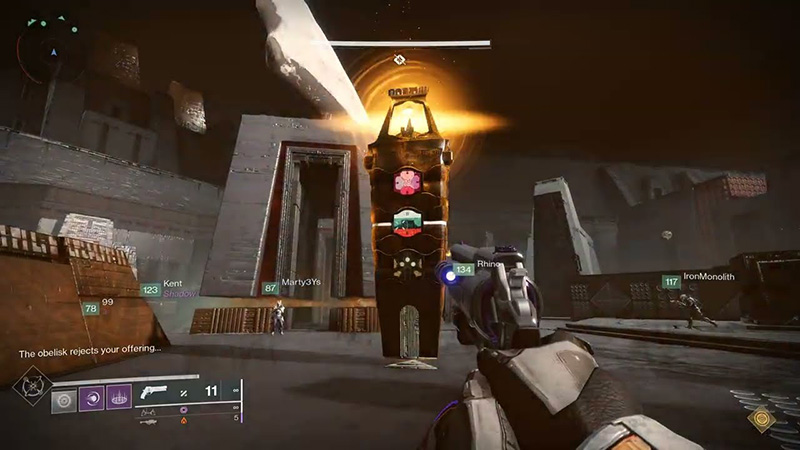
The first formal encounter, Acquisition, serves as a complex introduction to the raid's core symbol mechanics, demanding precise communication and coordinated execution from the entire fireteam. The primary objective is to make successful "offerings" to three distinct obelisks within the arena by deciphering and inputting sequences of three symbols. This process must be repeated three times to complete the encounter.
Arena Layout and Key Elements:
The Acquisition arena is a large, multi-level space dominated by several key features:
- Obelisks: Three large, prism-like structures are located near the center: one near the entrance (Spawn), one to the left, and one to the right. These obelisks serve as the offering receptacles and act as wipe timers; they slowly fill with orange light, and if one fills completely, the team wipes. Enemy fire and player shots hitting the obelisks accelerate this timer.
- Totems: In front of each obelisk stands a smaller totem pole with three hexagonal plates or empty spaces. These totems display instructional symbols throughout the encounter.
- Dark/Light Division: A large wall in the center features the Pyramid and Traveler symbols, effectively dividing the room into a Dark (Pyramid, typically left) side and a Light (Traveler, typically right) side. This division is crucial for identifying enemy spawn locations.
- Symbol Rooms: Nine rooms line the perimeter of the arena, each marked with a distinct symbol above its entrance. The specific rooms are Enter (near spawn), Gift, Grief, Stop, Knowledge (Dark side), and Worship, Kill, Commune, Drink (Light side). Inside each room, there's also a conceptual Light (left) and Dark (right) side.
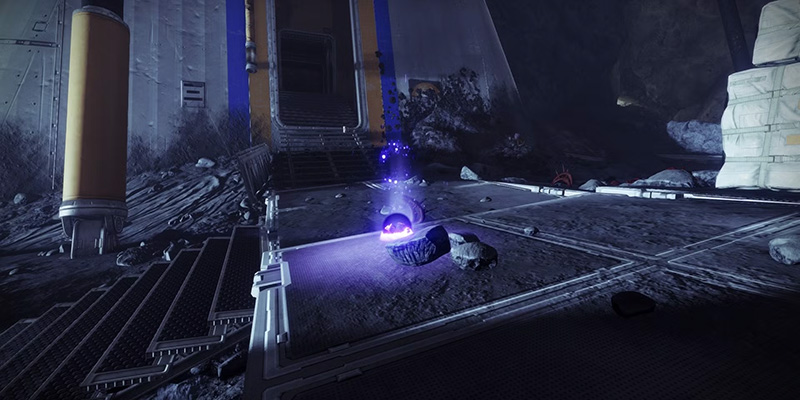
- Central Crux: A shootable Darkness shard in the center of the room initiates the encounter and subsequently toggles the doors to the perimeter rooms (opening closed doors and closing open ones).
Role Assignments:
The standard strategy involves splitting the six Guardians into three teams of two, each assigned to one obelisk. Each pair consists of:
This player remains near their assigned obelisk, focusing on eliminating incoming enemies, particularly the yellow-bar Scorn Lurkers called Adherents, which are the only enemies that directly damage the obelisks. Defenders must also relay the symbols appearing on their totem to their partner. On Master difficulty, Defenders need the Unstoppable Champion mod.
This player has a more complex role. They must locate and kill the correct Taken Knight (Disciple's Compass) based on the Defender's callout. They then enter the specific symbol room indicated by the next totem callout, kill the correct Glyphkeeper (Scorn Chieftain) inside based on the final Light/Dark callout, and crucially, identify and call out the symbol that drops from the defeated Glyphkeeper. Finally, they assist in locating the correct obelisk for the offering. On Master, Runners need the Overload Champion mod.
Encounter Flow and Mechanics:
The encounter unfolds through a repeating cycle of information gathering and execution:
- Initiation: Shoot the central crux to begin. Enemies spawn, and the obelisk wipe timers start.
- Totem Callout 1 (Location): The top plate on one totem illuminates with either the Pyramid or Traveler symbol. The Defender calls this out. Pyramid signifies a Taken Knight (Disciple's Compass) has spawned on the Left/Dark side of the arena; Traveler signifies a spawn on the Right/Light side.
- Knight Kill: The corresponding Roamer finds and eliminates the Taken Knight. An Unstoppable Ogre spawns upon the Knight's death, requiring attention from Defenders.
- Totem Callout 2 (Destination): The middle plate on the same totem reveals a new symbol. This symbol corresponds to one of the nine perimeter rooms. The Defender calls this out, and the Roamer heads to that specific room. The central crux may need to be shot to open the door.
- Totem Callout 3 (Target): Once the Roamer enters the designated room, the bottom plate on the same totem displays either the Light or Dark symbol. The Defender relays this. Inside the room, two Glyphkeepers spawn (one Left/Light side, one Right/Dark side). The Roamer must kill the Glyphkeeper corresponding to the callout (Light symbol = kill Left Glyphkeeper; Dark symbol = kill Right Glyphkeeper). Beware of Screebs that also spawn inside.
- Symbol Collection: Upon killing the correct Glyphkeeper, a symbol appears floating where it died. The Roamer must note this symbol (writing it down or putting it in team chat is recommended) and call it out to the team. Successfully killing the correct Glyphkeeper also resets the obelisk wipe timer.
- Cycle Repetition: The entire process (steps 2-6) repeats for the other two obelisks/teams until three distinct symbols have been collected from the Glyphkeepers.
- The Offering: Once three symbols are collected, the fireteam must locate the one obelisk displaying all three of those collected symbols on its faces. The symbols can be on any of the obelisk's three sides.
- Shooting the Symbols: The team assigned to that obelisk (or all available players) must quickly shoot the three correct symbols on that specific obelisk. The order doesn't matter, but speed is critical – there's a short window (around 30 seconds), and shots might need to be timed between obelisk rotations or "waves". Correctly shot symbols glow yellow. Strategies include having multiple players shoot simultaneously or assigning sides. Anyone can shoot the glyphs.
- Confirmation and Completion: A successful offering displays the message "The obelisk accepts your offering" in the chat feed, resets the wipe timer, and completes one round. This entire cycle (steps 2-10) must be completed three times total to finish the encounter. Obelisks that have accepted an offering are excluded from subsequent rounds.
Master Difficulty Notes:
On Master difficulty, the challenge increases significantly: Scorn Glyphkeepers in the symbol rooms become Overload Champions, the Disciple's Compass Knights gain Solar Shields, and Scorn Wraiths also have Solar Shields. This necessitates specific anti-champion mods: Defenders should equip Unstoppable mods for the Ogres, while Runners need Overload mods for the Glyphkeepers inside the rooms. Match Game will also be active, requiring coverage for Solar shields.
Challenge: Swift Destruction
Strategy:
- Preparation: All six players must equip an Unstoppable mod. Weapons with high burst damage (Rocket Launchers, Parasite, Izanagi's Burden) are recommended.
- Execution: As Unstoppable Champions spawn (one per correct Glyphkeeper kill), the nearest Defender should repeatedly stun them to keep them stationary. Once all three symbols for the phase are collected and all three Champions are present, the team should weaken all three Champions without killing them.
- Coordinated Kill: One player makes a clear countdown call ("3, 2, 1, Kill!"). On the call, the entire team focuses fire to eliminate all three Champions almost simultaneously. Watch the feed for three rapid "A Champion is defeated!" messages.
- Timing: The coordinated kill can happen after the obelisk offering is accepted but before the phase fully ends. Alternatively, for the final (third) phase, the Champions can be left alive to despawn upon encounter completion.
- Failure: If the time between Champion kills is too long (estimated >5 seconds), the "Challenge failed" message appears, requiring a wipe and restart.
Encounter 2 - The Caretaker
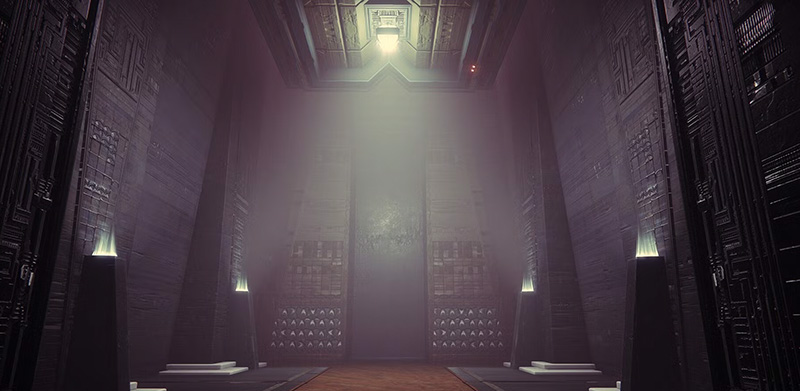
Following the Acquisition encounter, fireteams face the first true boss of the Vow of the Disciple raid: the Caretaker. This multi-stage battle takes place across three distinct floors, culminating in a frantic final stand. The core loop involves stunning the relentlessly advancing Caretaker while simultaneously collecting and offering symbols to an obelisk, mirroring mechanics from the previous encounter but adding significant pressure and environmental hazards.
Starting the Encounter:
The fight begins after ascending from the Acquisition area. Locate the obelisk and the large closed door behind it. Shooting one of the two Darkness cruxes flanking the door will open it and initiate the encounter.
Role Assignments:
Success against the Caretaker demands clear role division:
These Guardians are responsible for entering the dark room behind the starting door to collect symbols. They must memorize the symbols (and potentially their order), exit the room quickly to manage Pervading Darkness stacks, and shoot the collected symbols on the obelisk outside. Hunters, particularly Nightstalkers using invisibility, are well-suited for this role due to the darkness and enemies within the symbol room.
This crucial role prevents the Caretaker from reaching the obelisk, which results in an instant wipe. One player (the "baiter" or "taunter") needs to get close to the Caretaker to provoke its powerful ground slam attack. Immediately after the slam, the Caretaker's face and back will glow yellow. The baiter (or another player) shoots the face to stagger it, and then another player (the "back shooter") shoots the exposed backpack to fully stun the boss, halting its advance temporarily. This stun cycle must be repeated frequently to buy time for the runners. The player who baits the slam receives the "Caretaker's Gaze" debuff, causing the boss to focus on them until the next stun; this player might need to swap roles if they cannot re-acquire aggro. Using Melee Damage Resistance mods can significantly help the baiter survive the slam.
These players focus on eliminating the numerous Scorn and Taken enemies that spawn throughout the arena. Their priorities are protecting the stun team and preventing enemies (like Abated Adherents) from damaging the obelisk or interfering with symbol runners. They must also destroy the tracking projectiles (often called "worms" or "bees") launched by the Caretaker, which deal Solar damage and apply Pervading Darkness.
Symbol Room and Offering Mechanics:
- Entering and Collecting: Runners enter the dark room through the door opened at the start. Inside, they must find and memorize symbols scattered around the area. The goal is to collect nine symbols per floor to offer to the obelisk. The symbols are drawn from the same set of 27 used throughout the raid.
- Pervading Darkness: While inside the symbol room, runners accumulate stacks of Pervading Darkness. Reaching 10 stacks is fatal. Runners must exit quickly to allow the stacks to dissipate before re-entering.
- Environmental Progression: The symbol room's layout changes and increases in difficulty on each subsequent floor. Floor 2 introduces pitfalls, while Floor 3 features a much larger, multi-level space with dangerous jumps. This environmental scaling demands increased movement skill and careful navigation from the runners as the fight progresses. If Pervading Darkness stacks get too high or the room becomes too dangerous, runners can opt to collect fewer than three symbols per run and make extra trips. Taken Wizards are always present inside.
- Offering: Once outside, runners shoot the symbols they collected onto the central obelisk when prompted. There's a limited time to shoot all symbols from a single collection run. If the Caretaker reaches the obelisk before all nine symbols for the floor are successfully offered, the team wipes.
Damage Per Second (DPS) Phase:
- Initiation: The DPS phase begins once all nine symbols for the current floor have been successfully offered to the obelisk.
- DPS Plates: Three circular plates on the ground near the obelisk will illuminate sequentially, starting with the one closest to the stairs the Caretaker ascended. The entire team must stand within the currently active glowing plate to damage the Caretaker. Teams need to move quickly to the next plate as the previous one fades.
- Damage Cap (Healthgating): The amount of damage the Caretaker can take per floor is capped, indicated by divisions on its health bar. The goal is to reach this damage threshold on each floor.
- Linear Fusion Rifles (Cataclysmic, Sleeper Simulant, Reed's Regret)
- Rocket Launchers (especially one Gjallarhorn buffing Legendary rockets like Palmyra-B or Hothead)
- Izanagi's Burden paired with an auto-loading rocket
- Witherhoard for damage-over-time
- Outbreak Perfected (if low on Special/Heavy ammo)
- Divinity (highly recommended for crit spot and debuff)
- Well of Radiance (Warlock) for healing and damage buff
- Mobius Quiver (Hunter) for high Void damage
- Thundercrash (Titan) for burst damage
- Banner Shield (Titan) for protection
- Nova Bomb (Warlock) for high burst damage
Floor Progression and Final Stand:
After each DPS phase concludes, a set of golden stairs descends, allowing the team to move to the next floor. The entire cycle of stunning, symbol running, and DPS repeats on floors 2 and 3, with the aforementioned changes to the symbol room layout.
Following the third floor's DPS phase, the team ascends a final set of stairs to initiate the Final Stand. This phase takes place in a long hallway with three final DPS plates that illuminate sequentially as the team advances towards the Caretaker. There are no more symbols or stuns. The objective is simple: defeat the Caretaker before the buff from the final DPS plate expires. Failure results in an immediate wipe, forcing a restart of the entire encounter. The Caretaker continues to fire its projectiles during this phase; equipping Solar Damage Resistance mods can improve survivability. Saving some Supers and Heavy ammo for this final push is highly recommended.
Master Difficulty Notes:
The Master version introduces more enemies and adds Taken Phalanxes with Arc Shields near the stun team's area. Match Game necessitates dealing with these shields effectively.
Challenge: Base Information
Strategy:
- Relay System: This necessitates a symbol relay. Typically, two runners alternate. Runner 1 enters, grabs one symbol, exits. As Runner 1 exits/offers, Runner 2 enters, grabs one symbol, exits. Runner 1 offers their symbol, then re-enters as Runner 2 offers theirs. This continues for all nine symbols.
- Three-Runner Variant: Some teams find using three runners, each grabbing one symbol per cycle, to be faster and less pressure-intensive.
- Communication & Timing: Precise communication is vital. Runners must announce they have a symbol. Door management (shooting the crux to keep the door open for exiting runners) is crucial. Players must wait for the obelisk prompt "Obelisk requests offering from [Player Name]" before shooting their symbol to avoid conflicts.
- Impact: This challenge significantly slows down the symbol collection phase, placing greater emphasis on flawless execution by the stun team and ad clear team to buy enough time. Avoid accidentally picking up a second symbol, especially when sprinting or near corners.
- Failure: Picking up more than one symbol instantly fails the challenge, requiring a wipe.
Encounter 3 - Exhibition
The Exhibition encounter, sometimes referred to as the "Upended Summit" in Triumphs, is a high-octane gauntlet that tests a fireteam's coordination, communication, and ability to manage multiple mechanics under strict time constraints. There is no traditional boss; instead, the team must navigate through four distinct rooms, utilizing three different relics to overcome obstacles, defeat enemies, decipher symbols, and extend a constantly ticking timer. The encounter concludes successfully only when all three relics are deposited in the final vestibule.
Relics and Associated Debuffs:
Three key relics, introduced sequentially, are central to this encounter:
This is the first relic acquired and is present in all four rooms. Its primary purpose is to destroy the immune shields of specific Taken Knights (Disciple's Hourglass) that spawn after Glyphkeepers are defeated. Only the Shard holder can damage these Knights. Killing a Knight extends the encounter timer (Terminal Resonance) by approximately 40 seconds. The Shard holder can read the symbols dropped by defeated Taken Glyphkeepers. Picking up the Shard applies the Terminal Resonance debuff to the entire fireteam. This acts as the main encounter timer (starting around 1:14), and if it reaches zero, the team wipes.
This relic becomes available starting in Room 2. The holder can use its cleanse ability (typically LT/L2) to remove stacks of Pervading Darkness from themselves and nearby teammates. This debuff accumulates over time or from specific enemy attacks and is fatal at 10 stacks. The Shield holder can also read the symbols dropped by defeated Taken Glyphkeepers. Picking up the Shield applies Pervading Darkness stacks to the holder.
This relic appears starting in Room 3. The holder uses its grenade ability (typically LB/L1) to destroy Taken Blight orbs scattered throughout the room. These Blights make nearby enemies immune to all damage until destroyed. The Blight holder can also read the symbols dropped by defeated Taken Glyphkeepers.
Roles and Relic Rotation Strategy:
Due to Curbed Resonance, players must swap relic responsibilities. A common approach is to divide the fireteam into two groups of three. One group handles the relics in Rooms 1 and 3, while the other group takes over in Rooms 2 and 4. Within each room, the roles are:
- Relic Holders (1-3 players): Carry the active relics, perform their specific functions (kill Knights, cleanse, destroy Blights), and read Taken Glyphkeeper symbols.
- Add Clear / Symbol Readers (Remaining players): Focus on defeating regular enemies (including Overload Champions on Master), killing Scorn Glyphkeepers, reading the Scorn symbols, identifying the common symbol(s) with the relic holders, and shooting the correct symbol(s) on the exit door.
Encounter Flow (Generalized Per Room):
- Start: Enter the room and pick up the available relic(s) from the deposit stations. This starts the Terminal Resonance timer.
- Initial Clear & Mechanics: Defeat initial waves of enemies (Hobgoblins are mentioned as spawning first). Relic holders perform their duties: Shield holder cleanses Pervading Darkness, Blight holder destroys immunity Blights.
- Glyphkeeper Phase: Once initial enemies are cleared, Scorn and Taken Glyphkeepers spawn. Kill both types.
- Symbol Reading & Identification: Relic holders read the three symbols dropped by the Taken Glyphkeeper. Non-relic holders read the three symbols from the Scorn Glyphkeeper. Communicate clearly to find the symbol(s) common to both sets. Room 1 requires one common symbol; Rooms 2, 3, and 4 require two.
- Taken Knight Phase: After the Glyphkeepers die, one or two Taken Knights (Disciple's Hourglass) spawn. The Resonant Shard holder must quickly kill the Knight(s) to add time to the Terminal Resonance clock. (Room 1: 1 Knight; Rooms 2-4: 2 Knights).
- Open Exit: Shoot the identified common symbol(s) on the plates near the exit door to open it.
- Transition: Proceed to the next room's vestibule and deposit all currently held relics into the stations. This resets the timer and debuffs. Players who just deposited relics will have Curbed Resonance and cannot pick up the next set.
Room-Specific Notes:
Taken Blight Spawns: Blight locations alternate sides based on the first spawn in a room (e.g., if first is left, next is right). This predictability helps the Taken Relic holder plan their path.
Loadout Recommendations:
Prioritize strong add clear and Overload Champion counters (for Master). Effective options include:
- Exotics: Witherhoard, Gjallarhorn, Tractor Cannon, Sleeper Simulant.
- Legendaries: SMGs (Funnelweb, Submission), Blinding Grenade Launchers, Wave Frame Grenade Launchers, Swords (Falling Guillotine).
- Subclasses: Void 3.0 builds with Devour aspects (Echo of Starvation) are excellent for survivability, especially when combined with Orb/Well generation mods (Void Siphon, Elemental Armaments, Volatile Flow, Well of Tenacity). Crowd control Supers (Shadowshot, Silence and Squall, Glacial Quake, Nova Bomb) are valuable.
Master Difficulty Notes:
Master Exhibition introduces Overload Scorn Glyphkeepers and Unstoppable Taken Glyphkeepers, requiring both anti-champion mods within the fireteam. Additionally, Taken Hobgoblins gain Void Shields, and Scorn Wraiths gain Solar Shields, demanding appropriate elemental coverage due to the Match Game modifier.
Challenge: Defenses Down
Strategy:
- Knight Skipping: Since there are seven Knights total (1 in Room 1, 2 in Rooms 2-4) and only six players, one Knight must be skipped. Skipping the second Knight in Room 2 is a common and relatively safe strategy, as Room 2 is shorter. Alternatively, killing only one Knight per room is possible but significantly increases time pressure.
- Relic Passing: This challenge necessitates frequent passing of the Resonant Shard. In rooms with two Knights (Rooms 3 and 4), the player who kills the first Knight must drop the Shard safely for another designated player (who hasn't killed a Knight yet) to pick up and kill the second Knight. Careful coordination is needed to manage the Curbed Resonance cooldown when passing the Shard mid-room.
- Tracking: Teams must meticulously track which player has killed a Knight. Using a chart or assigning players (Player 1 kills Knight in Room 1, Player 2 kills first Knight in Room 2, etc.) is highly recommended.
- Failure: If any player kills a second Knight, the "Challenge failed" message appears, requiring a wipe. Knights accidentally dying to environmental factors can also cause issues.
Encounter 4 - Rhulk, Disciple of the Witness
The final confrontation of the Vow of the Disciple raid pits Guardians against Rhulk, the First Disciple of the Witness. This encounter is a multi-phase battle renowned for its dynamic movement, intricate buff management, and aggressive boss AI, culminating in a high-pressure final stand.
Starting the Encounter:
To begin, approach the large orange energy barrier at the top of the stairs leading into the arena. The fireteam will be forcefully knocked back, and a large Darkness crystal will appear above Rhulk. This crystal immediately begins inflicting rapidly stacking Pervading Darkness on the entire team; it must be destroyed quickly to stop the debuff and grant one player the initial Leeching Force buff.
Phase 1: Pushing Back the Barrier
The first major phase involves managing buffs and deciphering symbols to push back Rhulk's protective energy barrier six times, allowing the team to ascend the stairs to the main arena.
- Buff Handlers/Rotators (2-4 players): These players are responsible for acquiring, splitting, converting, and dunking the Leeching Force and Emanating Force buffs.
- Ad Clear/Readers (2-3 players): These players focus on eliminating spawning enemies (including Glyphkeepers) and reading the necessary symbols.
The Buff Cycle - Leeching Force & Splitting:
- The player who destroyed the initial crystal gains Leeching Force, a 45-second buff.
- This player must immediately go to the large symbol plate near the spawn area (often called "Give" or "Hands" symbol).
- Standing on the plate spawns two smaller Darkness crystals to the left and right of Rhulk.
- Two different players (without Leeching Force) must shoot these smaller crystals. Doing so grants them Leeching Force and removes it from the player on the plate. This "splitting" process is fundamental to keeping the buff active.
This cycle of acquiring, splitting, and managing Leeching Force is the central activity of Phase 1. The team must continuously pass the buff between players using the splitting mechanic to prevent the timer from expiring on any individual. If Leeching Force is lost entirely (e.g., both holders let it expire or convert simultaneously without a backup), Rhulk spawns another large crystal. The team has a limited number of these "recoveries" (often cited as one free recovery, wipe on the second loss) before wiping. Maintaining the buff cycle flawlessly is key, especially for the Looping Catalyst challenge.
Converting to Emanating Force:
To deposit the buff and push back the barrier, one player currently holding Leeching Force must intentionally stand in Rhulk's sweeping laser beam attack. This converts Leeching Force into Emanating Force, resetting the buff timer and allowing the player to pass through the orange barrier. Players without Leeching Force will be killed by the beam. Only one player should convert per dunk cycle (unless attempting the double dunk strategy later).
Symbol Reading and Dunking:
- While buff juggling occurs, the Ad Clear team kills spawning enemies, including two Glyphkeepers (one Scorn, one Taken).
- Killing the Glyphkeepers reveals two sets of three symbols on large pillars near the back of the arena. Players with Leeching or Emanating Force can see the symbols on the Left pillar; players without any buff see the symbols on the Right pillar.
- The team communicates to identify the one symbol that appears in both sets (the common symbol).
- Six smaller totems are arranged near the barrier (often labeled L1, L2, L3 and R1, R2, R3 from front to back). Players without buffs can see the symbols currently displayed on these totems.
- The non-buffed players identify which two totems display the common symbol found in step 3. They call out the location(s) (e.g., "Common symbol is Traveler, dunk at L1 and R2").
- The player with Emanating Force runs past the barrier and deposits their buff into one of the correct totems. Dunking at the wrong totem results in death. A successful dunk pushes the barrier back slightly.
The team needs to successfully deposit Emanating Force six times total to fully push back the barrier and ascend the stairs. This requires continuously repeating the split-convert-read-dunk cycle. Teams can dunk one buff at a time for safety or, after the fourth dunk, convert and dunk two buffs simultaneously (double dunk) to speed up the process.
Phase 2: Breaking Rhulk's Armor
Once the barrier is down, the fireteam ascends the stairs into the main arena for a direct confrontation.
Arena and Attacks:
The arena features four pillars at the corners, corresponding to symbols: Traveler (bottom left), Pyramid (top left), Light (bottom right), Darkness (top right). Rhulk becomes mobile and aggressive, using direct attacks alongside spawning Shadow Thrall. Key attacks include:
- Rhulk's Lunge: A fast dash forward with his glaive, telegraphed by golden waves on the ground. Move perpendicular to avoid.
- Laser Barrage/Beam: Fires beams of energy, often in a cross pattern. Used to convert Leeching Force.
Glaive and Symbol Mechanic:
- After performing a lunge attack, Rhulk leaves his glaive momentarily embedded in the ground.
- A designated player shoots the glaive. This grants that player Leeching Force. It's crucial only the intended player shoots it to avoid messing up the buff assignment.
- Shooting the glaive also causes a symbol (Traveler, Pyramid, Light, or Dark) to appear briefly where the glaive was. Only players without Leeching/Emanating Force can see this symbol.
Convert, Dunk, and Break Weak Spot:
- The non-buffed players call out the symbol seen from the glaive.
- The player with Leeching Force gets hit by Rhulk's next laser beam attack to convert it to Emanating Force.
- The team directs the Emanating Force player to the corner pillar corresponding to the called-out glaive symbol.
- The player dunks the Emanating Force at the correct pillar.
- A successful dunk reveals a glowing white weak spot on Rhulk's armor (shoulders or legs).
- The entire team focuses fire to destroy this weak spot. Using Special or Heavy ammo is advised for speed.
This entire sequence (shoot glaive, read symbol, convert, dunk, destroy weak spot) must be repeated four times total to break all of Rhulk's armor pieces and initiate the DPS phase.
Phase 3: Damage Per Second (DPS)
Begins after the fourth weak spot is destroyed. Rhulk becomes enraged, moves more erratically, and attacks more frequently.
DPS Strategies:
- Divinity: Essential for creating a large, consistent critical hit spot on the mobile boss and applying a debuff.
- Heavy Weapons: Rocket Launchers (ideally buffed by one Gjallarhorn) or Linear Fusion Rifles (Sleeper Simulant, Cataclysmic, Reed's Regret) are top choices.
- Special Weapons: Izanagi's Burden (for the Izzy/Rocket swap technique) or high-damage snipers. Witherhoard can provide passive damage.
- Supers: High-damage, burst supers are preferred: Thundercrash (Titan), Mobius Quiver (Hunter), Nova Bomb (Warlock). Gathering Storm (Arc Hunter) with sustained damage weapons like Thunderlord can also work, especially with artifact mods.
After a set time, Rhulk becomes immune again. The fireteam must quickly retreat down the stairs to restart the entire process from Phase 1 (pushing the barrier). Teams typically aim to reach the final stand threshold within 2-3 full DPS cycles.
Phase 4: Final Stand
Occurs when Rhulk's health reaches a critical low point. Pervading Darkness begins stacking uncontrollably on all players. Reaching 10 stacks results in death for that player, and likely a wipe if the whole team succumbs. Avoid taking beam damage just before this phase starts to minimize initial stacks.
Master Difficulty Notes:
On Master, Taken Glyphkeepers (Phase 1) become Overload Champions, and Scorn Glyphkeepers become Unstoppable Champions. Taken Hobgoblins gain Void Shields. Match Game is active. The Pantheon version adds Tormentors during Phase 1 and a Shadow Clone of Rhulk during the DPS phase, requiring a player to kite it.
Challenge: Looping Catalyst
Strategy:
This challenge essentially requires flawless execution of the standard Phase 1 buff management loop. Ensure that at least one player always retains Leeching Force before any conversions or splits occur. Avoid mistakes like letting the timer expire or having all Leeching Force holders convert to Emanating Force simultaneously without a designated player retaining the original buff. Both single and double dunk strategies are compatible, as long as the core buff is maintained. This is often considered the easiest Vow challenge if the team understands the base mechanics well.
Failure: If Leeching Force is completely lost at any point during Phase 1 (indicated by Rhulk spawning a new large crystal or the "Challenge failed" message), the challenge is void, requiring a wipe to retry.
"The Witness shapes worlds as a potter shapes clay. Your end will help bring true shape to this universe."
Optimal Loadouts for Vow of the Disciple
Welcome back, Guardian. You've learned the symbols, breached the Pyramid, and faced down the Disciple's deadliest servants. Now, it's time to talk gear. Vow of the Disciple throws a variety of challenges your way, from hordes of Scorn and Taken to towering bosses demanding maximum firepower. Simply bringing your favorite loadout won't cut it; success, especially on Master difficulty or when tackling challenges, requires tailoring your arsenal to the specific demands of each encounter. This section breaks down the optimal weapons, subclasses, armor, and mods to help your fireteam conquer Rhulk and claim the spoils.
Gearing Up for the Disciple: Loadout Fundamentals
Before diving into encounter specifics, let's establish some core principles for building effective loadouts in Vow of the Disciple. Think of your loadout not just as weapons and armor, but as a toolkit designed to solve the problems each encounter presents.
However, simply maximizing damage isn't enough. Survival is paramount, especially when learning mechanics or tackling Master difficulty where enemies hit harder and are more resilient. Prioritizing Resilience on your armor, incorporating healing sources like Devour or Restoration, and utilizing damage resistance mods can mean the difference between a smooth run and a frustrating wipe.
Finally, utility plays a critical role. This encompasses everything from stunning Champions and managing debuffs like Pervading Darkness to providing crucial buffs for your team or executing specific mechanics like cleansing allies or destroying Taken Blights. An effective loadout must integrate these utility elements without excessively compromising its primary ad clear or DPS function.
Team Synergy Essentials: The Power of Divinity, Gjallarhorn, and Buffs/Debuffs
While individual skill and loadouts matter, Vow of the Disciple heavily rewards team coordination, particularly through support Exotics and abilities. The inclusion of certain support elements fundamentally shapes the optimal choices for the rest of the fireteam.
- Divinity: This Exotic Trace Rifle remains a staple in many raid encounters. By creating a large critical hit bubble on a target, it significantly simplifies aiming for teammates and guarantees precision damage, enabling perks like Fourth Time's the Charm or Bait and Switch on Linear Fusion Rifles. Having one player run Divinity, often a Warlock using Cenotaph Mask for heavy ammo generation, can dramatically increase the team's overall damage output and consistency.
- Gjallarhorn: The iconic Exotic Rocket Launcher provides immense value through its Wolfpack Rounds perk. When the catalyst is complete, firing Gjallarhorn grants nearby allies using non-Exotic Rocket Launchers the powerful Wolfpack Rounds effect, leading to a massive increase in team rocket damage. This encourages a strategy where one player uses Gjallarhorn, and others equip high-damage Legendary rockets.
- Buffs/Debuffs: Subclass abilities like Well of Radiance (healing and damage buff) and Ward of Dawn (Weapons of Light damage buff), along with Void debuffs from Shadowshot, are crucial for maximizing DPS phases. Coordinating these buffs ensures the team hits as hard as possible during limited damage windows.
A Note on Flexibility: Adapting to Your Fireteam and Comfort Level
While this guide presents meta and highly effective loadouts, remember that Destiny 2 offers a vast arsenal. Player skill, comfort with specific weapons or strategies, and the gear available in your vault all play a significant role. Especially when learning encounters, using a loadout you are comfortable and consistent with might yield better results than attempting a complex, high-skill strategy you haven't mastered.
Don't be afraid to deviate from the absolute "meta" if something else works better for you or your team. For instance, while Izanagi's Burden and Rocket Launcher swapping offers high theoretical DPS, it requires precise execution; a simpler loadout like Sleeper Simulant might provide more reliable damage for some players. Similarly, if your team struggles with a particular mechanic, adjusting loadouts to prioritize safety or utility (like bringing more crowd control or healing) might be necessary. Adaptability based on your team's strengths, weaknesses, and chosen strategies (like the single vs. double dunk approach in Rhulk's first phase) is key.
The Vow Armory: Top-Tier Weapons & Perks

Let's break down the weapon archetypes and specific gear that shine in Vow of the Disciple.
Heavy Hitters: Rockets vs. LFRs vs. Swords vs. MGs
Your Heavy weapon is often the cornerstone of your DPS loadout.
- Rocket Launchers: Offering immense burst damage, rockets are a premier choice for Vow's damage phases, especially Caretaker and Rhulk. Their effectiveness skyrockets when paired with a Gjallarhorn user.
- Top Choices: The Hothead (Arc Adaptive Frame) and the craftable Palmyra-B (Stasis Precision Frame) are standouts. While Precision Frames generally deal less damage than Adaptives or Aggressives, Palmyra-B's craftability and access to perks like Explosive Light make it competitive. Cold Comfort (Stasis Aggressive Frame) with Bait and Switch is another strong option.
- Key Perks: Auto-Loading Holster is invaluable for swap rotations, Clown Cartridge increases burst potential, Explosive Light provides a significant damage buff easily activated via Orbs of Power, and Bait and Switch offers a large damage increase after hitting the target with your other weapons.
- Synergy: The Argent Ordnance armor mod can further boost rocket damage and reload speed.
- Linear Fusion Rifles (LFRs): The previous kings of sustained DPS, LFRs remain highly viable, particularly for encounters requiring consistent precision damage over a longer window.
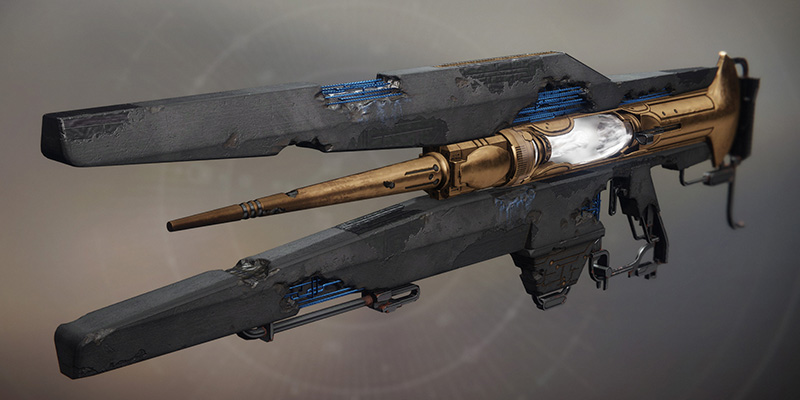
- Top Choices: The raid's own Cataclysmic (Solar Precision Frame) is arguably the best Legendary LFR, especially craftable with enhanced perks. Sleeper Simulant (Exotic Solar) provides excellent damage with forgiving ricocheting beams, making it a user-friendly powerhouse. Reed's Regret (Stasis Precision Frame) is another strong option, particularly Adept versions with Firing Line. Stormchaser (Arc Aggressive Frame) was also noted.
- Key Perks: Fourth Time's the Charm + Bait and Switch on Cataclysmic is a top-tier combination for damage and ammo economy. Focused Fury and Firing Line are other excellent damage perks. Triple Tap helps with ammo.
- Pairing: Often paired with Fusion Rifles like Cartesian Coordinate (Solar Rapid-Fire with Vorpal) for ammo efficiency.
- Swords: Generally more situational in Vow due to boss mechanics often favoring ranged combat. However, they can excel in specific scenarios.
- Options: The Lament (Exotic Solar) offers healing and high burst damage with its revved attack, useful for ad clear or potentially close-range DPS if safe. Falling Guillotine (Legendary Void Vortex Frame) is a classic for ad clear. The Exotic sword Legend of Acrius (Arc Heavy Shotgun, effectively) with its catalyst sees niche use in a specific, high-risk Rhulk strategy involving Well of Radiance.
- Machine Guns (MGs): Primarily used for ad clear due to lower single-target DPS compared to Rockets or LFRs.
- Options: Thunderlord (Exotic Arc) provides decent, easy-to-use damage and built-in Overload capabilities, making it a reliable fallback if other strategies prove too difficult or ammo runs dry. Legendary options like Corrective Measure (Void Adaptive from Vault of Glass) or Commemoration (Void Adaptive from Deep Stone Crypt) with perks like Subsistence/Feeding Frenzy and Rampage/Killing Tally are excellent for ad clear, especially with Volatile Rounds synergy.
Special Weapon Workhorses
Your Special weapon handles tasks from major enemy takedowns and Champion stunning to crucial boss debuffs.
- Burst Damage/Support:
- Izanagi's Burden (Exotic Kinetic Sniper): The king of burst damage when combined with its Honed Edge x4 shot. Essential for high-end DPS strategies involving swapping to an Auto-Loading Holster Heavy weapon. Mastering the reload-swap timing is key.
- Divinity (Exotic Arc Trace Rifle): As mentioned, indispensable for team DPS by creating a large crit spot and applying a Weaken debuff.
- Ad Clear & Utility:
- Witherhoard (Exotic Kinetic Grenade Launcher): Creates damage-over-time pools excellent for controlling areas, clearing groups of adds, and adding passive boss damage.
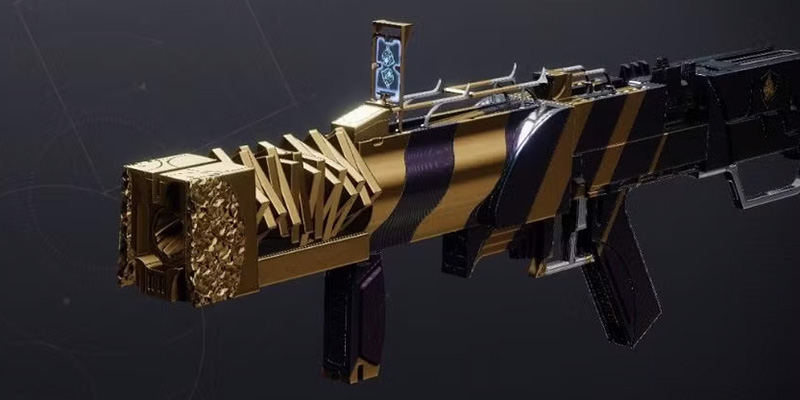
- Wave Frame Grenade Launchers: The raid's Forbearance (Arc) with Ambitious Assassin and Chain Reaction is arguably the best ad-clearing weapon in the game and drops from Caretaker/Exhibition. Unparalleled for clearing rooms quickly.
- Blinding Grenade Launchers: Extremely valuable for crowd control, especially in add-dense encounters like Exhibition or when dealing with Champions. Any GL with Blinding Grenades works.
- Fusion Rifles: Reliable for damaging majors and decent backup boss damage.
- Options: The raid's Deliverance (Stasis Rapid-Fire) is solid, especially with Chill Clip for utility. Cartesian Coordinate (Solar Rapid-Fire) with Vorpal Weapon pairs well with LFRs. Null Composure (Void Rapid-Fire) is another strong Legendary.
- Glaives: Can stun Unstoppable Champions (if the artifact mod is available) and potentially stagger Caretaker. The raid Glaive is Lubrae's Ruin (Solar). Specific Hunter builds utilized Glaives effectively.
- Slug Shotguns: Offer high damage at close range. Mentioned for potential double-slug DPS strategies. Wastelander M5 (Kinetic Lightweight) with Trench Barrel was noted for Exhibition add/major clear.
Ad Clear Champions
Your Primary weapon handles the rank-and-file enemies. Reliability and ammo economy are key.
- SMGs: Excellent for close-to-mid range combat. The raid's Submission (Kinetic Precision Frame) is a top-tier choice with great perks. Funnelweb (Void Lightweight) has fantastic synergy with Void 3.0 builds. Osteo Striga (Exotic Kinetic) provides potent poison damage and ad clear.
- Auto Rifles: Dependable all-around primaries. Krait (Stasis Rapid-Fire) was mentioned for Exhibition. Many options work well depending on preferred range and feel.
- Pulse Rifles: Strong at mid-to-long range. The raid's Insidious (Arc Adaptive Frame) is a powerful option. Outbreak Perfected (Exotic Kinetic) serves as a niche backup DPS weapon if multiple players use it when heavy/special ammo is depleted.
- Trace Rifles: Can function as primaries with good ammo economy mods, offering solid ad clear. Divinity doubles as one, though its primary role is debuffing.
- Exotic Ad Clear Kings: While not explicitly named in Vow loadout snippets, Trinity Ghoul (Arc Bow) and Riskrunner (Arc SMG, especially when taking Arc damage) are generally S-tier ad clear options worth considering.
Must-Have Perks
Look for these traits when selecting your Vow of the Disciple arsenal:
- Damage Boosters: Bait and Switch, Vorpal Weapon, Explosive Light, Focused Fury, Firing Line, Killing Tally, Chain Reaction, Adrenaline Junkie, Frenzy, Swashbuckler, One for All.
- Ammo & Reload: Auto-Loading Holster, Fourth Time's the Charm, Triple Tap, Clown Cartridge, Overflow, Field Prep, Subsistence, Demolitionist, Rapid Hit, Sleight of Hand.
- Utility & Handling: Chill Clip, Perpetual Motion, Grave Robber, Unstoppable Force, Ambitious Assassin, Dragonfly, Turnabout.
- Raid Origin Trait: Souldrinker heals the user upon reloading based on hits landed before reloading, offering passive survivability on all Vow weapons.
Subclass & Exotic Armor Synergy
Matching your subclass and Exotic armor to the encounter's demands and your team's needs is crucial.
Warlocks bring unparalleled support and strong damage/ad clear options.
- Well of Radiance (Middle Tree Dawnblade / Solar): Virtually mandatory for most boss DPS phases and provides a vital safety zone during chaotic encounters.
- Exotic Pairings: Lunafaction Boots for faster reloads during DPS, Phoenix Protocol for faster Super regeneration in add-heavy sections, Starfire Protocol (though nerfed since Vow's release, previously used for Fusion Grenade spam), Boots of the Assembler for potential ranged healing/buffing (mentioned for a Rhulk cheese).
- Voidwalker (Void): Offers high burst damage and excellent survivability.
- Supers: Nova Bomb (Cataclysm or Vortex) provides significant single-target damage.
- Synergies: Access to Devour (via Feed the Void aspect or Echo of Starvation fragment) grants full health and grenade energy on kills, making Voidwalkers incredibly durable.
- Exotic Pairings: Contraverse Hold enhances Vortex Grenades for ad clear and damage, Secant Filaments grants Devour on rift cast, Nezarec's Sin speeds up ability regeneration with Void kills, Cenotaph Mask is essential for Divinity users needing to generate Heavy ammo for the team.
- Shadebinder (Stasis): Primarily utility-focused, offering crowd control via freezing. Can contribute to damage through Bleak Watcher turrets or specific shatter strategies, but generally less favored for pure boss DPS in Vow. New Stasis exotic arms were noted as potentially useful early on.
- Stormcaller (Arc): Generally considered less optimal for Vow's endgame content compared to Solar or Void, though Chaos Reach was mentioned for completing an Arc-specific challenge. Fallen Sunstar can enhance ability regeneration and Ionic Trace generation for Arc Soul builds, potentially useful for ad clear.
Titans provide crucial damage buffs, burst damage, and defensive capabilities.
- Striker (Arc):
- Super: Thundercrash paired with Cuirass of the Falling Star delivers some of the highest burst Super damage in the game, ideal for Caretaker or Rhulk DPS phases.
- Neutral Game: Storm Grenades, especially when enhanced by Heart of Inmost Light (pre-nerf state during Vow's prime), offered potent ad clear.
- Sentinel (Void): Offers defensive support and Void synergies.
- Supers: Ward of Dawn (Bubble) grants Weapons of Light, a significant damage buff for teammates inside. Sentinel Shield provides mobile protection and a lesser damage buff via Banner Shield.
- Synergies: Access to Overshields (via Bastion aspect) and Volatile Rounds (via Controlled Demolition aspect) provides excellent team survivability and ad clear potential.
- Exotic Pairings: Helm of Saint-14 enhances Ward of Dawn, Ursa Furiosa refunds Super energy for Sentinel Shield blocks, Heart of Inmost Light (pre-nerf) boosted ability uptime, Synthoceps significantly buffs melee and Super damage when surrounded, potentially useful for the Acrius strategy on Rhulk.
- Sunbreaker (Solar): Less emphasized for Vow in the provided materials, but Hammer of Sol can contribute to ad clear or supplemental boss damage. Burning Maul offers burst damage.
- Behemoth (Stasis): Generally less utilized for Vow's core strategies compared to Arc or Void, though Stasis crystals can offer defensive utility or damage via shattering.
Hunters excel at debuffing enemies, dealing high damage, and providing clutch utility through invisibility.
- Nightstalker (Void): A cornerstone of many Vow fireteams.
- Super: Shadowshot (Moebius Quiver or Deadfall) applies a powerful Weaken debuff, increasing all incoming damage, while Moebius Quiver also deals substantial damage itself.
- Synergies: Access to Invisibility (via Vanishing Step aspect or Stylish Executioner aspect) is invaluable for safe revives, executing mechanics under pressure (like symbol running or stunning), or simply repositioning safely. Volatile Rounds can be easily accessed for potent ad clear.
- Exotic Pairings: Orpheus Rig enhances Moebius Quiver damage and tether potential, Star-Eater Scales significantly boosts Super damage after collecting Orbs of Power, Gyrfalcon's Hauberk grants Volatile Rounds after emerging from invisibility, creating powerful ad clear loops, Omnioculus provides damage resistance and extra smoke bombs for team invisibility.
- Revenant (Stasis): Offers excellent crowd control and area denial.
- Super: Silence & Squall can lock down large groups of enemies or provide supplemental boss damage.
- Utility: Stasis slows and freezes are effective for controlling champions or dangerous enemies. Mentioned as a good subclass for players handling mechanics/running roles. New Stasis exotic arms were noted early on.
- Gunslinger (Solar): Focused on precision damage.
- Supers: Golden Gun (Marksman or Deadshot) can provide high burst damage, especially when paired with Celestial Nighthawk for a single, massive shot. Blade Barrage offers quick burst AoE damage. Often, Shadowshot's debuff is preferred over raw Golden Gun damage for team utility.
- Arcstrider (Arc): Generally less meta for Vow compared to Void or Stasis.
- Super: Gathering Storm provides good single-target damage over time. Arc Staff is primarily for ad clear.
- Exotic Pairings: Liar's Handshake enhances melee damage, mentioned for potential synergy with the Acrius strategy.
Combat Style Mods: The Secret Sauce
Combat Style mods (Charged With Light, Elemental Wells) provide significant boosts to damage, survivability, and ability regeneration, acting as the "secret sauce" that elevates a good loadout to a great one.
Charged With Light (CWL)
CWL builds focus on becoming Charged with Light (via mods like Taking Charge, Elemental Charge, etc.) and expending those charges for various effects.
- High-Energy Fire (HEF): A straightforward and popular choice, granting a 20% weapon damage bonus while Charged with Light. It stacks with Font of Might but not with empowering buffs like Well of Radiance, Ward of Dawn, or the raid mod Umbral Sharpening (the highest bonus takes precedence). Essential for maximizing damage outside of empowering rifts/bubbles.
- Argent Ordnance: Specifically buffs Rocket Launcher damage and reload speed when expending CWL stacks. Ideal for dedicated rocket DPS builds.
- Lucent Finisher (Artifact Mod): When available, allows finishers on Lucent Hive (or Champions) to generate Heavy ammo for the team. Extremely valuable for ammo sustain.
- Special Finisher: Consumes CWL stacks to generate Special ammo on a finisher. Can be helpful in encounters with high Special weapon usage if ammo becomes scarce.
Elemental Wells
Elemental Well builds revolve around creating wells matching your subclass element (or using mods that create wells of specific types) and picking them up for various effects.
- Font of Might: A potent damage buff (25%) for weapons matching your subclass element after picking up a matching well. Stacks with most other damage buffs (including Well of Radiance and High-Energy Fire), making it key for peak DPS setups. Requires mods to generate wells reliably (e.g., Elemental Ordnance for grenade kills, Melee Wellmaker, Elemental Armaments for matching weapon kills, Reaping Wellmaker for Hunters) and often Elemental Time Dilation to extend its duration.
- Well of Tenacity: Picking up a Void well grants damage resistance, significantly boosting survivability. Excellent for dangerous encounters or Master difficulty.
- Well Generation: Key mods include Elemental Ordnance (grenade kills), Melee Wellmaker, Elemental Armaments (matching weapon kills), Reaping Wellmaker (Void weapon kill after Hunter dodge), and Supreme Wellmaker (Stasis wells on Super cast).
- Volatile Flow (Seasonal Artifact Mod): When available, picking up a Void well grants Volatile Rounds to Void weapons. Incredibly strong for ad clear with Void weapons.
Champion Mods
Absolutely essential, especially on Master difficulty. These mods must be equipped on arms armor (based on the seasonal artifact) or come intrinsically with certain Exotic weapons.
- Unstoppable: Required in Acquisition (Normal & Master), Caretaker (Master), and Exhibition (Master - Taken Glyphkeepers). Hand Cannons, Glaives, Pulse Rifles, or specific Exotics cover this.
- Overload: Required in Acquisition (Master - Scorn Glyphkeepers), Caretaker (Master), and Exhibition (Master - Scorn Glyphkeepers). SMGs, Auto Rifles, Bows, or Exotics like Divinity or Thunderlord typically handle Overloads.
Essential Utility Mods
Don't overlook these crucial supporting mods:
- Ammo Mods: Ammo Finder (Helmet) and Ammo Scavenger (Legs) mods for your Heavy and Special weapons are critical for maintaining reserves throughout the raid. Reserves mods (Chest) can also be beneficial.
- Damage Resistance Mods: Chest armor mods like Sniper Damage Resist, Concussive Dampener, and elemental-specific resists (Arc, Solar, Void) significantly improve survivability based on the threats in each encounter. Stacking these is highly recommended, especially on Master.
- Fastball (Arms): Increases grenade throw distance. Generally a useful quality-of-life mod.
Raid Mods
Vow of the Disciple armor can slot unique raid mods:
- Umbral Sharpening: Grants a significant damage bonus (40% with 4 armor pieces) after getting a kill near an Obelisk (Acquisition/Caretaker) or Darkness shard (Exhibition/Rhulk). Overrides High-Energy Fire. Can be powerful but requires specific positioning and raid armor investment.
- Other mods exist offering benefits like faster revives in Darkness zones or increased damage near specific objects.
Encounter-Specific Loadout Blueprints
Now, let's apply these principles to each major encounter. Remember to adjust based on your specific role, fireteam composition, and whether you're playing on Normal or Master difficulty.
Acquisition
This encounter demands a split focus: three players defend obelisks against waves of Scorn and Unstoppable Champions, while three runners kill Knights, navigate symbol rooms, and eliminate Glyphkeepers. Master difficulty adds Overload Champions and Solar shielded enemies.
Defenders (Obelisk Guards):
- Role: Protect the obelisk from adds (especially Abated Adherents), stun Champions, survive.
- Weapons:
- Primary: Reliable ad clear (SMG like Submission, Auto Rifle).
- Special: Unstoppable coverage (Hand Cannon, Glaive, Pulse Rifle - check artifact) or Overload (Master - SMG/Auto/Bow). A Blinding Grenade Launcher can be very helpful for controlling Champions and adds. Fusion/Shotgun for majors.
- Heavy: Often less critical. MG for ad clear, Rocket Launcher for burst on Champions. On Master, consider Solar weapons for shields.
- Subclass: High survivability (Devour Warlock/Hunter, Overshield Titan) or strong ad clear (Arc Titan Storm Grenades, Stasis control).
- Mods: Relevant Champion mod(s), Ammo Finders, Resistance mods, potentially Special Finisher if ammo is tight.
Runners (Floaters):
- Role: Kill Taken Knight, quickly enter the correct room, kill the correct Glyphkeeper (Light/Dark side), note the symbol, exit safely. Mobility is key.
- Weapons:
- Primary: Reliable primary.
- Special: Weapon for fast Glyphkeeper kill (Fusion Rifle, Slug Shotgun, Sniper). On Master, need Overload coverage for Scorn Glyphkeepers.
- Heavy: Less crucial, potentially a sword for mobility or rocket for burst.
- Exotic Armor: Mobility options (Transversive Steps, St0mp-EE5, Dunemarchers).
- Subclass: Mobility and/or survivability (Invis Hunter, Blink Warlock, Striker Titan).
- Mods: Overload mod (Master), Ammo Finders/Scavengers.
The Caretaker
This fight involves stunning the boss, running symbols in a dark room while managing Pervading Darkness, clearing adds, and executing DPS on specific plates. Master difficulty adds Overload Champions.
Stun Team (2 Players):
- Role: Bait the Caretaker's slam, shoot its glowing face, then shoot its glowing back to stun it repeatedly. Consistency is key to buy time for runners.
- Weapons: Reliable precision weapon for face shot (Scout, Pulse, HC, Sniper). Fast-firing weapon for back crit (Auto, SMG, Fusion, Shotgun). A Glaive was noted as potentially helping stagger. Need to handle nearby adds between stuns.
- Subclass: Any, survivability helps.
- Mods: Ammo Finders/Scavengers.
Symbol Runners (2 Players; 3 for Challenge):
- Role: Enter dark room, grab symbols (only one per trip for Base Information challenge), exit before Pervading Darkness hits 10 stacks, shoot correct symbol on obelisk. Requires speed, memory, and careful navigation (especially on later floors with pitfalls).
- Weapons: Lightweight weapon for speed, accurate weapon for shooting symbols.
- Exotic Armor: Mobility (Transversive Steps, St0mp-EE5).
- Subclass: Mobility (Top Tree Dawnblade, Invis/Stasis Hunter).
- Mods: Dexterity mods.
Ad Clear (2 Players):
- Role: Kill spawning Scorn/Taken, destroy Caretaker's homing projectiles, prevent Scorn Adherents from shooting the obelisk. On Master, must handle Overload Champions.
- Weapons: Top-tier ad clear (Witherhoard, Forbearance, Void SMG/MG with Volatile). One player might run Divinity to assist with stuns and DPS. Overload weapon needed on Master.
- Subclass: Ad clear focus (Storm Grenade Titan, Voidwalker/Shadebinder Warlock, Nightstalker Hunter). Well of Radiance useful for starting DPS safely.
- Mods: Overload mod (Master), Ammo Finders/Scavengers, Special Finisher can help ammo economy.
DPS Phase:
- Strategy: Gather on the illuminated floor plates to damage Caretaker. Damage is capped per floor, so don't waste heavy ammo/supers if the cap is reached early.
- Loadouts: See table below. Rockets (Gjally + Legendaries like Hothead/Palmyra) offer excellent burst. LFRs (Cataclysmic, Sleeper) provide strong sustained damage. Izanagi swapping is viable. Divinity is highly recommended. Witherhoard adds passive damage. Outbreak Perfected is a solid backup if ammo runs low. Well of Radiance is essential. Burst supers like Nova Bomb, Thundercrash, Moebius Quiver are effective.
| Strategy | Key Weapons | Required Support | Pros | Cons | Ideal Scenario |
|---|---|---|---|---|---|
| Gjallarhorn + Rockets | Gjallarhorn, Hothead/Palmyra (ALH/Explosive) | Gjallarhorn (1) | High Burst Damage, Easy to Use | Ammo intensive, Less total damage than LFRs | Quick damage needed to hit floor cap, Good ammo |
| LFR Focus | Cataclysmic (FTTC/B+S), Sleeper, Reed's (FL) | Divinity (Rec.) | High Sustained Damage, Good Ammo Economy | Requires precision, Sleeper uses Exotic slot | Longer damage windows, Need consistent aiming |
| Izanagi + Rocket Swap | Izanagi's Burden, ALH Rocket (Hothead/Palmyra) | Divinity (Rec.) | Highest Potential Burst Damage | High skill execution, Punishing if messed up | Experienced teams aiming for speed, Max burst needed |
| Witherhoard + Heavy | Witherhoard, Rockets or LFRs | Optional | Adds passive DoT, Good ammo economy for Wither | Less immediate burst than pure Rockets/Izanagi | Supplementing team damage, Conserving Heavy ammo |
Exhibition
A high-pressure, timed encounter focused on ad clear, relic management, and symbol identification across four rooms. Master difficulty adds Overload (Scorn Glyphkeepers) and Unstoppable (Taken Glyphkeepers) Champions, plus Solar and Void shielded enemies.
General Philosophy:
Maximize ad clear and survivability. Crowd control Supers are invaluable. Everyone needs reliable weapons for red and yellow bar enemies. Relic holders focus on mechanics but still need to survive.
Weapons:
- Ad Clear Stars: Witherhoard, Forbearance (Chain Reaction), Void SMGs (Funnelweb, Submission) with Volatile Rounds, Trinity Ghoul, Riskrunner.
- Majors/Champions: LFRs (Sleeper, Reed's), Falling Guillotine, Wastelander M5 (Trench Barrel), Thunderlord (Overload). Need relevant Champion weapons on Master.
- Utility: Blinding Grenade Launchers, Long-range weapon for Hobgoblins (Scout, Pulse, Arbalest).
Subclasses:
- Survivability/Control: Void 3.0 (Devour Warlock/Hunter, Sentinel Titan), Stasis (Hunter/Warlock).
- Ad Clear Power: Arc Titan (Storm Grenades/HoIL pre-nerf).
- Supers: Crowd control focused: Shadowshot Deadfall, Silence & Squall, Nova Bomb Cataclysm, Winter's Wrath, Sentinel Shield, Glacial Quake. Thundercrash can work for quick major deletion. Well of Radiance provides safety.
Relic Holders:
Focus on survival. Builds enhancing survivability (Devour, Wells, high Resilience) are beneficial. Remember the Laser relic does not deal Solar damage.
Mods:
Champion Mods (Master), Ammo Finders/Scavengers, Resistance Mods, Elemental Well mods (Well of Tenacity, Elemental Armaments, Volatile Flow when available).
| Loadout Archetype | Key Weapons | Recommended Subclass/Exotic | Strengths | Weaknesses | Champion Coverage (Master) |
|---|---|---|---|---|---|
| Void SMG + Blinding GL | Funnelweb/Submission, Blinding GL, LFR/Rocket | Void (Devour/Invis/Overshield), Gyrfalcon's/Contraverse | Excellent Ad Clear (Volatile), Crowd Control, Safety | Can struggle with distant enemies | Overload (SMG), Unstoppable (Heavy?) |
| Wave Frame + Primary | Forbearance (Chain Reaction), Kinetic Primary | Any (Arc Titan Storm Grenades strong) | Unmatched Room Clearing, Good Ammo Economy | Less single-target burst | Needs Champion weapon in Primary/Heavy |
| Witherhoard + Auto/SMG | Witherhoard, Krait/Submission, LFR/Rocket | Any (Void/Stasis good synergy) | Passive Damage, Area Denial, Good Major Damage | Requires direct hits for Witherhoard DoT | Overload (Auto/SMG), Unstoppable (Heavy?) |
| Exotic Primary Ad Clear | Trinity Ghoul / Riskrunner / Osteo Striga | Matching Subclass (Arc/Kinetic/Void for Osteo synergy) | Extreme Ad Clear Potential | Uses Exotic Slot, Can be situational (Riskrunner) | Needs Champion weapon in Special/Heavy |
| Sword Build | Falling Guillotine/Lament, Primary, Fusion/Sniper | Void/Solar (for matching sword), Stronghold Titan | High CQC Damage/Ad Clear, Healing (Lament) | Risky, Requires close range | Needs Champion weapon in Primary/Special |
| MG Focus | Thunderlord / Commemoration (Void), Special | Arc (Thunderlord) / Void (Commemoration + Volatile) | Good Ad Clear, Ammo Efficient, Overload (Thunderlord) | Lower burst than Rockets/LFRs | Overload (Thunderlord), Needs Unstoppable |
Rhulk, Disciple of the Witness
The final confrontation. Phase 1 involves intricate buff juggling and symbol dunking under pressure. Phase 2 is a pure DPS check against a mobile and dangerous boss. Master difficulty adds Overload (Taken Glyphkeepers) and Unstoppable (Scorn Glyphkeepers) Champions in Phase 1.
Phase 1 (Buff Dunking):
- Role: Juggle Leeching Force buff, get hit by Rhulk's beam to gain Emanating Force, read symbols called by teammates, dunk Emanating Force into the correct pillar. Simultaneously, kill Glyphkeepers (Champions on Master) and survive Rhulk's attacks and Pervading Darkness.
- Weapons: Balanced loadout. Reliable primary/special for adds and Glyphkeepers (Champions on Master). Survivability is key. Divinity user helps manage adds and prepares for DPS.
- Subclass: Survivability and utility focus (Invis Hunter, Devour Warlock, Well Warlock for safe spots, Overshield Titan).
- Mods: Relevant Champion mods (Master), Resistance mods, Ammo Finders.
Phase 2 (DPS Arena):
- Role: Break Rhulk's glaive (spawns Leeching Force), dunk Emanating Force at correct pillar based on glaive symbol callout to reveal crit spots, survive Rhulk's lunge and laser attacks, deal maximum damage during DPS window. Repeat cycle. Final stand requires burning remaining health quickly under Pervading Darkness.
- Weapons: Maximum Boss DPS focus.
- Top Tier: Izanagi + Rocket swap (high skill), Gjallarhorn + Legendary Rockets, LFRs (Cataclysmic, Sleeper, Reed's).
- Support: Divinity is essential.
- Niche/Alternatives: Legend of Acrius CQC strategy (high risk), Thunderlord/Cloudstrike, Lorentz Driver + Cataclysmic, Malfeasance + Lucky Pants Hunter.
- Subclass:
- Support: Well of Radiance (multiple recommended for safety and uptime).
- Damage: Thundercrash Titan (Cuirass), Nova Bomb Warlock, Moebius Quiver Hunter (Debuff + Damage).
- Advanced: Stasis subclass swap for Font of Might buff on Palmyra-B rockets.
- Mods: High-Energy Fire, Font of Might, Supreme Wellmaker, Elemental Time Dilation, Umbral Sharpening, Ammo Scavengers/Reserves. Focus on stacking damage buffs.
| Strategy Name | Key Weapons/Exotics | Required Support/Mods | Execution Difficulty | Pros | Cons | Typical Damage Phase Potential |
|---|---|---|---|---|---|---|
| Izanagi + ALH Rocket | Izanagi's Burden, Hothead/Palmyra (ALH + Damage Perk) | Divinity, Well, Buffs (HEF/FoM), Precise Swapping | High | Highest Potential Burst DPS | Very punishing on errors, Requires practice | 1-2 Phase Kill Potential |
| Gjallarhorn + Rockets | Gjallarhorn (1), Legendary Rockets (ALH/Damage Perk) | Divinity, Well, Buffs (HEF/FoM) | Medium | High Team Burst, Easier than Izanagi Swap | Requires coordinated rocket firing, Ammo hungry | 1-2 Phase Kill Potential |
| LFR Focus (Sustained) | Cataclysmic (FTTC/B+S), Sleeper, Reed's (FL) | Divinity, Well, Buffs (HEF/FoM) | Medium | Consistent Damage, Good Ammo Economy | Lower burst than rockets, Requires precision | 2 Phase Kill Likely |
| Divinity + Team LFRs | Divinity (1), Team uses LFRs (as above) | Well, Buffs (HEF/FoM) | Low-Medium | Very Consistent, Easy Crits | Lower peak potential than swap/Gjally strats | 2-3 Phase Kill Likely |
| Acrius CQC Strategy | Legend of Acrius (Catalyst), Synthoceps/Liar's | Divinity (Kiting Clone), Multiple Wells, Melee Synergy | Very High | Extremely High CQC Burst | Extremely Risky, Requires perfect setup/kiting | 1 Phase Kill Possible (High Risk) |
Final Preparations: Ready for Anything
Mastering Vow of the Disciple's encounters requires not only understanding the mechanics but also bringing the right tools for the job. Use Destiny Item Manager (DIM) or the in-game loadout system to save your preferred builds for each encounter, making swaps quick and easy between phases.
Remember that practice, clear communication, and a willingness to adapt your strategy based on your team's performance are just as important as having the perfect gear. Don't be discouraged by wipes; learn from them, refine your approach, and coordinate with your fireteam.
With the right preparation and execution, you and your team have everything you need to face the Disciple, overcome his challenges, and claim the powerful rewards that await within the Sunken Pyramid. Good luck, Guardian.