
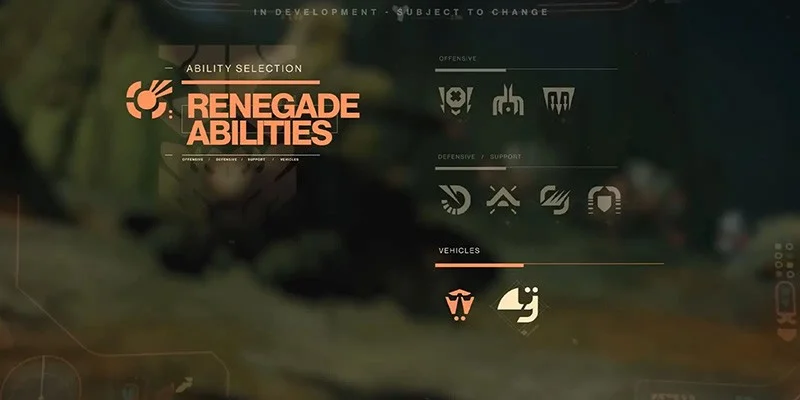
The Renegades expansion introduces a powerful new toolset that works alongside your existing Guardian build. Renegade Abilities are deployable tactical assets that can swing encounters in your favor when you use them at the right moment. This guide covers everything you need to know about all nine abilities, how to unlock them, the upgrade system, and which Syndicates grant access to each one.
What Are Renegade Abilities?
Renegade Abilities exist as a completely separate system from your Guardian's subclass powers. They don't replace your grenade, melee, Super, or class ability. Instead, they add another layer of tactical options you can deploy during Renegades content.
Think of them as bonus charges that sit on top of your normal build. Each ability fills a different role: healing support, reconnaissance intel, raw offensive firepower, defensive protection, or mobility options. You select which abilities to bring before each mission, so you can tailor your loadout to whatever challenges lie ahead.
How Renegade Abilities Work
Activation Method
You activate Renegade Abilities with a dedicated input:
- Controller: Press R3
- Keyboard: Press Z
Once you press this button, your grenade and melee inputs temporarily switch to your equipped Renegade Abilities. From there, you throw a token-like object that triggers the selected ability at your target location. This throwing mechanic lets you place abilities precisely, so you can drop defensive domes exactly where you need them or call in airstrikes on specific enemy clusters.
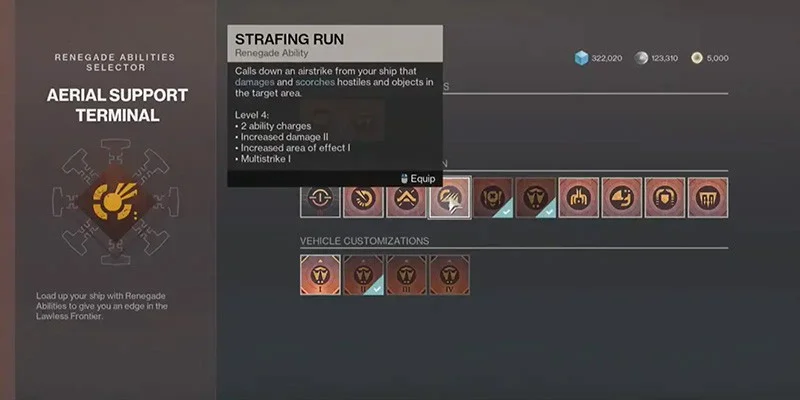
Equipping Abilities
Before each Lawless Frontier job, you start in the Hangar area where a support Shank helps you select your Renegade Abilities. This is where you pick which two abilities to bring into the mission. Players who queue as Invaders in the PvEvP mode get their own separate selection screen.
The pre-mission selection screen appears on the Holomap interface, giving you time to consider which abilities work best with your fireteam and the job type you're running.
Charges and Refills
Renegade Abilities run on a charge system. You start each mission with a set number of charges based on your ability upgrades. During the mission, you can replenish charges by finding small caches scattered throughout the Lawless Frontier maps. This creates a resource management element where you need to balance using abilities at key moments while keeping some charges available for later fights.
How to Unlock Renegade Abilities
Campaign Progression
When you start the Renegades campaign, you'll unlock several Renegade Abilities through natural story progression. These initial abilities give you a foundation while you learn the new systems.
Syndicate Reputation
The remaining abilities require you to build relationships with the three Syndicates operating in the Lawless Frontier. Here's the process:
- Pledge to a Syndicate: Visit Tharsis Outpost and formally pledge your allegiance to one of the three Syndicate factions
- Complete Jobs and Contracts: Run Lawless Frontier missions and fulfill contracts associated with your chosen Syndicate
- Contribute Dark Matter Ingots: Deposit Dark Matter Ingots into your Syndicate's War Chest
Both completing jobs and contributing Ingots raise your Reputation Rank with that Syndicate. As your rank climbs, the Syndicate Quartermaster unlocks additional abilities and upgrade tiers for purchase.
Vendor Locations
You can acquire and upgrade abilities through two vendor types:
- Spider: Sells certain abilities and upgrades from his spot in Tharsis Outpost
- Syndicate Quartermasters: Each Syndicate has its own Quartermaster in their den within the Tharsis Outpost cantina, selling faction-specific abilities
Syndicate Ability Distribution
Each Syndicate grants access to three unique Renegade Abilities. Your choice of Syndicate determines which abilities you can unlock first, though you can eventually earn reputation with all three factions.
The Eliksni Pikers offer abilities focused on support and area denial: Revitalize (Healing and ability energy restoration), Recon Shank (Enemy and objective marking), and Piker Mortar (Homing missile bombardment).
The Cabal Totality Division specializes in heavy firepower and direct damage: Strafing Run (Aerial bombardment from your ship), Imperium Drop Pod (Impact damage plus ammo supply), and Imperium Behemoth (Pilotable heavy war machine).
The Vex Tharsis Reformation provides mobility and defensive options: Falcon (Attack vehicle for mobility and firepower), Vex Deflector (Protective dome with offensive properties), and Vex Stun Field (Area denial through blindness and damage).
Complete Ability Breakdown
Revitalize (Pikers)
What it does: Calls in a utility Shank that heals allied Guardians and gives everyone in the area a significant ability energy boost.
Revitalize serves as your primary healing option in the Lawless Frontier. Since automatic health regeneration is disabled in this mode, having a reliable healing source matters a lot. The ability energy bonus also helps your fireteam cycle through subclass abilities faster.
Deploy Revitalize during or right after intense firefights where your team has taken damage. The ability energy restoration makes it valuable even when health isn't critical, since it speeds up Super generation and ability cooldowns across your whole team.
Recon Shank (Pikers)
What it does: Summons a scout Shank that marks all hostiles, high-value targets, and objects of interest in the area.
The Lawless Frontier contains plenty of optional secrets, hidden chests, and destructible containers with valuable loot. Recon Shank reveals these locations along with enemy positions, making it invaluable for both combat awareness and loot hunting.
Use Recon Shank when entering new areas to identify threats before you engage. The keycard door revelation is particularly useful for accessing locked areas with bonus rewards. If you're having trouble finding optional loot in the Lawless Frontier, this ability solves that problem directly.
Strafing Run (Totality Division)
What it does: Calls down an airstrike from your ship that damages and applies Scorch to enemies and objects in the target area.
Strafing Run delivers heavy damage across a wide lane. It's excellent for clearing groups of enemies or dealing big damage to tougher targets, and the Scorch application adds ongoing Solar damage.
Deploy Strafing Run on chokepoints where enemies funnel together, or use it to clear adds during boss encounters. The Multistrike upgrade at higher levels makes it more effective against spread-out enemy groups. Save it for moments when enemies are clustered for maximum impact.
Imperium Drop Pod (Totality Division)
What it does: Calls down a modified Cabal drop pod that slams into the ground, dealing heavy damage on impact to nearby combatants. After landing, the pod leaves behind a pile of weapon ammo.
This ability pulls double duty. The impact damage clears or damages enemies in the landing zone, while the ammo cache helps your team sustain firepower through extended engagements.
Drop Pods work well during extraction sequences when enemies swarm your position. The ammo resupply is valuable when your team is running low on Special or Heavy. Consider calling one down on enemy spawn points for impact damage while positioning the ammo cache where your team can safely grab it.
Imperium Behemoth (Totality Division)
What it does: Calls in a pilotable Imperium Behemoth war machine at the beacon's location, giving you massive mobile firepower that you can directly control.
The Behemoth represents the heaviest offensive option among Renegade Abilities. When you need overwhelming firepower, climbing into this war machine lets you dominate the battlefield with its weapons systems.
Save the Behemoth for the most challenging encounters or when your team needs to push through heavily defended areas. The damage resistance upgrade helps it survive focused enemy fire. Coordinate with your fireteam so they can support you while you're piloting, since the Behemoth draws significant enemy attention.
Piker Mortar (Pikers)
What it does: Calls in a Piker Mortar emplacement that launches a barrage of homing missiles at targets in the area.
The homing capability means these missiles track targets rather than requiring precise placement. This makes Piker Mortar effective against mobile enemies or scattered groups that would be difficult to hit with static area attacks.
The Stasis Slow upgrade at higher levels adds crowd control to your damage output, slowing enemies and making them easier targets for your fireteam. Deploy the mortar where it has clear sightlines to enemy positions and let the homing missiles do the work.
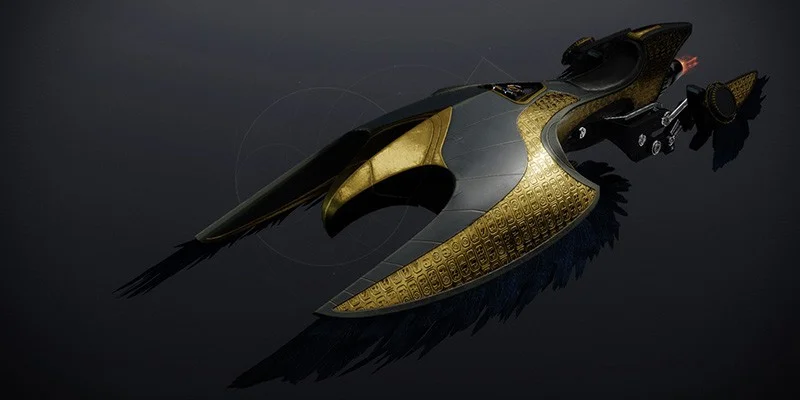
Falcon (Tharsis Reformation)
What it does: Summons a Falcon attack vehicle that provides high mobility and offensive support on the field.
The Falcon combines transportation speed with combat capability. It's built for situations where you need to cover ground quickly while maintaining firepower, or when you want to strafe enemy positions from a mobile platform.
Use the Falcon during extraction sequences when you need to reach the pickup point quickly while fighting through enemies. The Strand model upgrade at higher levels may provide additional effects tied to Strand damage types. The damage resistance helps the vehicle survive longer under fire.
Vex Deflector (Tharsis Reformation)
What it does: Creates a defensive Vex dome that absorbs and reflects incoming fire. Allies who enter the dome receive the Amplified buff, while enemies who pass through take damage and become Jolted.
Vex Deflector provides both protection and offensive buffs. Your team can fire from inside the dome while being shielded from incoming damage. The Amplified buff improves your movement and weapon handling, while Jolt chains Arc damage to nearby enemies.
Deploy the Deflector before starting boss damage phases so your team can safely dish out damage. It's also valuable when holding extraction points or defending objectives. Position it where your team needs to make a stand, and punish enemies who try to push through the barrier with the Jolt effect.
Vex Stun Field (Tharsis Reformation)
What it does: Creates a Vex-derived field that Blinds enemies and applies damage over time to targets caught within its area.
The Blind effect removes enemies' ability to fight effectively, giving your team a significant advantage. Combined with the damage over time, enemies caught in the field are both weakened and disoriented.
Vex Stun Field shines when you need to neutralize a dangerous group of enemies or defend against incoming waves. The Blind effect is particularly valuable against enemies that would otherwise pose serious threats. Drop it on chokepoints or directly on clustered enemies for maximum effect.
The Upgrade System
Each of the nine Renegade Abilities features a progression track with seven upgrade levels. As you invest in upgrades, your abilities become significantly more powerful:
| Upgrade Type | Effect | Impact |
|---|---|---|
| Additional Charges | More uses per mission before finding caches | High |
| Extended Duration | Longer active time for persistent effects | Medium-High |
| Increased Damage | Higher damage output for offensive abilities | High |
| Larger Area of Effect | Wider coverage for area-based abilities | Medium |
| Special Effects | Unique bonuses like elemental applications | Variable |
You purchase upgrades using Credits at the appropriate vendor. Spider sells upgrades for certain abilities, while Syndicate Quartermasters sell upgrades for their faction's abilities. Your Reputation level with each Syndicate determines which upgrade tiers become available at their Quartermaster.
Fireteam Coordination Tips
Renegade Abilities become significantly more effective when your fireteam coordinates their selections.
Complementary Loadouts: Having one player bring defensive abilities (Vex Deflector, Revitalize) while others bring offensive options (Strafing Run, Piker Mortar) creates a balanced team composition that can handle most situations.
Ability Chains: A Vex Deflector can provide safe positioning for the team while another player calls in a Strafing Run on approaching enemies. One player's Revitalize can keep the team healthy while others focus purely on damage output.
Role Distribution: Consider assigning roles based on ability selection. The player with Recon Shank scouts ahead and marks threats. The player with Revitalize monitors team health and provides healing. The player with heavy offensive abilities waits for optimal moments to deploy maximum damage.
Ability Recommendations by Job Type
| Job Type | Recommended Abilities | Strategy |
|---|---|---|
| Bounty Hunt | Recon Shank, Strafing Run, Revitalize | Track target through phases, clear gangs quickly, sustain through extended hunt |
| Sabotage | Vex Deflector, Piker Mortar, Strafing Run | Protect team at objectives, clear defenders from capture points |
| Smuggle | Falcon, Vex Stun Field, Imperium Drop Pod | Fast extraction, escape pursuers, clear blocking enemies |
| Invasion Defense | Vex Deflector, Vex Stun Field, Revitalize | Protect against hostile Guardians, blind invaders, sustain team |
| Invasion Offense | Fast offensive abilities | Maximize kill potential within limited invasion window |
Summary
The nine Renegade Abilities add serious tactical depth to the Lawless Frontier experience. Once you understand each ability's function, unlock them through Syndicate reputation, and invest in upgrades, you'll have a full arsenal of deployable assets that can turn difficult situations around.
Focus on building reputation with the Syndicate whose abilities best match your playstyle, then expand to the others as you get more comfortable with the systems. Coordinate with your fireteam to create complementary loadouts, and don't hesitate to use abilities at key moments rather than hoarding charges for situations that might never come.
The Lawless Frontier rewards Guardians who master these tools. Calling in airstrikes, deploying defensive domes, piloting war machines: these abilities give you the edge you need to survive and thrive in the criminal underworld of the Renegades expansion.