
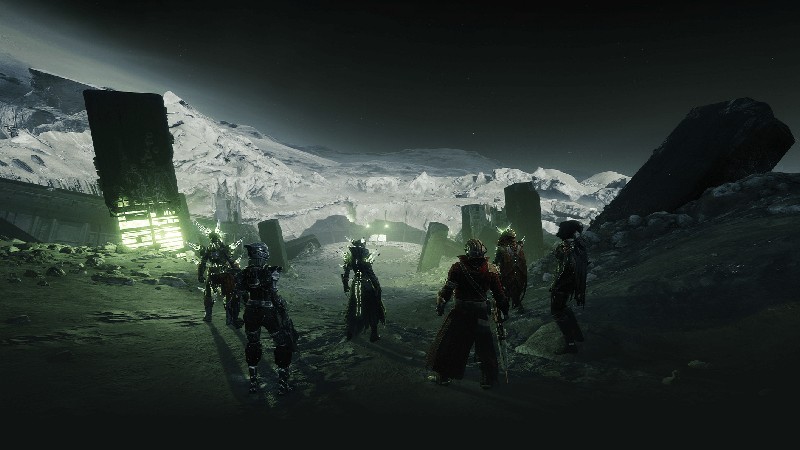
The Crota's End raid, a memorable confrontation from Destiny's past, was re-introduced to Destiny 2 on September 1st, 2023, inviting Guardians to once again delve into the dark heart of the Hellmouth on the Moon and Crota's own throne world within the Ascendant Realm. This reprised raid challenges fireteams of six to avenge the losses of the Great Disaster and finally end the reign of the Hive god, Crota, Son of Oryx. This guide provides a comprehensive walkthrough of each encounter, detailing the mechanics, strategies, and rewards that await those brave enough to face this iconic adversary.
Introduction to Crota's End in Destiny 2
Crota's End pits Guardians against the formidable Hive god Crota. The narrative thrust is to eliminate him within his throne world, a continuation of the original Destiny storyline where his soul was banished. The general theme is one of confronting immense Hive power in treacherous, dark environments, culminating in a battle against Crota himself.
The raid is a six-player cooperative mission characterized by high challenge, requiring robust communication and teamwork. Unlike Strikes, raids do not feature matchmaking (though an in-game LFG 'Fireteam Finder' is available for Guardian Rank 5+ players) and lack explicit waypoints or objectives, demanding players discover solutions independently. Enemies within possess unique abilities, and encounters can take significantly longer than typical activities, though checkpoints allow progress to be saved weekly.
For the reprised Destiny 2 version, the recommended Power Level is 1790 for Normal difficulty and 1820 for Master difficulty. The original raid was often considered short, but the Destiny 2 iteration, particularly its Contest Mode, proved significantly more challenging. A core mechanical change in the Destiny 2 version is the introduction of the "Chalice of Light," a juggling mechanic that persists through every encounter, and the associated "Enlightened" buff.
Preparing for the Descent: Loadouts and Team Composition
Success in Crota's End hinges on appropriate Power Levels, a well-synergized team, and optimized weapon loadouts.
Recommended Power Levels
- Normal Difficulty: Minimum Power Level of 1790.
- Master Difficulty: Minimum Power Level of 1820. It's important to note that this raid offers loot but no direct XP rewards.
Ideal Team Composition (Subclasses and Roles)
A balanced fireteam should prioritize survivability, enemy control, and high damage output.
 Titans
Ward of Dawn (Sentinel) is highly recommended for its protective bubble and damage buffs (Weapons of Light).
 Hunters
Shadowshot (Nightstalker) provides excellent enemy debuffing and tethering capabilities, making groups of enemies easier to manage and damage.
 Warlocks
Well of Radiance (Dawnblade) is indispensable for its healing and damage amplification, creating safe zones for the team during damage phases or intense enemy waves.
Essential Weapon Loadouts
Specific encounters demand particular weapon types, but a versatile arsenal will serve players well throughout.
Key Exotic Weapons:
- Divinity (Trace Rifle): Essential for creating a large critical hit spot on bosses and applying a weaken debuff, significantly boosting team damage.
- Gjallarhorn (Rocket Launcher): A classic choice for high burst damage, especially effective against bosses and powerful majors. Its Wolfpack Rounds also buff nearby Legendary rocket launchers.
- Tractor Cannon (Shotgun): Applies a potent debuff (30% on non-bosses, higher on bosses) that stacks with other buffs, making it excellent for coordinated burst damage.
- Outbreak Perfected (Pulse Rifle): Strong for sustained damage and add clear due to its SIVA nanites.
Specialized Weapon Archetypes:
- Shotguns for Hive Knights: High-damage shotguns are crucial for quickly dispatching powerful Hive Knights. Recommended options include:
- Slug Shotguns: Heritage, Nessa's Oblation.
- Perk-based options: Wastelander M5 (One-Two Punch), Basso Ostinato (Trench Barrel).
- Sniper Rifles for Long-Range: Necessary for encounters like The Bridge or for eliminating distant Wizards. The Supremacy and Succession are strong choices.
Add-Clearing Weapons:
Efficiently managing rank-and-file enemies is vital.
- Forbearance (Grenade Launcher): Widely considered one of the best ad-clear weapons due to its wave-frame nature and excellent perks like Chain Reaction.
- Thunderlord (Machine Gun): Excellent for mowing down large groups of enemies with its lightning strikes.
- Tessellation (Fusion Rifle): Effective for quickly eliminating swarms of foes, especially with its ability to consume a grenade for a powerful shot.
The Overarching Mechanic: The Chalice of Light
The reprised Crota's End introduces a raid-wide mechanic: the Chalice of Light. Understanding its function is paramount to success in every encounter.
- Picking up the Chalice: When a player picks up the Chalice, a charge bar appears on their screen. This bar fills passively over time and also gains a small amount of charge when the holder kills enemies.
- Engulfed in Light/Darkness:
- Once the Chalice's charge bar is full, the holder receives a 10-second debuff, often called "Engulfed in Light" or a similar name. Another player must take the Chalice from the holder before this timer expires, or the holder will die.
- In the Abyss encounter specifically, picking up the Chalice also applies a debuff called "Engulfed in Darkness," a 1-minute wipe timer that must be reset by preserving the Chalice or activating lamps.
- Becoming Enlightened: When a player successfully passes a fully charged Chalice to a teammate, the original holder receives the "Enlightened" buff. This buff has no timer itself and is crucial for interacting with various raid mechanics, such as activating plates, lamps, or picking up Hive Swords. If the Chalice is taken before it's fully charged, the Enlightened buff is not granted.
- Drained of Light: After a player uses their Enlightened buff to perform a mechanic (like activating a lamp in the Abyss or picking up a sword), they will receive the "Drained of Light" debuff. This debuff prevents them from picking up the Chalice or becoming Enlightened again for a period (45 seconds after losing Enlightened in the Ir Yût encounter, for example, or potentially for the rest of the Abyss encounter after lighting a lamp).
- Preserving the Chalice: In certain encounters, particularly the Abyss, there are pedestals or nodes where the Chalice can be "preserved" or "deposited". This action typically resets timers like "Engulfed in Darkness" and may activate subsequent mechanics or allow another player to retrieve the Chalice.
The Chalice mechanic necessitates constant communication and a rotation of players to manage buffs and debuffs effectively. Its presence throughout the raid means teams must master this "juggle" to progress.
The Abyss – Navigating the Dark Descent
The first major encounter tasks Guardians with traversing a pitch-black labyrinth, relying on lamps for light and safety while managing the Chalice of Light and accumulating darkness.
Initial Descent and Bridge Formation (Hellmouth Entrance)
Before entering the Abyss proper, teams must form a bridge at the Hellmouth's edge.
- Objective: Activate a sync plate to construct a bridge leading to a gravity lift.
- Mechanics:
- The Chalice of Light will be present.
- Pick up the Chalice. Once its meter fills, another player takes it, granting the first player the "Enlightened" buff.
- The Enlightened player stands on (or "dunks" their buff onto) the sync plate to charge it and begin bridge construction.
- Repeat this process of passing the Chalice and applying the Enlightened buff to the plate until the bridge is fully formed. Waves of Hive enemies will spawn during this process.
- Once the bridge is complete, the Chalice vanishes temporarily. Players cross and drop down the lift into the Abyss.
Traversing the Stills: Lamps, Darkness, and the Chalice
Upon landing in the Abyss, players take fall damage and acquire the "Weight of Darkness" debuff. The Chalice of Light reappears.
- Objective: Navigate the dark pathways from lamp to lamp, eventually reaching a final plate to build an exit bridge.
- Key Mechanics & Debuffs/Buffs:
- Weight of Darkness: Stacks up to x10, progressively slowing players and eventually preventing running and double jumping. Standing near an activated abyssal lamp removes this debuff.
- Engulfed in Darkness: A 60-second debuff timer that appears when a player picks up the Chalice in the Abyss. If it expires, the player dies. This timer is reset by preserving the Chalice at a node or by an Enlightened player activating a lamp.
- Chalice of Light: As described previously. In the Abyss, its primary use is to make players Enlightened so they can activate lamps or the final bridge plate.
- Enlightened: Allows a player to interact with and activate an unlit abyssal lamp. This action consumes the Enlightened buff and applies "Drained of Light".
- Drained of Light: Prevents the player from picking up the Chalice again for the remainder of the encounter after activating a lamp.
- Abyssal Lamps: Provide light and remove Weight of Darkness stacks.
- Some lamps are initially unlit and must be activated by an Enlightened player.
- Lamps will eventually turn orange and explode after roughly 30 seconds (or a few seconds after activation), killing nearby players, forcing the team to keep moving.
- Preservation Nodes: Found near some lamps (every 4-5 lamps). The Chalice holder can "preserve" the Chalice here. This action may activate the next set of lamps and resets the Engulfed in Darkness timer for the Chalice holder. The player who preserves the Chalice does not become Enlightened from this action alone; another player must take the preserved Chalice to grant Enlightenment.
- Enemy Types: Primarily large numbers of Thrall, Cursed Thrall, some Knights, and Ogres. Unstoppable Ogres spawn at the final bridge plate.
Strategy and Execution Flow
- Pick Up Chalice: One player grabs the Chalice of Light upon entering the Abyss.
- Charge and Pass: The Chalice holder allows it to charge fully. Another player then takes the Chalice, making the first player "Enlightened".
- Preserve/Activate First Lamp:
- Preserve First: The new Chalice holder moves to the first lamp (which often has a preservation node) and "preserves" the Chalice. The Enlightened player then activates the lamp. This removes Weight of Darkness for nearby players and resets Engulfed in Darkness timers.
- Pass then Preserve: Alternatively, the first Chalice holder gets Enlightened, then the new Chalice holder takes it to the lamp and preserves it. The Enlightened player activates.
- Retrieve Chalice: A player not afflicted with "Drained of Light" retrieves the Chalice from the preservation node.
- Advance and Repeat: The team moves towards the next unlit lamp (or series of lamps). The cycle of charging the Chalice, passing it to create an Enlightened player, preserving the Chalice (if a node is present), and having the Enlightened player activate the lamp continues. This process ensures that the "Weight of Darkness" is manageable and the "Engulfed in Darkness" timer doesn't lead to wipes. The ability to preserve the Chalice at nodes found every 4-5 lamps provides crucial checkpoints and flexibility in managing the buff rotation.
- Lamp Explosions: Teams must be vigilant for lamps turning orange, signaling an imminent explosion, and move away quickly.
- Final Plate and Bridge: At the end of the Abyss, players find a sync plate. There are no more lamps here, so Weight of Darkness will re-accumulate.
- Players must become Enlightened (by passing the Chalice) and then use that buff on the plate to build the bridge. This may require multiple Enlightened dunks.
- The team must defend this plate from waves of enemies, including Unstoppable Ogres, for a set duration while the bridge forms.
- Players can choose to preserve the Chalice or continue passing it to accelerate bridge formation.
- Crossing the Final Bridge: Once the bridge is complete, cross it. More Thrall and Cursed Thrall will spawn on the bridge. Dead players should be left, as they will respawn in the next section.
The dynamic nature of lamp locations (except the first) and preservation nodes requires adaptability. Effective add clear is crucial, making weapons like wave-frame grenade launchers highly valuable. The "Drained of Light" debuff necessitates that at least six unique players (if all activate a lamp) participate in the lamp activation process, reinforcing the need for full team involvement.
Challenge Guide: Conservation of Energy
- Requirement: During the Abyss encounter, a lantern may only be activated after the Chalice of Light has been preserved in the node beside it. Alternatively, you may only light one lantern between every Chalice of Light deposit. A more nuanced interpretation: "You can only Enlighten Lamps UP TO the number of times you've Preserved the Chalice at a new pedestal." Think of it as earning "Light Tokens" per preserve, spent per enlighten. Failing to have a token when enlightening fails the challenge.
- Strategy:
- The most straightforward approach is to always preserve the Chalice at a pedestal before an Enlightened player activates the associated lamp.
- This means the team will likely need to run past multiple unlit lanterns, incurring high stacks of Weight of Darkness. This makes it difficult to combine with the "Feather-Light" Triumph.
- Prioritize communication. If a distant lantern is unlit, a Chalice pedestal is likely nearby.
- Using the "Light Token" system: Each time the Chalice is preserved at a new pedestal, the team gains a conceptual "token." Each lamp activation consumes a token. Attempting to light a lamp with zero tokens fails the challenge. This allows for strategic hoarding of tokens early on to activate multiple lamps later if needed, provided a preserve action occurred at a new pedestal for each token.
- Sticking together and managing add clear are paramount due to increased debuff stacks.
Triumph Guide: Feather-Light
- Requirement: Complete the Abyss encounter without any player reaching 10 stacks of Weight of Darkness.
- Strategy: This is arguably one of the hardest Triumphs.
- Requires meticulous coordination and rapid Chalice swapping and lamp activation.
- Assign each player a number for a strict Chalice rotation order.
- The first person grabs the Chalice, charges it, passes it, and the newly Enlightened player immediately lights the lantern. Wait for Darkness stacks to decay before moving.
- Light every lantern on the path. Do not skip any.
- Maximize mobility: Eager Edge swords and Strand grapple abilities are highly effective for traversing the labyrinth quickly.
- Kill Thrall efficiently to speed up Chalice charge rate. Add clear exotics like Sunshot or Trinity Ghoul are excellent.
- Support abilities (Banner of War, Healing Grenades, Devour) are crucial for survival.
Secret Chest #1 Location
- Location: After dropping into the Abyss proper (Stills), instead of proceeding to the first lamp, veer left at the nearest column or hug the left wall.
- Path: Continue following this left wall. Players will pass several Hive doors that open upon approach. The secret chest is located in a small room behind the fifth such door on the left.
- This chest is accessible early and relies on navigating to this specific sequence of doors. Using movement abilities like Strand grapples or Eager Edge swords can help reach it quickly. The information about letting Thralls kill the player to make the chest materialize appears to be outdated or a misunderstanding of the Destiny 2 mechanics, where the chest has a fixed spawn logic.
The Bridge – A Treacherous Crossing
The second encounter demands the fireteam construct and cross a chasm-spanning bridge, transporting Hive Swords to defeat Gatekeepers on the far side, all while managing Annihilator Totems and the Chalice of Light.
Objective & Key Mechanics
- Objective: Build a bridge across a chasm. All six Guardians must cross, and five Hive Swords must be acquired, carried across, and deposited in preservation nodes on the far side after defeating Gatekeepers. Finally, defeat a wave of powerful enemies.
- Mechanics:
- Bridge Construction: Standing on the central Hive plate initiates bridge formation. The player on the plate must be "Enlightened" for the bridge to form or for its progress to be accelerated. The more Enlightened buffs active or deposited on the plate, the faster the bridge forms.
- Annihilator Totems: These activate on both the starting and far sides once bridge construction begins. Typically, one player must stand under each of the two totems on the active side (left and right of the central plate) to prevent a rapid team wipe.
- Chalice of Light: Functions as in previous sections, passed between players to grant the "Enlightened" buff.
- Enlightened Buff: Consumed to pick up a Hive Sword from a defeated Swordbearer Knight. Can also be used by the plate-holder to expedite bridge building.
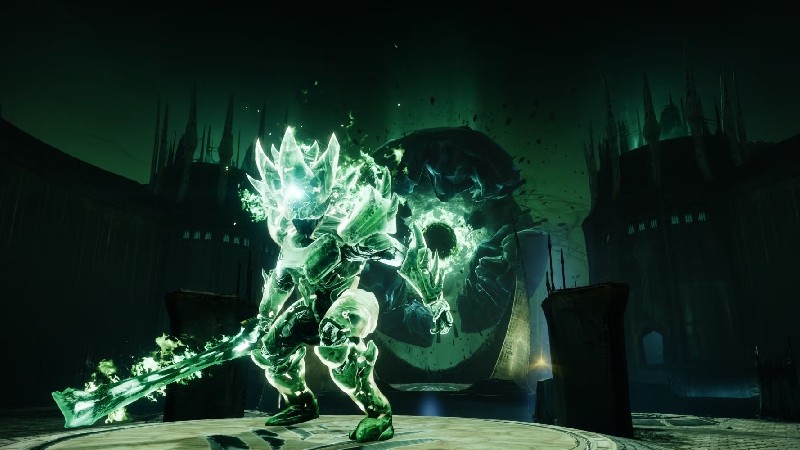
- Swordbearers: Powerful Hive Knights that spawn on the starting side once bridge construction is underway (timing varies: after construction starts, after three bridge segments form, or approximately one minute in). They drop a Hive Sword upon defeat.
- Hive Swords: Relic weapons. Only players with the "Enlightened" buff can pick them up. Swords are used to damage and defeat Gatekeepers on the far side of the bridge. Swords last for 30 seconds once picked up.
- Crossing the Bridge: Players can only cross the bridge if they are holding a Hive Sword OR the Chalice of Light. Attempting to cross without one results in death.
- Gatekeepers: Elite Hive Knights located on the far side of the bridge. They can only be damaged by Hive Swords.
- Sword Deposit: After defeating a Gatekeeper with a Hive Sword, the sword must be deposited into one of five preservation nodes/pedestals on the far side. Five swords must be successfully deposited to progress the encounter.
- Far Side Mechanics: Once players cross to the far side, they must take control of the bridge plate and Annihilator Totems there to allow remaining teammates to cross.
- Final Phase: After all five swords are deposited and all six Guardians are across, waves of adds, including Barrier Knights, Ogres, and Wizards, will spawn. Following these, multiple Gatekeepers will appear (e.g., five or six). These final Gatekeepers must also be defeated using swords retrieved from the preservation nodes (requiring Enlightenment again). Depositing the Chalice of Light after all enemies are cleared ends the encounter.
This encounter is a significant ramp-up in complexity from the Abyss. The simultaneous demands of totem management, bridge building, Chalice rotation, and precise sword mechanics require excellent team coordination. The ability for Chalice holders to cross with sword bearers is a vital strategic element, enabling immediate support and Chalice availability on the far side.

Strategies for Sword Transport and Team Coordination
Several strategies exist, catering to different team strengths and preferences.
- Role Assignment: Crucial for clarity. Assign 2 players to totems (one left, one right on the active side), 1 player to the central bridge plate. The remaining 3 players will primarily manage the Chalice, kill Swordbearers, and transport swords.
- "Enlighten Five" Strategy (Conservative):
- Begin the encounter and have players cycle through holding the Chalice until five Guardians are Enlightened. The sixth player will hold the Chalice.
- The Chalice holder and one Enlightened player (who picks up the first sword) cross the bridge together.
- The Chalice holder deposits the Chalice in a preservation node on the far side. This allows other Enlightened players to cross with swords without needing to juggle the Chalice back and forth under pressure.
- Sword bearers cross one by one, kill their Gatekeeper, and deposit their sword.
- This method is generally safer and easier to coordinate for less experienced teams as it minimizes complex Chalice exchanges during the dangerous crossing phase.
- "Escort" Strategy (Dynamic):
- The Chalice holder becomes Enlightened, then passes the Chalice.
- An Enlightened player picks up a sword. The current Chalice holder then escorts the sword bearer across the bridge.
- On the far side, the sword bearer defeats the Gatekeeper. The Chalice holder can then either run back across the bridge with the Chalice or pass it to another Enlightened player on the starting side who runs it back.
- This is repeated for each sword. This strategy can be faster but requires more precise execution and communication for Chalice transfers.
- Simultaneous First Crossing: The first two players to cross can be one with a sword and one with the Chalice. The Chalice carrier can then provide immediate support (e.g., Well of Radiance, Tractor Cannon) for the sword user against the Gatekeeper.
- Mid-Encounter Transition: Once three players have crossed and secured the far side (holding its plate and totems), they can maintain the bridge. The remaining players on the starting side can then coordinate to have one pick up a sword and another pick up the Chalice (if it was returned or never sent over) and cross together.
- Communication: Constant callouts are vital for Swordbearer spawns, status of Gatekeepers, Chalice charge/availability, and ensuring totems are always covered when the bridge plate is active. Players on the starting side can use long-range weapons to support those who have crossed by clearing adds.
The "Enlighten Five" strategy often proves more reliable, especially with LFG teams, as it front-loads much of the Chalice mechanic, reducing the number of variables during the critical sword-crossing phase.
Dropped Sword Protocols
Losing a sword can be costly, but the encounter has failsafes.
- Cannot Re-pickup: If an Enlightened player picks up a Hive Sword and then drops it for any reason (e.g., timer expires, manually dropped), that specific sword cannot be picked up again by anyone, and the Enlightened buff used to grab it is consumed and lost.
- Player Death with Sword: If a player dies while holding a sword, the sword is lost. A new Swordbearer will need to be spawned and defeated to obtain another sword.
- Far-Side Swordbearer Spawn: If all living players are on the far side of the bridge but a sword despawns or is lost before five are deposited, a new Swordbearer Knight will eventually spawn on the far side (the side players crossed to). This prevents a soft lock where the team cannot acquire more swords. An Enlightened player on the far side can then kill this Swordbearer and take its sword. This is a crucial recovery mechanic. The inability to retrieve a dropped sword emphasizes the importance of the sword carrier's survival and timely Gatekeeper kill. The far-side Swordbearer spawn is a welcome design choice that prevents a single mistake from forcing a full encounter reset late in the process.
Challenge Guide: Precarious Balance
- Requirement: Players must only cross the bridge while it is deforming or decaying. This means no player can be standing on a bridge construction plate (neither starting side nor far side) at the moment another player is physically on the bridge crossing.
- Players standing under Annihilator Totems do not void this challenge; only the bridge construction plates matter.
- Strategy:
- The team prepares as usual, with players on totems and one on the bridge plate to build it initially.
- When a sword carrier (or Chalice carrier) is ready to cross, they signal the Guardian on the active bridge plate.
- The plate Guardian steps off the plate, causing the bridge to begin deforming.
- The crossing player immediately runs and jumps across the partially formed/decaying bridge segments. This may require a well-timed jump to clear gaps.
- Once the player is safely across, the plate Guardian can step back on their plate to reform the bridge for the next person.
- This process is repeated for all six players.
- Communication is paramount to coordinate stepping off/on the plate and the crossing player's movement.
- It's highly recommended to get all (or most) players Enlightened before starting any crossings to minimize Chalice juggling during this more complex procedure.
- If the middle plate is unoccupied, totem players can briefly step off but must coordinate their return with the plate holder.
This challenge fundamentally alters the rhythm of crossing, introducing a deliberate deconstruction phase for each traversal. It increases risk due to the unstable bridge and demands precise timing and clear communication.
Triumph Guide: Threatening Reach
- Requirement: During the Bridge encounter, all Swordbearer Knights must be defeated by players who are on the opposite side of the chasm from where the Swordbearer spawns.
- Strategy:
- Initially, players on the starting side will defeat the first few Swordbearers as normal to get swords across.
- Once at least one player is on the far side with a long-range weapon (Sniper Rifles like Supremacy or Succession are ideal), subsequent Swordbearers that spawn on the starting side must be killed by players on the far side.
- Similarly, if Swordbearers spawn on the far side (due to the failsafe mechanic or during the final phase), they must be killed by players on the starting side.
- This requires clear callouts for when and where Swordbearers spawn and for players on the opposite side to have clear lines of sight and potent long-range weaponry.
This Triumph inverts the typical combat responsibility, forcing players to engage targets across the chasm, testing their long-range accuracy and map awareness.
End of Encounter: Depositing Chalice
- After the initial five swords are deposited and all Guardians are across, a final wave of enemies, including Ogres, Wizards, and Barrier Knights, must be defeated.
- This is followed by a group of Gatekeepers (typically five or six). Players will need to become Enlightened again (using the Chalice which should be on the far side) to retrieve swords from the deposit pedestals to kill these final Gatekeepers.
- Once all enemies are defeated, the Chalice of Light must be deposited into a final receptacle or interacted with to formally end the encounter. The encounter does not conclude solely upon defeating all enemies; this final Chalice interaction is mandatory. This reinforces the Chalice's central role throughout the raid.
The Shrieker-Infested Thrallway
Following the Bridge, Guardians navigate a perilous corridor packed with enemies and barriers, acting as a transition to the domain of Ir Yût.
Objective & Navigational Hazards
- Objective: Traverse an uphill hallway filled with numerous Thrall and guarded by Shriekers and Hive energy barriers, ultimately depositing the Chalice of Light and descending to the next arena.
- Mechanics:
- Chalice of Light: Picked up at the start of the Thrallway. It is used to grant the "Enlightened" buff through the standard passing mechanic.
- Enlightened Buff: Essential for progression. Only Enlightened players can pass through the green Hive forcefields that block the path. Passing through a barrier consumes the Enlightened buff.
- Shriekers: Positioned behind each Hive barrier. An Enlightened player must pass through the barrier and quickly destroy the Shrieker. Defeating a Shrieker removes its corresponding barrier, allowing the rest of the fireteam to advance.
- Final Phase: At the end of the Thrallway, the Chalice of Light must be deposited into a designated receptacle. This action will cause a hole to appear in the ground, leading to Ir Yût's arena.
This section serves as a gauntlet, testing the team's ability to manage the Chalice/Enlightened cycle efficiently while under constant pressure from Thrall and the need to quickly neutralize Shriekers. Speed and coordination in passing the Chalice and dispatching Shriekers are key to a smooth transition.
Secret Chest #2 Location (In the Thrallway/Post-Bridge Hallway)
- Location: This chest is found within the Thrallway, specifically at its very end, contingent on rapid completion of the section.
- Mechanics to Access:
- As the team progresses through the Thrallway, the Chalice of Light must be managed to Enlighten players who then pass barriers and destroy Shriekers.
- This process must be done with considerable speed. The player currently holding the Chalice of Light must race to the end of the hallway, where a large Hive door is situated.
- The Chalice holder must deposit the Chalice into a podium located just before this door before the door fully closes.
- If successful, the large door will open (or reopen if it had started closing), revealing the second secret chest inside.
- Strategy: Success requires a coordinated team effort focusing on swift add clear (Well of Radiance and Gjallarhorn are recommended to handle the dense Thrall population) and rapid Shrieker takedowns to minimize delays. The Chalice holder, in particular, needs a clear path and may require escorts or covering fire.
This secret chest transforms the Thrallway from a simple passage into a timed challenge, rewarding teams that can execute the core mechanics with speed and precision.
Ir Yût, the Deathsinger – A Race Against Ruin
Guardians now face Ir Yût, the Deathsinger, a powerful Hive Wizard whose song spells doom. This encounter is a frantic race against time, demanding precise coordination and high damage output.
Objective & The Impending Liturgy of Ruin
- Objective: Defeat Ir Yût, the Deathsinger, before she completes her devastating attack, the "Liturgy of Ruin" (also referred to as "Dark Liturgy"), which results in a team wipe.
- Timer Mechanics: The timing of this encounter is multi-faceted and critical:
- Overall Encounter Window: Upon engaging enemies or entering the main arena space after the Thrallway, a general timer of approximately 3 minutes begins for the entire process of accessing the Chalice, killing Wizards, and defeating Ir Yût. A message "The Deathsinger prepares her song" may appear.
- Liturgy of Ruin / Dark Liturgy Timer: This is the more immediate and critical timer. It begins when the first of Ir Yût's Shieldsinger Wizards is killed. This timer is typically 45 seconds. Within this 45-second window, the team must kill all remaining active Shieldsinger Wizards and then deal sufficient damage to Ir Yût to interrupt her song.
- Final Phase of Liturgy: If the Wizards are killed and Ir Yût is damaged but not enough to interrupt, some sources suggest a final 30-second phase of the Liturgy commences, during which she must be killed or the team wipes. However, the 45-second timer initiated by the first Wizard kill is the primary constraint for the DPS phase itself. The encounter structure pushes teams to be highly efficient in both the setup (accessing Chalice, finding Wizards) and the execution (killing Wizards and damaging Ir Yût).
The dual triggers for a wipe – either the overall encounter time elapsing or failing the Dark Liturgy DPS check – mean that there is no room for significant error.
Key Mechanics: Acquiring Chalice, Shieldsinger Wizards, Barriers, Expunging Enlightened
- Acquiring the Chalice of Light:
- The fireteam typically splits into two groups of three, covering the left and right sides of the arena.
- Initial waves of Hive, including Hallowed Wizards or Blistered Knights, must be defeated.
- Defeating these specific enemies will cause Shriekers, usually one on each side of a central crystal room, to open or become vulnerable.
- Destroying these Shriekers lowers the transparent barriers sealing the central room, granting access to the Chalice of Light. The Chalice can also be docked at a preservation node at the bottom center of the map, near the spawn point, if needed.
- Shieldsinger Wizards:
- Ir Yût is protected by a number of Shieldsinger Wizards. Typically, there are three in the first damage phase, four in the second, and five if a third phase is required.
- These Wizards are hidden behind green Hive forcefields in various sealed rooms around the arena.
- There are seven potential spawn locations for these Wizards: top and bottom rooms in the left tower, top and bottom rooms in the right tower, and three rooms at the rear of the arena (left, middle, right) roughly above the initial spawn area.
- Some of these seven locations might contain a Shrieker instead of a Wizard. These Shriekers should not be killed, as they are not part of the Shieldsinger mechanic for this phase.
- A designated "Scout" player (often the first to take the Chalice) is responsible for quickly identifying the active Wizard locations. Exotic bows like Wish-Ender or the Nightstalker Hunter's Stylish Executioner Aspect can help see Wizards through walls.
- Enlightened Buff & Barriers:
- Players must become "Enlightened" by passing the Chalice of Light to enter the sealed rooms containing the Shieldsinger Wizards.
- Passing through one of these green Hive barriers consumes the Enlightened buff. After losing the Enlightened buff, a player cannot pick up the Chalice again for 45 seconds.
- Wizard Elimination & DPS Phase Initiation:
- The required number of Enlightened players (e.g., three for the first phase) must simultaneously, or in very rapid succession, enter their assigned Wizard's room and kill the Shieldsinger Wizard. The kills need to be close together because the "Dark Liturgy" timer starts with the first Wizard death.
- Once all active Shieldsingers are defeated, Ir Yût becomes vulnerable to damage.
- The fireteam must then inflict a significant amount of damage to Ir Yût (approximately 25% to one-third of her total health) before the Dark Liturgy timer expires to interrupt her song and prevent a wipe.
- Expunging Enlightened on Ir Yût:
- If there are additional players with the "Enlightened" buff during Ir Yût's DPS phase (beyond those needed for Wizard killing), they can approach Ir Yût and use an interaction prompt to "Expunge" their buff.
- This action consumes the Enlightened buff and deals a burst of additional damage to Ir Yût. The damage is reported to be around 2.5% of her health per expunge. While some early reports questioned its effectiveness, the consensus, particularly from Contest Mode experiences, is that it provides a valuable damage contribution and can even stun Ir Yût.
- Post-DPS Cycle: After the damage phase ends (either by timer expiration or successful interruption), any remaining adds like Acolytes and Knights must be cleared. The team then repeats the process: acquire Chalice, Enlighten players, scout and kill the next set of Wizards (which will increase in number), and damage Ir Yût.
The encounter's rhythm is dictated by the Chalice rotation and the escalating number of Wizards per phase. This increasing difficulty in later phases strongly incentivizes maximizing damage during the initial DPS opportunities. The Expunge mechanic offers a way for well-coordinated teams to shorten the fight by leveraging surplus Enlightened buffs.
Strategies for Wizard Hunting, Chalice Management, and DPS
- Team Division & Chalice Rotation: Splitting into two teams of three (left/right) is standard for initial add clear and accessing the Chalice room. A strict Chalice passing order (e.g., Player 1 to Player 2, P2 to P3, etc.) should be established to ensure the correct number of players become Enlightened for Wizard hunting. Remember the 45-second "Drained of Light" style cooldown on picking up the Chalice after losing Enlightenment.
- Scouting & Wizard Callouts: The designated scout must quickly and accurately identify which of the seven potential rooms house the active Shieldsingers. Clear, concise callouts are essential (e.g., "Top Left Tower," "Bottom Right Tower," "Back Middle Room").
- Simultaneous Wizard Kills: Coordination is key. Enlightened players assigned to Wizards should approach their respective rooms and enter on a countdown to ensure the Wizards die almost simultaneously. This maximizes the time available for DPS on Ir Yût under the Dark Liturgy timer.
- DPS Phase:
- A Well of Radiance is highly recommended for survivability and damage boost during the DPS phase.
- Divinity is extremely helpful to create an easy critical hit spot on the mobile Ir Yût.
- High-damage weapons like Rocket Launchers, Linear Fusion Rifles, and Grenade Launchers are effective choices.
- Players with surplus Enlightened buffs should move to Ir Yût and use the "Expunge" interaction for extra damage.
- Master Difficulty Considerations: On Master difficulty, the density and lethality of adds in the central crystal room can be very high. Teams might opt to manage Chalice swaps and even conduct DPS from the upper platforms near the back Wizard rooms, after initially clearing the Shriekers to open the Chalice room.
This encounter is a demanding test of a fireteam's ability to execute multiple complex sequences under severe time pressure. Every role, from add clear to Chalice runner to Wizard hunter to DPS, must be performed with precision.
Challenge Guide: Equal Vessels
- Requirement: Throughout the Ir Yût encounter, every player in the fireteam must receive the Chalice of Light before the Chalice can be claimed again by someone who has already held it in that cycle. This strict rotation must be maintained even during the DPS phase and across Chalice preservations.
- Strategy:
- Before starting the encounter, assign a fixed Chalice rotation order (Player 1 → Player 2 → Player 3 → Player 4 → Player 5 → Player 6 → Player 1, and so on).
- Adhere strictly to this order for every Chalice pickup.
- Depositing the Chalice in a preservation node does not reset this rotation; the next player in the established sequence must be the one to retrieve it.
- The rotation continues through DPS phases. If a player needs to become Enlightened during DPS (e.g., for an Expunge, if part of the strategy), the Chalice must still be passed according to the sequence.
- If Ir Yût is defeated before a full 6-player rotation is completed in the current cycle, the challenge still counts as successful, provided no player took the Chalice out of sequence (i.e., someone didn't take it for a second time before all others had it once in that cycle).
This challenge formalizes and enforces meticulous Chalice management, ensuring every fireteam member actively participates in the mechanic throughout all phases of the encounter.
Triumph Guide: Communal Rites
- Requirement: During each damage phase (each "round") of the Ir Yût encounter, at least one player must successfully expunge their Enlightened buff on Ir Yût.
- Strategy:
- Ensure the team's Chalice rotation and Wizard-killing plan allows for at least one player to be Enlightened and available during each DPS phase on Ir Yût.
- This might mean deliberately creating one more Enlightened player than is strictly necessary to kill the active Shieldsingers.
- Alternatively, a player who quickly kills their assigned Wizard could then move to Ir Yût to perform the Expunge.
- The Enlightened player must get close to Ir Yût during the DPS window and use the on-screen "Expunge" interaction prompt.
- This must be done for every distinct damage phase. If Ir Yût is defeated in one phase, and an Expunge occurred, the Triumph condition for that "round" is met. If it takes two phases, an Expunge must happen in both.
This Triumph ensures teams engage with and understand the Expunge mechanic, adding an extra objective to the already hectic DPS phase. It requires foresight in managing the Enlightened buffs.
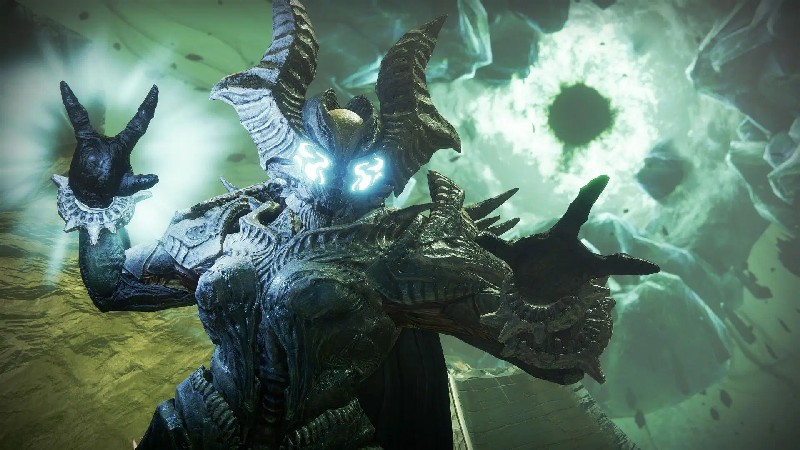
Crota, Son of Oryx – Confronting the God-Knight
The final confrontation takes place in the same arena as the Ir Yût encounter, pitting Guardians against Crota, Son of Oryx himself. This battle synthesizes all previously learned mechanics, culminating in a demanding test of skill and coordination.
Objective & Arena Mechanics
- Objective: Defeat Crota, Son of Oryx.
- Arena and Initiation: The fight occurs in the same oversized chamber as the Ir Yût battle. To begin the encounter, all six fireteam members must simultaneously press against the large crystal in the central sealed room (where Ir Yût may have been fought). Crota will then appear, and the barriers will drop.
- Presence of Crota (Destiny 2 Mechanics):
- A significant change from Destiny 1, the "Presence of Crota" debuff in Destiny 2 does not disable passive health regeneration for players. Guardians will regenerate health normally.
- Instead, its primary effect is to restrict the passing of the Chalice of Light. The Chalice can only be passed from one player to another if both players are standing within a "Pool of Light". This is a critical distinction from its original iteration.
- Pools of Light: These are conspicuous, shining circles of light that appear randomly on the floor throughout the arena. After the Chalice is successfully passed within a Pool of Light, that Pool will despawn, and a new one will appear in a different location. Their random and shifting nature adds a dynamic element to Chalice management, forcing players to constantly locate them. The updated "Presence of Crota" mechanic shifts the challenge from direct survivability (lack of health regen) to a logistical one (needing to find Pools of Light for Chalice transfers). This demands greater spatial awareness and communication from the team.
Key Mechanics: Chalice, Boomer Knights, Swordbearers, Shield Breaking, DPS, Oversoul, Expunge
- Chalice of Light: Spawns in the bottom-center area of the arena at the start. It is passed between players within Pools of Light to grant the "Enlightened" buff. The Enlightened buff is mandatory for players to pick up the Hive Swords dropped by Swordbearers. Once a sufficient number of players are Enlightened for the current cycle's needs (sword bearers, Oversoul shooter), the Chalice can be preserved at its spawn point.
- Boomer Knights: Arc-shielded Knights that spawn in the high towers at the back-left and back-right of the arena. Defeating all four of these Boomer Knights (two in each tower) is the trigger for a Swordbearer Knight and two Ogres to spawn in the central area. These Boomer Knights will respawn periodically, allowing for further Swordbearer spawns if needed.
- Swordbearers: Powerful Knights that appear (usually accompanied by Ogres) after all Boomer Knights in the towers are eliminated. Upon defeat, they drop a Hive Sword.
- Hive Swords: These are relic weapons picked up by Enlightened players. Their primary function in this encounter is to damage and break Crota's impenetrable shield. Typically, two to three swords are needed to break his shield per cycle. Sword damage output against the shield can be maximized by using an animation cancel (heavy attack immediately followed by the sword's super ability). Debuffs applied to Crota, such as Tractor Cannon, will increase the damage his shield takes from swords. Player-based damage buffs like Radiant or Well of Radiance generally do not directly increase sword damage to the shield, though some specific stacking interactions (like Lumina + Radiant) have been anecdotally reported to have an effect.
- Crota's Shield: Crota begins the fight with an overshield that makes him immune to all regular weapon damage. This shield must be completely depleted using Hive Swords before he becomes vulnerable for a DPS phase.
- DPS Phase: Once his shield is broken, Crota will kneel and become vulnerable to damage from all sources for a limited time.
- Oversoul:
- A colossal green orb/eye that appears high in the sky behind Crota's main platform.
- The Oversoul activates and a 30-second wipe timer begins as soon as Crota's shield breaks and the DPS phase starts. If this timer reaches zero, the entire fireteam is wiped.
- An "Enlightened" player must shoot and destroy the Oversoul before its timer expires. Destroying the Oversoul immediately ends the current DPS phase on Crota. Therefore, the Enlightened player should wait until the Oversoul timer is very low (e.g., 3-5 seconds remaining) to maximize damage time on Crota.
- Expunging Enlightened on Crota:
- Players who have the "Enlightened" buff but are not assigned to Oversoul duty can approach Crota during the DPS phase and use an interaction prompt (default interact key/button) to "Expunge" their buff.
- This action consumes the Enlightened buff and deals a significant chunk of direct damage to Crota, reported to be approximately 2.5% to 2.75% of his total health per expunge. It can also briefly stun Crota.
- The player designated to shoot the Oversoul should not Expunge their buff, as they need to remain Enlightened for that critical task.
- Final Stand:
- Triggered when Crota's health is reduced to a certain threshold (around 10% to 25%).
- Upon entering Final Stand, Crota will briefly regain his shield, perform a powerful area-of-effect (AoE) blast, and then become damageable again for a last-ditch effort by the team.
- Oversoul Behavior during Final Stand: This is a critical and often misunderstood phase.
- An initial Oversoul will appear with a timer (e.g., 15 seconds, 20 seconds).
- An Enlightened player must shoot this first Final Stand Oversoul. Most sources indicate that destroying this Oversoul will then cause a new, faster Oversoul to spawn with a very short timer (e.g., 10 seconds), and this second Oversoul is typically unkillable. The team must defeat Crota before this final, unkillable Oversoul's timer expires.
- Some sources suggest shooting the first Final Stand Oversoul extends its timer, but the "destroy first, new faster one appears" mechanic is more consistently reported for the Destiny 2 version and presents a more urgent DPS check. The safest interpretation for this guide is that dealing with the first Final Stand Oversoul buys a very brief window, leading into an ultimate race against the second, fatal Oversoul.
The Crota encounter is a culmination of the raid's mechanics, demanding precise execution of Chalice rotations within Pools of Light, coordinated takedowns of Boomer Knights to spawn Swordbearers, efficient shield breaking with Hive Swords, maximized DPS windows, and flawless Oversoul management, especially during the high-stakes Final Stand. The Expunge mechanic offers a strategic option for teams capable of generating surplus Enlightened buffs to accelerate damage phases.
Strategies for Each Phase, Including Final Stand Oversoul Management
A structured approach with clear roles is essential for conquering Crota.
- Role Assignment:
- Sword Bearers (2-3 players): Responsible for becoming Enlightened and using Hive Swords to break Crota's shield.
- Oversoul Duty (1-2 players): At least one primary player who will always be Enlightened to shoot the Oversoul during regular DPS phases. A backup or second Enlightened player is crucial for the Final Stand Oversoul.
- Chalice Manager/Docker (1 player): Responsible for initiating Chalice rotations and preserving the Chalice once enough players are Enlightened. This player can also be a primary add clearer.
- Add Clear / Boomer Knights (Remaining players): Focus on clearing general Hive enemies and, critically, the Boomer Knights in the towers to trigger Swordbearer spawns.
- Phase 1: Setup and Shield Breaking
- Initiate Encounter: All players gather at the central crystal.
- Chalice Rotation & Enlightenment: The designated first Sword Bearer (or Chalice Manager) picks up the Chalice from the bottom-center area. They locate the first Pool of Light and call out its position. The next player in the sequence (e.g., second Sword Bearer) meets them there to take the Chalice, making the first player Enlightened. This continues until all designated Sword Bearers and the primary Oversoul shooter are Enlightened. The Chalice is then preserved.
- Boomer Knight and Swordbearer Spawn: Simultaneously, other team members focus on eliminating the four Boomer Knights in the towers. Once all four are down, a Swordbearer Knight and two Ogres will spawn in the central area below Crota's platform. Prioritize killing the Ogres first, then the Swordbearer. Crucially, do not kill the Swordbearer until an Enlightened Sword player is in position and ready to pick up the sword immediately.
- Breaking Crota's Shield: Once Enlightened players have swords (usually 2, or 3 if not using Tractor Cannon or for safety), wait for Crota to be in a favorable position (often near one of the side platforms or the central area). Apply Tractor Cannon to Crota if available. All Sword Bearers then attack Crota's shield simultaneously or in rapid succession to break it quickly.
- Phase 2: DPS and Oversoul Management
- Damage Crota: Once the shield breaks, Crota kneels. This is the DPS phase. Deploy Well of Radiance (ideally at Crota's feet or slightly elevated to avoid being broken by his slams), and use all available firepower.
- Oversoul Timer: The 30-second Oversoul timer begins immediately. The designated Enlightened Oversoul player must monitor this timer vigilantly.
- Expunge (Optional but Recommended): Any additional Enlightened players should approach Crota and use the "Expunge" interaction for bonus damage.
- Destroy Oversoul: The Oversoul player should shoot and destroy the Oversoul when its timer has only a few seconds remaining (e.g., 3-5 seconds) to maximize DPS time on Crota. Its destruction ends the DPS phase.
- Repeat Cycle: After the Oversoul is destroyed, Crota's shield regenerates. The team resets: the Chalice Manager retrieves the Chalice from its preserved spot, new Pools of Light are located, players become Enlightened as needed, Boomer Knights are killed, and the cycle repeats. Most teams will aim for a two or three-phase kill.
- Phase 3: Final Stand
- Triggering Final Stand: When Crota's health reaches the critical threshold (around 10-25%), he enters Final Stand. He will briefly become immune and unleash an AoE blast; players should back away momentarily to avoid this.
- First Final Stand Oversoul: After the blast, Crota becomes damageable again, and the first Final Stand Oversoul appears with its timer (e.g., 15-20 seconds). An Enlightened player (ideally the backup Oversoul shooter or a pre-designated Final Stand Oversoul player) must shoot this Oversoul before its timer expires.
- Second (Fatal) Final Stand Oversoul: Destroying the first Final Stand Oversoul will typically trigger the appearance of a second, faster Oversoul (e.g., 10-second timer) that cannot be destroyed.
- Final DPS Push: The team must defeat Crota before this final, unkillable Oversoul's timer expires and wipes the fireteam. All remaining supers, heavy ammo, and abilities should be used here.
The encounter's success hinges on flawless execution of each role, particularly the timely management of the Chalice within Pools of Light, rapid Boomer takedowns, coordinated shield breaks, and precise Oversoul destruction. Final Stand is a pure DPS race against an unyielding clock.
Challenge Guide: All For One
- Requirement: When breaking Crota's shield, all sword damage contributing to that shield break must be dealt within a very short window, typically interpreted as either using three swords simultaneously or ensuring the entire shield is depleted within 3 seconds of the first sword hit.
- Strategy:
- Enlighten three players and have them all acquire Hive Swords.
- Position all three Sword Bearers near Crota.
- One player applies Tractor Cannon to Crota (if used).
- On a coordinated call (e.g., "3, 2, 1, GO!" immediately after Tractor impact), all three Sword Bearers attack Crota's shield simultaneously or in extremely rapid succession.
- While two swords can break the shield on Normal difficulty with perfect execution and no missed hits, using three swords is a much safer and more consistent strategy for completing the challenge, especially on Master difficulty.
- A previous bug that could cause challenge failure if Final Stand was reached too quickly after the shield drop has reportedly been fixed.
This challenge standardizes the shield-breaking phase, demanding a synchronized burst of sword damage rather than allowing for staggered or sequential attempts. It places a premium on the setup phase where three players must be Enlightened and armed with swords concurrently.
Triumph Guide: Singular Sensation
- Requirement: Complete the Crota, Son of Oryx encounter while ensuring that only one player in the fireteam is "Enlightened" at any given time.
- Strategy: This Triumph imposes a significant restriction on buff management.
- Chalice Juggling: The Chalice must be passed meticulously so that as soon as one player becomes Enlightened, no other player is simultaneously holding the buff.
- Sword Phase: To get a sword, a player must become Enlightened. They pick up the sword and attempt to damage Crota's shield. If multiple sword hits are needed to break the shield (which is typical), this single Enlightened player would have to do all the work for that sword, or the Chalice would need to be passed to make a different player Enlightened for a subsequent sword, ensuring the first player is no longer Enlightened. This would likely require multiple, smaller shield damage phases or a highly skilled sword user capable of maximizing damage from a single sword.
- Oversoul Phase: The player who needs to shoot the Oversoul must be the only Enlightened player at that moment. This requires precise timing of Chalice passes to ensure the Oversoul shooter gets the buff just before, or as, the DPS phase begins.
- Overall: This strategy will significantly slow down the encounter. It demands impeccable communication and planning for Chalice transfers to ensure the "one Enlightened at a time" rule is never broken. It effectively bottlenecks all Enlightened-dependent mechanics through a single individual at any point.
This Triumph tests a team's mastery of the Chalice mechanic under extreme constraints, forcing a sequential and deliberate approach to actions that are normally performed in parallel or by multiple buffed individuals.
The Spoils of Conquest: Crota's End Loot and Rewards
Successfully navigating the Hellmouth's depths and defeating Crota and his lieutenants yields a host of coveted weapons, armor, and cosmetic items.
Comprehensive Loot Table by Encounter
The following table details potential weapon and armor drops from each of the four main encounters in the Crota's End raid. Note that the Necrochasm Exotic has its own acquisition method (see section IX.D) but can also drop from Crota after its quest is completed or during Contest/Challenge modes for initial acquisition. Armor pieces are generic to all classes unless specified, dropping the class-appropriate version for the player.
| Encounter | Possible Weapon Drops | Possible Armor Drops (All Classes) |
|---|---|---|
| 1. The Abyss (Stills) | Song of Ir Yût (Arc Machine Gun), Fang of Ir Yût (Strand Scout Rifle), Abyss Defiant (Solar Auto Rifle) | Helmet, Chest Armor, Gauntlets |
| 2. The Bridge | Swordbreaker (Strand Shotgun), Fang of Ir Yût (Strand Scout Rifle), Oversoul Edict (Arc Pulse Rifle) | Chest Armor, Gauntlets, Leg Armor |
| 3. Ir Yût, the Deathsinger | Word of Crota (Void Hand Cannon), Song of Ir Yût (Arc Machine Gun), Oversoul Edict (Arc Pulse Rifle) | Chest Armor, Leg Armor, Class Item |
| 4. Crota, Son of Oryx | Word of Crota (Void Hand Cannon), Abyss Defiant (Solar Auto Rifle), Swordbreaker (Strand Shotgun). Necrochasm (Kinetic Exotic Auto Rifle) has a chance post-quest completion or via initial Contest Mode reward. | Helmet, Leg Armor, Class Item |
Note on Song of Ir Yût element: While one source listed it as Solar from Ir Yût, the overwhelming consensus across multiple sources confirms it as an Arc Machine Gun.
This loot table is invaluable for Guardians looking to farm specific pieces of gear, especially when Crota's End is the featured weekly raid, allowing for multiple targeted loot drops per character.
Legendary Weapon Deep Dive
The Crota's End raid offers six unique Legendary weapons, each with a distinct Origin Trait and the potential to be crafted.
- Legendary Weapons:
- Abyss Defiant: Solar Auto Rifle (High-Impact Frame)
- Fang of Ir Yût: Strand Scout Rifle (Rapid-Fire Frame)
- Word of Crota: Void Hand Cannon (Precision Frame)
- Oversoul Edict: Arc Pulse Rifle (Rapid-Fire Frame)
- Swordbreaker: Strand Shotgun (Lightweight Frame)
- Song of Ir Yût: Arc Machine Gun (Adaptive Frame)
- Origin Trait: Cursed Thrall: After defeating a target with a melee attack, final blows with this weapon cause targets to explode for a short duration. This trait encourages an aggressive gameplay loop, integrating melee combat with gunplay for explosive results.
- Craftability: All six Legendary raid weapons are craftable, requiring Guardians to acquire five Deepsight Resonance (red border) versions of each weapon to unlock its pattern at the Enclave. Crafting allows for the selection of preferred barrels, magazines, and perks, including enhanced versions.
- Noteworthy Perks (Examples):
- Word of Crota: Can roll with potent Void synergy perks like Repulsor Brace and Destabilizing Rounds, or damage perks like Dragonfly and Sword Logic.
- Song of Ir Yût: Sought-after rolls include Rewind Rounds and Target Lock for sustained boss damage.
- Abyss Defiant: Perks like Zen Moment/Kill Clip or Enlightened Action/Swashbuckler offer strong neutral game and damage potential.
- Fang of Ir Yût: Can feature Shoot to Loot for utility or damage perks like Precision Instrument and Golden Tricorn.
- Oversoul Edict: Demolitionist and Voltshot is a powerful combination for ability-focused builds.
- Swordbreaker: One-Two Punch for melee builds or Surrounded for close-quarters damage are notable.
The combination of the unique Cursed Thrall origin trait and the ability to craft god rolls makes these weapons highly desirable.
Armor Sets
Each class receives a distinct armor set visually themed around the Hive and Crota's dark aesthetic.
- Titan: Willbreaker Armor Set
- Helmet: Willbreaker's Watch
- Gauntlets: Willbreaker's Fists
- Chest Armor: Willbreaker's Resolve
- Leg Armor: Willbreaker's Greaves
- Class Item: Mark of the Pit
- Hunter: Unyielding Armor Set (The class item "Shroud of Flies" is often associated with the set name)
- Helmet: Unyielding Casque
- Gauntlets: Dogged Gage
- Chest Armor: Relentless Harness
- Leg Armor: Tireless Striders
- Class Item: Shroud of Flies
- Warlock: Deathsinger Armor Set
- Helmet: Deathsinger's Gaze
- Gauntlets: Deathsinger's Grip
- Chest Armor: Deathsinger's Mantle
- Leg Armor: Deathsinger's Herald
- Class Item: Bone Circlet
- Raid Mods: Crota's End armor can equip specific raid mods that provide benefits during the raid encounters. Examples include:
- Stoic When Panicked: Gain damage resistance while standing on a plate, near a lantern/totem, or while carrying a relic Sword.
- Benevolent Overflow: While Engulfed in Light, dying or having the Chalice taken creates a healing burst. Stacks increase radius/potency.
- Brimming with Exhaustion: Reduces duration of Drained of Light debuff.
- Chomping at the Stem: After being Drained of Light, gain bonus mobility, weapon handling, and reload speed.
- Refreshing Thirst: Becoming Drained of Light grants an armor charge. These mods offer tangible advantages within the raid, rewarding players who invest in collecting and utilizing the raid armor.
The Necrochasm Exotic: Acquisition Quest and Catalyst Details
The Necrochasm, an Exotic Kinetic Auto Rifle, returns with a dedicated questline.
- Acquisition of Necrochasm:
- Initial Step - "Bottomless Pit" Quest: After a fireteam's first successful completion of the Crota's End raid, players can interact with the Sword of Crota (the end-of-raid vendor) to pick up the "Bottomless Pit" Exotic quest.
- Husk of the Pit: The quest immediately grants players the "Husk of the Pit," a Common (white rarity) Auto Rifle.
- Step 1 - Feeding the Husk: Players must defeat 100 Hive enemies using the Husk of the Pit. Final blows achieved within the Crota's End raid grant significantly more progress. Alternatively, activities like Altars of Sorrow on the Moon or the Grasp of Avarice dungeon are efficient farming locations. Completing this step transforms the Husk of the Pit into the "Eidolon Ally," a Legendary Auto Rifle.
- Step 2 - Essence of the Oversoul: The next step requires players to collect 20 "Essence of the Oversoul".
- Essence of the Oversoul can drop from completing encounters within the Crota's End raid.
- Additionally, specific Triumphs associated with the Crota's End raid reward Essence of the Oversoul (up to 11 can be earned this way).
- Step 3 - Claiming Necrochasm: Once 20 Essences of the Oversoul are collected, players can return to the Sword of Crota vendor at the end of the raid to claim their Necrochasm Exotic Auto Rifle.
- Contest Mode Reward: Fireteams that completed the Crota's End raid during its initial 48-hour Contest Mode period were automatically awarded the Necrochasm.
- Random Drop Chance: There is also a small chance for Necrochasm to drop directly from defeating Crota on subsequent clears after the player has completed the "Bottomless Pit" quest and obtained it once.
- Necrochasm Exotic Auto Rifle Details:
- Weapon Type: Kinetic Auto Rifle
- RPM: 720 (Rapid-Fire Frame)
- Intrinsic Trait - Cursebringer: Precision final blows with Necrochasm create a Cursed Thrall explosion. Final blows resulting from this explosion refill the weapon's magazine.
- Necrochasm Catalyst:
- Acquisition: The catalyst is obtained by completing two secret mini-encounters within the Crota's End raid. The Necrochasm Exotic Auto Rifle must be equipped to trigger these events.
- First Plate (Post-Bridge Encounter): After completing the Bridge encounter (Encounter 2), proceed towards the exit but instead of going up the stairs to the Thrallway, go to the right side of the area. A green glowing plate will be visible. Standing on this plate with Necrochasm equipped will trigger a prompt: "Crota's Minions Appear." A timed event (approximately 90 seconds) will begin, spawning numerous Gatekeepers and Swordbearers around the Bridge arena. The fireteam must defeat all these enemies within the time limit.
- Second Plate (Post-Ir Yût Encounter): After defeating Ir Yût, the Deathsinger (Encounter 3), proceed to the very back-right of the arena. Another similar green glowing plate will be found. Activating it with Necrochasm equipped triggers a similar timed event with Gatekeepers and Swordbearers.
- Catalyst Reward: Successfully completing both hidden plate encounters will award the Necrochasm Exotic Catalyst.
- Masterworking the Catalyst: To fully Masterwork the catalyst, players need to collect an additional 35 Essence of the Oversoul. Essences collected previously for the main Necrochasm quest count retroactively towards this requirement.
- Catalyst Effect: The catalyst enhances Necrochasm, traditionally by improving stats like stability or range, and potentially increasing the potency or radius of its Cursed Thrall explosions.
- Acquisition: The catalyst is obtained by completing two secret mini-encounters within the Crota's End raid. The Necrochasm Exotic Auto Rifle must be equipped to trigger these events.
The multi-stage quest for Necrochasm and its catalyst encourages deep engagement with the raid, requiring not only completions but also Triumph hunting and mastery of hidden mechanics.
Adept Weapon Guide
Adept versions of the Crota's End Legendary weapons offer enhanced capabilities for dedicated raiders.
- Source: Adept weapons are exclusively obtained by completing the weekly rotating encounter Challenges on Master difficulty of the Crota's End raid. Each successful Master Challenge completion rewards one random Adept weapon from the raid's pool. The specific Adept weapon awarded is random and not on a fixed weekly rotation.
- Available Adept Weapons: All six Legendary raid weapons have Adept versions:
- Abyss Defiant (Adept)
- Fang of Ir Yût (Adept)
- Word of Crota (Adept)
- Oversoul Edict (Adept)
- Swordbreaker (Adept)
- Song of Ir Yût (Adept)
- Benefits of Adept Weapons:
- Distinct golden visual appearance.
- Provide a +3 bonus to all stats (except Impact) when fully Masterworked, compared to the +10 to a single stat on standard Masterworked weapons.
- Can equip powerful Adept mods, which offer enhanced effects over regular weapon mods (e.g., Adept Range, Adept Big Ones Spec).
- Following the system introduced with the Root of Nightmares raid, it is highly probable that these Adept weapons can be "enhanced" at the Enclave, allowing players to select specific barrels, magazines, a Masterwork stat, and even upgrade perks to their enhanced versions, provided the desired perks are on the initial Adept drop.
Adept weapons represent the pinnacle of raid loot, rewarding mastery of the most challenging version of Crota's End and its specific encounter modifications.
Cosmetic Collection
Beyond powerful gear, Crota's End offers a range of exclusive cosmetic items to showcase a Guardian's accomplishments.
- Exotic Ship:
- War's Lament: Awarded for completing the Crota's End raid on Master difficulty.
- Exotic Sparrow:
- Crota's Exile: Awarded for completing the "Conquest by Virtue" Triumph, which requires successfully finishing all four encounter challenges on Master difficulty in Crota's End.
- Shaders:
- Warped Rachis: Awarded for looting all hidden chests within the Crota's End raid. This involves finding the standard secret chests, not the red border chest.
- Shed Carapace: Another shader from the raid, though its specific acquisition method is less commonly detailed, it is listed as a raid cosmetic. Likely tied to a specific Triumph or collection badge.
- Emblems:
- Illuminated Peril: Awarded for a Guardian's first completion of the Crota's End raid on Normal difficulty.
- A Broken Throne: Awarded exclusively to players who cleared the Crota's End raid during its 48-hour Contest Mode (Challenge Mode) window upon its re-release (September 1-3, 2023). This emblem is no longer obtainable.
- Hope Eater: Was available through Bungie Rewards for helping ten Guardians complete Crota's End. This emblem is also noted as currently unavailable.
These cosmetic items serve as prestigious symbols of a player's dedication and skill in conquering various facets of the Crota's End raid.
Beyond Victory: Triumphs and Hidden Secrets
For Guardians seeking to fully master Crota's End and earn its coveted title, a series of Triumphs and hidden chests await.
The Swordbearer Title: A Guide to Essential Triumphs
The "Swordbearer" title is awarded to players who complete a specific list of Triumphs associated with the Crota's End raid. These Triumphs test various aspects of gameplay, from encounter challenges to specific fireteam compositions and flawless execution.
| Triumph Name | Requirement | Reward (if specified) |
|---|---|---|
| Crota's End | Complete any version of the "Crota's End" raid. | Illuminated Peril Emblem |
| Spoils of Conquest | Loot 3 hidden chests in the "Crota's End" raid. | Warped Rachis Shader |
| Broken Throne | Complete the Master tier of "Crota's End." | War's Lament (Exotic Ship), Essence of Oversoul +2 |
| Conquest By Virtue | Complete all encounter challenges in the Master tier of "Crota's End." | Crota's Exile (Exotic Sparrow) |
| Conservation of Energy | Complete the "Conservation of Energy" challenge mode (Abyss encounter). | Essence of Oversoul |
| Precarious Balance | Complete the "Precarious Balance" challenge mode (Bridge encounter). | Essence of Oversoul |
| Equal Vessels | Complete the "Equal Vessels" challenge mode (Ir Yût encounter). | Essence of Oversoul |
| All For One | Complete the "All For One" challenge mode (Crota, Son of Oryx encounter). | Essence of Oversoul |
| Unbowed | Complete all encounters in the "Crota's End" raid without any member of your fireteam dying. | Essence of Oversoul |
| Threatening Reach | During the Bridge encounter, defeat all Swordbearer Knights from the opposite side of the chasm. | Essence of Oversoul |
| Communal Rites | During each round of the Ir Yut encounter, at least one player must expunge Ir Yut. | Essence of Oversoul |
| Singular Sensation | Complete the Crota, Son of Oryx encounter with only one player Enlightened at a time. | Essence of Oversoul |
Achieving the Swordbearer title is a testament to a Guardian's comprehensive mastery of the Crota's End raid.
Secret Chest Locations
There are three standard hidden chests in the Crota's End raid that contribute to the "Spoils of Conquest" Triumph.
- Secret Chest #1 (The Abyss/Stills):
- Location: After dropping into the Abyss encounter (where the lamps begin), ignore the main path. Instead, immediately turn and hug the far-left wall of the area.
- Path: Follow this left wall. You will pass through a series of (typically four) Hive doorways that open as you approach. The chest is located in a small alcove behind the fifth door encountered along this left wall path.
- This chest can be reached quickly with movement abilities like Strand grapple or Eager Edge swords.
- Secret Chest #2 (Thrallway/Post-Bridge Hallway):
- Location: This chest is found at the end of the Thrallway, the corridor connecting the Bridge encounter to Ir Yût's arena.
- Mechanics: Accessing this chest is a timed event. As the fireteam progresses through the Thrallway, managing the Chalice of Light to Enlighten players who then destroy Shriekers to lower barriers, the current Chalice holder must reach the very end of the hallway. There, they must deposit the Chalice into a podium before a large Hive door at the end of the hall fully closes.
- If the Chalice is deposited in time, the door will open (or reopen), revealing the chest inside. This requires swift add clear and efficient Shrieker takedowns by the entire team to ensure the Chalice carrier has a clear and rapid path.
- Secret Chest #3 (Red Border Chest / Hive Statue Puzzle):
- Location: This chest spawns after defeating Crota, but only if a raid-long puzzle involving Hive statues is completed correctly. It awards a guaranteed Deepsight (red border) weapon.
- Mechanics - Overview:
- Observation Phase (Hellmouth Entrance): At the very beginning of the raid, before dropping into the Abyss, observe three pairs of Hive statues in the Hellmouth overlook area. One statue in each pair will be lit (on fire). Note which statue (left or right within its pair) is lit for all three sets.
- Activation Phase (Throughout Raid): Within the raid, the fireteam will find three corresponding pairs of interactable Hive statues. For each pair, the team must activate (light up) the statue that matches the lit one from the Hellmouth entrance observation.
- If correct, a message "A balance is reached..." appears.
- If incorrect, "An irredeemable mistake..." appears, and the puzzle fails for that run.
- Statue Set Locations for Activation:
- Set 1 (Before Bridge Encounter / Start of Bridge Encounter): At the beginning of the Bridge encounter area, in two rooms at the bottom left and bottom right (relative to spawn), each containing one statue. Activate the one corresponding to the first observed pair from the Hellmouth.
- Set 2 (After Bridge Encounter / Far Side of Bridge): After successfully crossing the bridge and completing that phase of the encounter (before the Thrallway), two statues are found at the left and right ends of the far side area. Activate the one corresponding to the second observed pair.
- Set 3 (After Deathsinger Encounter / Crota's Arena): After defeating Ir Yût, in the final arena where Crota is fought. The statues are located outside on the top balcony area of the central structure where the crystal to start the Crota fight is. The orientation here can be tricky: "left" and "right" are relative to facing the giant Oversoul in the sky, or, if facing the statues from the crystal, their positions will appear flipped. Activate the one corresponding to the third observed pair.
- If all three sets of statues are activated correctly throughout the raid, an additional chest will spawn after defeating Crota, containing a guaranteed Deepsight weapon. A similar statue puzzle for a red border chest confirms the mechanic. While this is referred to as "Secret Chest #3," it's distinct from the two standard hidden chests that count for the "Spoils of Conquest" Triumph, which only requires looting 3 hidden chests, implying the two standard ones and one of these statue-activated ones, or that the triumph refers to the two standard chests plus one other type of hidden chest if the red border chest is considered separate. However, most guides list two standard secret chests and the red border chest puzzle. The "Spoils of Conquest" Triumph likely refers to the two standard chests found in the Abyss and Thrallway, plus potentially one other regular hidden chest if it exists, or it might be that the triumph is satisfied by any three distinct hidden/extra chests found in the raid. Given three distinct hidden chests (Abyss, Thrallway, Red Border), it is probable the Triumph counts these.
The "Spoils of Conquest" Triumph requires looting 3 hidden chests. Based on available information, there are two standard secret chests (Abyss, Thrallway) and one more elaborate puzzle-based chest (Red Border chest). It is likely these three chests satisfy the Triumph.
Encounter Challenge Details
Each of the four main encounters features a specific weekly rotating challenge that, when completed on Normal or Master difficulty, provides additional rewards. Completing them on Master difficulty is required for Adept weapons and the "Conquest By Virtue" Triumph.
- Encounter 1 (The Abyss) - Conservation of Energy:
- Requirement: Only light one lantern for each time the Chalice of Light has been preserved at a new pedestal. Effectively, you earn a "permission" to light a lamp each time you preserve the Chalice at a unique spot. You cannot light a lamp if you have no "permissions" stored.
- Strategy: This usually means skipping several lamps between preservation points, leading to high Weight of Darkness stacks. Coordinate Chalice preservation with lamp lighting. Stay together, manage adds, and use mobility tools. Do not attempt with Feather-Light Triumph simultaneously.
- Encounter 2 (The Bridge) - Precarious Balance:
- Requirement: Players may only cross the bridge while no one is standing on a bridge construction plate (i.e., the bridge must be actively deforming/decaying).
- Strategy: The plate holder must step off as a player begins to cross. The crosser then jumps the gaps of the deforming bridge. Communication is key. Enlighten multiple players beforehand to simplify Chalice management.
- Encounter 3 (Ir Yût, the Deathsinger) - Equal Vessels:
- Requirement: Every player in the fireteam must receive the Chalice of Light before it can be claimed again by someone who has already held it in that specific rotation cycle. This order must be maintained throughout the entire encounter, including during DPS and across Chalice preservations.
- Strategy: Assign a strict 1-6 player rotation for the Chalice. Adhere to it rigidly. Dunking the Chalice does not reset the rotation order.
- Encounter 4 (Crota, Son of Oryx) - All For One:
- Requirement: Crota's shield must be broken by Hive Swords within a very short timeframe – typically within 3 seconds of the first sword hit, often necessitating the simultaneous use of three swords.
- Strategy: Have three Enlightened players acquire swords. Apply Tractor Cannon to Crota, then have all three sword users attack his shield at the same moment on a countdown.
Conclusion
The reprised Crota's End raid in Destiny 2 offers a formidable challenge that blends nostalgia with refreshed mechanics. The introduction of the Chalice of Light as a persistent element across all encounters demands constant teamwork, communication, and adaptability from fireteams. From the oppressive darkness of the Abyss to the intricate dance of the Bridge, the timed fury of Ir Yût, and the climactic confrontation with Crota himself, each stage presents unique hurdles.
Successful navigation requires not only mastery of individual roles and loadouts tailored to specific threats—such as specialized shotguns for Knights or sniper rifles for distant targets—but also a cohesive understanding of how the Chalice, Enlightened, and Drained of Light mechanics intertwine with each encounter's primary objectives. The strategic depth is further enhanced by encounter-specific challenges and Triumphs, pushing teams to execute mechanics with near-perfect precision and explore unconventional strategies.
The rewards, ranging from uniquely perked Legendary weapons with the Cursed Thrall Origin Trait, class-specific armor sets, to the coveted Necrochasm Exotic and its catalyst, provide ample incentive for Guardians to brave the Hellmouth's depths repeatedly. Adept weapons from Master difficulty challenges and exclusive cosmetic items like shaders, ships, and sparrows offer further goals for the most dedicated raiders.
"The strongest steel is forged in the hottest flames."
Ultimately, conquering Crota's End is a significant achievement, a testament to a fireteam's skill, patience, and ability to collaborate under pressure. This guide serves as a comprehensive resource to aid Guardians in their quest to silence the Son of Oryx once and for all.