
So, you're seeing videos and posts buzzing about a gun that screams like a dragon and explodes everything? They're talking about One Thousand Voices (1KV), and trust me, it's every bit as awesome as it sounds! This guide is your straight shot to getting your hands on this beastly Exotic Heavy Fusion Rifle from the Last Wish raid. No fluff, just the fiery details you need!
Introduction to One Thousand Voices
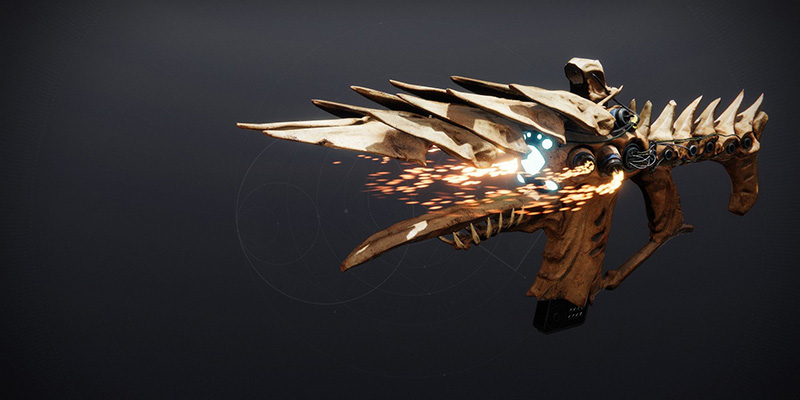
Get ready to unleash some serious firepower, because One Thousand Voices is one of the most iconic and, frankly, awesome Exotic weapons in Destiny 2! What is it? It's an Exotic Heavy Fusion Rifle, but that description doesn't even begin to cover the sheer destructive joy it brings. Imagine a gun that fires a giant, continuous beam of pure Solar death that makes targets erupt in delayed explosions a second or two after you hit them. Yeah, it's that cool.
Its power comes from two unique perks working in tandem:
- Ahamkara's Eye (Intrinsic): This is what unleashes that "giant continuous beam of death."
- Unforeseen Repercussions (Trait): This perk causes the weapon's beam to superheat its targets upon impact, leading to those satisfying, delayed scorching explosions.
Think of it as weaponized dragon's breath – a fitting analogy since it's a prize from defeating Riven, the last known Ahamkara (basically, wish-granting space dragons!). Beyond looking and sounding incredible, 1KV is fantastic for melting bosses and clearing out groups of tough enemies with those signature delayed detonations.
The only place to get this coveted weapon is from the Last Wish raid, specifically from the chests at the very end after you defeat Riven and complete the subsequent Queenswalk encounter.
The Last Wish Raid
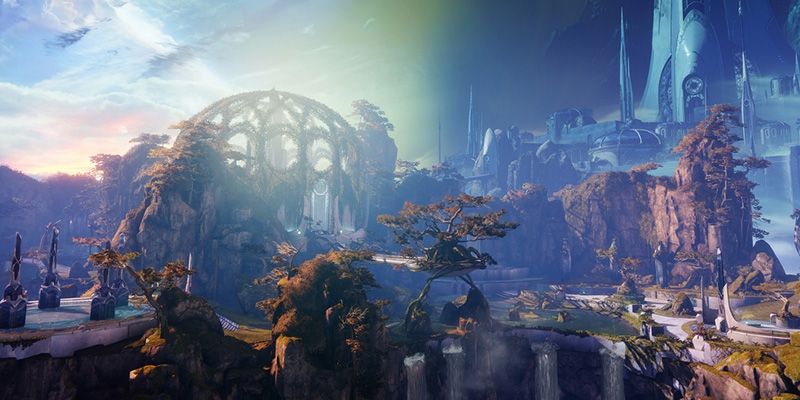
The Last Wish raid is your gateway to One Thousand Voices, and it's located in the Dreaming City, a stunningly beautiful but tragically corrupted Awoken homeland. This raid isn't just a loot piñata; it continues the epic story that began in the Forsaken expansion, where Guardians like us ventured into the heart of the Dreaming City to confront and stop the Ahamkara, Riven.
Now, don't let the word "raid" intimidate you. You don't need to be a hardcore, max-level raider decked out in the absolute best gear to get 1KV, especially with the efficient strategies we'll cover. While the raid initially had higher Power Level suggestions when it was released, many players now comfortably tackle it even if they aren't at the pinnacle cap, thanks to evolving strategies and the ability to use shortcuts.
Wall of Wishes Shortcut
Ready for a HUGE time-saver? Let's talk about the Wall of Wishes. The Last Wish raid is a substantial undertaking with multiple challenging encounters like Kalli, Shuro Chi, Morgeth, and the Vault before you even get to Riven. But if your primary goal is that sweet, sweet One Thousand Voices, you can skip right to the main event: the final boss, Riven.
Here's how: Before the very first encounter of the raid (Kalli, the Corrupted), instead of heading into her arena, look to your left. You'll spot a small lake and some distinctive green grassy ledges along the cliff faces. Carefully platform your way up these ledges. Your path will eventually lead you to a hidden chamber containing a giant wall covered in a grid of symbols. This is the legendary Wall of Wishes.
It's a clever in-game system that allows players to input specific codes by shooting the symbols on the wall. Correctly entered codes activate different effects, including teleporting your fireteam to later encounters in the raid. This feature is a fantastic acknowledgment by the developers that players will seek efficiency, especially when farming for rare, randomly-dropped items.
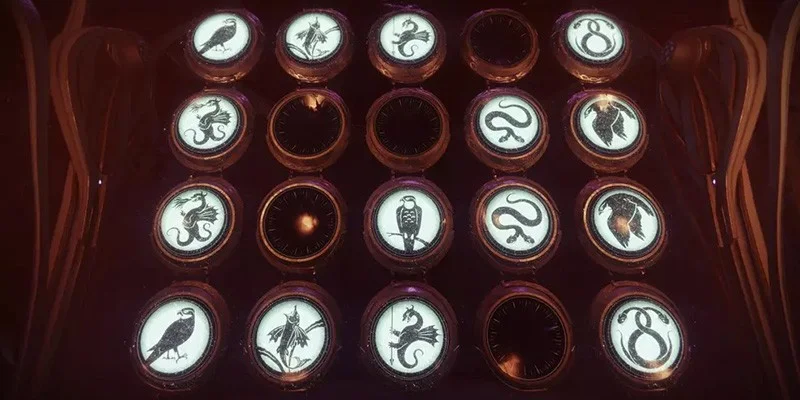
The mechanics are simple: you shoot the circular panels on the wall to cycle through different symbols. Once you have arranged the symbols into the correct pattern for your desired wish, your entire fireteam should step onto the circular plate in the middle of the room to activate it. If you've entered the combination correctly, the symbols on the wall will flash white and then fade away, and your wish will be granted. If you've made a mistake, the symbols will turn red or orange and then fade, allowing you to try again.
There are 14 known wishes, each with a unique effect, ranging from spawning extra loot chests to unlocking emblems or even adding humorous audio commentary to the raid. But the one we care about for getting One Thousand Voices quickly is Wish #7: "To Help a Friend in Need." This specific wish, when activated, will teleport your entire fireteam directly to the Riven encounter, which is the fifth major encounter of the raid.
Using this wish drastically cuts down the time investment needed for each attempt at One Thousand Voices, transforming the farm from a lengthy full raid clear into a much more manageable "boss encounter plus finale" run. This makes the weapon significantly more accessible, especially for players who might not have several hours or a dedicated team for full clears.
To activate Wish #7, you'll need to replicate the specific pattern of symbols on the Wall. Above, we've included a visual representation of the wish symbols in all of their glory. Don't rush, and check before you enter the whole code - accuracy is key!
Riven Cheese Strategy

Alright, you've successfully wished your fireteam to Riven's doorstep. Fantastic! Now, Riven of a Thousand Voices can be an incredibly complex and demanding fight if you attempt it the "legitimate" way. This involves splitting the team, managing buffs and debuffs, deciphering symbols, calling out which of Riven's many eyes to shoot, and executing precise mechanics across multiple rooms and phases. It's a true test of teamwork and coordination.
But... we're here for that coveted Exotic, and we want it efficiently, right? So, we're going to "cheese" her! In Destiny lingo, "cheesing" a boss means using a specific strategy, often exploiting a particular weapon, ability, or mechanic, to defeat them in a way that bypasses most of the intended complex mechanics, making the fight significantly easier and faster.
The Magic Wall Strategy
Currently, one of the most popular, reliable, and relatively accessible cheese strategies for Riven involves a slightly weird, but totally legitimate interaction with one of the walls in the encounters. There is a small spot that, if you huddle close enough to it, teleports you back to the starting arena, allowing you to skip the intended mechanics and run straight to the boss's demise!
Setup Requirements
- Weaponry: As many players as possible should be Stasis Titans. There is another "peculiar" interaction that causes Stasis Titan's Super to cause massive damage if all of the crystals are aimed at Riven's paw. Everyone else ideally should equip The Lament, that awesome Exotic chainsaw sword known for its high burst damage.
- Buffs: You'll absolutely want a Well of Radiance from a Warlock. This Super provides substantial healing and a significant damage buff to everyone standing in it. Alternatively, a Titan's Ward of Dawn (Bubble) with the Weapons of Light buff also works wonders for boosting damage.
- Debuffs: Someone on the team should be responsible for applying a debuff to Riven. The most common and effective choice is Tractor Cannon, an Exotic shotgun that "boops" the target and makes them take increased damage from all sources. Alternative sources of the Weakness debuffs are good, but Tractor Cannon gives you the highest debuff value!
- Armor Mods: Players using The Lament can equip Solar Weapon Surges on their leg armor if they are also using a Solar subclass.
| Role | Key Weapon(s) | Subclass | Key Exotics or Armor Mods |
|---|---|---|---|
| DPS (Titans) | Any | Stasis | Focus on survivability, as your only source of damage will be your Super! |
| Support - Buff | Lament | Warlock (Well of Radiance)/ Titan (Ward of Dawn) | Healing Turrets or Helm of Saint-14 |
| Support - Debuff | Tractor Cannon, a shotgun, or fusion rifle | Any (Hunter can use Gathering Storm for more damage) | If you're a Hunter, equip Star-Eater Scales |
Execution Steps
- Entry & Room Choice: When the encounter starts, everyone needs to drop down into the large arena. For this cheese, all six of you are typically trying to get to the "crystal room" (the door is right under the entrance to the room/rally flag point).
- Predicting Riven: The entire team should enter the small round room. More attentive and mobile players should go to the large crystal room and watch the back wall of a construction that looks like a theater stage. If a large shadow passes across it, Riven is coming to that room. If no shadow is seen after a short wait, everyone in your team should run back to the small round room.
- Cheese Away: Your team should find a small spot near the wall - if you're coming back from the large crystal room, it's to the right and a little bit back - a bit behind a small greyish rock if you're looking from the door. You will immediately notice if you're in the correct spot, as you will see "Joining Allies In" message and a timer. Don't worry - that's a good thing! Once that timer is passed, you will be teleported back to the large room you started the encounter from. Run to the right, where you'll find a huge door behind a big tree. Jump down, run straight into a small door to find a giant circular hole there, jump down again, and wait for your teammates to catch up!
- Clear Adds: If Riven's shadow appeared in the first room, wait there for her arrival and quickly clear out any Taken enemies that spawn. Prioritize taking down the Hobgoblin snipers, as they can easily pick off players during setup. If you had to do the wall cheese and run afterwards, you would skip this step, as once you enter the room, Riven will come out immediately - so don't rush ahead alone!
- Riven's Arrival: Riven will eventually stick her massive head and one of her claws/feet into the room. This is your signal to unleash everything!
- Buffs & Debuffs: The Warlock should immediately drop their Well of Radiance right near Riven's left claw/foot. The player with Tractor Cannon needs to "boop" the same spot on Riven to apply the debuff.
- DPS: Stasis Titans need to launch their Supers. One good trick to spawn as many Stasis crystals as possible with the limited ult energy you're given is to press S to step back while you're pressing the right Mouse button. Do not try to do any additional attacks or break the crystals yourself - your job is to spam that Heavy Attack! Everyone else with The Lament needs to rev up their blades. The optimal combo is to Hold Guard to rev the blade, then unleash a Light Attack, Light Attack, Heavy Attack sequence. Repeat this charged combo for maximum damage.
- Focus Fire: All damage should be focused on her claw that's in the Well and debuffed. If everyone executes correctly, Riven's health bar should plummet rapidly. Careful, as not dealing enough damage to one-shot her will fail this strategy, and you will have to wipe and try again.
Once you deal enough damage, you will be teleported inside and will have to do a small but dangerous jump puzzle to reach the top and trigger the last stand portion of her HP. The dangers include constant DoT damage and Taken Phalanx that are all too happy to kick you into the abyss with their shields. Don't rush, and you will be at the top without any worry, where all you'll have to do is step on a Taken beam to teleport back to the arena, where Riven will come out once more. Finish her off with the rest of your Heavy ammo or abilities, and she is finally felled... sort of? You will still have to run into her now-opened mouth and reach a corrupted room in her innards, where a large Taken heart will be beating. Damage it as well, until it's gone, and the encounter is now over!
Conquering the Queenswalk
You did it! Riven is a pile of Taken dust! Congratulations! But hold your celebratory emotes for just a moment because there's one more crucial step before you can claim your loot: the Queenswalk. This isn't another boss fight, but rather a unique and atmospheric cosmic relay race where your fireteam carries Riven's pulsating heart out of her corrupted lair.
The Cosmic Relay Mechanics
- Fate's Chosen: As soon as Riven is defeated, one random player in your fireteam will receive a buff called "Fate's Chosen." This player picks up Riven's Heart from where Riven fell and must start walking/running back through connected areas.
- The Timer: The heart carrier will have a 15-second countdown timer prominently displayed. It is absolutely vital that they clearly communicate this timer to the rest of the team, especially calling out when it gets low.
- The Protective Aura: The Guardian carrying the heart projects a protective aura. Everyone else needs to huddle close to the carrier, staying within this aura to avoid the "Creeping Darkness" debuff.
- The Teleport & Handoff: When the heart carrier's timer reaches approximately 2-3 seconds, they will be forcibly teleported inside the heart itself. Everyone else must BACK AWAY from the carrier just before this teleport happens to avoid getting sucked in.
Inside the Heart Mechanics
When a player is teleported inside the heart, they will find themselves in a small, ethereal space containing several glowing Taken Strength Beams we previously saw. The primary job of the player inside the heart is to collect these beams to extend the timer for the current outside carrier.
- When a person is teleported inside the heart for the first time, it spawns one Taken Strength beam. The second will cause two beams to spawn, the third - three, etc. Beams only appear because of this teleportation rotation.
- The last beam OF THE ROTATION picked up by someone inside the heart will reset/extend the timer for the current outside carrier. Ideally, grab an orb when the outside carrier's timer is around 3 seconds.
- Subsequently, the first person to be teleported into the heart should wait until the current carrier says they have 3 seconds left and then collect the beam. This will extend the carrier's timer. After it's depleted and they are the second person to be teleported into the room, 2 beams appear. One can be picked up instantly, but the last is always left for later, when the current carrier asks for an extension. Communication has never been more important - don't hesitate to say the important information, even such as "I can't pick up, someone else get ready" or "I accidentally walked into the first beam - don't touch the other one".
- Crucially, accidental teleports (when the player stays too close to the heart carrier and is sucked into the heart with them) do not count for the beams. Moreover, one player can never pick up three Taken Strength beams at once, as that could be deadly. Count carefully!
Path to Victory
You're essentially backtracking through some familiar areas of the Riven and Vault encounter, navigating through its tunnels. Eventually, you'll reach a large, cylindrical room with a gravity lift in the center. Everyone left standing drops down this lift. At the bottom, you'll see a final illuminated staircase. Head up these stairs towards a bright light, where you will dunk Riven's Heart near two waiting Techeuns (Awoken witches).
- Establish a clear beam-picking order
- Constant timer communication from carriers
- Aggressive add clearing by non-carriers
- Quick and efficient map navigation by carriers
- Standing too close during teleports
- Poor timer communication
- Collecting too many beams too fast inside the heart
- Letting adds overwhelm the carrier
Ethereal Keys and Loot Room
You made it through the Queenswalk! After successfully dunking Riven's Heart, your entire fireteam will be teleported to the final destination: the LOOT ROOM! And what a sight it is – a grand chamber filled with chests. To be precise, there are 24 chests arranged in this room, each one a potential container for glory.
Remember how, for successfully defeating Riven, you were awarded an Ethereal Key? This key is your ticket to fortune. Each Ethereal Key you possess allows you to open ONE of these chests. The Ethereal Key itself is a physical manifestation of your "chance" at the loot, making the reward process feel more tangible and directly earned than a simple item drop at the end of an activity.
Now, here's the kicker: you can pick any chest you like! Feel drawn to the one in the far corner? Go for it. Does the one on the left whisper your name? It's all yours. From a loot perspective, all chests have the exact same chance to drop One Thousand Voices. It's all up to the whims of RNG (also known as the Destiny gods of luck) at this point.
So, approach the chest of your choosing, use your Ethereal Key, and open it. Cross your fingers, hold your breath, and listen for that distinct, sweet, sweet Exotic engram sound. Hopefully, you'll see the icon for One Thousand Voices pop up on your screen!
Smart Farming Strategies
Okay, let's talk about what really matters when you're on the hunt: your chances of getting One Thousand Voices. Understanding how the drop rates work, and how you can influence them, is key to an efficient and less frustrating farm.
Drop Rate Mechanics
By default, when you open one of the final chests in the Last Wish raid with an Ethereal Key, One Thousand Voices has a 10% chance to drop. It's important to note that this 10% rate was an improvement made by Bungie in Update 2.2.1 (back in April 2019). Originally, the drop rate was even lower, at 5%. This change was a direct response to community feedback regarding the frustration of extremely low drop rates for raid Exotics.
Bad Luck Protection System
Bungie understands that pure, unadulterated RNG can be a cruel mistress. To combat extreme cases of bad luck, the Last Wish raid features a Bad Luck Protection system specifically for One Thousand Voices. Here's how it works:
- Every time you complete a "looted clear" – which means defeating Riven AND successfully completing the Queenswalk to earn and then use an Ethereal Key on a chest that week on that character – and you don't get 1KV, your chances of getting it on your next looted clear will increase.
- The drop chance for the Exotic increases by approximately 2% for each looted clear where you don't receive the weapon. This bonus accumulates until your drop chance caps out at a 50% chance per chest.
- You'll reach this 50% cap after approximately 20 looted clears where One Thousand Voices did not drop. This system ensures that even the unluckiest Guardians will eventually have a very high probability of obtaining the weapon.
- This Bad Luck Protection is account-wide, and it specifically builds up from looted clears – meaning, a Riven kill plus a Queenswalk completion where you actually open a chest with a key obtained that week for that character.
Maximizing Weekly Chances
The most efficient way to farm One Thousand Voices involves maximizing your Ethereal Key acquisitions each week:
- You can earn one Ethereal Key per character class (Titan, Hunter, Warlock) per week. So, if you have all three classes, you can defeat Riven on each of your three characters, netting you three Ethereal Keys.
- Ethereal Keys are account-bound, but they can be used by any of your characters. This means you can collect your three keys by doing three Riven kills on your different characters, and then complete the Queenswalk encounter just ONCE with one of those characters.
- That character can then open all three chests in the same loot room session! This maximizes your weekly chances at One Thousand Voices while minimizing the number of times you need to complete the coordination-intensive Queenswalk encounter.
- You can hold up to 5 Ethereal Keys on your character at one time, and an additional 5 in each character's Postmaster.
Triumph Bonuses
You might notice that there are certain Last Wish Triumphs (in-game achievements) that state their reward is to "Increase initial One Thousand Voices drop rate." These include challenging feats like:
- 'Petra's Run': Completing the entire Last Wish raid flawlessly, without a single death in the fireteam.
- Subclass Triumphs: Completing all raid encounters with a full fireteam where everyone is using the specified subclass.
- 'Habitual Wisher': Making 10 wishes at the Wall of Wishes.
- Raid Challenges: Completing specified Raid Challenges while they're active.
| Factor | Value / Effect | Notes |
|---|---|---|
| Base Drop Rate | 10% per chest | After a Riven + Queenswalk looted clear |
| Bad Luck Protection | +2% per failed clear | Stacks up to 50% maximum |
| Weekly Key Acquisition | 1 per character per week | Maximum 3 for most players |
| Triumph Boosts | Exact % unknown | Increases "initial" drop rate |
The exact percentage boost these Triumphs provide isn't officially detailed by Bungie, and the term "initial" drop rate suggests it might be a starting bonus that applies before your standard Bad Luck Protection begins to accumulate significantly. For One Thousand Voices, the 2% stacking luck per clear (up to 50%) is a well-documented and understood system. If you enjoy chasing Triumphs or are up for the challenge, completing these could give your odds a little nudge, especially early in your farming journey.
Final Pro-Tips
Just a couple more crucial things to keep in mind as you embark on your quest for the dragon's roar, champ:
- Raid Banners are Non-Negotiable: Seriously, always, ALWAYS use Raid Banners before starting the Riven encounter and Queenswalk. Full ammo and a topped-off Super for everyone? Yes, please! Petra Venj sells them in the Dreaming City, or you can grab them from Hawthorne in the Tower.
- Patience, Young Padawan: This hunt might take a few tries, or you could get incredibly lucky and snag One Thousand Voices on your very first run! RNG is a fickle beast, and everyone's journey with it is different. Try not to get discouraged if it doesn't drop right away. Remember that Bad Luck Protection is your silent ally, slowly but surely tipping the scales in your favor with each unsuccessful (but looted!) clear.
- Find a Fun Team: Raiding, even when farming, is always a more enjoyable experience with friends or a chill LFG team. Good communication, a positive attitude, and a willingness to laugh off the occasional mistake can make all the difference, especially when you're running the same encounter multiple times.
- Most Importantly, Have Fun With It! The Last Wish raid is, even years after its release, a visually stunning and intricately designed piece of content. Riven, even when cheesed, is an impressive and imposing sight. Try to enjoy the journey, the teamwork, and the anticipation of getting one of Destiny 2's coolest and most sought-after Exotic weapons.
Now go out there, Guardian, use that Wall of Wishes, show Riven who's boss, conquer the Queenswalk, and get your laser dragon! Rooting for you!
Conclusion
Obtaining the coveted One Thousand Voices Exotic Heavy Fusion Rifle is a rewarding Destiny 2 endeavor that beautifully blends understanding intricate raid mechanics, utilizing clever community-discovered shortcuts, and embracing the thrill of random loot drops—all made more manageable by systems designed to eventually reward a Guardian's persistence.
The core path to this weapon involves a series of well-defined steps: accessing the Last Wish raid in the Dreaming City, skillfully employing Wish #7 at the hidden Wall of Wishes to bypass earlier encounters, executing an effective 'cheese' strategy like the wall teleportation, Stasis Titan or the Lament sword method to quickly defeat Riven, successfully navigating the unique Queenswalk encounter to earn a precious Ethereal Key, and finally opening one of the 24 chests in the grand loot room.
To truly maximize your chances of acquiring this weapon, the community has adopted an optimal farming strategy: running the Riven encounter on up to three different characters each week to collect multiple Ethereal Keys, then completing the Queenswalk just once with a single character to use all collected keys in one session. This efficiency is further bolstered by the game's Bad Luck Protection mechanism, which increases your odds by approximately 2% for every unsuccessful looted clear, capping at a very favorable 50% chance per chest.
While the prospect of tackling a raid for a specific weapon might seem daunting at first, breaking the process down into these manageable components—especially when armed with the knowledge of shortcuts and effective strategies—makes One Thousand Voices an attainable and incredibly rewarding prize. With a good team, clear communication, and a dash of persistence, that draconic power can be yours.
Good luck, Guardian! May your aim be true and your loot drops plentiful.