The Iso Doctrine: Forget Everything You Know About Duelists
Welcome to the inner circle. If you're here, it's because you're ready to move beyond the flashy dashes and chaotic explosions that define most duelists. You're ready to learn about Iso, Valorant's methodical assassin, the agent who doesn't just enter a fight—he dictates its every term. Forget what you think a duelist is supposed to be. Iso isn't about speed; he's about certainty. He is a walking, talking gunfight advantage, and by the end of this guide, you'll know how to wield that power to become an unstoppable force in any lobby.

The Juggernaut Philosophy
Before you can master Iso, you must understand his core philosophy. Riot Games' designers have referred to him as a "Juggernaut," a duelist conceived to "run a team through and keep on going without mobility or healing". This is the key to his entire identity. While a Jett dashes to create chaos and a Raze satchels in to displace enemies, Iso simply walks forward, protected by his own reconfigured energy, and challenges anyone in his path.
Hailing from China, Iso is a "fixer for hire," an assassin known as "Dead Lilac" who dismantles his opposition with cold, calculated precision. His kit reflects this persona perfectly. He has no escape tools, no panic buttons. Instead, every one of his abilities is designed to do one thing: stack the odds of a gunfight so heavily in your favor that the outcome is a foregone conclusion. Playing Iso is about embracing this identity. You are not the skirmisher who peeks and runs; you are the advancing threat that forces enemies to react to you. You don't dodge fights; you force them, and you win them.
This approach represents a fundamental shift in duelist design. The first wave of duelists primarily manipulated space through movement. Iso, on the other hand, manipulates the very rules of engagement. His power isn't derived from getting to the fight faster, but from ensuring he is the one who walks away once it begins. This forces a more tactical response from your opponents. They can't just hold a crosshair and wait for you to fly into it. They must actively counter the utility that makes your duels unfair—breaking your shield, playing around your wall, and respecting the terrifying threat of your ultimate. In this way, Iso tests an enemy team's coordination and strategic thinking, not just their raw aim.
Aim is Everything
Let's be crystal clear: Iso is an agent for players who are confident in their gunplay. More than almost any other character in Valorant, his effectiveness is directly tied to your mechanical skill. His abilities don't get kills for you; they create the perfect opportunity for you to get the kill. His signature ability, Double Tap, only activates after you secure a kill or assist. His ultimate, Kill Contract, literally pulls you into a raw aim duel.
If you're a player who trusts your crosshair placement, your flicks, and your ability to click on heads, Iso will feel like he was designed specifically for you. He amplifies your existing strengths, turning your solid aim into round-winning dominance. If your mechanics are still developing, playing Iso is one of the best ways to forge them in the fire. He forces you to take direct, honest gunfights, and in doing so, makes you a better player. So, before you lock him in, head to the range, play some Deathmatch, and get comfortable, because with Iso, your gun is always your primary weapon.
The Duelist-Initiator Hybrid
Here is the first secret that separates average Iso players from great ones: he is not a purely selfish duelist. While agents like Reyna are almost entirely self-sufficient, Iso often shines brightest when played as a secondary duelist or even an "initiator hybrid". He lacks the explosive, space-creating entry tools of a Jett or Raze, which makes him a less-than-ideal choice to be the very first person through the door in a five-person execute.
However, his kit possesses immense potential for team setup. His Undercut ability, in particular, is one of the most powerful supportive tools in the game, capable of weakening enemies for your teammates from complete safety. Think of yourself as the second person in, the "trade fragger" who is built to clean up the fight that your primary duelist starts. You let your Jett dash in to draw attention, and you follow behind, using your abilities to guarantee that your team wins the ensuing chaos. This unique role allows you to be both a fragger and a facilitator, making you an incredibly versatile and valuable asset to any team composition.
The Flow State: Your Guide to Iso's Lethal Toolkit
Understanding Iso's philosophy is the first step. Now, it's time to get our hands dirty. His core abilities are your tools for dismantling the enemy team, piece by piece. Each one requires foresight, precision, and a bit of swagger. Let's break down how to use them not just correctly, but lethally.
Double Tap (E) - The One-Shot Shield
This is Iso's signature ability, the core of his "Juggernaut" identity. When you press 'E', a focus timer begins. If you get a kill or an assist while this timer is active, a glowing purple orb will spawn above the fallen enemy's body for a few seconds. Your job is to shoot that orb. Succeed, and you're granted a personal shield.
But this isn't just any shield. It absorbs one single instance of damage, regardless of the source. That means it can block a stray Classic bullet, or it can block a direct hit from a Raze Showstopper or an Operator shot. This makes it one of the most powerful defensive abilities in the game, but only if you use it right.

Pro Tip #1: The Pre-Fight Pop
The focus timer is generous, giving you plenty of time to find a fight. Before you peek a dangerous angle, before you push a site, before you hear the thunder of enemy footsteps approaching—that is when you pop Double Tap. Get into the habit of activating it proactively whenever you anticipate a duel. Wasting a charge because no fight occurred is far better than dying because you didn't have it ready.
Pro Tip #2: The Golden Rule - Win the Fight First
Picture this: you get a kill, the orb appears, but another enemy is swinging at you. The temptation to flick up and secure your shield is immense. You must resist it. The second secret to mastering Double Tap is to never greed for the orb. Your absolute priority is to win the current gunfight. The orb can wait. Getting killed while your crosshair is pointed at the sky is one of the most frustrating ways to lose a round. Secure the area, make sure you're safe, then shoot the orb. Your life is always more valuable than the shield.
Pro Tip #3: The Ultimate Counter-Peek
Once you have that beautiful purple shield wrapped around you, you become an Operator's worst nightmare. You now have a "get out of jail free" card for one shot. This is where you can take aggressive, confident peeks that would be suicide for any other agent. Swing wide on an Operator holding a long angle. Challenge a Judge hiding in a corner. Your shield gives you an incredible advantage, forcing enemies to either hit you, reposition, and then try to hit you again, or simply die. This is a key advantage Iso holds over Reyna. A healed Reyna at 150 HP still dies to a Vandal headshot or an Operator bodyshot. A shielded Iso walks away from both. Use this power to create immense pressure and take space that others can't.
The Economy of Double Tap
On your pistol round, it's often wise to buy only a single charge of Double Tap. Since the ability refreshes with kills, you can potentially chain it throughout the round anyway. Those extra 150 credits are often better spent on an Undercut charge or Light Shields, giving you more utility and survivability for that crucial first round.
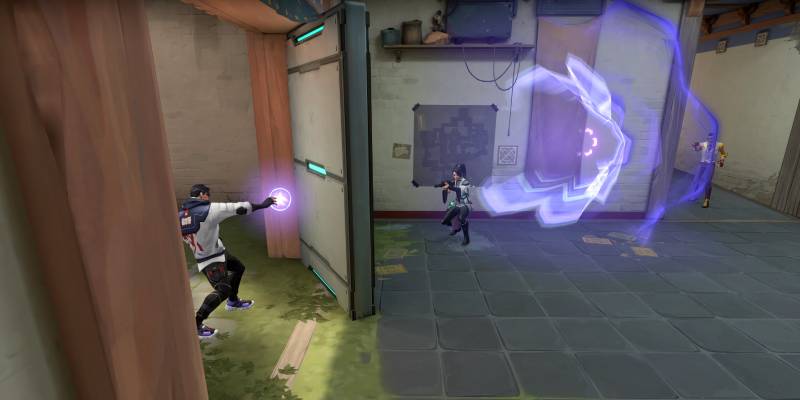
Undercut (Q) - The Wallhacker's Best Friend
If Double Tap is your shield, Undercut is your sword. This ability allows you to fire a "molecular bolt" that travels in a straight line, passing through all solid objects, including walls, boxes, and entire buildings. Any enemy it touches is afflicted with the FRAGILE status effect for 4 seconds, causing them to take double damage from all sources. It's similar to Omen's Paranoia in its deployment, but its effect is arguably far more lethal.
Secret Tech #1: The Eco Round Game-Winner
You can hold a tight angle, hit an enemy team pushing with Vandals, and instantly even the odds. This synergy also works devastatingly well with close-range weapons like the Judge or Marshall, turning them into instruments of pure terror.
Secret Tech #2: Your Initiator Side-Hustle
Undercut is your single best tool for team play and the reason you can function as a hybrid initiator. Before your team executes onto a site, find a safe position and fire an Undercut through the wall into common defensive spots. Hitting enemies in Haven's A-Hell or Bind's Hookah just as your Jett is dashing in can turn a difficult entry into a slaughter. Coordinate with your team; let them know where you're aiming. A word of caution: the bolt can hit your teammates, so make sure they aren't standing directly in its path when you fire.
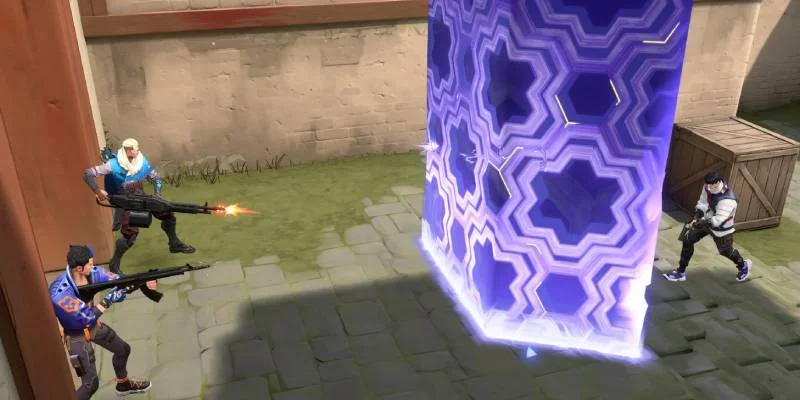
Contingency (C) - The Unstoppable Push
Contingency is your space-taking tool. For 250 credits, you get one charge of a moving, indestructible wall of prismatic energy. This wall blocks all incoming bullets, but allows players and abilities to pass through it. Crucially, unlike Harbor's Cascade, it moves at a set speed and cannot be stopped once deployed.
Application #1: Slicing the Site
The primary function of Contingency is to allow you and your team to advance down a long, dangerous sightline safely. It's the ultimate anti-Operator weapon. By sending the wall forward, you effectively "slice" the site in half, blocking off one major angle and allowing your team to focus their attention on clearing out closer corners one by one. For example, on Ascent B-site, you can send the wall towards Market to block that crossfire while you clear out the front of the site and Shed.
Application #2: Information and Entry
Here's a subtle trick used by pros like Oxy. As you push behind your wall, you can often see the barrel of an enemy's gun clipping through the edge of the wall before they can see you. This gives you a split-second information advantage, allowing you to pre-aim their position and win the duel the moment they are revealed. It turns your defensive wall into an offensive information tool.
Application #3: Defensive Stall
Contingency isn't just for attacking. On defense, you can use it to stall an enemy execute, forcing them to either push through it blindly or wait for it to dissipate, buying precious time for your teammates to rotate. It's also an excellent tool for retaking a site, providing a moving shield that allows your team to advance onto a post-plant setup without getting picked off from afar.
The combination of these abilities creates a unique gameplay rhythm that sets Iso apart. While a Reyna or Jett's flow is a rapid, explosive cycle of kill-and-escape, Iso's is a more deliberate, three-step process: Preparation (activating Double Tap before a fight), Execution (using Undercut or Contingency to shape the duel and securing the kill), and Consolidation (safely shooting the orb to claim your reward). This makes playing Iso less about pure reaction and more about micro-planning and foresight. It rewards players who can think one step ahead, anticipating where the fight will be and preparing the battlefield before it even begins.
Domain Expansion: Mastering the Kill Contract (X)
This is it. The main event. Iso's ultimate, Kill Contract, is one of the most unique and game-altering abilities in Valorant. For the cost of seven ultimate points, you unleash a wave of energy that pulls the first enemy it hits into an interdimensional arena for a fight to the death. This isn't just a gunfight; it's a statement. Mastering this ultimate—knowing who to target, when to use it, and how to win the duel—is the final step to becoming a truly terrifying Iso player.

The Hit List: Who, When, and Why
Activating Kill Contract is a strategic decision that can single-handedly win you the round, but only if you choose your target wisely. Inside the arena, both you and your opponent are suppressed (no abilities), have your health restored to 150, and your ammo refilled. Here are your priority targets:
| Priority Target | Why Target | Impact |
|---|---|---|
| The Sentinel | Disables entire defensive setup | Free site execution for team |
| The Ulting Threat | Cancels powerful ultimates | Neutralizes round-winning threats |
| The Anchor | Removes one defender | Turns 5v2 into favorable 4v1 |
| The Post-Plant Defuser | Wastes 8 seconds of defuse time | Win by timeout even if you lose |
Priority Target #1: The Sentinel
This is arguably the most powerful use of your ultimate on attack. Targeting the enemy Sentinel—be it a Cypher, Killjoy, or Chamber—is devastating. The moment you pull them into your arena, their entire defensive setup on the site (turrets, traps, etc.) is deactivated. This gives your team a golden opportunity to execute onto the site completely unimpeded. It's a free pass, and it's your job to provide it.
Priority Target #2: The Ulting Threat
Kill Contract is a hard counter to some of the most powerful ultimates in the game. Is the enemy Raze pulling out her Showstopper? Is Jett activating Blade Storm? Is Chamber setting up for Tour De Force? Ult them. The suppression effect will instantly cancel their ultimate, neutralizing a massive round-winning threat and forcing them into a fair gunfight.
Priority Target #3: The Anchor
When attacking a site defended by two players, your ultimate can instantly shift the odds. By targeting one of the defenders, you effectively remove them from the equation for your teammates. The execute turns from a difficult 5v2 into a much more favorable 4v1 for your team on site. You create a numbers advantage where it matters most, right at the point of attack.
Priority Target #4: The Post-Plant Defuser
It's a 1v1 post-plant situation. The enemy is tapping the spike. Time is running out. This is your moment. Ulting the defuser is an incredible stalling tool. The animation and duel time waste approximately 8 seconds of the defuse timer. This means you can often win the round by running out the clock, even if you don't manage to win the duel itself.
The Arena Masterclass: How to Never Lose the 1v1
Once you're inside the arena, it's all about the duel. But this is no fair fight. You have several built-in advantages.
The Barrier Advantage
The arena is not symmetrical. You spawn with two destructible barriers for cover, while your opponent only gets one. This is a significant geometric advantage. It forces your opponent to guess which side you'll peek from, giving them a wider area to cover with their crosshair while you can focus your aim more narrowly. Use this. Play the angles, and don't be predictable.
The Ultimate Pre-Buff
Mind Games & Sound Cues
The arena is filled with shallow water. Use this to your advantage. Listen for the sound of enemy footsteps to pinpoint their location. You can fake movement by stepping to one side, then silently walking to the other to peek when they aren't expecting it. Many players will pre-aim one of your barriers as the walls are about to drop; use this timing to peek from the other side and catch them completely off-guard.
To Spray or To Tap?
This is a common question. While precise single taps are king at long range, the Kill Contract arena is a close-quarters environment. Here, controlled bursts or even crouching to spray can be more reliable, especially if your opponent is moving erratically. Don't be afraid to adjust your firing style to fit the situation.
Post-Duel Shield
If you win the duel, a Double Tap orb will automatically spawn over your defeated opponent's body. Before you are teleported back to the main map, always shoot this orb. This ensures you return to the fight with a fresh shield, ready to continue your rampage.
Winning by Losing: The True Power of the Ult
Here it is. The final, most high-level secret of Kill Contract: you don't have to win the duel to win the round. Even if you die in the arena, your ultimate can still be a game-winning play. Why? Because your teammates know the exact location where the enemy will respawn, marked by a glowing purple hexagon on the ground. They can be waiting, crosshairs aimed, ready for the guaranteed trade kill the moment the victor reappears. This makes the ultimate an incredibly safe and high-value tool in any coordinated setting. If you ult the last defender on a site and die, but your teammate trades you, your team has just secured the site for the cost of a 1-for-1 trade—a massive victory.
Furthermore, if you cast your ultimate and fail to capture anyone, it's not a total waste. You have just gained invaluable information, confirming that an entire lane of the map is clear for your team to either push or rotate through.
Ultimately, the value of Kill Contract is not measured by your personal K/D within it, but by its impact on the round's "action economy." It's a tool that manipulates the entire state of the game. The decision to use it should always be based on the question, "What is the most disruptive thing I can do right now?" not simply, "Can I win this 1v1?" Ulting a lone Cypher to disable his traps and give your team a free site take is infinitely more valuable than ulting a full-HP Reyna in a chaotic mid-round fight, even if the duel itself is riskier. This strategic understanding is what separates a good Iso from a legendary one.
The Dream Team: Iso's Best Synergies and Battlegrounds
No agent is an island, not even one who can create his own pocket dimension. Iso's true potential is unlocked when he's paired with the right teammates on the right maps. Understanding these synergies will elevate your play from solo-carrying in ranked to being a pivotal part of a winning team strategy.
Iso's Perfect Partners
As a duelist who lacks mobility, Iso thrives when he has teammates who can either create space for him or capitalize on the vulnerabilities he creates.
The Secondary Duelist Role
As mentioned, Iso is often at his best when he's not the primary entry fragger. He pairs exceptionally well with a mobile duelist like Jett or Raze. The game plan is simple: let the mobile duelist use their abilities to create the initial chaos and draw the enemy's attention. You follow close behind, using your Undercut to soften targets and your Double Tap to win the ensuing trades and secure the site. This one-two punch is incredibly difficult for defending teams to handle.
The Damage Combo Kings: Raze & Sova
Iso's Undercut ability, which makes enemies take double damage, has some of the most devastating synergies in the game. Your best friends are agents with powerful, area-of-effect damage abilities.
Raze: A Fragile enemy caught in Raze's Paint Shells is almost certainly dead. Coordinate with your Raze to throw your Undercut into a chokepoint just as her grenade is about to land for guaranteed kills.
Sova: The combination with Sova is legendary. A Fragile enemy hit by Sova's Shock Darts will take massive damage, perfect for clearing post-plant positions. But the true power lies with his ultimate. An enemy hit by Undercut will be killed in a single blast from Sova's Hunter's Fury. This is a foolproof way to break a defensive setup or deny a spike defuse from across the map.
The Setup Crew: Initiators & Controllers
To use your kit effectively, you need information and cover. Initiators like Fade or Skye can provide the intel you need to land a perfect Undercut or choose the right target for your ultimate. Controllers like Omen can use their smokes to block off extra angles, allowing you to focus on the duels you want to take.
The Undercut Combo Playbook
To make these synergies easy to remember and execute in the heat of a match, use this quick-reference playbook. See who is on your team, and you'll instantly have a high-impact play ready to go.
| Paired Agent | Paired Ability | Combo Description & Impact | Ideal Scenario |
|---|---|---|---|
| Raze | Paint Shells (E) | Hit enemies with Undercut as they are being flushed out by Raze's grenade. The double damage from Fragile makes the nade lethal. | Site Executes, Clearing U-Haul/Hookah |
| Sova | Hunter's Fury (X) | Tag an enemy with Undercut through a wall, then have Sova ult them. Each hit from the ult will be a one-shot kill. | Post-plant Denial, Breaking a Sentinel Setup |
| Sova | Shock Dart (Q) | Perfect for post-plant lineups. Hit the defuser with Undercut, then land a Shock Dart for a guaranteed kill. | Post-plant Denial |
| KAY/O | FRAG/ment (C) | Similar to Raze's nade, use Undercut on enemies trapped in KAY/O's molly to secure a quick kill. | Chokepoint Control, Post-plant |
| Brimstone | Orbital Strike (X) | The ultimate area denial. Hit a key defender with Undercut, then have Brimstone ult their position for an inescapable kill. | Breaking a Dug-in Defender (e.g., Haven A-Hell) |
Iso's Prime Playgrounds
Iso excels on maps with long, defined corridors and tight chokepoints where his Contingency wall can block critical sightlines and his Undercut can hit multiple enemies. The consensus best maps for him are Split, Bind, and Haven.
Map Breakdown: Bind
Bind's teleporters and narrow entryways are perfect for Iso.
Attacking: Use Contingency to push down the Operator-heavy sightlines of B-Long or A-Short, allowing your team to close the distance safely. Use Undercut to clear out defenders hiding in Hookah or A-Showers before your team even peeks the angle.
Defending: An early Undercut through the wall at B-Main can stop a rush in its tracks. Your ultimate is fantastic for isolating a player trying to push through the teleporters.
Map Breakdown: Split
Split is a classic double-duelist map where Iso's methodical approach can shine.
Attacking: Send Contingency up A-Ramps to block off Heaven, or straight onto B-site to protect from the back-site crossfire. The map's abundance of walls and tight corners makes Undercut incredibly valuable for clearing common spots in both A-Main and B-Garage.
Defending: You can hold Mid control almost single-handedly. A well-placed Undercut can punish any team trying to group up, and your wall can allow for safe peeks into Mid from Vents or Mail.
Map Breakdown: Haven
Haven's three-site layout and long sightlines make it a prime playground for Iso.
Attacking: Contingency is a powerhouse here. You can use it to take control of A-Lobby by walling off the long sightline from A-Long, or you can use it to push down C-Long and neutralize the threat of an Operator. The sites themselves are small and compact, making it easy to hit multiple defenders with a single Undercut.
Defending: Your ultimate is incredible for dealing with attackers splitting through Garage. By ulting one player, you give your team time to collapse on the other and stabilize the defense.
The Final Secret: The Iso Mindset
You now have the tools, the tactics, and the map knowledge. But the final piece of the puzzle is the most important: the mindset. To truly master Iso, you must adopt the mentality of a methodical aggressor.
The Methodical Aggressor
A great Iso player is not a reckless one. They embody "smart aggression". They understand that they don't need to take fair, 50/50 gunfights. Their entire kit is designed to rig those fights, to turn them into 80/20s before a single shot is fired. This requires a unique blend of patience and confidence. You need the patience to wait for the right moment, to use your utility proactively, and to not greed for your shield. And you need the confidence to know that once you've set the stage, you will win the duel. You are not just a fragger; you are a problem-solver, and your solution is always a guaranteed gunfight victory.
- One-shot shield blocks any damage
- Undercut doubles damage through walls
- Ultimate removes key defenders
- Excellent team synergy potential
- Strong on tight corridor maps
- No mobility or escape tools
- Heavily aim-dependent
- Weak on open maps
- Limited solo entry potential
- Ultimate can be whiffed easily
From Ranked Hero to Pro Play Puzzle
It's important to understand where Iso fits in the broader Valorant landscape. In ranked play, where individual mechanical skill can often dictate the outcome of a game, Iso is a monster. His kit directly rewards and amplifies strong aim, making him a fantastic agent for climbing the ladder.
However, in the highly coordinated world of professional play, his viability is more complex. His lack of mobility for fast, synchronized site executes makes him a niche pick compared to the staples of Jett and Raze. Pro teams rely on creating space through speed, something Iso simply cannot do. This doesn't make him a bad agent; it makes him a specialist, brought out for specific strategies on specific maps. Understanding this distinction will help you appreciate his strengths without getting frustrated by his limitations.
Your Path to Mastery
Mastering Iso is a journey back to the fundamentals of what makes a great tactical shooter player. It's a path defined by crisp aim, intelligent positioning, and proactive, thoughtful utility usage. He is an agent that rewards dedication. Every hour you spend in the practice range, every round you spend thinking about your next move, will make you a better Iso player.
You now have the secrets. You know how to prepare for a fight, how to stack the odds in your favor, and how to use every part of your kit to support your team and dismantle your opponents. Go forth, enter your flow state, and show them what a true Juggernaut can do.