
Mastering the pistol round is the foundation of economic dominance in Valorant. This comprehensive guide breaks down every aspect of pistol round strategy, from weapon selection to team coordination, providing you with the tactical knowledge to consistently win these crucial opening rounds.
Understanding Pistol Round Economics and Impact
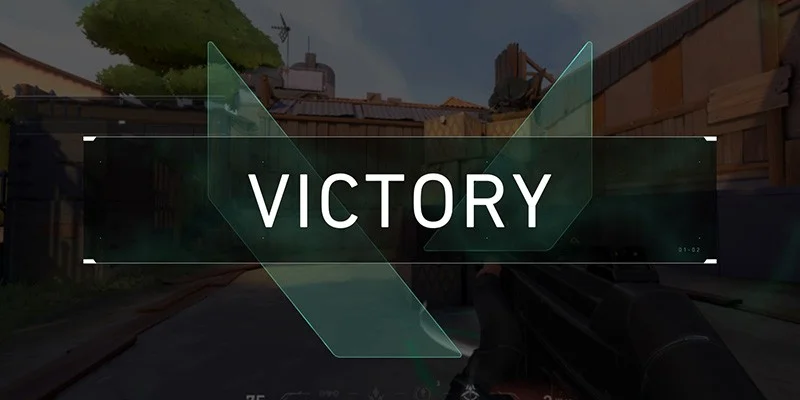
Pistol rounds occur at the start of each half with every player receiving exactly 800 credits. These rounds carry extraordinary weight in determining the trajectory of the following 2-3 rounds through economic advantages and psychological momentum. Victory in the pistol round typically leads to bonus credits and favorable force-buy scenarios, while defeat often forces teams into challenging save rounds or risky force-buys.
The economic ripple effect extends beyond immediate financial gain. Teams that secure pistol rounds establish tempo control, dictating the pace and style of subsequent rounds while opponents scramble to regain footing with limited resources.
Complete Weapon Analysis and Selection Framework
Core Weapon Statistics and Performance Metrics
Understanding each weapon's capabilities forms the foundation of optimal purchasing decisions:
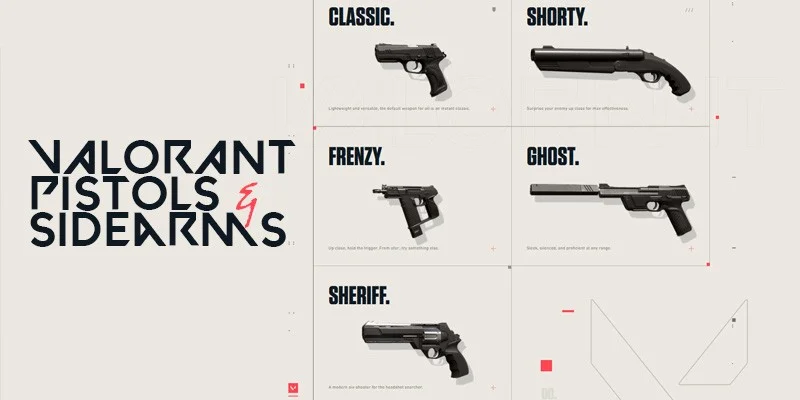
| Weapon | Cost | Headshot Damage | Body Damage | Fire Rate |
|---|---|---|---|---|
| Classic | 0 Credits | 78 | 26 | 6.75 rounds/sec |
| Shorty | 150 Credits | 36 × 12 pellets | 12 × 12 pellets | 3.3 rounds/sec |
| Frenzy | 450 Credits | 78 | 26 | 10 rounds/sec |
| Ghost | 500 Credits | 105 | 30 | 6.75 rounds/sec |
| Sheriff | 800 Credits | 159 | 55 | 4 rounds/sec |
Classic (0 Credits)
Headshot Damage: 78
Body Damage: 26
Fire Rate: 6.75 rounds per second
Penetration: Low
Strategic Value: Reliable baseline weapon with underutilized right-click burst mode for close-range engagements
Shorty (150 Credits)
Headshot Damage: 36 × 12 pellets
Body Damage: 12 × 12 pellets
Fire Rate: 3.3 rounds per second
Penetration: Low
Strategic Value: Devastating at point-blank range, completely ineffective beyond close quarters
Frenzy (450 Credits)
Headshot Damage: 78
Body Damage: 26
Fire Rate: 10 rounds per second
Penetration: Low
Strategic Value: High-volume spray weapon ideal for aggressive entries and rush compositions
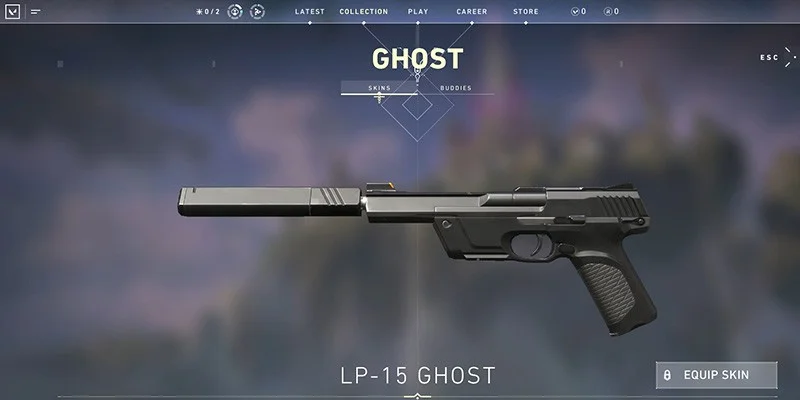
Ghost (500 Credits)
Headshot Damage: 105
Body Damage: 30
Fire Rate: 6.75 rounds per second
Penetration: Medium
Strategic Value: Silenced precision weapon capable of clean elimination through headshots
Sheriff (800 Credits)
Headshot Damage: 159
Body Damage: 55
Fire Rate: 4 rounds per second
Penetration: High
Strategic Value: Maximum damage potential requiring exceptional aim precision
Weapon Selection Philosophy by Combat Role
- Ghost provides optimal balance of damage and accuracy
- Cost-effective for controlled engagements
- Excellent for players with precise aim
- Frenzy delivers maximum close-range damage
- Perfect for site executions and rush strategies
- High fire rate for trading kills
Utility-Dependent Players: Classic allows maximum credit allocation toward essential abilities while maintaining reasonable combat capability.
High-Skill Aim Players: Sheriff offers single-shot elimination potential for players with exceptional mechanical skill and confidence.
Situational Specialists: Shorty serves specific defensive scenarios where extreme close-range combat is guaranteed.
Team Composition and Role Allocation
All-Out Rush Strategy Implementation
Objective: Overwhelm defensive positions through coordinated speed and numbers advantage.
Role Distribution:
- Entry Duelists (Jett, Raze, Reyna): Frenzy or Ghost paired with entry utility for maximum initial impact
- Support Initiators (Skye, Breach): Classic with dual flash capabilities to clear common defensive angles
- Smoke Controllers (Brimstone, Omen): Classic plus strategic smoke placement to block rotations and sightlines
- Defensive Anchors (Sage): Classic with barrier orb to secure flanks or post-plant positioning
Spread Default Control Strategy
Objective: Establish map control through distributed positioning and information gathering.
Role Distribution:
- Flex Duelists (Phoenix, Reyna): Ghost for long-range engagement capability and quick elimination potential
- Information Initiators (Sova, Fade): Ghost paired with reconnaissance utility to safely gather intelligence
- Support Controllers (Harbor, Astra): Classic with comprehensive smoke coverage for late-round utility
- Site Anchors (Killjoy, Cypher): Ghost plus full defensive setup to lock down secondary positions
Mid-Control Dominance Strategy
Objective: Secure central map areas to control rotations and create late-round advantages.
Role Distribution:
- Aggressive Duelists (Jett, Neon): Frenzy with light shields or utility for sustained trading capability
- Flash Initiators (Skye, KAY/O): Classic with double flash for corridor clearing and angle breaking
- Enabling Controllers (Brimstone): Stimulation beacon plus classic or smoke for duelist support
- Flanking Sentinels (Chamber): Headhunter ammunition with trademark for rotation security
Heavy Anchor Defense Strategy
Objective: Solo or minimal-support site holding with maximum delay potential until rotation assistance.
Role Distribution:
- Setup Sentinels (Killjoy, Cypher): Light shields plus complete utility kit for maximum stall duration
- Lineup Controllers (Viper, Omen): Classic with pre-planned utility lineups or one-way smokes
- Trade Duelists (Raze): Ghost or Shorty with boom bot for initial pick attempts or guaranteed trades
Trap and Collapse Strategy
Objective: Allow controlled enemy advancement before coordinated collapse with utility and crossfire advantages.
Role Distribution:
- Crowd Control Initiators (Fade, Breach): Classic with area denial utility for committed enemy punishments
- Setup Sentinels (Sage, Chamber): Classic with delayed utility activation for post-commitment punishments
- Off-Angle Duelists: Shorty or Ghost with light shields for unexpected positioning and swing timing
Agent-Specific Optimization Guide
Duelist Recommendations
Jett: Ghost plus cloudburst provides mobility and precision for aggressive angles while maintaining escape options.
Raze: Ghost with boom bot enables angle clearing and pressure application without sacrificing elimination potential.
Reyna: Ghost paired with leer creates optimal dueling scenarios with healing sustainability through eliminations.
Phoenix: Ghost plus curveball balances self-sustaining capability with entry utility for team support.
Neon: Frenzy with fast lane supports high-speed execution strategies requiring rapid elimination potential.
Yoru: Ghost plus blindside enables deceptive positioning and flanking opportunities with precision capability.
Controller Recommendations
Omen: Ghost with dark cover or shrouded step provides flexible positioning and lurking potential.
Brimstone: Stimulation beacon plus sky smokes or classic supports team execution through area control and enhancement.
Astra: Ghost with star placement provides range capability and comprehensive map control utility.
Harbor: Cove plus cascade controls sightlines and supports coordinated team movement through area denial.
Viper: Ghost with snakebite controls critical areas and denies enemy movement through damage zones.
Initiator Recommendations
Sova: Light shields plus owl drone gathers essential intelligence while maintaining defensive capability.
Skye: Ghost with guiding light supports team vision and provides healing sustainability for extended rounds.
Breach: Double flashpoint plus aftershock maximizes entry potential through comprehensive utility deployment.
Fade: Ghost plus prowler combines reconnaissance capability with lethal elimination potential.
KAY/O: Ghost with flash drive enables aggressive suppression plays with precision backup capability.
Sentinel Recommendations
Sage: Light shields plus barrier orb fortifies defensive positions with enhanced survivability for extended holds.
Killjoy: Light shields with alarmbot and nanoswarm strengthens site defense through utility coverage and personal durability.
Cypher: Ghost with trapwire and cyber cage enhances site anchoring through information gathering and area control.
Chamber: Trademark plus headhunter ammunition leverages signature weapon precision while securing rotation routes.
Advanced Scenario Analysis and Contextual Decision-Making
Fast Site Execution Scenarios
When executing rapid site takes on maps like Bind A-site or Haven B-site, prioritize Frenzy or Ghost paired with single ability purchases. Armor investment becomes counterproductive when serving as entry fraggers, as credits provide greater value through mobility or flash utility enabling successful site breaks.
Solo Wide Site Defense
Defending expansive areas like Breeze C-site or Lotus B-site requires Ghost or Sheriff purchases paired with essential abilities. Isolation demands range capability and high damage potential to either secure eliminations or delay sufficiently for rotation assistance.
Mid-Control Team Fighting
Five-person mid-control scenarios on Split or Ascent prioritize Classic purchases with maximum utility investment. Success depends on corner-clearing capability and defensive positioning rather than individual fragging potential, making ability coordination more valuable than weapon upgrades.
Setup-Heavy Defensive Roles
Sentinel agents focusing on comprehensive site setups benefit from Classic purchases with complete utility deployment. Individual weapon capability becomes secondary to stall potential through defensive infrastructure, maximizing utility value over personal firepower.
Standard Default Positioning
Ranked environment default plays optimize through Ghost purchases paired with single ability investments. This configuration maintains engagement capability across various ranges while preserving utility for post-plant scenarios and unexpected contact situations.
Professional Meta Analysis and Current Trends
Current Professional Purchasing Patterns
Duelist Priority: Professional duelists consistently prioritize Ghost purchases with flash or dash utility, rarely investing in armor due to aggressive role requirements emphasizing early impact over survivability.
Initiator Focus: Support initiators universally purchase Classic with maximum utility deployment, as Skye, Breach, and Sova provide greater team value through ability usage than individual fragging capability.
Sentinel Adaptation: Professional sentinels invest in light shields paired with utility to maximize stall potential and enable rotation timing, prioritizing team positioning over personal elimination capability.
Sheriff Decline: Sheriff purchases appear rarely in professional play due to risk-reward imbalance, with Ghost providing superior consistency and cost-effectiveness for precision requirements.
Evolving Strategic Approaches
Professional teams increasingly emphasize utility coordination over individual weapon investment, recognizing that pistol round success depends more heavily on team execution than personal firepower. This trend reflects the maturation of tactical understanding and the reduced effectiveness of individual heroics in coordinated team environments.
Armor Versus Utility Investment Strategy
Light Shields Analysis (400 Credits)
Light shields provide 25 additional health points, offering meaningful survivability improvement for specific roles and scenarios. The investment becomes most valuable for:
- Players expecting direct combat engagement
- Ghost users requiring extended dueling capability
- Defensive anchors needing survival time for rotations
- Agents with essential but limited utility requirements
Utility Priority Framework
Ability purchases often provide greater round impact than armor investment through:
- Vision denial creating advantageous positioning
- Flash utility enabling successful site execution
- Information gathering reducing uncertainty and risk
- Area control limiting enemy options and movement
The decision between armor and utility should reflect role requirements and team strategy rather than individual preference or general recommendations.
Map-Specific Considerations and Adaptations
Attack Side Adaptations
Attacking teams benefit from utility investment enabling site control and vision denial. Controllers require smoke capability, initiators need flash potential, and duelists should prioritize entry tools over survivability enhancement.
Defense Side Optimizations
Defensive positioning emphasizes holding long angles and delaying enemy advancement, making Ghost purchases valuable for range capability while sentinel utility creates essential stall mechanisms.
Site-Specific Requirements
Different sites demand varying approaches based on angle complexity, range requirements, and common execution patterns. Wide sites favor precision weapons, tight sites benefit from close-range capability, and complex sites require utility coordination.
Smoke Positioning Tactics
Defensive players utilizing Shorty weapons within smoke coverage can eliminate multiple enemies through unexpected positioning. While risky, this approach succeeds against teams expecting standard defensive setups and can swing rounds through element of surprise.
Off-Angle Positioning
Classic burst-fire mode becomes viable in unexpected positions where enemies clear standard angles but miss unconventional spots. This approach requires map knowledge and timing but provides economic efficiency with surprise value.
Coordination-Based Rushes
Teams investing heavily in flash utility while maintaining Classic weapons can overwhelm defensive positions through pure coordination and utility advantage, demonstrating that weapon investment isn't always necessary for successful execution.
Frequently Asked Questions and Common Misconceptions
Optimal Beginner Weapon Selection
New players benefit most from Ghost purchases due to the weapon's accuracy, reasonable damage output, and forgiving nature compared to Sheriff requirements. Ghost provides learning opportunity for precision aiming while maintaining combat effectiveness.
Universal Armor Investment
Armor purchases should reflect role requirements rather than automatic investment. Players serving as entry fraggers, utility-focused support, or information gatherers often gain greater value through ability purchases than survival enhancement.
Sheriff Viability Assessment
Sheriff purchases require exceptional mechanical skill and confidence to justify the credit investment and risk. Players without consistent headshot capability should prioritize Ghost for better cost-effectiveness and engagement reliability.
Team Push Optimization
Coordinated team executions benefit from concentrated flash and smoke utility paired with select Frenzy purchases for front-line players. Success depends more on utility timing and coordination than individual weapon selection.
Round Impact Significance
Pistol rounds determine economic trajectory and psychological momentum for subsequent rounds, making them disproportionately influential compared to individual round value. Winning pistol rounds typically secures 2-3 round advantages through economic and morale benefits.
"The pistol round isn't just about aim—it's about understanding your role, your team's strategy, and making smart economic decisions that set up multiple rounds of success."
This comprehensive approach to pistol round strategy provides the foundation for consistent performance improvement and team coordination. Success requires understanding role requirements, team strategy alignment, and situational adaptation rather than memorizing static purchasing patterns or generic recommendations.