
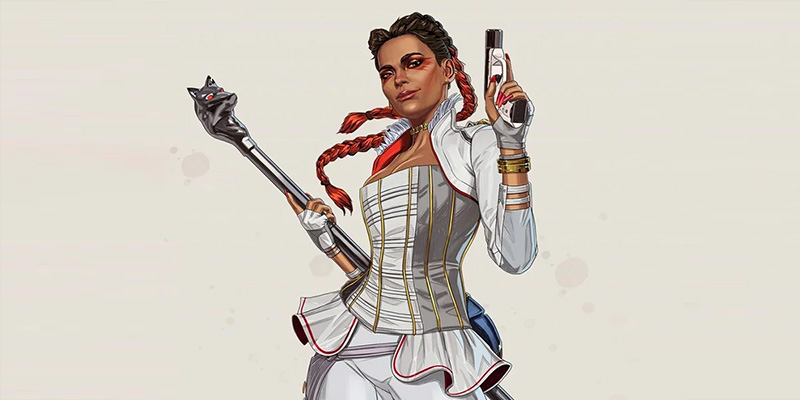
Loba Andrade, the sophisticated and resourceful Translocating Thief of the Apex Games, offers a unique blend of unparalleled looting capabilities, potent mobility, and high-class style. She is far more than a legend who simply finds the best gear; Loba fundamentally alters the battlefield by controlling the loot economy, ensuring her squad enters every engagement with a distinct material advantage. Mastering her abilities means always having the perfect tools for any situation, dictating the tempo of resource gathering, and repositioning with finesse to outmaneuver opponents.
The allure of Loba lies in her capacity to consistently equip her team, a strength that has been significantly amplified by recent enhancements to her kit. No longer just the "queen of loot," Loba has evolved into a dynamic Support Legend with considerable offensive potential, capable of aggressive plays and impressive survivability. Recent updates, including dual charges for her tactical teleport, an ultimate ability that starts nearly fully charged, and impactful new Legend Upgrades, have catapulted her into the upper echelons of the legend roster, making her a "super strong" and highly viable pick in the current meta. Understanding and leveraging these changes is key to unlocking Loba's full potential and dominating the Outlands. This guide will delve into every facet of Loba's kit, from the fundamental mechanics of her abilities to advanced strategies that will allow players to loot efficiently, teleport effectively, and secure victory.
Loba's Arsenal: A Detailed Look at Her Abilities – The Tools of a Master Thief
Loba's effectiveness stems from a synergistic set of abilities designed to give her squad a consistent edge in gear and positioning. As a Support Class legend, she brings inherent benefits to her team even beyond her unique skills.
Belonging to the Support Class grants Loba and her team several advantages. Support Legends can access special blue extended supply bins, which have a higher chance of containing valuable healing and survival items. Furthermore, a critical Support perk allows Loba to craft allied banners at Crafting Stations, even if those banners have expired. This ability to recover teammates who might have been lost early in a fight, combined with her capacity to quickly re-equip them via her Black Market Boutique, makes Loba an invaluable asset for team resilience and recovery. The Support class also allows for faster revives under certain conditions and can spawn a Mobile Respawn Beacon when a banner card is acquired.
Passive Ability: Eye for Quality – Always Find the Best
Loba's passive, Eye for Quality, is the cornerstone of her looting prowess. It allows her to automatically see nearby epic (purple), legendary (gold), and mythic (red) tier loot through walls, supply bins, and other obstacles. This ability extends to a considerable range of 112.5 meters, identical to the reach of her Black Market Boutique. Loba can ping these valuable items for her teammates, even through obstructions, with a base ping range of 12 meters that can be extended using optics. A recent enhancement (as of the January 16, 2025 patch) allows Loba to aim down sights (ADS) when unarmed to view the loot UI for items highlighted by her passive, making identification even more precise.
Strategically, Eye for Quality is used for more than just finding shiny objects. It enables Loba to dictate efficient looting paths for her squad, minimizing time spent searching and maximizing gear acquisition, especially crucial in the early game. More subtly, it serves as an intel tool. If a high-tier item Loba is observing suddenly vanishes, it's a clear indication that an enemy squad is in the vicinity and has picked it up. This passive intel gathering can sometimes outrange dedicated recon abilities, providing early warnings or insights into enemy looting patterns. This capability transforms Loba from a simple looter into a scout who can track enemy movements based on resource acquisition. The awareness that a Loba is present can even influence how opponents loot, potentially forcing them into hurried or less optimal choices.
Tactical Ability: Burglar's Best Friend – Your Personal Teleporter
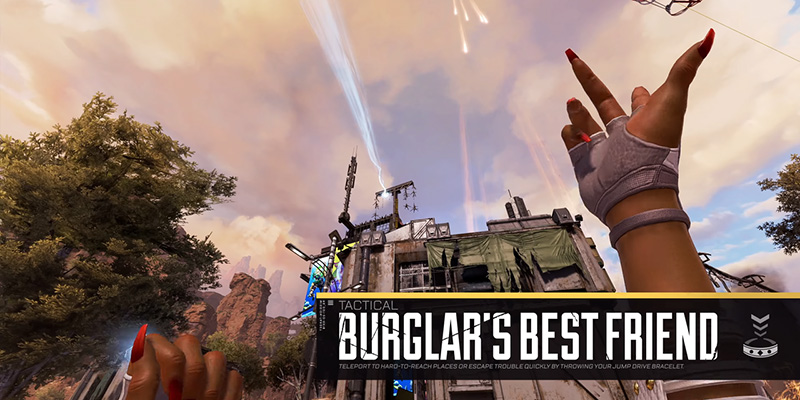
Burglar's Best Friend is Loba's signature mobility tool, a Jump Drive bracelet that allows her to teleport to its thrown location. This ability has recently been upgraded to hold two charges, a significant buff that greatly enhances its flexibility and utility. Each charge has a 25-second cooldown.
The bracelet can be thrown up to 71 meters on flat ground, with this range extending to over 100 meters when thrown from higher elevations. Aiming the throw at approximately a 30 to 40-degree angle to the ground typically yields the maximum horizontal distance. Players can activate the ability to throw the bracelet and press the ability key again while it's mid-air to force it to drop immediately, allowing for precise landings behind cover or to cut travel short.
If the bracelet is thrown out of map boundaries, it will return to Loba without triggering the cooldown. The ability is accompanied by loud audio cues and a visible trail, alerting attentive enemies to her movement.
Basic uses include quickly reaching high ground for a tactical advantage or disengaging from unfavorable encounters. However, players must be mindful of the brief vulnerability during the throw and upon landing. The introduction of two charges fundamentally changes how Burglar's Best Friend can be employed. It's no longer a single, high-commitment escape or repositioning tool. Instead, it allows for sequential teleports for more complex maneuvers, sustained pressure, or layered disengagements. Combined with the removal of the post-teleport slowdown and synergistic Legend Upgrades, Loba's tactical has become a far more fluid and reliable combat tool, addressing previous concerns about her being vulnerable during its use.
Ultimate Ability: Black Market Boutique – The Outlands' Premier Shop
Loba's ultimate, the Black Market Boutique, allows her to deploy a portable device that teleports all nearby loot directly into an interface accessible by any player, friendly or foe. This ability has a 2.5-minute (150 seconds) cooldown. In a massive buff, Loba now starts each match with her ultimate 99% charged, allowing for almost immediate deployment upon landing. The activation time has also been drastically reduced; it now takes approximately 0.5 seconds for the market to become accessible after placement, though it still releases a visible energy pulse that can alert enemies.
The Black Market has a generous spherical radius of 112.5 meters. Each player interacting with the market can take up to two items of their choice. The device itself has 100 health points and can be used to block doorways or provide temporary cover. Loba can remotely collapse her own Black Market by pressing the Character Utility Button, and deploying a new one will automatically collapse any previous market she had active. A significant recent change allows Loba to steal one item from locked locations like Explosive Holds or the Icarus Bridge, and more importantly, she can now open locked Vaults without a key. Stealing from a Vault no longer destroys the Black Market, though it will still trigger an audible alarm.
The Black Market is primarily used to rapidly gear up the squad with necessary items, ammunition, and healing supplies, often from the safety of cover. The 99% starting charge and rapid deployment have revolutionized Loba's early-game impact. She can establish a loot advantage for her team almost instantly, influencing the outcome of initial engagements by ensuring her squad is better equipped and by potentially stripping an area of vital resources like small heals before other teams can access them. This immediate economic power can dictate early rotations and engagements, forcing opponents to adapt quickly or risk being out-resourced. The ability to access Vaults without sacrificing the market further enhances her sustained looting capability throughout a match.
| Ability Name | Type | Cooldown | Range/Radius | Key Functions & Recent Buffs |
|---|---|---|---|---|
| Eye for Quality | Passive | N/A | 112.5 meters | Sees epic, legendary, mythic loot through walls. Pings items for team. ADS unarmed for loot UI. Range matches Black Market. |
| Burglar's Best Friend | Tactical | 25 seconds per charge | Up to 71m (flat), 100+m (height). Max distance at 30-40° throw angle. | Teleport bracelet. Now has 2 charges. Force drop mid-air. No slow after translocating. Visible/audible trail. Returns if out of bounds. |
| Black Market Boutique | Ultimate | 2.5 minutes (150s) | 112.5 meters radius | Deploys loot shop. Starts 99% charged. ~0.5s activation. 2 items per player. Ammo, Syringes, Shield Cells are FREE & UNLIMITED. Banners free. Can open Vaults (no key, no market destruction, alarm sounds). 100 HP. Loba can collapse remotely. Visible pulse on activation. |
Mastering the Jump Drive: Advanced Bracelet Techniques – Beyond Simple Teleports
Loba's Burglar's Best Friend, especially with its dual charges and synergy with her Legend Upgrades, has evolved from a simple escape tool into a versatile instrument for aggressive repositioning and complex tactical maneuvers. Effective use demands more than just pointing and throwing; it requires an understanding of its nuances and a proactive mindset.
Repositioning for Combat Superiority
The bracelet excels at allowing Loba to seize advantageous positions or create chaos for the enemy team. Aggressive flanks become highly viable; Loba can toss her bracelet to get behind an unsuspecting squad or to an angle that creates a crossfire, forcing enemies to divide their attention. A common tactic is to throw the bracelet in one direction while physically moving in another, a feint that can confuse pursuers or observers. Securing high ground or unexpected angles that are difficult for other legends to access remains a primary and potent use of the bracelet, offering clear sightlines and a tactical advantage. While it can be used for disengagement, its true strength in combat lies in proactive repositioning to cover, high ground, or a spot from which Loba can re-engage or provide support, rather than as a last-ditch panic button, especially given the brief vulnerability during its animations.
Advanced Throw Mechanics & Nuances
Precision with the Jump Drive comes from mastering its trajectory and interaction with the environment.
- Threading the Needle: Throwing the bracelet through small windows, doorways, or narrow gaps allows for surprise entries into buildings or quick escapes from confined spaces. This requires practice but can lead to highly effective plays.
- Verticality and Arc: Understanding the arc of the bracelet is crucial for precise vertical teleports. While a 30-40 degree angle maximizes horizontal distance, steeper angles are needed for scaling structures.
- "Quick Drops" / Manual Fall: The ability to press the tactical key again while the bracelet is mid-air to make it drop immediately is a vital skill. This allows for pinpoint accuracy, such as landing directly behind a piece of cover or cutting travel short if the initial throw was too far or if Loba comes under fire.
- Zipline and Launch Pad Synergy: The bracelet can be used while riding ziplines, offering another layer of mobility. Throwing from height, such as off a zipline, can also increase the travel speed and distance of the bracelet. Furthermore, the bracelet's distance can be extended if it bounces off a friendly Launch Pad, though this interaction requires specific spacing from the pad to work effectively.
Movement Integration & Vulnerability Mitigation
To minimize the inherent risks of teleportation, Loba players should always be moving. Sliding, jumping, and maintaining sprint momentum while the bracelet is in flight make Loba a much harder target. The recent removal of the movement slowdown after translocating is a significant buff in this regard. Equally important is landing safely; always aim for cover or locations where Loba won't be immediately exposed upon arrival.
Leveraging Dual Charges
The addition of two charges for Burglar's Best Friend has been a game-changer. This allows for:
- Sequential Teleports: Use one charge to initiate an engagement, take an aggressive angle, or scout a position, with the second charge held in reserve to quickly follow up, escape if the situation turns sour, or reposition to an even better spot.
- Baiting and Re-engagement: A Loba can throw one bracelet to draw enemy attention or gunfire towards a specific location, then use the second charge to teleport to an unexpected flank while they are distracted.
- Extended Mobility: Two well-placed throws can cover significantly more ground than a single teleport, enabling faster rotations or navigation of complex, multi-level terrain.
This allows for a dynamic "hit-and-run" or sustained skirmishing playstyle, enabling Loba to teleport in, deal damage with enhanced readiness, absorb some return fire, and then teleport out to recover shields and reposition for the next engagement. This newfound fluidity and combat viability directly addresses past criticisms of the bracelet leaving her too vulnerable or easy to track if used with foresight and the new tools available.
The Art of the Steal: Black Market Boutique Mastery – Your Squad's Personal Armory
Loba's Black Market Boutique is more than just a loot vacuum; it's a strategic tool that, when mastered, can dictate the pace of the game, ensure team survivability, and even serve as a tactical implement in combat. Its recent buffs, particularly the 99% starting charge and faster deployment, have made its effective use from the very start of the match a critical Loba skill.
Optimal Market Positioning & Timing
Where and when Loba deploys her Black Market significantly impacts its effectiveness and safety.
- Safe & Central Locations: The ideal placement is behind substantial cover, inside buildings (especially those with multiple rooms or escape routes), or in locations not easily visible or accessible to enemy squads. This allows the team to loot without exposing themselves to fire. The market's loot-pulling range is a sphere, so placing it on different floors of a building can still access loot above or below, a factor to consider for multi-level POIs.
- Mid-Fight Deployment: While riskier, dropping the Black Market during a fight can be a game-changer if done correctly. It should be placed behind solid, unbreakable cover during a lull in the engagement, allowing for rapid armor swaps or crucial ammo replenishment. This tactic requires good awareness and timing to avoid being caught out.
- Using as Cover/Door Block: The Black Market device has 100 health points and a physical presence. It can be strategically deployed to block narrow doorways, preventing enemy pushes or buying time for a reset. In open areas, it can serve as a small piece of temporary cover if absolutely necessary, though its health is limited.
- Early Game (99% Start Charge): This is where Loba's recent buffs shine. Upon landing, Loba should aim to deploy her Black Market almost immediately in a relatively safe yet central spot within her chosen Point of Interest (POI). The priority here is not just gearing her team but actively denying resources, especially Shield Cells and Syringes, to any nearby enemy teams.
- Timing Considerations: Beyond the early game, the Black Market should be deployed when the team is not actively engaged in combat or when enemies are clearly occupied elsewhere. The initial energy pulse upon activation is a clear signal to nearby enemies, so stealthy deployment is rarely an option.
Loot Prioritization – What to Grab and When
Knowing what to take from the Black Market, and in what order, maximizes its efficiency.
- Initial Grabs (Early Game): Body Shields are paramount if anyone on the team lacks one or has a very low-tier version. Next, focus on key weapon attachments like extended magazines, shotgun bolts, or preferred optics, followed by desired weapons if not already found.
- Ammo & Small Heals (FREE): With ammunition, Shield Cells, and Syringes now being free and not counting towards the two-item limit, these should always be topped off. In the early game, it's strategically sound for the Loba squad to take all available Shield Cells and Syringes from the market's radius to starve out other teams.
- Armor Swapping: This is one of the Black Market's most powerful mid-fight applications. Instead of spending precious seconds using shield cells or batteries, a player can quickly grab a fresh, higher-tier (or at least undamaged) shield from the market. An advanced technique involves Loba or teammates pre-emptively pulling spare armors from the market and dropping them on the ground near the device for even faster swaps during an intense fight.
- Late Game Essentials: As the match progresses and the ring tightens, priorities shift. Shield Batteries, Medkits, and throwable ordnance (grenades, arc stars, thermites) become incredibly valuable. Denying all remaining ammunition from the area of the final rings can also severely handicap opponent squads.
- Care Packages & High-Value Items: The Black Market can be used to safely extract powerful items from Care Packages, such as Kraber sniper rifles or other red-tier weapons and gear, without needing to expose the team to the often-contested drop location.
Advanced Black Market Strategies
Beyond basic looting, the Black Market offers several tactical applications:
- Baiting Enemies: A cleverly placed (and seemingly abandoned) Black Market can sometimes lure curious or desperate enemy players into a pre-set ambush.
- Denying Enemy Loot: After Loba's squad has finished looting, she should remotely collapse the Black Market to prevent opponents from benefiting from it, especially if it's in a contested area or if enemies are known to be nearby. Alternatively, the team can use it to strip an area of all valuable loot and ammo before rotating out.
- Vaults & Locked Compartments: Loba's ability to interact with these has been significantly buffed. She can take one item from locked Explosive Holds on Kings Canyon or the Icarus Bridge on Olympus. More critically, she can now open locked Vaults without needing a Vault Key. Stealing loot from these Vaults will still sound a loud alarm, alerting nearby players, but it no longer destroys the Black Market Boutique. This is a massive improvement, allowing her to secure top-tier gear for her team without sacrificing her ultimate for further use.
- Quick Re-gearing Respawned Teammates: If a teammate is respawned, the Black Market is the fastest way to get them combat-ready with weapons, armor, and supplies.
- Rotation Facilitator: When rotating between POIs, Loba can deploy her Black Market to quickly "skim" loot from areas with many death boxes or unlooted buildings without the team needing to stop and manually search, thus maintaining momentum and safety.
- Banner Retrieval: The ability to grab teammate banner cards from Death Boxes for free using the Black Market is a crucial support function, allowing for safer recovery attempts.
- Item Radar & Enemy Detection: The Black Market can serve as an "item radar," helping the team quickly assess whether an area is worth looting thoroughly based on the quantity and quality of items shown in its interface. Additionally, if items within the Black Market's radius are seen floating (an indicator that someone is interacting with it), it signals enemy presence, even if they are out of sight.
"The Black Market Boutique, with its recent enhancements, has solidified Loba's role as an economic powerhouse."
The 99% starting charge and the ability to take small heals and all ammo for free mean she can establish an immediate resource advantage for her team and a corresponding disadvantage for nearby opponents from the moment they land. This capacity for resource denial and early-game tempo control elevates her ultimate beyond mere loot acquisition. Furthermore, the buff to Vault interactions—opening them without a key and without destroying the market—provides a consistent avenue for high-tier loot throughout the mid-game, ensuring her team remains well-equipped without sacrificing her ultimate's availability for other strategic uses like armor swaps or re-gearing.
Loba's Legend Upgrades: Tailoring Your Thievery for Maximum Impact
Loba's Legend Upgrades, unlocked by accumulating EVO points through combat and other in-game actions, allow her to significantly enhance either her tactical mobility or her ultimate's team-wide benefits. These choices enable players to tailor Loba's capabilities to their preferred playstyle, team composition, or the evolving needs of the match.
Level 2 Upgrades (Unlocked at 450 EVO)
This upgrade dramatically enhances Loba's aggressive potential and skirmishing ability. It allows her to teleport onto a flank or directly into an engagement and be instantly combat-ready, minimizing the brief vulnerability window after teleporting. It synergizes exceptionally well with her dual bracelet charges, enabling rapid, successive offensive maneuvers or quick hit-and-run attacks. This is the prime choice for players looking to play a more combat-focused, mobile Loba.
This upgrade significantly boosts the team-wide looting advantage provided by the Black Market. It's particularly useful for ensuring every squad member can fully optimize their loadout, grab extra grenades, or secure more high-tier attachments, especially in the mid to late game when specific items become crucial. This is ideal for a Loba focused on maximizing her team's resource superiority and playing a more traditional support role. One interesting aspect is that this perk applies even if the market was already deployed before selecting the upgrade; the team can return to the existing market and grab their third item.
Level 3 Upgrades (Unlocked at 1700 EVO)
This upgrade greatly increases Loba's personal survivability and shield economy during engagements. It allows her to absorb some poke damage, teleport to safety, and recover a portion of her shields without expending healing items, enabling a quicker re-engagement or a more effective escape. When combined with dual charges, she can potentially regenerate a significant amount of shielding by teleporting twice in succession. This pairs excellently with "Wolf's Claws" for an aggressive, highly elusive playstyle.
This is a uniquely powerful team-wide utility upgrade, providing a massive inventory advantage. Gold backpacks allow players to carry significantly more ammunition, healing items, and grenades, which is invaluable, especially in the late game. While the gold backpack's perk of allowing teammates to gain extra health/shields from healing items doesn't directly benefit Loba when she heals herself, the sheer inventory space for everyone is a substantial boon. This upgrade is a strong contender for a support-focused Loba, complementing "Shopping Spree" for ultimate resource dominance. If a teammate finds a "Boost Kit" (granting all upgrades in pubs), Loba holding it temporarily can grant the entire squad gold bags even if she drops the kit afterward.
Strategic Choices & Combinations
Loba's upgrade path allows for distinct specializations:
- Wolf's Claws at Level 2
- Escape Artist at Level 3
- Highly mobile and resilient combatant
- Maximizes engage/disengage ability
- Formidable duelist and flanker
- Shopping Spree at Level 2
- Brand New Bag at Level 3
- Maximizes team resource advantage
- Ensures exceptional equipment
- Superior sustain for late game
While hybrid builds (e.g., Wolf's Claws + Brand New Bag) are possible, many players find specializing in either tactical enhancements or ultimate/team benefits yields more focused and impactful results. The flexibility to choose mid-match allows Loba to adapt to the flow of the game; if early fights are proving difficult, the tactical upgrades can provide a needed combat edge. Conversely, if the team is controlling engagements but needs better resource management for the late game, the ultimate-focused upgrades become more appealing. The "Escape Artist" perk, particularly if the shield regeneration can be consistently chained with dual teleports, makes Loba exceptionally difficult to eliminate, forcing enemies to commit more resources or specific counters (like Silence) to deal with her effectively. The "Brand New Bag" upgrade is unparalleled in its ability to provide a team-wide inventory boost, a utility no other legend currently offers.
| Upgrade Level | Upgrade Name | Effect | Strategic Notes/Synergies |
|---|---|---|---|
| Level 2 | Wolf's Claws | After teleporting with Burglar's Best Friend, get a speed boost and super-fast weapon draw. | Boosts aggressive repositioning and combat readiness. Synergizes with dual charges for hit-and-run. Ideal for skirmisher Loba. |
| Level 2 | Shopping Spree | Your squad can take +1 extra item from Black Market Boutique (total 3 items, excluding free items). | Enhances team loot advantage. Good for gearing up or late-game specific items. Best for traditional support Loba. Applies to already deployed markets. |
| Level 3 | Escape Artist | After teleporting with Burglar's Best Friend, regenerate 25 shield HP (until taking damage). | Increases survivability and shield economy. Allows for poke, teleport, regen. Can be chained with dual charges. Excellent with Wolf's Claws for aggressive play. |
| Level 3 | Brand New Bag | Your entire squad gets gold backpacks. | Massive team-wide inventory advantage for more ammo, heals, grenades. Powerful support upgrade, especially late game. Synergizes with Shopping Spree. Can be triggered via Boost Kits. |
Loot, Fight, or Reposition? Loba's Decision-Making Tree – The Thief's Gambit
A successful Loba player must constantly evaluate the battlefield, their team's needs, and the opportunities presented by her unique kit. The decision to loot, engage in combat, or reposition is a fluid one, heavily influenced by the game phase and Loba's available abilities.
Early Game (First ~5 Minutes)
The early game for Loba is now defined by her immediate Black Market access.
- Priority 1: Deploy Black Market Boutique. As soon as Loba lands in a relatively secure but centrally located spot within her chosen POI, the ultimate should be deployed. There's no need to open bins or pick up ground loot first if the market can provide immediate weapons and shields.
- Loot Focus: The primary goal is to quickly arm the squad and, crucially, to strip the area of all small healing items (Shield Cells, Syringes) and as much ammunition as possible. Since these are free from the Black Market, Loba's team can hoard them, severely limiting the resources available to any contesting enemy squads. Eye for Quality should be used to quickly identify the locations of these vital supplies and any early armor upgrades.
- Fight or Flight: If the landing spot is contested, the immediate resource advantage gained from the Black Market should give Loba's team a significant edge in the initial skirmish. However, if multiple teams are present or the fight seems unfavorable, the Burglar's Best Friend (now with two charges) provides an excellent means to reposition to a safer part of the POI or a nearby, less chaotic area after the initial, rapid looting phase. Prolonged early-game fights should generally be avoided unless a clear advantage can be pressed.
Mid Game (Ring 2 Closing to Ring 4 Closing)
This phase is where Loba's flexibility truly shines, demanding a balance between continued resource acquisition, strategic movement, and opportunistic engagements.
- Looting for Upgrades: The Black Market should be used consistently off cooldown to upgrade body shields, secure better weapon attachments, or help teammates find their preferred weapons. Targeting clusters of death boxes from previous fights or unlooted sections of POIs during rotations can be highly efficient. Vaults can now be accessed without a key and without destroying the market, offering another avenue for high-tier loot.
- Strategic Rotations: Burglar's Best Friend is invaluable for enabling faster and safer rotations. Loba can use it to access high ground for scouting, traverse dangerous open areas quickly, or take paths that are inaccessible or time-consuming for other legends. The Black Market can also facilitate rotations by allowing the team to "skim" loot from POIs they are passing through without needing to stop for extended periods.
- Taking Advantageous Fights: If Loba has successfully kept her team well-kitted, they should be actively looking for engagements where they hold a positional or numerical advantage. Her bracelet, especially when augmented by the "Wolf's Claws" upgrade, can be used to initiate flanks or take aggressive off-angles to support her team's push.
- Third-Partying: Loba excels at capitalizing on fights already in progress. Her bracelet allows for rapid entry into the fray, potentially catching weakened teams off-guard. Post-fight, the Black Market ensures her squad can efficiently loot the spoils and re-arm before another potential engagement.
Late Game (Ring 4 Closing to End)
In the tense final stages of a match, Loba's abilities become critical for survival and securing victory.
- Critical Supplies via Black Market: The Black Market is paramount for late-game armor swaps from death boxes, often the difference between winning and losing a close-quarters battle. It also ensures the team has a ready supply of Shield Batteries, Medkits, and grenades. A key late-game strategy is to use the Black Market to remove all remaining ammunition from the final playable zones, potentially crippling opponents who are running low.
- Positioning is Key: Burglar's Best Friend, with its dual charges and the potential shield regeneration from "Escape Artist," is crucial for securing advantageous positions ("god spots") within the shrinking final rings or for making life-saving repositions under pressure.
- Fight to Win: Most engagements in the late game are unavoidable. Loba's team should leverage their potentially superior loot (thanks to her efforts throughout the match) and her powerful repositioning tools to outmaneuver and outlast the remaining squads.
Reading the Game – The Loba Instinct
Effective Loba play requires a high degree of game sense:
- When to Disengage & Loot: If the team is low on resources, caught in a bad position, or facing a chaotic multi-team fight, it's often wise to use the bracelet to create distance. Once safe, the Black Market can be deployed to re-supply before considering a re-engagement.
- When to Press an Advantage: If an enemy is confirmed cracked, a teammate secures a knock, or the squad has a clear positional or numerical superiority, Loba can use her bracelet aggressively (especially with "Wolf's Claws") to close the distance, secure kills, or apply further pressure.
- Communication is Paramount: Loba should be in constant communication with her team, relaying information about high-tier loot locations spotted with Eye for Quality, enemy activity inferred from disappearing loot, her intentions for Black Market placement, and coordinated bracelet plays.
Loba's decision-making often revolves around the cooldown of her Black Market and the current inventory status of her team. Each deployment of her ultimate (after the initial one) is a strategic investment. Her passive ability, Eye for Quality, continuously informs where the next high-value Black Market deployment might be. This constant assessment of resources and opportunities makes a skilled Loba the logistical backbone of her team, ensuring they are always prepared for the next fight by maintaining an economic advantage. The 99% ultimate charge at the start of the game means her first major strategic decision occurs almost immediately upon landing, setting the resource tempo for the crucial opening minutes of the match.
Gearing Up in Style: Best Weapons & Loadouts for Loba – The Translocating Thief's Armory
Loba's unique ability to guarantee access to virtually any piece of loot, including copious amounts of ammunition, allows her and her team to be more flexible and ambitious with their weapon choices. Loadouts can be tailored to her chosen Legend Upgrades and the team's overall strategy, rather than being dictated by whatever random loot is available.
Synergy with Black Market Boutique
The Black Market fundamentally changes weapon viability:
- Ammo-Hungry Weapons: Weapons notorious for high ammo consumption, such as the Devotion LMG, Havoc Rifle (especially without a Turbocharger initially), or the Rampage LMG, become far more practical choices when Loba is on the team. Her ability to continuously supply energy or heavy ammo negates their primary drawback. This also applies to sniper rifles, allowing for more liberal use of long-range fire.
- Attachment-Reliant Weapons: Many weapons only reach their full potential with specific attachments. Loba's Black Market can quickly provide essential items like Turbochargers for the Havoc/Devotion, ideal scopes for marksman and sniper rifles, extended magazines for SMGs and ARs, or shotgun bolts for the Peacekeeper and Mastiff.
Playstyle-Based Loadouts (Considering Current Meta)
Loba's loadout should complement her intended role, influenced by her Legend Upgrade choices. Recent meta analyses from Seasons 21-25 highlight several strong weapon options.
Aggressive Support / Skirmisher (Leveraging "Wolf's Claws" & "Escape Artist")
- Primary: Versatile Assault Rifles are excellent for this role. The VK-47 Flatline, R-301 Carbine, Nemesis Burst AR, and Hemlok Burst AR offer reliable damage at various ranges, suitable for pushing advantages created by bracelet flanks.
- Secondary: A potent close-quarters weapon is essential for capitalizing on aggressive teleports. SMGs like the R-99, Volt SMG, or C.A.R. SMG provide high rates of fire. Shotguns such as the Mastiff or Peacekeeper offer devastating burst damage. While one source noted SMGs lost some value due to digital threat removal, their raw close-range DPS remains crucial for an aggressive Loba.
Mid-to-Long Range Dominance (Traditional Support / Sniper Playstyle)
- Primary: Marksman Rifles like the 30-30 Repeater or G7 Scout, or dedicated Sniper Rifles such as the Sentinel, Longbow DMR, or even the Charge Rifle (especially with the Select Fire hop-up for versatility) are strong choices. Loba can easily keep these weapons fed with ammunition and find optimal scopes. Her bracelet also allows her to access sniper nests and advantageous high ground with ease.
- Secondary: An SMG (R-99, Volt) or a reliable Assault Rifle (Flatline, R-301) is recommended to handle threats that manage to close the distance.
Current Meta Weapon Considerations (Seasons 21-25)
- A Season 21 weapon tier list (though subjective) rated the Havoc, Prowler, Triple Take, and Sentinel as S-Tier, with the Flatline, Volt, Spitfire, Rampage, G7 Scout, Peacekeeper, and Mastiff in A-Tier.
- More recent Season 25 meta discussions emphasize the strength of weapons like the Devotion, Rampage, and Havoc (particularly potent with Ballistic's sling, but indicative of their general power). The Nemesis, Hemlok, 30-30 Repeater, G7 Scout, R-301 Carbine, Flatline, Wingman, and Bocek Bow are also highlighted as strong primary options. For secondaries, SMGs like the R-99, Volt, C.A.R., and Prowler remain popular.
- The introduction of the Relic Pulse Blade, a melee weapon granting a movement speed boost and a sonar pulse to detect nearby enemies, offers an intriguing option. This could pair exceptionally well with Loba's teleportation abilities for highly aggressive and unpredictable close-quarters engagements, especially when combined with her "Wolf's Claws" upgrade.
Loba's ideal weapon loadout is ultimately flexible and should adapt to her chosen Legend Upgrades and the team's overall strategy. If she opts for the aggressive "Wolf's Claws" and "Escape Artist" upgrades, she is better equipped to wield close-to-mid-range weaponry to capitalize on her teleport-initiated engagements. Conversely, if she chooses the team-focused "Shopping Spree" and "Brand New Bag" upgrades, she can more effectively support ammo-intensive long-range weapons for herself or her teammates. Her unparalleled ability to quickly find any weapon and its necessary attachments means she is less constrained by loot randomness than any other legend. This can also subtly influence her team's weapon choices, as teammates may feel more comfortable running less common or ammo-guzzling loadouts knowing Loba can consistently keep them supplied, potentially leading to more diverse and powerful team compositions.
| Playstyle | Primary Weapon | Secondary Weapon | Key Attachments to Prioritize | Notes/Synergy with Loba's Kit |
|---|---|---|---|---|
| Aggressive Skirmisher | VK-47 Flatline, R-301 Carbine, Nemesis, Hemlok | R-99 SMG, Volt SMG, C.A.R. SMG, Mastiff Shotgun, Peacekeeper | Extended Mags (AR & SMG), Shotgun Bolts, 1x-2x Optics, Laser Sights | Capitalizes on "Wolf's Claws" for fast weapon draw after teleport. Black Market ensures ammo for sustained CQC. |
| Mid-Range Support | 30-30 Repeater, G7 Scout, Hemlok, Flatline | Volt SMG, R-301 Carbine | Mid-Range Optics (2x, 3x, 2x-4x), Extended Mags, Barrels | Balanced approach. Bracelet for repositioning to cover or high ground. Black Market for consistent ammo and attachment upgrades for sustained mid-range fights. |
| Long-Range Sharpshooter | Sentinel, Longbow DMR, Charge Rifle (with Select Fire), Triple Take, Bocek Bow | R-99 SMG, Volt SMG, P2020 (with Hammerpoints if available) | Sniper Optics (4x-8x, 6x, Digital Threat), Sniper Stocks | Bracelet provides access to sniper nests. Black Market guarantees ample sniper ammo and desired optics, making ammo-intensive snipers more viable. |
The Perfect Heist: Loba in the Current Meta & Team Compositions – Orchestrating Victory
Loba's position in the Apex Legends meta has seen a significant upswing, largely due to a series of impactful buffs that have broadened her utility beyond pure loot acquisition. She has evolved from a niche support into a versatile and often "super strong" legend capable of facilitating aggressive plays while maintaining high personal survivability and, of course, unparalleled team gearing.
Loba's Evolving Role (Season 23-25)
The introduction of dual tactical charges, a 99% starting ultimate charge, and powerful Legend Upgrades have collectively shifted Loba's optimal playstyle.
- Her core strength remains her unmatched ability to equip her team, providing a consistent resource advantage from the very start of the game.
- Her Burglar's Best Friend bracelet, now with two charges and synergistic upgrades, offers excellent repositioning, flanking potential, and escape capabilities.
- This results in a strong early-game presence due to immediate Black Market access and enhanced personal survivability, especially with tactical upgrades like "Escape Artist".
- Despite her buffs, some considerations remain. The Black Market Boutique, if placed carelessly, can still reveal the team's position due to its activation pulse and the visible trails when items are taken.
- Her bracelet, while improved, still has visual and audio tells, and Loba experiences a brief moment of vulnerability upon landing.
- Compared to purely offensive legends, her abilities do not deal direct combat damage.
- One notable limitation is her inability to directly extract teammates from dangerous situations in the way legends like Wraith or Alter can.
Synergistic Team Compositions
Loba's versatility allows her to fit into various team structures, enhancing both aggressive and control-oriented strategies.
Aggressive "W-Key" Compositions
This composition boasts extreme mobility. Loba fuels their aggressive pushes with a constant supply of loot and can use her enhanced tactical to flank or create diversions alongside Pathfinder's ziplines and Wraith's portals, which serve for both engagement and disengagement. Loba's upgrades make her a formidable individual skirmisher within this fast-paced team.
Alter provides unparalleled team repositioning and escape options with Void Nexus and Void Passage, while Ash offers aggressive initiation with Phase Breach and lockdown potential with Arc Snare. Loba ensures this high-octane composition is always well-supplied and can use her own mobility to keep pace, create openings, or secure flanks. While Alter's passive offers some individual loot capability, Loba's Black Market is far superior for comprehensive team gearing.
Control / Sustain Compositions
This team excels at tactical gameplay, resource management, and map control. Loba's Black Market ensures the team is perpetually stocked for long defensive engagements or late-game scenarios where resources are scarce. Crypto provides invaluable reconnaissance with his drone and can use his EMP to disable enemy traps and defenses, creating openings for Wattson to secure areas with her fences and Interception Pylon. Loba allows the team to loot safely and efficiently without exposing themselves.
Similar to the Wattson composition, Loba fuels defensive legends who excel at fortifying and holding buildings. The Black Market, deployed from a secure position, allows them to maintain their defenses and supplies throughout protracted engagements.
General Synergies
- Loba pairs well with legends who wield ammo-intensive weapons (e.g., Ballistic with his Sling weapon), as she guarantees they will never run dry.
- She also complements legends who can capitalize on the openings created by her bracelet flanks or who can create diversions that allow her to use her abilities more safely and effectively.
How Loba's Upgrades Influence Team Strategy
The choice of Loba's Legend Upgrades can significantly shape the team's overall approach:
- Tactical Upgrades ("Wolf's Claws," "Escape Artist"): These encourage a more aggressive team playstyle. Knowing Loba can effectively contribute to fights, survive engagements, and quickly reposition allows the team to take more risks and push advantages with greater confidence.
- Ultimate Upgrades ("Shopping Spree," "Brand New Bag"): These upgrades facilitate strategies that rely on superior resources and sustain. Teams can opt for more resource-intensive loadouts, engage in longer periods of area denial, or simply outlast opponents in wars of attrition due to better supplies and inventory space.
Loba's best team composition is not fixed but rather adapts to her chosen upgrade path and the team's strategic goals. She can seamlessly flex between an aggressive skirmishing support and a supreme loot provider. This adaptability, combined with her now-potent early-game ultimate and impactful upgrades, positions her as a strong candidate for an In-Game Leader (IGL) or at least a key strategic decision-maker. She directly influences rotations based on loot availability (via Eye for Quality), dictates the early-game resource balance (via Black Market), and can enable specific offensive or defensive plays with her versatile kit. This elevates her strategic importance far beyond merely being "the loot legend."
| Team Composition | Loba's Role | Key Synergies | Recommended Loba Upgrades |
|---|---|---|---|
| Loba / Pathfinder / Wraith | Aggressive Support, Flanker, Skirmisher | High team mobility (Ziplines, Portals, Bracelet). Loba fuels aggressive pushes with loot and provides additional flanking/repositioning. | Wolf's Claws, Escape Artist |
| Loba / Wattson / Crypto | Primary Resource Provider, Defensive Support | Loba ensures continuous supply for fortified positions. Crypto provides intel and EMP support. Wattson provides area denial and shield regeneration. Black Market for safe looting. | Shopping Spree, Brand New Bag |
| Loba / Ballistic / Alter | Mobile Resource Engine, Secondary Skirmisher | Loba supplies Ballistic's ammo-hungry Sling and team's general needs. Alter provides aggressive engage/disengage with Void abilities. Loba keeps pace with tactical. | Wolf's Claws or Shopping Spree, Escape Artist or Brand New Bag (flexible based on team aggression) |
Common Pitfalls & How to Avoid Them: Becoming a Top-Tier Loba – Sidestepping the Traps
While Loba's kit is incredibly powerful, especially after recent buffs, several common mistakes can undermine her effectiveness. Understanding these pitfalls and how to avoid them is crucial for any aspiring Translocating Thief.
Bracelet Mismanagement
Avoidance: Prioritize using the bracelet preemptively for repositioning to advantageous cover or high ground before taking critical damage. When escaping is necessary, aim for unpredictable locations, utilize the "quick drop" feature to land behind immediate cover, and leverage the dual charges and "Escape Artist" upgrade for safer, more layered disengagements.
Avoidance: Vary teleport destinations. Utilize throws through windows or small gaps, employ misdirection by looking one way and throwing another, and master the "quick drop" to make landings less predictable.
Avoidance: Actively practice sequential teleports in the Firing Range. Always consider the potential of the second charge – for further escape, aggressive re-engagement after a shield regen from "Escape Artist," or reaching a more dominant position.
Black Market Blunders
Avoidance: Prioritize placing the Black Market behind solid cover, on rooftops if accessible and safe, or within buildings offering multiple entry/exit points. Always communicate the intended placement with the team to ensure they can access it safely. Be mindful of its activation pulse alerting enemies.
Avoidance: Deploy the Black Market during lulls in combat, before an anticipated fight to gear up, or immediately after a fight to quickly re-supply and loot death boxes. The 99% starting charge largely mitigates timing issues for the initial deployment, but subsequent uses require more tactical consideration.
Avoidance: Develop the habit of remotely collapsing the Black Market (using the Character Utility Button) once the team has taken what they need, especially in later rings, contested areas, or if rotating away from its location.
Looting Inefficiencies & Tunnel Vision
- Neglecting Team Needs: Focusing solely on personal loot upgrades without communicating with or prioritizing items for teammates who might have more urgent needs (e.g., a low-level body shield or a missing core attachment).
- Avoidance: Maintain constant communication regarding loot requirements. Utilize the ping system effectively and encourage teammates to voice their needs before and during Black Market use.
- Hyper-fixating on High-Tier Loot: Chasing a distant gold item visible via Eye for Quality while ignoring immediately available and necessary lower-tier items like a blue body shield (if currently without one), essential ammunition, or basic healing supplies.
- Avoidance: Prioritize immediate survival and combat effectiveness. A blue shield now is better than a gold shield later if it means surviving the next encounter. Ensure basic needs are met before optimizing for higher tiers.
- Not Utilizing Eye for Quality for Intel: Using the passive solely to spot loot and failing to recognize its secondary function as an enemy activity indicator (e.g., if a high-tier item suddenly disappears).
- Avoidance: Actively monitor high-value items in the vicinity. If one vanishes, communicate the potential enemy presence to the team. This can provide crucial early warnings.
General Gameplay Errors
- Reactive vs. Proactive Ability Use: Waiting until a situation is dire before considering using the bracelet or Black Market, rather than using them proactively to create advantages or prevent bad situations from escalating.
- Avoidance: Constantly assess the environment and think ahead. Use the bracelet to take strong positions before fights begin. Deploy the Black Market in anticipation of resource needs, not just in response to depletion.
- Slow Looting from Market: Taking an excessive amount of time to browse and select items from the Black Market interface, leaving the team stationary and vulnerable for too long, especially in the early game or contested areas.
- Avoidance: Have a mental checklist of needed items before opening the market. Encourage teammates to decide quickly. Prioritize speed and efficiency, especially with the initial market deployment.
- Rigid Upgrade Paths: Sticking to a predetermined Legend Upgrade path regardless of the match's specific circumstances, team composition, or evolving needs.
- Avoidance: Be flexible. Assess how the match is unfolding. If the team is struggling in fights, perhaps the tactical upgrades ("Wolf's Claws," "Escape Artist") are more beneficial. If resource sustain is the primary concern, the ultimate upgrades ("Shopping Spree," "Brand New Bag") might be the better choice.
Conclusion: Dominate the Outlands with Style, Substance, and an Unrivaled Supply Chain
Loba Andrade has firmly established herself as a premier Support Legend in Apex Legends, offering an unmatched ability to control the flow of loot, enhance her team's combat readiness, and navigate the battlefield with unique finesse. Her recent and significant enhancements—dual tactical charges, a near-instant ultimate at the start of matches, and game-altering Legend Upgrades—have elevated her from a valuable niche pick to a potentially S-Tier contender capable of shaping the meta. She is no longer solely the "queen of loot"; she is an aggressive facilitator, a survivable skirmisher, and the ultimate quartermaster for any squad aiming for victory.
The mark of a master Loba lies not just in the quantity of high-tier loot she acquires, but in the strategic control and tempo she imposes on the match. It's about ensuring her team always has the material advantage, enabling aggressive plays through superior resources, and utilizing her mobility to create opportunities and escape danger. It's about intelligent Black Market placement that not only supplies allies but also denies enemies, and bracelet usage that is both an artful dodge and a decisive offensive maneuver.
- Refine Bracelet Mechanics: Dedicate time in the Firing Range to practice diverse bracelet throws. Experiment with angles for maximum distance, threading throws through tight gaps, mastering quick drops for precise landings, and integrating movement techniques like sliding and jumping to minimize vulnerability.
- Elevate Communication: Become the team's primary intel source for high-value loot and potential enemy activity identified through Eye for Quality. Clearly communicate Black Market intentions and coordinate aggressive or defensive plays involving her tactical.
- Adapt Legend Upgrades: Do not rigidly adhere to a single upgrade path. Assess the evolving needs of each match and the strengths of the team composition. Choose upgrades that provide the most significant current benefit, whether that's enhanced personal combat capability or superior team-wide resource management.
- Strategic Black Market Deployment: Always be thinking ahead. Where will the next Black Market provide the most value? When is the optimal time to deploy it for gearing, mid-fight swaps, or late-game denial?
Embrace Loba's multifaceted playstyle. Loot with precision, teleport with purpose, and support with an unmatched arsenal. By mastering her sophisticated toolkit and making astute strategic decisions, players can ensure their squad is always a cut above the rest, ready to dominate the Apex Games with style and substance.