
Arc Raiders has a full skill tree system, which is unusual for an extraction shooter. Instead of relying only on loot for progression, you invest skill points into permanent perks that shape how your raider moves, loots, fights, and survives. There are 45 unique skills spread across three branches, and since you're capped at 75 total skill points, you can't unlock everything. Where you spend those points matters a lot.
This guide covers every perk in the game with ratings, explains common misconceptions that trip players up, and provides recommended builds for solo, squad, and general play. You'll find breakdowns of what each perk actually does (not just what the description says), along with specific stat numbers from testing where available.
A few things to know before reading: you earn one skill point per level up. Most perks accept up to five upgrade points, while some only need a single point. Perks deeper in each tree require you to spend a minimum number of points within that branch first. The final perk in each tree, for example, needs 36 points invested in that specific branch before it unlocks. Because of this, some weaker perks end up being necessary stepping stones to reach the good stuff further along.
Understanding the Three Skill Trees
Arc Raiders splits its 45 perks into three branches:
Conditioning (Green Tree) covers how your raider handles physical stress and danger. You'll find perks for shield weight reduction, breaching speed, stamina recovery when hurt, and survival while downed. The melee perks also live at the far end of this tree.
Mobility (Yellow Tree) is all about movement, stamina efficiency, and traversal. Most players consider this the single most important branch because it houses the perks that extend your stamina pool and reduce movement costs. If you feel sluggish during early raids, start here.
Survival (Red Tree) focuses on looting, crafting, and weight management. Faster looting, higher carry capacity, crafting during raids, and access to special containers all live in this branch. Players who want to maximize their haul will be spending a lot of points here.
Skills to Unlock First
Your top priority as a new player should be stamina efficiency. Your starting stamina pool is painfully small, and you'll spend most of every raid sprinting across large maps. These perks should be your earliest investments:
Marathon Runner (Mobility)
Reduces the stamina cost of moving around. Max this out with all five points as fast as you can. You'll be able to run for roughly three extra seconds before hitting empty, regardless of which shield you're wearing. That might not sound huge, but running is the single most common thing you do in Arc Raiders. Over the course of a full raid (and hundreds of raids after that), this perk pays for itself many times over.
Youthful Lungs (Mobility)
Flat out increases your maximum stamina. It stacks beautifully with Marathon Runner. With both perks maxed at five points each, you can sprint for about five seconds longer than with Marathon Runner alone. Together, these two form the most important perk combination in the game. Max both and never touch them again.
In-Round Crafting (Survival)
Unlocks crafting during raids for just a single skill point. You get access to bandages, shield rechargers, adrenaline shots, smoke grenades, impact grenades, fruit mixes, agave juice, and flame sprays (provided you have materials). Being able to throw together a bandage or shield recharger when you're running low during a rough raid can save your run, especially early on when your loadout options are limited.
Conditioning Tree (Green)
The Conditioning tree handles shield penalties, breaching, combat stamina recovery, mechanics while downed, and melee. It has some strong perks mixed in with several deeply underwhelming ones.
Used to the Weight
Effect: Wearing a shield doesn't slow you down as much.
Max Investment: 5 points
Rating: Very Helpful
This reduces the movement speed penalty from equipping shields. It doesn't affect stamina drain, just how fast your raider physically moves. Light shields show almost no difference with or without the perk. Medium shields get a solid speed boost. Heavy shields see the biggest improvement, and you'll really feel the difference when moving around the map. If you regularly run medium or heavy shields (which becomes more common as you progress), this is a great investment. PvP players especially will appreciate staying mobile with heavier protection equipped.
Gentle Pressure
Effect: You make less noise when breaching.
Max Investment: 5 points
Rating: Not Really Helpful
Even fully maxed out, you're still fairly loud when breaching doors. The noise reduction exists, but it's not dramatic enough to reliably keep nearby enemies from hearing you. You'll see this perk in most recommended builds anyway because you need points in the Conditioning tree to reach the stronger perks deeper in the branch.
Blast-Born
Effect: Your hearing is less affected by nearby explosions.
Max Investment: 5 points
Rating: Not Really Helpful
The ringing sound after an explosion goes off near you fades away faster with this perk maxed. How useful that is comes down to personal annoyance tolerance. PvP players who rely on audio cues to track enemies might get some value from it, but most players can safely skip this one.
Fight or Flight
Effect: When you're hurt in combat, regain a fixed amount of stamina. Has a cooldown between uses.
Max Investment: 5 points
Rating: Very Helpful
Take damage from another player and you instantly get back a big chunk of stamina. If you get ambushed, you immediately have enough gas in the tank to sprint to cover, dodge roll, or reposition. The stamina recovery is surprisingly generous.
Proficient Pryer
Effect: Breaching doors and containers takes less time.
Max Investment: 5 points
Rating: Not Really Helpful (but often a necessary stepping stone)
With all five points invested, doors breach about three seconds faster and containers about one second faster. Modest savings that depend on how often you breach per match. Players who aggressively breach everything might notice the cumulative time savings, but the perk itself isn't exciting. Like Gentle Pressure, it shows up in builds because it's a required stepping stone to reach deeper Conditioning perks.
Unburdened Roll
Effect: If your shield breaks, your first dodge roll within a few seconds does not cost stamina.
Max Investment: 1 point
Rating: Somewhat Helpful
Your shield just broke and you're probably taking heavy fire. Your very next dodge roll costs zero stamina. It's only one free roll, but it can be the difference between reaching cover and eating dirt. Especially valuable in PvP where shield breaks happen suddenly during firefights. A fair trade for a single point.
Survivor's Stamina
Effect: When you're critically hurt, your stamina regenerates faster.
Max Investment: 1 point
Rating: Somewhat Helpful
The regeneration boost isn't massive, but it's a solid improvement at critical health. It serves a similar purpose to Fight or Flight (helping you move and dodge when you're in trouble) but feels less impactful since it speeds up regen rather than giving you an instant chunk. Still a reasonable pickup as a stepping stone.
Downed but Determined
Effect: When you're downed, it takes longer before you collapse.
Max Investment: 5 points
Rating: Very Helpful (especially for squads)
At five points, you survive roughly 34 extra seconds while downed before bleeding out (assuming nobody shoots you on the ground). That's a huge window for a teammate to finish a fight and get you back up, or for you to crawl somewhere safer. The value for squad players is obvious, but even solo raiders can benefit since you can call elevators and extract while downed. If you play trios, max this out.
A Little Extra
Effect: Breaching an object generates resources.
Max Investment: 1 point
Rating: Not Really Helpful (but worth taking as a stepping stone)
Breach any container and a small resource drops on the floor in front of it. You'll mostly get simple stuff like metal from doors or Arc Alloy from ARC objects. The perk itself isn't thrilling. What makes it worth taking is that spending this one point opens up access to Loaded Arms, which is much stronger.
Loaded Arms
Effect: Your equipped weapon has less impact on your encumbrance.
Max Investment: 1 point
Rating: Somewhat Helpful to Very Helpful
Your equipped weapons weigh less toward your total carry capacity after spending one point here. In testing with a Jupiter equipped, encumbrance dropped by about 2 kg. Running both a Jupiter and a Venator with attachments cut roughly 3.5 kg off total weight. Since being overencumbered tanks your speed, increases your noise, and slows stamina regen, shaving kilograms of weapon weight off your loadout is a real quality of life improvement. Loot heavy players will love this one.
Turtle Crawl
Effect: While downed, you take less damage.
Max Investment: 5 points
Rating: Somewhat Helpful
In testing, a downed raider without this perk survived about four shots from a Pharaoh before dying. With the perk fully upgraded, that jumped to roughly six shots. It's a PvP perk for situations where enemies are actively trying to finish you off while you crawl away. Pairs well with Downed but Determined if you're building around surviving while downed.
Back on Your Feet
Effect: When you're critically hurt, your health regenerates until a certain point.
Max Investment: 5 points
Rating: Almost Never Helpful
Passive health regen sounds incredible until you see the numbers. After reaching critical health, about 30 seconds pass before the perk does anything at all. Then your health crawls back over another 25 or so seconds, recovering only about 25% of your total health bar. That's close to a full minute of standing around for a quarter of your health. Any normal player is going to pop a healing item long before this perk ever kicks in. For a perk that requires reaching the end of a tree, this is widely considered one of the worst skills in the game.
Effortless Swing
Effect: Melee abilities cost less stamina.
Max Investment: 5 points
Rating: Almost Never Helpful
Without the perk, you get about seven swings before running out of stamina. Fully upgraded, you get roughly 11. If you want to try a melee build, go for it, but melee in Arc Raiders just isn't viable compared to using guns. Bullets are cheap to craft, easy to find during raids, and way more practical in every situation.
Sky-Clearing Swing
Effect: You deal more melee damage to drones.
Max Investment: 5 points
Rating: Almost Never Helpful
Even with all five points invested, wasps can still take two to three melee hits to kill (unless you get lucky and clip a propeller for a one shot, which can happen even without the perk). Hornets take an absurd number of hits no matter what. On top of that, wasps tend to fly backward when they see you coming, switching into attack mode before you can reach them. Just shoot them. It's a million times easier.
Fly Swatter
Effect: Wasps and turrets can now be destroyed with a single melee attack.
Max Investment: Final perk (requires 36 points in Conditioning)
Rating: Almost Never Helpful
Single hit melee kills on wasps and turrets sounds nice, but two problems ruin it. Wasps still fly away when they spot you approaching, and a lot of turrets are placed out of melee reach entirely. Combine that with the 36 point investment needed to unlock it, and there's no good reason to take this perk.
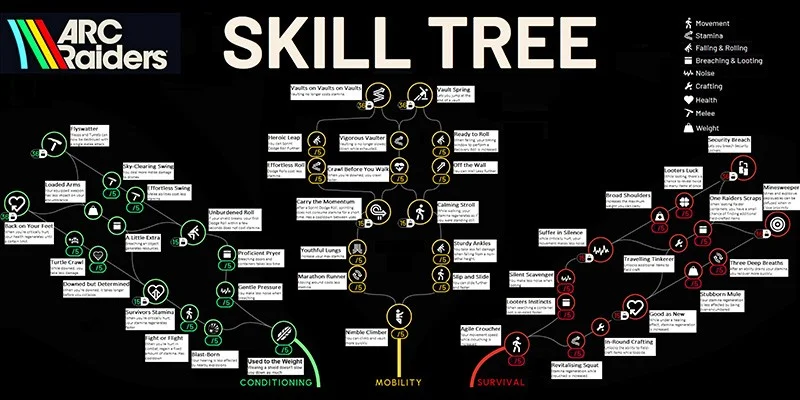
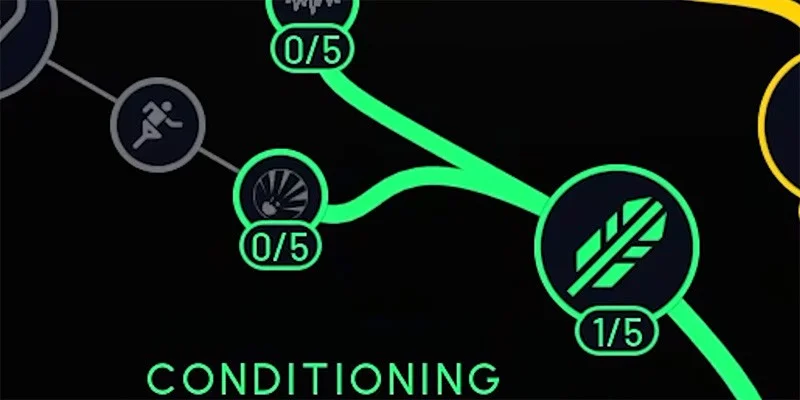
Mobility Tree (Yellow)
The Mobility tree is widely considered the most important branch in the game. It has the best stamina perks and several strong movement upgrades that benefit every playstyle.
Nimble Climber
Effect: You can climb and vault more quickly.
Max Investment: 5 points
Rating: Not Really Helpful (as a standalone perk)
The speed improvement is tiny. You'd need to slow footage down to even notice the climbing difference, and the vaulting boost is even harder to spot. You do need at least one point here to progress into the Mobility tree, though, and several recommended builds invest multiple points as a stepping stone. Don't expect much from the perk itself.
Marathon Runner
Effect: Moving around costs less stamina.
Max Investment: 5 points
Rating: Very Helpful
Covered above in the Skills to Unlock First section. At five points, you get roughly three extra seconds of sprinting before hitting empty across all shield types. Running is the thing you do most in Arc Raiders, so the value here is enormous. Max it out first.
Slip and Slide
Effect: You can slide further and faster.
Max Investment: 5 points
Rating: Somewhat Helpful
The extra slide distance is clear in side by side comparisons, and you move faster to compensate for the longer slide. This perk is mainly for aggressive PvP players who use sliding as part of their combat movement. It does suffer from diminishing returns at higher investment levels, so putting in just one or two points gives you most of the benefit without spending all five.
Youthful Lungs
Effect: Increases your maximum stamina.
Max Investment: 5 points
Rating: Very Helpful
Also covered in the opening section. Stacks with Marathon Runner for five extra seconds of sprinting on top of what Marathon Runner provides alone. These two perks together are the foundation of every build in the game. Max both and keep them forever.
Sturdy Ankles
Effect: You take less fall damage when falling from a non-lethal height.
Max Investment: 5 points
Rating: Not Really Helpful
The damage reduction is minor. Most experienced players already know which heights deal fall damage and just avoid jumping from them (or use ziplines instead). Unless you're constantly Wile E. Coyoting yourself off ledges by accident, skip this. It shows up in some builds at 1/5 purely as a stepping stone.
Calming Stroll
Effect: While walking, your stamina regenerates as if you were standing still.
Max Investment: 1 point
Rating: Very Helpful (with an important caveat)
Your stamina regens at full speed while walking instead of only when you're standing still. A lot of players think this perk is broken, though, because of one key detail: on mouse and keyboard, your default movement speed is a jog, not a walk. To actually walk and trigger this perk, you need to go into settings and bind a walk key. Controller players just gently tilt the joystick. Once you understand this, the perk is strong. You get to keep moving and regenerating stamina at the same time instead of stopping dead in your tracks, all for a single skill point.
Carry the Momentum
Effect: After a sprint dodge roll, sprinting does not consume stamina for a short duration. Has a cooldown between uses.
Max Investment: 1 point
Rating: Somewhat Helpful
Sprint dodge roll, then start sprinting again, and your stamina bar freezes for about three seconds. A nice burst of free movement when you need to get out of danger. It costs one point and does exactly what it promises.
Off the Wall
Effect: You can wall leap further.
Max Investment: 5 points
Rating: Almost Never Helpful
Covers both horizontal leaps from ladders and shimmy jumps along ledges. Try as you might, it's hard to think of a real raid scenario where this extra distance would matter. Skip it.
Ready to Roll
Effect: When falling, your timing window to perform a recovery roll is increased.
Max Investment: 5 points
Rating: Almost Never Helpful
The recovery roll window (hitting dodge right before landing to avoid fall damage) is already pretty generous by default. Most players don't need any help timing it. Skipping this also lets you avoid an entire section of the yellow tree that leads nowhere useful, which frees up points for better perks.
Crawl Before You Walk
Effect: When you're downed, you crawl faster.
Max Investment: 5 points
Rating: Somewhat Helpful (especially in squads)
With all five points invested, you crawl roughly 35% faster while downed. That's a big boost that can get you to safety for a revive instead of bleeding out in the open. Squad players get the most out of this since they have teammates who can actually pick them up, but solo players can potentially use it to reach extraction points while downed.
Vigorous Vaulter
Effect: Vaulting is no longer slowed down when exhausted.
Max Investment: 1 point
Rating: Not Really Helpful
The speed improvement is minimal. You'd need to slow footage way down to even see a difference. It only activates when you're already out of stamina, which limits its usefulness further. The one saving grace is that it only costs a single point, but the impact is so marginal that it's hard to recommend.
Effortless Roll
Effect: Dodge rolls cost less stamina.
Max Investment: 5 points
Rating: Very Helpful
Without this perk, you can chain about seven dodge rolls in a row before running dry. With full investment, that jumps to roughly 11. It also works on sprint dodge rolls even though the description only mentions regular dodge rolls. Without the perk, you get about three sprint dodge rolls in a row; with it, you get five. Dodge rolling is critical for both PvE and PvP, so this is valuable no matter how you play. You'll gain an extra dodge roll once you hit three points invested, and points four and five continue improving stamina efficiency from there.
Heroic Leap
Effect: You can sprint dodge roll further.
Max Investment: 5 points
Rating: Not Really Helpful
You do leap a bit further. And that's about it. Some aggressive PvP players might occasionally find the extra distance useful, but the default sprint dodge roll distance works fine for most situations. Five points for a few extra inches of range isn't a great trade.
Vaults on Vaults on Vaults
Effect: Vaulting no longer requires stamina.
Max Investment: Final perk (requires 36 points in Mobility)
Rating: Somewhat Helpful
Applies to both hopping over waist high obstacles and climbing up to ledges. Your stamina temporarily pauses during these actions instead of draining. Stamina preservation is always nice, but the 36 point investment in Mobility makes it hard to justify since you'd have to gut the other two trees.
Vault Spring
Effect: You can jump at the end of a vault.
Max Investment: Final perk (requires 36 points in Mobility)
Rating: Almost Never Helpful
Press jump about halfway through a waist high vault and you get a little forward leap at the end. Only works on waist high obstacles, not when climbing ledges. It's fun to mess with, but good luck finding regular opportunities to use it during an actual raid. One of the weakest final perks in the game.
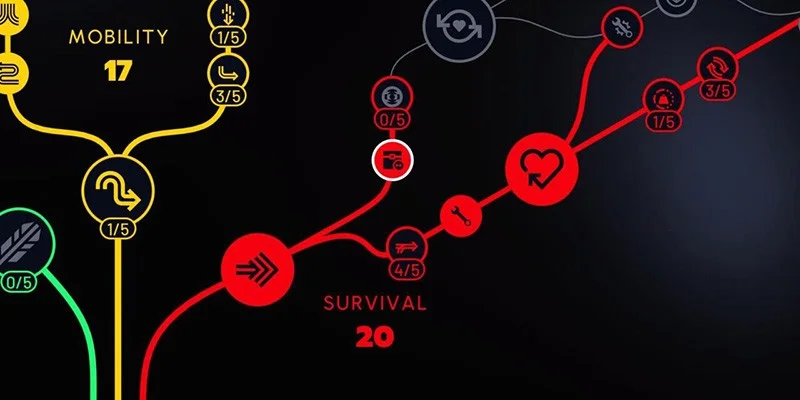
Survival Tree (Red)
The Survival tree covers looting speed, crafting, weight management, and stealth. Several perks here feel close to mandatory for comfortable gameplay.
Agile Croucher
Effect: Your movement speed while crouching is increased.
Max Investment: 5 points
Rating: Not Really Helpful (as a standalone perk)
With all five points invested, you crouch walk about 15% faster. Stealthy PvP players who like creeping up on enemies will get the most out of it, but for most players the improvement isn't dramatic enough to build around. Like Nimble Climber in the Mobility tree, this one shows up in recommended builds because you need to spend points here to unlock the stronger perks further in.
Looter's Instincts
Effect: When searching a container, loot is revealed faster.
Max Investment: 5 points
Rating: Very Helpful (borderline mandatory)
A game update slowed down base looting speed significantly, and this perk went from "nice to have" to nearly required overnight. Without it, waiting for loot to reveal when you open a container is painfully slow. With Looter's Instincts fully upgraded, the speed feels comfortable again. Until a potential rebalance changes the base looting speed, consider this one of the highest priority perks in the entire game. Max it out.
Silent Scavenger
Effect: You make less noise when looting.
Max Investment: 5 points
Rating: Not Really Helpful
Even at five points, you still make obvious sound when opening containers. There might be edge cases where an enemy is barely far enough away that the reduced noise saves you, but those moments are too rare to build around. It shows up in builds at two to three points as a stepping stone to higher tier Survival perks, not for its own merit.
Revitalizing Squat
Effect: Stamina regeneration while crouched is increased.
Max Investment: 5 points
Rating: Somewhat Helpful
Without the perk, crouching stamina regen takes about 14 seconds for a full bar. Fully upgraded, that drops to around 11 seconds. Not incredible, but a meaningful improvement. Since you need 16 points to unlock the next tier of Survival perks, Revitalizing Squat is often a practical place to dump some of those required points.
In-Round Crafting
Effect: Unlocks the ability to field craft items while topside.
Max Investment: 1 point
Rating: Somewhat Helpful
Covered in the opening section. One point unlocks crafting during raids for bandages, shield rechargers, adrenaline shots, smoke grenades, impact grenades, fruit mixes, agave juice, and flame sprays. Being able to craft a heal or a shield recharge when things go sideways can save your entire run, especially early on.
Good as New
Effect: While under a healing effect, stamina regeneration is increased.
Max Investment: 1 point
Rating: Somewhat Helpful
Your stamina regens faster while a healing item like a bandage is actively doing its thing. The window is short (only lasts as long as the heal itself), and the boost isn't huge, but every bit of extra stamina helps when you're trying to heal and reposition during a PvP fight. A decent pickup for one point.
Suffer in Silence
Effect: While critically hurt, your movement makes less noise.
Max Investment: 1 point
Rating: Somewhat Helpful
Makes a clear difference, especially on loud surfaces like metal stairs. Testing showed a real reduction in footstep noise when at critical health. An easy pickup for PvP players. Grabbing it also opens up the path to Broad Shoulders further along the tree, so it doubles as a stepping stone.
Broad Shoulders
Effect: Increases the maximum weight you can carry.
Max Investment: 5 points
Rating: Very Helpful
Each point adds 2 kg to your max carry capacity, totaling 10 kg at full investment. Being overencumbered is one of the worst things that can happen in Arc Raiders: your speed tanks, you make more noise, and your stamina regen slows to a crawl. Broad Shoulders gives you a comfortable buffer so you can fill your backpack with the good stuff without getting punished. Every player should max this out at some point. Embark knew how good it was, which is why they put it so far along the Survival branch.
Looter's Luck
Effect: While looting, there's a chance to reveal twice as many items at once.
Max Investment: 5 points
Rating: Somewhat Helpful
You get roughly a 1 in 4 chance for any loot reveal to produce double items. When it triggers, it effectively halves the time you spend on that container. The RNG element is annoying since you can't count on it activating when you need it, but over the course of a full raid with dozens of containers, the cumulative benefit is real. Pairs well with Looter's Instincts if you're building for maximum looting efficiency.
Traveling Tinkerer
Effect: Unlocks additional items for field crafting.
Max Investment: 1 point
Rating: Somewhat Helpful
Builds on In-Round Crafting by expanding your crafting options to include noise makers, blaze gas, smoke and lure grenade traps, herbal bandages, and Raider Hatch Keys. The standout additions are herbal bandages (stronger healing) and Raider Hatch Keys (open special loot containers). You could always craft a Hatch Key before loading into a match, but being able to make one during a raid when you stumble onto a hatch unprepared is a nice backup option. One point.
One Raider's Scraps
Effect: When looting raider containers, you have a small chance of finding additional field crafted items.
Max Investment: 5 points
Rating: Not Really Helpful
Figuring out what this perk actually does in practice is close to impossible. When you open a container, you can't reliably tell which loot was normal and which came from the perk activating. Note that "raider containers" covers more than just Raider Caches; it applies to various container types. Testing suggested a slight increase in weapon mods and gun parts, but you can just buy those from traders. Hard to justify five points on something this vague.
Stubborn Mule
Effect: Your stamina regeneration is less affected by being overencumbered.
Max Investment: 5 points
Rating: Somewhat Helpful
The best strategy for overencumbrance is to avoid it in the first place, sure. But plenty of raids end with you finding too much valuable loot to leave behind. Being overloaded tanks your speed, increases your noise, and guts your stamina regen, making you a sitting duck in both PvE and PvP. This perk keeps your stamina regen closer to normal even when you're loaded down, and pairs well with Broad Shoulders for a full weight management setup.
Three Deep Breaths
Effect: After an ability drains your stamina, you recover more quickly.
Max Investment: 5 points
Rating: Not Really Helpful
This perk is widely misunderstood, and a lot of players think it straight up doesn't work. The confusion comes from the description. It doesn't make stamina come back faster after using an ability like a slide or dodge. Instead, when an ability completely empties your stamina bar and you enter the "exhausted" state (the flashing bar), this perk shortens how long you stay exhausted. You can start doing things again slightly sooner, but since most players just wait for full regen before acting anyway, the practical benefit is minimal.
Minesweeper
Effect: Mines and explosive deployables can be defused when in close proximity.
Max Investment: 5 points
Rating: Almost Never Helpful
This perk sounds useful but falls apart once you think about it. Proximity triggered explosives like jolt mines still go off when you get close. The perk doesn't prevent activation; it only lets you manually defuse traps that don't auto trigger, like placed grenade traps. Anyone with a brain will put their traps in spots where they activate instantly or in locations that are impossible to reach. And even if you spot a trap you could theoretically defuse, you can just shoot it instead. The perk solves a problem that barely exists.
Security Breach
Effect: Lets you breach Security Lockers.
Max Investment: 1 point (requires 36 points in Survival)
Rating: Somewhat Helpful
Security Lockers are special containers scattered across raid maps that you literally cannot open without this perk. The loot inside has been nerfed since launch: locations are now RNG based (not guaranteed spawns), and the quality isn't consistently top tier anymore. You can still find good stuff like blue tier weapons or rare grenades on occasion, though. Whether the 36 point investment in Survival is worth it depends entirely on your build priorities. Loot focused players will say yes; everyone else might find the cost too steep.
Skill Tier Rankings at a Glance
| Perk Name | Tree | Rating |
|---|---|---|
| Marathon Runner | Mobility | Very Helpful |
| Youthful Lungs | Mobility | Very Helpful |
| Effortless Roll | Mobility | Very Helpful |
| Calming Stroll | Mobility | Very Helpful |
| Looter's Instincts | Survival | Very Helpful |
| Broad Shoulders | Survival | Very Helpful |
| Used to the Weight | Conditioning | Very Helpful |
| Fight or Flight | Conditioning | Very Helpful |
| Downed but Determined | Conditioning | Very Helpful |
Somewhat Helpful Perks
Good perks that pull their weight depending on your playstyle:
- Carry the Momentum (Mobility)
- Crawl Before You Walk (Mobility, stronger for squads)
- Slip and Slide (Mobility, invest just 1 or 2 points)
- Unburdened Roll (Conditioning)
- Survivor's Stamina (Conditioning)
- Turtle Crawl (Conditioning)
- Loaded Arms (Conditioning, loot heavy players may rank this higher)
- In-Round Crafting (Survival)
- Revitalizing Squat (Survival)
- Good as New (Survival)
- Suffer in Silence (Survival)
- Stubborn Mule (Survival)
- Traveling Tinkerer (Survival)
- Looter's Luck (Survival)
- Security Breach (Survival)
- Vaults on Vaults on Vaults (Mobility)
Not Really Helpful Perks
Too little impact on their own, or primarily valuable as stepping stones:
- Nimble Climber (Mobility)
- Sturdy Ankles (Mobility)
- Vigorous Vaulter (Mobility)
- Heroic Leap (Mobility)
- Gentle Pressure (Conditioning)
- Blast-Born (Conditioning)
- Proficient Pryer (Conditioning)
- A Little Extra (Conditioning, but take it for Loaded Arms access)
- Agile Croucher (Survival)
- Silent Scavenger (Survival)
- One Raider's Scraps (Survival)
- Three Deep Breaths (Survival)
Almost Never Helpful Perks
Tough to recommend under any circumstances:
- Off the Wall (Mobility)
- Ready to Roll (Mobility)
- Vault Spring (Mobility)
- Back on Your Feet (Conditioning)
- Effortless Swing (Conditioning)
- Sky-Clearing Swing (Conditioning)
- Fly Swatter (Conditioning)
- Minesweeper (Survival)
Recommended Builds
You're capped at 75 skill points, plus 5 bonus points from completing an Expedition for a potential 80. None of these builds can include every strong perk, so tradeoffs are inevitable. Below are three builds tailored to different playstyles.
Optimal All-Around Build
This build invests heavily in Survival (42 points) to reach Security Breach, balanced by Mobility (20 points) and Conditioning (18 points) picks. It requires all 80 points (including the 5 Expedition bonus), so if you only have 75 to work with, consider dropping Effortless Roll from 4/5 to a lower level or cutting Stubborn Mule.
Mobility (20 points)
- Nimble Climber 5/5
- Marathon Runner 5/5
- Youthful Lungs 5/5
- Carry the Momentum 1/1
- Effortless Roll 4/5
Survival (42 points)
- Agile Croucher 5/5
- Looter's Instincts 5/5
- Silent Scavenger 2/5 (stepping stone)
- Revitalizing Squat 5/5
- In-Round Crafting 1/1
- Suffer in Silence 1/1
- Traveling Tinkerer 1/1
- Broad Shoulders 5/5
- Looter's Luck 5/5
- Good as New 1/1
- Stubborn Mule 5/5
- Security Breach 1/1
Conditioning (18 points)
- Used to the Weight 5/5
- Gentle Pressure 5/5 (stepping stone)
- Proficient Pryer 5/5 (stepping stone)
- Unburdened Roll 1/1
- A Little Extra 1/1
- Loaded Arms 1/1
This gives you the full looting suite (Looter's Instincts, Looter's Luck, Broad Shoulders, Security Breach), strong weight management (Broad Shoulders, Stubborn Mule, Loaded Arms), and all the core stamina perks from Mobility. The Conditioning picks focus on shield mobility and unlocking Loaded Arms.
Recommended Build for Squad Players
This build balances combat effectiveness with squad utility, putting emphasis on perks that shine when teammates can pick you up. The unlock order below shows exactly which perks to grab at each stage of progression.
- Nimble Climber 1/5 (Mobility)
- Marathon Runner 5/5 (Mobility)
- Youthful Lungs 5/5 (Mobility)
- Agile Croucher 1/5 (Survival)
- Revitalizing Squat 1/5 (Survival)
- In-Round Crafting 1/1 (Survival)
- Agile Croucher 5/5 (Survival)
- Looter's Instincts 5/5 (Survival)
- Silent Scavenger 3/5 (Survival)
- Suffer in Silence 1/1 (Survival)
- Traveling Tinkerer 1/1 (Survival)
- Broad Shoulders 5/5 (Survival)
- Used to the Weight 5/5 (Conditioning)
- Gentle Pressure 5/5 (Conditioning)
- Proficient Pryer 5/5 (Conditioning)
- Blast-Born 1/5 (Conditioning)
- Fight or Flight 1/5 (Conditioning)
- Survivor's Stamina 1/1 (Conditioning)
- Downed but Determined 5/5 (Conditioning)
- Unburdened Roll 1/1 (Conditioning)
- A Little Extra 1/1 (Conditioning)
- Loaded Arms 1/1 (Conditioning)
- Revitalizing Squat 2/5 (Survival)
- Nimble Climber 3/5 (Mobility)
- Slip and Slide 2/5 (Mobility)
- Sturdy Ankles 1/5 (Mobility)
- Calming Stroll 1/1 (Mobility)
- Carry the Momentum 1/1 (Mobility)
- Crawl Before You Walk 3/5 (Mobility)
- Effortless Roll 5/5 (Mobility)
Your first 11 points go into Marathon Runner and Youthful Lungs because stamina is the biggest limiting factor early on. From there, you shift to Survival and push toward In-Round Crafting, then go back to fill out Agile Croucher. Next priority is going deep enough into Survival to unlock Broad Shoulders (extra carry weight) and Traveling Tinkerer (expanded crafting). Once that's done, you turn to Conditioning, where the goal is maxing Used to the Weight and then pushing all the way up to Downed but Determined and Loaded Arms. Your final points go into Mobility for Calming Stroll, Carry the Momentum, and maxing out Effortless Roll to round out your late game maneuverability.
Final point totals: 25 Mobility, 25 Survival, 25 Conditioning. An even split across all three trees.
Recommended Build for Solo Players
Solo play changes two things. Downed state perks lose most of their value since nobody's coming to revive you (though you can still call elevators and extract while downed). And mobility plus combat perks become even more important because you have no teammates to bail you out. This build redirects those squad focused points into extra stealth, traversal, and combat stamina recovery, and reaches Effortless Roll earlier in progression.
- Nimble Climber 1/5 (Mobility)
- Marathon Runner 5/5 (Mobility)
- Youthful Lungs 5/5 (Mobility)
- Agile Croucher 1/5 (Survival)
- Revitalizing Squat 1/5 (Survival)
- In-Round Crafting 1/1 (Survival)
- Agile Croucher 5/5 (Survival)
- Looter's Instincts 5/5 (Survival)
- Silent Scavenger 3/5 (Survival)
- Suffer in Silence 1/1 (Survival)
- Traveling Tinkerer 1/1 (Survival)
- Broad Shoulders 5/5 (Survival)
- Silent Scavenger 5/5 (Survival)
- Used to the Weight 5/5 (Conditioning)
- Nimble Climber 5/5 (Mobility)
- Carry the Momentum 1/1 (Mobility)
- Effortless Roll 5/5 (Mobility)
- Slip and Slide 2/5 (Mobility)
- Sturdy Ankles 1/5 (Mobility)
- Calming Stroll 1/1 (Mobility)
- Revitalizing Squat 2/5 (Survival)
- Gentle Pressure 5/5 (Conditioning)
- Proficient Pryer 5/5 (Conditioning)
- Unburdened Roll 1/1 (Conditioning)
- A Little Extra 1/1 (Conditioning)
- Loaded Arms 1/1 (Conditioning)
- Blast-Born 1/5 (Conditioning)
- Fight or Flight 1/5 (Conditioning)
- Survivor's Stamina 1/1 (Conditioning)
- Fight or Flight 5/5 (Conditioning)
The differences from the Squad build are subtle but meaningful. No points in Downed but Determined or Crawl Before You Walk. Instead, those points go into maxing Silent Scavenger and Nimble Climber, plus fully upgrading Fight or Flight for stronger stamina recovery during PvP encounters. You also reach Effortless Roll much earlier in the progression, giving you better dodge roll efficiency through the mid game. The result is another clean 25/25/25 split across all three trees.
Common Myths and Misconceptions
Several perks don't work the way their descriptions suggest, or have hidden catches that change their value. These are the clarifications that matter most:
Effortless Roll works on sprint dodge rolls too. The description only mentions "dodge rolls," but the stamina reduction applies to sprint dodge rolls as well.
A Little Extra generates only basic materials. You'll get simple stuff like metal from breaching doors, or Arc Alloy from ARC objects. No rare loot.
Slip and Slide has diminishing returns. Each additional point gives less benefit than the last. One or two points gets you most of the value.
Back on Your Feet has a hidden 30 second delay. The regen doesn't kick in immediately at critical health. You wait about 30 seconds, then it slowly restores roughly 25% of your health over another 25 seconds. Completely impractical.
Minesweeper doesn't prevent mine detonation. Proximity triggered explosives still blow up when you get close. The perk only lets you manually defuse traps that don't auto trigger, like placed grenade traps. And you could just shoot those.
Good as New only works during active healing effects. The stamina regen boost lasts only for the few seconds that a healing item is actively restoring your health. It's not a persistent buff.
Proficient Pryer saves about three seconds on doors and one second on containers. Those are the exact time savings at full investment.
Looter's Luck has roughly a 1 in 4 activation chance. The double reveal effect triggers about 25% of the time, so it's helpful over a full raid but unreliable on any single container.
Broad Shoulders adds 2 kg per level. Each of the five levels adds a flat 2 kg to your max carrying capacity, totaling 10 kg.
Final Tips for Spending Skill Points
Start with stamina. Marathon Runner and Youthful Lungs should eat your first ten points. Low stamina is the biggest handicap for new players, and nothing else comes close in early game impact.
Factor in stepping stone costs. Plenty of perks rated "not really helpful" still show up in optimal builds because they're required to reach stronger perks deeper in the tree. When planning your build, always count the cost of the stepping stones you'll need along the way.
Don't chase final perks (usually). Fly Swatter, Vaults on Vaults on Vaults, Vault Spring, Security Breach, and Minesweeper all require 36 points in their respective branch. That's over half your budget locked into one tree, and most of those perks aren't strong enough to justify the sacrifice. Security Breach is the one exception for dedicated looters.
Skill tree resets exist. They require a lot of effort (gathering a huge number of items and making hundreds of donations), but they're there. Don't be afraid to experiment with different builds as your playstyle evolves.
Plan your path before spending. Since deeper perks require minimum point investments in their tree, map out which perks you want and calculate the stepping stone cost to reach them. A little planning up front saves you from wasting points on dead end branches.
Use your Expedition bonus points wisely. Completing an Expedition gives you 5 extra skill points on top of the base 75. If your build feels one or two perks short, those bonus points can fill the gaps.