
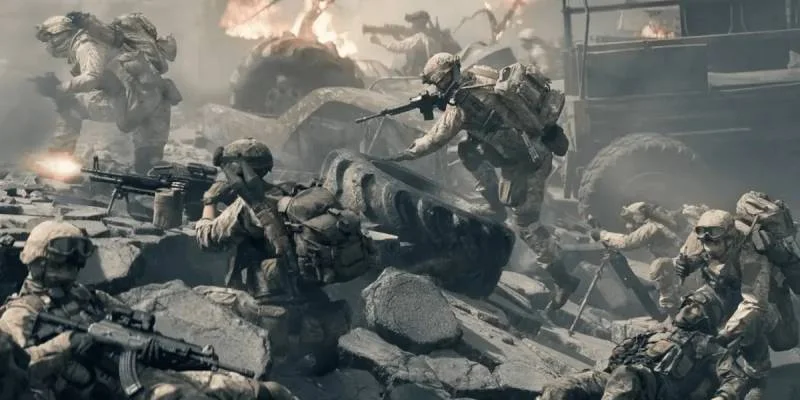
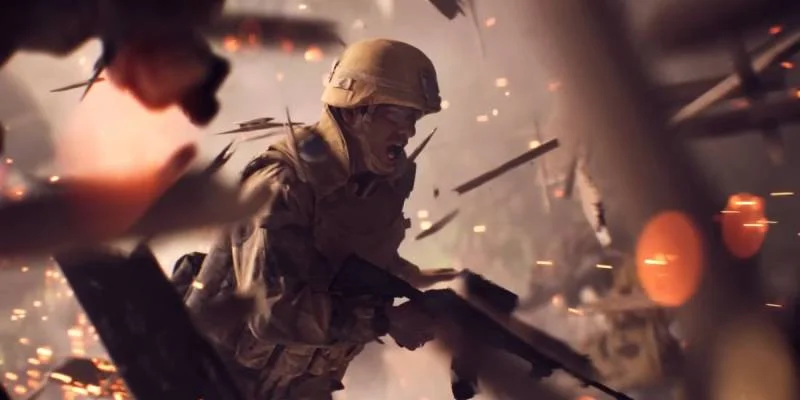
Battlefield 6 brings back the classic formula that made Battlefield 3 and 4 legendary. Modern combat meets fast-paced class teamwork and all-out warfare. The game runs on interconnected systems where smooth movement, sound awareness, and smart positioning beat perfect aim every time. TTK (time-to-kill) is way faster than Battlefield 2042, so tactical awareness keeps you alive.
- 2042's specialists are gone, replaced with traditional classes
- Movement system chains multiple states for fluid, unpredictable paths
- Audio design gives you tactical intel with distinct ally/enemy footsteps
- Revive system now includes dragging mechanics
- Cover peeking and mounting provide serious tactical advantages
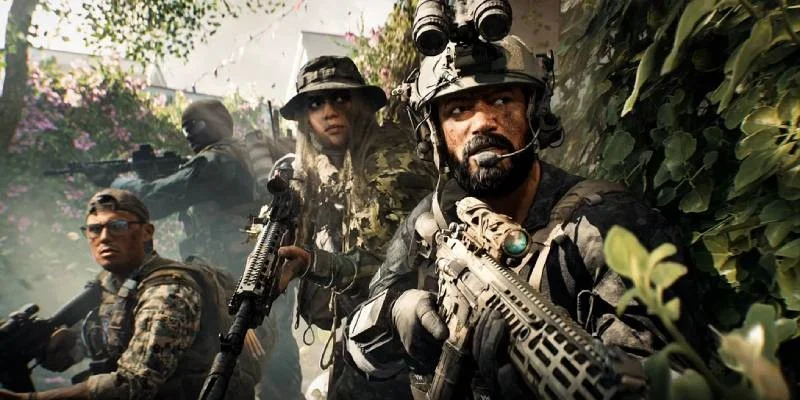
The Four Classes Explained
Class Fundamentals
Each class serves specific roles while contributing to squad gameplay through specialization trees. Squad teamwork earns points, letting the squad leader ping objectives and call in support. All classes benefit from going prone to exit combat, which lets squads spawn on you faster.
Your Role: Aggressive positioning with solid assault rifles and squad utility
- Assault Ladder: New gadget for climbing and navigating blown walls
- Strong assault rifles with four to five shot kills
- Pop adrenaline injector before breaching contested areas
- Place deploy beacons in covered spots that are hard to find
- Focus on flanking rather than head-on fights
Your Role: Team's eyes and ears with sniping capabilities and intel tools
- Motion Sensor: Detects enemy movement (counter by crouching/prone)
- UAV: Final specialization that can be shot down by engineers
- Use prone to remove enemy pings and avoid motion sensor detection
- Hit tank flanks using stealth and C4
- Relocate after one or two kills to avoid counter-sniping
Your Role: Squad sustainability through healing, ammo, and revival
- Light Machine Guns: No movement speed penalty
- Suppression System: Delays enemy healing instead of affecting accuracy
- Maximize revival potential to keep more friendlies fighting
- Use portable cover near objectives and have engineers repair when damaged
- Mount weapons on portable cover for stability
Your Role: Destroy enemy vehicles and maintain friendly vehicle operations
- SGX Submachine Gun Specialization: Hand stop under-barrel for sprint shooting
- Don't overheat the blowtorch repair tool
- Place mines off the side of roads for mortar effect
- Use tight hip fire with SMGs and consider skipping optics
- Prioritize vehicle destruction over infantry kills
Movement Mastery
Core Movement Philosophy
Movement in Battlefield 6 chains multiple states to create fluid, unpredictable paths that make you harder to track and punish. Clean inputs and smooth transitions turn simple sprints into escapes, peeks, and surprise attacks.
- Crouch: Separate toggle (recommended: Ctrl)
- Prone: Independent bind (recommended: Z)
- Slide/Dive: Dedicated key (recommended: C)
- Enable crouch toggle in settings to prevent accidental crouching
| Movement Chain | Best Use | Momentum Retention |
|---|---|---|
| Sprint → Slide → Prone | Escaping sniper fire | High |
| Jump → Slide | Corner clearing | Medium |
| Slide → Jump | Obstacle navigation | High |
| Crouch-Sprint → Dive | Emergency cover | Medium |
Directional Sliding
When sliding into prone, you can change direction mid-animation:
- Start slide toward cover
- Hit prone while adjusting aim toward safety
- Creates an unpredictable movement pattern that's tough to track
Advanced Movement Features
- Crouch Sprinting: Hit crouch first, then sprint - moves at 80% speed with smaller profile
- Flick Look: Perfect 180-degree turn instantly, great for quick direction changes
- Contextual Lean: Walk up to walls to automatically adjust gun position
- Speed Movement: Pull out knife for fastest movement speeds
Combat Fundamentals and Weapon Meta
Understanding the Combat Pace
TTK is way faster than Battlefield 2042. Peeking with damaged health almost guarantees death, so always heal up before re-engaging.
Weapon Selection
Long Range: Sniper rifles with scope glint control open sightlines with one-shot potential making open ground crossings risky
Close Quarters: Shotguns are overperforming and can delete targets before they react
All-Purpose: Assault rifles stay reliable with four to five shot kills and manageable recoil
Recoil Control Innovation
- Strafe left while moving crosshair right
- Strafe right while moving crosshair left
- Add light downward pull for vertical kick
- Use short bursts instead of full sprays
- Don't overcorrect to maintain the assist
Traditional Firing: Tap fire for medium to long-range fights. Weapons have noticeable recoil at distance.
Mounting and Cover Systems
- Use auto-peek when aiming near solid cover for quick shots
- Switch to manual mounting with F for tighter control
- Crouch before mounting to lower your profile
- Adjust height by toggling crouch while mounted
Slice the Pie: Edge out in small steps instead of full exposure. Stick to hard cover like concrete and vehicle hulls.
Audio and Situational Awareness
Audio Design Advantages
Battlefield 6's audio delivers tactical information that reveals position, intent, and timing before you see anyone.
- Game uses distinct profiles for allies and enemies
- Enemy footsteps are deliberately louder and sharper
- You can identify threats through walls and cover
- Track movement between floors
- Anticipate flanking attempts before visual contact
- Use a headset to take full advantage of footstep positioning
Minimap Mastery
Any enemy firing unsuppressed weapons appears instantly on the minimap. Functions like built-in wallhack for attentive players. Keep glancing between crosshair and map to track pings. Use above and below indicators to read elevation.
- Don't ignore loud footsteps thinking they're teammates
- Enemy audio cuts through ambient noise by design
- Be conscious of your own audio when sneaking
- Solid red dots give exact player positions
- Relying only on visual information
- Ignoring minimap red dots
- Not pre-aiming where enemies will peek
- Making too much noise while flanking
Crosshair Placement and Centering
Watch pro players who always aim where enemies will most likely appear while moving around the map. This gives faster reaction times and easier target acquisition. Always think about crosshair placement and maintain centering discipline.
Tactical Systems and Team Play
Spawn System Intelligence
The revive system includes real-time condition monitoring. Check zone cameras for active fights and review teammate body-cam views before spawning. Avoid hot spawn points where you'll die immediately.
- Workaround 1: Recon spawn beacon placement in covered, hard-to-find spots
- Workaround 2: Vehicle spawns that any player can access
- Tanks should operate on outskirts as mobile team spawning points
Smart Revival and Squad Management
Pull downed teammates to cover before reviving in dangerous areas. Throw smoke and drag into cover for safer revival. Keep trying revives to preserve tickets and maintain team momentum.
Objective Play and Team Coordination
- Play the objective as primary focus - this is where most kills and score come from
- Be a team player through role fulfillment and teammate revival
- Unlike other shooters, farming kills on outskirts doesn't help win
- Position yourself at objectives, defending them, or holding key map lanes
Advanced Tactical Equipment
- Stuns and frags are underpowered in current meta
- Smokes allow tactical plays that keep squads alive
- Enable flanks that generate significant kill opportunities
- You get two smoke grenades instead of one
- Critical for bypassing choke points and breaking through defenses
Vehicle Combat Mastery
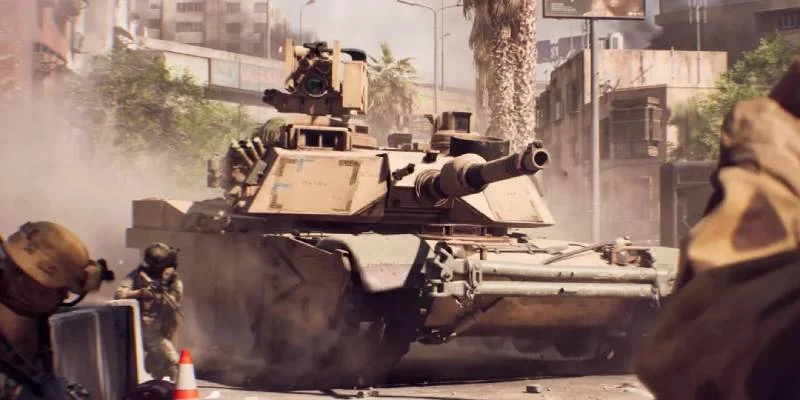
Tank Operations and Control
Use third-person camera to survey battlefield. Always angle front armor toward enemies. Don't expose rear weak spots to RPG attacks. Bring a gunner for repairs and infantry defense.
Jet Combat and Air Superiority
Jet Combat Priorities
Target around 315 mph for sharpest turns. Machine gun cannon extremely powerful for air-to-air combat. Only available on large maps through vehicle supply stations.
- Throttle Control: Maintain proper speeds, slow on entry to maximize targeting time
- Best Speed: Target around 315 mph for sharpest turns
- Speed Management: Accelerate going up, decelerate going down
- Terrain Following: Stay low toward terrain, set up ambushes
- Free Look: Full third-person free look for battlefield assessment
Helicopter Operations and Tactics
Spawn at base or directly from main menu. Beta helicopter is slow and heavy, requiring flight mastery. Stay low, use terrain and building cover. Get behind enemy lines for fast strafe runs.
- Dump entire rocket load quickly with gunner support
- Never stay stationary, RPGs can one-shot helicopters
- Stinger missiles provide easier lock-on than RPG direct hits
- Use flares only when missile incoming warning occurs with fast beep
- Based on momentum systems - continue turning while moving in same direction
Anti-Air Defense Systems
- Two anti-air cannons available on peak map near objectives
- Can be used anytime to deter jets and helicopters
- Important for area denial and air superiority
- Engineer anti-air role: Use stinger lock-on for helicopter targeting
Specialized Combat Techniques
Sniping Mastery and Long-Range Combat
Sniper Mechanics and Technique
Long-range shots require leading and gravity compensation. Each sniper rifle has unique velocity and drop rate. Default zero set to 100 meters. Can ping ground for meter range checks.
Sniper glint/scope glare reveals position to enemies. Relocate after one or two kills. Change vantage points when multiple sniper glints target you. Find different angles instead of engaging in sniper duels.
Provide team reconnaissance beyond individual kills. Spot tanks for air support and engineer targeting. Use aim-down-sight spotting for team intel. Headshots prevent enemy revives, giving tactical advantage.
Destruction and Environmental Manipulation
Blow holes in walls for new routes and exits. Clear entire doorways and buildings. Use grenades and knives to open window sills. Destroy staircases and bridges to prevent pursuit. Create chaos to gain tactical advantages.
- Fire RPGs at buildings containing enemy players
- Use destruction for breakthrough mode advantages
- Environmental manipulation changes battlefield dynamics
- Destruction creates new sight lines and flanking routes
Combat Movement Integration
| Technique | Input Sequence | Best Application | Effectiveness |
|---|---|---|---|
| Slide Combat | Sprint + Double-tap Crouch | Reaching cover or becoming harder target | Good defensive |
| Drop-shotting | Aim + Prone | Ineffective due to animation preventing shooting | Not recommended |
| Jump-slide Combo | Jump + Crouch in air | Land in slide with ADS capability | Advanced technique |
| Slide-past | Slide + Turn around | Surprise kills on enemies | High risk/reward |
| Supine Position | Dive backwards onto back | Makes spotting difficult | Situational |
Gadget and Equipment Tips
- Call for medic when knocked to slow bleed-out
- Important in tight games where every ticket matters
- Don't instantly respawn, allow teammates revival opportunity
- Preserve team points through patience
Settings and Configuration
Graphics Settings
Performance Tweaks
| Setting | Recommended | Reason | Impact |
|---|---|---|---|
| World Motion Blur | Turn Off | Better enemy spotting | High visibility improvement |
| Weapon Motion Blur | Disable | Visual clarity | Medium clarity boost |
| Camera Shake Amount | Reduce/Disable | Steady aim | Consistent improvement |
| VSYNC | Turn Off | Reduced input lag | High responsiveness |
Control and Input Configuration
- Soldier Aim Input Curve: BF1 setting recommended
- Aim Acceleration: BF1 with 80 setting
- Infantry Zoom Aim Sensitivity: 85 for precision
- Prevents accidental reloads when opening doors or entering vehicles
HUD and Interface Setup
Bring HUD padding closer for reduced minimap distance. Increase scale adjustments for close, medium, and far view distances. Enhanced minimap scale for better tactical information. Minimize screen clutter while maintaining necessary info.
- Revive Icon: Keep at full opacity for team awareness
- Enemy Markers: Maximum visibility for threat identification
- Objective Icons: Reduce opacity when occluded to prevent visual blocking
Specialized Vehicle Settings
- Spacebar: Pitch up
- Left Alt: Pitch down
- Third-Person Aircraft Camera Roll: Set to off for horizon-level camera stability
- Landing Roll: Enable and spam spacebar upon high falls for damage mitigation
Advanced Strategies and Pro Tips
Situational Awareness Mastery
Laying prone stops marker appearance over head in contested points. Players often assume prone players are already eliminated. Effective psychological warfare technique for ambush positioning and avoiding detection.
Vehicle Integration with Infantry
Hitchhike on tanks and helicopters for quick objective transport. Be ready to dismount quickly due to exposure. Use destroyed vehicle chassis as cover until completely destroyed. Metal remains provide great cover, especially in breakthrough modes.
Combat Positioning and Engagement
- Pre-aim and hold corridors and choke points
- Critical tactic due to player flooding of positions
- Without extreme movement, holding position with irons wins engagements
- Smoke grenades necessary for bypassing established choke points
- Never peek with damaged health due to fast TTK
- Always heal up before re-engaging
- Damage counter provides engagement advantage assessment
- Use health status for push/retreat decisions
Team Coordination Excellence
Work together as squad to earn squad points. Squad leader must ping objectives for point generation. Points enable powerful call-ins for tactical advantage. Coordinate squad specializations for maximum effectiveness.
Master these class combinations for maximum team effectiveness:
- Engineers repair support portable cover
- Support provides ammo for engineer launcher sustainability
- Recon spots for engineer vehicle targeting
- Assault provides spawn points for team positioning
Weapon Meta and Loadout Guide
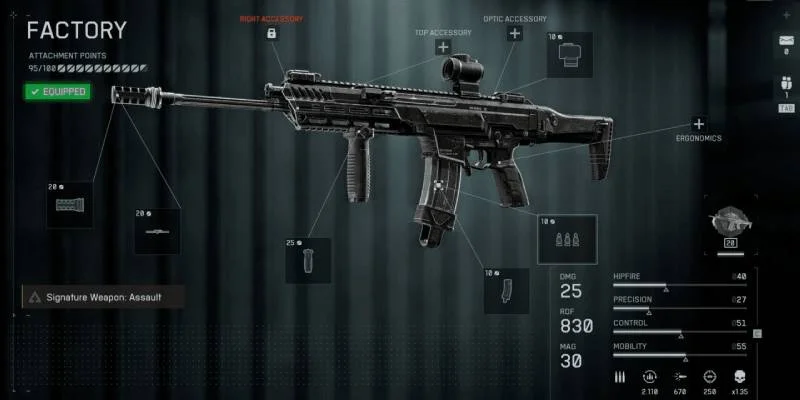
Current Weapon Tier List
Battlefield 6 Beta Weapon Rankings
Best Loadout Configurations
Perfect balance of stealth, control, and damage. Great for aggressive players who want versatility across all ranges.
Level 20 attachment unlocks incredible hipfire spread. Lets aggressive players melt enemies before they react.
Map-Specific Strategies

Urban Combat - Siege of Cairo
Tight spaces and hallways favor shotguns and SMGs. Use destruction to create new routes and sight lines. Portable cover becomes crucial for holding choke points. Focus on vertical gameplay and rooftop positioning.
Vehicle-Heavy Maps - Liberation Peak
Traditional, vehicle-focused map with long sightlines perfect for tanks and snipers. Engineers become essential for vehicle control. Coordinate tank movements as mobile spawn points. Air superiority determines map control.
Map Difficulty Assessment
- Prioritize anti-vehicle loadouts
- Use terrain for tank cover and positioning
- Coordinate air and ground vehicle attacks
- Control high ground for tactical advantage
Game Mode Mastery
Conquest Mode Strategy
Classic, large-scale Battlefield mode where two teams fight for control of multiple flags across the map. Focus on flag rotation rather than holding single objectives. Use vehicles for rapid objective switching.
Conquest Tactical Timeline
Secure nearest flags • Deploy spawn beacons • Establish vehicle control
Flag rotation • Vehicle battles • Map control establishment
Ticket conservation • Final pushes • Objective securing
Breakthrough Mode Strategy
Attack-and-defend mode where one team pushes through sectors while the other tries to hold them back. Attackers must coordinate pushes and use smoke extensively. Defenders focus on choke point control and area denial.
Breakthrough Tips
Attacking Team
Defending Team
Beta Challenges and Progression
Weekend Challenge Guide
The Battlefield 6 open beta runs across two weekends with exclusive challenges. Focus on objective-based modes for maximum XP. Conquest and Breakthrough provide the best experience point generation.
Beta Rewards Overview
Efficient XP Farming
- Focus on objective captures and defenses
- Use vehicles for kills and assists
- Engineer repairs provide significant points
- Support revives and supply drops boost XP
- Squad play bonuses multiply your gains
Pro Player Insights
Crosshair Placement and Centering
Watch pro players who always aim where enemies will most likely appear while moving around the map. This gives faster reaction times and easier target acquisition. Always think about crosshair placement and maintain centering discipline.
This guide covers all the important systems in Battlefield 6 from basic class understanding through advanced vehicle combat and settings. Master these interconnected systems to dominate both the open beta and full release, focusing on tactical positioning and team coordination over individual mechanical skill alone.
Advanced Movement Techniques
Combat Movement Integration
Slide combat applications work best when sprinting by double-tapping crouch. Perfect for reaching cover or becoming harder target. Don't use as offensive action due to accuracy penalty. Engineers with SMGs can hip fire and slide effectively.
Advanced Movement Combinations
| Technique | Input Sequence | Best Application | Difficulty |
|---|---|---|---|
| Drop-shooting | Aim + Prone | Ineffective due to animation | Not Recommended |
| Jump-slide Combo | Jump + Crouch in air | Land in slide with ADS capability | Advanced |
| Slide-past | Slide + Turn around | Surprise kills on enemies | Intermediate |
| Supine Position | Dive backwards | Makes spotting difficult | Basic |
Specialized Game Mechanics
Flanking Strategy
- Most players get caught in bottlenecks around objectives
- Monitor minimap for openings in enemy lines
- Attack undefended objectives to pull enemies away from contested areas
- Execute flanks in smaller fights to make opponents feel trapped
- Use flanking to swing match momentum in your team's favor
C4 and Explosive Tactics
In typical Battlefield fashion, C4 is the best explosive tool in the game; three well-placed packs can demolish any tank. In Battlefield 6, C4 feels lighter and can be thrown noticeably further away, so staying behind cover in most scenarios is the recommended approach.
- Throw packs around corners or over obstacles
- Watch entire enemy groups and tanks go boom
- Use for area denial and choke point control
- Coordinate with team for maximum effectiveness
Spotting and Intelligence
Like in past modern Battlefield games, you can press Q (L1 or Left Bumper on controllers) to spot any enemy in your sight, whether they're outside or inside a vehicle. They'll show up marked for everyone in your team on the HUD and map for a few seconds.
- Recons can spot automatically thanks to their class abilities
- Manual spotting works for everyone
- You can ping wherever you want and double-ping to indicate hot areas
- Spot enemies while lying on the ground after being downed
- Use spotting to track movement between floors and through cover
Field Specializations and Builds
Class Field Specs
Though the options are limited, the open beta classes in BF6 come with field specs, which include active and passive skills that dramatically alter your tactical approach.
Teamwork Through Mechanics
A big part of Battlefield vs. Call of Duty is teamwork through mechanics. The prominent element here is the Support class and how it can heal, revive, and restock other players. This creates interdependence that rewards coordinated squad play.
Environmental Awareness
Map Destruction Tactics
Like a lot of things, destruction is once again important in Battlefield 6. While not everything can be destroyed, many of the structures around a map's key points of interest are destructible.
- If it seems like you don't have a way to reach your objective, try blowing out the wall
- You can make a hole more than big enough to run through
- Use destruction to create new types of cover or remove enemy power positions
- Remove windows, corners, and camping spots
- Change the flow of the map dynamically
Route Planning and Map Flow
The maps in Battlefield 6 are designed with multiple routes to objectives. They're big enough that no team can cover all routes at once unless they have you trapped at a single flag. Instead of throwing yourself at an objective, seek a way around.
Tactical Route Assessment
Direct approach • High enemy presence • Heavily defended
Longer approach • Moderate risk • Better positioning
Blown walls • Unexpected angles • Tactical surprise
Advanced Team Coordination
Squad Point Management
Squad teamwork earns points, letting the squad leader ping objectives and call in support. This system rewards coordinated play and tactical communication between squad members.
- Squad leaders must actively ping objectives to generate points
- Coordinate with squad members on class selection
- Use call-ins strategically to support major pushes
- Maintain squad cohesion for maximum point generation
Role-Specific Squad Contributions
| Class | Primary Role | Squad Support | Key Contribution |
|---|---|---|---|
| Assault | Objective Pushing | Spawn Beacons | Aggressive positioning |
| Engineer | Vehicle Control | Repairs & Destruction | Anti-vehicle operations |
| Support | Squad Sustain | Healing & Ammo | Team survivability |
| Recon | Intelligence | Spotting & Overwatch | Tactical information |
Final Pro Tips and Summary
Essential Takeaways
- Tactical positioning matters more than perfect aim
- Audio awareness provides crucial battlefield intelligence
- Team coordination through class roles wins matches
- Vehicle control determines map dominance
- Movement fluidity keeps you alive longer
Practice Priorities
- Master your chosen class abilities completely
- Practice movement combinations in safe areas
- Learn audio cues for enemy detection
- Study minimap for tactical advantages
- Solo rushing without team coordination
- Ignoring vehicle threats and opportunities
- Playing for kills instead of objectives
- Neglecting class-specific responsibilities
Progression Mindset
Battlefield 6 rewards players who master its interconnected systems rather than relying on raw aim alone. Movement fluidity, audio awareness, and tactical positioning often matter more than perfect shooting mechanics. Focus on understanding these systems and how they work together rather than trying to master everything at once.
Start with one class and master its complete kit before moving to others. Focus on team play and objective control. Practice movement in low-pressure situations. Most importantly, learn from each engagement and adapt your tactics accordingly.
- Week 1-2: Master movement and one class completely
- Week 3-4: Add vehicle operation and team coordination
- Week 5+: Advanced tactics and multi-class flexibility
This comprehensive guide covers all essential systems in Battlefield 6, from fundamental class mechanics to advanced tactical coordination. The key to success lies in understanding how these systems interconnect and support each other. Master tactical positioning and team coordination over individual mechanical skill, and you'll dominate both the beta and full release.